
 Sometimes advice passed on through the ages is wise and true. BUT, sometimes one needs to re-examine it, thus finding it no longer (if ever) viable.
Which brings me to the SOUFFLE TOPPED PORTOBELLO – a cheese soufflé baked directly on a portobello mushroom. Many people refuse attempting to make a soufflé, having heard they’ll collapse from loud noises or that they need kid-gloves whilst gently folding in the egg whites.
American’s Test Kitchen put those rumors to the test….and debunked them. (I actually screamed “NOOOO!” at the screen when the beaten egg whites were poured into the mixer with the batter.) To my shock and delight, the soufflé rose beautifully.
Yet I was still skeptical when I tried it for myself. I’ve made this recipe 3 times now, and they’ve come out beautifully each time.
Do not be afraid!!! This is a very easy and quick recipe to make.
SOUFFLE TOPPED PORTOBELLO – makes 4
- 4 large Portobello mushrooms
- 5 T butter, divided
- 1/2 cup Parmesan cheese, finely grated, divided
- 2 T shallots, minced
- 1 large garlic clove, pressed
- 3 T flour
- 1/4 tsp paprika
- 1/4 tsp salt
- 1/4 tsp cayenne pepper
- 1/4 tsp white pepper
- pinch nutmeg
- 3/4 cup milk, preferably whole milk
- 5 oz Gruyère cheese, shredded
- 4 eggs,
- pinch cream of tartar
Preheat oven to 350º Fahrenheit. This is important!
Thoroughly clean mushrooms, discard stems, and dry gills up. 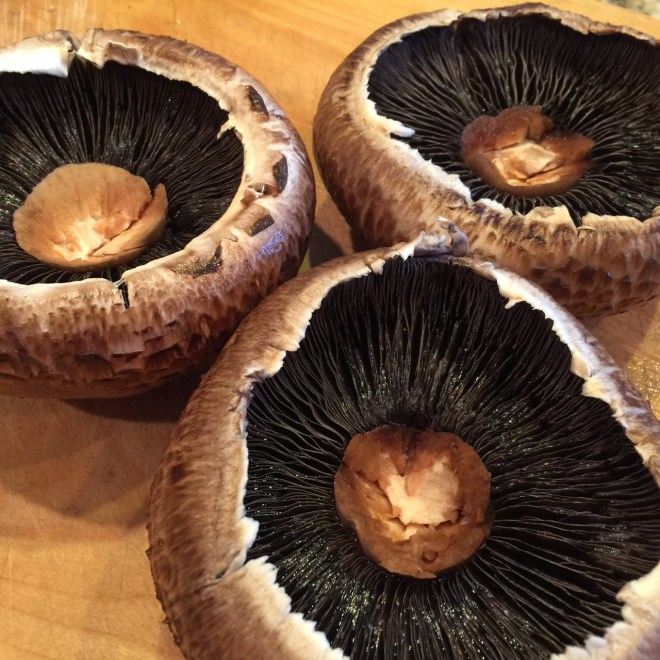 In a saucepan, melt 3 T butter. Sauté shallots over medium heat for about 3 minutes. Add in garlic and cook for 30 seconds more, just to bloom the garlic. Remove pan from heat.
  In a small bowl, mix together the flour, paprika, salt, cayenne, white pepper, and nutmeg. Blend into the butter mixture, smashing out any lumps – this is your only chance to do so!
 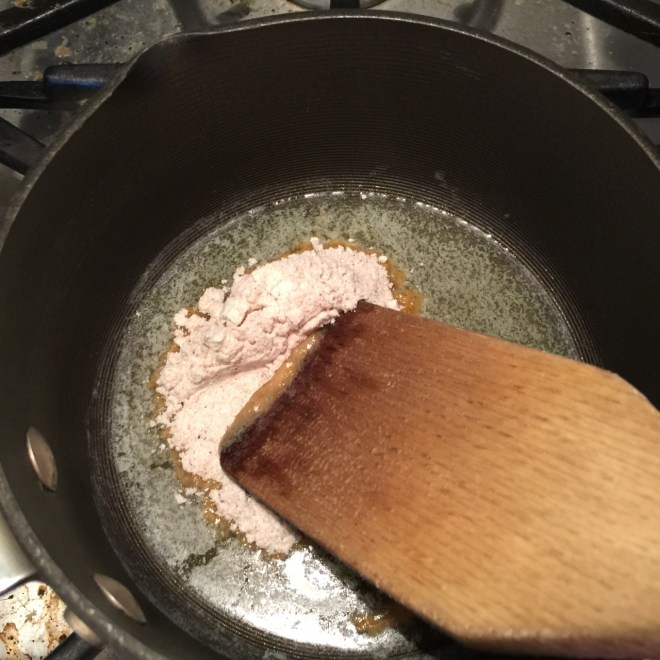 Return pan to heat and cook roux (that’s what this paste is called) for 2 minutes over medium/low heat. (This will get rid of the flour taste.)
 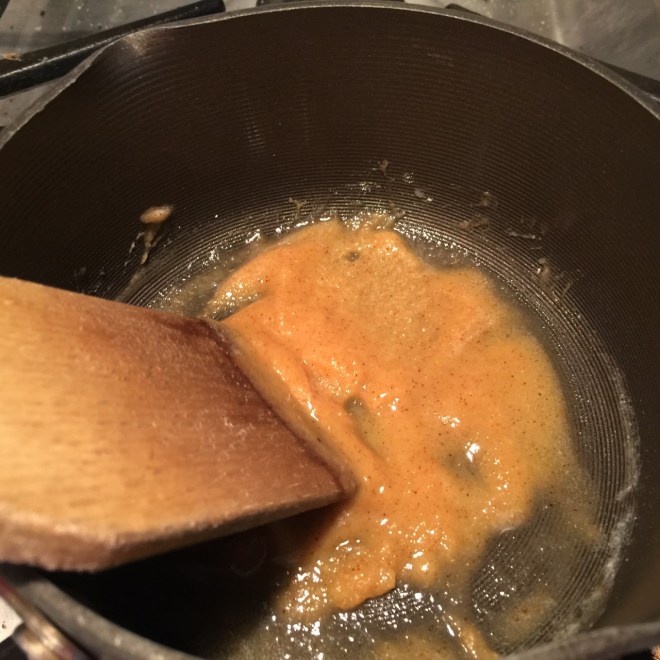 Pour in the milk and cook over medium/low until thickened, stirring constantly. Turn off burner but leave pot in place in order to use residual heat.
  Stir in Gruyère and 1/4 cup Parmesan until melted.
 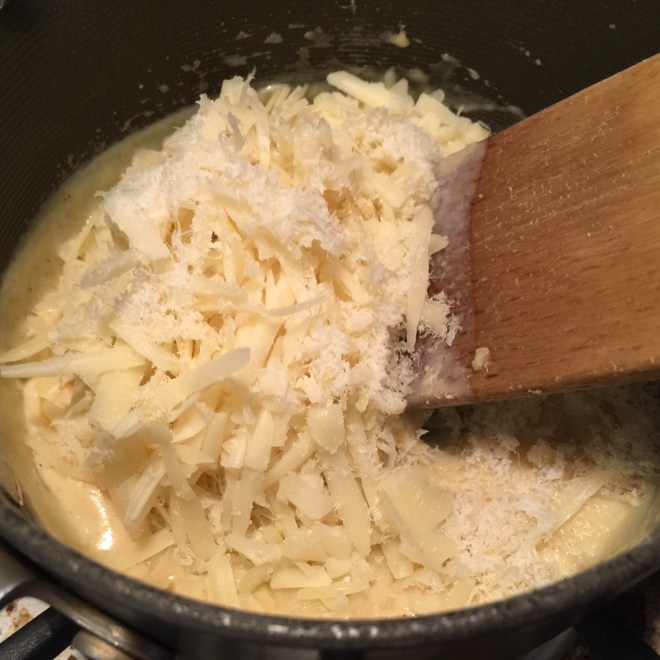 Remove pot from warm burner and let cool 5 minutes.
 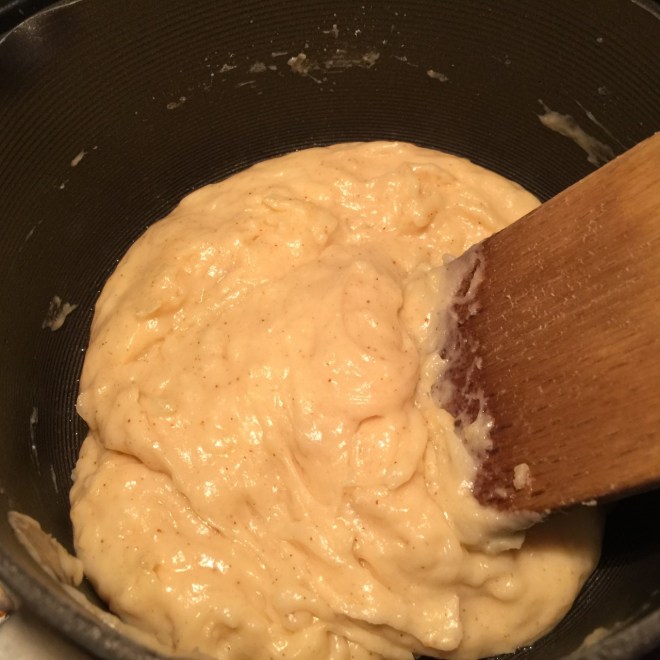 Meanwhile, build a foil cylinder around each mushroom – heavy or regular aluminum foil will work. Cut 4 pieces of foil – 8″ long if using heavy foil, and 12″ long if using regular.
  For the heavy foil, fold in half lengthwise; for the regular, fold in thirds lengthwise. The goal is to make a 4″ high strip that will surround the Portobello. Grease one side of the strips with the remaining butter (You may not need all of it, but don’t be stingy – this will prevent the soufflé from sticking.) Sprinkle the remaining Parmesan on the greased strips, lightly patting down to make it adhere to the butter.
 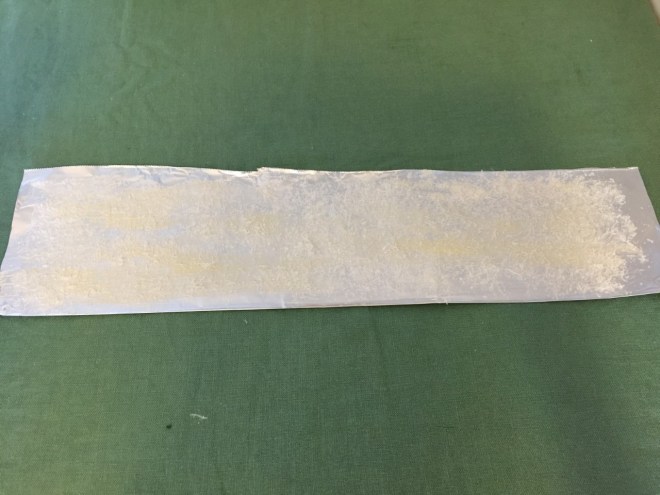 Surround each Portobello snuggly with a foil strip, coated side facing the mushroom. Secure it with a paperclip at the top.
 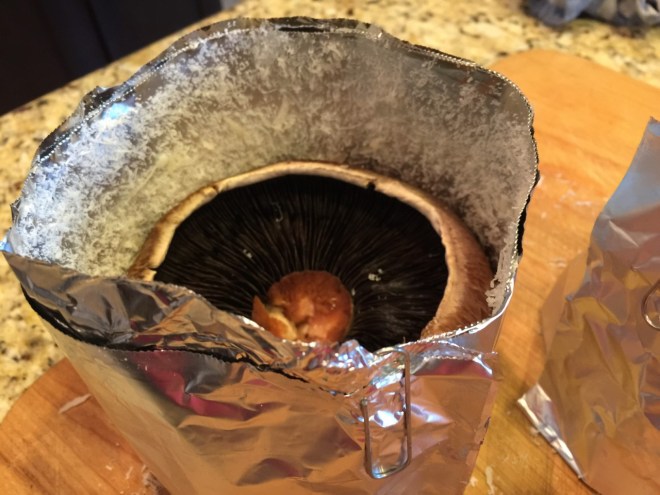 Place mushrooms on a parchment lined cookie sheet and set aside.
Make sure the oven is preheated by now!
Separate eggs. Stir the yolks together in a small bowl, then mix into the cheese sauce, stirring as you pour. 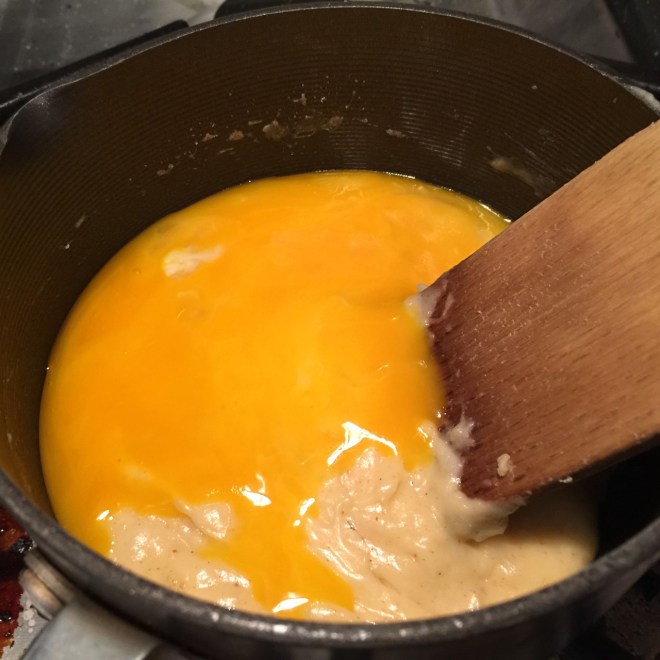 Let cool.
Place egg whites in the large bowl of your electric mixer. Begin mixing the whites on medium speed, adding the cream of tartar once they’re foamy. Continue beating on high until stiff peaks form. 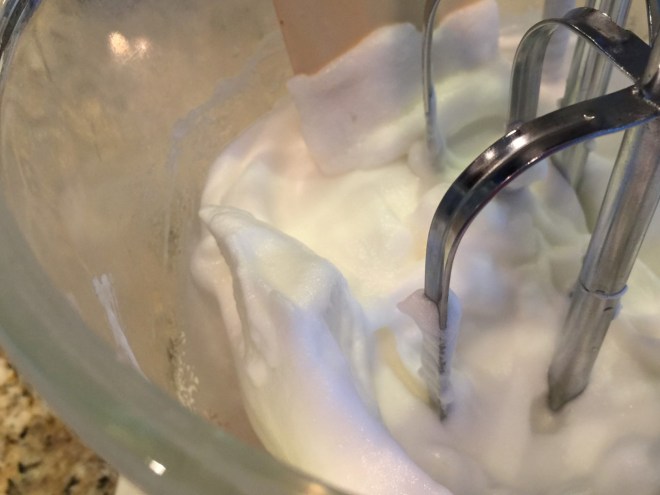 Deep breath! Pour the cheese sauce into the beaten whites. Turn the mixer on low and mix until just combined.
  Pour mixture on top of Portobellos, dividing as equally as you can – don’t get crazy about it, though.
 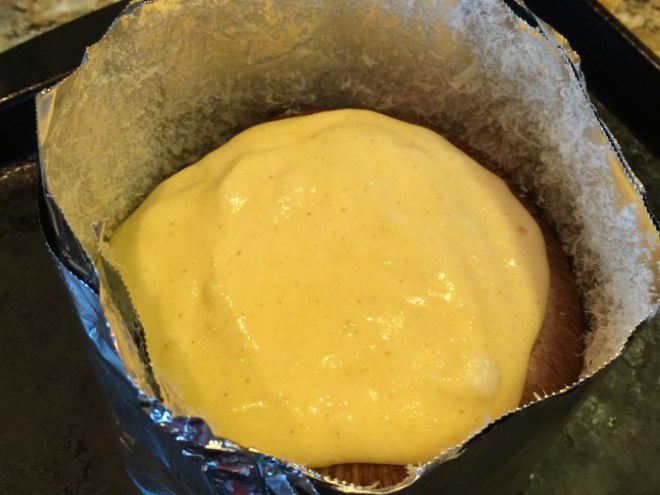 Bake at 350º F for 25 minutes – don’t open the oven door to check before that time. The soufflé should be golden and jiggly.
  Remove paper clip (take care – it’ll be hot!) and foil collar. Serve immediately.
 One of my family’s favorite soups is HOT & SOUR. Not only does it have an appealing kick, but I love that you can eat a lot of it with almost no calories. Yay! When I start my meal with a big bowl, it takes the edge off my hunger so I don’t inhale half a dozen eggrolls.
 Cut bamboo shoots in half widthwise, then into slivers lengthwise.
  Press out excess liquid from tofu, then cut into 1/2″ cubes.
 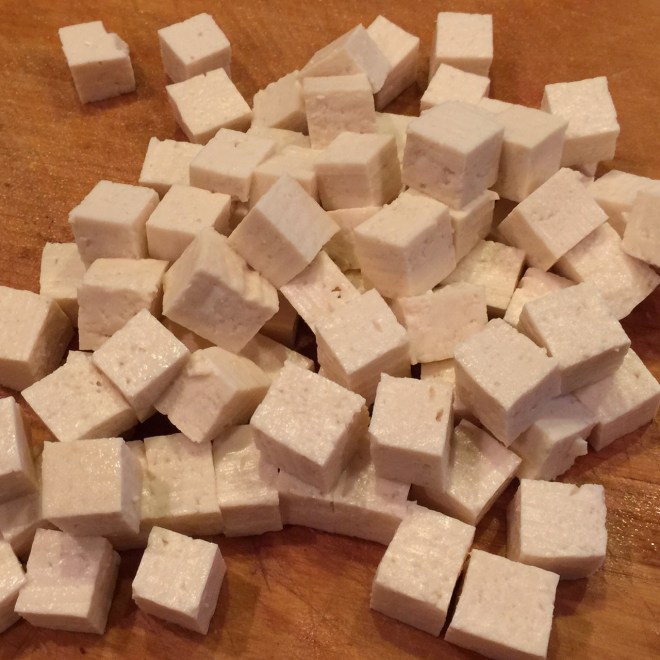 Bring vegetable stock to a boil. Add in mushrooms and bamboo shoots. Simmer for 5 minutes.
 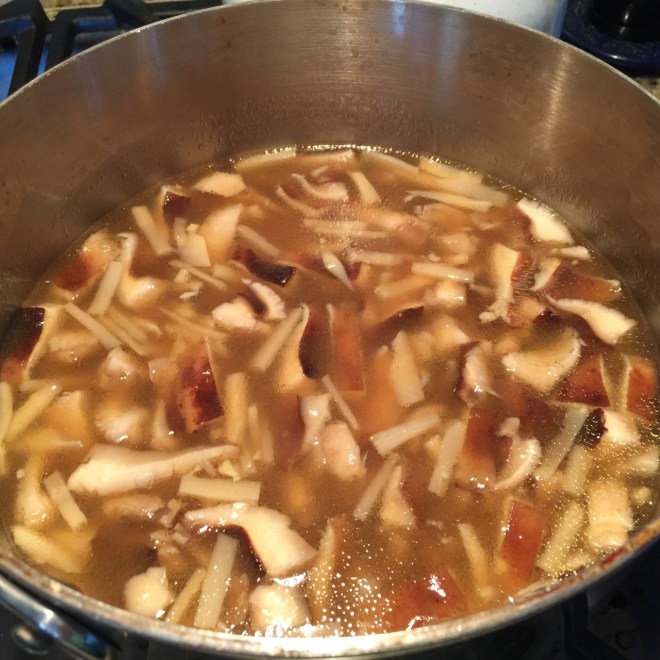 In a small bowl stir together 3 T cornstarch and 3 T water.
  Stirring stock, pour in slurry (cornstarch/water mix). Add in tofu, white pepper, tomato paste, ginger, garlic, sesame oil, soy sauce, and scallions.
 Simmer 5-10 minutes. In a small bowl whisk together the egg, 1/2 tsp cornstarch, and 1 tsp water. Turn off heat. VERY SLOWLY drizzle in the egg in a thin stream, going in all directions.
 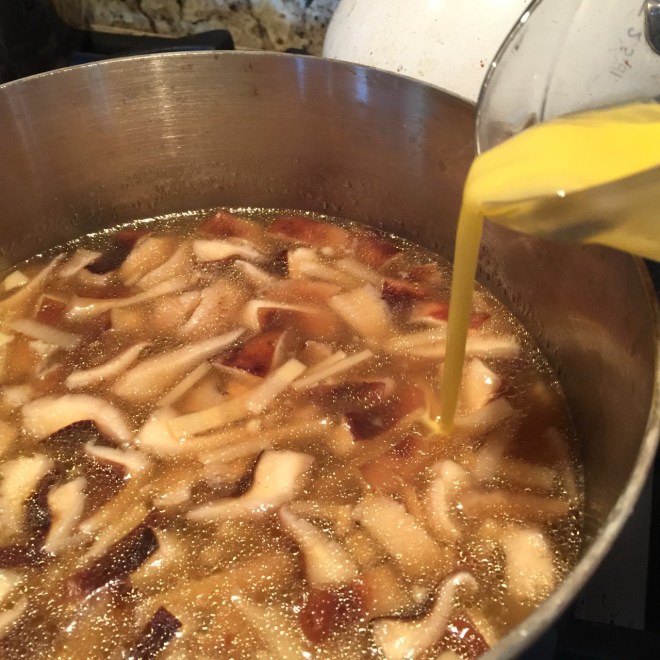 Turn the heat on again and whisk gently to break up egg strands. Serve.
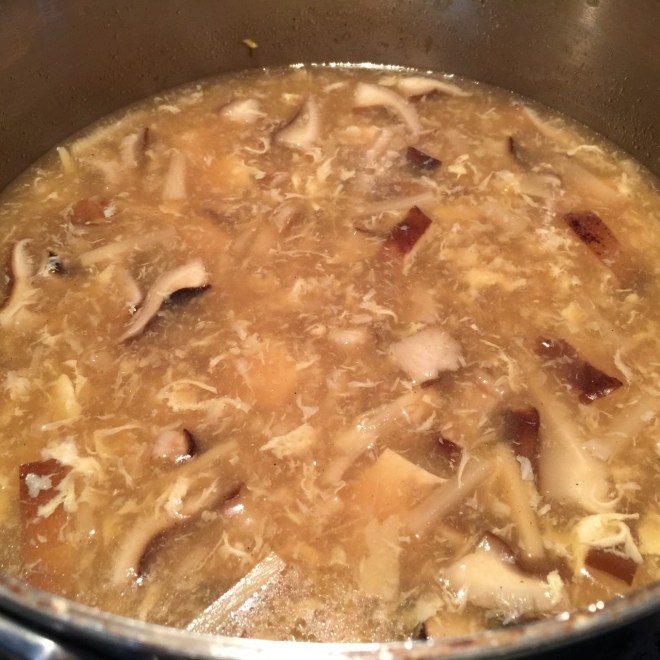
 What could be better on a chilly evening than sipping a nice mug of MULLED APPLE CIDER?! (You could even add in a dash of an adult beverage, if you like.)
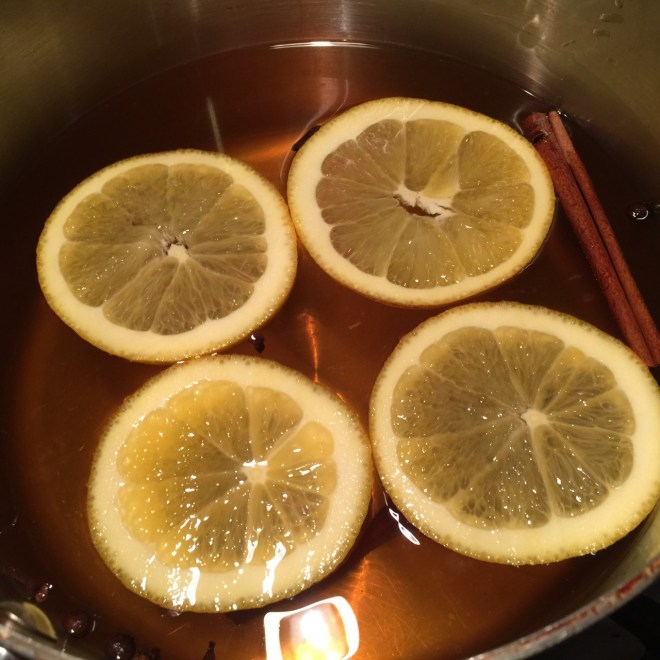 Cover and decrease heat enought to maintain a low simmer. (Make sure you cover the pot while cooking the cider. The first time I made it, I left it uncovered and most of the liquid evaporated.) Cook 30 minutes. Done.
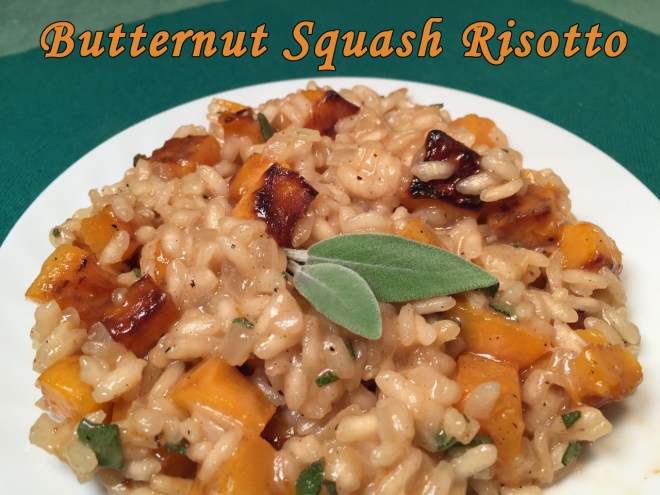 Winter squash comes in many varieties and colors – very tempting to buy as a Fall decoration. Of course, cooking them may seem a bit daunting… what with the potential for slicing off a finger or two.
 Remove neck (yikes!), slice into rounds, then cut into 1/2″ cubes. Cut the body (this is getting creepy) in half and scrape out seeds and fibers. (Remember to save the seeds, fibers, and skin for the broth!) Slice into 1/2″ thick pieces, then cut those into 1/2″ cubes.
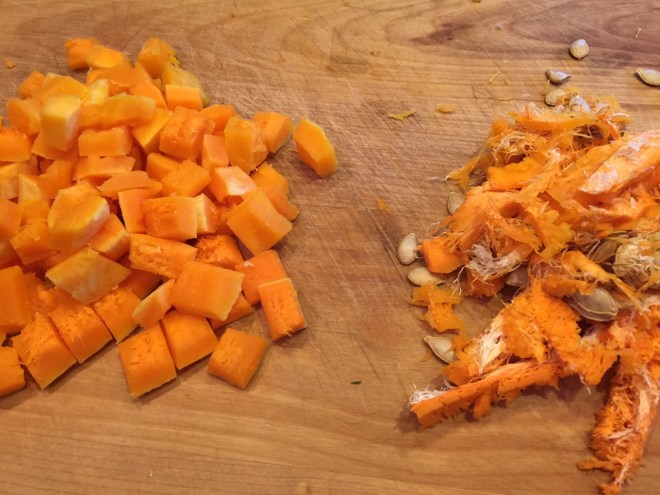 Measure out 1¾ cup of cubes (put any remaining cubes with the skins and seeds for the broth.) Into a 12″ nonstick skillet heat the olive oil over medium/high until shimmering. Add the 1¾ cup of cubed squash, spreading out into a single layer.
 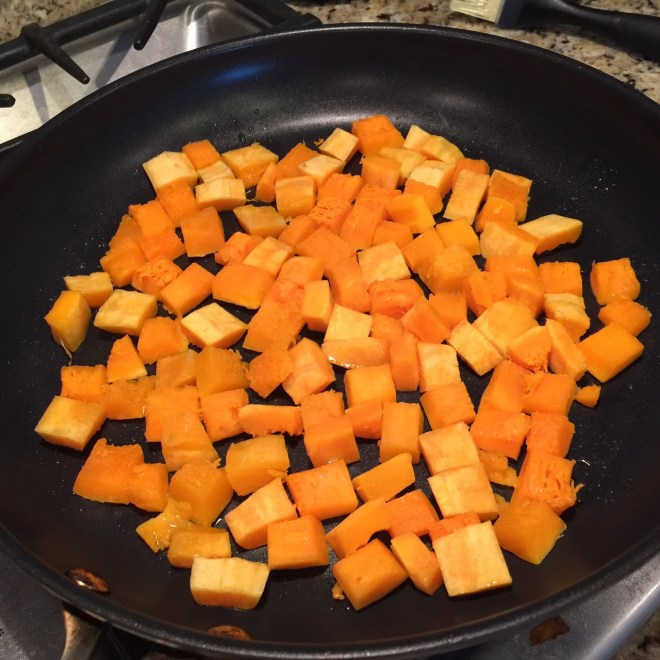 Cook about 5 minutes without stirring, until bottoms are browned. Continue cooking another 4-5 minutes, stirring now and then, trying not to turn them over – you want only one side browned. Remove to a bowl and set aside.
 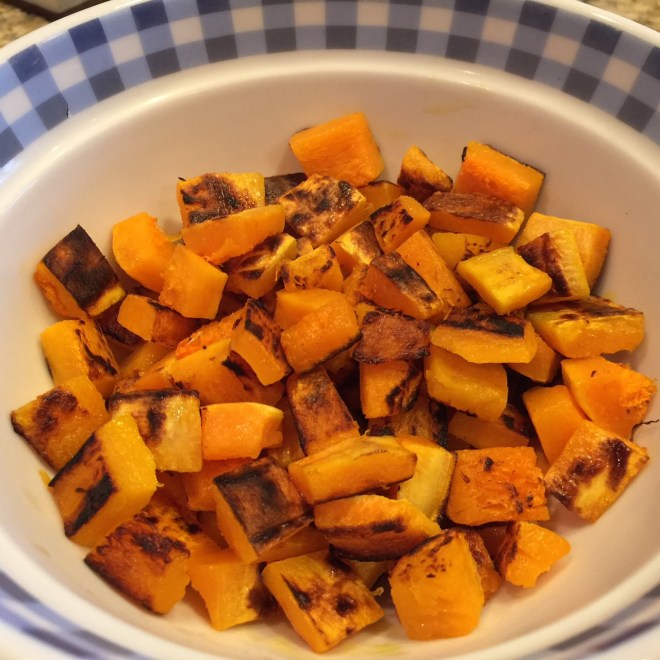 Into the now empty skillet put the seeds and skins, cooking over medium heat about 4 minutes to brown. (Beware of popping seeds as they cook.)
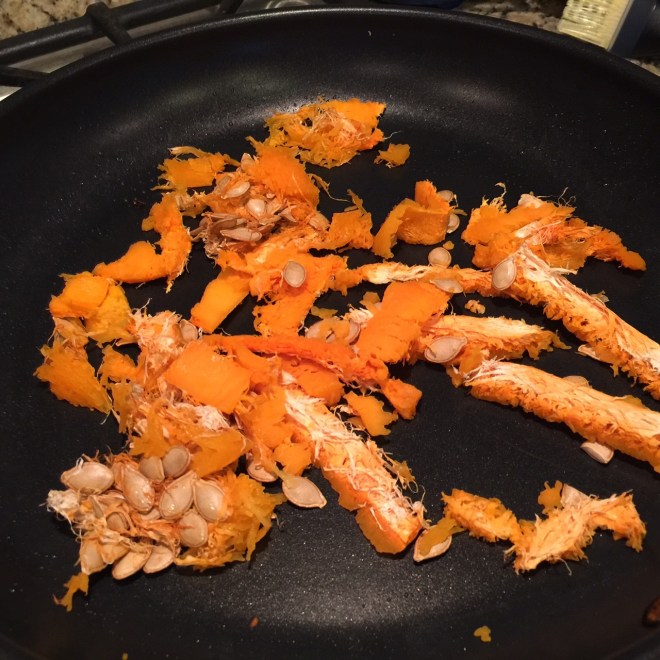 Remove to a small saucepan. Add in the vegetable stock, bring to a simmer, cover, and cook 10-15 minutes.
 Into the empty skillet melt 1½ T butter. Add in the onions, salt, and black pepper. Sauté over medium heat until onions start to brown.
 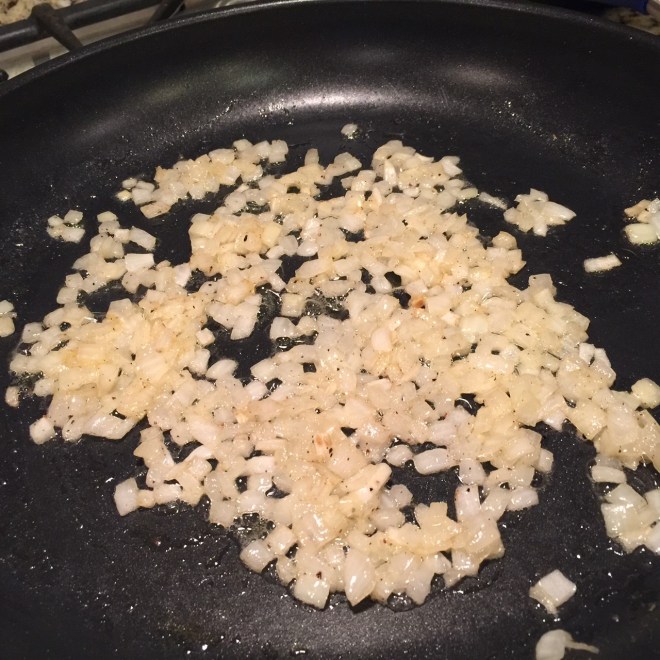 Add in nutmeg, cinnamon, and garlic. Cook another 30 seconds to bloom the spices. Pour the Arborio into the onions and sauté over medium until edges of rice become translucent.
  Add the wine to the rice and cook uncovered over medium high until it evaporates.
  As the wine is cooking, strain the broth made with seeds. Discard strained solids and set broth aside.
 Stir in Parmesan, sage, remaining 1/2 T butter, and lemon juice. Adjust salt and lemon juice, if needed.
 I can’t deny it – I’m a huge potato lover. Mashed, French fried, hash browned, scalloped, and baked: I love them all! (It must be a trait inherited from my Irish mother.)
 Remove skewer and slice in half, lengthwise, along narrow side of potato so they lay flat.
 Carefully, scrap out insides, leaving 1/8″ border to support the skin. (If you scrap a bit too much in a section, just take some of the potato and smash it down to form a patch.) Place potato pulp in a bowl.
 With a fork, mash the potato, breaking down lumps – you don’t need to make it as creamy as you would with mashed potatoes…unless, you want.
  Add in the butter and stir until melted. Then add the buttermilk, sour cream, salt, pepper, cheese, and scallions. Mix gently, but thoroughly.
 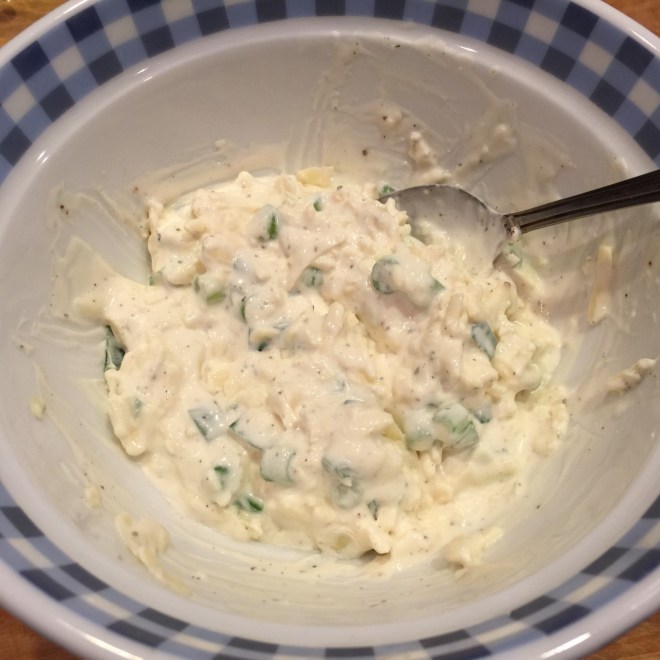 Divide equally and fill potato skins. At this point, you can cover them and complete preparation later.
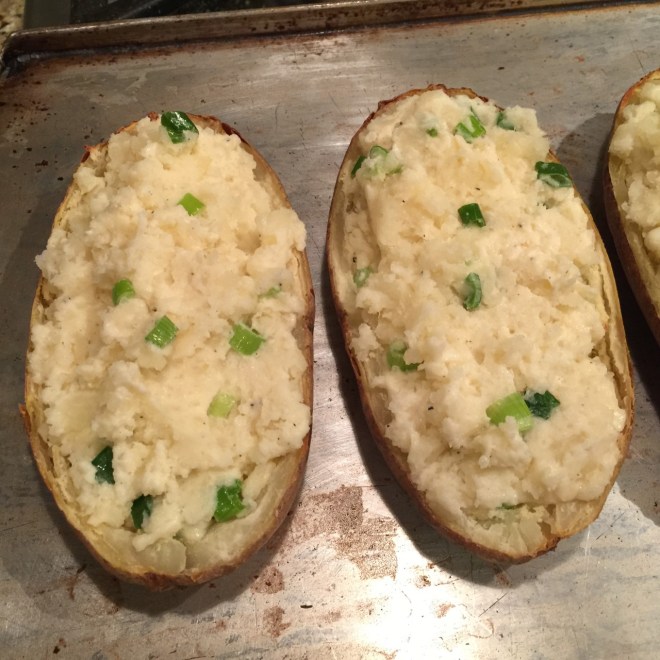 Just before serving time, broil potatoes about 4″ from heating element 10-15 minutes, until spotty brown on top. Serve hot.
 Every now and then I get an idea for a recipe that I think will be a piece of cake (pun intended!) to develop. It never is.
 Pour in the HOT coffee. Immediately cover bowl with a plate to retain heat in order to melt the chocolate. Let sit for 5 minutes to soften, then stir until all chocolate is melted and mixture is well blended. Set aside to cool for 10 minutes.
 Into another bowl combine the flour, sugar, salt, and baking soda. Set aside.
 Line your muffin tins with 18 regular-sized cupcake papers.
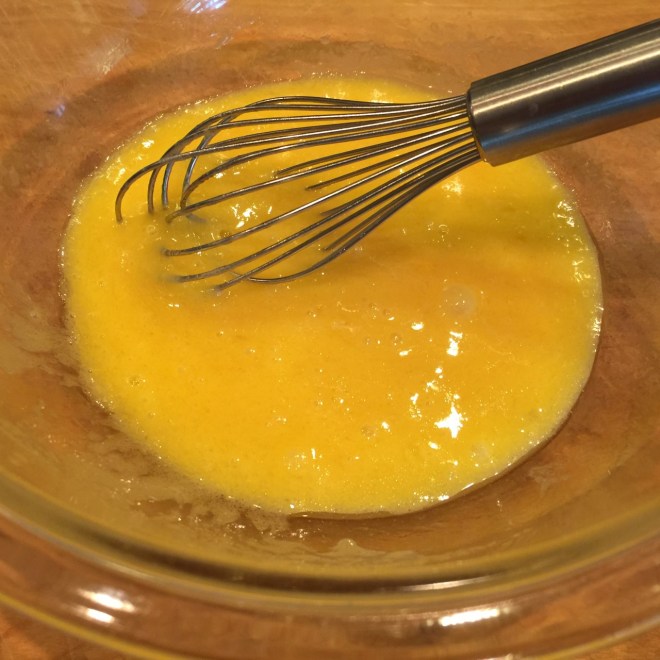 Pour egg mixture into cooled melted chocolate and stir. (You don’t want the chocolate to be too hot or it could cook the eggs.)
 Add in flour mixture and mix well – this is one instance where you want a little toughness to the cake so it holds up to the caramel.
 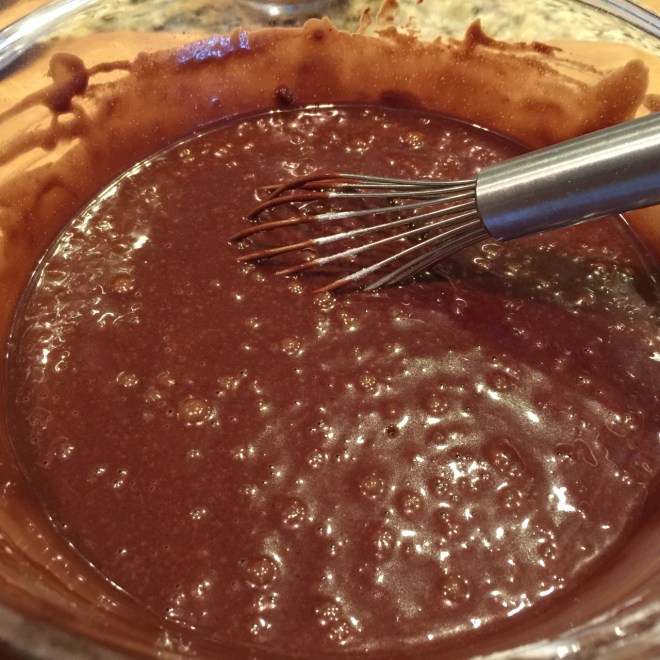 Pour
Pour 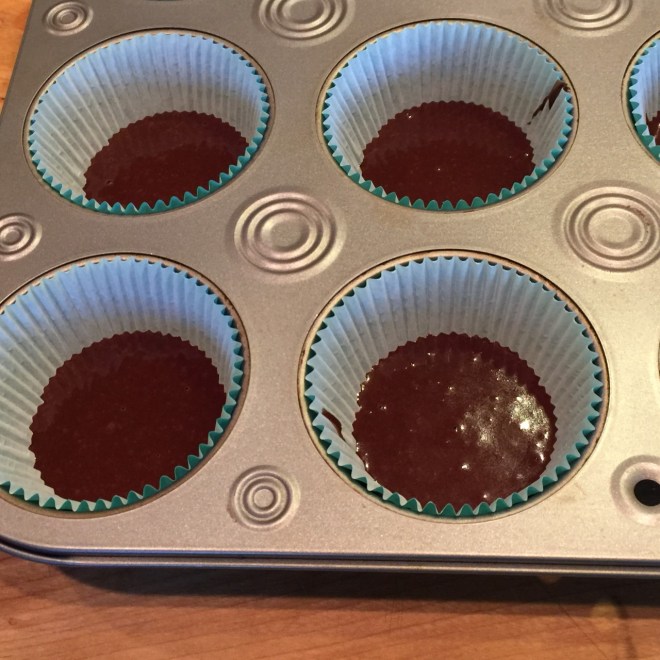 Bake for 6 minutes (SET A TIMER!!!) in the preheated 350º F oven. Remove from oven. Set a frozen caramel ball on top of each baked cake bit, dead center (do your best).
 Then pour batter around and on top of ball, 1/3″ from top of paper. (This is where a spouted measuring cup comes in handy! Use a spoon to catch the drips.)
  Return to oven and bake at 350º F for another 11 minutes. Remove from oven and keep cupcakes in hot muffin tin 10 minutes to set. Remove cupcakes – with papers – to a wire rack to completely cool.
 To make ganache frosting, place chocolate chips, vanilla, and salt in a bowl.
  Heat cream until bubbles form along sides – don’t let it boil.
 Immediately pour over chips, cover with a plate, and let melt for 5 minutes. Stir until smooth. If the chips don’t completely melt, pour mixture into a small saucepan and, over a very low heat, stir until melted. Allow to cool completely so it thickens, stirring now and then. Pipe ganache on cupcakes, or just frost with a knife.
 For some reason, Macaroni & Cheese is perceived as a bland, children’s food. (Don’t even get me started on the boxed version!)
 Pulse about 7 times to get small pieces.
 Pour into bowl and add in 1/2 oz (1/2 cup) Parmesan, 1 tsp salt, and black pepper. (It’s easiest to mix with fingers.) Set aside.
  Into a large pot, bring 4 quarts of water to a full boil. Add in 1 rounded T salt and the penne. Stir immediately to prevent sticking, then stir every now and then, until al dente. (Don’t overcook – pasta will continue to soften when the cheeses and sauce are added.)
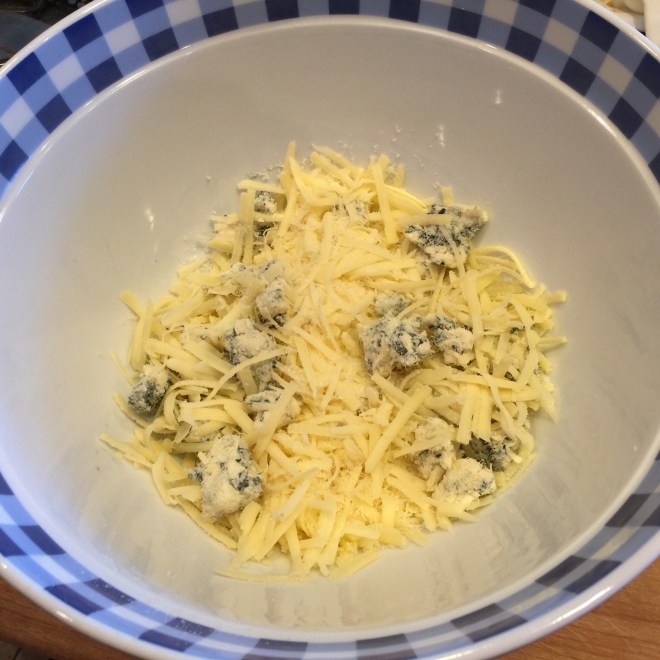 In a saucepan melt the butter over low heat. Turn off heat and mix in the flour, making sure you smoosh any lumps – this is your only chance to remove them. Cook 2 minutes over low heat, stirring continuously, to prevent that flour-y taste.
  Add in the cream and remaining 1 tsp salt. Increase the heat slightly to medium/low and stir until thickened.
 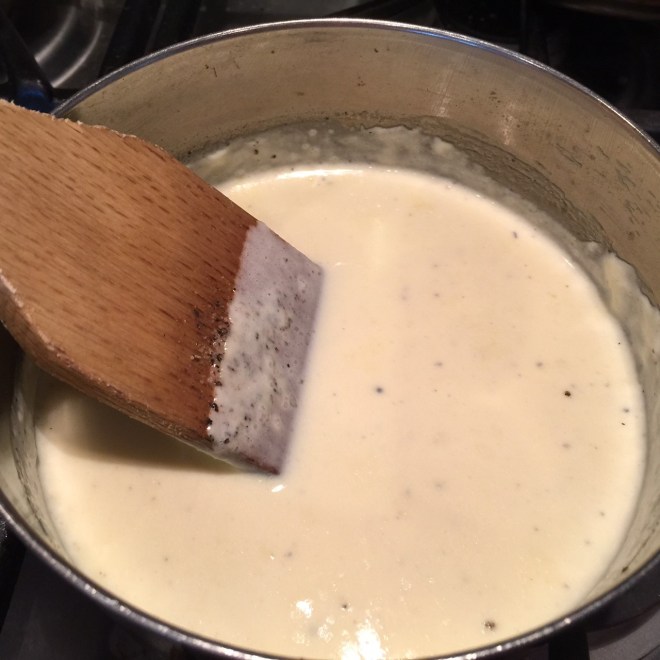 By now, the pasta should be cooked. Drain in colander, but don’t shake strainer. Immediately pour hot pasta over cheeses in bowl.
  Pour hot sauce on top. (Don’t stir yet.) Cover – I use a cookie sheet. Let set for 3 minutes to melt the cheeses. Remove cover and stir everything together.
  Pour into a casserole dish and sprinkle on breadcrumbs.
  Bake at 500º F for about 7 minutes, until breadcrumbs are browned.
  Sprinkle on a little chopped parsley, if desired. Can be served immediately.
 Cornbread often doesn’t live up to expectations. While it may look buttery-moist with it’s vibrant yellow color, one bite sends you reaching for the water glass. The other side of the coin is the cornbread you get at some restaurants, so full of sugar and fat that’s it’s really just a slice of cake.
 Melt the butter and set aside to cool a bit.
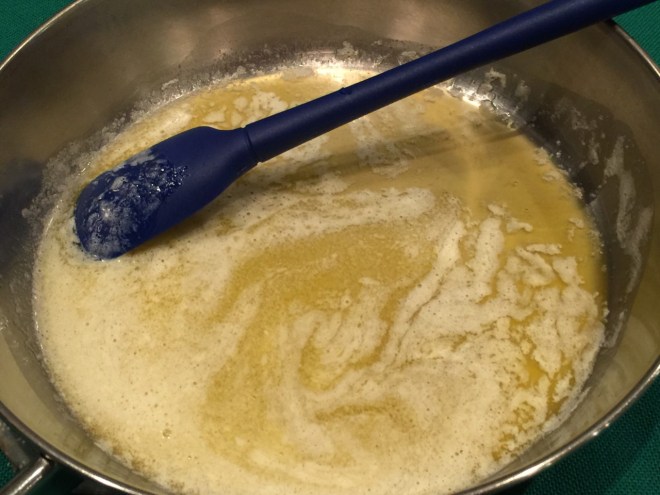 Into the workbowl of your food processor (If you don’t own one, put it on your birthday or holiday list, which is becoming longer by the minute!)), add the corn, sour cream, eggs, and hot sauce. Pulse about 6 times to break up corn.
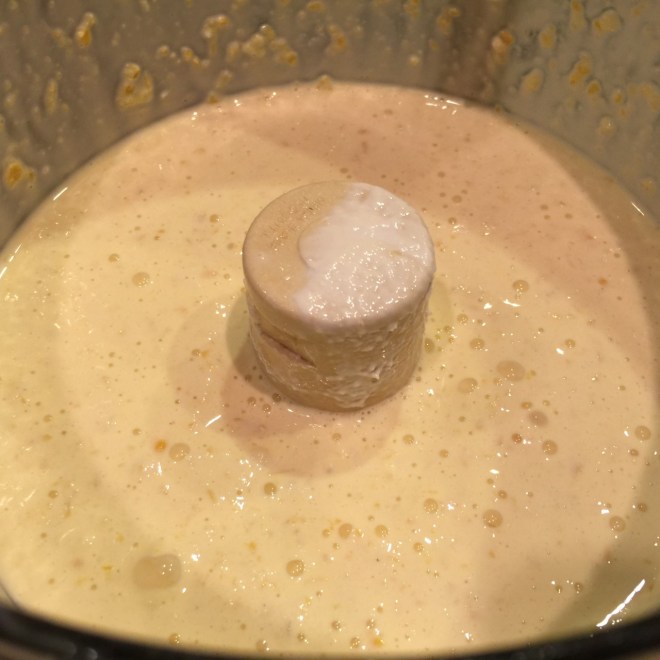 Pour the corn mixture into the cornmeal mixture and gently stir a few times. (The dry mixture will buffer the eggs so they don’t cook when the hot butter is added.) Then add in the butter and complete blending the ingredients just to the point where the flour in incorporated. Don’t over mix – overmixing a quick bread (which this is) will produce a tough bread.
 On the stovetop, heat the oil in a 10″ cast iron skillet over high heat until shimmering. Turn off heat and pour in batter (you’ll hear sizzling), spreading it out evenly and smoothing top.
 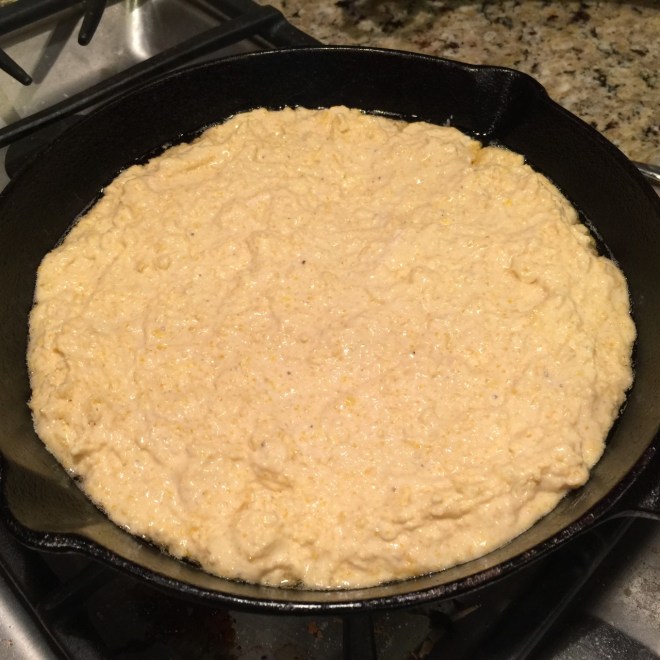 Place in hot oven and bake at 450º F for 18-25 minutes. (Set your timer for 18 minutes and test with a toothpick – when done, it should come out clean. Reset timer and cook longer, if need be.)
 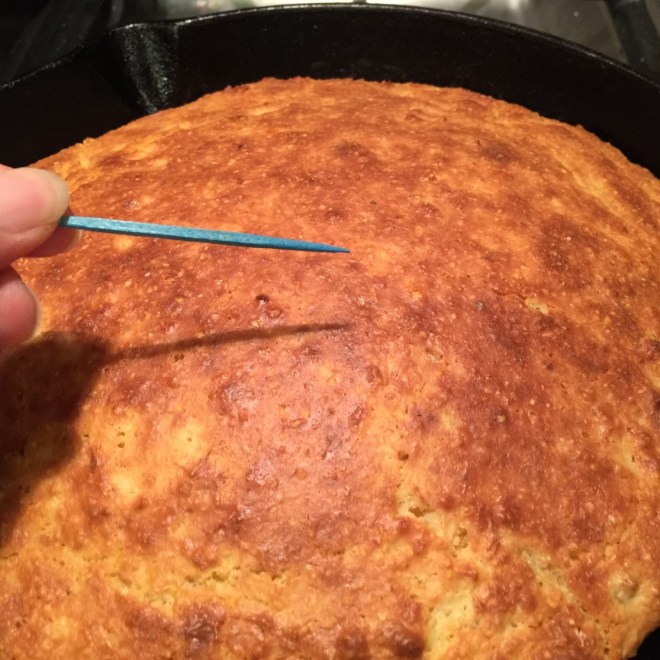 When done, remove from oven and let cornbread set in skillet at least 20 minutes before slicing.
 It’s autumn – that time of year when the days get shorter, the air a little brisker, and the markets display all kinds and colors of winter squash. While, of course, we appreciate them for their beauty – and sometimes cuteness – they’re actually edible, delicious, and filled with nutrients and fiber.
 Add in the seeds and fibers. Sauté another 4 minutes on medium.
  Add in the water and salt, bringing to a boil.
  While liquid is heating, slice the squash (unpeeled) into chunks. Place them cut side down on a steamer basket.
 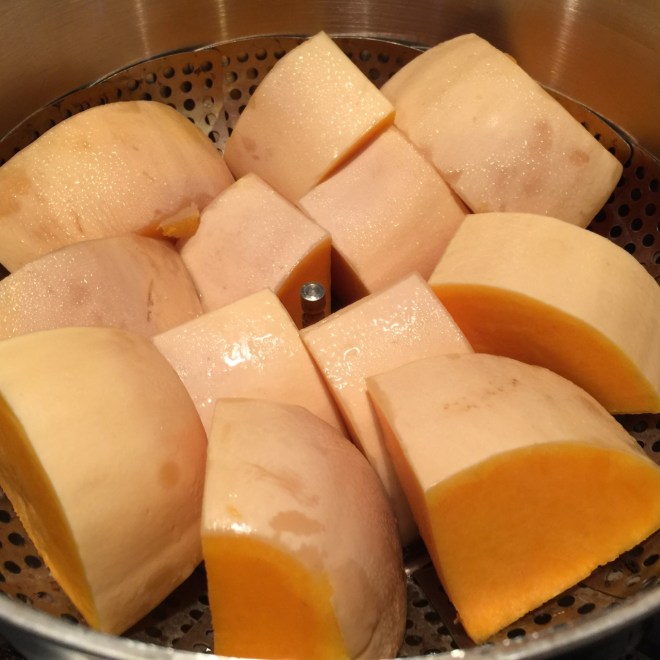 When the liquid has come to a boil, drop in the steamer basket and cover. Decrease flame to maintain a simmer. Simmer for 30 minutes. Remove basket from liquid, letting squash cool enough to handle.
 Once squash is cooled, scrap squash from its peel, discarding peel. Put squash into a blender and add enough of the liquid to purèe squash. (Depending on the size of your blender, you may have to do this in batches.)
  Empty purèe into the now-empty stockpot. Add in brown sugar and cream. Heat over medium to just before boiling. Taste for seasoning.
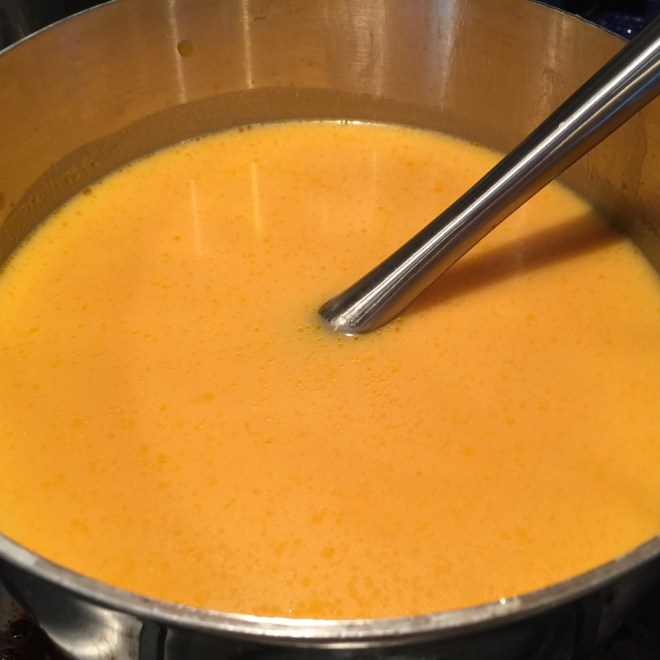

 You know that feeling at the end of a filling meal when you want just a little something sweet? TIRAMISU is the perfect solution. Although it looks rich and creamy, it’s actually very light. In fact, give me a fork and I could easily ingest the entire pan. (Thank goodness for will power.)
 In the small bowl of your electric mixer, put the egg yolks. Beat on low speed about 5 seconds, just to break them up.
  Add in the sugar and salt. Turn mixer to medium speed and beat 1 minute. The yolks will turn pale and thick.
 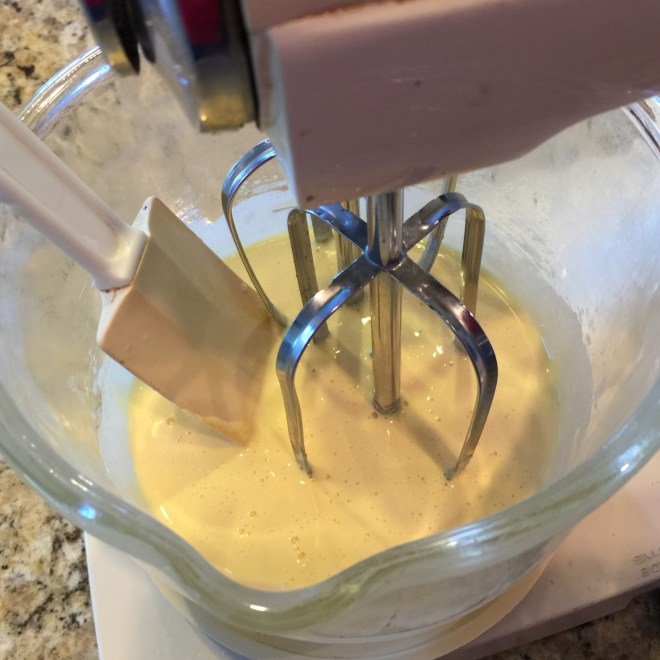 Pour in the remaining 2 T rum and beat on medium 30 seconds. Add in the cold mascarpone and beat on medium for about 30 seconds, until there are no lumps.
 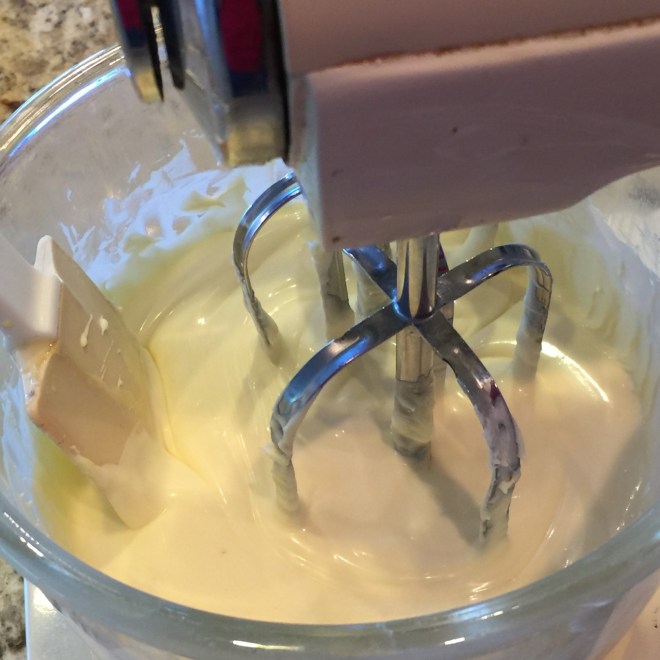 Empty mixture into a large bowl.
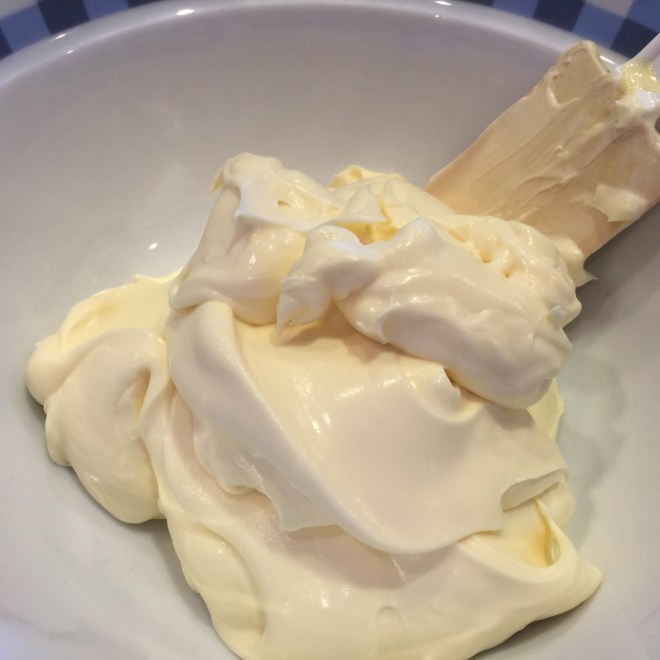 In the now-empty mixing bowl (you don’t have to clean it), pour the cream. Beat on high until soft peaks form.
  Stir 1/3 of whipped cream into mascarpone mixture to loosen texture. Fold in remaining whipped cream.
  Have ready an 8″x8″ pan (or it’s equivalent), the ladyfingers, and the coffee mixture. Holding a ladyfinger at the midsection, quickly dip one long, flat side into the coffee (submerge less than 1/4″ – don’t go midway), turn it over and dip the other side. Shake off any excess liquid. (The goal is to get just the outside portion of the cookie wet so it will remain crispy in the center – you want the coffee flavor, but not the mush.)
  Then place the dipped ladyfinger in the pan. Continue on, lining up the ladyfingers in the same direction, until the bottom is covered. By the time you get to the last one, they will have become somewhat softer. You can probably shove them together to make room for one more in each row.
  Cover ladyfingers with half of the mascarpone, smoothing evenly.
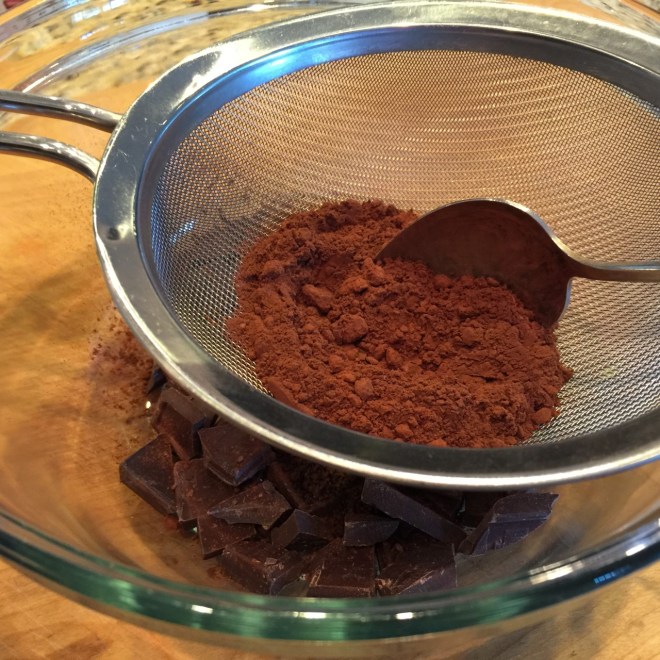
 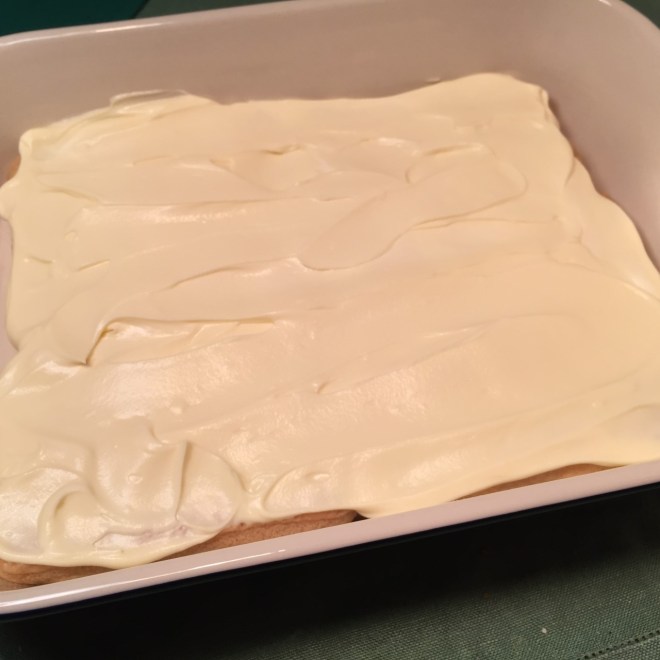 Place 1 T cocoa powder in a small sieve. Stir the cocoa with a spoon to sprinkle cocoa evenly over mascarpone. (Cocoa tends to clump – the spoon breaks them up.)
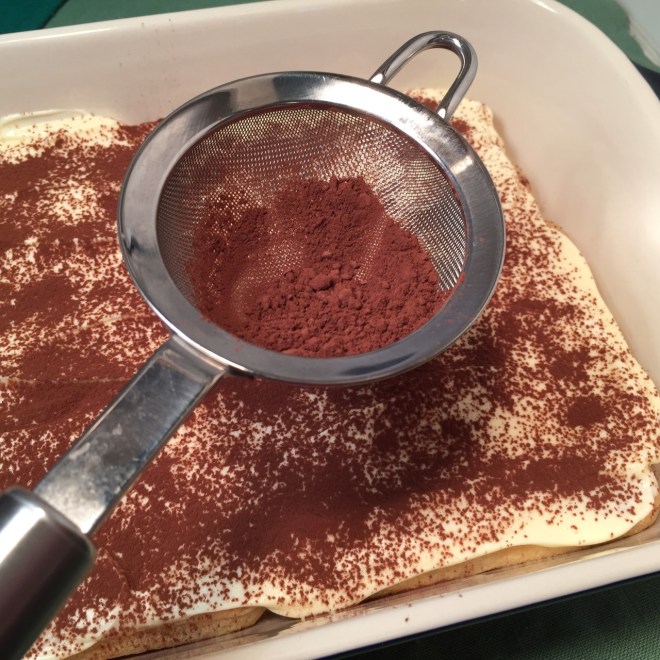 Add the second layer of ladyfingers, dipping as above, laying them in the opposite direction of the first layer. Fit as many cookies as you can, although you may not need them all. Save the undipped ones for future use.
 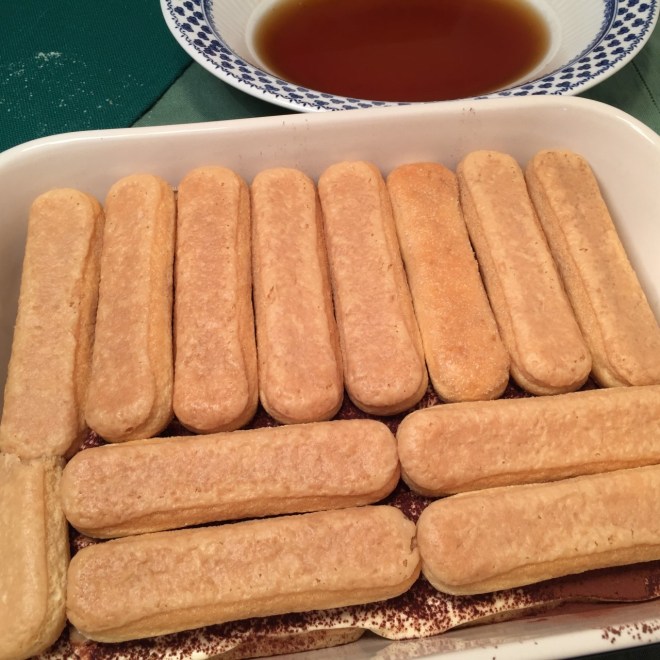 Spread on remaining mascarpone evenly, then sprinkle on the remaining 1 T cocoa.
  Cover with plastic film and refrigerate at least 6 hours. (I make it the night before.) You’ll notice the cocoa will turn a deeper chocolate color due to condensation.
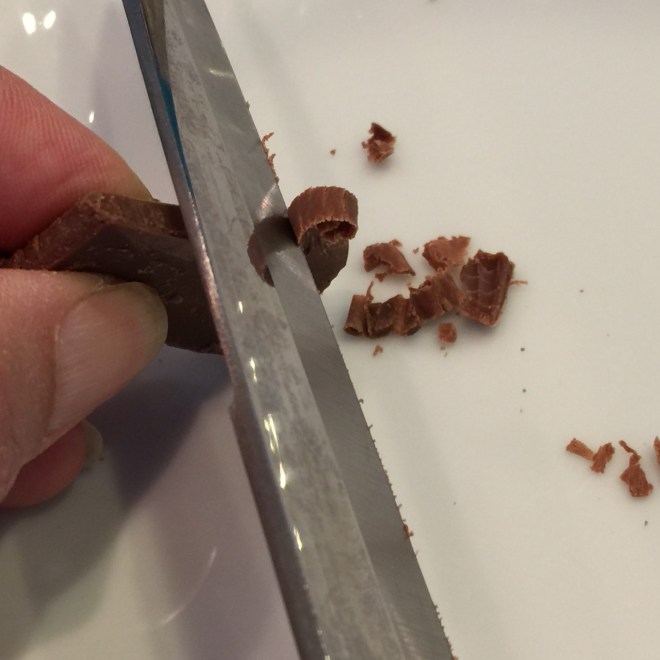 Keep TIRAMISU in refrigerator until ready to serve.