TANGERINE “TURKEY” (or TOFU) SALAD – Not Just A Pretty Picture!

Colorful MANDARIN TOFU SALAD

Colorful TANGERINE TOFU SALAD

Not all salads are created equal. There are dinner salads, meant to whet the appetite. There are fruit salads, often eaten in lieu of French fries (so we can justify dessert). And then, there are meal salads. We feel proud of ourselves when we eat a meal salad. They fill us up with healthy stuff (so we can justify dessert).

My friend, blogger Angie Thompson at Peas For Two, posted a mouth-watering photo of a chicken salad from Umalu restaurant in Hawaii. People post a lot of food on Facebook, but this photo grabbed me like an iron vice.

Thanks to the internet I was able to find Umalu’s menu, read a description of the salad, and then promptly changed several things to make it vegetarian and mine.

As you may have noticed, I called this salad “Turkey” (quotation marks denote imitation) OR Tofu. That’s because they both work and are tasty. My husband and I prefer the fake turkey in this recipe, but I know there are those of you leery of imitation products. Tofu is rather bland and doesn’t really add much tastewise to the salad, whereas the faux (I’m feeling posh) gives a nice turkey-ish flavor and texture.

NOTE: There are lots of imitation turkey products out there. Some are fabulous, and some taste like cardboard. Don’t give up if you don’t like the first brand you try. My favorite is by Worthington and it’s called Meatless Smoked Turkey Roll (See photo below). Don’t be put off by the price – this baby weighs in at 4 pounds and it’s all edible. It comes frozen so I let it thaw enough to cut it into meal sized portions, then refreeze it. And, no, they’re not paying me to promote it.

Turkey fake color bkg

My favorite fake turkey!

The only real work to producing TANGERINE “TURKEY” SALAD is pan frying the “turkey” (or tofu, if you choose), and the tortilla strips – but neither of these steps is too time consuming. For the most part, this salad is fast and easy.

Of course, me being the perennial DIYer, I made the tortillas myself, which added a bit of extra work. I see you rolling your eyes, thinking that I could just pick up a pack of pre-made tortillas and save the trouble. Hear me out! Those tortillas come in packs of 12 and I only needed 1 or 2 (depending on size). Unfortunately, tortillas don’t freeze well. So I made only what I need and there’s no waste. As you may have noticed by now – I hate waste! I included the recipe for flour tortillas below – they’re really easy.

TANGERINE “TURKEY” (OR TOFU) SALAD – makes 3 servings

  • about 6 oz tofu or imitation turkey (3/4″ slice of Meatless Smoked Turkey)
  • 2  6″ flour tortillas (recipe below, for the adventurous)
  • about 3 cups red leaf lettuce, torn into bite sized pieces
  • 1 cup red cabbage, thinly sliced
  • 1 cucumber, skinned, seeded, and sliced
  • 6 scallions, sliced
  • 1/2 cup carrots, shredded (about 2 carrots)
  • 1  11-oz can Mandarin oranges, drained
  • 2-3 T spicy peanuts
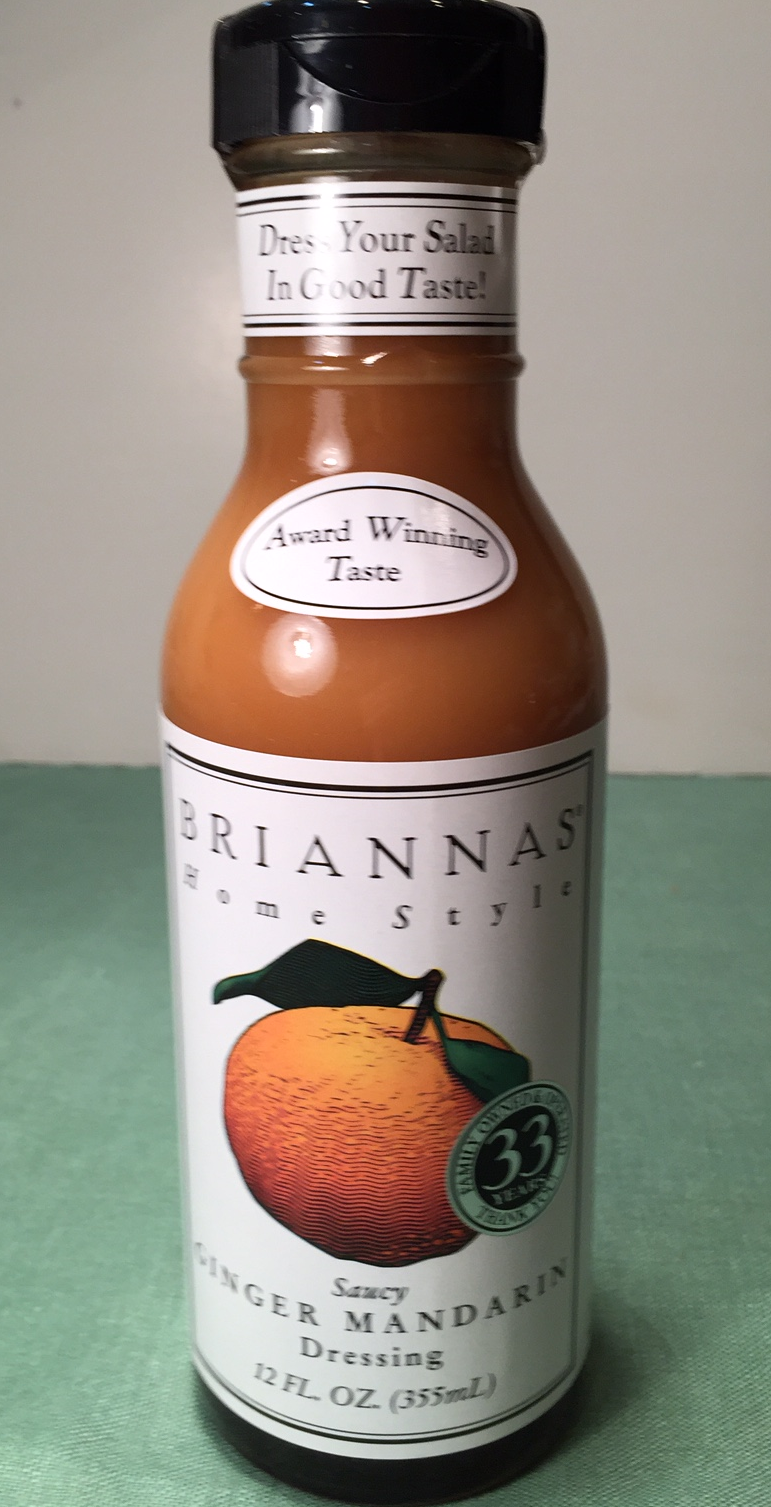
  • Ginger Mandarin Dressing (see photo) or a similar oneGINGER MANDARIN DRSG

Cut “turkey” into two 3/8″ thick discs. If using tofu, slice three 3/8″ pieces. Dredge the “turkey” in flour and shake off excess (you don’t have to do this with the tofu). It’s best to use a nonstick skillet if you’re using tofu – even with oil it tends to stick to pan. Fry in oil, browning both sides. Remove to paper towel and cool. Slice into bite sized pieces.

Slice the tortillas into 3/8″ wide x 1½” long strips. A pizza cutter works really well for this task. In a small saucepan or wok, put at least 1/2″ of vegetable oil and heat to 375º Fahrenheit. Deep fry small batches of the tortilla strips until they’re browned on both sides. Remove to paper towel.

NOTE:  You can reuse the deep fry oil by pouring it through a fine sieve into a container. Store in the fridge.

In a large bowl, combine the lettuce, cabbage, cucumber, scallions, carrots, oranges, and “turkey” or tofu. Add dressing (don’t be stingy) and mix well.

Just before serving, sprinkle in the peanuts and tortilla strips.

FLOUR TORTILLAS – makes 2 tortillas

  • 1/4 cup flour
  • 1/8 tsp salt
  • 1 T vegetable oil
  • 2 T water

I used my food processor to mix the dough, but because this was such a small amount, I had to keep stopping the machine to scrape the sides and bottom. Instead, you can just mix everything together by hand, kneading until it’s well mixed.

Divide dough into 2 balls, cover, and let rest for 1/2 hour. (If you don’t do this, the dough will resist rolling.)

On a well floured board, roll out each dough ball into circles 6″ in diameter.

Either use a tortilla cooker or a 10″ dry skillet. One at a time, cook the tortillas, flipping often. You DON’T want to brown them or they get crispy – they need to be flexible. Each one will take about 1 minute total. Transfer into a plastic bag to keep them moist until ready to use.


Advertisement

MINI LEMON PIES – A Flavor Explosion!


FullSizeRender (2)

ZINGY MINI LEMON PIES

While I’m a confirmed chocoholic, sometimes I like to shake things up a bit. So when my friend, George, gave me several lemons from his tree, I decided to make a lemon pie. And I didn’t want just a hint of lemon…I wanted LEMON! Toe curling lemon!

The key to achieving lip smacking lemony flavor is using plenty of lemon zest. For you newbies, zest is the very outer layer of citrus – where the color is (not the white rind part). Use the smallest holes on a cheese grater and cautiously scrape away. One lemon produces about 1 packed teaspoon.

Portion control being my motto, individual pies baked in custard cups were in order. When I make a standard sized pie, I have a tendency to cut myself a slice, then (because it wasn’t a perfect cut) “clean up” the raggedy edge left behind, then (after inhaling said piece) slice myself “just a wee bit more”.

If something is already preordained as a portion, I seem to have better control over myself. (I remember the days when I could eat half a cake, do 10 jumping jacks, and not gain an ounce. Sigh!)

While the graham cracker crust is briefly baked, the pie isn’t. Rather, the filling is cooked on the stovetop, poured over the crust, then refrigerated. For optimum taste, Mini Lemon Pies should be made the day before serving so they’ve properly set and chilled.

MINI LEMON PIES – makes 4 custard cup pies

Crust:

  • 3 T butter, melted
  • 6 graham crackers (3.2 oz), well crushed (no chunks!)

Mix butter and graham crackers together with a fork. Divide evenly amongst 4 custard cups. Pat down to fill the bottom of each cup. To do this faster and easier, I use a 5th custard cup to press down the crust, rather than my fingers or a spoon.

Bake at 350º Fahrenheit for 7 minutes. Remove to wire rack and cool.

Filling:

  • 1/4 cup butter
  • 3 eggs
  • 3/4 cup sugar
  • 1/2 cup lemon juice
  • 1 tsp packed lemon zest (don’t be stingy!)

Melt butter and set aside to cool down a little while you prepare the rest of the ingredients.

Put water in the bottom half of a double boiler. Don’t overfill or the water will sputter out.

Into the top half, put the eggs. Beat well with an egg beater or whisk. Add in sugar, lemon juice, zest, and butter. Turn flame on medium. Adjust heat as needed to keep the water from boiling over.

Stir well and frequently until thickened – about 10 minutes. (At around 7 minutes you’ll notice the mixture begins to thicken.)

NOTE: The filling will firm up in the fridge.

Remove the top pot from the water bath, wipe off the dripping water, and pour the filling evenly into the 4 custard cups. Let set on the counter at least half an hour to cool, then refrigerate in a covered container.

Top with whipped cream, if you like, and serve.  Then try and restrain yourself from indulging in another.


TOMATOES & BASIL & PASTA – Oh, My!

IMG_3767

TOMATO & CAMEMBERT TOPPED SPAGHETTI


It’s all happening in the garden! Tomatoes, cucumbers, beans, basil, and, of course, the ever-present zucchini. Nature is in full bounty!

Whether you grow your own veggies or buy from a farmer’s market, there’s a world of difference between farm fresh and the flavorless produce at the grocery store. So let’s enjoy these garden glories while we can.

I’ve been making Tomato & Camembert Topped Spaghetti for years and have always used dried basil in the dish. It’s so much easier and I figured dried is the same thing as fresh minus the water, right? Well, as it turns out, while that may be technically true,  where taste is concerned, fresh is absolutely superior. I recently made this dish using some leftover fresh basil I had (you know me – waste not, want not!) – my mouth was aglow with flavor.

Nothing but fresh from now on in this recipe!

Tomato & Camembert Topped Spaghetti obviously calls for spaghetti (or linguine) noodles. I make my own pasta (no surprise to those of you loyal followers of my blog). I’ve included the recipe for the brave souls out there willing to give it a go.

TIP:  An easy way to chop basil is to put the leaves in a cup and snip away with kitchen shears.            This photo shows me chopping parsley, but it’s the same principle.

parsley snipping

TOMATO & CAMEMBERT TOPPED SPAGHETTI – makes enough for 3

  • 10½ oz spaghetti or linguine pasta (recipe follows – or buy pre-made)
  • 3 tomatoes, coarsely chopped
  • 1/2 lb Camembert cheese, torn into bite sized pieces
  • 1/2 cup extra virgin olive oil
  • 1/2 cup fresh basil (chopped)
  • 3 cloves garlic, pressed
  • 1½ tsp salt
  • ground pepper to taste
  • about 1/3 cup Romano or Parmesan cheese, shredded

Boil pasta until done. Drain.

As pasta is cooking, put the tomatoes, Camembert, olive oil, basil, garlic, and salt into a large serving bowl and blend. Mix in cooked pasta. Can be served immediately as a warmish dish, or refrigerated and served cold.

To each serving sprinkle on Romano (or Parmesan) and ground pepper.

HOMEMADE PASTA – makes 10.5 oz (approximately 3 servings)

  • 2 eggs
  • 1 T extra virgin olive oil
  • 1½ cups all purpose flour
  • additional water, if needed

Into the workbowl of your food processor, put the eggs, olive oil and flour. Whirl, stopping now and then to scrape the loose flour into dough. The goal is for the dough to be able to form a ball when dough is squeezed. Add a teaspoon of water at a time, if needed. However, you don’t want it too wet.  If it’s sticky, add a tablespoon at a time of flour and mix.

I use the Atlas hand crank pasta machine. For my pasta maker, I start with a setting of ‘1’ and work my way to ‘5’. Then I run the dough through the spaghetti cutter.

There are a number of youtube videos about making homemade pasta that would be a good idea to watch.


TOASTY TOMATO & PESTO SANDWICHES

TOASTY TOMATO PESTO SANDWICH

TOASTY TOMATO PESTO SANDWICH

After picking my first tomato of the season, I wanted to make the most of this tempting treat. So I came up with an amazing sandwich:  a toasted focaccia bun topped with melted provolone cheese, slathered with pesto, and a fat slice of my precious tomato.

I’m a firm believer in cooking from scratch – it not only saves big bucks, but it empowers you to choose what goes in your body. So, of course, I made the pesto and focaccia myself.

However, I understand not everyone shares my passion as a diehard DIY-er. So you can simply purchase the pesto and focaccia and STILL have a great tasting sandwich.

As a glass half full kind of gal, I’ve included recipes for the pesto and focaccia, along with the sandwich directions, in my optimism that some of you will give them a try.

TOASTY TOMATO PESTO SANDWICH – makes 1 sandwich

Ingredients:

  • thick tomato slice (preferably home grown or from a farmer’s market)
  • 2 or 3 Tbsp. pesto (recipe follows below)
  • 2 slices provolone (or whatever cheese you prefer)
  • focaccia bun (recipe follows below)

Directions:

  1. Slice the focaccia in half horizontally and toast it.
  2. Lay the cheese on bottom half and zap in the microwave for 15 seconds or so to melt the cheese.
  3. Slather on pesto.
  4. Add the tomato.
  5. Place the top half of the roll.

Now open wide and enjoy the feast!!!

PESTO – makes 1 cup

  • 2½ cups (4 oz) basil, packed
  • 6 cloves garlic
  • 1/2 tsp salt
  • 2½ T lemon juice
  • 1/2 cup Romano cheese, shredded
  • 1/3 cup pine nuts, toasted
  • 1/3 cup extra virgin olive oil

Put all ingredients in a blender and puree. You’re going to need to start and stop the blender a lot in the beginning in order to mix things around by hand.  WARNING:  Do NOT push down with any utensil while machine is running. Been there, done that. Turn machine off before mixing things up! Pretty soon everything will blend on its own.

FOCACCIA BREAD – makes 5 buns

  • 1 cup water, 100º-104º Fahrenheit
  • 1¼ tsp yeast
  • 1½ (7 oz) cups white bread flour
  • 1½ (7¼ oz) cups whole wheat flour
  • 2 T olive oil
  • 1 tsp salt
  • 1/2 tsp dried sage
  • coarse salt in grinder for top of bun
  • extra olive oil for soufflé dishes

Proof yeast in water.

Into the work bowl of food processor put all of the white flour, 1 cup of the whole wheat flour, the olive oil, salt, and sage. Turn on machine and slowly stream in the yeast water through the pour spout. Add the remaining wheat flour one tablespoon at a time until the dough forms a firm ball. Let the machine run 45 seconds more to knead the dough. (If you don’t own a food processor, you’ll have to do this by hand. As you undertake this task, think about buying a food processor!)

Plop dough into an oiled bowl, then flip dough and place back in bowl. Now both sides are oiled. Cover with tea towel and let rise 1 hour.

Cut dough into 5 pieces. If you have 4¼” individual soufflé dishes (see photo) use them – you’ll need 5.

IMG_1318

The buns will turn out nice and rounded. If you don’t have soufflé dishes, just use a well oiled cookie sheet. As you can see from the photos, the soufflé dishes turn out prettier focaccia buns – but they taste the same!

BAKED IN SOUFFLE DISH VS FREE FORM

BAKED IN SOUFFLE DISH VS FREE FORM

Pour about 1½ tsp olive oil into each soufflé dish. One by one, take a piece of the dough and work it into a 4″ disk, smooth on one side. Place the smooth side down into the oiled dish, and press. Flip dough and press down again, so the dough fills the dish bottom – try not to mar the smooth surface. Cover and let rise 1/2 hour.

Using a finger with a short fingernail (or the stick end of a wooden spoon), make several deep indentations in dough. Brush with a little olive oil (not absolutely necessary to do this), and grind sea salt over top.

Bake in preheated 400º Fahrenheit oven for 20 minutes. Let rest for 10 minutes before removing from soufflé dishes to a wire rack to cool.


GOLDEN GAZPACHO – Soup With The Midas Touch!

Refreshing GOLDEN GAZPACHO

Refreshing GOLDEN GAZPACHO

In my part of the world, summers are brutal. It’s not unusual for temperatures to rise above 100º F (for you celsius folks, that’s over 38º)! So, what am I making for dinner? Soup!

No, the heat hasn’t addled my brain – I’m talking chilled soup, specifically GOLDEN GAZPACHO. The key is to make it early in the day. This serves two functions: 1) the kitchen hasn’t heated up yet so I can comfortably do my chopping, and 2) for Golden Gazpacho to be at its peak of flavor, it needs to be ice cold.

There’s a lot of wiggle room in this recipe. You can adapt it to suit you preferences. In fact, I once mistakenly bought a papaya instead of the called-for mango. (As I sliced through it, I kept waiting for the giant seed – it never came.) Papaya was wonderful, and a lot easier to cut up.

NOTE: Cilantro is one of the ingredients. A lot of people (including myself) think it tastes like soap. So before adding it to your whole batch, do a taste test with a small portion. I have to divide the soup and add cilantro to half since my husband prefers it, and I hate it. But – I love my husband.

GOLDEN GAZPACHO – makes about 5 cups

  • 3 tomatoes (any color), chopped – you can leave the skin on
  • 1/2 cup vegetable stock (purchased or homemade – VEGETABLE STOCK)
  • 1 T chili pepper (any kind), seeded & chopped finely
  • 1/4 cup fresh lime juice
  • 1/4 tsp turmeric
  • 1/8 tsp salt
  • 1 cup orange juice
  • 1 mango, chopped
  • 1 cup melon (cantaloupe, honeydew), chopped
  • 1 small yellow pepper (or orange or red), chopped
  • 1/2 cucumber, skinned, seeded, & chopped
  • 1 T extra virgin olive oil
  • 1/4 cup scallions, sliced
  • optional: 1/2 T cilantro

In a blender or food processor, purée 1 tomato, vegetable stock, chili, lime juice, turmeric, salt, orange juice, 1/3 cup mango, and 1/3 cup cantaloupe. Pour into large serving bowl and add remaining ingredients. Season to taste with salt and pepper, if desired. Refrigerate at least 4 hours – the longer, the better.