 Every now and then I get an idea for a recipe that I think will be a piece of cake (pun intended!) to develop. It never is.
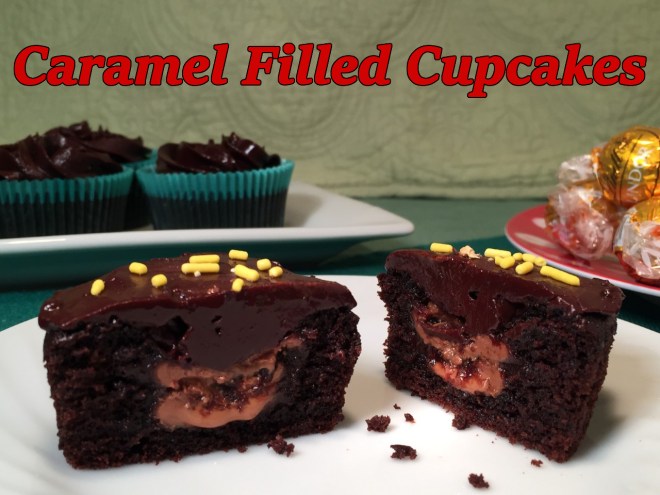
The saga of my CARAMEL FILLED CUPCAKES began with an inspiration from Hostess Cupcakes and Cadbury Caramel Eggs. I envisioned biting into a firm cupcake filled with, not white fluff, but with creamy caramel. The recipes I found called for baking a chocolate cupcake, digging out divots from the tops, and filling with caramel sauce.
First of all, cutting out the divots seemed like a lot of messy work. Second of all, what to do with all the divots? (I hate waste!) So, I figured I’d just pour batter into the tins and drop in homemade caramel. FAIL! All that happened was the caramel blended with the batter during baking. Tasty, but not what I wanted.
I tried freezing the caramel into balls and adding it to the batter. Same result as before since it turns out caramel doesn’t freeze. (Who knew?) I tried dropping in the caramel at different times during baking. Same. Finally, I decided I needed to encase the caramel – like the Cadbury Eggs. It couldn’t actually be Cadbury Eggs, though, since not only are they seasonal, but they’re huge.
After scouring the candy departments of various stores (what I won’t do for my blog!), I had a eureka moment when I found Lindt’s chocolate covered caramels. They were just the right size and shape! Getting closer. I dropped them into the batter. They sank to the bottom, leaking caramel. I wanted the caramel in the middle – like Hostess Cupcakes’ fluff. How could I keep the balls suspended?
It finally hit me to bake a wee bit of batter in order to form a solid base for the balls, then add the balls, surrounding them with batter, and complete the bake. Yes!!! The last tweak was freezing the balls first so they remained intact.
NOTE: Just so you know, the many cupcakes that bombed were still eaten. I HATE WASTE!
CARAMEL FILLED CUPCAKES – makes 18 cupcakes
- 18 caramel filled chocolate 1″ balls (I use Lindt), frozen

- 3 oz bittersweet chocolate (I use Ghirardelli 60% bar – not chips)
- 1/3 cup Dutch processed cocoa powder
- 3/4 cup hot coffee
- 3/4 cup (4-1/8 oz) bread flour
- 3/4 cup granulated sugar
- 1/2 tsp salt
- 1/2 tsp baking soda
- 2 eggs
- 1 tsp vanilla
- 2 tsp distilled white vinegar
- 6 T vegetable oil
- 1¼ cups semi-sweet chocolate chips (I use Ghirardelli 60% chips)
- 1/2 cup cream
- 1 tsp vanilla
- 1/8 tsp salt
The first thing to do is freeze the chocolate-caramel balls. (I store them in the freezer immediately when I buy them.) They need to be solid to prevent melting during baking.
Break up the bittersweet chocolate bar into small pieces (so they melt quicker) and put into a bowl (or better yet, a 6 cup or more spouted measuring cup – the spout makes pouring the batter into the cupcake tin much easier). Sift the cocoa powder (cocoa powder tends to get lumpy in storage) into the bowl. 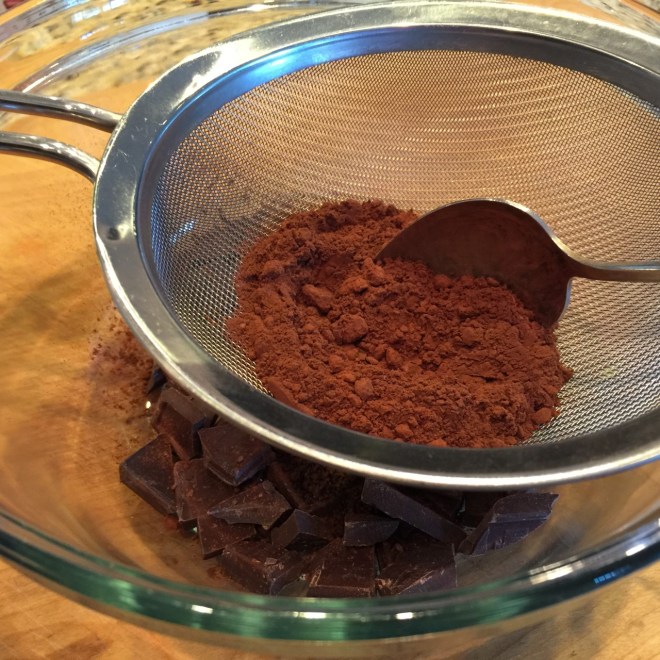 Pour in the HOT coffee. Immediately cover bowl with a plate to retain heat in order to melt the chocolate. Let sit for 5 minutes to soften, then stir until all chocolate is melted and mixture is well blended. Set aside to cool for 10 minutes.
 Into another bowl combine the flour, sugar, salt, and baking soda. Set aside.
 Line your muffin tins with 18 regular-sized cupcake papers.
Preheat oven to 350º Fahrenheit.
Into yet another bowl, whisk together the eggs, vanilla, vinegar, and oil. 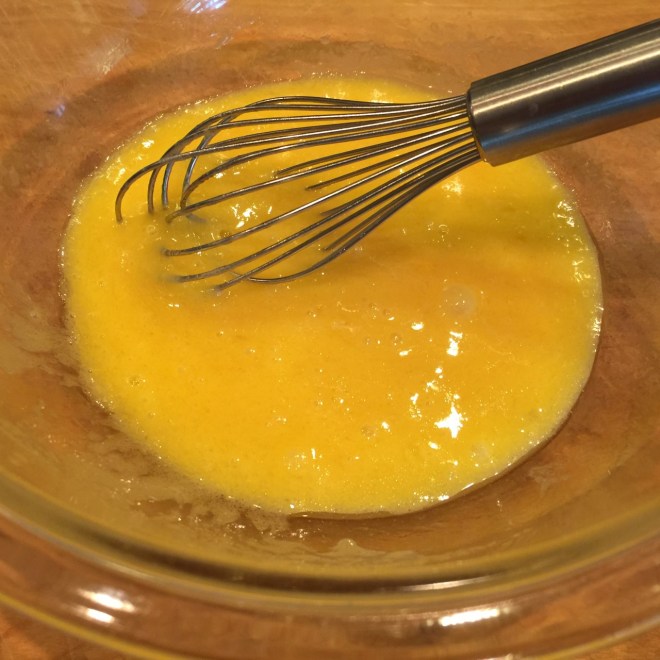 Pour egg mixture into cooled melted chocolate and stir. (You don’t want the chocolate to be too hot or it could cook the eggs.)
 Add in flour mixture and mix well – this is one instance where you want a little toughness to the cake so it holds up to the caramel.
 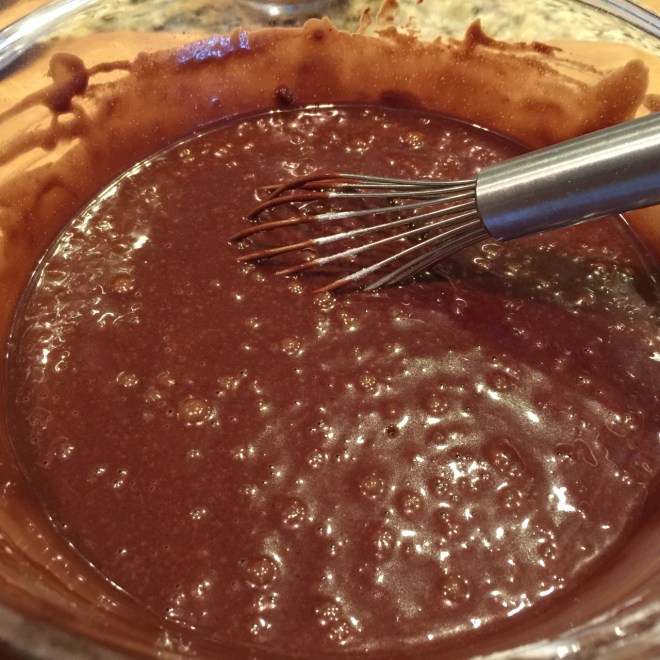 Pour 1 tablespoon into the bottom of each liner. Don’t put in more or the caramel ball will sit too high. This small bit of batter is going to form a barrier against the caramel, preventing it from seeping into the paper.
 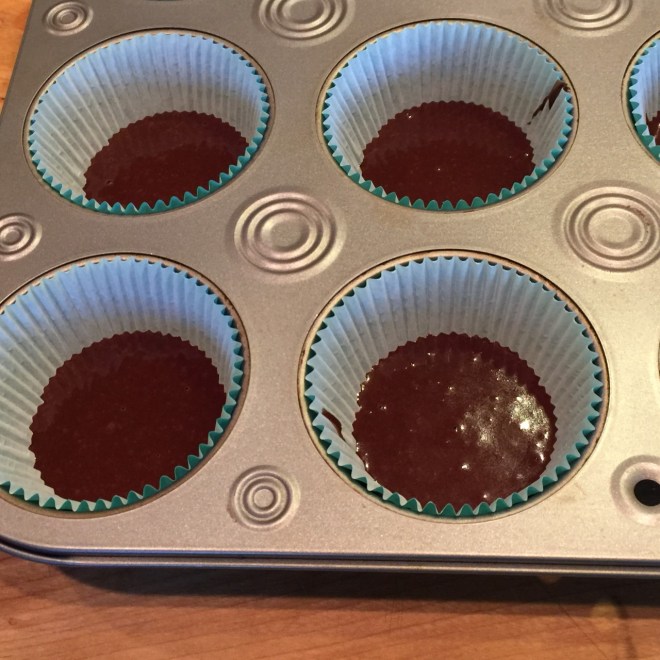 Bake for 6 minutes (SET A TIMER!!!) in the preheated 350º F oven. Remove from oven. Set a frozen caramel ball on top of each baked cake bit, dead center (do your best).
 Then pour batter around and on top of ball, 1/3″ from top of paper. (This is where a spouted measuring cup comes in handy! Use a spoon to catch the drips.)
  Return to oven and bake at 350º F for another 11 minutes. Remove from oven and keep cupcakes in hot muffin tin 10 minutes to set. Remove cupcakes – with papers – to a wire rack to completely cool.
 To make ganache frosting, place chocolate chips, vanilla, and salt in a bowl.
  Heat cream until bubbles form along sides – don’t let it boil.
 Immediately pour over chips, cover with a plate, and let melt for 5 minutes. Stir until smooth. If the chips don’t completely melt, pour mixture into a small saucepan and, over a very low heat, stir until melted. Allow to cool completely so it thickens, stirring now and then. Pipe ganache on cupcakes, or just frost with a knife.

 One of my family’s favorite soups is HOT & SOUR. Not only does it have an appealing kick, but I love that you can eat a lot of it with almost no calories. Yay! When I start my meal with a big bowl, it takes the edge off my hunger so I don’t inhale half a dozen eggrolls.
 Cut bamboo shoots in half widthwise, then into slivers lengthwise.
  Press out excess liquid from tofu, then cut into 1/2″ cubes.
 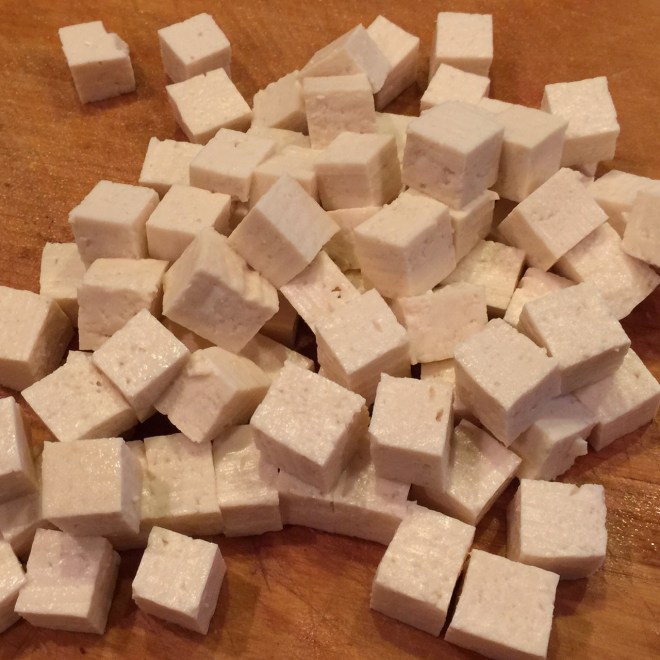 Bring vegetable stock to a boil. Add in mushrooms and bamboo shoots. Simmer for 5 minutes.
 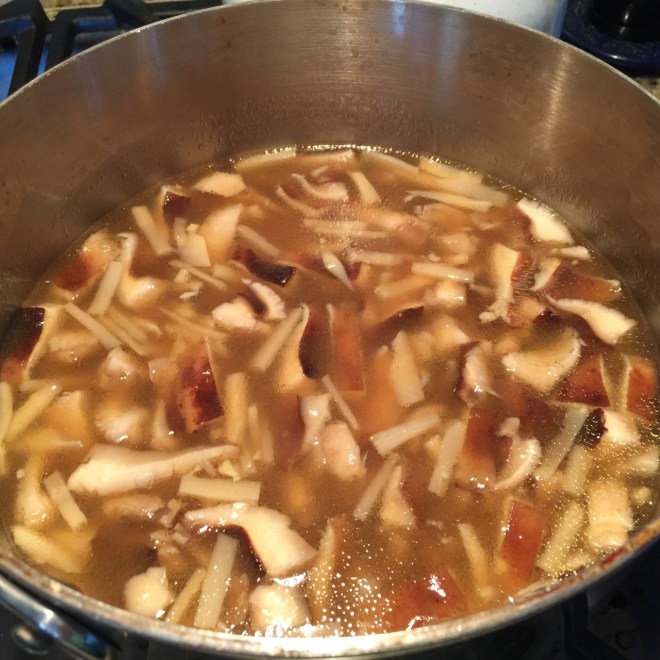 In a small bowl stir together 3 T cornstarch and 3 T water.
  Stirring stock, pour in slurry (cornstarch/water mix). Add in tofu, white pepper, tomato paste, ginger, garlic, sesame oil, soy sauce, and scallions.
 Simmer 5-10 minutes. In a small bowl whisk together the egg, 1/2 tsp cornstarch, and 1 tsp water. Turn off heat. VERY SLOWLY drizzle in the egg in a thin stream, going in all directions.
 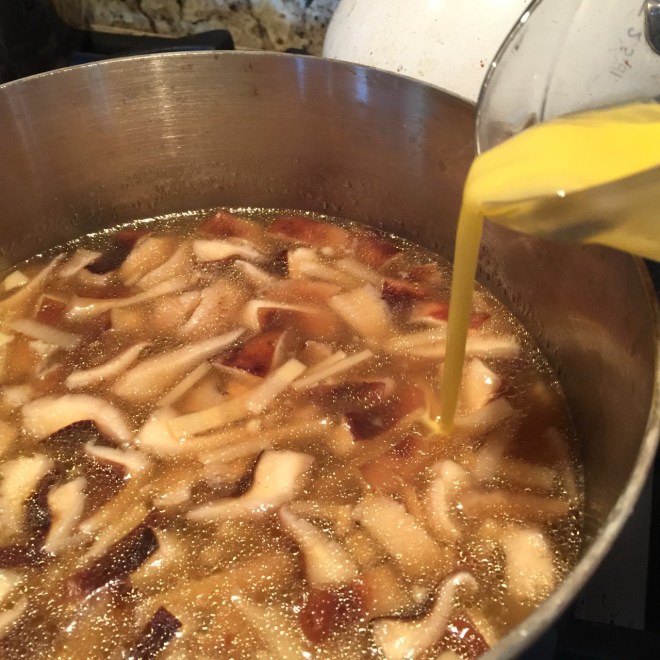 Turn the heat on again and whisk gently to break up egg strands. Serve.
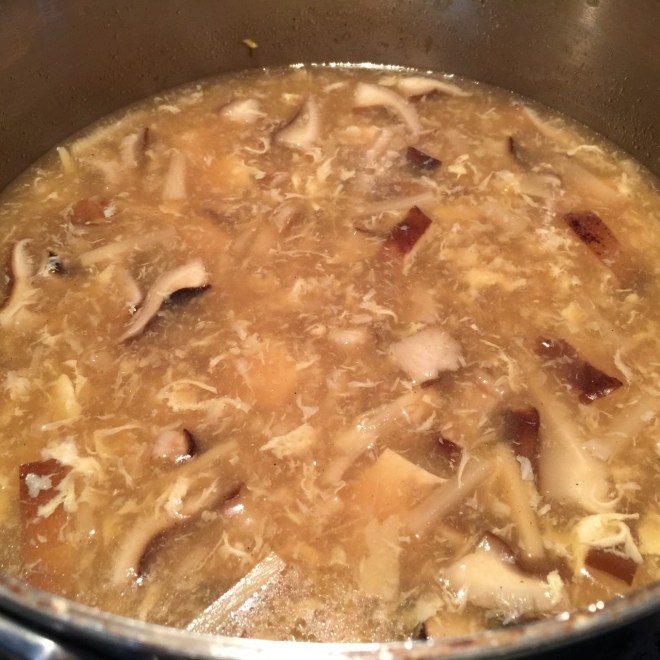
 What could be better on a chilly evening than sipping a nice mug of MULLED APPLE CIDER?! (You could even add in a dash of an adult beverage, if you like.)
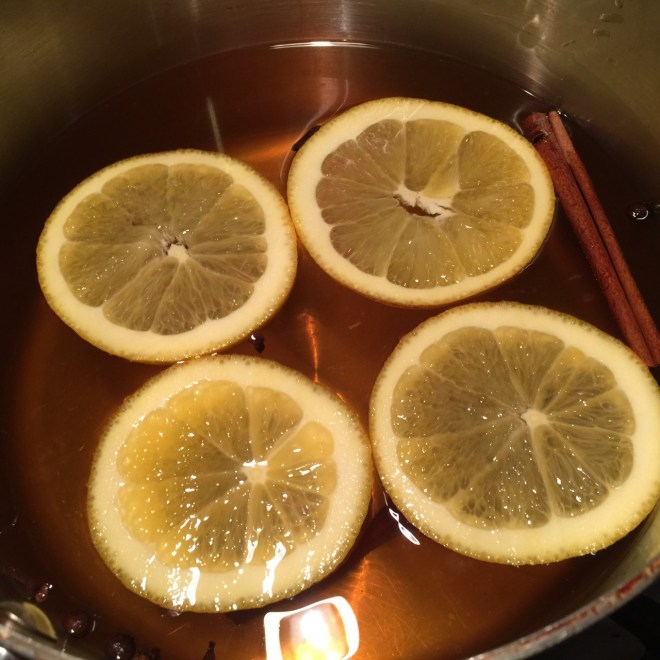 Cover and decrease heat enought to maintain a low simmer. (Make sure you cover the pot while cooking the cider. The first time I made it, I left it uncovered and most of the liquid evaporated.) Cook 30 minutes. Done.
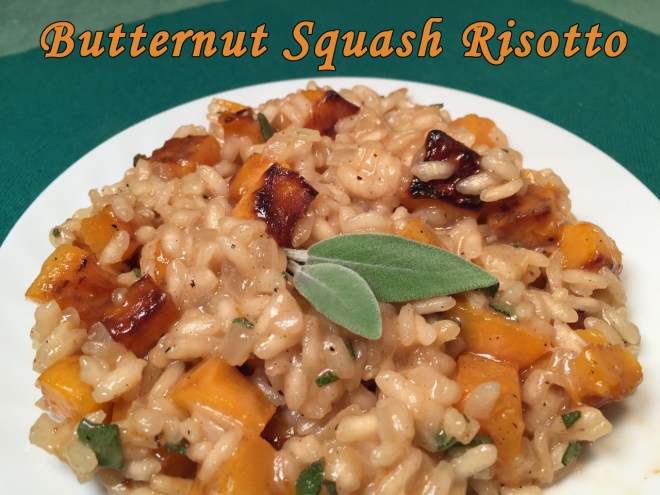 Winter squash comes in many varieties and colors – very tempting to buy as a Fall decoration. Of course, cooking them may seem a bit daunting… what with the potential for slicing off a finger or two.
 Remove neck (yikes!), slice into rounds, then cut into 1/2″ cubes. Cut the body (this is getting creepy) in half and scrape out seeds and fibers. (Remember to save the seeds, fibers, and skin for the broth!) Slice into 1/2″ thick pieces, then cut those into 1/2″ cubes.
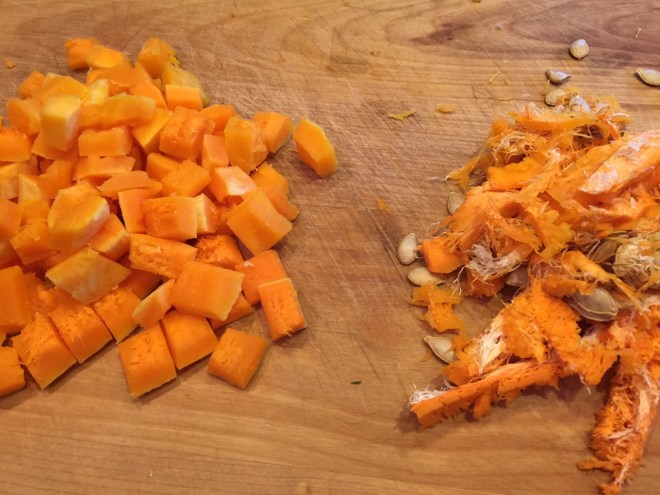 Measure out 1¾ cup of cubes (put any remaining cubes with the skins and seeds for the broth.) Into a 12″ nonstick skillet heat the olive oil over medium/high until shimmering. Add the 1¾ cup of cubed squash, spreading out into a single layer.
 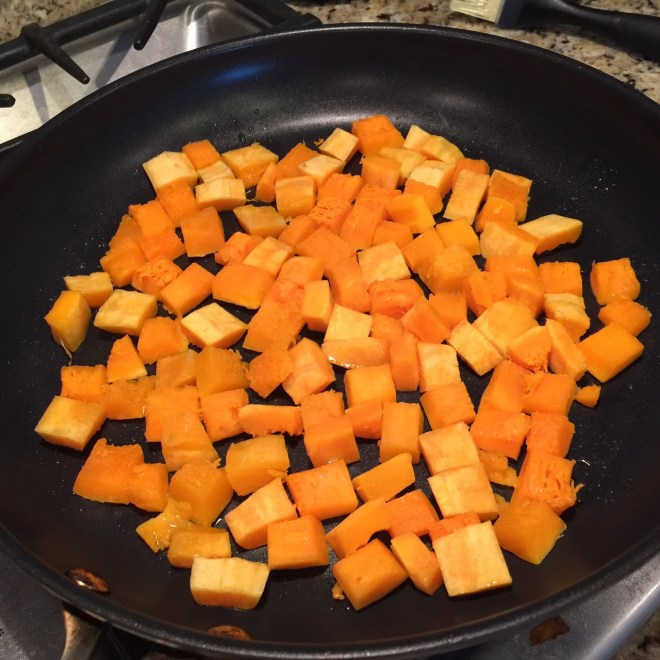 Cook about 5 minutes without stirring, until bottoms are browned. Continue cooking another 4-5 minutes, stirring now and then, trying not to turn them over – you want only one side browned. Remove to a bowl and set aside.
 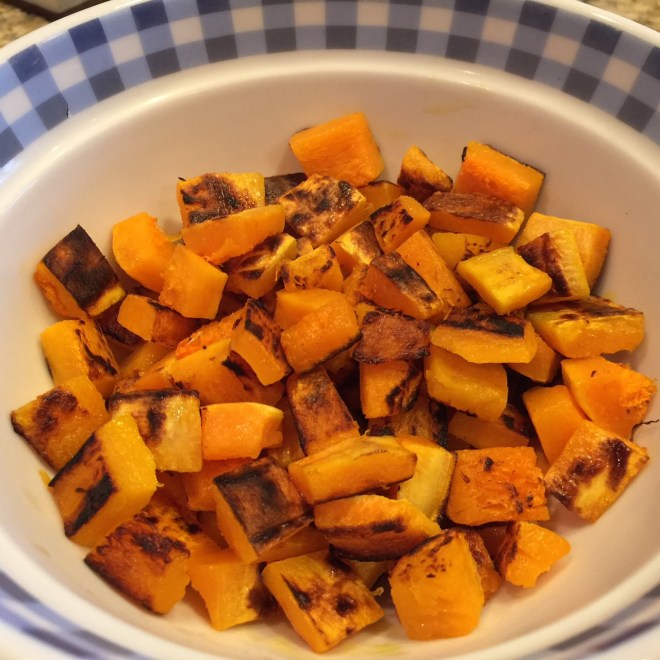 Into the now empty skillet put the seeds and skins, cooking over medium heat about 4 minutes to brown. (Beware of popping seeds as they cook.)
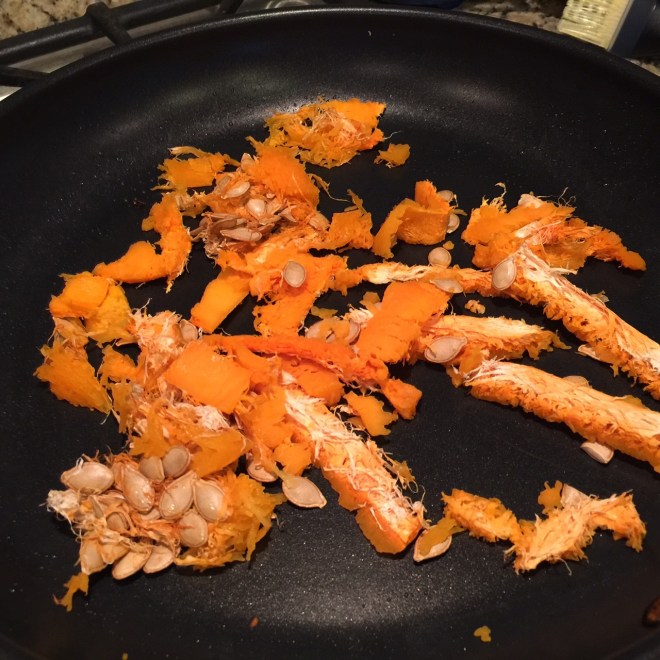 Remove to a small saucepan. Add in the vegetable stock, bring to a simmer, cover, and cook 10-15 minutes.
 Into the empty skillet melt 1½ T butter. Add in the onions, salt, and black pepper. Sauté over medium heat until onions start to brown.
 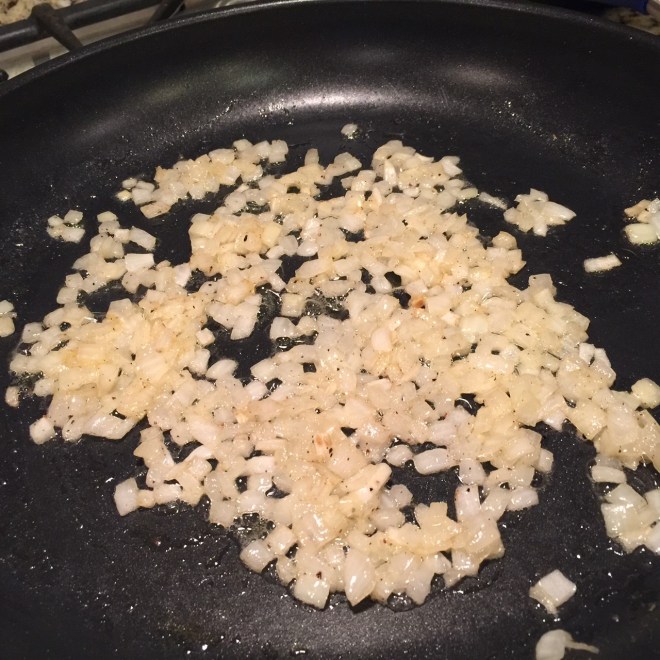 Add in nutmeg, cinnamon, and garlic. Cook another 30 seconds to bloom the spices. Pour the Arborio into the onions and sauté over medium until edges of rice become translucent.
  Add the wine to the rice and cook uncovered over medium high until it evaporates.
  As the wine is cooking, strain the broth made with seeds. Discard strained solids and set broth aside.
 Stir in Parmesan, sage, remaining 1/2 T butter, and lemon juice. Adjust salt and lemon juice, if needed.
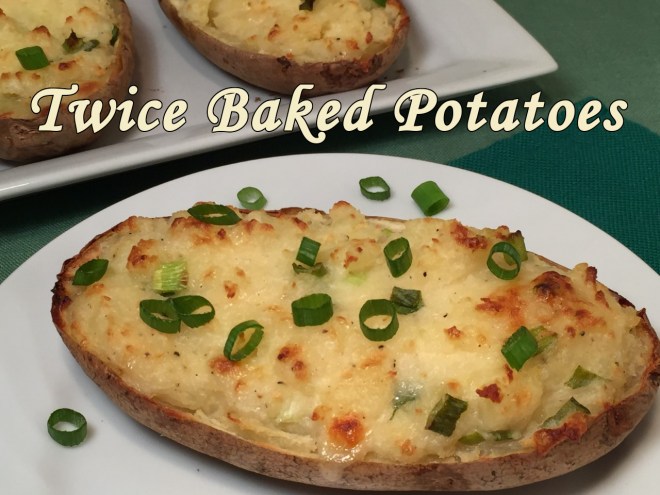 I can’t deny it – I’m a huge potato lover. Mashed, French fried, hash browned, scalloped, and baked: I love them all! (It must be a trait inherited from my Irish mother.)
 Remove skewer and slice in half, lengthwise, along narrow side of potato so they lay flat.
 Carefully, scrap out insides, leaving 1/8″ border to support the skin. (If you scrap a bit too much in a section, just take some of the potato and smash it down to form a patch.) Place potato pulp in a bowl.
 With a fork, mash the potato, breaking down lumps – you don’t need to make it as creamy as you would with mashed potatoes…unless, you want.
  Add in the butter and stir until melted. Then add the buttermilk, sour cream, salt, pepper, cheese, and scallions. Mix gently, but thoroughly.
 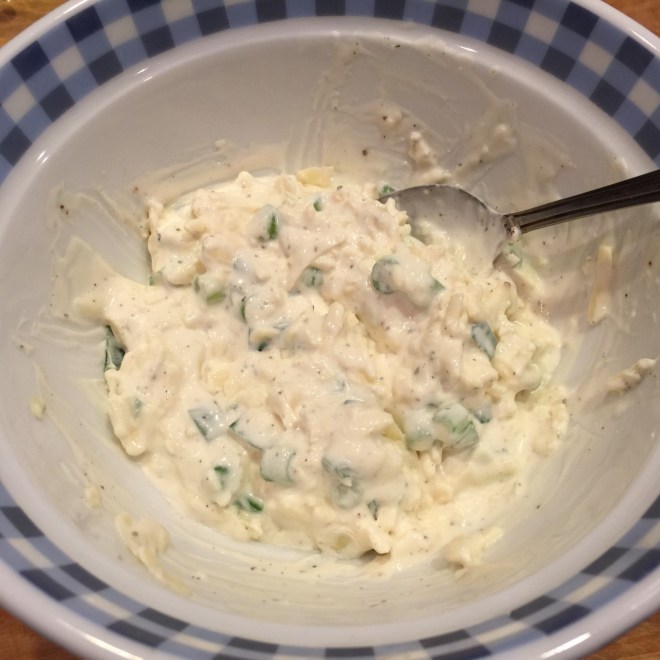 Divide equally and fill potato skins. At this point, you can cover them and complete preparation later.
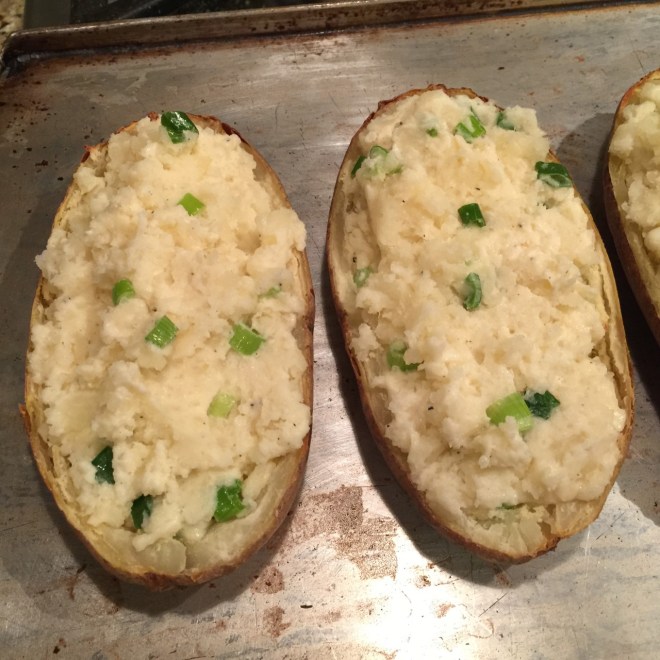 Just before serving time, broil potatoes about 4″ from heating element 10-15 minutes, until spotty brown on top. Serve hot.
