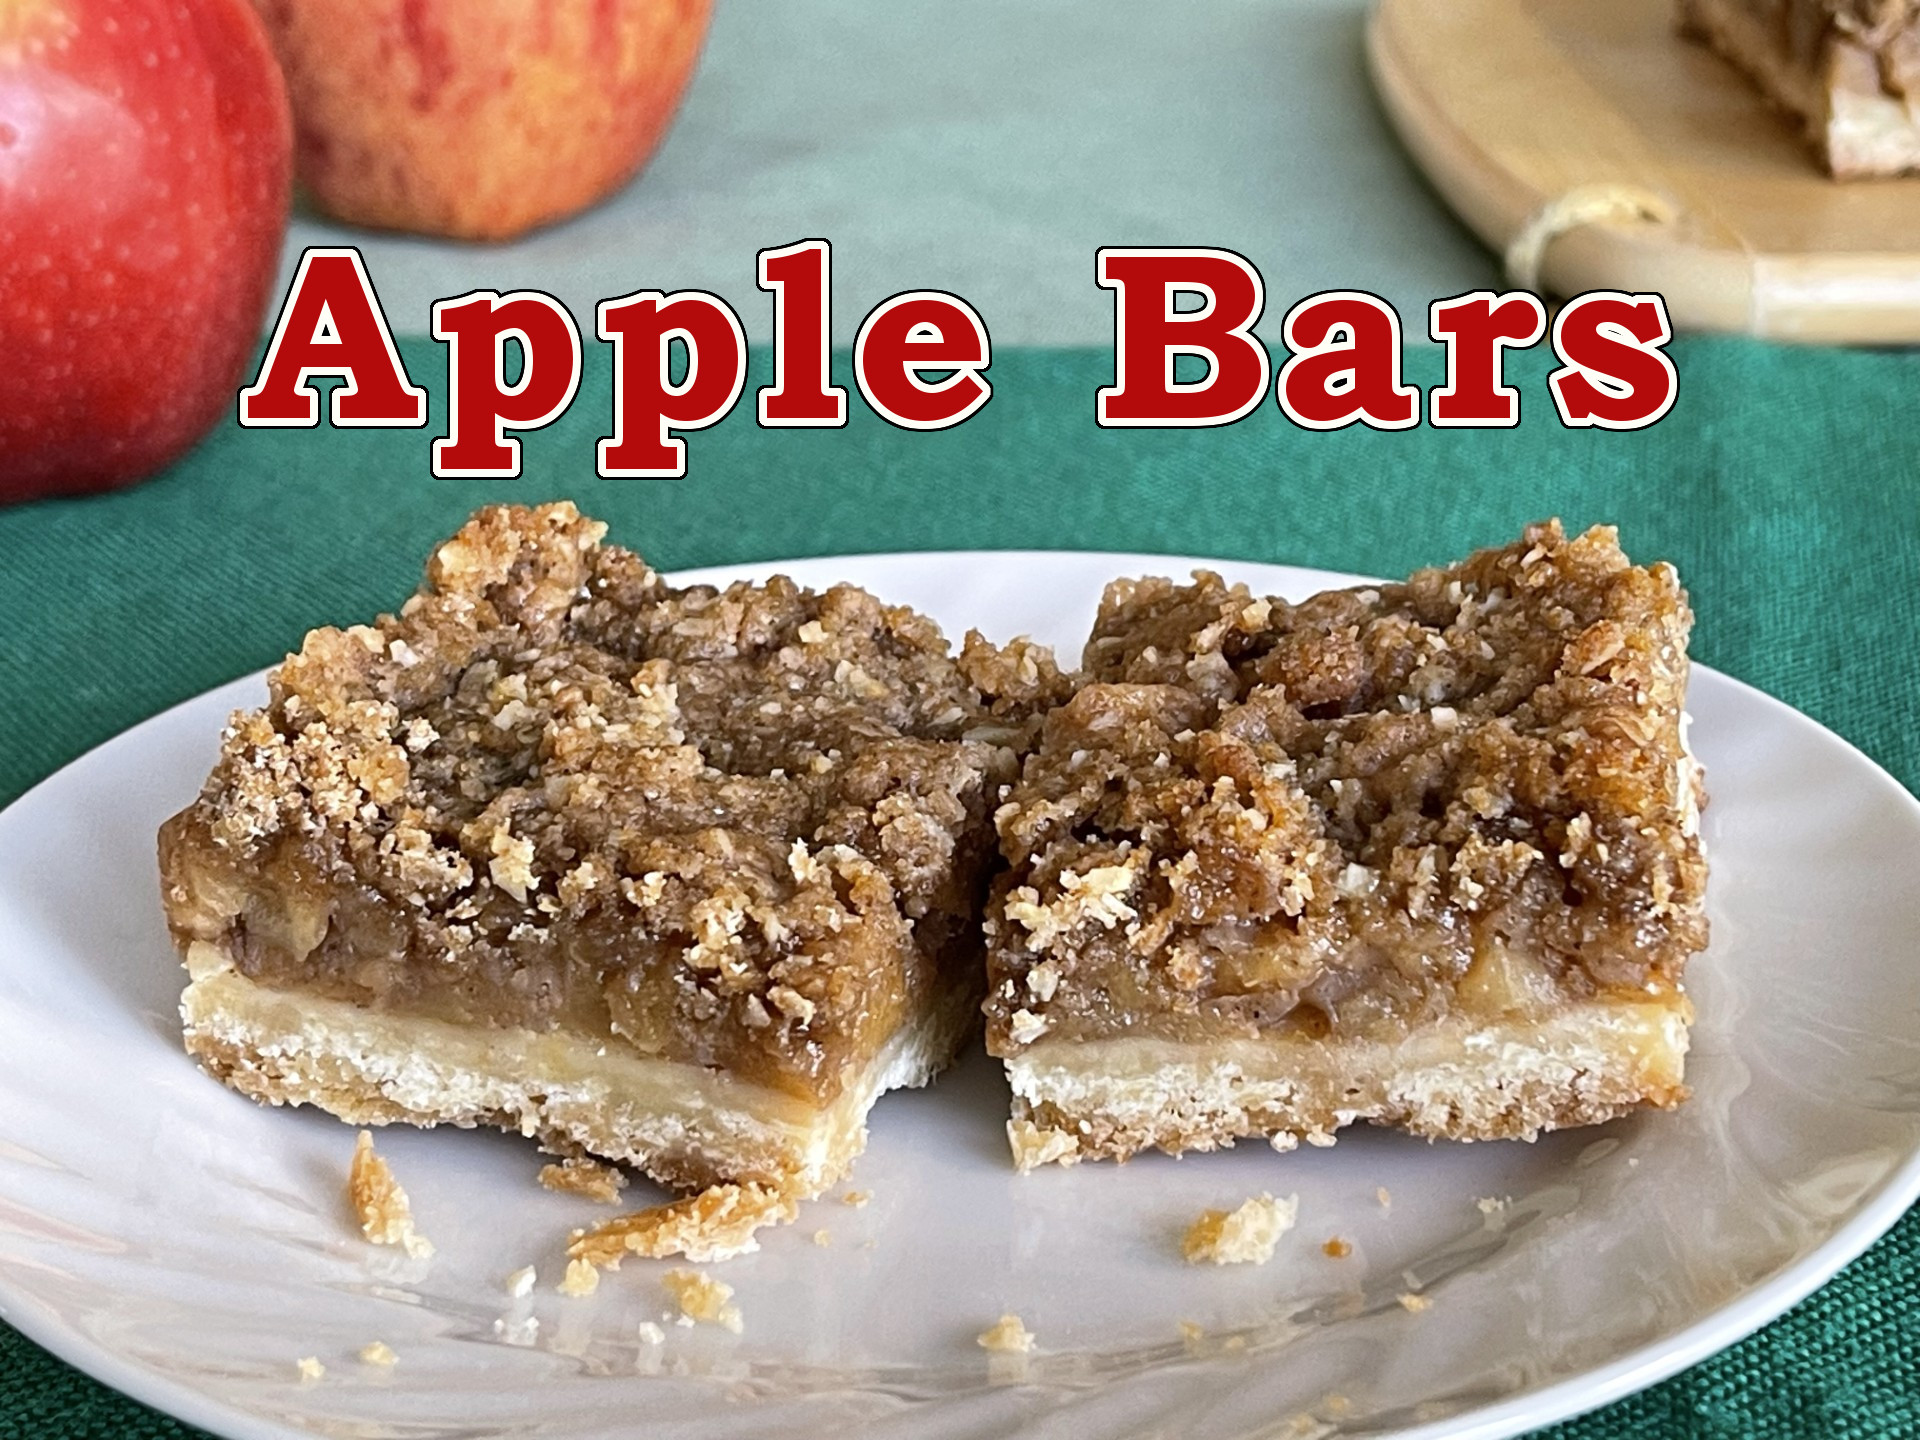
My brother has a penchant for apple desserts. So, as a good sister, I decided to develop an apple bar recipe for him. It was to be three layers: the crust, the apple filling, and the streusel topping. What I wanted was a sturdy crust so the bar could be picked up to eat, the apple filling full of flavor, and the streusel with a tasty crunch. Each layer ended up having its own challenges but, in the end, I got there!
APPLE BARS – Makes about 9 bars, depending how you cut them
Crust
112g (8 T) butter, melted
147g (1.25 cups) all-purpose flour
1/3 tsp salt
49g (1/4 cup) granulated sugar
Apple Filling
4 (1.5 lb) apples (I like Gala apples, but use what you prefer)
112g (8 T) butter
10g (1 T) granulated sugar
1/2 tsp cinnamon
1/2 tsp cardamom
1/4 tsp salt
13g (2 T) cornstarch
Streusel Topping
94g (1/2 cup), packed dark brown sugar
21g (1/4 cup) raw whole oats
30g (1/4 cup ) all-purpose flour
3/4 tsp cinnamon
1/4 tsp cardamom
1/4 tsp salt
56g (4 T) butter, cold
PREHEAT OVEN TO 375°F / 190°C
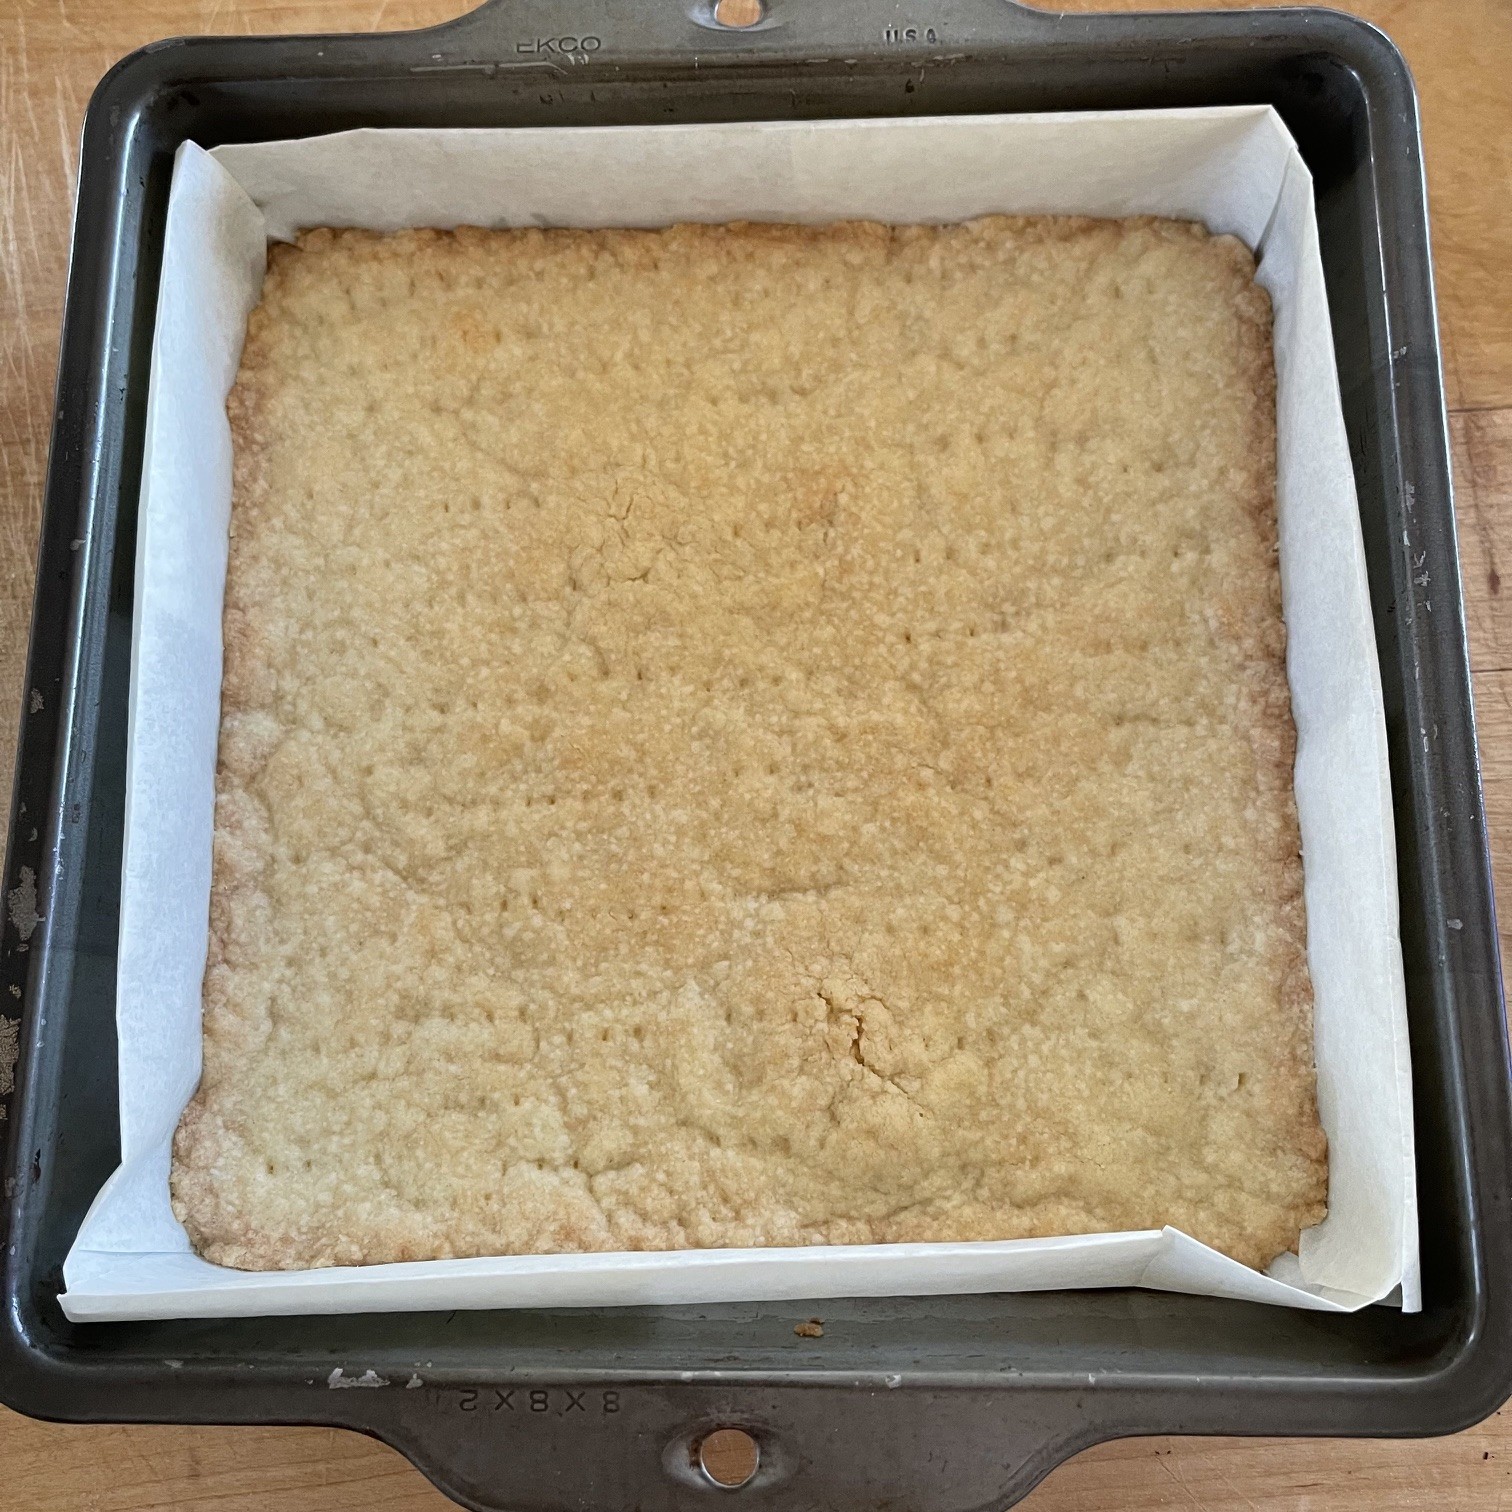
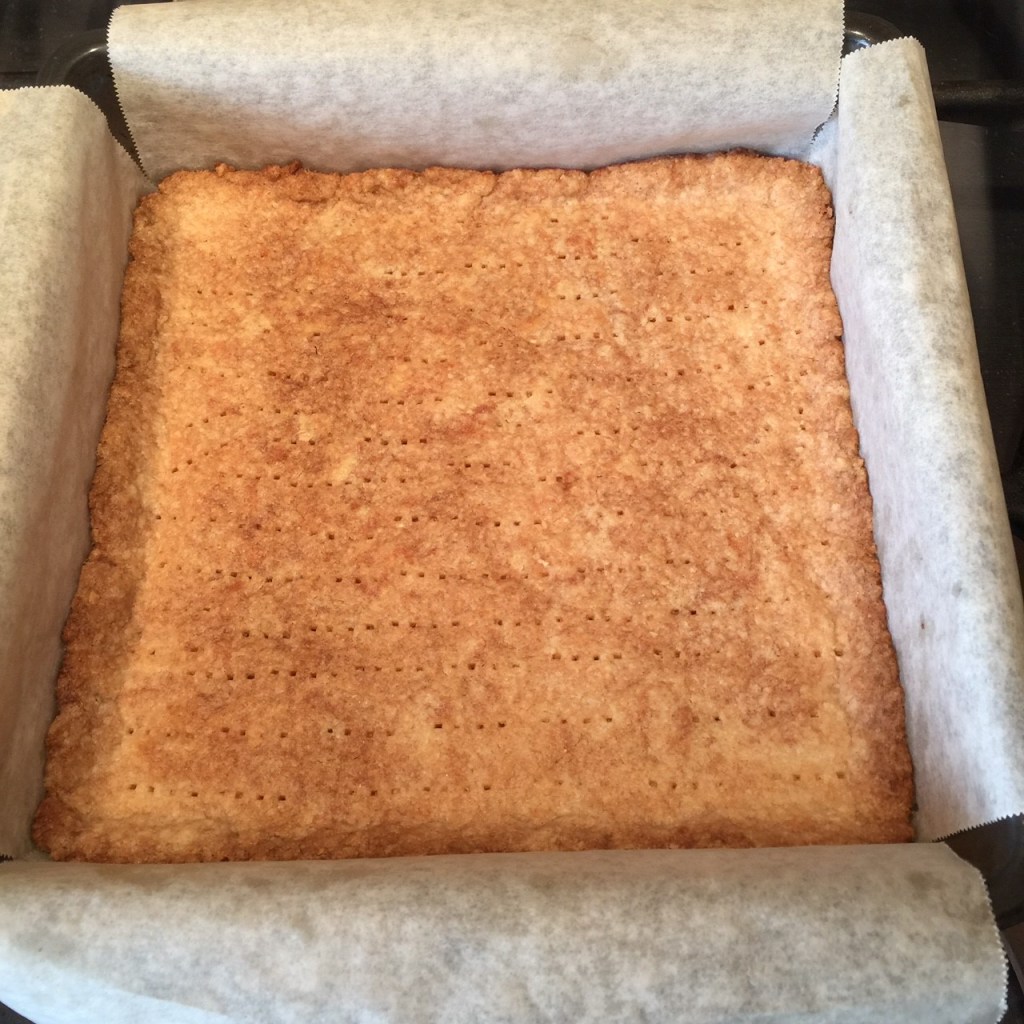
Line a 7.5″ x 7.5″ (19cm x 19cm) metal (preferably) pan with baking paper. The baking paper allows for removal of the bars for clean cuts. If you prefer not to use baking paper, just lightly butter the sides and bottom of the pan.
Prepare the crust:
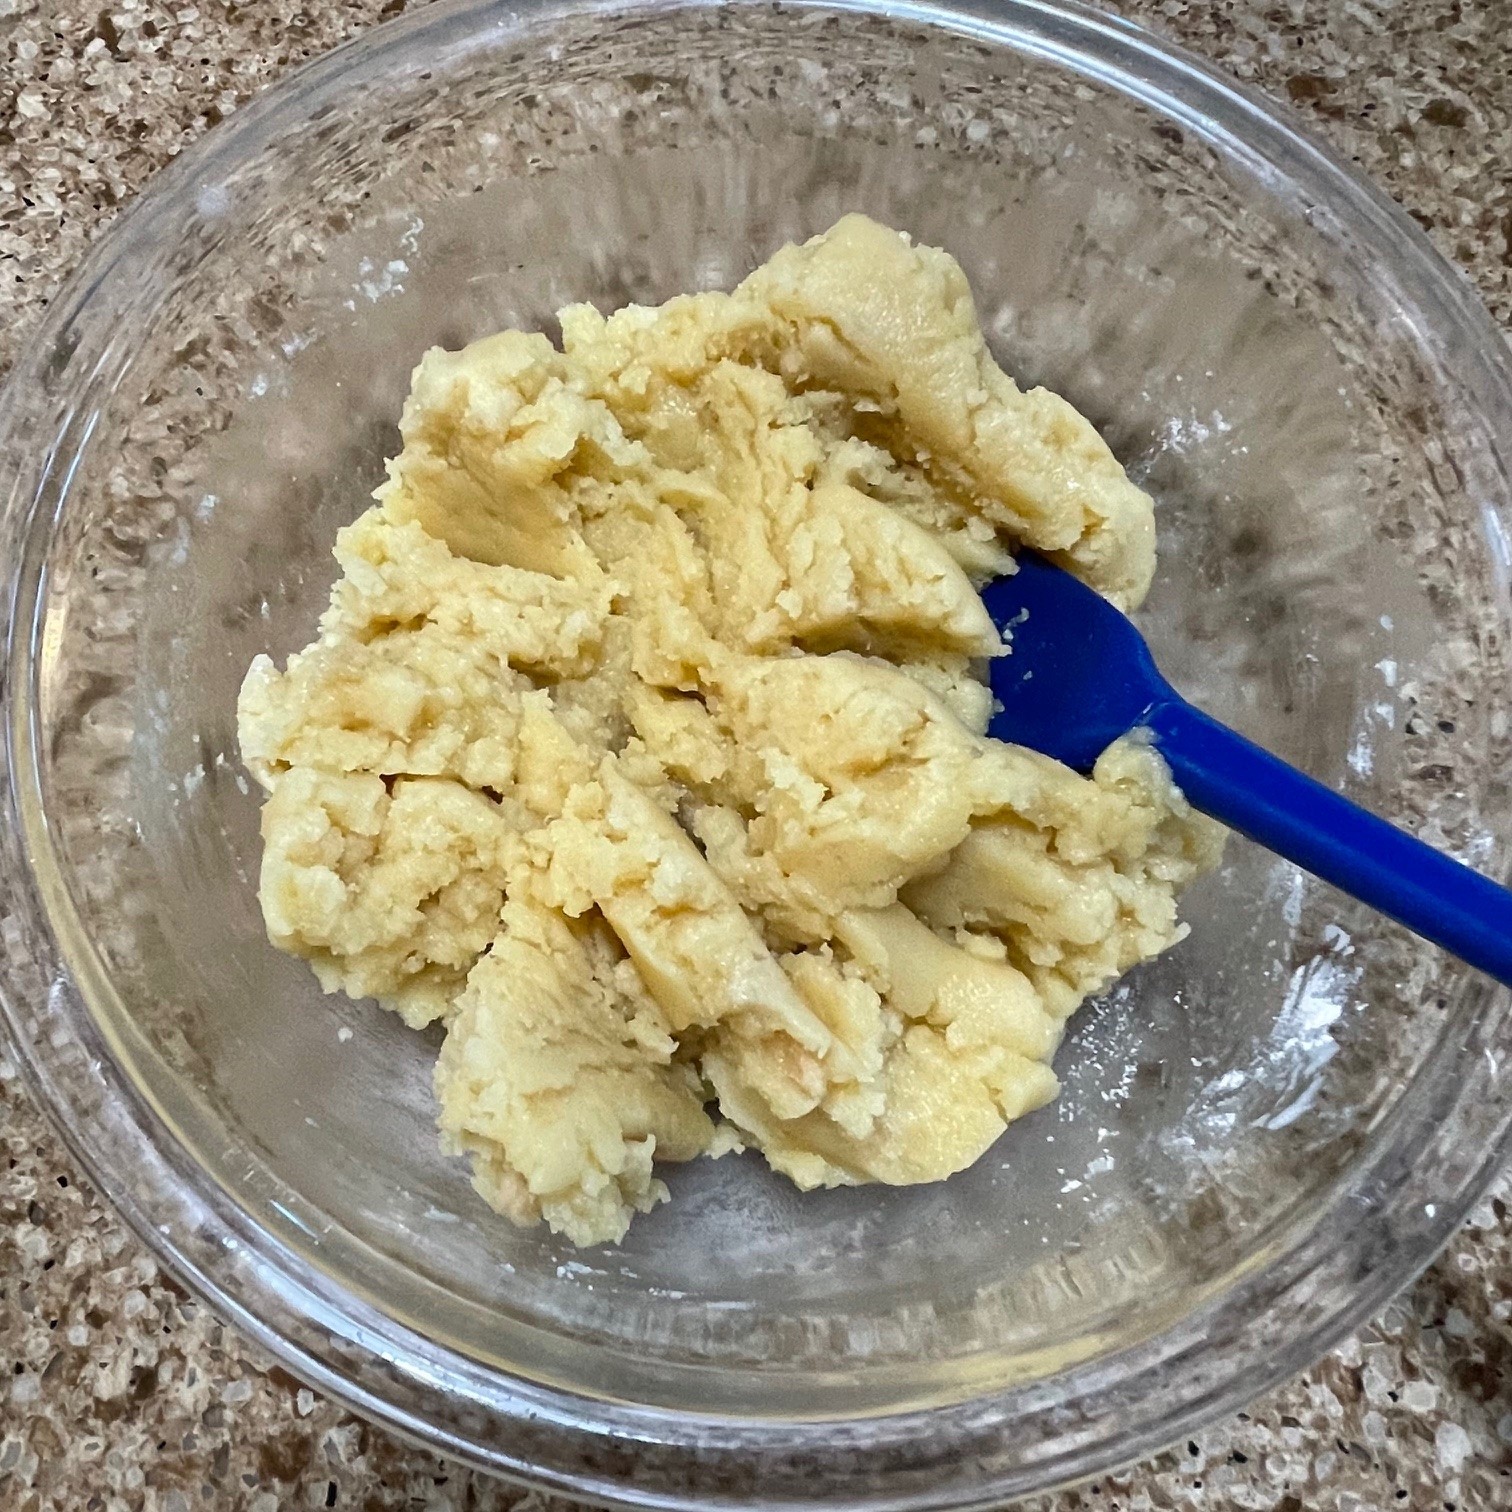
In a bowl, mix together the 147g (1.25 cups) flour, 1/3 tsp salt, and 49g (1/4 cup ) sugar. Add in the 112g (8 T) melted butter and blend with a fork or spatula.
Drop clumps of dough evenly onto baking pan and press with fingers to cover bottom. Compact the dough by lightly pressing down with a spatual or the bottom of a flat cup. Dock dough with a fork and bake in preheated 375°F (190°C) oven until lightly browned – about 23 minutes. Cool in pan.
Prepare the streusel topping:
Into the workbowl of a food processor, place the 94g (1/2 cup) brown sugar, 21g (1/4 cup) oats, 30g (1/4 cup) flour, 3/4 tsp cinnamon, 1/4 tsp cardamom, and 1/4 tsp salt. Pulse about 5 times. Cut the 56g (4 T) cold butter into small pieces and add to processor. Pulse several times to blend. Set streusel topping aside. If you don’t have a food processor, blend the dry ingredients together in a bowl, then cross-cut the cold butter into the mixture.
Prepare apple filling:
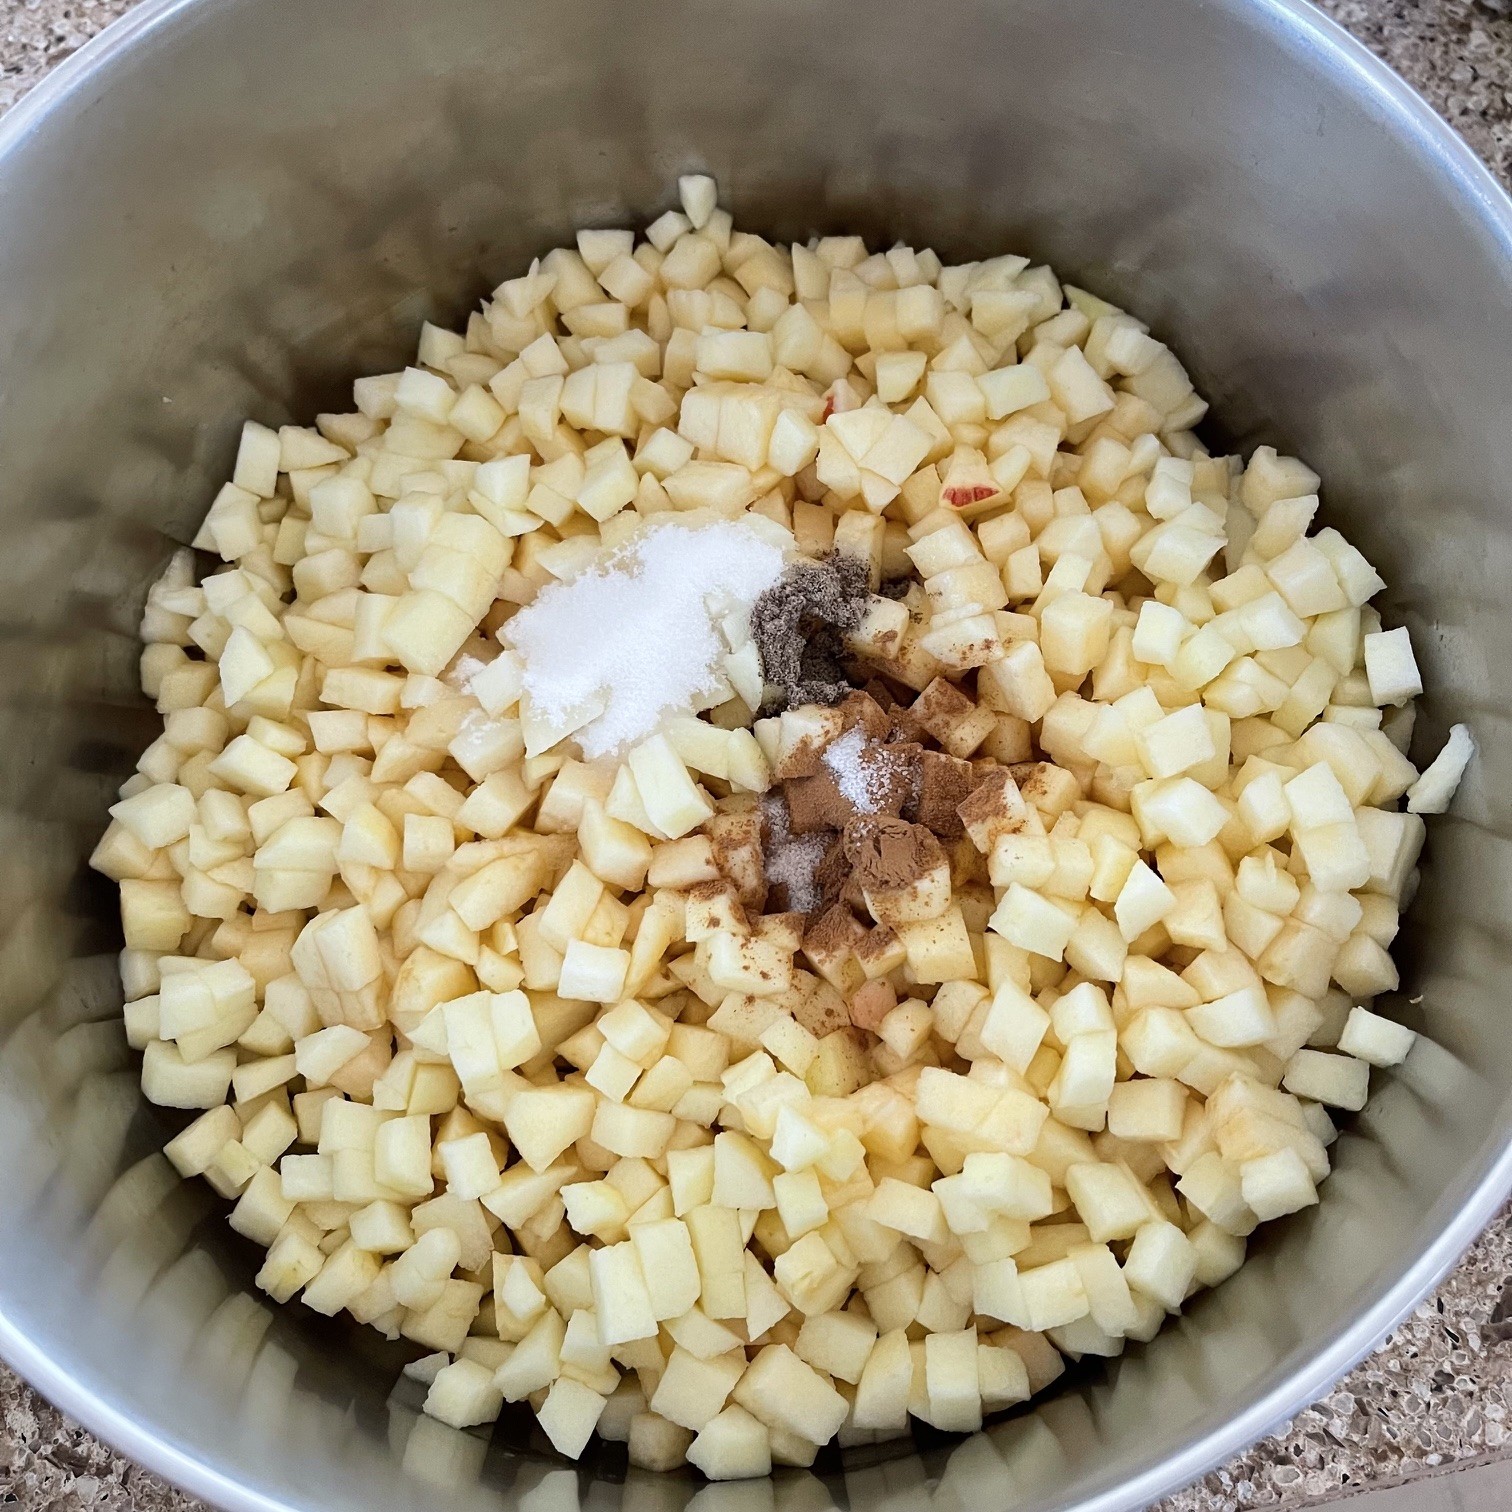
Peel, core, and cut apples into approximate 1.5cm (1/4″) pieces.
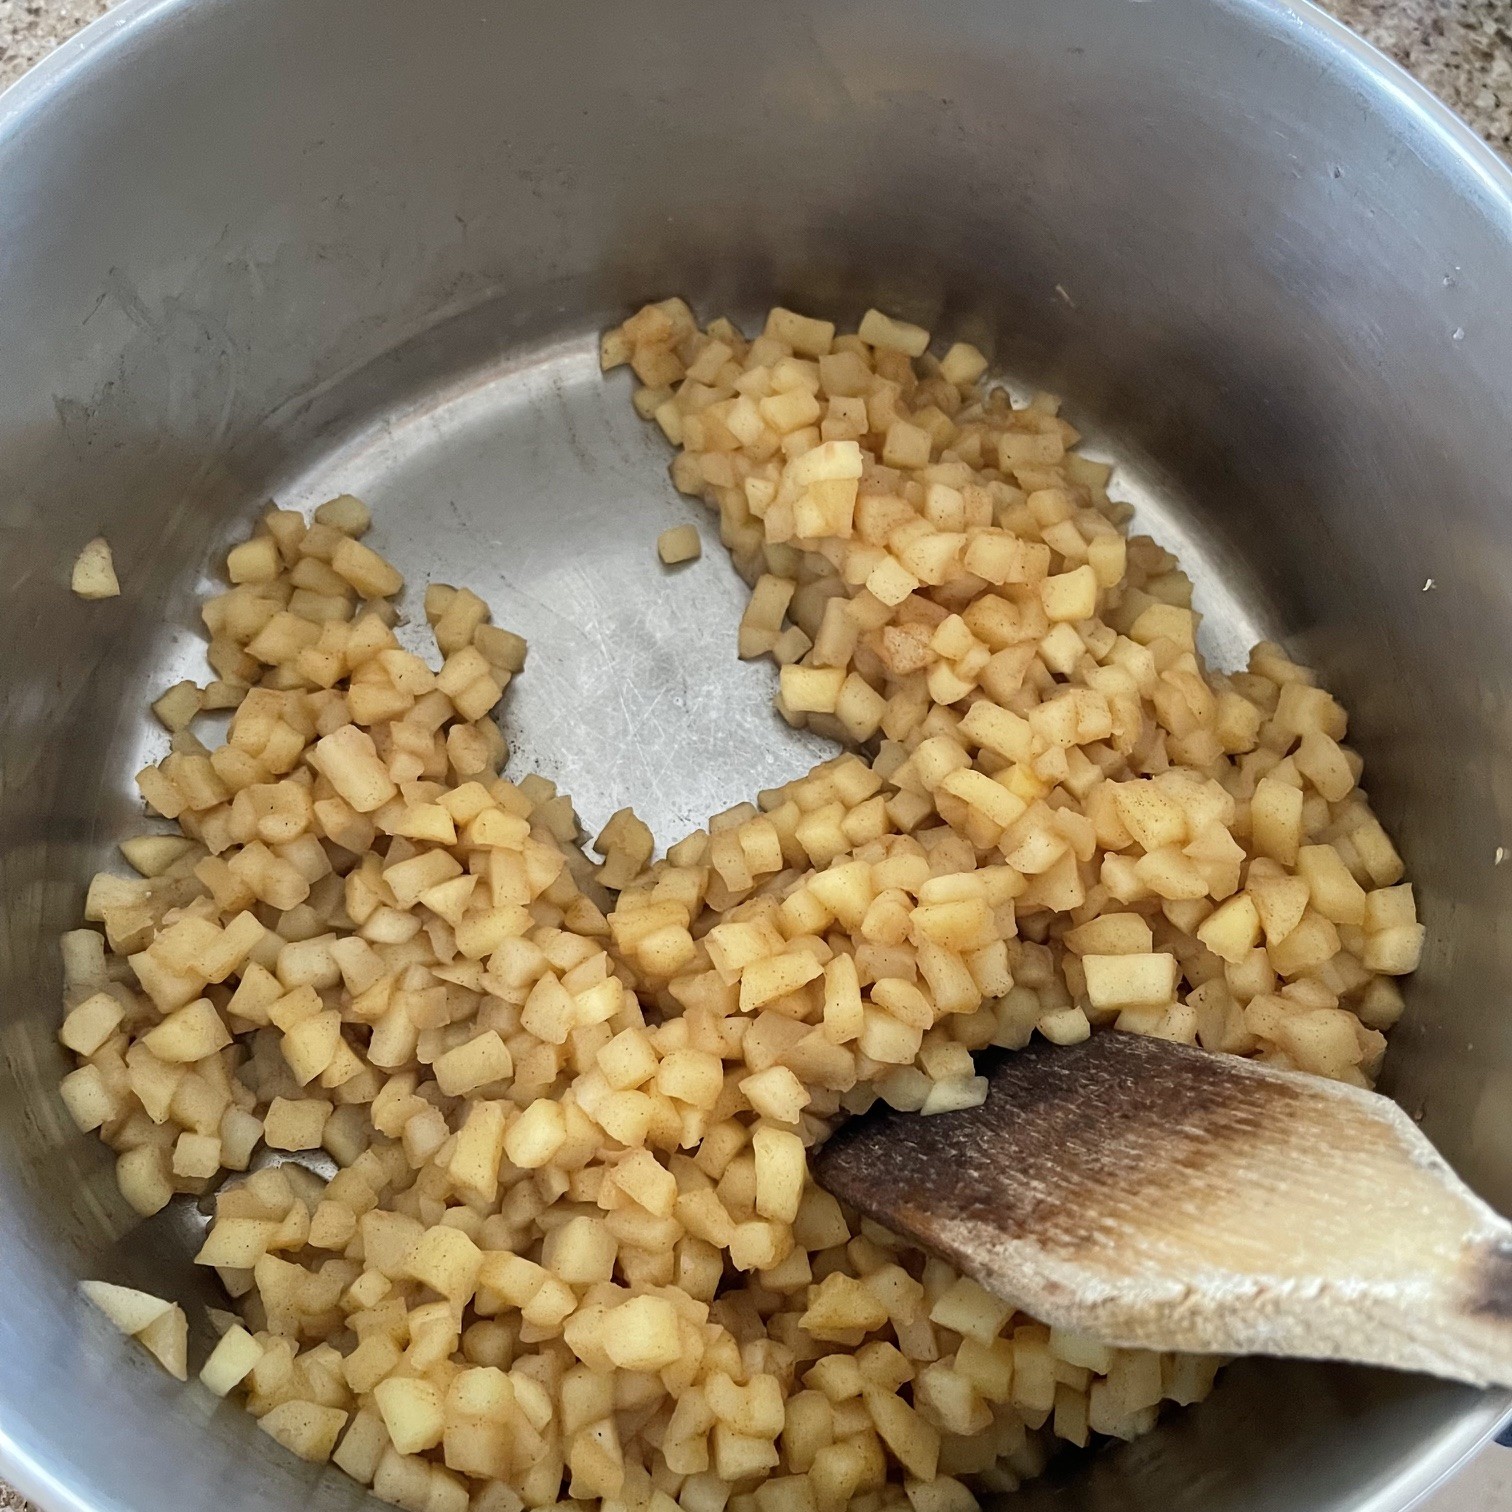
In skillet or saucepan, melt the 112g (8 /T) butter. Add in the cubed apples, 10g (1 T) granulated sugar, 1/2 tsp cinnamon, 1/2 tsp cardamom, and 1/4 tsp salt.
Over medium-high heat, cook the apple mixture until the liquid has evaporated – about 20 minutes. (If there’s still liquid remaining after 20 minutes, just pour it off and discard – you don’t want a soggy filling.)
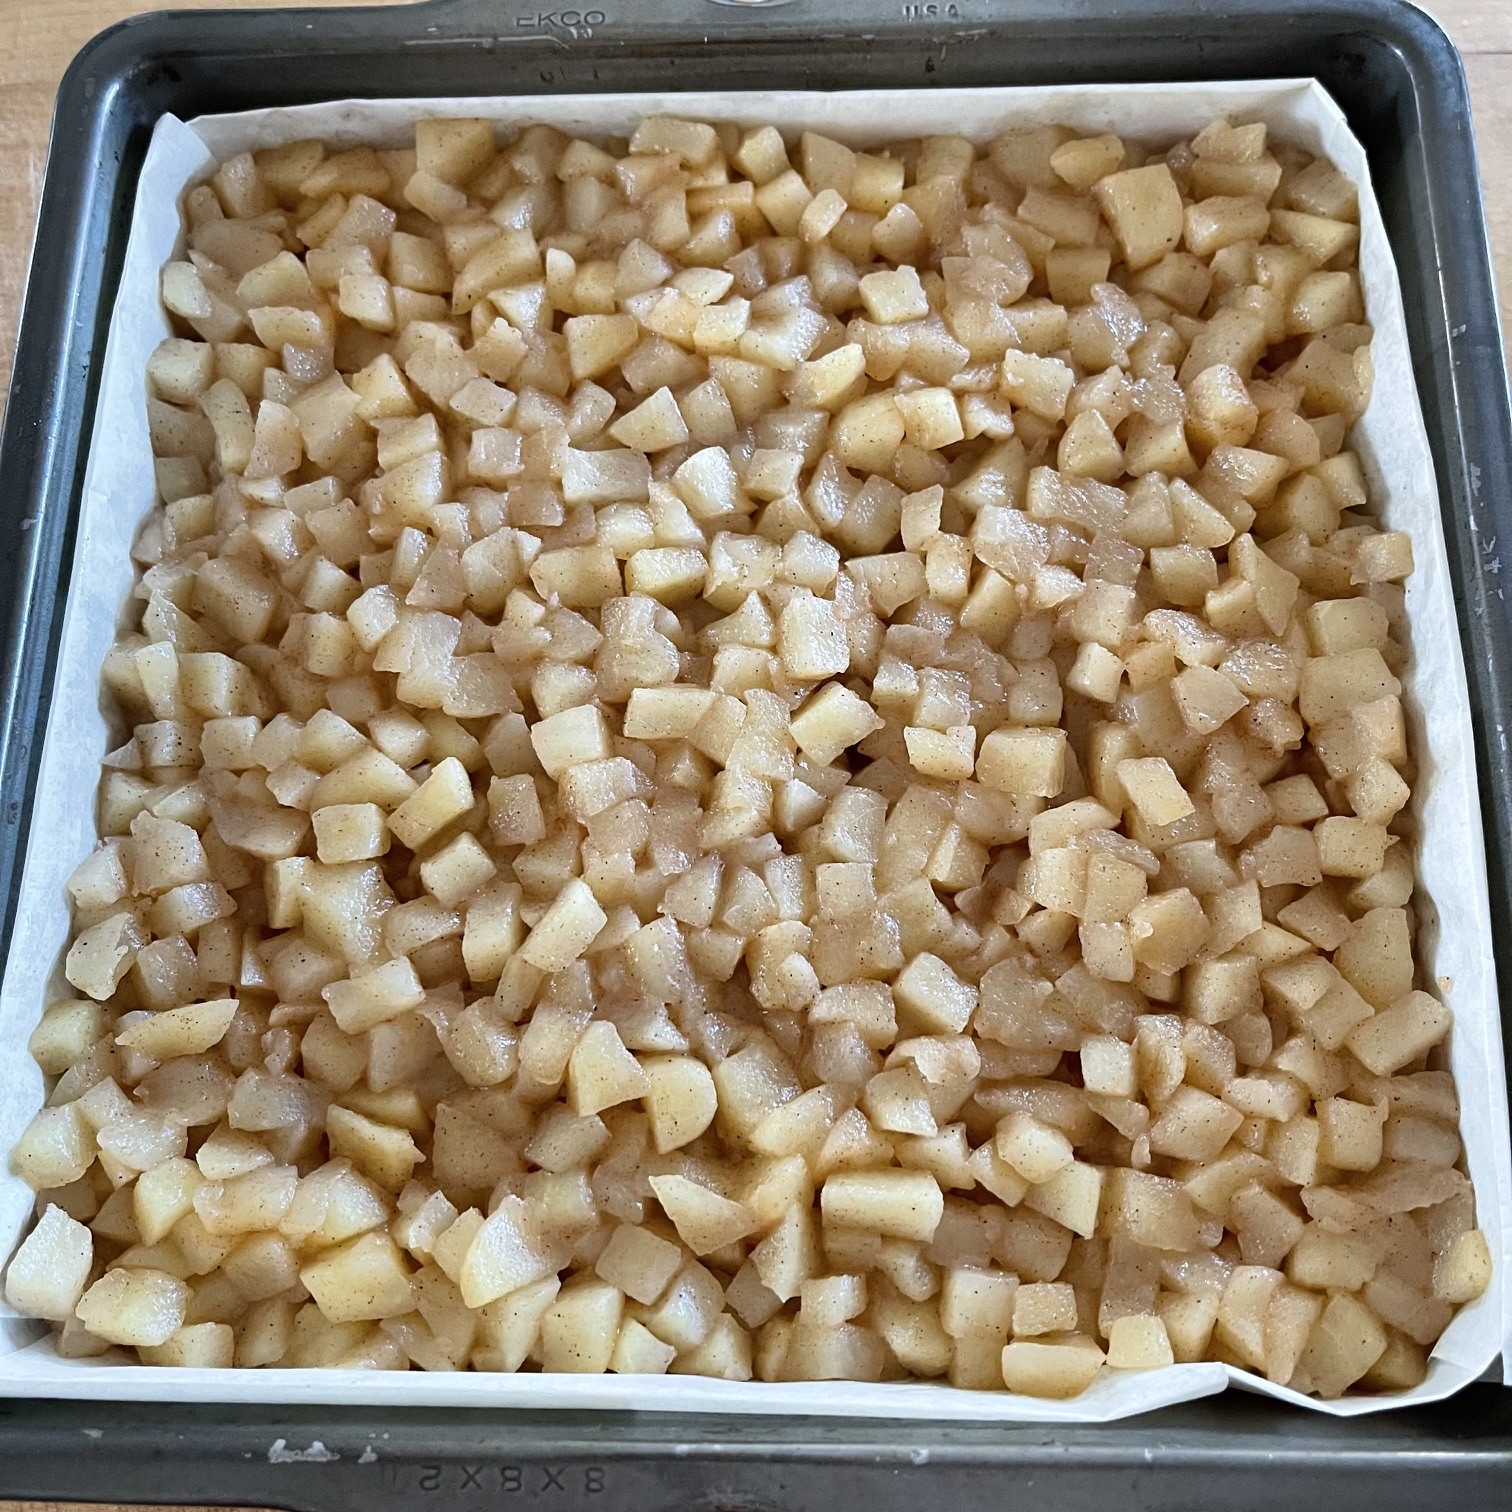
Stir the 13g (2 T) cornstarch into the apple mixture. Pour apple filling onto the cooled crust, spreading evenly. Gently tamp down filling to bind it.
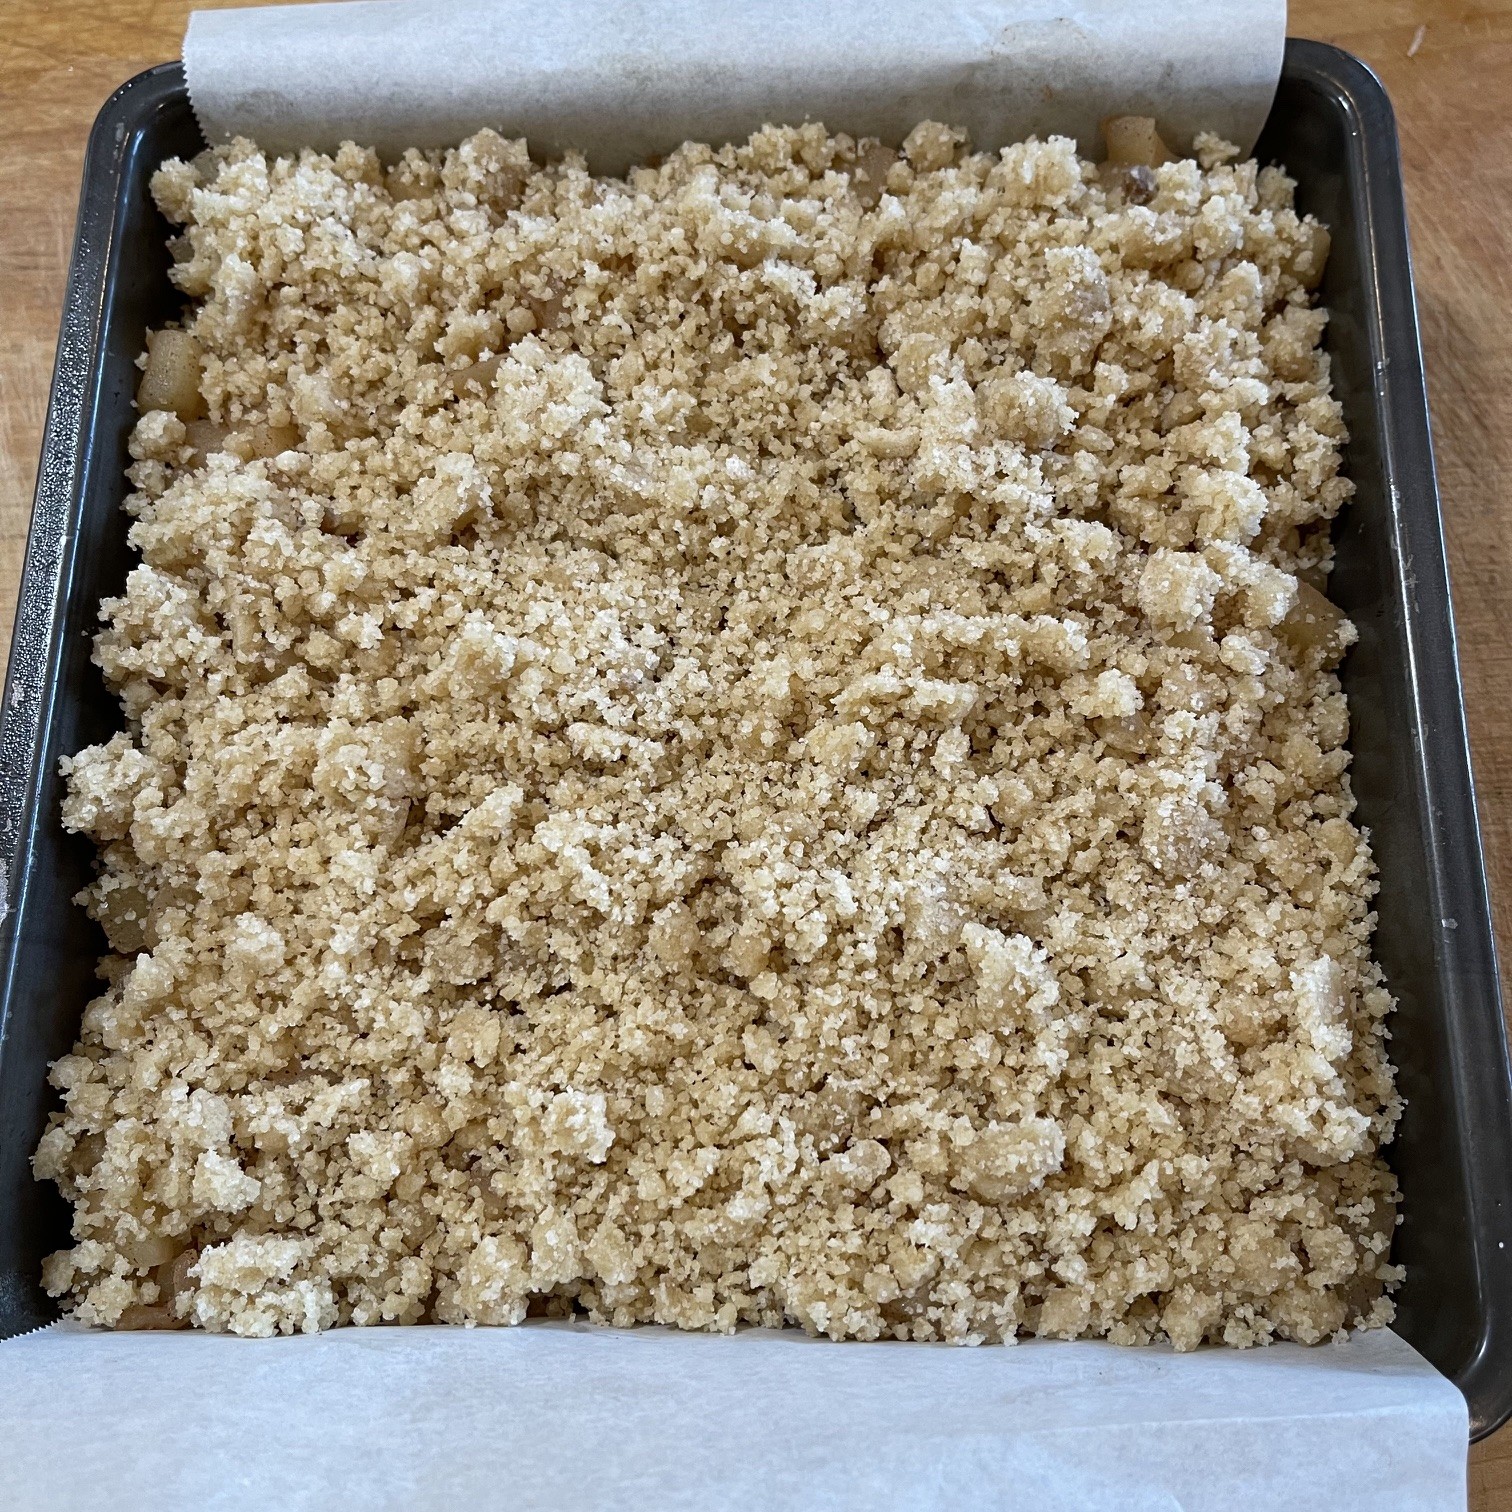
Sprinkle steusel topping over apples, and gently press it down with a fork or spatula.
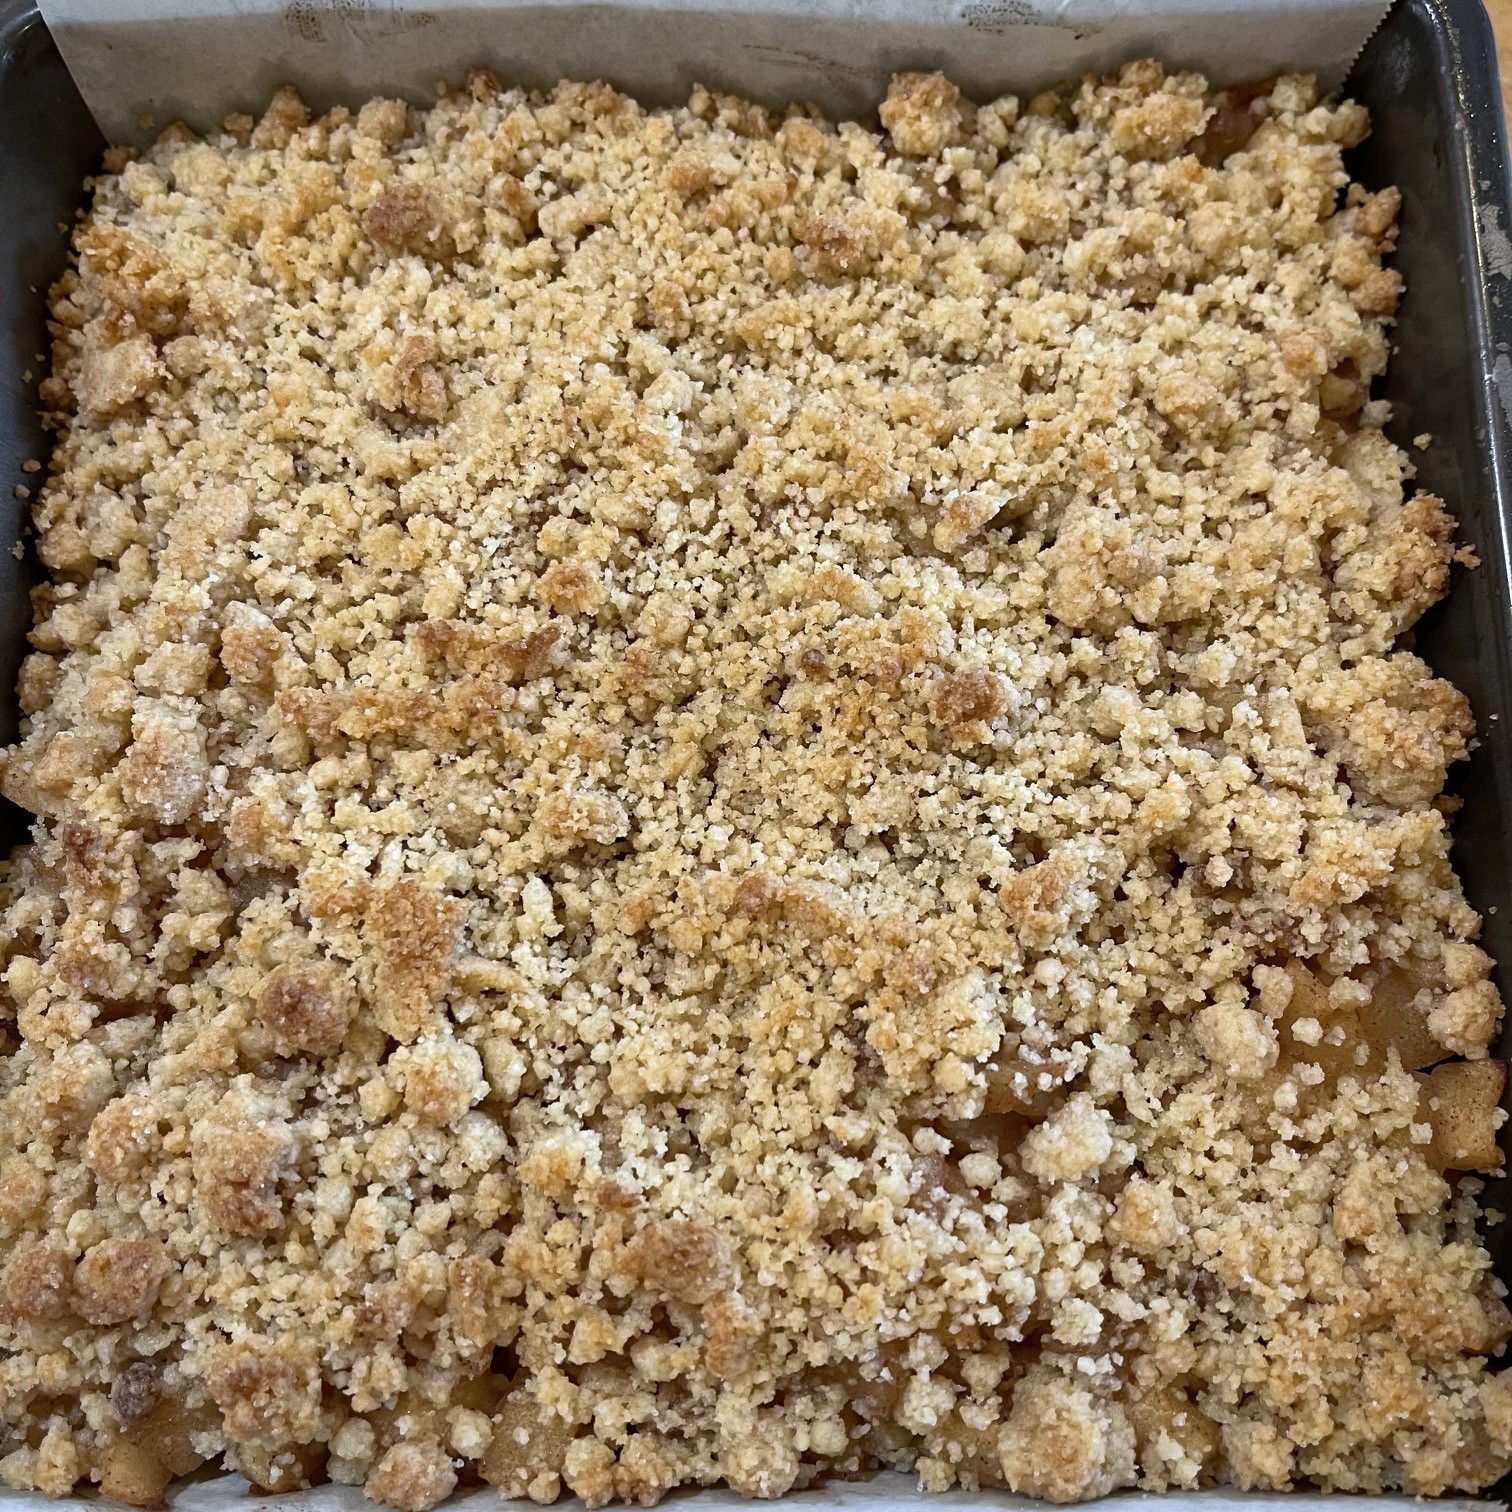
Bake in preheated 375°F (190°C) oven until lightly browned – about 37 minutes.
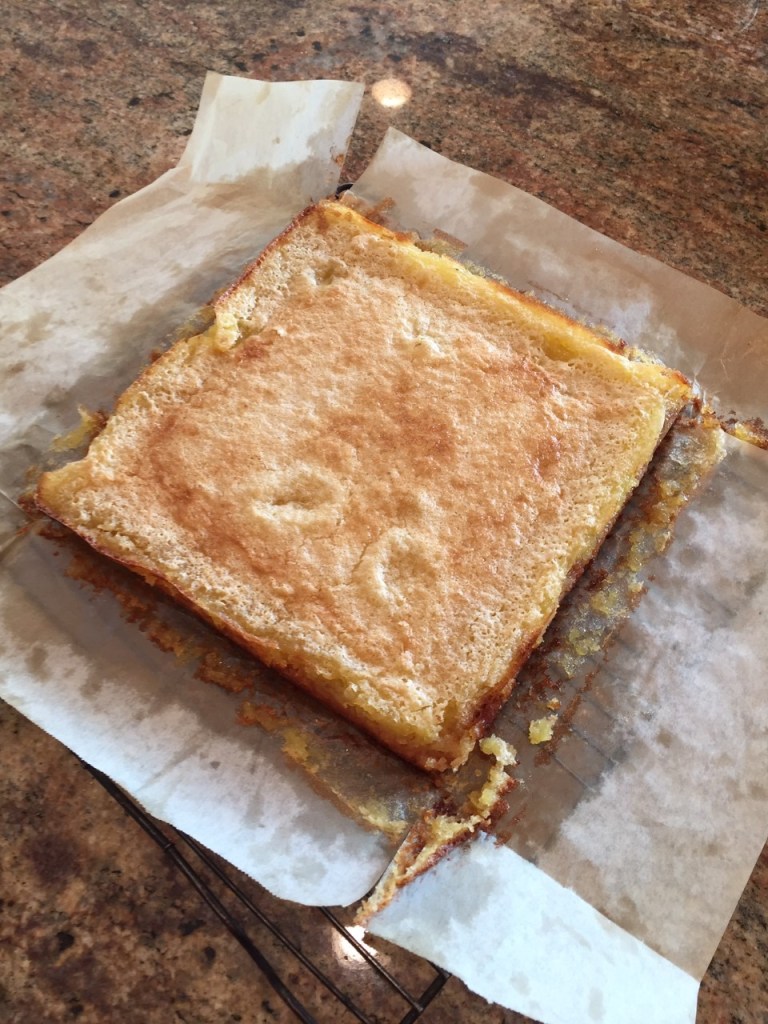
Remove from oven and cool. Then chill several hours to firm up Apple Bars before slicing.
Once the Apple Bars are firmed-up, remove from pan and slice. Serve as is, or top with, perhaps, ice cream or caramel sauce.
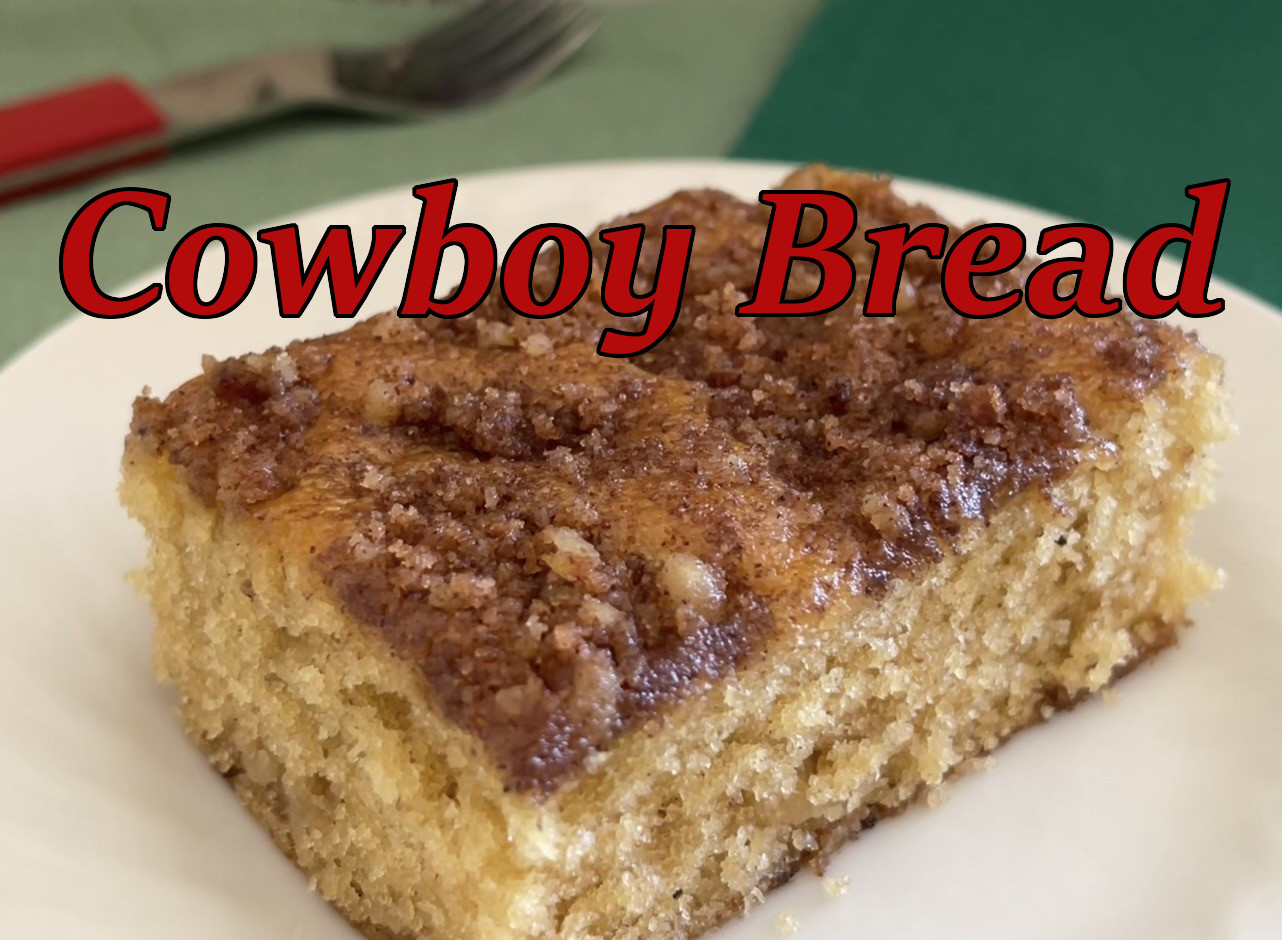
When I was at school, my favorite snack was a cinnamon cake called Cowboy Bread. (I have no idea why.) I never forgot how tasty it was. So, once the internet became a thing, I googled it to find the recipe. Of course, nothing is ever that easy. I found multiple recipes for Cowboy Bread, with slight variations. One of them was an actual bread. Sadly, none of them matched my memory of this scrumptious cake. I finally ended up creating my own version.
NOTE: Both chilled ingredients (the buttermilk and egg) should be at room temperature. I used to ignore this instruction in recipes, but it really makes a difference in baked goods! You’ll get a better rise from your cake.
COWBOY BREAD:
323g (2.5 cups) AP flour
209g (1 cup) packed brown sugar (I prefer light)
105g (1/2 cup + 1 T) granulated sugar
1 tsp salt
3/4 tsp nutmeg
2 tsp cinnamon + 1/4 tsp, DIVIDED
3/4 tsp cardamom
162g (3/4 cup) vegetable oil
250g (1 cup) buttermilk, room temperature
1 egg, room temperature
1 tsp baking soda
1 tsp baking powder
PREHEAT OVEN TO 350°F (180°F)
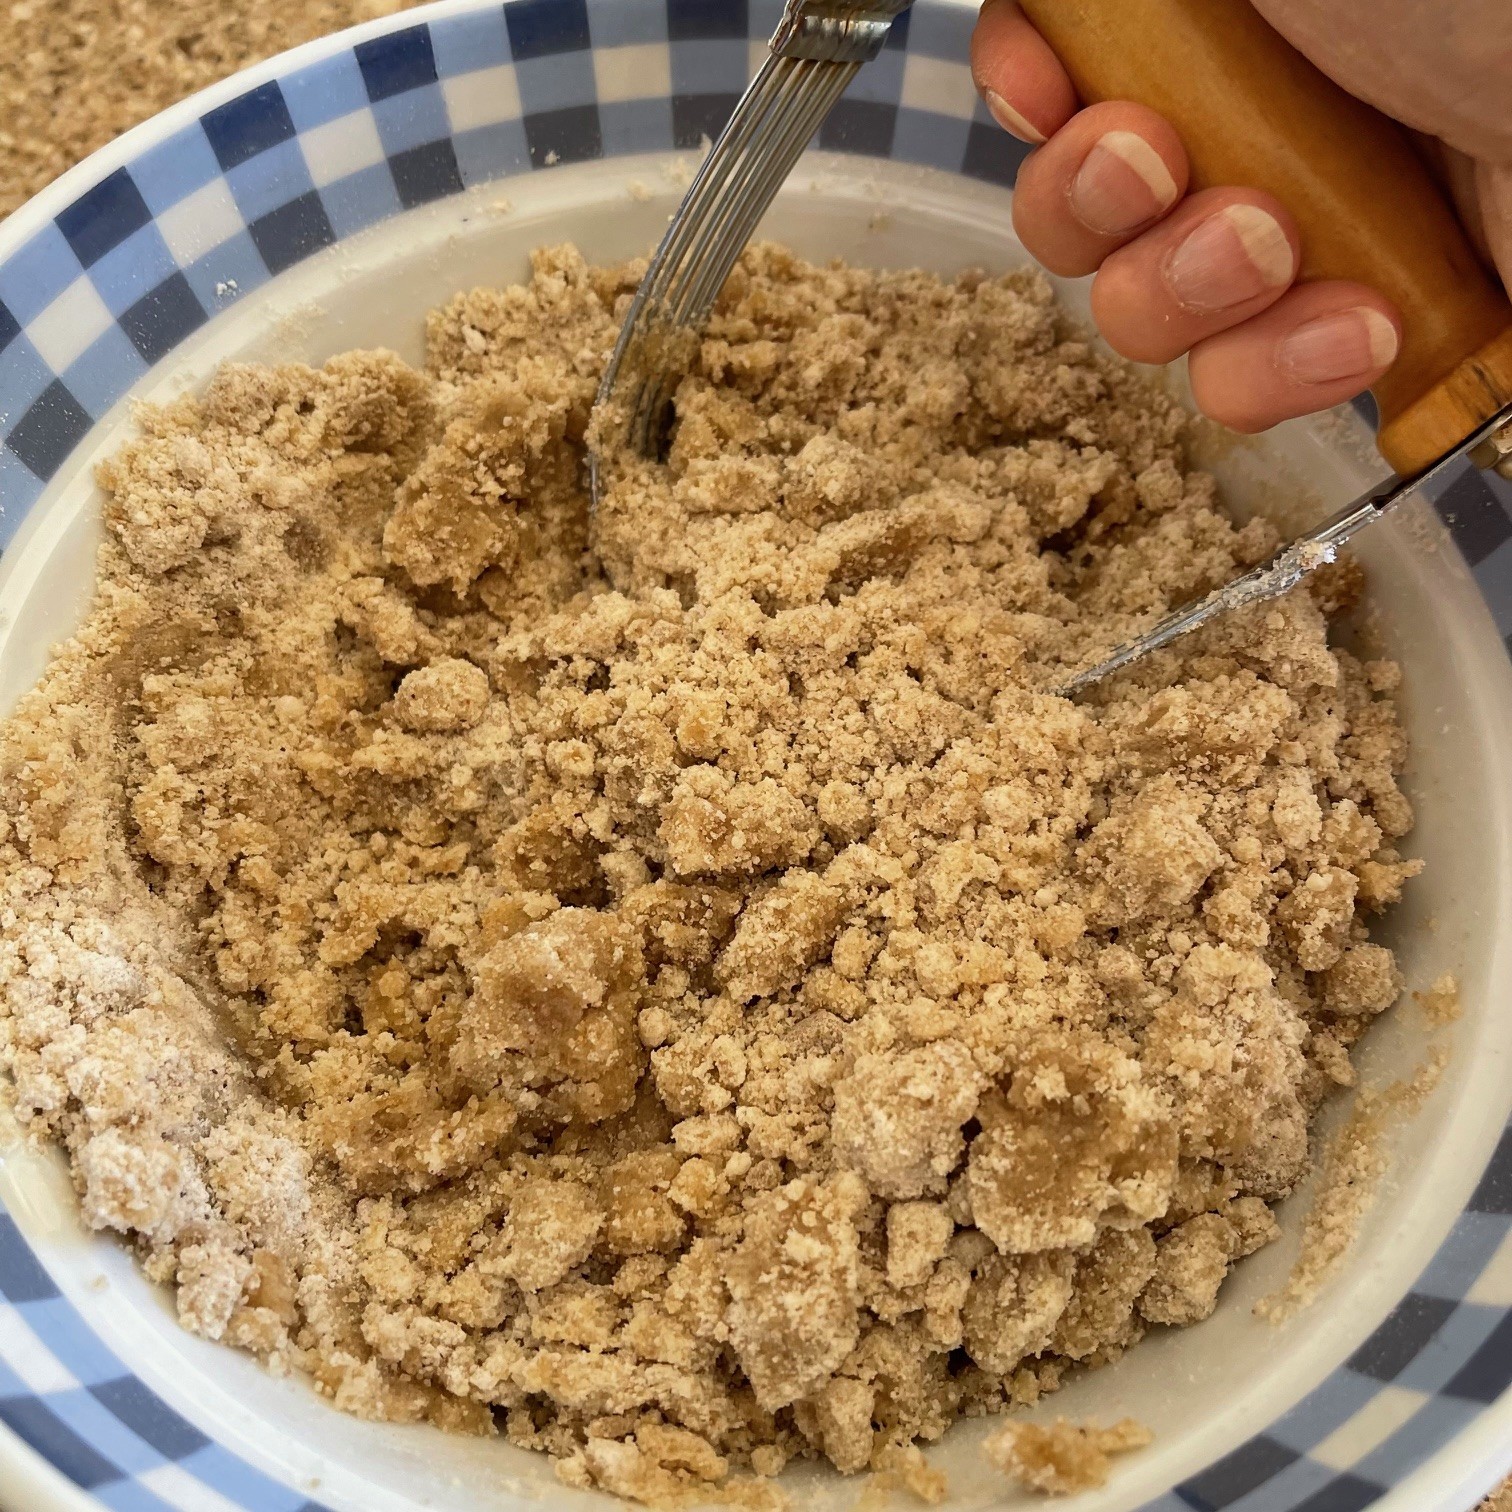
Into a large mixing bowl, put the flour, brown sugar, granulated sugar, salt, nutmeg, 2 tsp cinnamon, 3/4 tsp cardamom, and vegetable oil. Mix by hand – it will become crumbly. (I like to use a pastry cutter.)
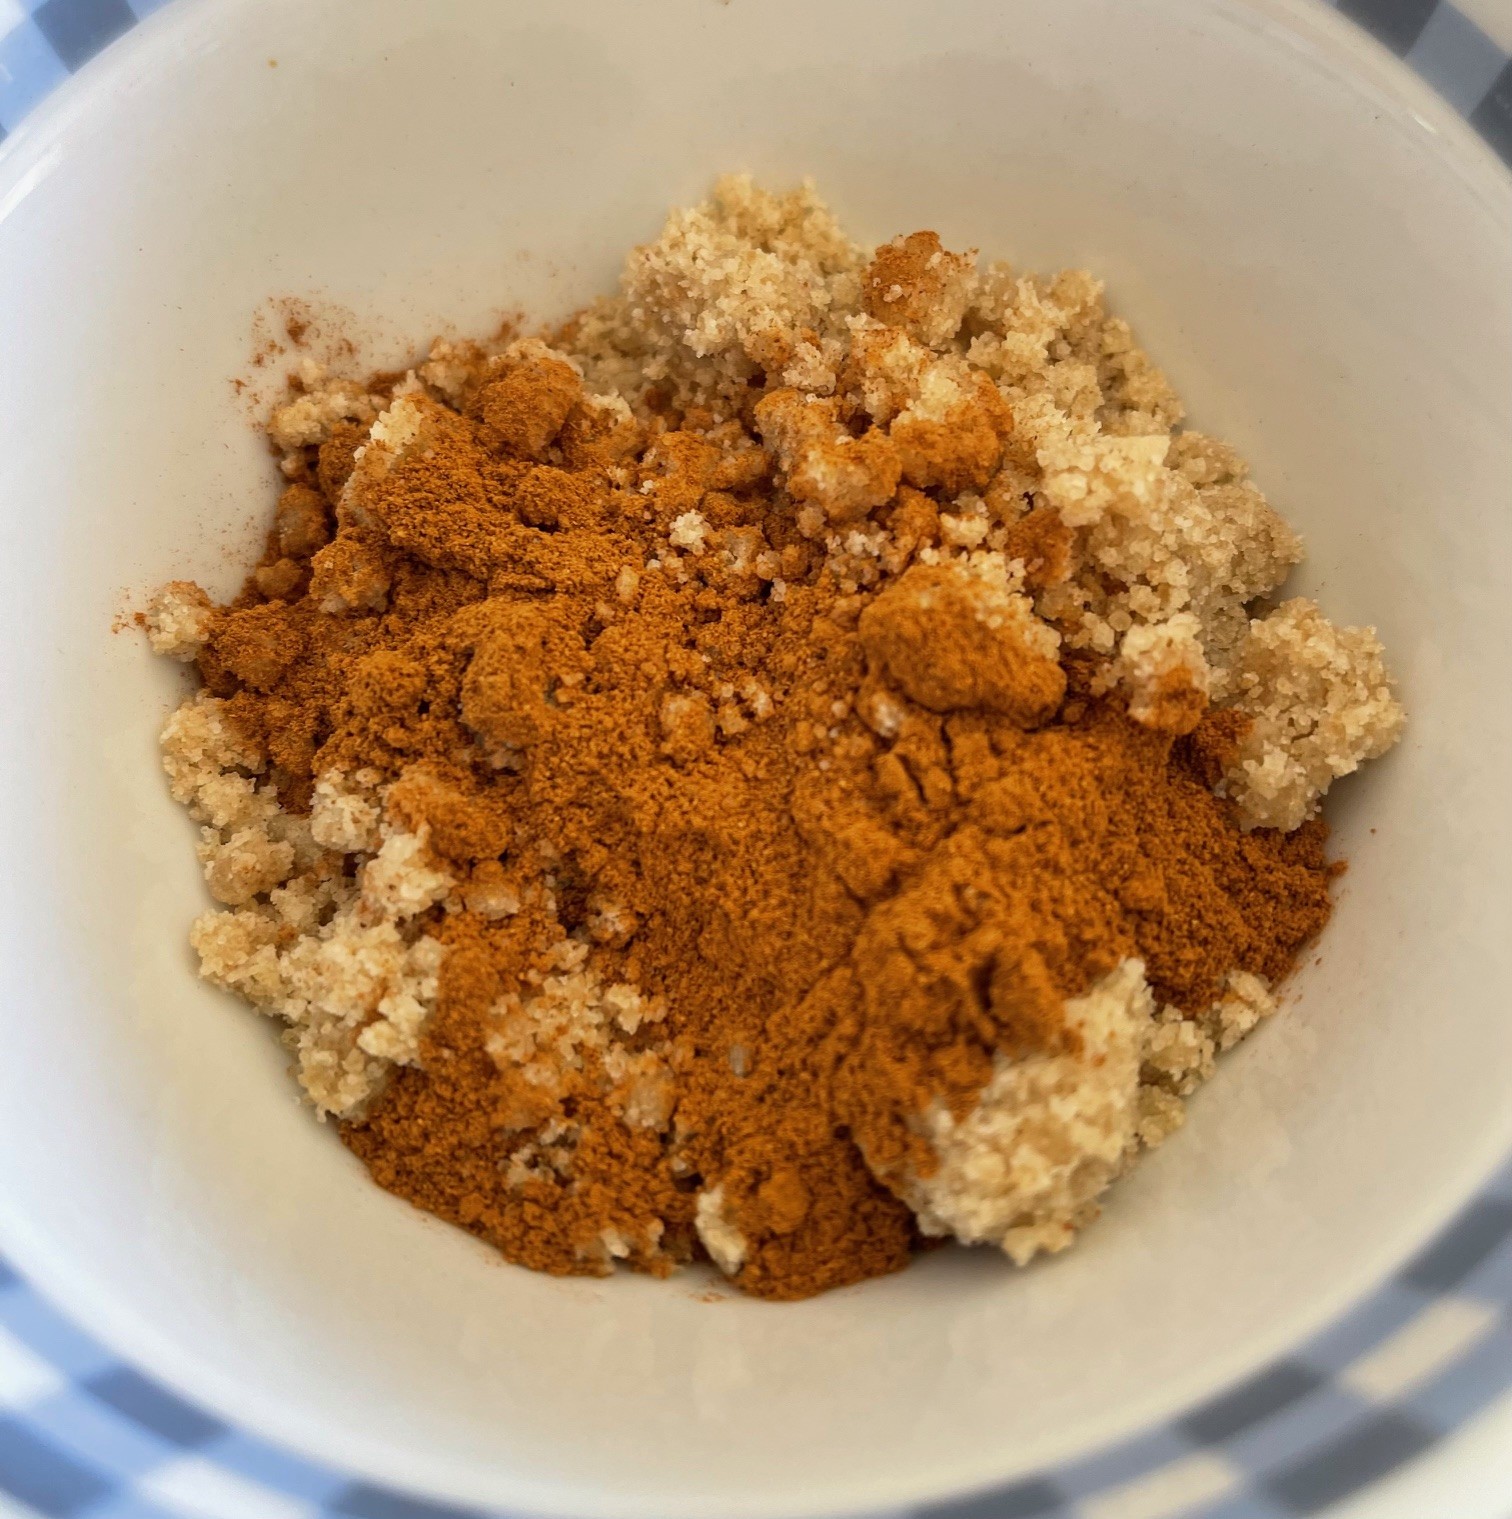
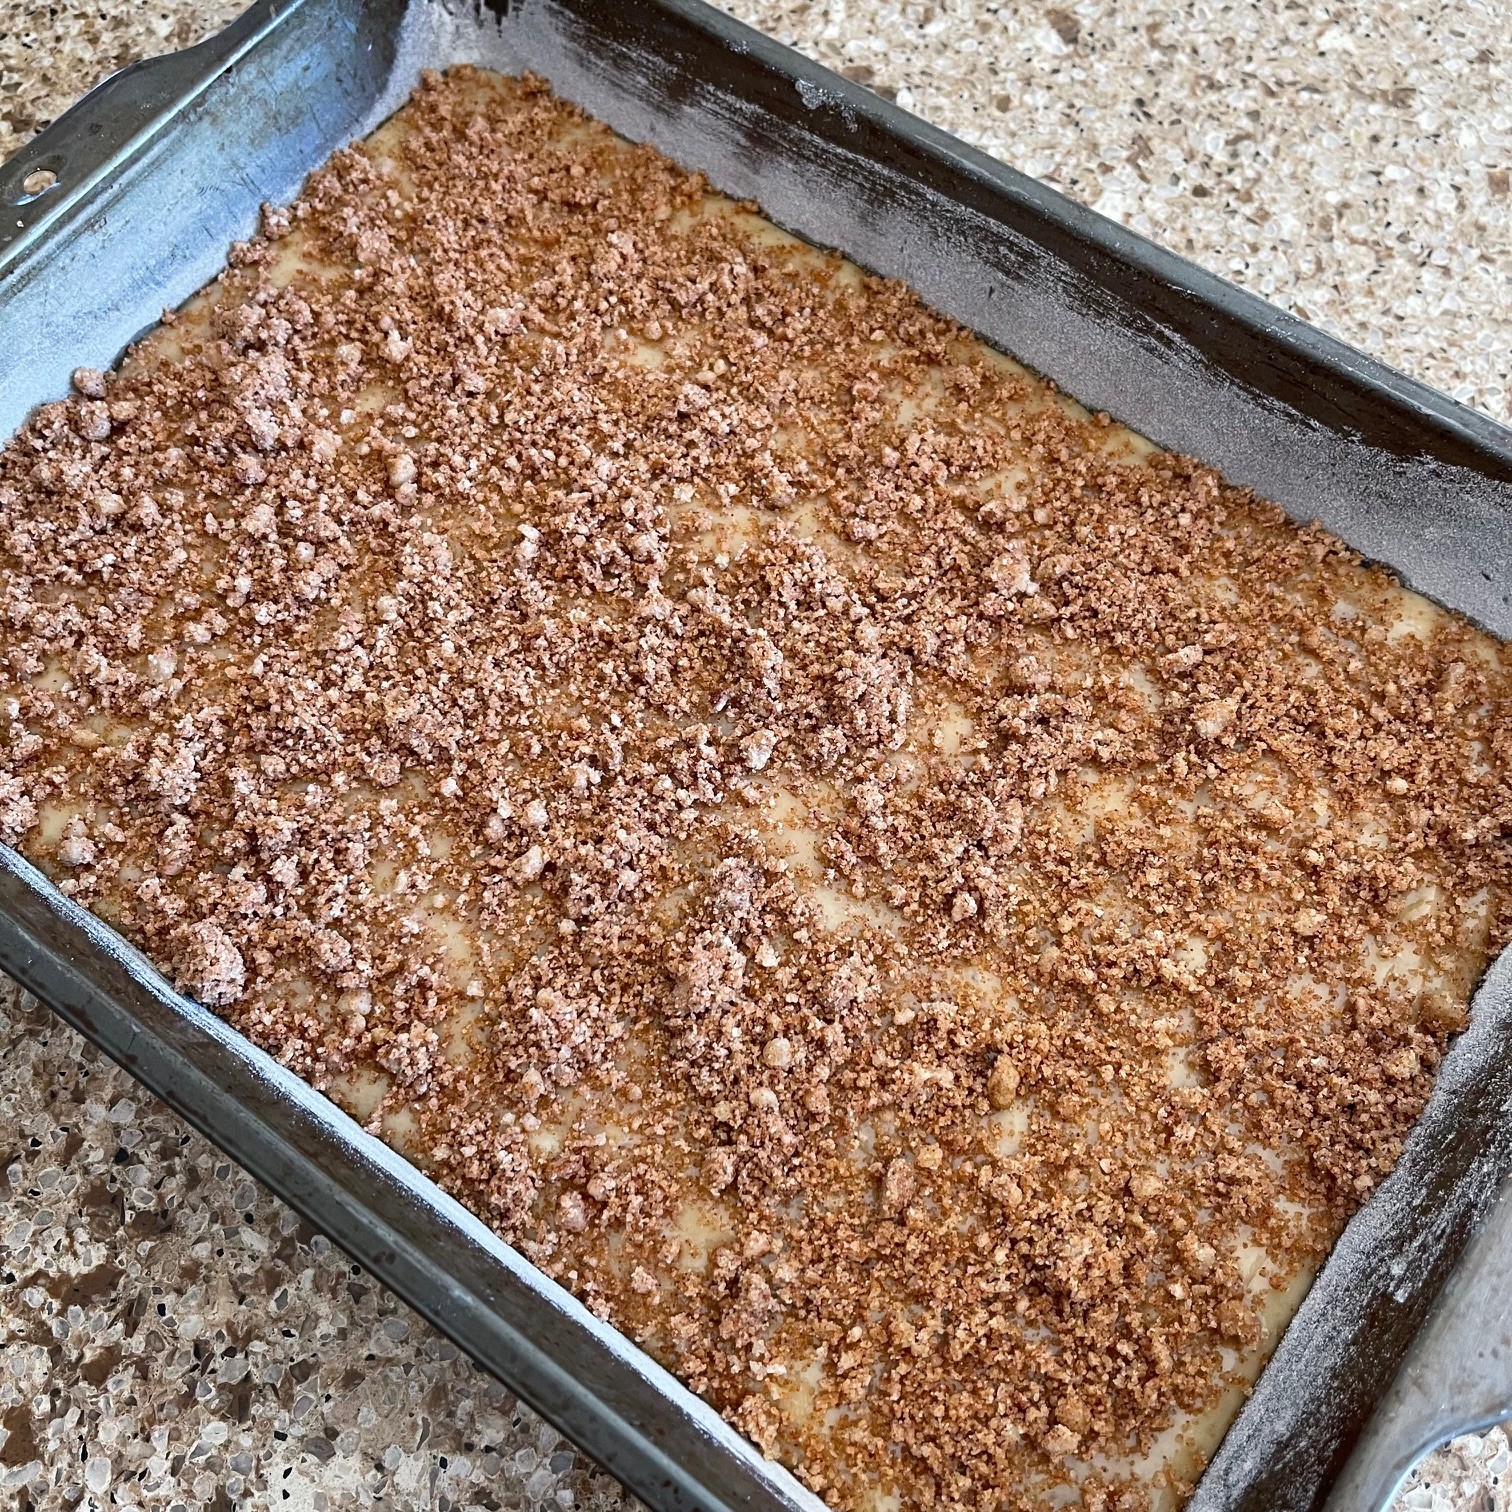
Remove 89g (1/2 cup) of flour mixture and place into a small bowl. Add in the remaining 1/4 tsp cinnamon and gently stir. Set aside – this will become the topping.
Beat the egg with a fork in a small bowl
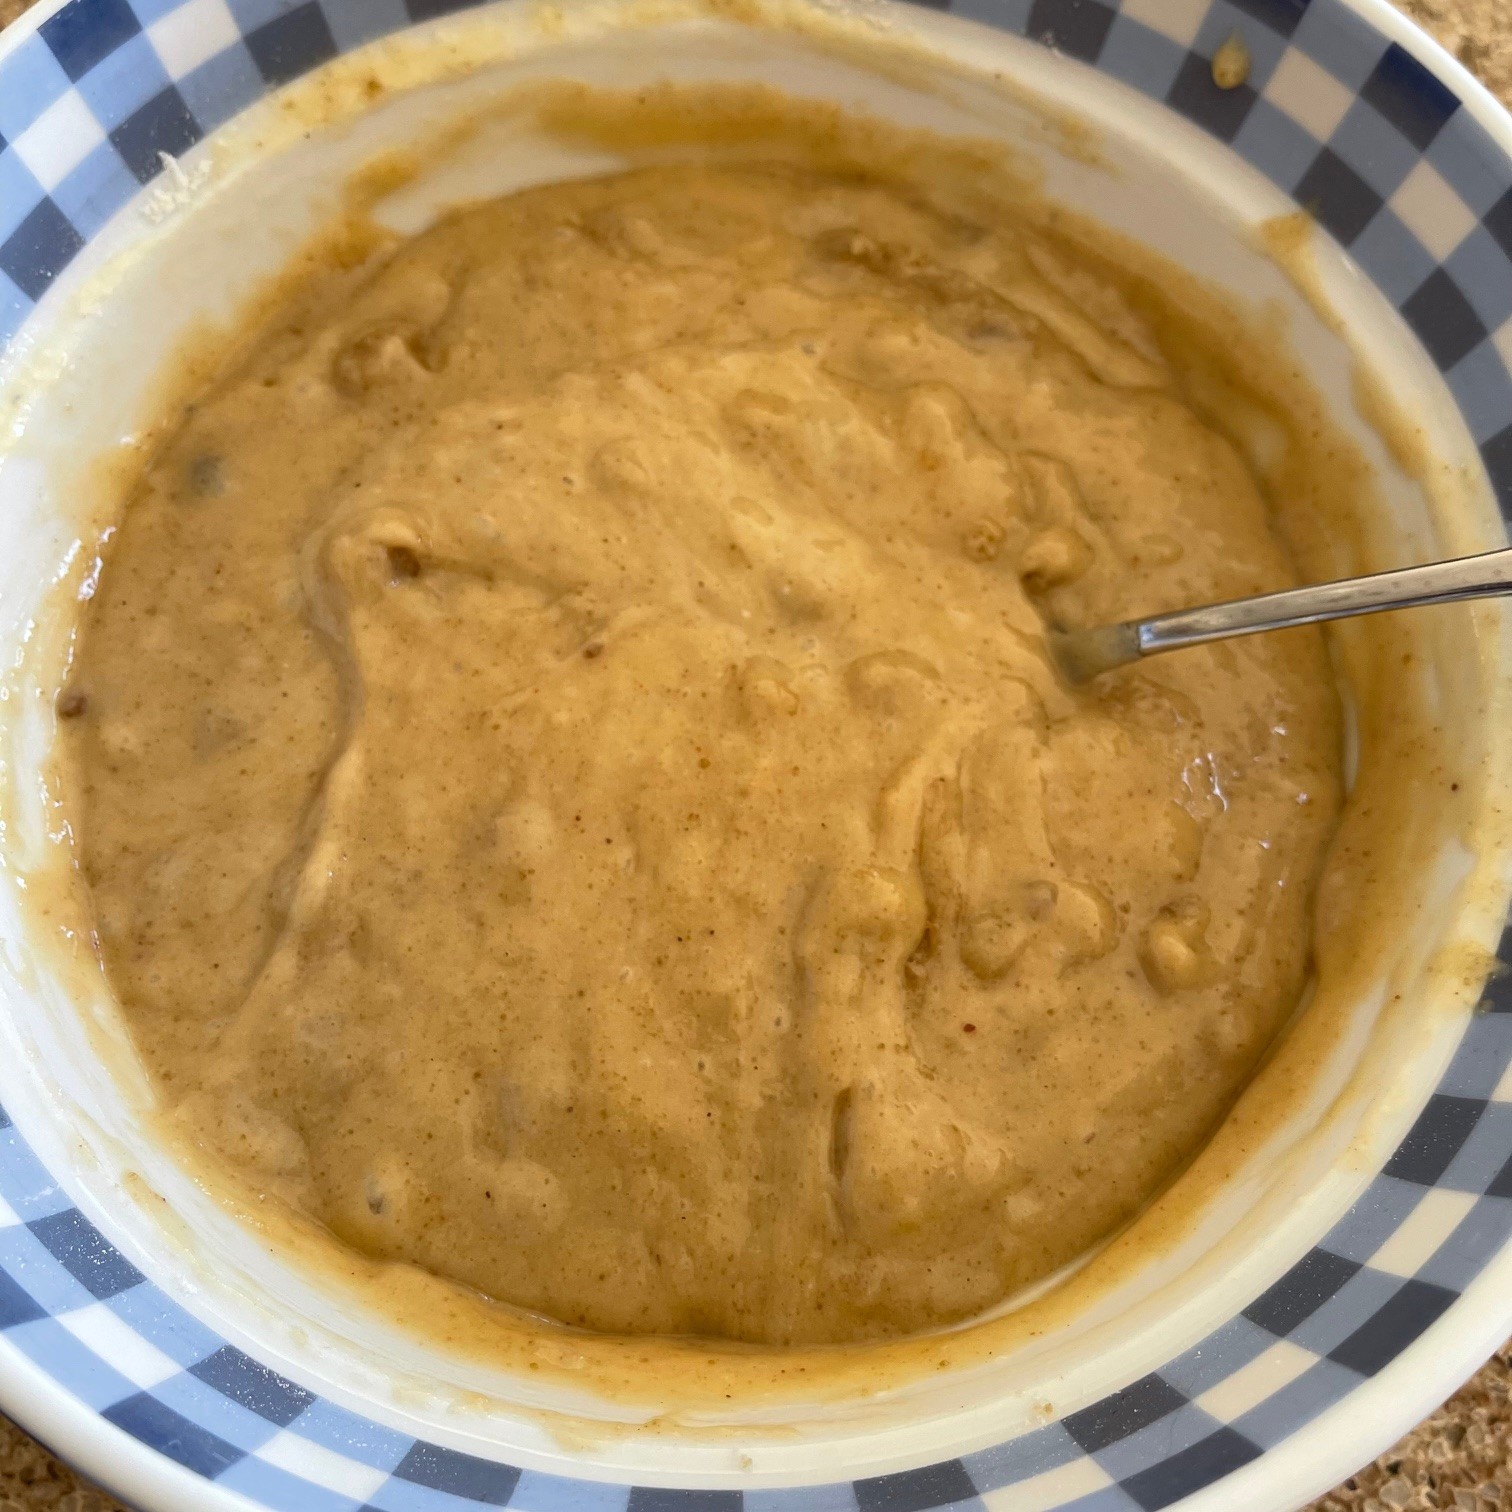
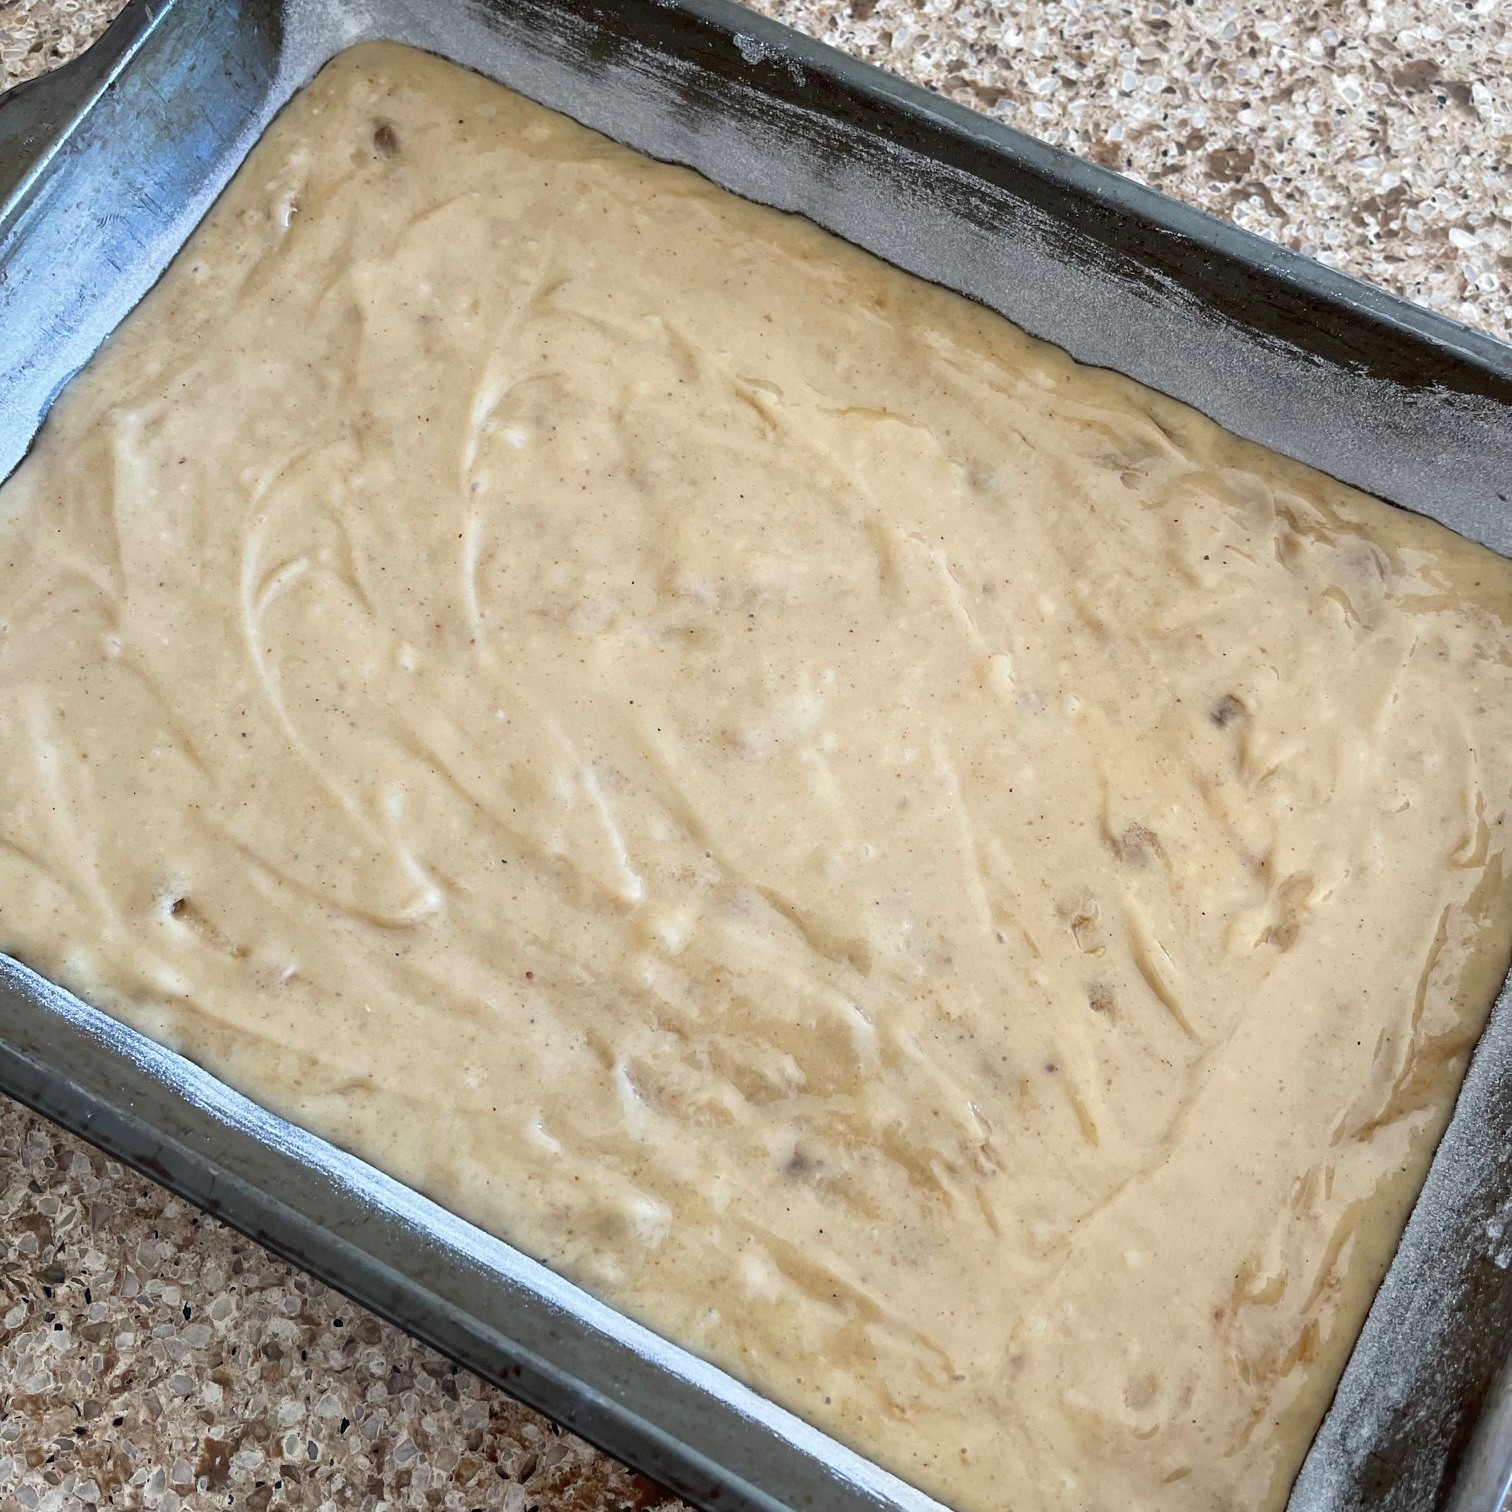
Into the large mixing bowl with the flour (not the small bowl set aside with the topping) add the egg, buttermilk, baking soda, and baking powder. Mix by hand just until the flour is incorporated. (Don’t over mix or the cake will be tougher)
Pour batter into a greased and floured 9″ x 13″ (7.5cm x 36cm ) metal pan. Tilt the pan around to even the batter level.
Sprinkle the topping on top of batter as evenly as you can.
Bake in 350°F (180°C) oven, rack in the middle position, for 25- 30 minutes. (Mine takes 25 minutes.) It’s a little difficult to tell doneness when there’s a topping. Look for browning around the edges. Also, you can carefully bring the cake near your ear and listen for a bubble popping sound. If you hear that, put it back in the oven another minute or so and check again.
When done, remove from oven. Cool completely before slicing.
Lemon Posset is a lovely, light-ish finish to a meal. It, also, happens to have been a favorite of Queen Elizabeth II. While anything favored by the queen may sound daunting, it’s, actually, extremely easy to prepare. Bonus: there are only 4 ingredients!
NOTE: It’s best to make this a day or two ahead of serving time to allow it to firm up to a creamy texture.
Ingredients
714g (3 cups) heavy cream
199g (1 cup) granulated sugar
8g (1.5 T) PACKED lemon zest – don’t be stingy!
113g (9 T) lemon juice
TIP: If you have a kitchen scale, this step will save you time. Weigh your EMPTYsaucepan. To this number add 755g. Write this number down so you don’t forget it. This is the number you’re going to reduce the mixture down to.
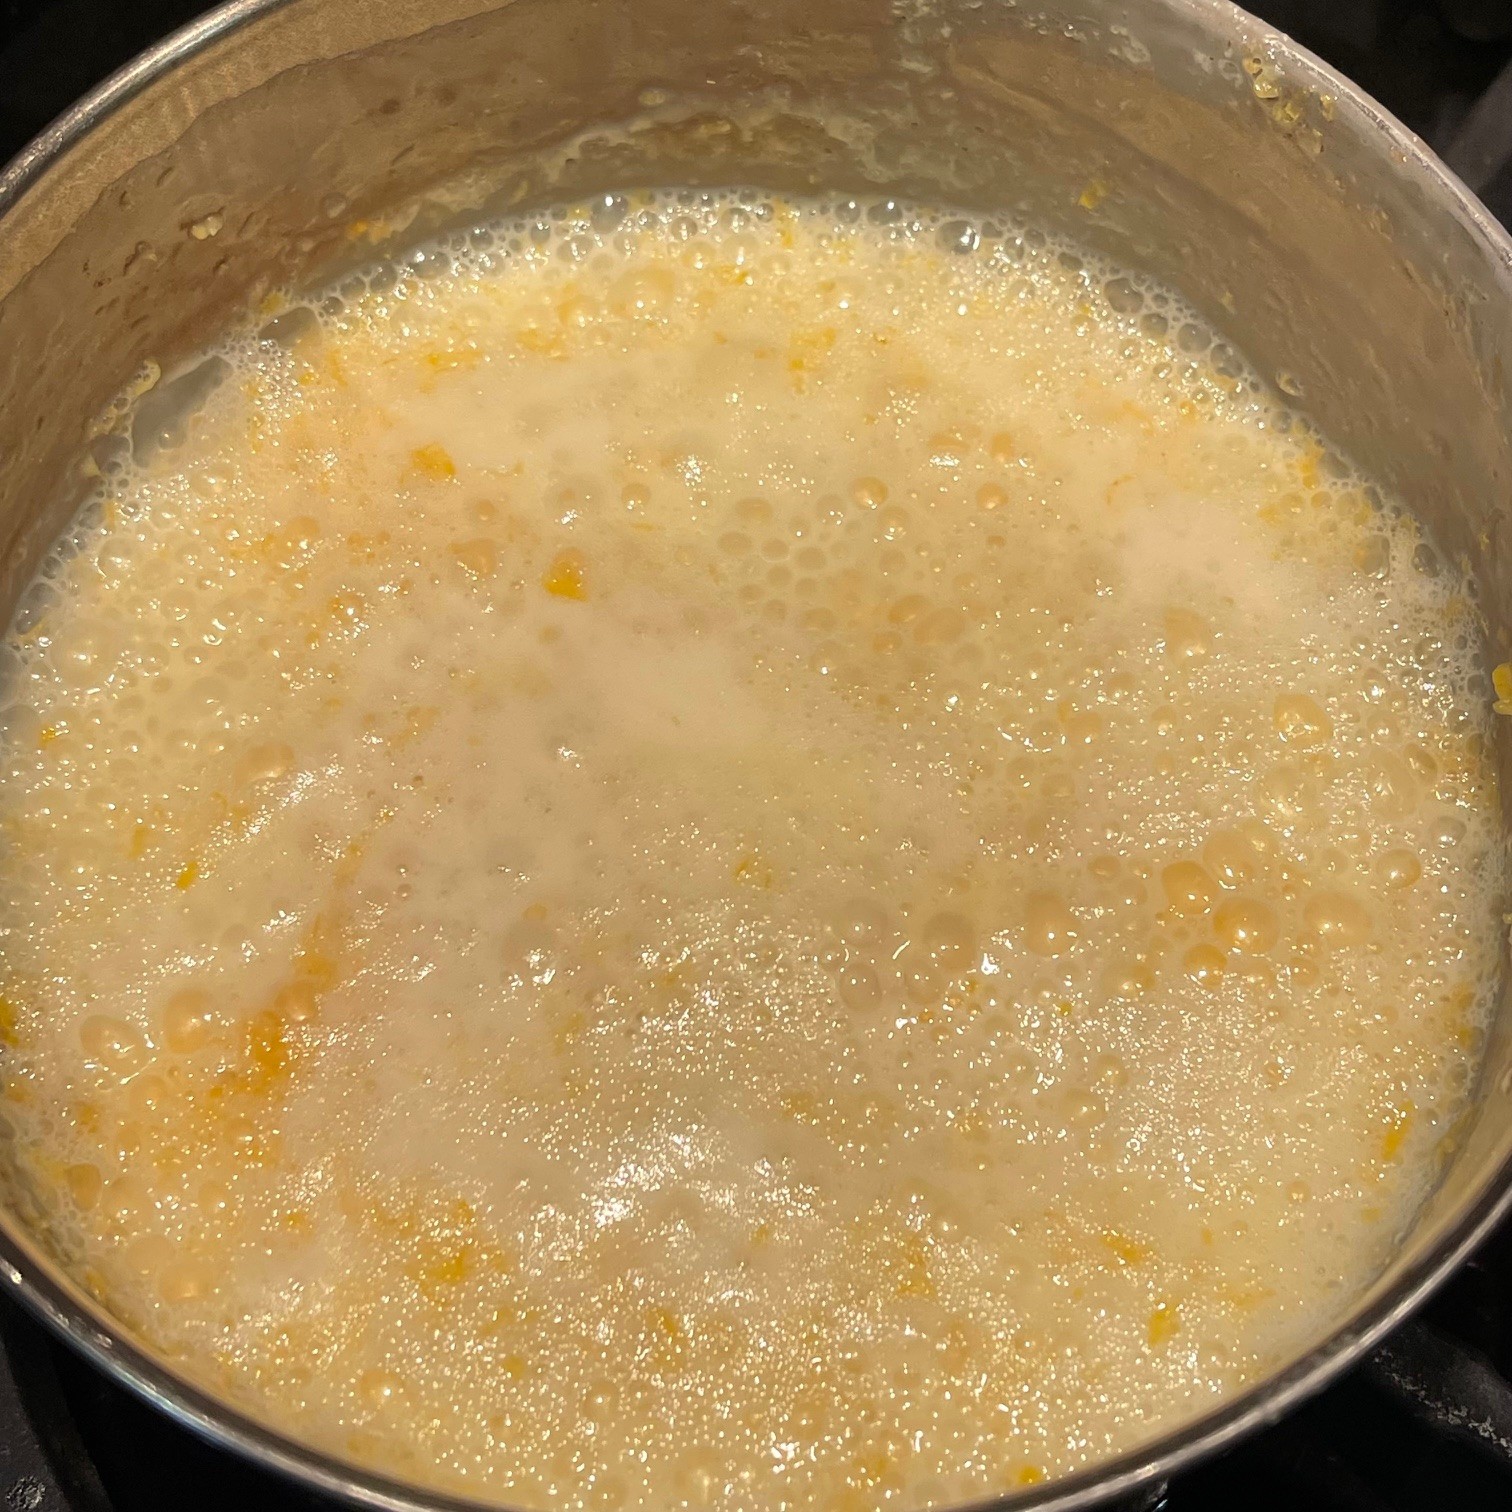
Into a large saucepan, add the cream, sugar, and zest.
Over medium heat bring mixture to a rolling boil, stirring now and then. Keep an eye on it so the mixture doesn’t boil over. Adjust the flame as needed.
Boil down to as close to 755g (3 cups) as you can. If you’re using my above mentioned tip, after about 5 minutes weigh the mixture plus the saucepan to get a sense of how close you are to the weight of your saucepan plus 755g (you wrote down this number, I hope!) Return the pan to the burner and continue to boil the liquid, weighing every few minutes until you reach your target weight. This takes about 8-12 minutes.
If you don’t have a scale, you’ll have to keep pouring the liquid into a measuring cup until you reach 3 cups (700ml). Remove pan from heat.
Stir in the lemon juice. Let set 20 minutes.
Strain cream mixture into a container with a spout (to make pouring easier). Use a spatula or spoon to scrape the sieve’s sides and bottom. This will assist the straining process. Don’t forget to scrape the mixture off the bottom of the sieve into the bowl.
Discard the solid remains left in the strainer.
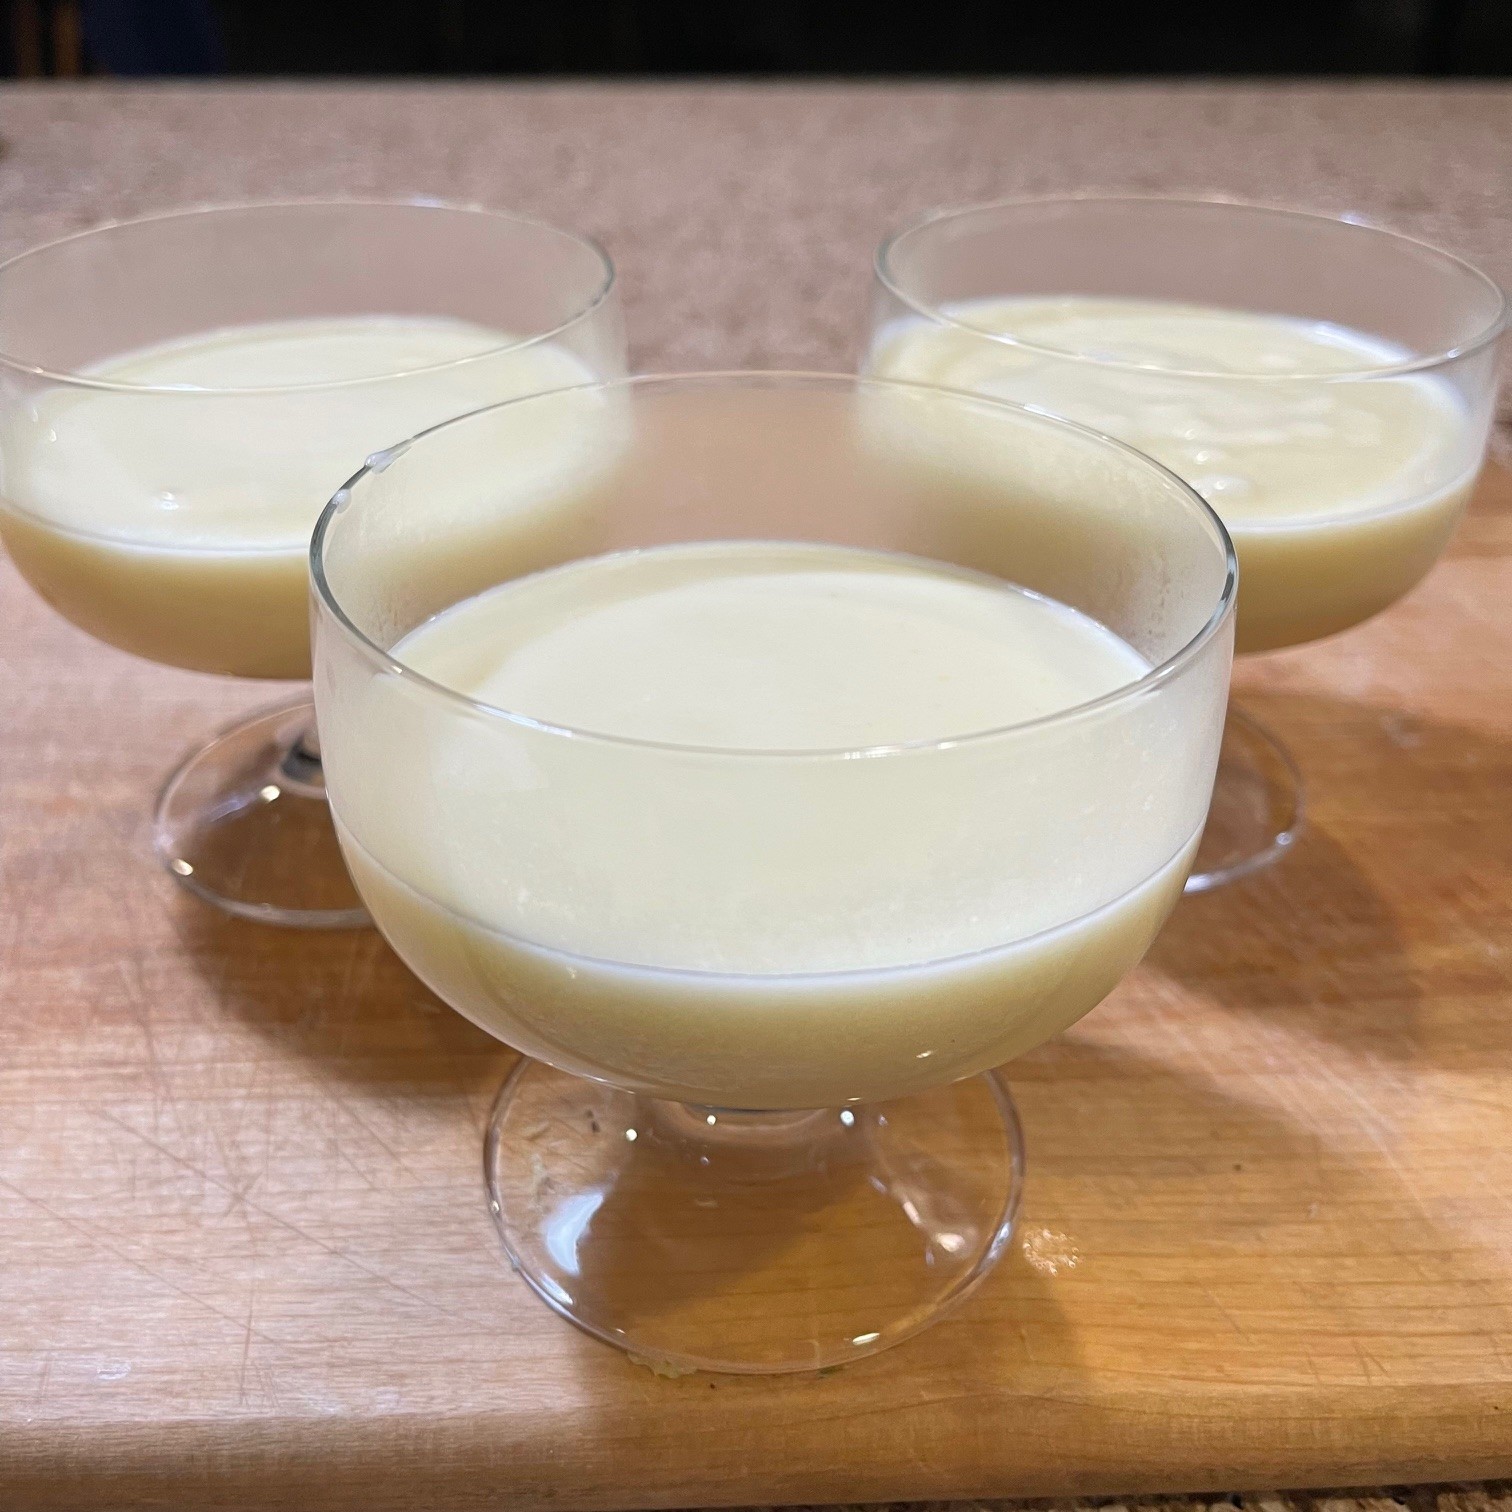
Then pour even amounts of the Lemon Posset into 4 indivual serving containers. NOTE: Don’t pour into one large bowl – it may not set properly. Cover and chill at least 5 hours. I strongly suggest making it a day or two before serving.
My Butterscotch-Ganache Pie has become the most requested item when friends and family come to our house for dinner. It took a few years to finally perfect it (in my opinion) so the layers were the right height, the ganache was the right consistency, the butterscotch pudding was the right texture, and the crust was not too crumbly nor too hard. The decorative top is optional.
NOTE:This pie should be made the day before it’s first served, so you need to plan ahead!
There are 4 parts to this pie: the crust, chocolate ganache, the butterscotch pudding, and the whipped cream. All of these should be made the day before serving so the pie has settled and is cold. This is a good thing – one less thing to do on company coming day!
BUTTERSCOTCH-GANACHE PIE
Butterscotch Pudding
169g (12 T) butter
90g (1/2 cup) granulated sugar
87g (1/2 cup) dark brown sugar, packed
56g (4 T) water
3/4 tsp table salt
1 tsp lemon juice
30g (2 T) Lyle’s Golden Syrup or corn syrup
118g (1/2 cup) heavy cream, DIVIDED
500g (2 cups) milk – any fat level will do
4 yolks
36g (1/4 cup) (1.25 oz) cornstarch
1 T vanilla extract
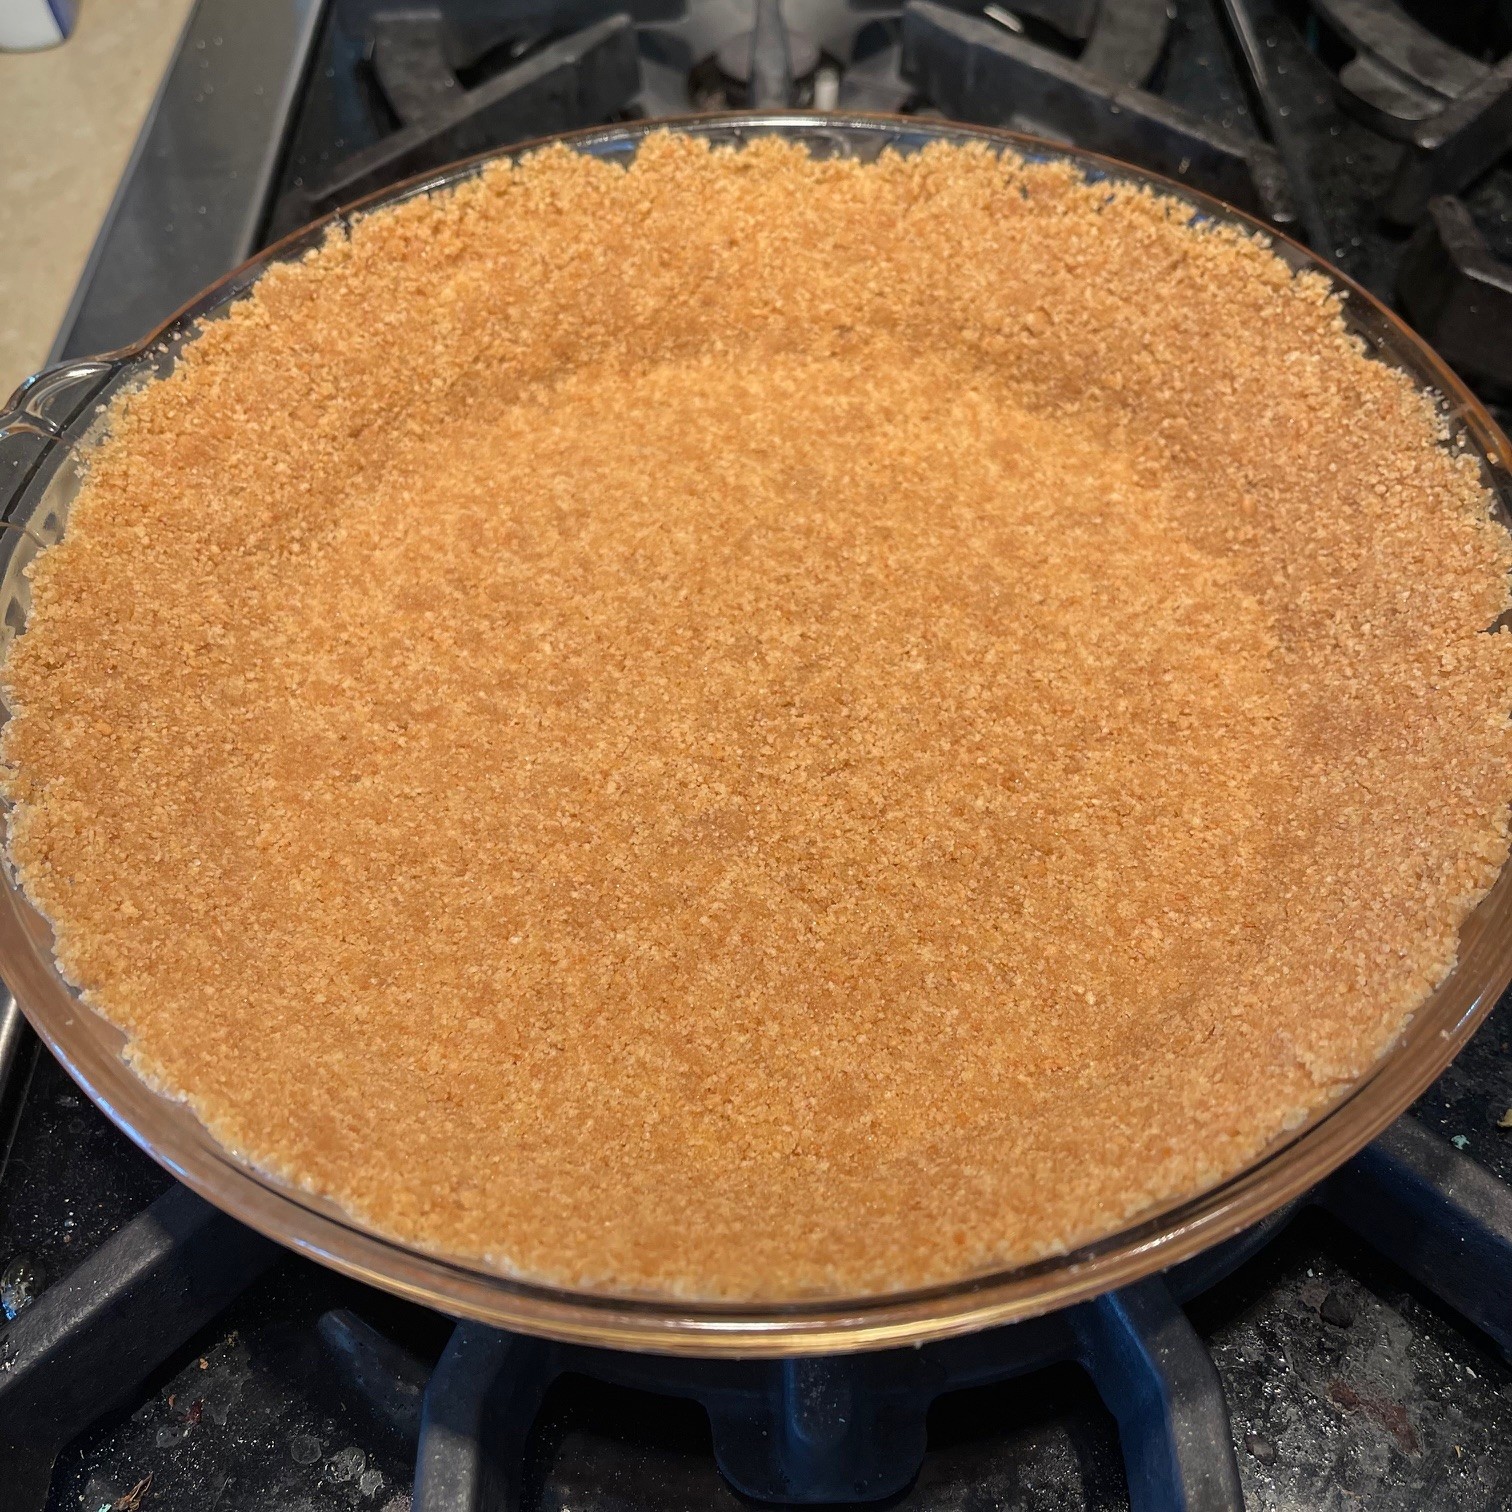
Graham Cracker Crust
163g (1.5 cups) graham crackers (I use Honey Maid
30g (3 T) granulated sugar
77g (5.5 T) butter, melted
Ganache
58g (2 oz) 60% cacao chocolate bar
58g (2 oz) 72% cacao chocolate bar
114g (4 oz) heavy cream
Whipped Cream
205g (3/4 cup) heavy cream, cold
14g (3/8 oz) confectioners (icing) sugar
It’s best to begin preparing this pie by making the butterscotch pudding since it needs to cool several hours before pouring it into the crust.
First, measure out the ingredients so everything is ready to go. Yes, I know this is a lot of bowls to wash, but having everything ready makes life easier in this recipe.
1 – Into a large saucepan (at least 3 quarts), place the butter, granulated sugar, brown sugar, water, salt, lemon juice, and Lyle’s Golden syrup (or corn syrup).
2 – Into a small saucepan, pour 59g (1/4 cup) heavy cream. (This will be simmered later.)
3 – Into a small bowl, pour 59g (1/4 cup) heavy cream.
4 – Into a small bowl, place the 4 yolks.
5 – Into a small bowl, place the 36g (1/4 cup) (1.25 oz) cornstarch.
6 – Either have ready the vanilla bottle with a tablespoon or measure out the 1 T into a tiny bowl.
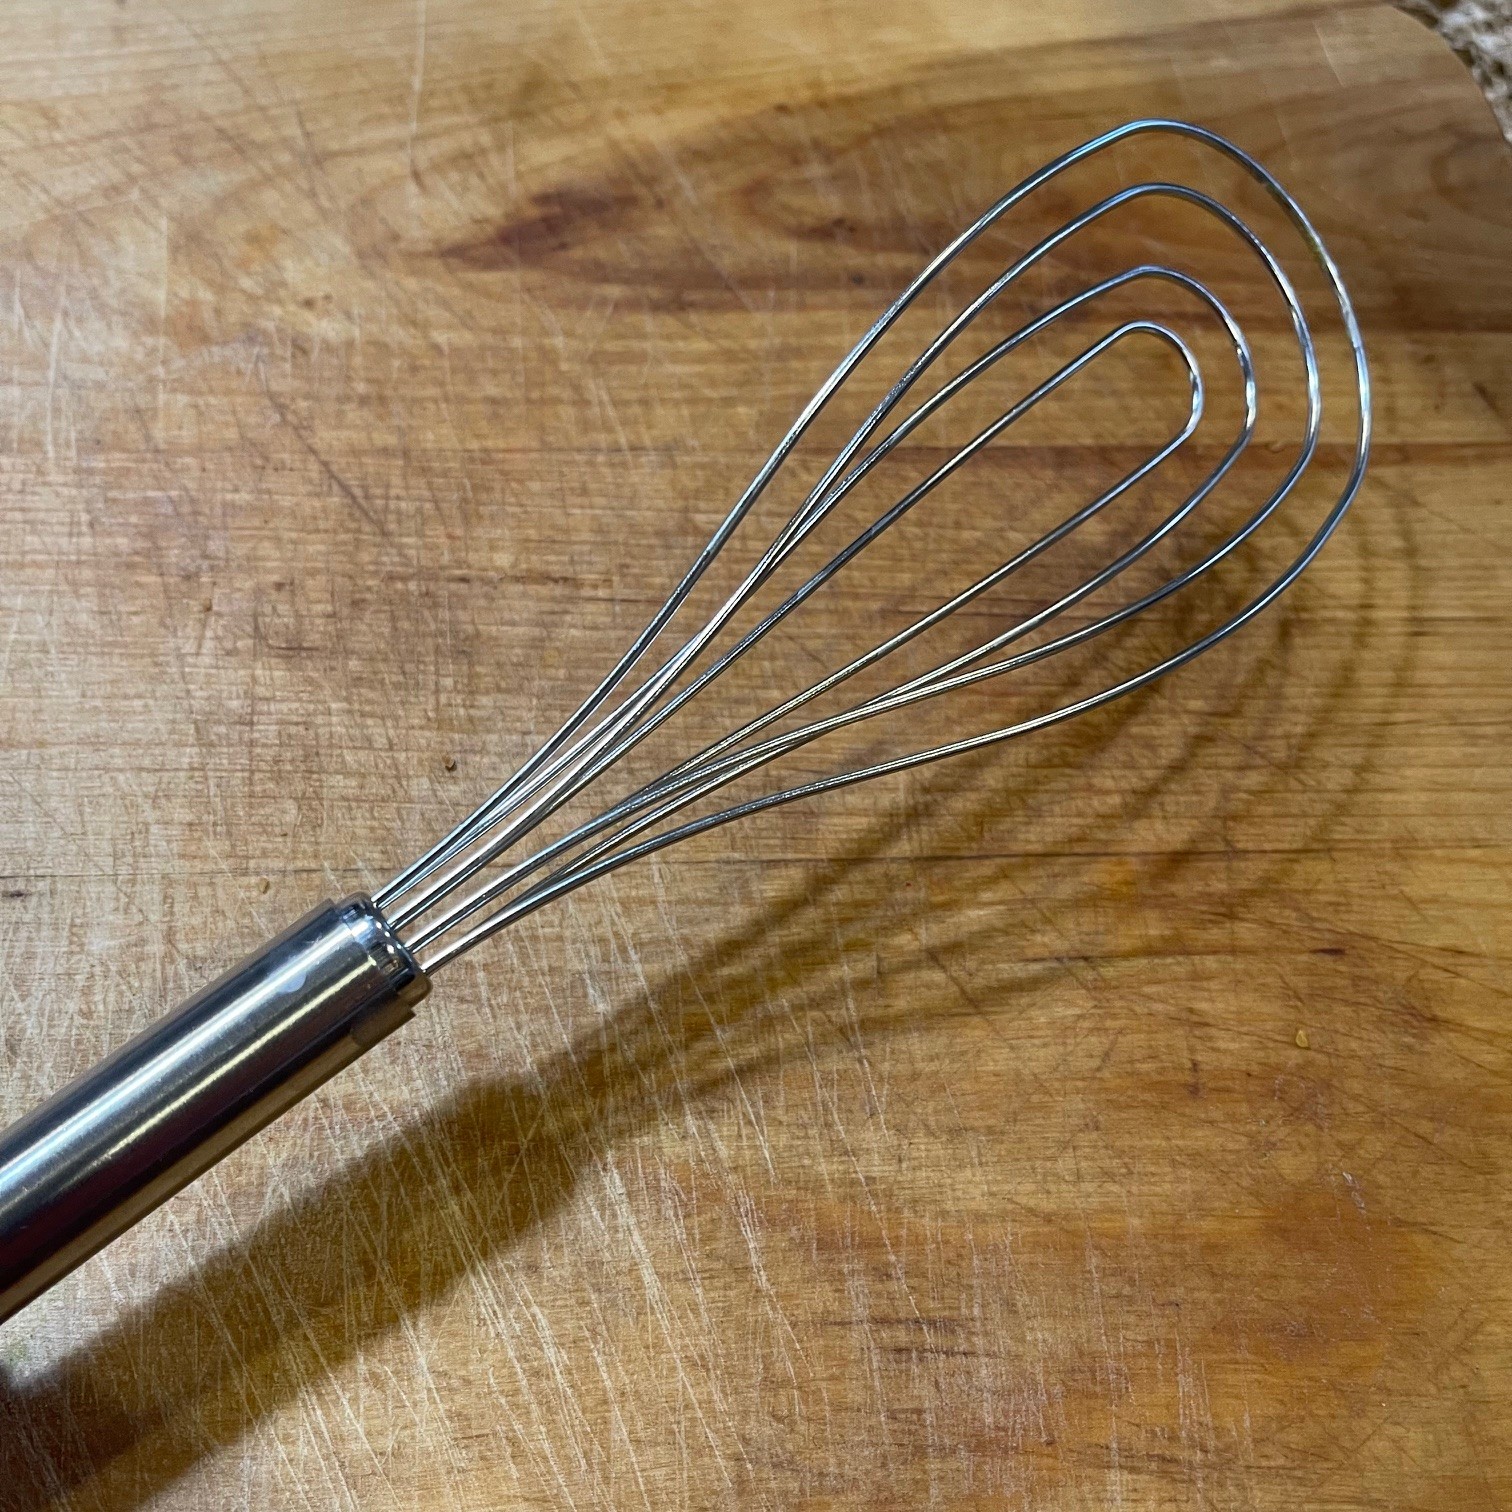
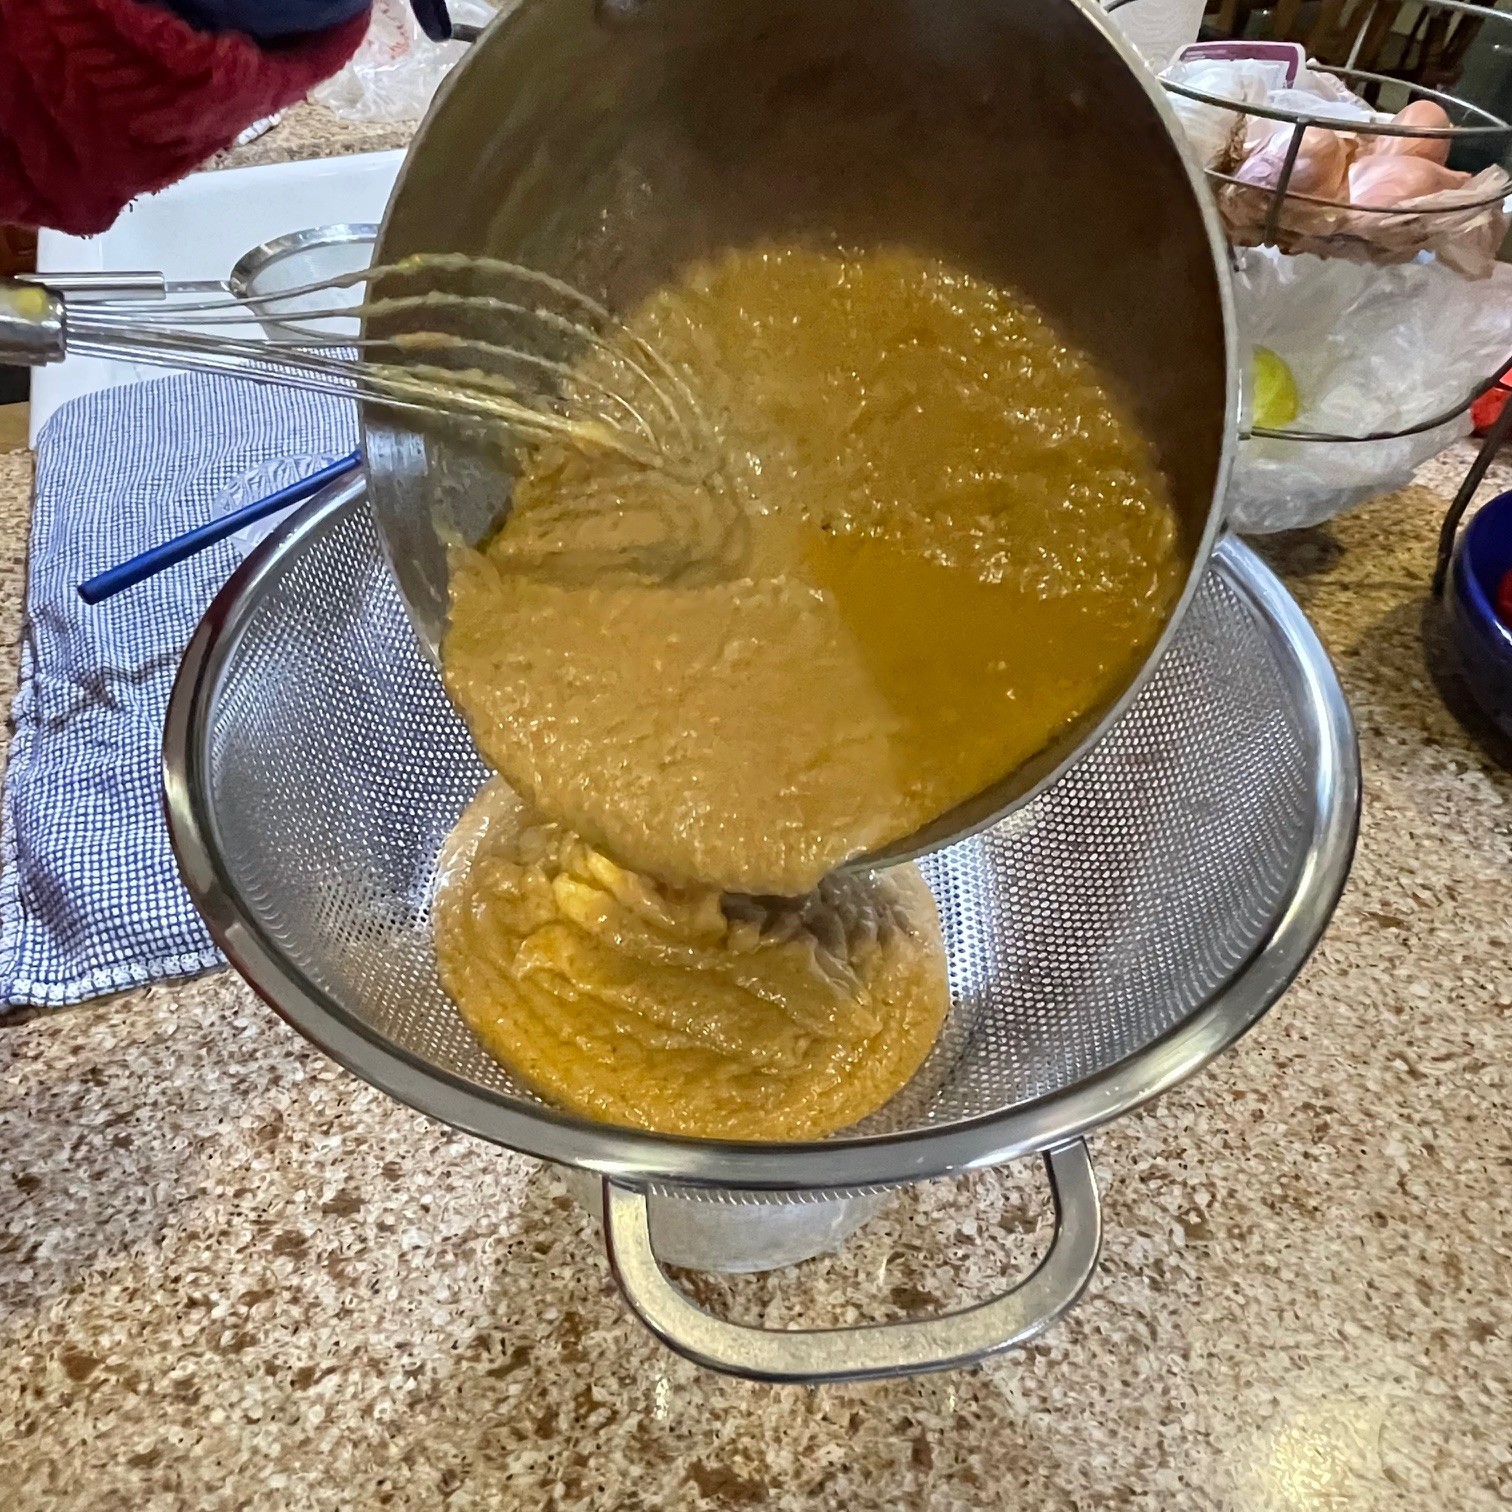
NOTE: I find using a flat whisk (see photo below) helpful for stirring mixtures in saucepans since they can get into the edges of the pan. This is NOT mandatory.
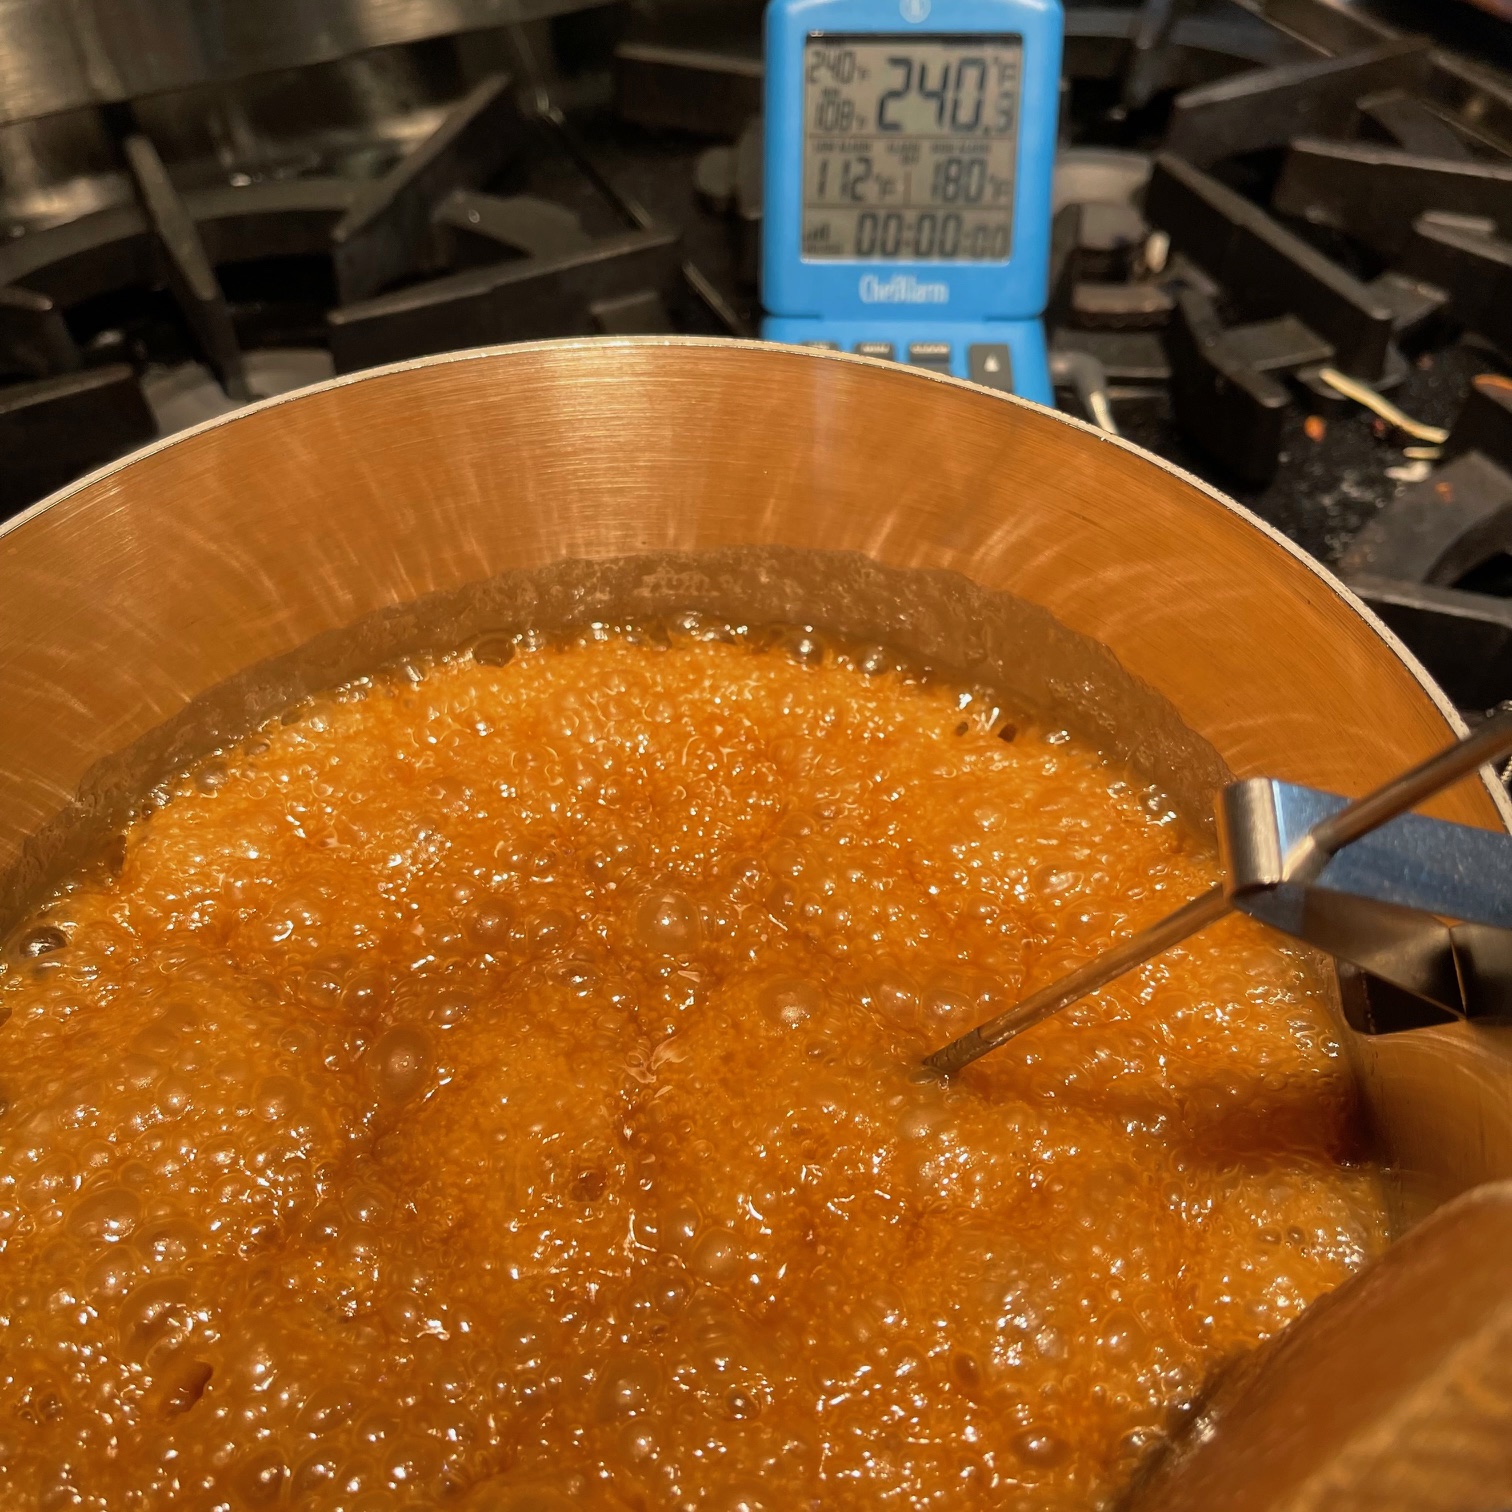
Over medium-high heat, bring the butter/sugar mixture in the saucepan to 240°F (116°C), stirring often (preferably constantly). USE A THERMOMETER! You’ll need a metal or glass thermometer that can attach to the side of the pan – plastic will soften due to the hot steam.
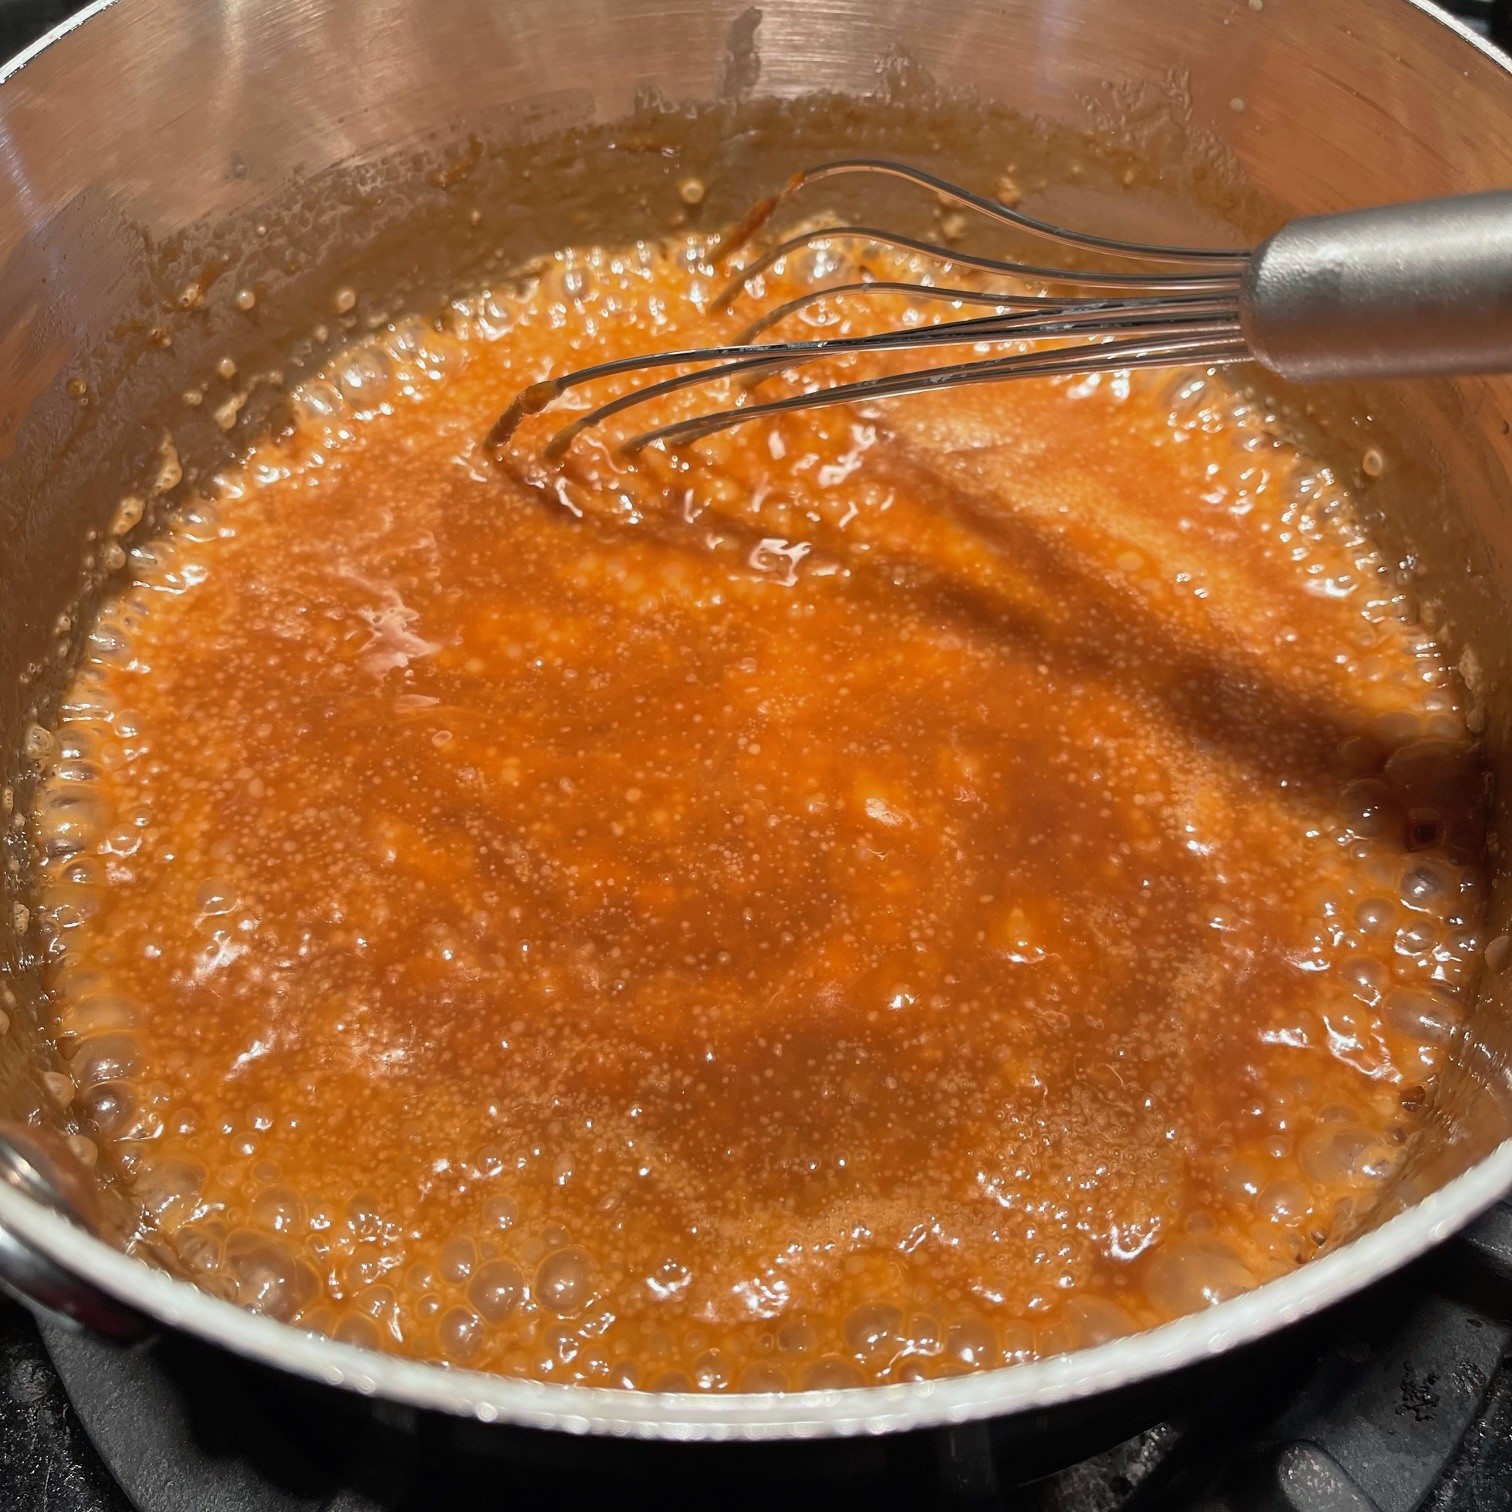
Decrease the heat to medium and stir until the liquid reaches 300°F (150°C), stirring often (preferably constantly). Much of the liquid will have evaporated and the mixture will have become a bit thicker. Turn off the flame and stir in 59g (3 T) cream for 30 seconds.
Turn on burner to medium-high again and stir in 500g (1.5 cups) milk. When milk has been incorporated, turn off burner again.
Stir the cornstarch into the egg yolks.
Bring the other 59g (3 T) cream to a simmer.
Slowly drizzle the hot cream into the yolk/cornstarch, stirring continuously (this will temper the egg yolks so they don’t scramble).
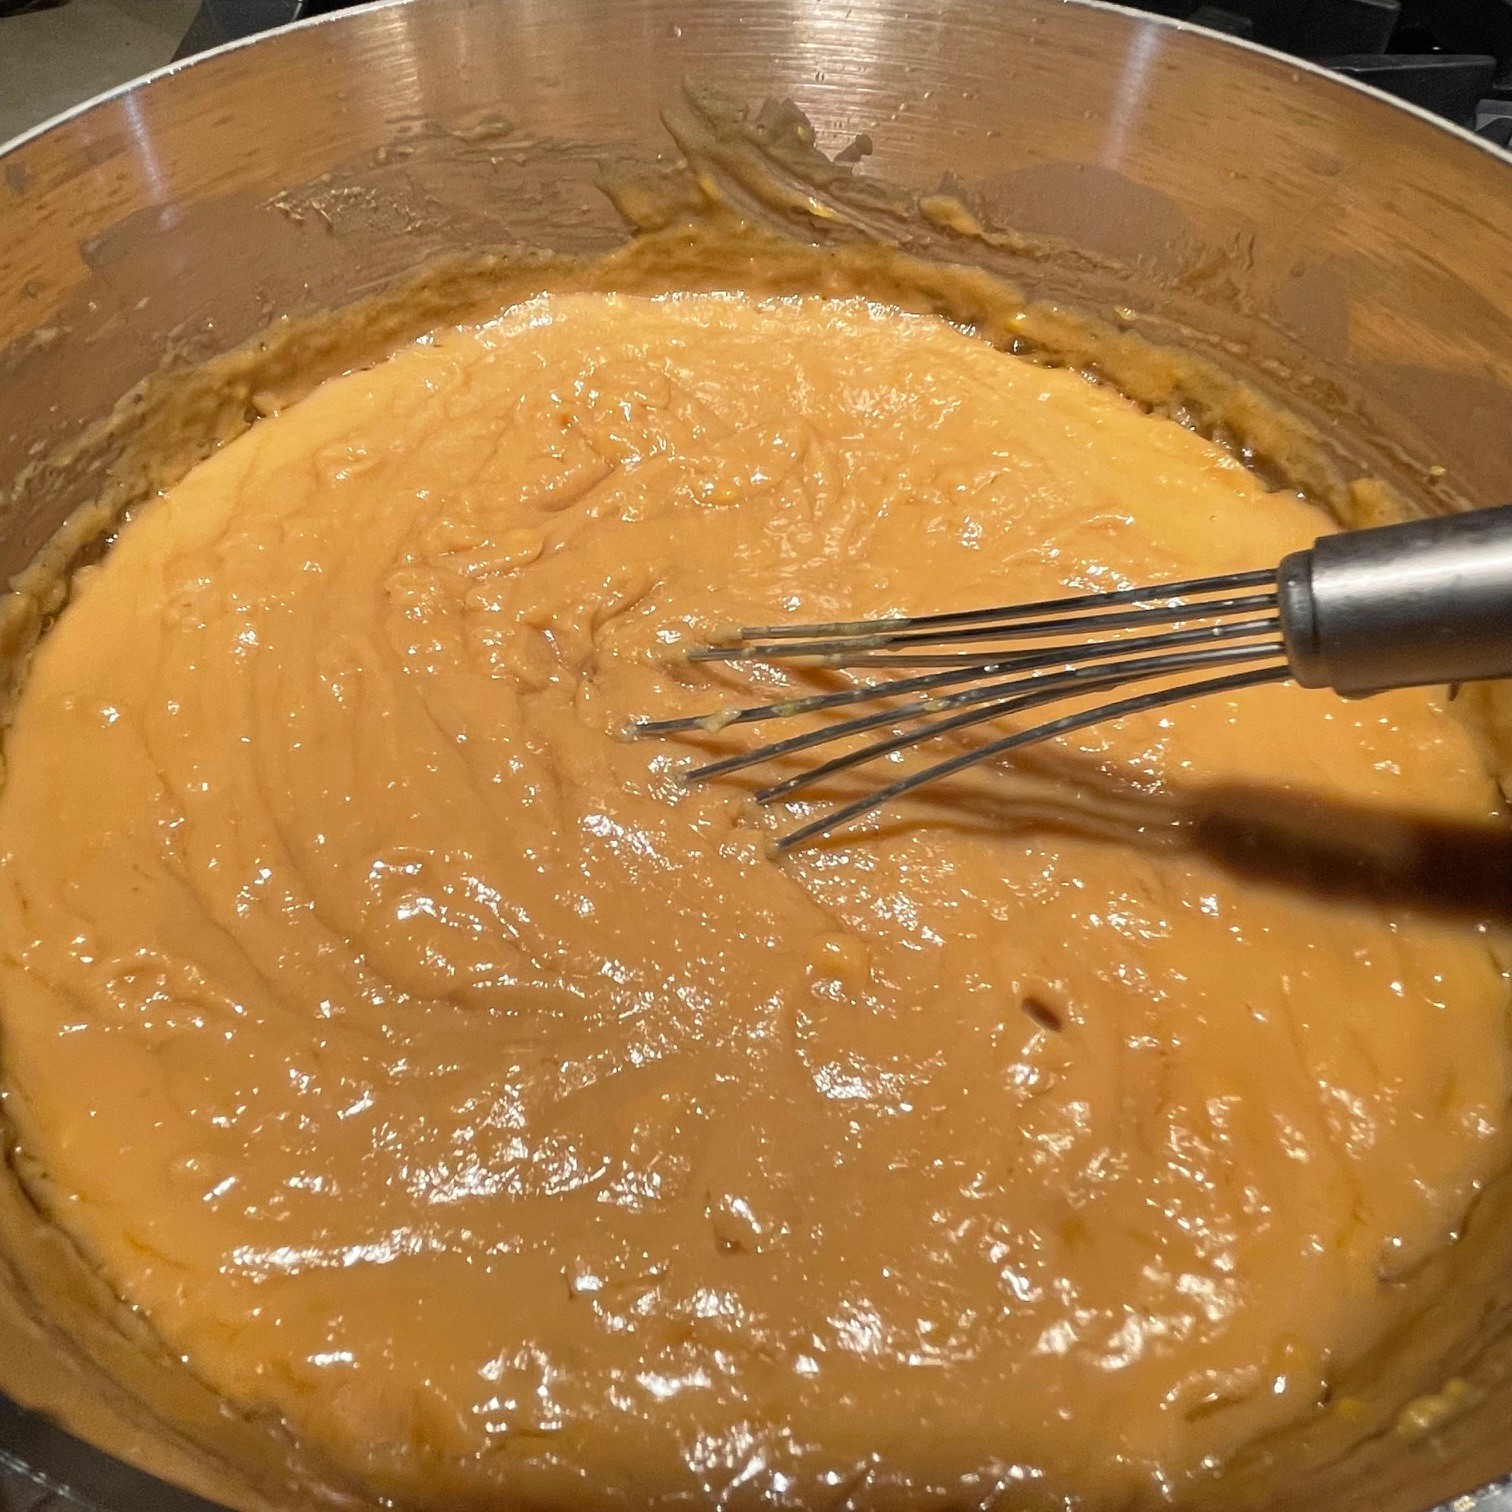
Bring the sugar mixture in the saucepan to a boil over medium-high and pour in the yolk/cornstarch/cream all at once. Whisk until thickened – about a minute. Turn off heat and stir in vanilla.
Into a bowl, strain mixture (to remove the eggy bits and any tiny lumps) through a sieve or colander that is NOT fine mesh. Stir pudding with a rubber spatula or wooden spoon to get the mixture to go through. I’ve tried using my fine mesh strainer and the butterscotch pudding is really too thick to go through. I have an Ekco strainer from days of yore that has 2mm (1/16″) holes, which works perfectly, but these strainers are hard to find. I tried my colander, and it worked fine.
You don’t have to strain the pudding, but it really does make a difference. The photo below shows the remains from straining. YUK!
Cover butterscotch pudding and chill in fridge for, at least, 3 hours.
Chill a bowl and beaters in preparation for whipping the cream later on.
Graham Cracker Crust
163g (1.5 cups) graham crackers (I use Honey Maid
30g (3 T) granulated sugar
77g (5.5 T) butter, melted
Preheat oven to 325°F (163°).
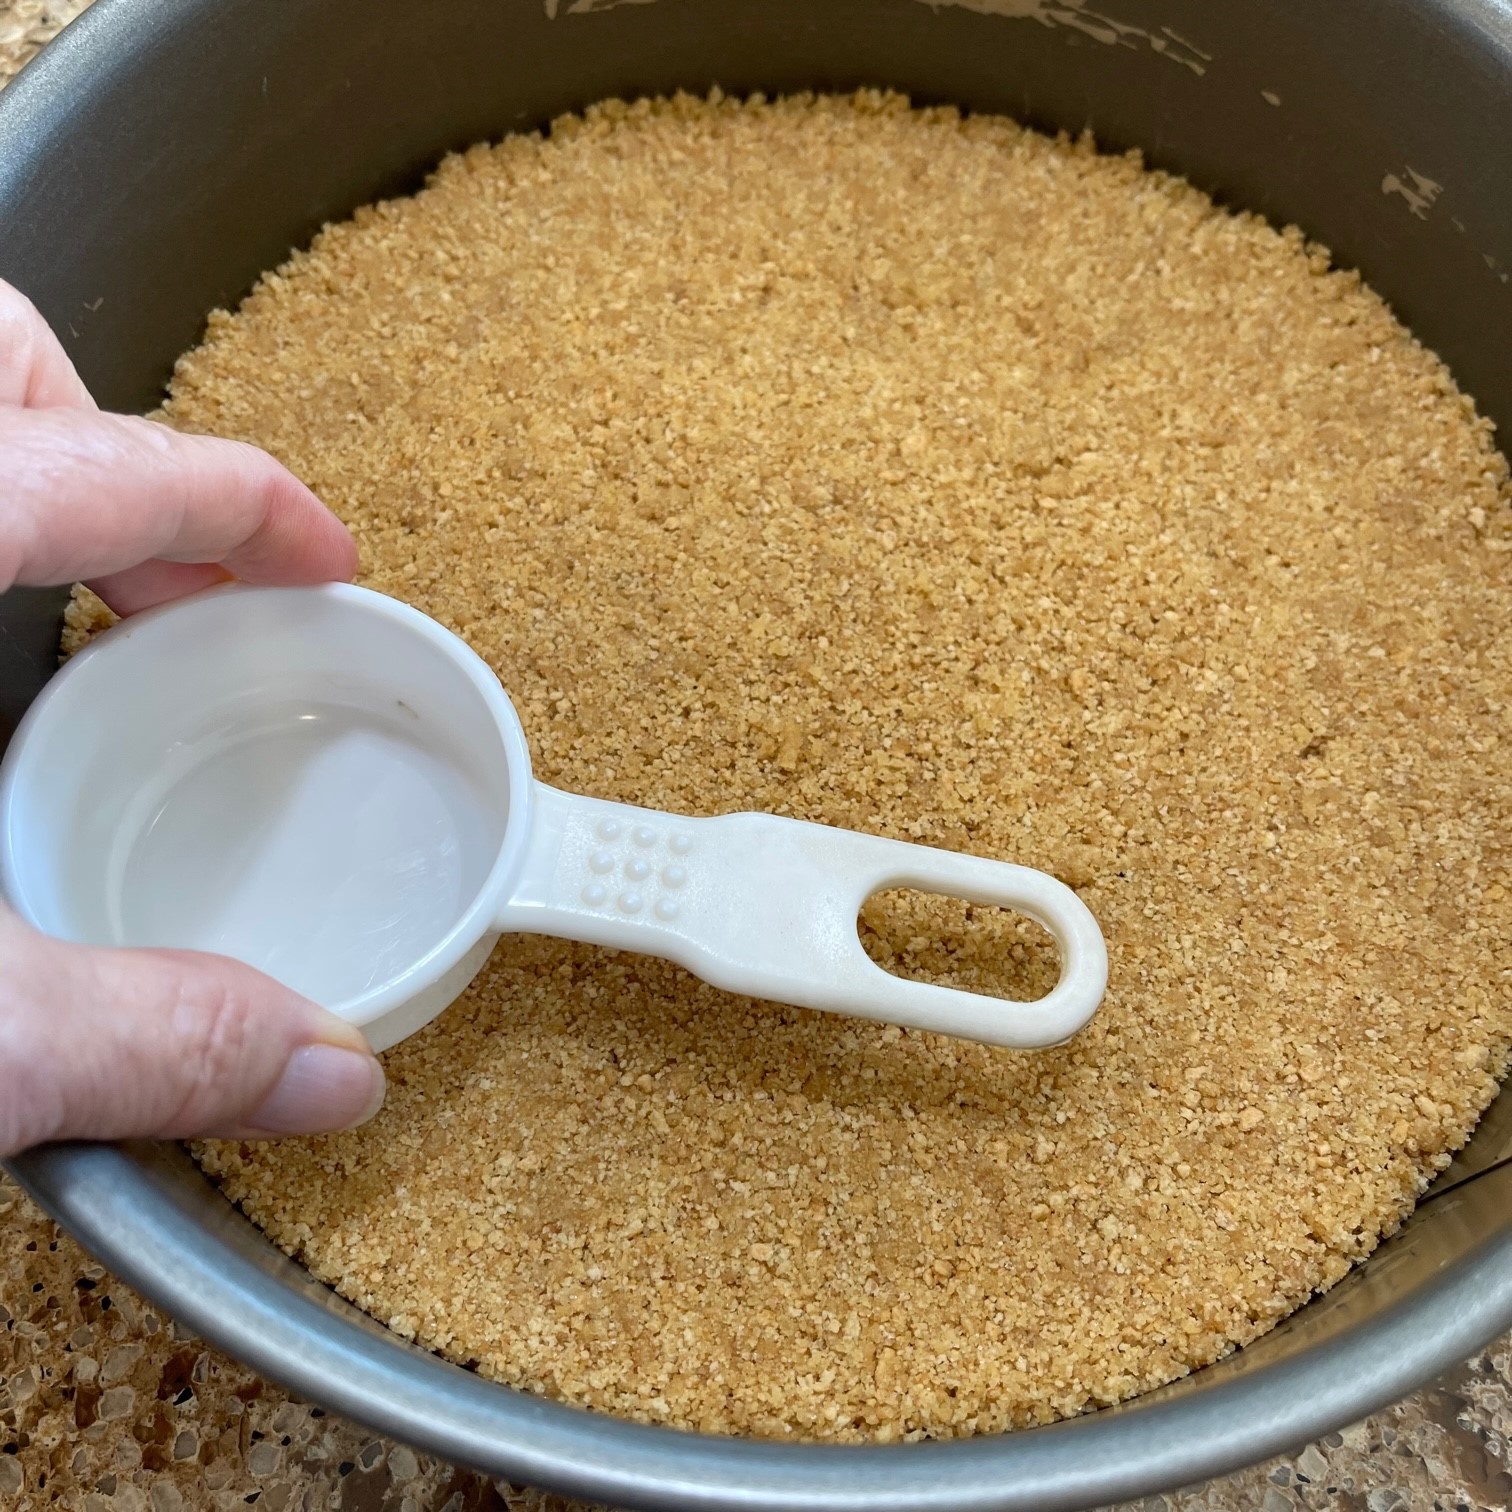
Crush graham crackers with a rolling pin until fine crumbs. Don’t use a food processor – the crumbs don’t get fine enough which leads to a not nicely textured crust. It’s easiest to break up the graham crackers and place them in a large plastic bag to contain them as you roll them. Pour crushed crackers into a bowl and stir in the melted butter and sugar.
Empty crumbs into a 9″ (25 cm) pie plate. Press mixture to evenly cover bottom and sides firmly. If find it best to use a 1/3 cup measuring cup, but you can use a fork or your fingers, etc.
Bake in preheated 325°F (163°C) until lightly browned – about 15 minutes. Let cool.
Ganache
58g (2 oz) 60% cacao chocolate bar, broken into small pieces
58g (2 oz) 72% cacao chocolate bar, broken into small pieces
114g (4 oz) heavy cream
Into a small saucepan, over LOW heat, stir the cream and chocolates together until all chocolate is melted.
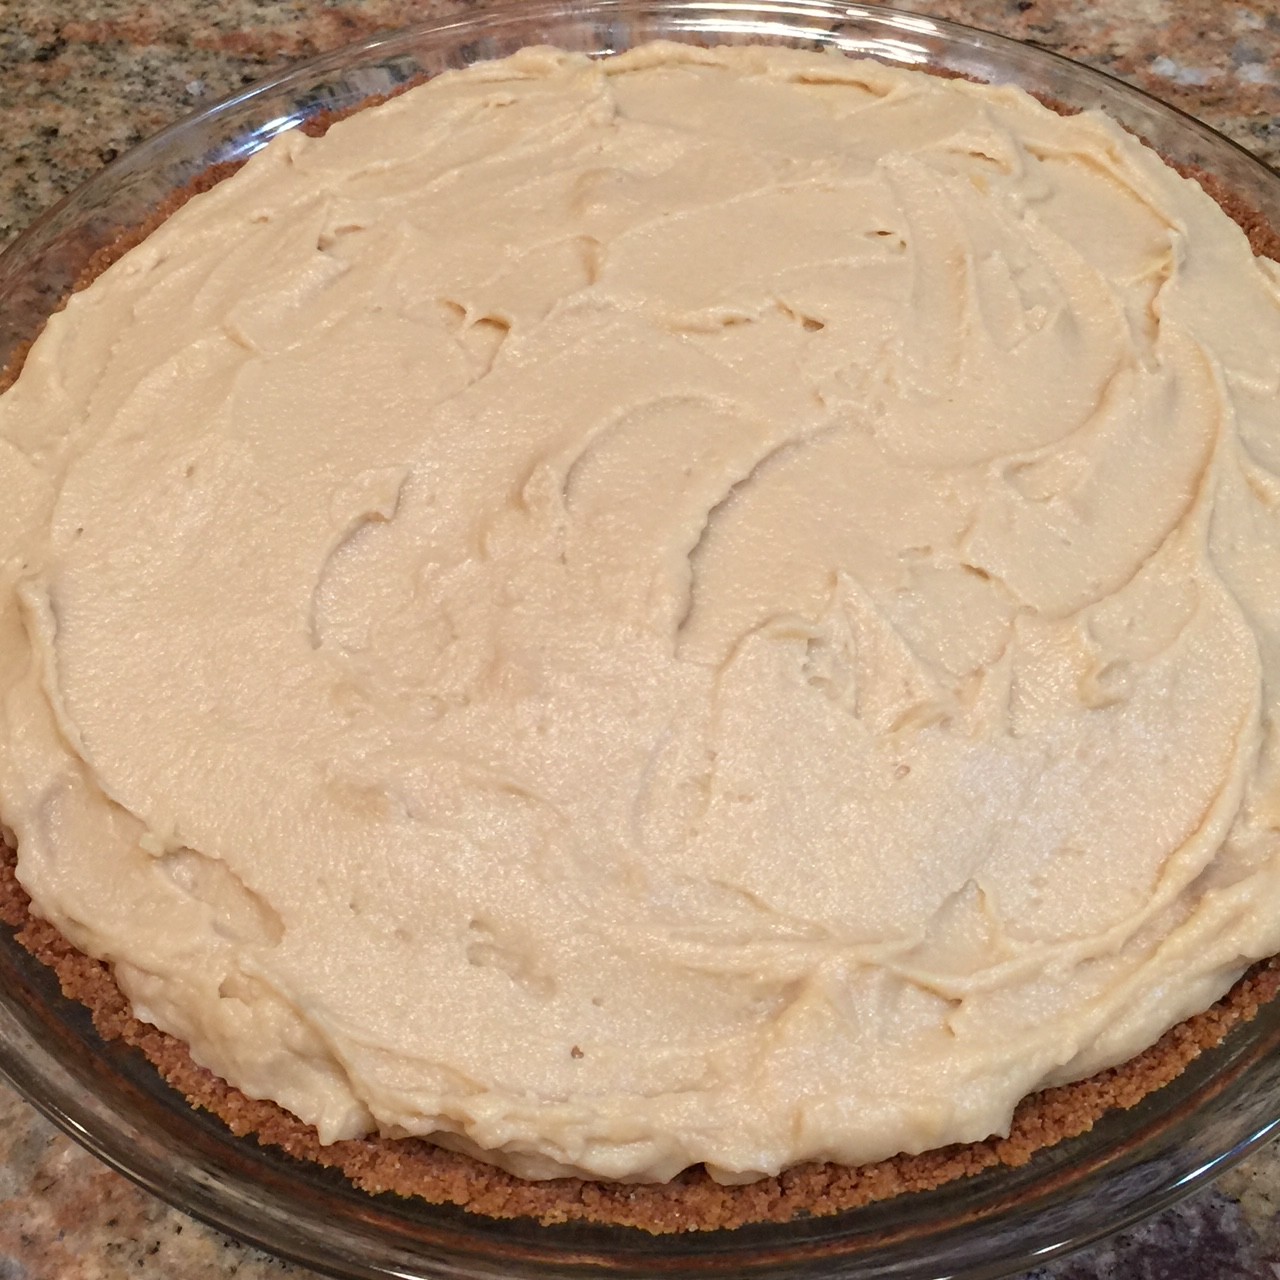
Pour melted chocolate onto graham cracker crust and spread evenly across bottom. Let ganache cool in the fridge at least 20 minutes.
While the ganache is cooling in the fridge, remove the butterscotch pudding from the fridge and stir. It will probably be very thick. (Sometimes there are a few thin shards of hardened butter around the edge. I toss them out – they’re not very nice to eat.)
Once the ganache has cooled and the butterscotch pudding has softened a bit (about 20-30 minutes), pour the pudding on top of the ganache and spread to an even thickness – just do your best. Don’t worry about making it pretty, the whipped cream will cover it. Set pie in the fridge while you whip the cream.
Whipped Cream
205g (3/4 cup) heavy cream, cold
14g (3/8 oz) confectioners (icing) sugar
Remove the bowl and beaters from the fridge and set up mixer. Then pour the cold cream into the bowl and sift in the sugar to remove any lumps. Turn mixer on high and beat until stiff peaks form. Pour whipped cream onto the pie, spreading to cover the butterscotch pudding.
While looking through my manilla file folder of recipes (yes, I still have one from days of yore), I came across a magazine clipping for lemon quick bread. Through the years I’d been tempted to try it but, as a fierce chocoholic, I’d always set it aside in favor of….well, chocolate.
Now that we live in a house with a lemon tree, I decided the time had come and made the Lemon Quick Bread. Like most quick breads, it’s fast and easy to prepare. But, more than that, it was absolutely delicious. So tender, yet firm!
NOTE: The recipe called for brushing a syrup made with a lemon juice and sugar onto the baked bread. But, for those who prefer a more powerful lemony punch, I’m adding an alternate choice of a pucker-inducing lemon icing that can be either piped or smoothed on top of the syrup.
ADDITIONAL NOTE: You can use either a glass or metal loaf pan. I’ve found the metal pan cooks the loaf faster and produces less of a crack on top.
LEMON QUICK BREAD – makes 1 standard loaf
195g (1.5 cups) plain or all-purpose flour
1 tsp baking powder
3/4 tsp salt
99g (1/2 cup) vegetable oil
212g (1 cup) granulated sugar
2 eggs
3g (1 tbsp, packed) lemon zest
125g (1/2 cup) milk (any kind – I use 2%)
45g (1/2 cup) walnuts, chopped and lightly toasted
36g (3 tbsp) lemon juice
25g (2 tbsp) granulated sugar
Optional lemon icing:
125g (1 cup) icing or powdered super – no need to sift
22g (1.5 tbsp) lemon juice
Preheat oven to 180°C / 350°F
Grease sides and bottom of a standard loaf pan. Line the bottom with baking paper – this will make removal of the loaf easier. If you don’t have baking paper, make sure to grease the bottom well.
In a small bowl, mix together the flour, baking powder, and salt. Set aside.
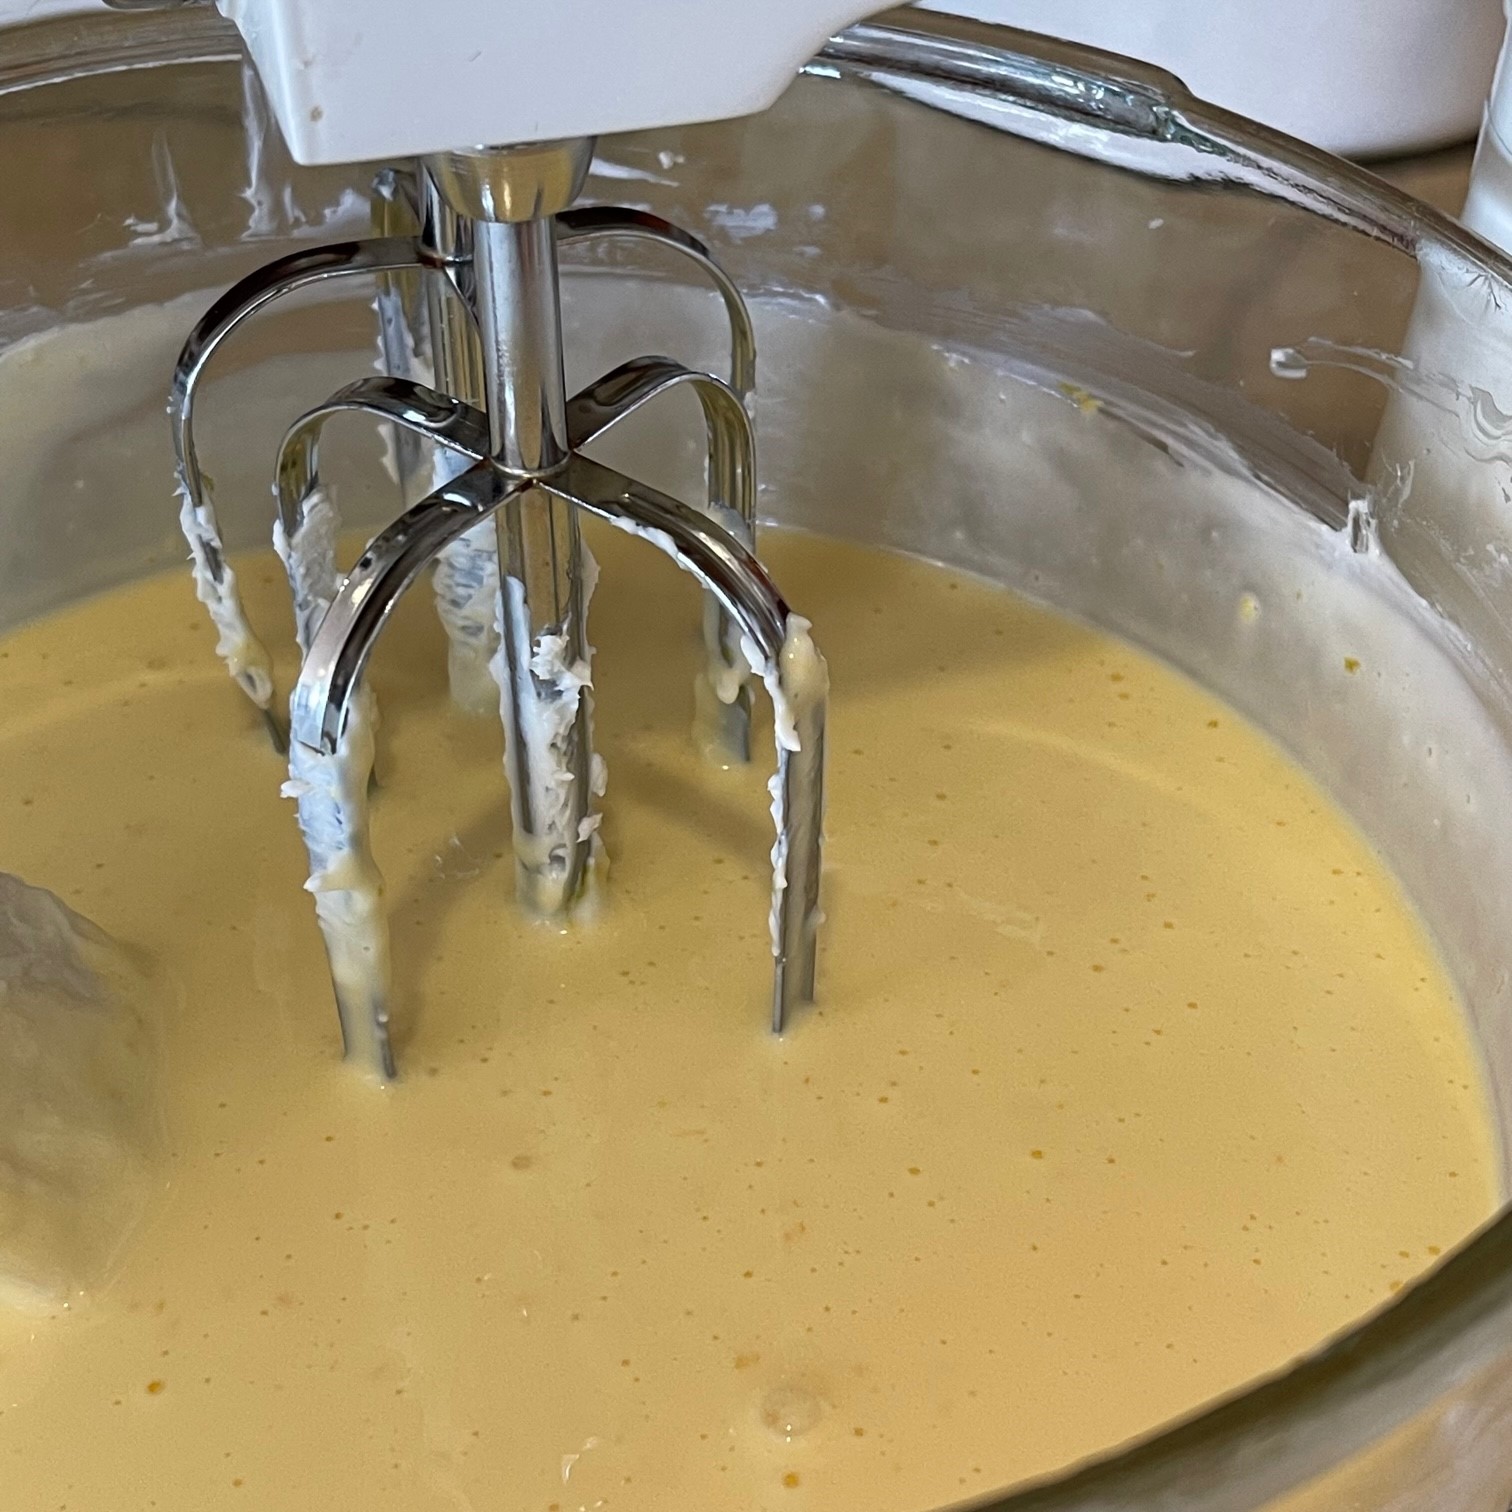
In the bowl of an electric mixer, beat the vegetable oil and 212g (1 cup) sugar on high for 2 minutes.
Add in the eggs and lemon zest. Beat on medium speed to blend well – about a minutes or so.
Add in the flour mix and beat on low until flour is almost all incorporated. Then add in milk on low speed until milk is just incorporated – you don’t want to overmix, Finally, stir in nuts.
Pour into prepared loaf pan.
Bake at 180°C / 350°F for about 50-60 minutes. The crack along the top, which always forms on my loaves, should NOT be liquidy – bake until it firms up (54 minutes in my oven).
Prepare the syrup while loaf is baking: in a small pot, add the 36g (3 tbsp) lemon juice and 25g (2 tbsp) sugar. Over medium heat, bring to boil to melt the sugar. Remove from heat and set aside.
When loaf is done, remove from oven. Remember to touch the crack – if it’s still wet, cook a bit longer.
While still in the tin, poke the top all over with a skewer, going down about halfway. Brush on (or drizzle) the lemon syrup – use it all. Let set 10 minutes.
Run a rounded tipped (so as not to scratch your tin) knife around the edges, then flip to remove from tin. Remove the baking paper.
Set right-side up on a wire rack to cool completely.
OPTIONAL LEMON ICING
When ready to ice loaf, prepare the icing.
Into a small bowl combine the 125g (1 cup) icing (powdered) sugar and 22g (1.5 tbsp) lemon juice. Smash all the lumps from the sugar.
You can either ice the top entirely or pipe. If too thick to pipe easily, add a tiny more lemon juice, if too thin, add more sugar.
My first face-to-face encounter with Millionaire Shortbread was a big disappointment. I’d heard about it on America’s Test Kitchen and thought it sounded amazing. Shortbread, caramel, and chocolate: what’s not to love? So, as a committed food blogger (what I won’t do for my readers!), I used ATK’s recipe and made a batch. With great anticipation, I took my first bite. The chocolate topping was too hard, causing the too soft caramel to ooze out. The cookie ended up kind of falling apart, although it tasted okay. I couldn’t figure out the big fuss over Millionaire Shortbread. UNTIL…..
The Great British Bake-Off had a Millionaire Shortbread challenge. Some of the bakes looked amazing and without the problems I encountered with the chocolate topping and the caramel. So, I went on another food quest to perfect the recipe. (For some reason, my quests are nearly always desserts.)
My goals for the perfect (in my opinion) Millionaire Shortbread:
Shortbread: I wanted the shortbread base to be the thickest layer and sturdy enough to hold together while eating the cookie.
Caramel: It should be a little over half the thickness of the shortbread so you can really taste it. It should be soft enough that you can easily bite through it, but not so soft it oozes.
Chocolate topping: The chocolate should be bittersweet to offset the sweetness of the caramel. But the higher the cacao percentage, the harder the chocolate, making the layer crack as you bite through it. So I ended up blending the chocolate bars. This layer should be about 1/3 of the caramel layer.
NOTE #1: I prefer to use a 19cm x 19cm (7.5″ x 7.5″) pan, measured at the inside base, NOT the top. This gives the Millionaire Shortbread the proper (IMO) overall height of the cookie as a whole. You can, also, use a rectangular pan which has close to the same total area: 361cm (56.25″). If you’ve forgotten your geometry, just multiply the length of one short side by the length of one long side to get the area.
NOTE #2: Millionaire Shortbread needs to be made the day before serving so it has plenty of time to set. It keeps for days on the counter and freezes well!
Line the bottom and sides of a 19cm x 19cm (7.5″ x 7.5″) pan (I use a Pyrex glass pan). Lining the pan is NOT mandatory, but it allows you to remove the entire Millionaire Shortbread block at once, thus making the slicing process easier and more attractive.
Shortbread
294g (2.5 cups) all-purpose flour
99g (1/2 cup) granulated sugar
3/4 tsp table salt
3/4 tsp vanilla
226g (1 cup) butter, melted
In a bowl, mix together the flour, sugar, salt, and vanilla. Pour in the melted butter and blend with a fork, just until the flour is incorporated.
Break up the dough into pieces and scatter them evenly in the baking pan.
With your fingers, press the dough to an even depth. As an added measure, use a flat bottomed surface (such as a glass or offset spatula) to firmly press out the finger marks. Finally, go around the edges to press down the dough that may have risen up at the edge. The entire surface should be as level as possible.
Bake the shortbread in the preheated 177°C (350°F) oven until lightly browned – about 25-30 minutes. Remove from oven, then take an offset spatula or a fork and lightly press down the entire surface to compact the dough – you want the shortbread to be sturdy and not fall apart.
Let shortbread cool while you make the caramel.
Caramel
473g (2 cups) cream
200g (7 oz) light brown sugar
34g (2T) light corn syrup
1/4 tsp salt
1.25 tsp vanilla
Caramel can be daunting, but follow my instructions to the letter, and you should have no problems.
NOTE #1: Plan about 25-30 minutes to be near the stove – caramel needs to be stirred often.
NOTE #2: You’ll need a metal or glass thermometer that can attach to the side of the pan – plastic will soften due to the hot steam.
NOTE #3: As the temperature rises, you’ll notice the number bounces around like a roller coaster. This is normal.
Into a sturdy saucepan, put the cream, brown sugar, corn syrup, and salt. Attach the thermometer so the tip doesn’t touch the bottom of the pan, but is still immersed in the liquid. Turn the flame to med/high and stir. The temperature is going to rise fairly steadily, fluctuating a few degrees up and down, until it gets towards the boiling point of water (100°C / 212°F). The temperature will bounce around here for about 15 minutes. THEN, it will begin to rise to the desired 115°C (239°F).
As the caramel nears the end point, you’ll notice it looks like melted peanut butter. Keep your eye on the temperature because it will happen soon. As soon as you see 115°C (239°F) – even if it lowers again – remove the pan from the heat. Stir in the vanilla.
Pour the hot caramel on the shortbread, spreading it evenly. Let cool about 20 minutes, then make the chocolate topping.
Chocolate Topping
After the caramel layer has cooled about 20 minutes, make the chocolate topping. You want the caramel to still be warm when you pour on the hot chocolate so the two layers stick together.
59g (2 oz) 60% cacao chocolate bar (I use Ghiradelli)
115g (4 oz) 72% cacao chocolate bar (I use Ghiradelli)
Break up the chocolate into small pieces and place in small saucepan. Over medium/low heat, melt chocolate, stirring often.
Once the chocolate is completely melted (no lumps), pour over warm caramel and smooth evenly. Let set several hours on the counter. Then set in fridge for a final set.
Fleur de Sel option
If you want to top the chocolate with fleur de sel, wait until the chocolate is no longer hot or the salt will melt. This can take a couple of hours – set it in the fridge, if you like, but don’t let it harden – the chocolate needs to be semi-soft so the salt will stick.
The next day, remove the Millionaire Shortbread from the fridge and let set on the counter for, at least, an hour. Run a rounded tipped knife between the baking paper and the pan. Then, pick up the block by the baking paper and set it on a cutting board. Carefully peel the paper from the sides and bottom.
I like to slice off the edges so the cut bars have clean sides, but it’s not mandatory. Of course, those removed edges don’t go to waste – everyone clamors for them, just to be sure the Millionaire Shortbread is up to par.
Cut into squares or rectangles using a long NON-serrated knife, pressing straight down with a SLOW rocking motion.
If I’m going to have dessert – and, I AM going to have dessert – it has to be worth the calories. What’s the point in exercising off a dessert I didn’t absolutely love?! So, while I like cheesecake, I rarely eat it since there are so many other choices that I prefer.
That changed recently when I watched an America’s Test Kitchen episode where they featured a lemon cheesecake. It looked so good, I decided I had to make it. And so began the evolution of my Lemon Cheesecake.
As I watched the episode, I copied down the recipe (or so I thought). One of the first steps was to combine 1/4 cup sugar with 1 T lemon zest in a food processor to break down the zest. Did that, no problem. Then, blend this lemon/sugar mixture with an additional 1 cup sugar. Uh oh! For some reason, I forgot to write down that part, so I ended up with a cheesecake batter 1 cup shy of sugar. I did think it strange there was so little sugar called for in the recipe, but waited until I popped the cheesecake in the oven before re-checking the recipe online. The cheesecake had already begun baking by this point so there was nothing to do but carry on and see what happens.
Much to my amazement, the finished cheesecake was delicious even though 80% of the sugar was left out. But that was just the beginning.
The next step came when I decided to make a triple chocolate cheesecake recipe that I found in one of Joanne Fluke’s mysteries. While, as mentioned previously, cheesecake may not be my favorite dessert, chocolate was, especially TRIPLE CHOCOLATE! The thing about the recipe was, besides the obvious cream cheese, it called for 1 cup of mayonnaise! MAYONNAISE???!!!
Well, even though that sounded crazy, the triple chocolate won me over enough to try it. And it was delicious! The mayonnaise lightened up the cheesecake just enough that it held together but wasn’t so thick and stodgy.
I decided to incorporate mayonnaise into ATK’s lemon cheesecake, making a few other changes such as an added egg, using a graham cracker crust, and putting back 48g (1/4 cup) of the 192g (1 cup) sugar that I originally left out. I ended up with a creamy, very lemony Lemon Cheesecake.
NOTE: The cheesecake is baked in a bain marie (water bath). Since you’ll be using a springform pan in which to bake, you’ll need to cover the bottom and sides up to the top rim so the water doesn’t leak into the cheesecake. Springform pans seem very tight, but water can get in. I happen to have a cake pan the does NOT have a false bottom that will contain the springform pan. But if you don’t have one, you can use heavy duty aluminum foil to encase the pan.
ADDITIONAL NOTE: Lemon Cheesecake needs to be made the day before serving. While the actual hands-on work is minimal, there are 7 hours needed for the cake to rest and chill, plus an hour of baking.
LEMON CHEESECAKE
Crust:
163g (1.5 cups) graham crackers
30g (3 T) granulated sugar
77g (5.5 T) butter, melted
Preheat oven to 350°F (177°C).
Crush the graham crackers into fine crumbs using a rolling pin. (Food processors don’t yield an evenly crushed crumb.) Mix the crumbs and sugar in a bowl. Add in the melted butter and blend with a fork.
Pour graham cracker mixture into a 9″ (23 cm) springform pan and spread to sides. Pat with finger tips as evenly as possible to the bottom only (not up the sides). Then, go around crumbs with a flat bottomed, circular object such a a glass or measuring cup. Press firmly, but not so much that you make indentations. The goal is a smooth, firm crust.
Bake in preheated 350°F (177°C) oven, until lightly browned around edges – about 13-15 minutes. Remove from oven and let cool while you prepare the filling.
Lower oven temperature to 325°F (163°C).
Filling:
96g (1/2 cup) granulated sugar
1 T lemon zest, packed (don’t be stingy – this is where the lemon flavor come from)
678g (24 oz) (1.5 lb) cream cheese, softened – use the block packaged cream cheese, NOT the whipped cream cheese in a tub
5 eggs
200g (1 cup) mayonnaise
53g (1/4 cup lemon juice
1/4 tsp salt
2 tsp vanilla extract
Put sugar and the lemon zest in a food processor or blender. Whirl about 30 seconds to break up zest and infuse the sugar, pausing to scrape down the sides and bottom.
Place the softened cream cheese in an electric mixer and beat on low for about 30 seconds to begin the creaming process. (Yes, I know my spatula has seen better days!)
Add the sugar/zest mixture to the bowl, scraping the sides and bottom of the processor to get every last bit. Beat on medium for 3 minutes – don’t shortchange the time.
Add 2 eggs to the bowl and beat on low just to blend.
Add another 2 eggs and beat on low to blend. Then, add the final egg and the mayonnaise, beating on low just to blend. Finally, add in the 53g (1/4 cup) lemon juice, salt, and 2 tsp vanilla, beating on low just to blend.
Make the bain marie: Place the springform pan with cooled crust either in a slightly larger pan (such as a cake pan that doesn’t have a false bottom) or cover the bottom and sides of the springform pan up to the rim with 1 piece of heavy duty aluminum foil (don’t piece the foil together – the seam would be a port of entry for water). The cake pan or foil will deter water from leaking into the cheesecake.
Place these pans in a large roasting pan, then pour the cheesecake batter into the springform pan. Heat water just before boiling and pour it into the large roasting pan (NOT the cake pan!) about 3/4″ (2 cm) deep. Very carefully place into oven, trying your very best not to slosh the water about. Bake at 325°F (163°C). Set your timer for 45 minutes. The cheesecake is done when the center of the cake registers 150°F (66°C) on your thermometer. It probably won’t be quite done at the 45 minute mark, but better to check early just in case. It takes about 50 minutes in my oven.
When the temperature reaches 150°F (66°C), immediately turn off the oven. Leave the cake in the bain marie in the oven. Crack open the oven door with something like a wooden spoon. Let cheesecake set in oven in the bain marie for 1 hour. Set timer!
After the hour in the oven, remove the springform pan from the bain marie and the cake pan or foil. Don’tunlatch the springform pan – the cheesecake still needs to set. Set springform pan on a wire rack on the counter and run a rounded tipped knife around the sides of the cake just to separate it from the pan. Let set for 2 hours.
Make the lemon curd while the cheesecake is baking.
Lemon Curd:
2 eggs
1 yolk
100g (1/2 cup) granulated sugar
65g (1/3 cup) lemon juice
28g (2 T) butter, cold
1 T heavy cream
1/4 tsp vanilla extract
pinch salt
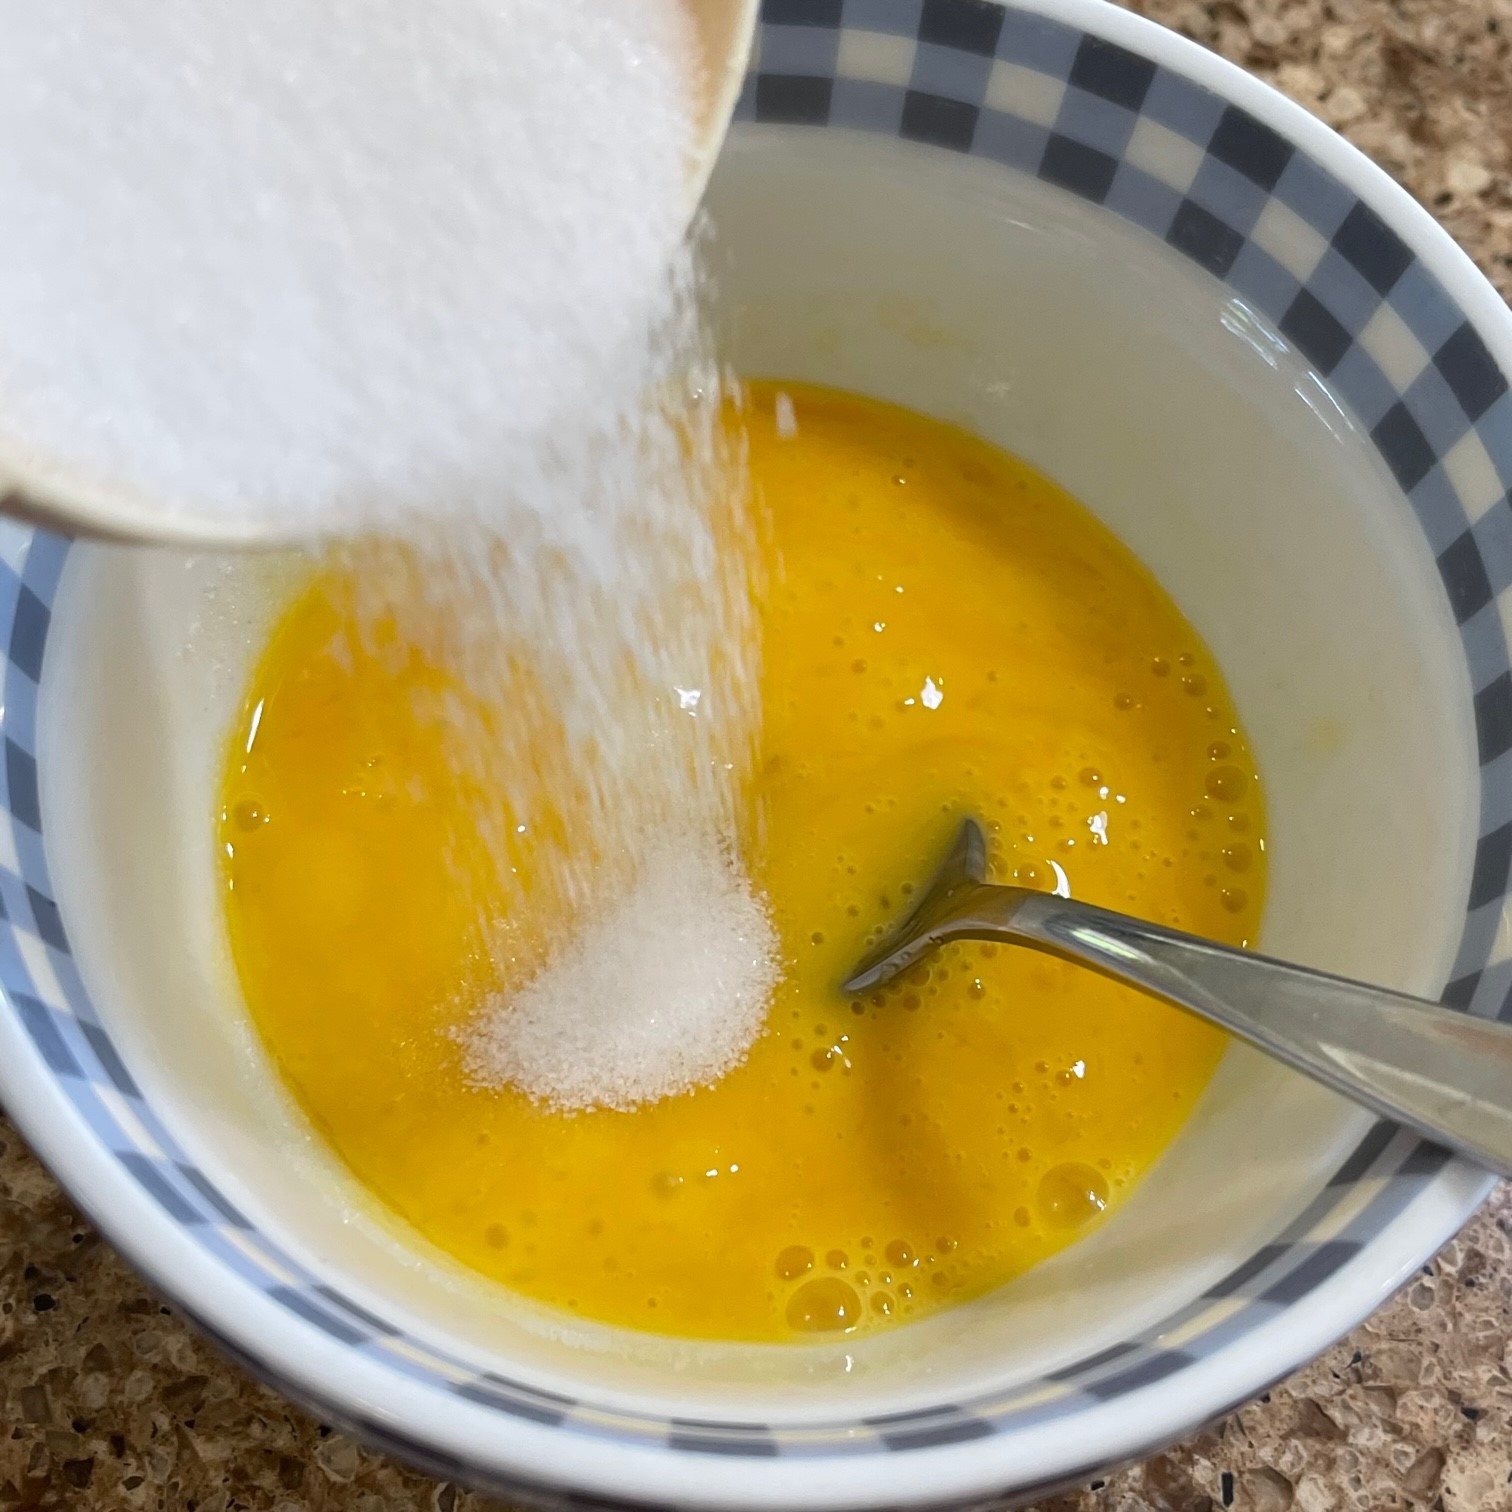
Beat eggs by hand in a bowl. Slowly pour in sugar, as you continuously beat mixture.
In a small pan, heat the lemon juice to a low simmer. Very gradually (you don’t want to cook the eggs) drizzle the lemon juice into eggs, whisking continuously.
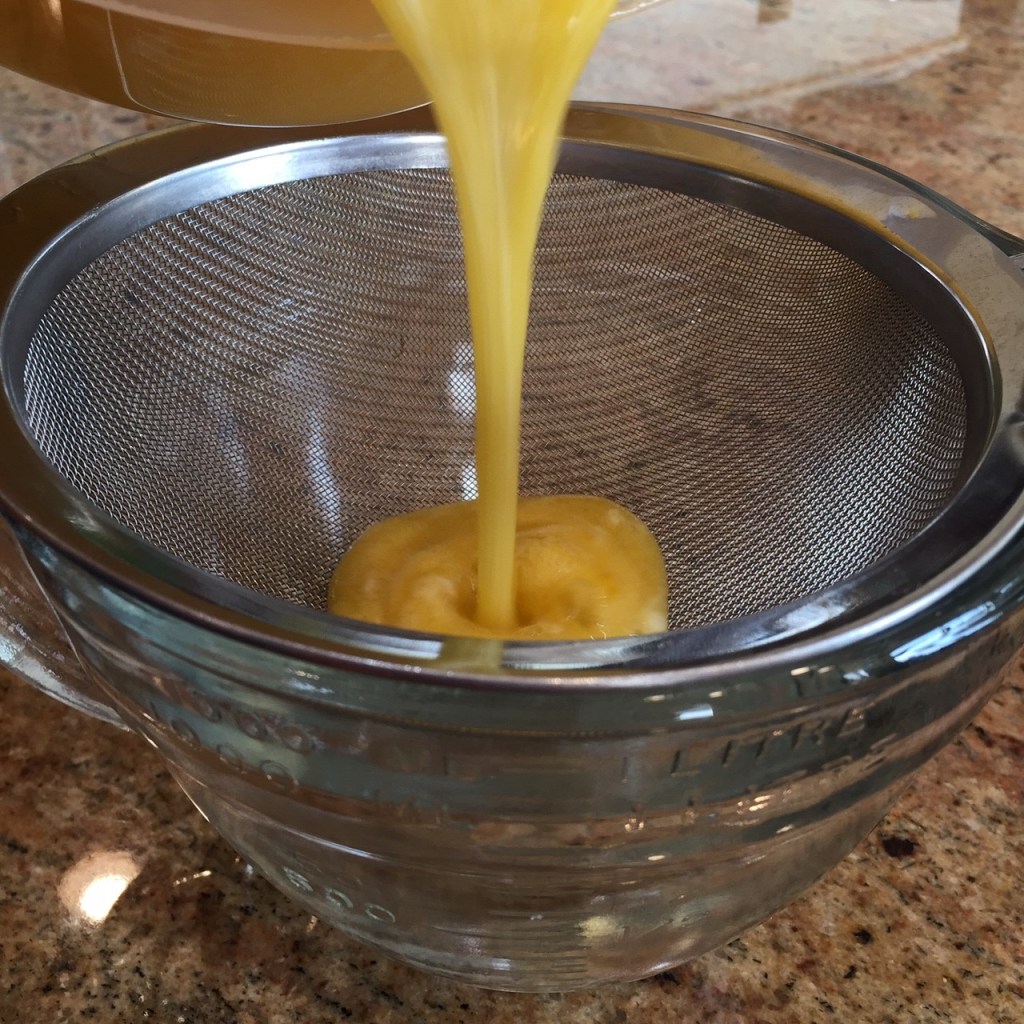
Pour the egg mixture into the now-empty saucepan and cook over medium-low, stirring constantly. At around 160°F (70°C) the mixture will begin to thicken. Continue cooking until the temperature reaches 170°F (77°C). Remove from burner.
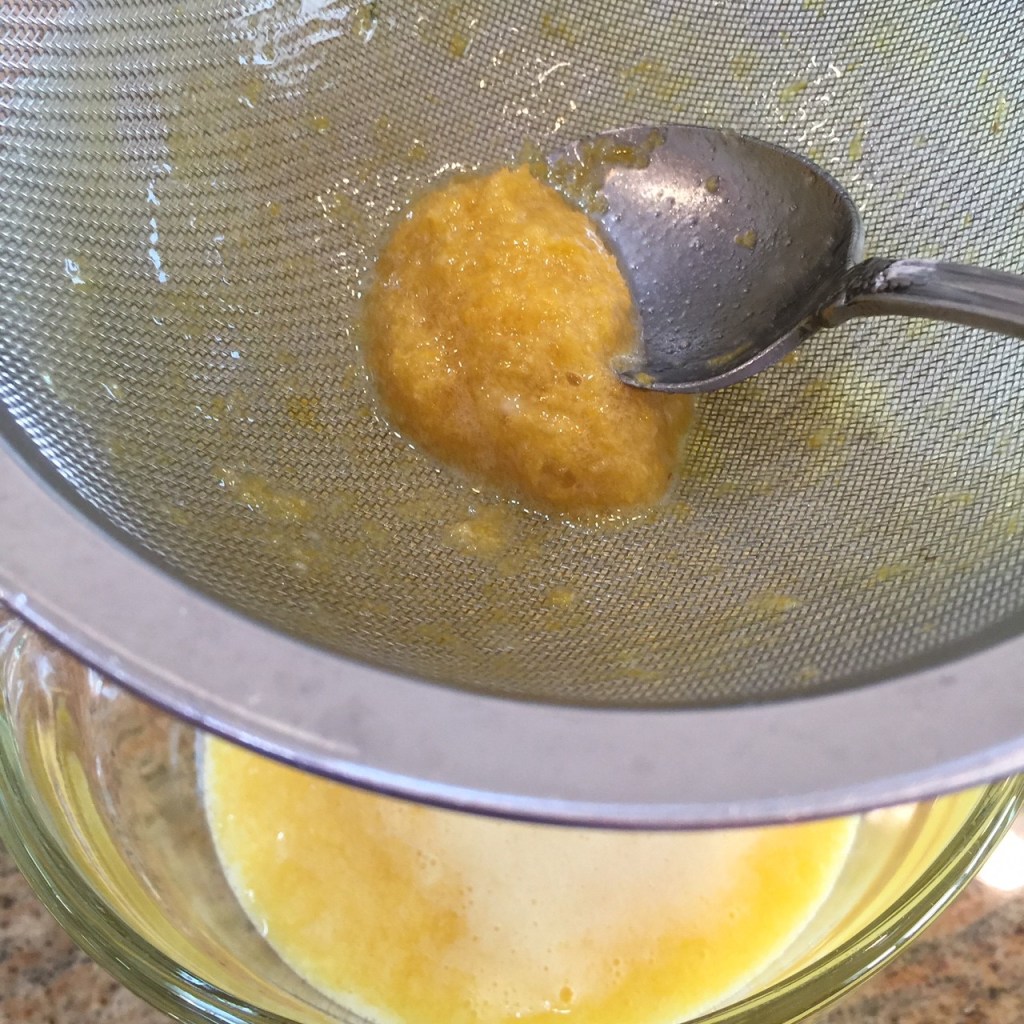
Immediately add the cold butter, cream, 1/4 tsp vanilla extract, and salt. Stir until butter is melted. Pour the curd into a strainer which is set upon a clean bowl (don’t forget the bowl or your curd will go down the sink!). Stir the curd in the strainer with a spoon to help the mixture flow through. Remember to scrape off the curd clinging to the underside of the strainer into the bowl (waste not, want not!).
Discard the bits remaining in the strainer – yuck!
Cover bowl and chill.
Once cheesecake has rested for 2 hours, pour curd on top, spreading to edges.
With the latch still locked on the springform pan, chill in fridge at least 4 hours. Release the spring on pan and remove the sides.
Run a long knife under the crust to release it. Carefully, slide the cheesecake onto a serving plate.
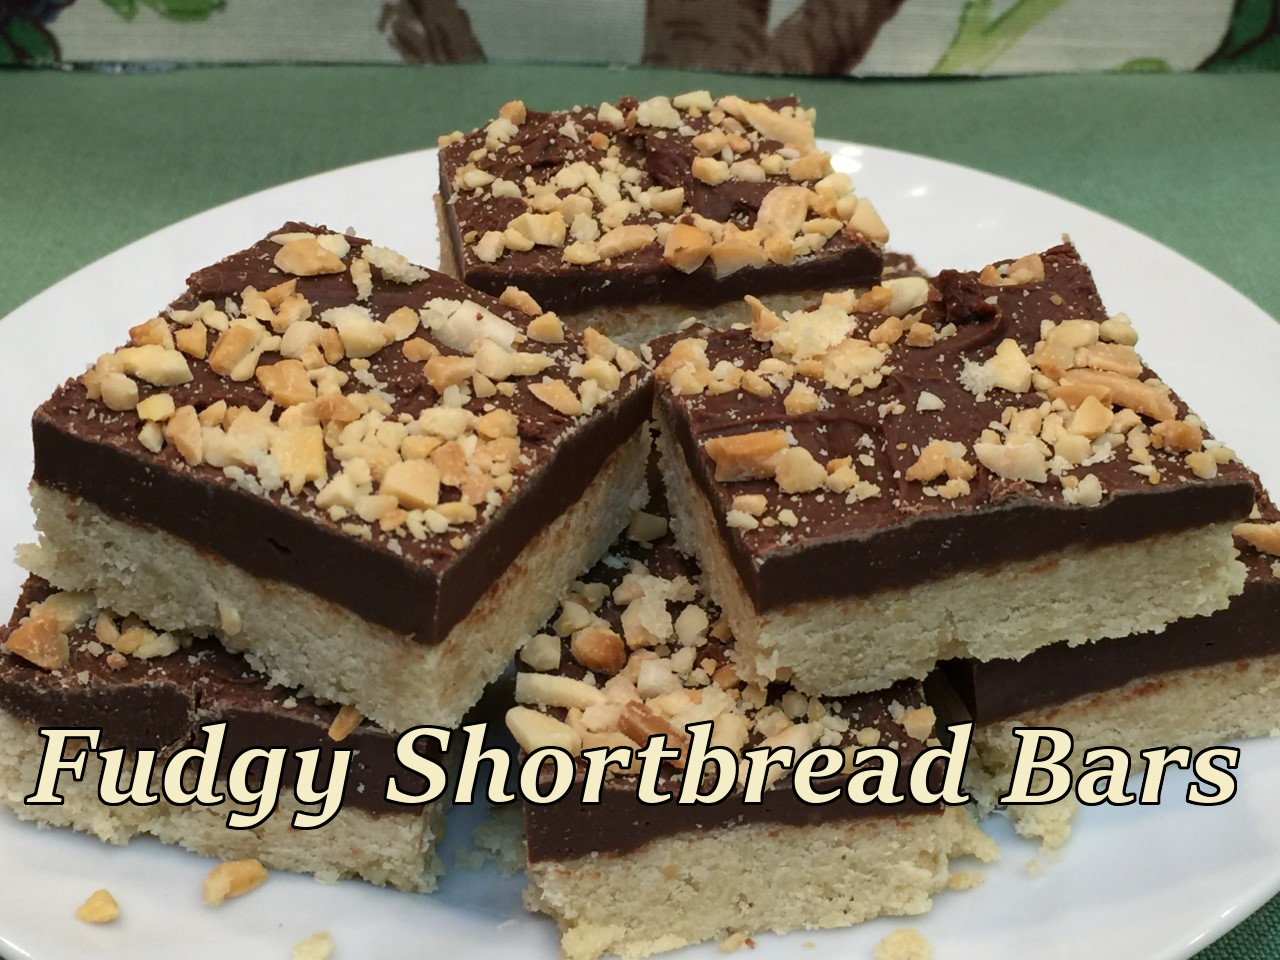
As you might imagine, between the Great British Bake-Off, America’s Test Kitchen, and the internet, there is no shortage of recipes for me to try. But, every now and then, I pull out my old recipe box (yes, there was a time when we had recipe cards) and thumb through it. I came across a recipe for Fudgy Shortbread Bars and decided to almond it up by altering the plain shortbread to an almond shortbread, adding a drop of almond extract to the fudge, and topping it with toasted almonds.
If you’re a purist, you can leave out all traces of the almonds, exchanging vanilla for the almond extract. Or, use walnuts, pecans, or hazelnuts – it’s up to you.
Note: This recipe can be doubled and made in a 9″x13″ (or 23cm x 33cm) pan.
Queen of Freeze Note: As the self-proclaimed Queen of Freeze, I would be remiss in my duties if I didn’t point out that these bars can be sliced and frozen for future use.
Second Queen of Freeze Note: This recipe calls for half of a can of sweetened condensed milk. The remaining half can be frozen.
190g (150ml) (6.75oz) sweetened condensed milk (this is half a standard can)
1/4 tsp almond extract
Preheat oven to 325°F (163°C)
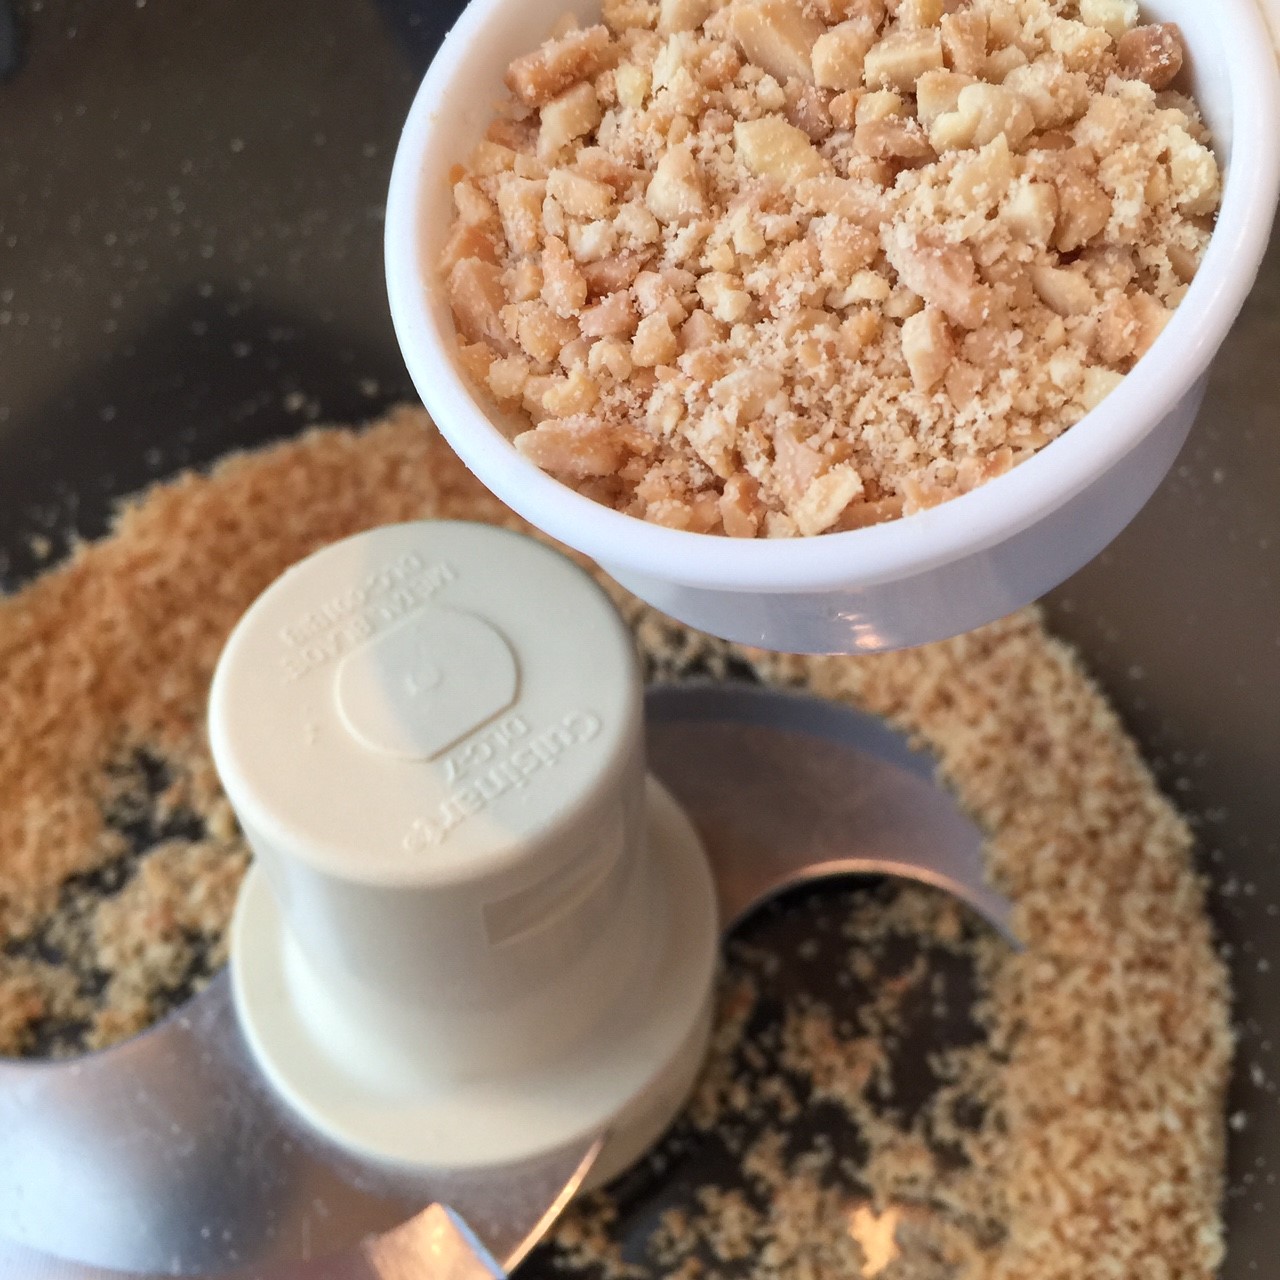
Make the shortbread: Pulse the almonds in the food processor 5-6 times – until they’re coarsely chopped. Remove 30g (1/4 cup) of the pieces and set aside – these will be sprinkled on top of the bars. Pulse remaining almonds to finely chopped.
Cut the butter into at least 12 slices and add to the almonds in the processor, along with the sugar and almond extract. Whirl to blend.
Add the flour to the mixture and pulse until blended, scraping the sides and corners now and then.
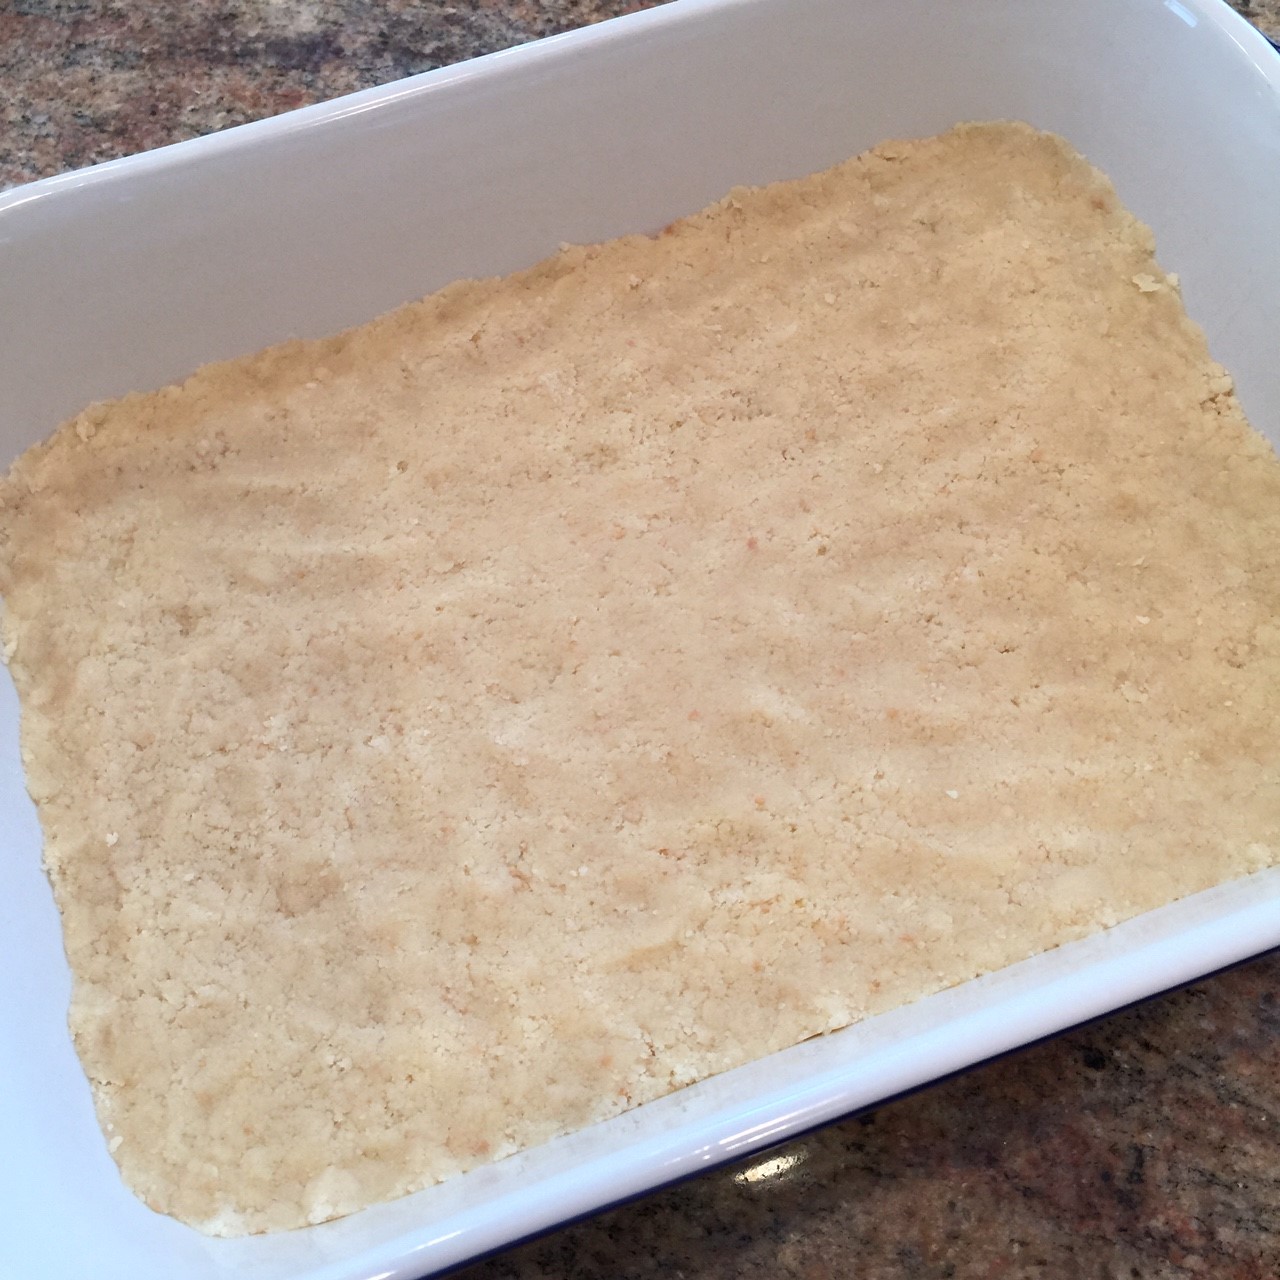
Scatter shortbread dough evenly (do your best) around an approximately 153 square cm (60 square inch) pan- such as a 20cm x 20cm (8″ x 8″). Press down the dough firmly, trying to maintain a level top.
Bake in preheated 325°F (163°C) oven for 25 minutes – until edges are starting to brown. Remove from oven.
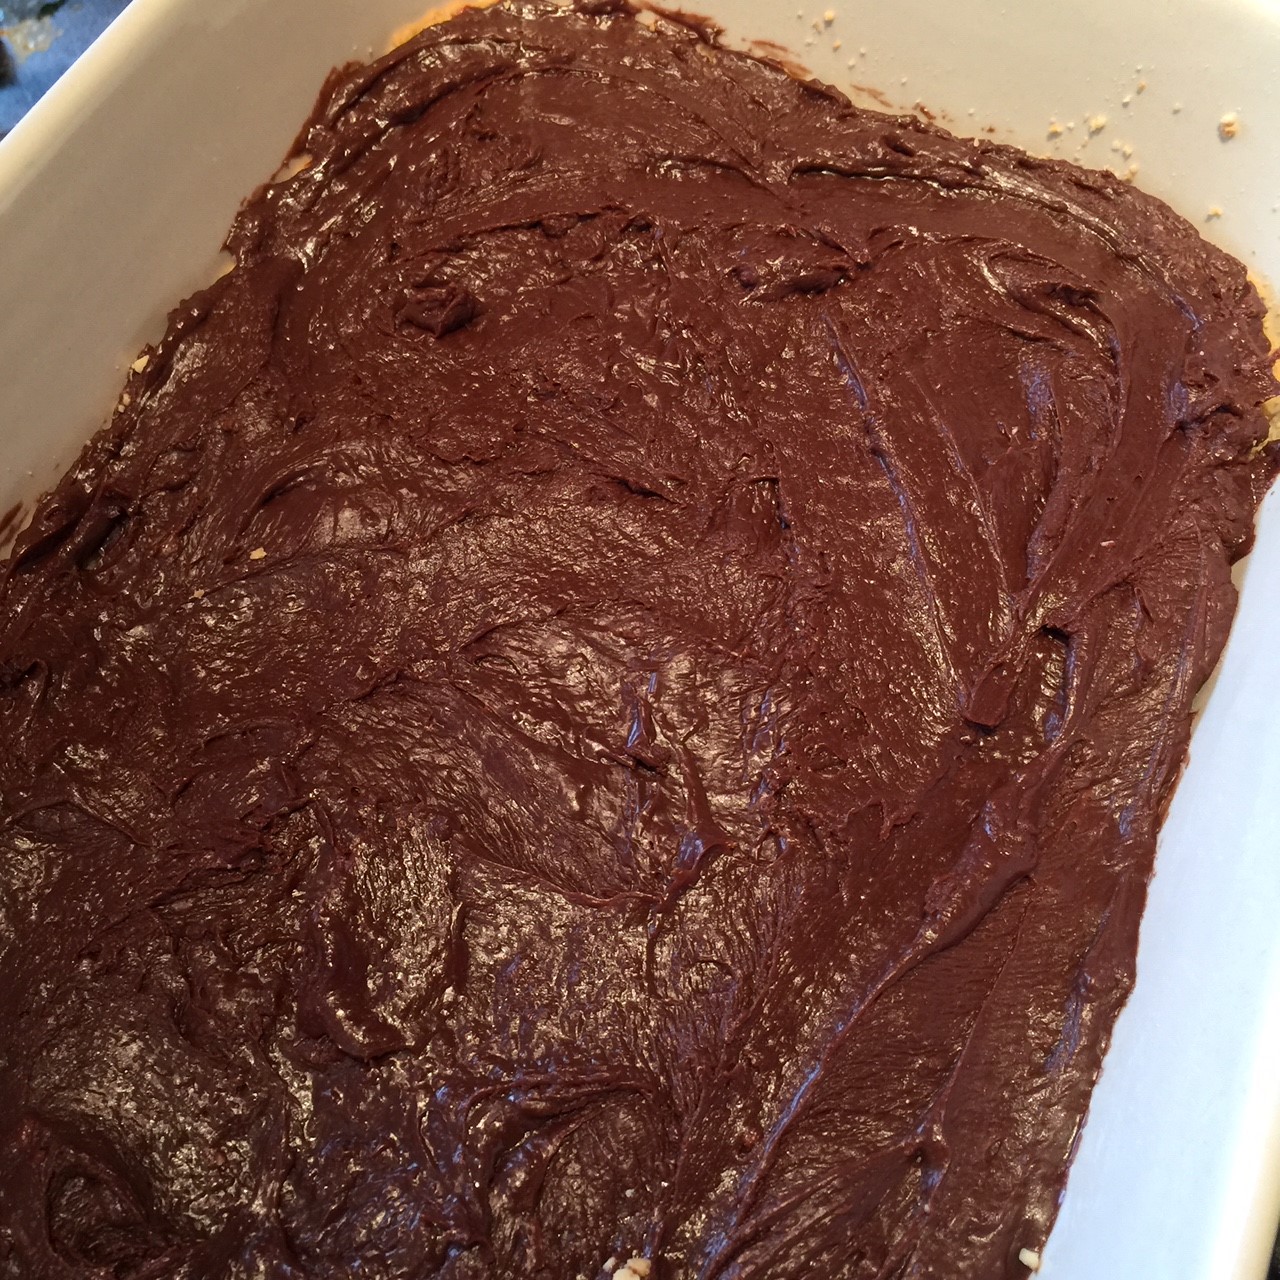
Prepare the topping: In a small saucepan, melt together the chocolate chips and condensed milk over low flame. Once the chips are nearly all melted, remove from heat and stir in the almond extract. Stir off-heat until all chips are completely melted. Pour over hot shortbread, spreading evenly.
Sprinkle on reserved toasted almonds. Lightly press into the fudge so they stick. Let cool, then refrigerate to firm up. They can be stored covered in either the fridge or on the counter.
a crisp crust (but not rock hard) that allows the cookie to be safely held
the cookie should be 1/3 crust and 2/3 filling
the filling should be firm enough that it doesn’t ooze, but not Jello-like
the filling should be tart
no stove-top cooking of the filling – oven bake only
whole eggs only rather than yolks, if possible
Is that too much to ask? It took MANY attempts but, as it turns out – no, it’s not.
As far as the crust goes, the keys were to use granulated sugar (rather than the often used confectioner’s sugar), and melted butter (rather than soft). Also, freezing the patted out dough for 5-10 minutes, followed by docking it (piercing it with a fork) before par-baking, kept the crust flat.
For the filling, remember – tartness comes from the lemon zest. Adding extra lemon juice only dilutes the curd. Pack the zest when measuring – don’t worry about the zest marring the creaminess, you’ll strain it out before baking. When I got down to the best number of eggs, I could either go with 2 whole eggs plus 2 yolks, or 3 whole eggs. Because the fillings were equal in consistency and flavor (although the ones with yolks were yellower), I went with 3 whole eggs since it was easier.
I started my Lemon Bars journey using a glass 8″ x 8″ pan. In my research, someone wrote metal pans lead to a crispier crust. I happened to have a metal 8″ x 8″, so I switched over. Of course, there were other variables I was doing to the dough, so I’m not sure how important the metal vs glass is. Use what you’ve got before buying something new.
The final piece of the Lemon Bar puzzle was removing them from the pan. I had a heck of a time. I watched tons of videos and they always seemed to just pop out – Ina Garten didn’t even use parchment! – so it may just be me. My problem may have been that I didn’t grease the pan before placing the parchment slings, nor did I grease the parchment itself. When I did grease the pan and the parchment, I was able to pry them out.
I, also, concocted a method of using one large piece of parchment to limit leakage (and using slightly less parchment!). I’ve fine-tuned my folding method since I did my last bake. Pictures and instructions of my latest fold method are at the end of this post, following the recipe. If you have a better method, by all means, use that.
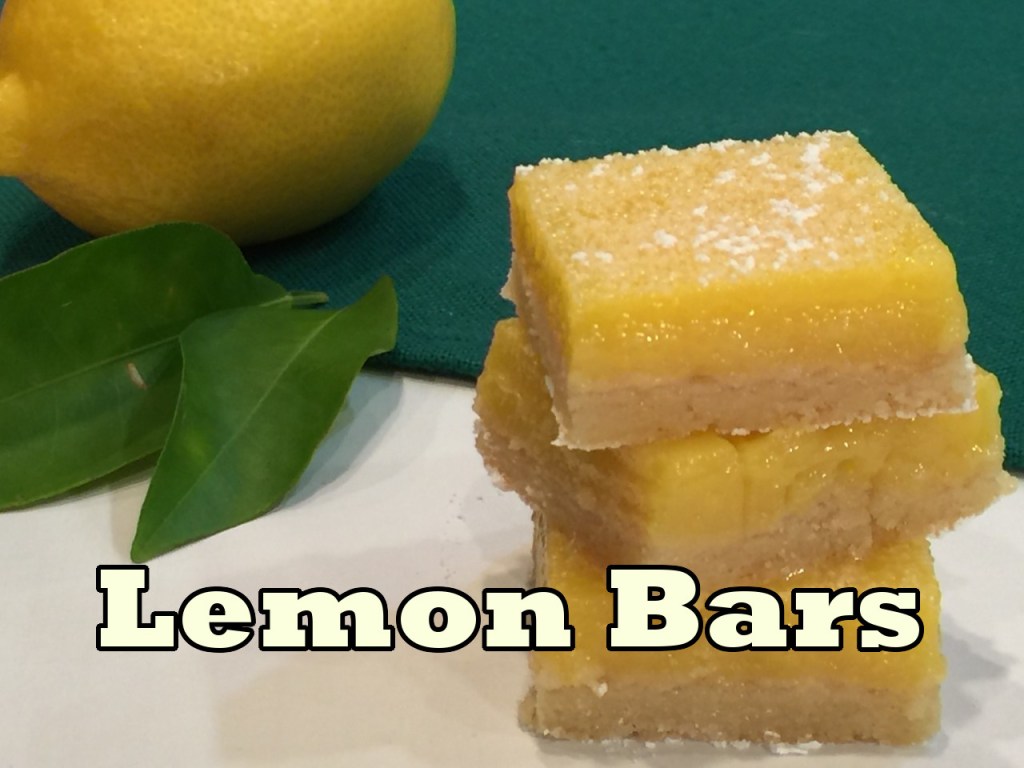
LEMON BARS
Note: I put measurements in grams, cups, and ounces – use what you like.
Crust Ingredients:
115 g (1 cup / 4 oz) all-purpose flour
30g (3 T / 1 oz) granulated sugar
1/8 tsp salt
85 g (6 T / 3 oz) butter, melted
Filling Ingredients:
287 g (1½ cups / 10 oz) granulated sugar
19 g (3 T / ½ oz) all-purpose flour
1/4 tsp salt
1½ T lemon zest – packed (don’t be stingy)
4½ T lemon juice (bottled or fresh)
3 eggs, beaten in a small bowl
1/4 tsp baking powder
confectioner’s sugar for sprinkling
Instructions:
Preheat oven to 350º Fahrenheit / 177º Celsius
Grease an 8″ x 8″ pan (I prefer metal). Line pan with parchment and grease the parchment. You can use the folded 1-sheet insert method (instructions below after the recipe), the 2-sheet sling method in which you have a parchment strip going north-south, and the other going east-west, or any other method you choose.
Start by combining the filling in order to draw out the lemon flavor from the zest: In a bowl, stir together the 287g sugar, 19g flour, 1/4 tsp salt, lemon zest, lemon juice, and beaten eggs. Set aside while you make the crust. The baking powder will be added just before pouring into the crust.
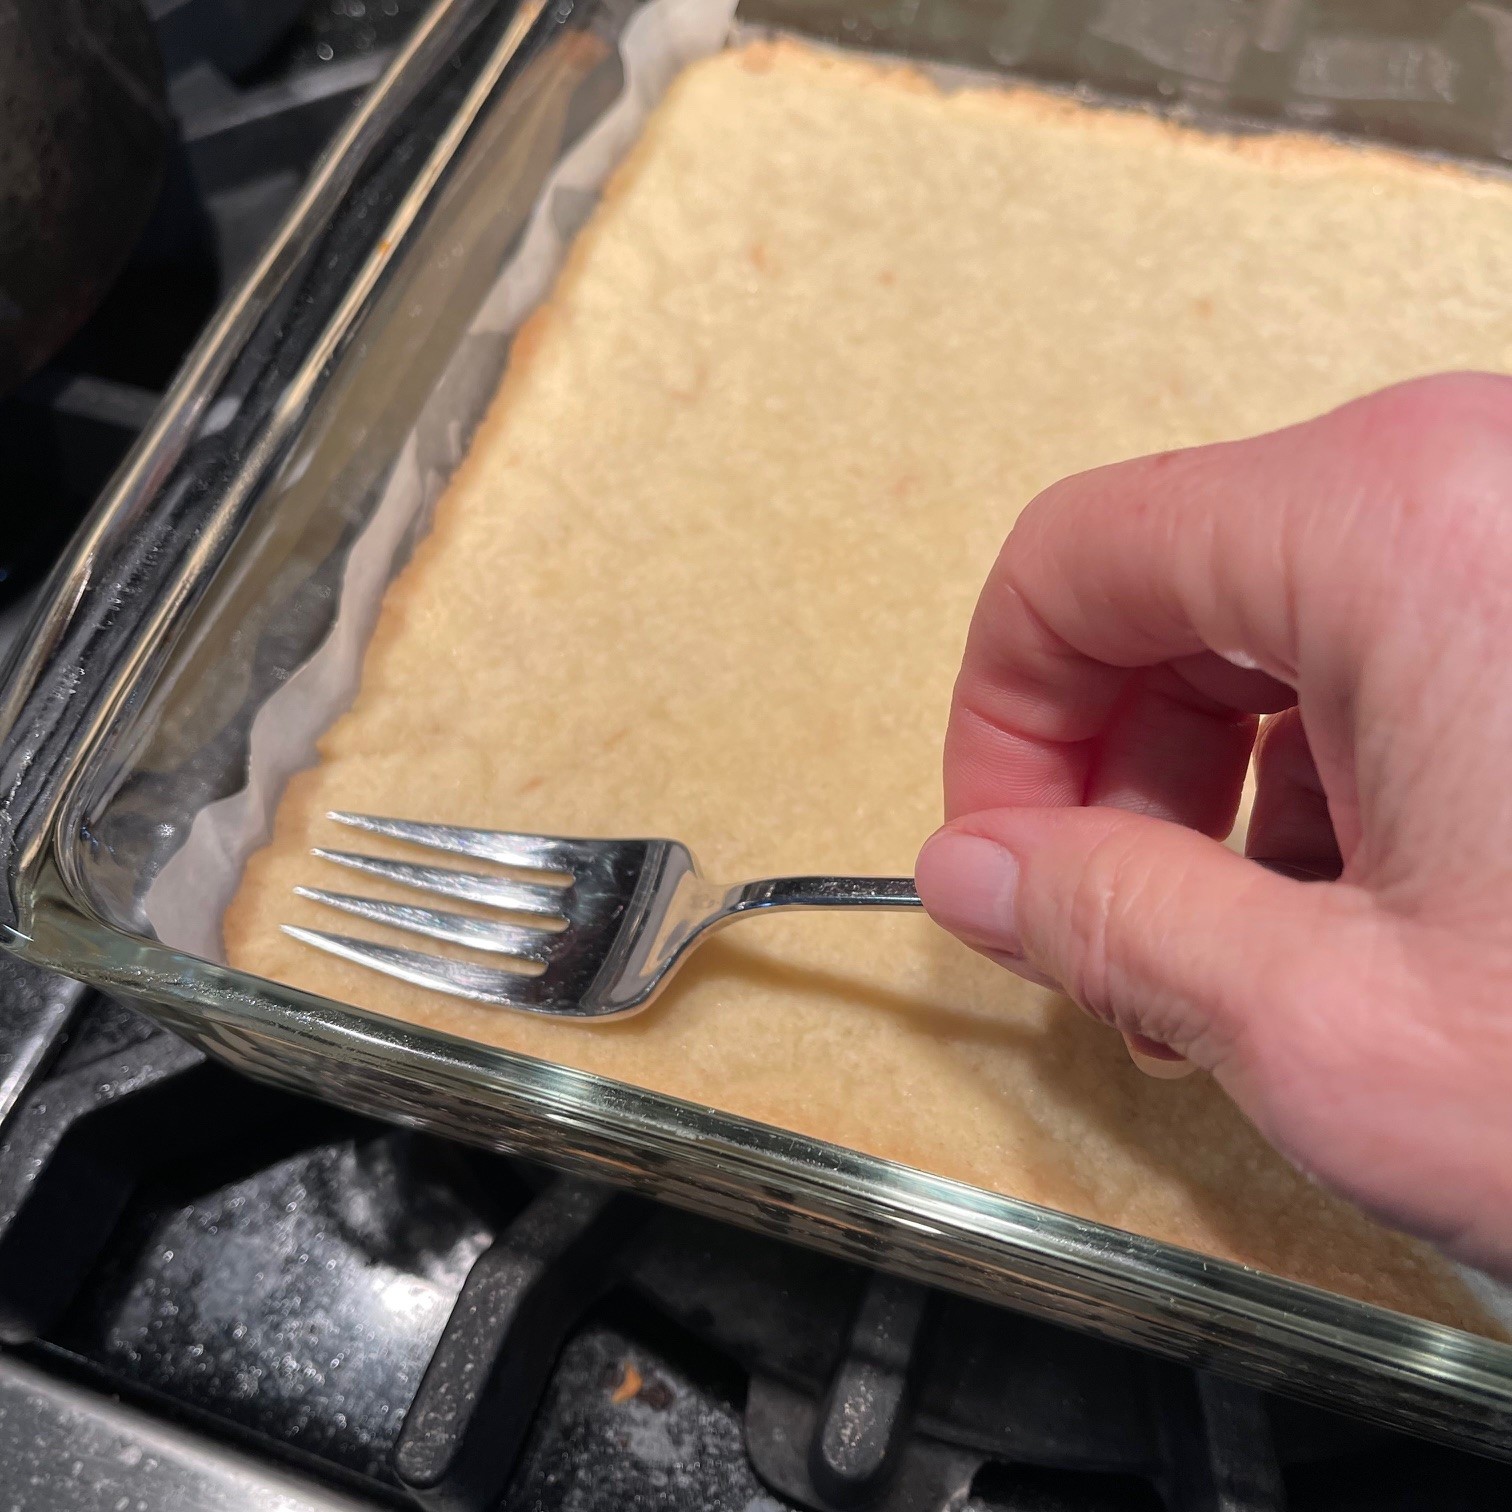
To make the crust, stir together the 115g flour, 30g (3 T) sugar, and 1/8 tsp salt, then pour in the melted butter. Using a fork, stir just until all the flour is incorporated. Sprinkle small clumps of dough evenly over bottom of prepared pan, then press dough to evenly cover bottom. Smooth it as best you can to lessen finger indentations. Freeze 5-10 minutes to firm up.
When oven is heated to 350 F/ 177 C, remove crust from the freezer and liberally dock the crust (pierce it with a fork) to prevent it from rising.
Bake until well-browned – about 19-22 minutes (it needs 21 minutes in my oven). Remove from oven.
When the crust comes out of the oven, stir the baking powder into the filling, then pour through a strainer into a clean container. Stir the filling in the sieve with a spoon to help the filling flow. Don’t forget to scrap off the filling clinging to the underside of the sieve! (Waste not, want not!)
Discard the bits of zest and egg that remain in the sieve. Yuck!
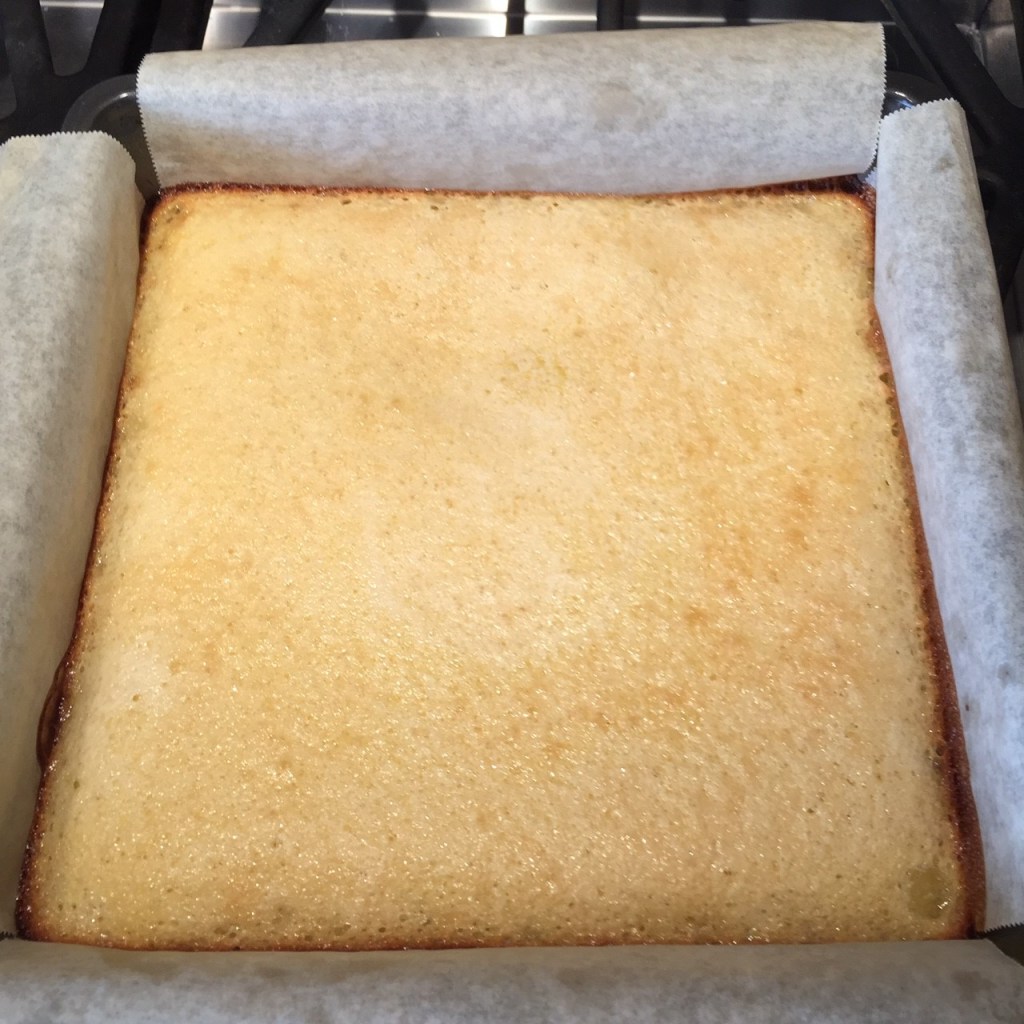
Pour filling onto the hot crust.
Bake at 350 F / 177 C until the very center of filling still has a slight wobble – 19-21 minutes. (Keep an eye out – the filling cooks quickly at the end). Remove from oven and let rest in the pan for 10-15 minutes.
Run a dull knife between the pan and parchment – the filling tends to leak before it solidifies and needs to be gently dislodged. Gently (notice I use this word again – the crust is still very soft and you don’t want to break it), begin to lift up the bars out of the pan. You’ll probably have to work your way around the parchment ears, lifting….gently. Once it breaks free, place the bars on a wire rack, then peel down the sides of the parchment and let cool completely. Yes, the sides look raggety, but you can cut those away later (or not).
Once the bars are completely cool (and I mean completely!), flip them over by sandwiching them between another wire rack or flat plate. Peel away the parchment and flip them back to right side up.
Slide them onto a flat surface and cover (I have a square Tupperware, or you can use the baking pan.) Refrigerate at least 24 hours. (I know that sounds like a long time to wait, but they need that time to come into their own.) Sprinkle liberally with confectioners sugar and slice away the ratty-looking edges (you can still eat them).
For appearances sake, it’s best to slice the bars with a non-serrated long knife, cutting straight down, using a rocking motion when you get down to the crust. Some people wipe the knife clean after each slice, but I’m not that particular.
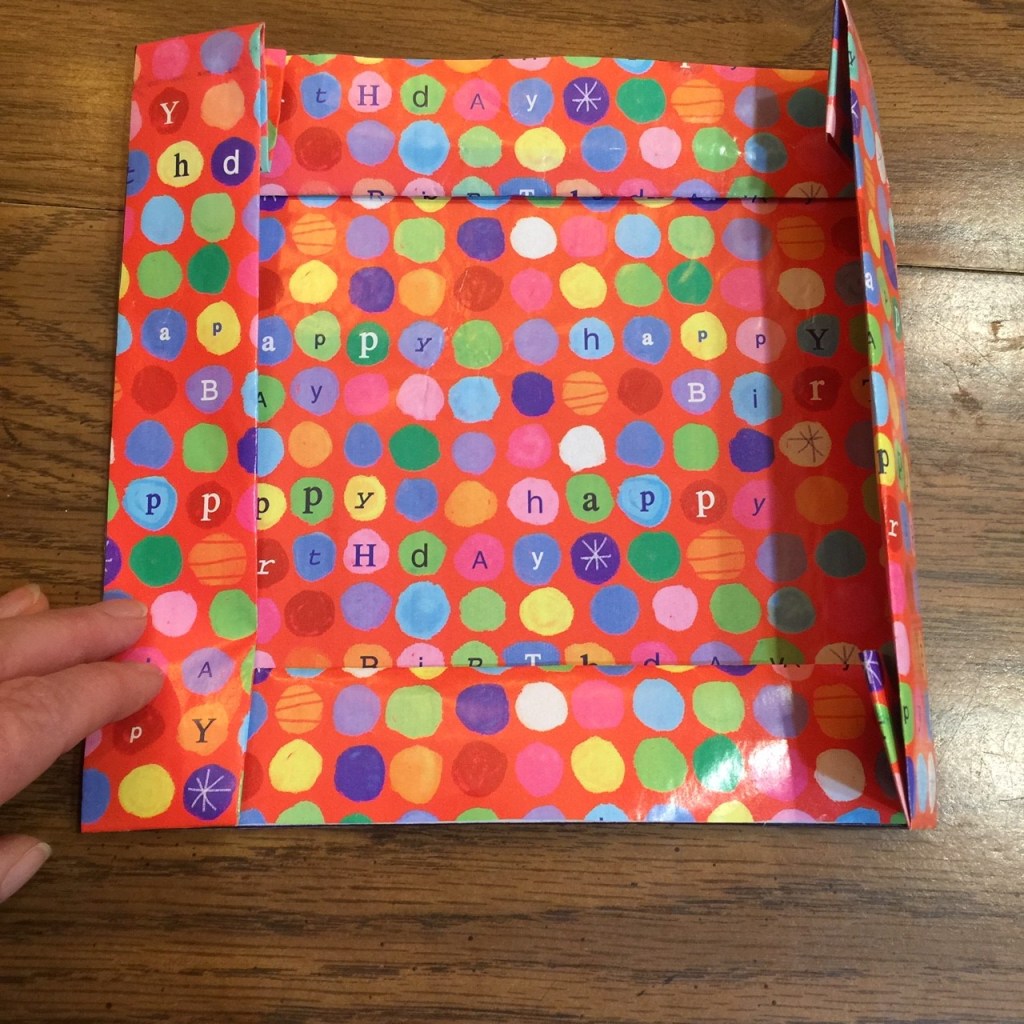
INSTRUCTIONS FOR FOLDING A PARCHMENT INSERT
I’m using wrapping paper for this demonstration so you can see which side of the paper goes where. The final product will look like this:
To line an 8″ x 8″ pan, cut out a 14″ x 14″ square (8″ for the pan, plus 3″ for each border. Draw an 8″ x 8″ square in the center of the paper (you don’t have to write the numbers). This will become the bottom of the insert – you don’t want food touching the pencil or ink marks.
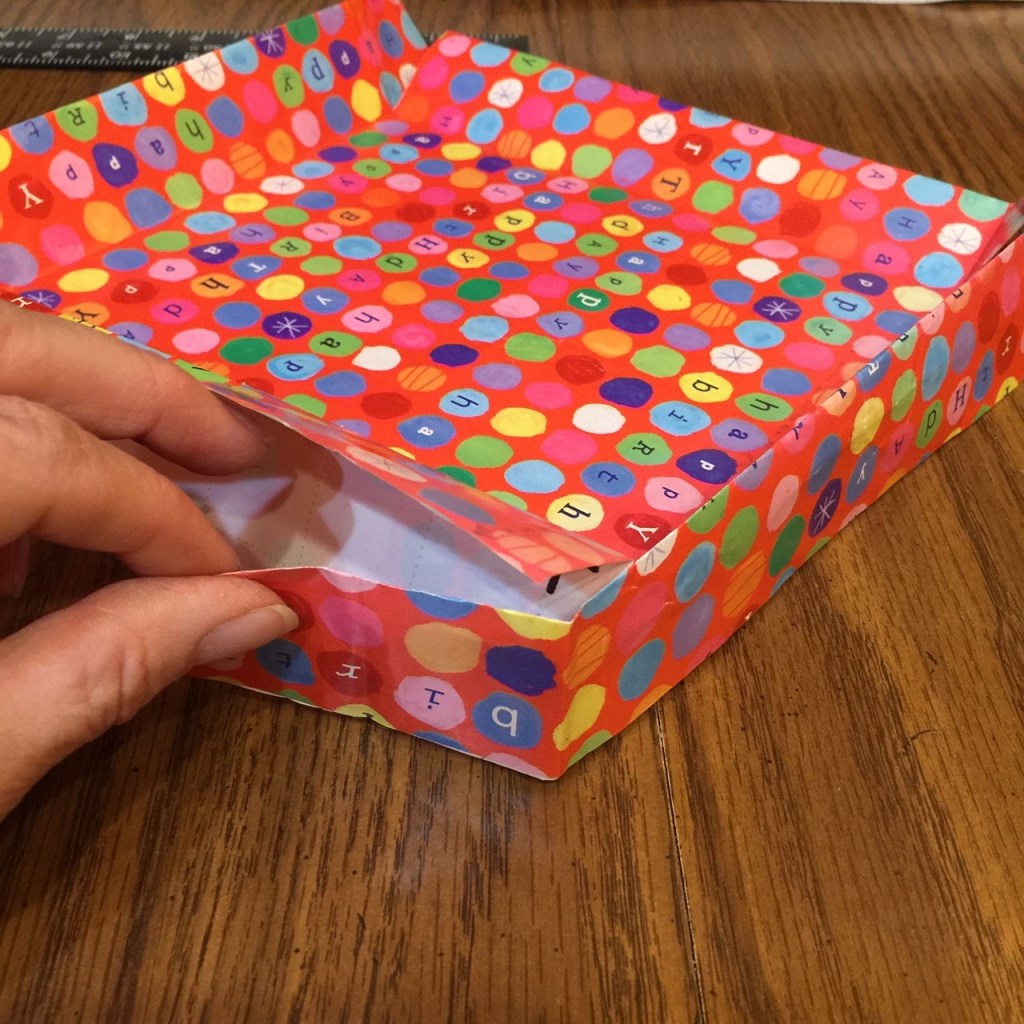
2. Fold each border in so the edge meets the ink mark. This fold will be 1.5″ for an 8″ x 8″ pan. There’s no special order to the folding.
3. Flip the paper and fold in each side border, creasing at the ink line. The side border will be 1.5″ tall, double folded. You will now have an 8″ x 8″ square.
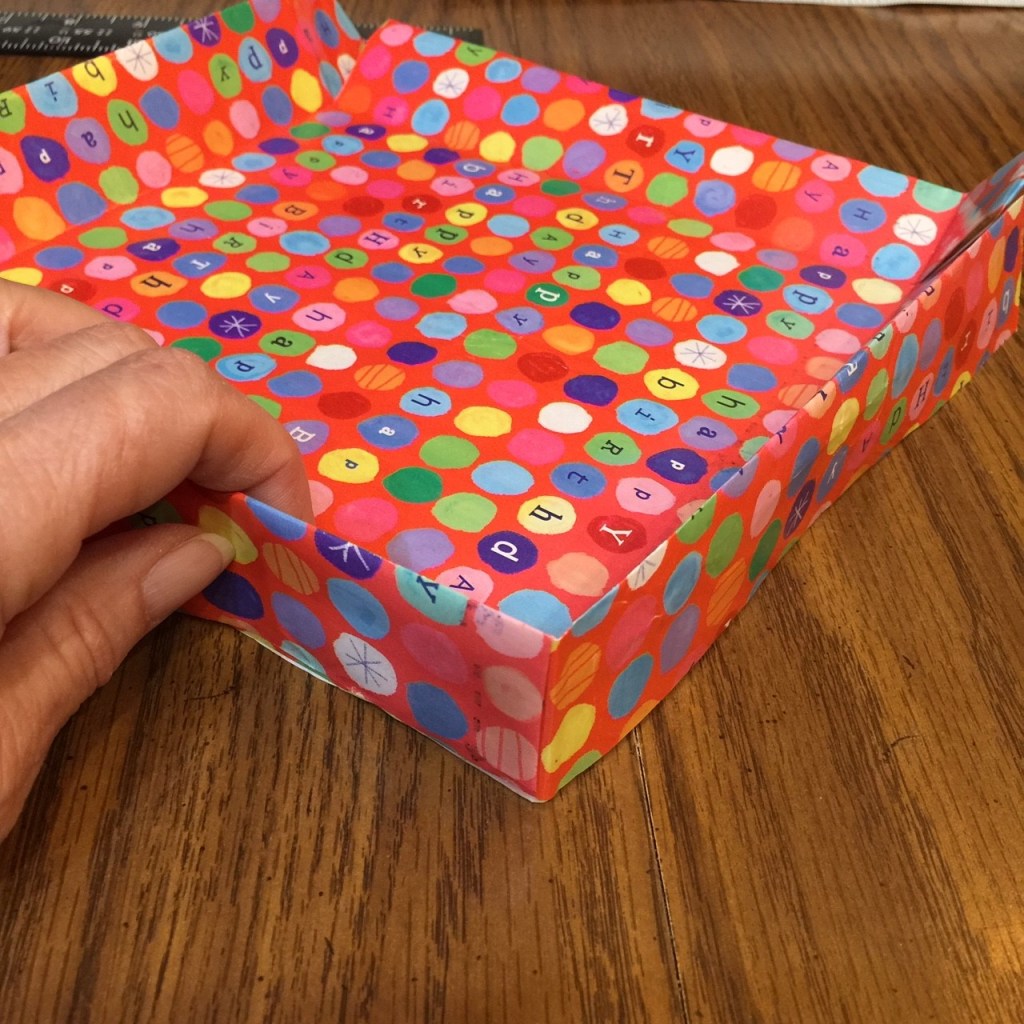
4. Unfold the fold you made in Step 3. In each corner you’ll notice a 1.5″ square created by 2 outside edges and 2 creases. Cut one of the 2 creases in each of the 4 corner squares to the corner point (see the neon green lines in the photo below). It doesn’t matter which of the 2 creases you cut in each square, but only cut 1 crease per square.
5. Unfold the paper from each corner flap.
6. Fold each corner flap underneath the side border next to it.
7. Unfold the side border and nestle the flap inside the side border so it fits snuggly.
Due to my frugal nature (some may say, ‘cheap’), I found myself with an abundance of frozen egg whites. It turns out there are many more recipes that call for an extra egg yoke than an extra egg white. Due to my aforementioned frugal nature, I froze the unused whites rather than throw out perfectly good food.
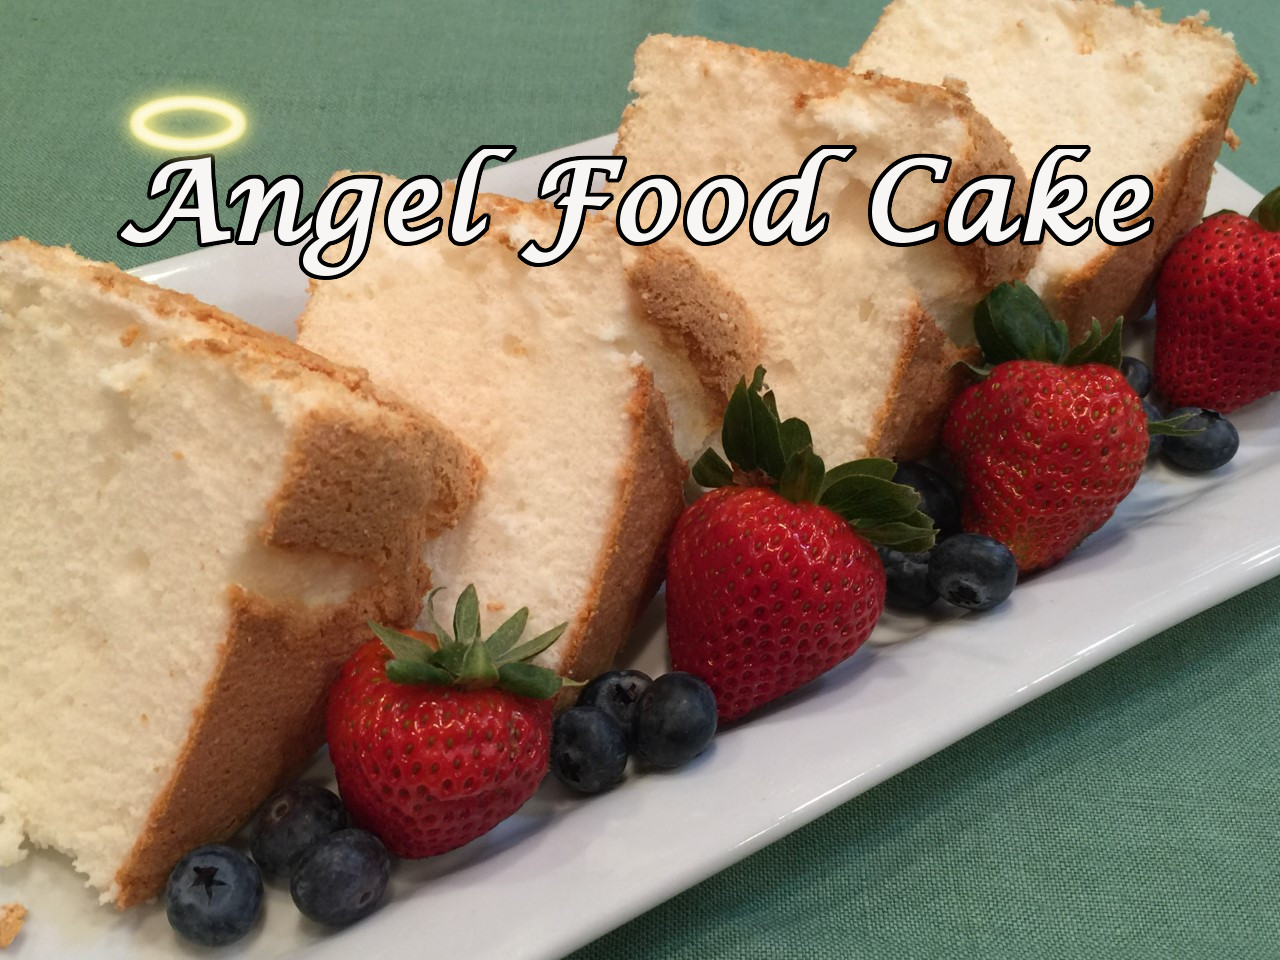
I’d always scoffed at the humble angel food cake – it just seemed so blah. However, I had an America’s Test Kitchen recipe that called for 12 egg whites in their angel food cake. This would make a significant dent in my frozen egg white stockpile, so I made it.
I was stunned at how good it was. A bonus being there are a lot less calories in an angel food cake compared to an equal sized slice of an iced butter cake.
Note: Ideally, you should use an angel food cake pan because it’s tubular, thus providing more surface area for the batter to climb and attach to. Also, it has little legs to allow air to flow underneath as the cake cools. (Angel food cakes are cooled upside down so they don’t collapse.) Use a bundt pan, if you don’t have the proper pan and elevate it.ANGEL FOOD CAKE
3 oz (1 cup) cake flour
10 oz (1½ cups) granulated sugar, divided
1 tsp cream of tartar
1/4 tsp salt
12 egg whites
1½ tsp vanilla
1½ tsp lemon juice
1/2 tsp almond extract
Preheat oven to 325º Fahrenheit.
Make a liner for the cake pan bottom by placing the pan on parchment paper open side up. Run a pencil around the outside of the pan bottom and cut out the circle. Flip the pan so the bottom of the pan is up, and place the cut-out circle on top. Firmly hold the parchment in place and trace the center tube outline with a pencil. Cut out and discard this inner circle. Very lightly grease the BOTTOM ONLY of the cake pan. (Don’t grease the sides – the batter needs to be able to grip it in order to rise.) Line the bottom of the cake pan with the parchment and press it down. The parchment will help the cake release.Into a bowl, sift together the cake flour and 5 oz (3/4 cup) of the sugar. Set aside.
Into another bowl mix together the remaining 5 oz (3/4 cup) sugar, the cream of tartar, and the salt. Set aside.
Into a small bowl, mix together the vanilla, lemon juice, and almond extract. Set aside.
Pour the egg whites into the large bowl of your standing electric mixer. Beat on medium. Large bubbles will form at first, then they’ll decrease in size after about a minute. With the mixer still running on medium, start adding the sugar/cream of tartar mixture to the whites 1 tablespoon at a time. Once all the sugar/tartar has been added, increase mixer speed to high until soft peaks form. Turn off machine, pour in the vanilla mixture, then quickly mix together on low. Here’s where your jaw may drop. If you read other angel food cake recipes, they’ll tell you to FOLD in the flour mixture gently in order not to deflate the meringue. I’m here to tell you that you don’t have to bother. Simply add 3 T of the flour mix to the batter through a sieve, then turn your mixer on the lowest speed for a few seconds to incorporate the flour, running a spatula along the sides and bottom of the bowl. Turn off the mixer, then add another 3 T flour to the batter, turn on the machine to low and mix to incorporate for a few seconds. Continue until all the flour is added and incorporated.
Once all the flour is incorporated, gently pour batter into the cake pan, smoothing top. Rap pan a couple of times on the counter to dislodge any air bubbles (I’m not sure if this is a myth, but it can’t hurt.) Put into the oven and bake about 45-50 minutes – until golden brown and cake springs back when you press it with your finger. Remove from oven and immediately turn upside-down. Let cake remain like this until completely cooled – about 3 hours. When cool, run a dull knife around the sides of the cake (including the tube), making sure you get all the way to the bottom. Flip the cake onto a plate – hopefully, the cake will fall out. (If not, run the knife around again.) Carefully, remove the parchment and let cake sit to completely cool before serving.


 Due to my frugal nature (some may say, ‘cheap’), I found myself with an abundance of frozen egg whites. It turns out there are many more recipes that call for an extra egg yoke than an extra egg white. Due to my aforementioned frugal nature, I froze the unused whites rather than throw out perfectly good food.
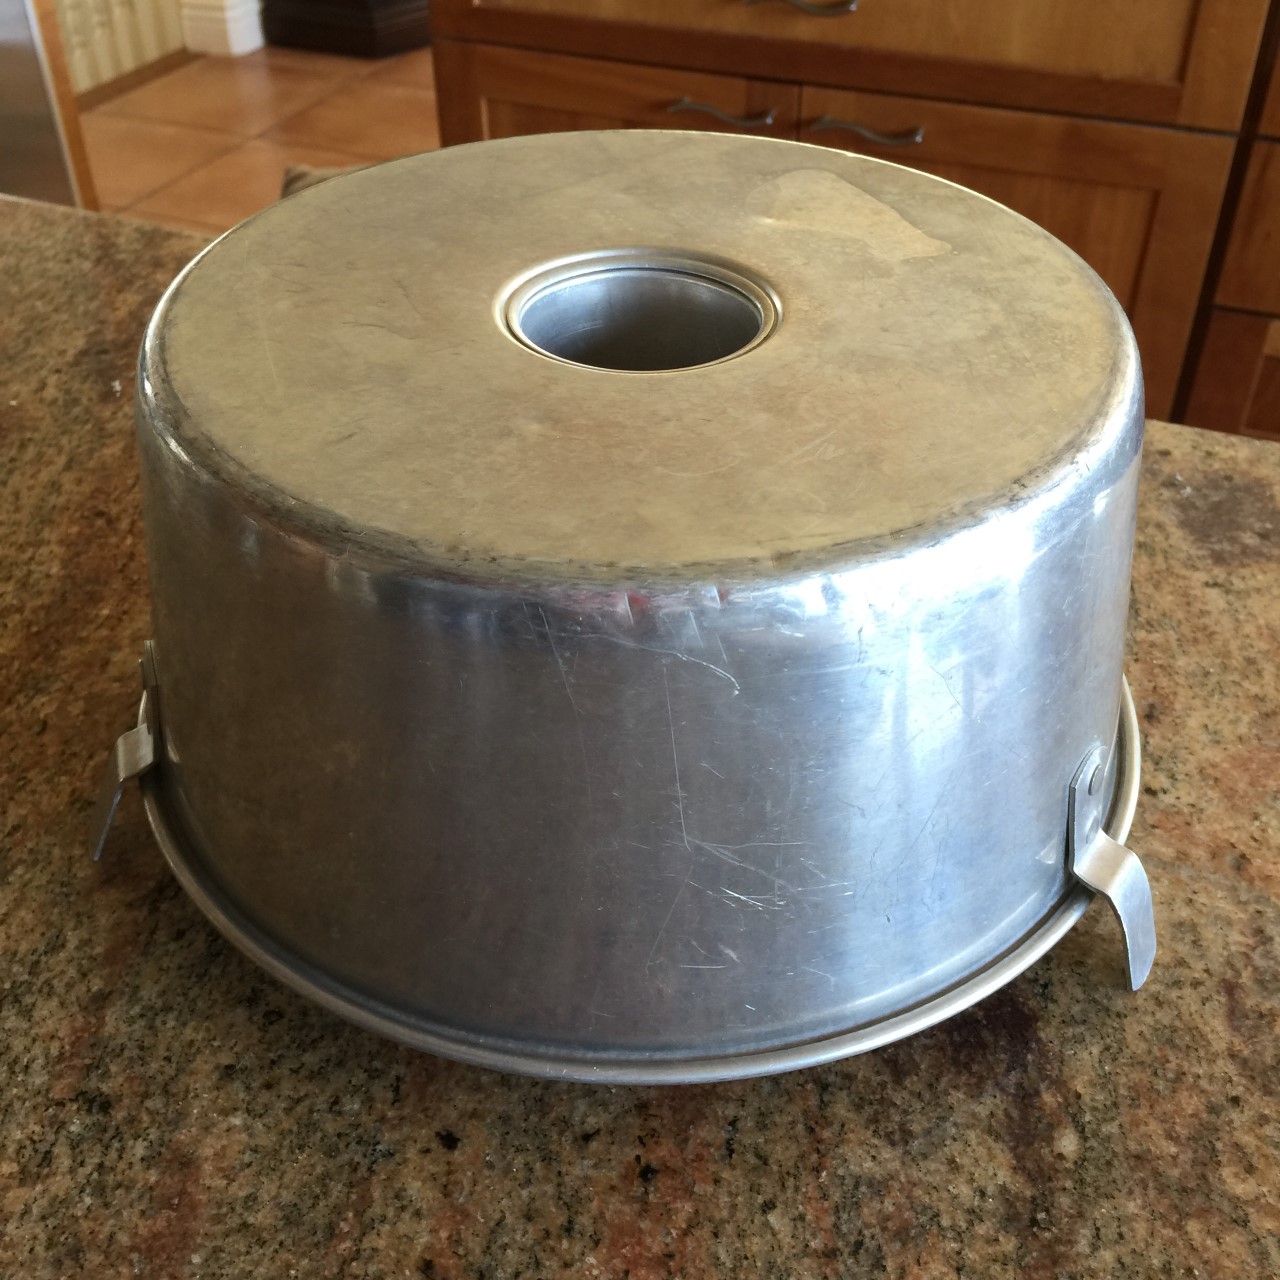
 Into a bowl, sift together the cake flour and 5 oz (3/4 cup) of the sugar. Set aside.
 With the mixer still running on medium, start adding the sugar/cream of tartar mixture to the whites 1 tablespoon at a time.
  Once all the sugar/tartar has been added, increase mixer speed to high until soft peaks form. Turn off machine, pour in the vanilla mixture, then quickly mix together on low.
  Here’s where your jaw may drop. If you read other angel food cake recipes, they’ll tell you to FOLD in the flour mixture gently in order not to deflate the meringue. I’m here to tell you that you don’t have to bother. Simply add 3 T of the flour mix to the batter through a sieve, then turn your mixer on the lowest speed for a few seconds to incorporate the flour, running a spatula along the sides and bottom of the bowl.
 Turn off the mixer, then add another 3 T flour to the batter, turn on the machine to low and mix to incorporate for a few seconds. Continue until all the flour is added and incorporated.
 Put into the oven and bake about 45-50 minutes – until golden brown and cake springs back when you press it with your finger.
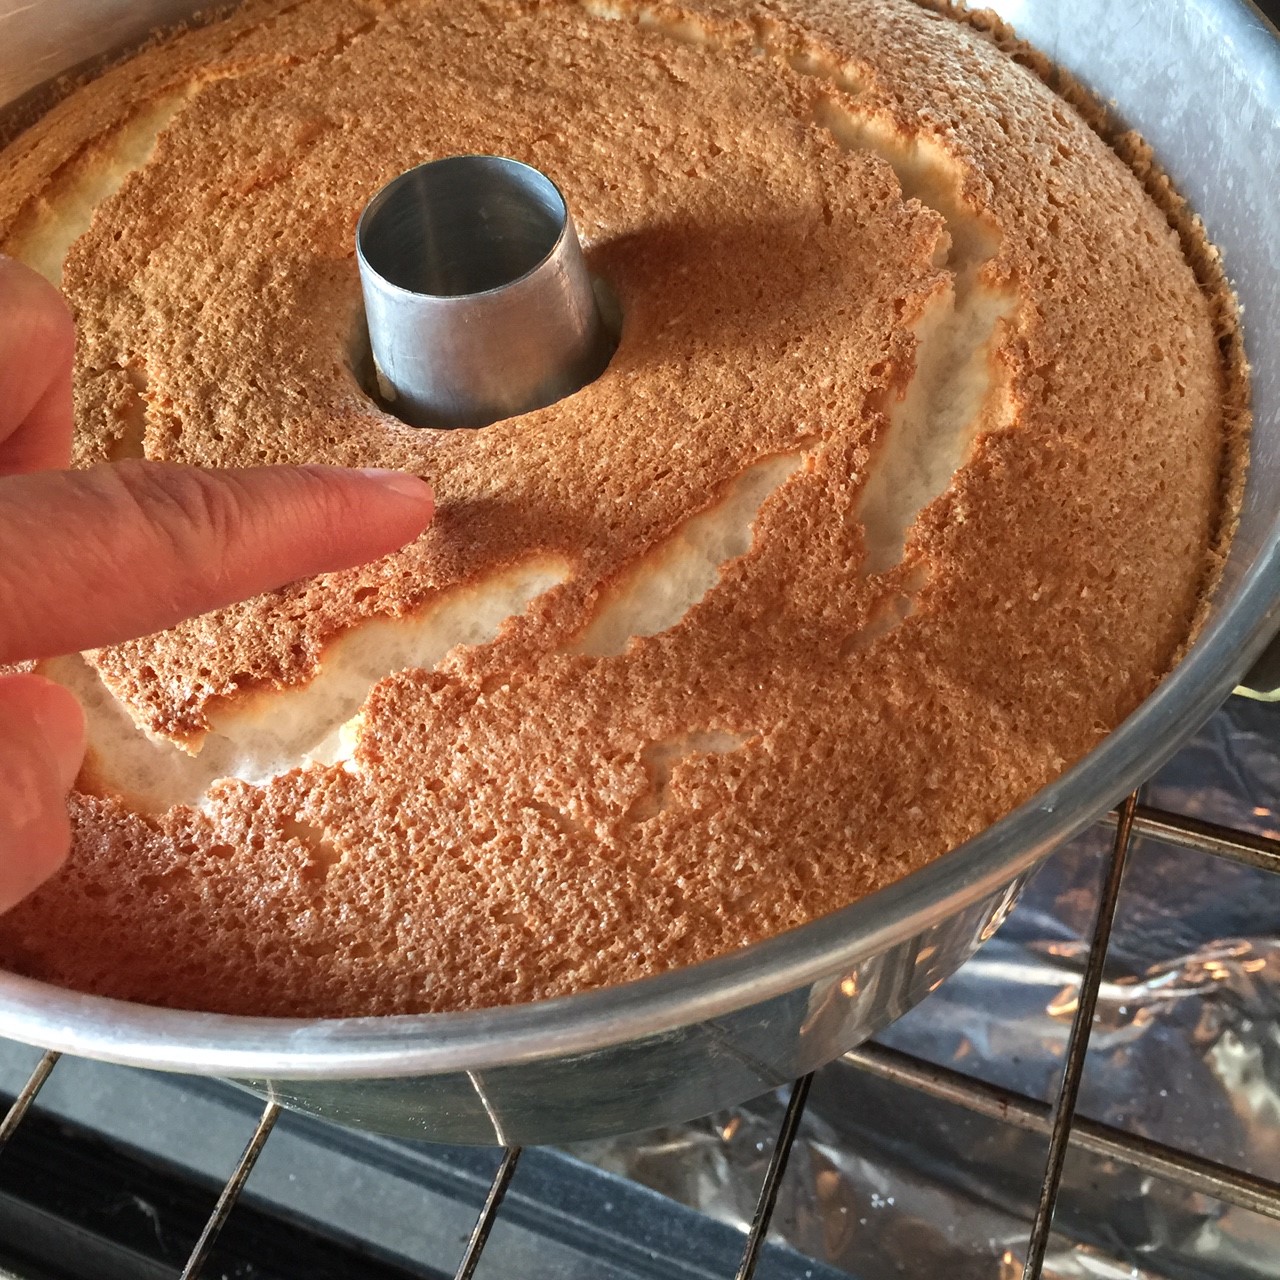 Remove from oven and immediately turn upside-down. Let cake remain like this until completely cooled – about 3 hours.
