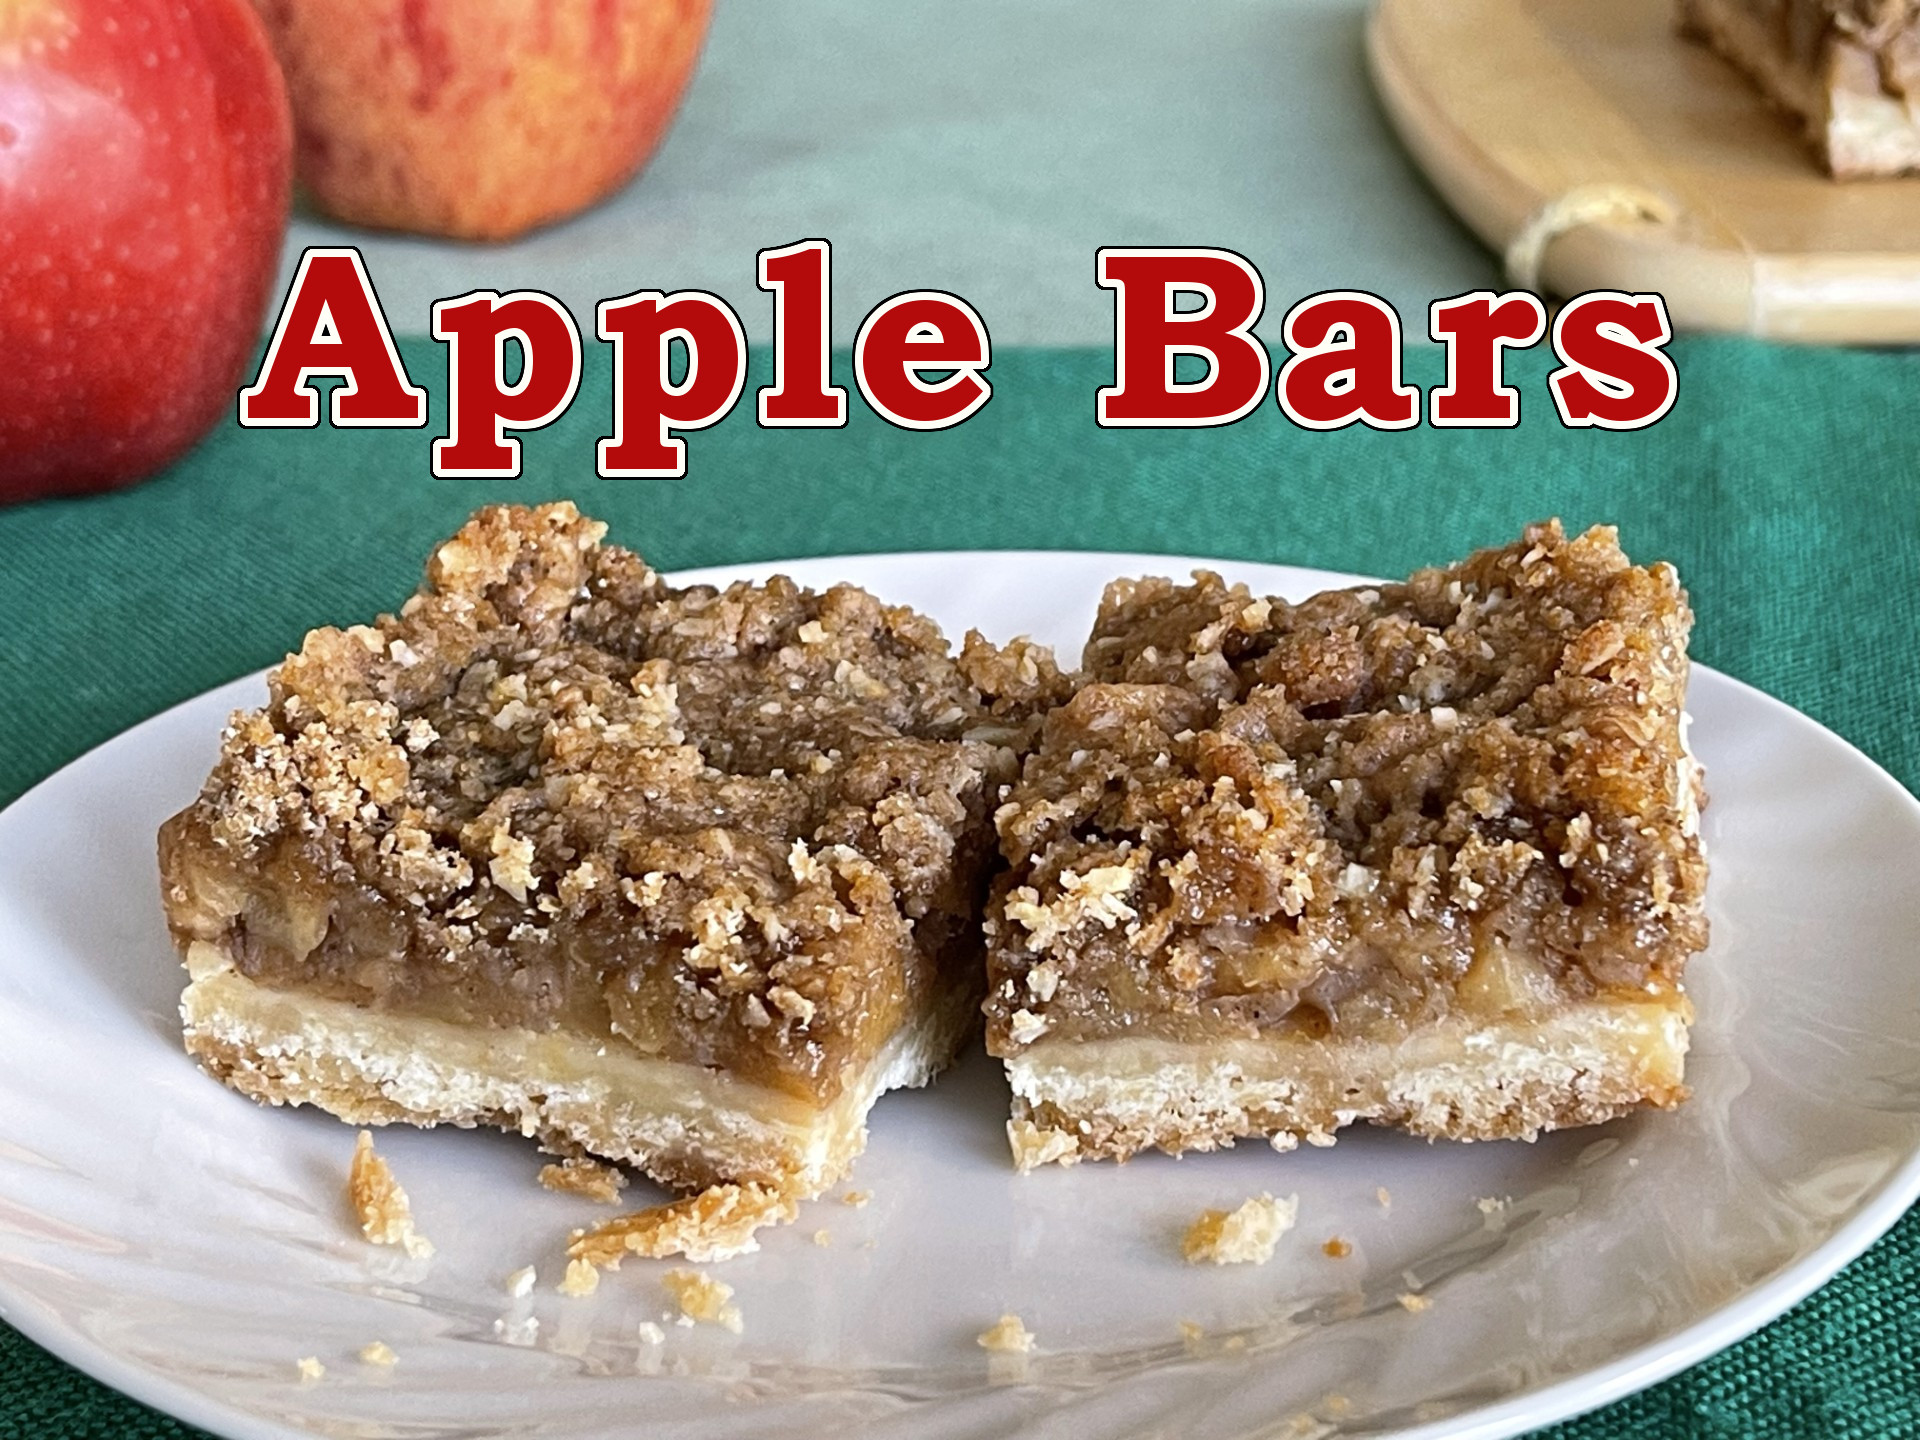
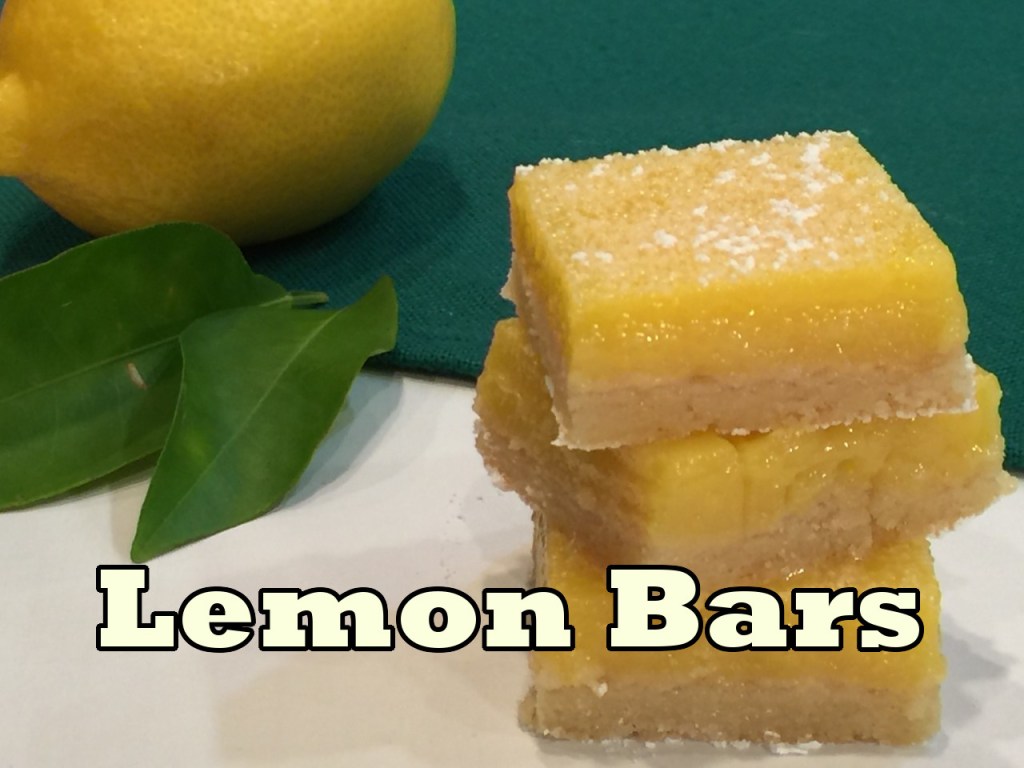
My brother has a penchant for apple desserts. So, as a good sister, I decided to develop an apple bar recipe for him. It was to be three layers: the crust, the apple filling, and the streusel topping. What I wanted was a sturdy crust so the bar could be picked up to eat, the apple filling full of flavor, and the streusel with a tasty crunch. Each layer ended up having its own challenges but, in the end, I got there!
APPLE BARS – Makes about 9 bars, depending how you cut them
Crust
112g (8 T) butter, melted
147g (1.25 cups) all-purpose flour
1/3 tsp salt
49g (1/4 cup) granulated sugar
Apple Filling
4 (1.5 lb) apples (I like Gala apples, but use what you prefer)
112g (8 T) butter
10g (1 T) granulated sugar
1/2 tsp cinnamon
1/2 tsp cardamom
1/4 tsp salt
13g (2 T) cornstarch
Streusel Topping
94g (1/2 cup), packed dark brown sugar
21g (1/4 cup) raw whole oats
30g (1/4 cup ) all-purpose flour
3/4 tsp cinnamon
1/4 tsp cardamom
1/4 tsp salt
56g (4 T) butter, cold
PREHEAT OVEN TO 375°F / 190°C
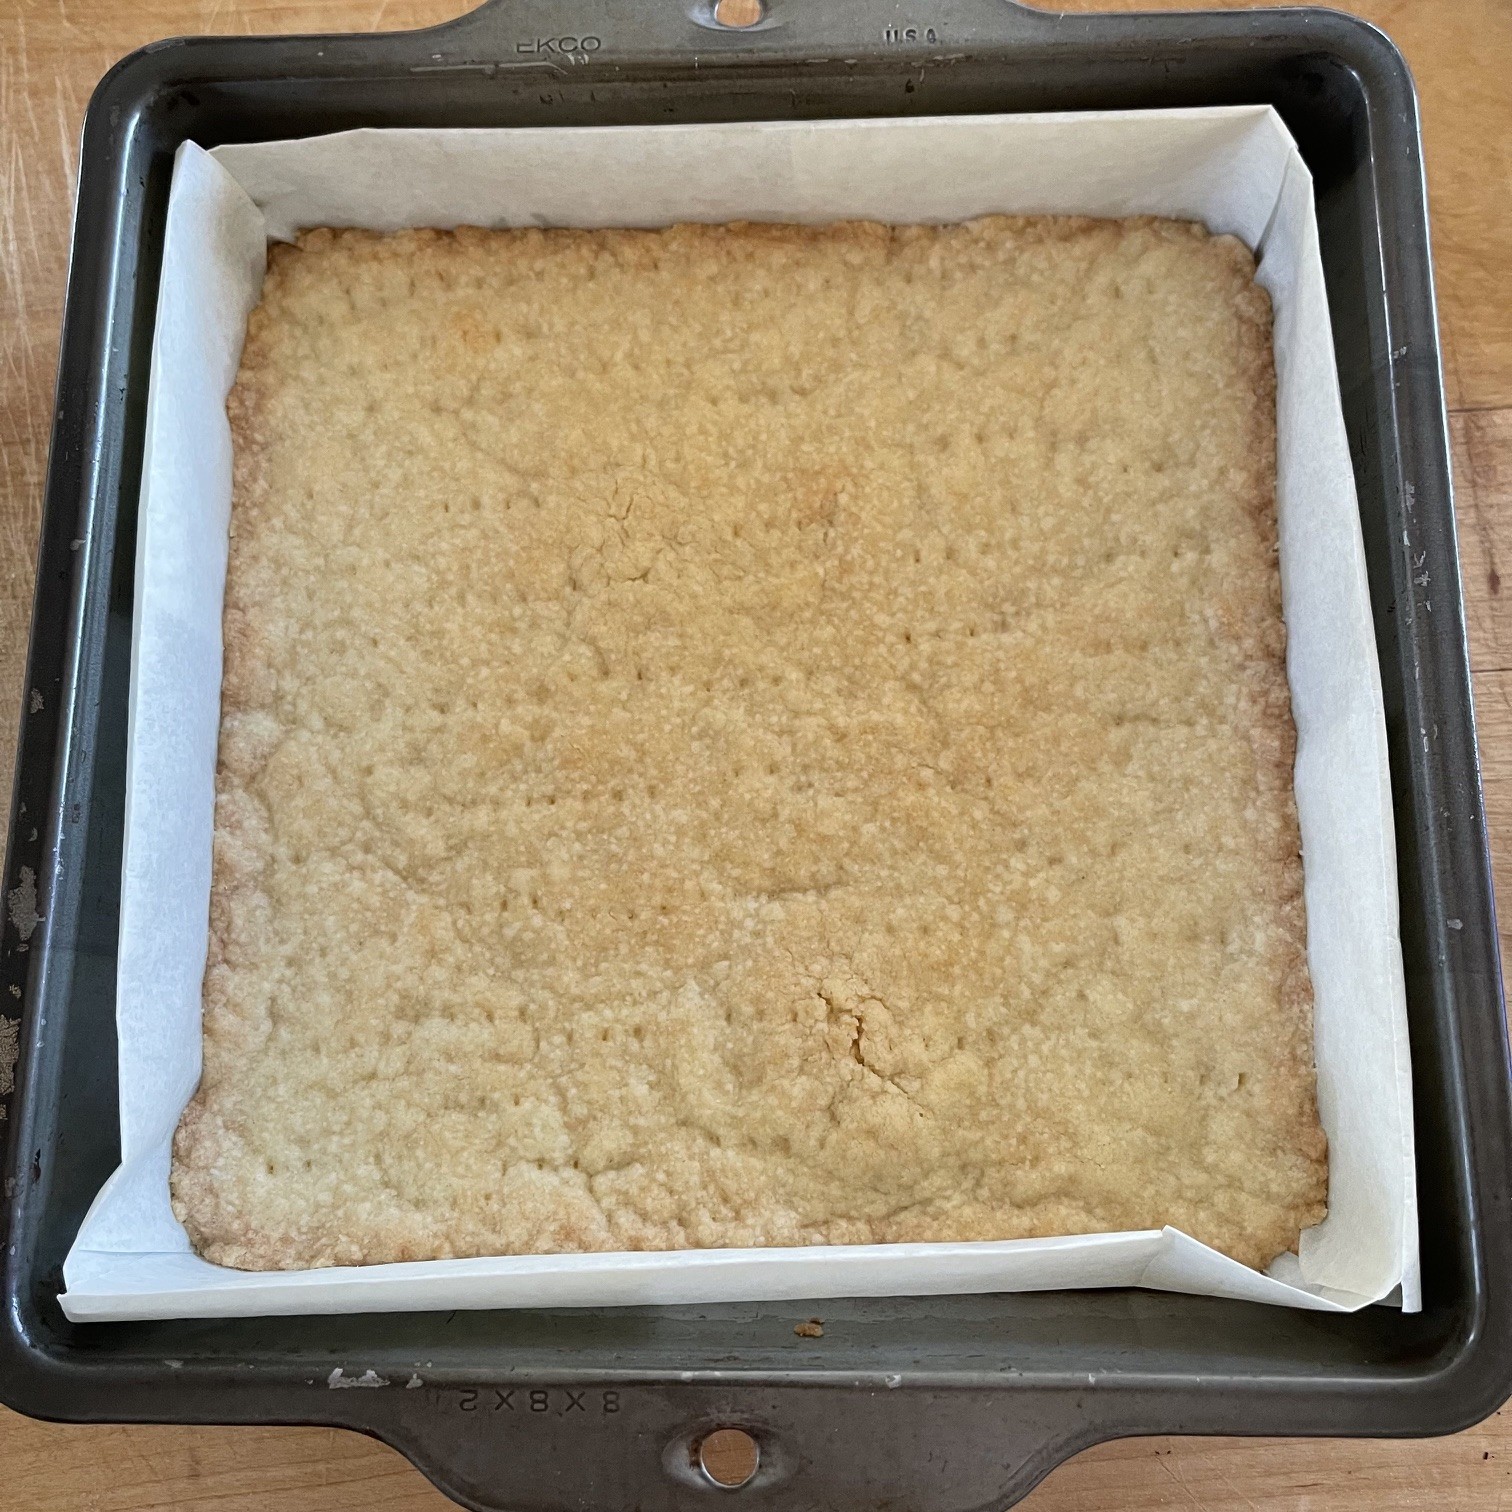
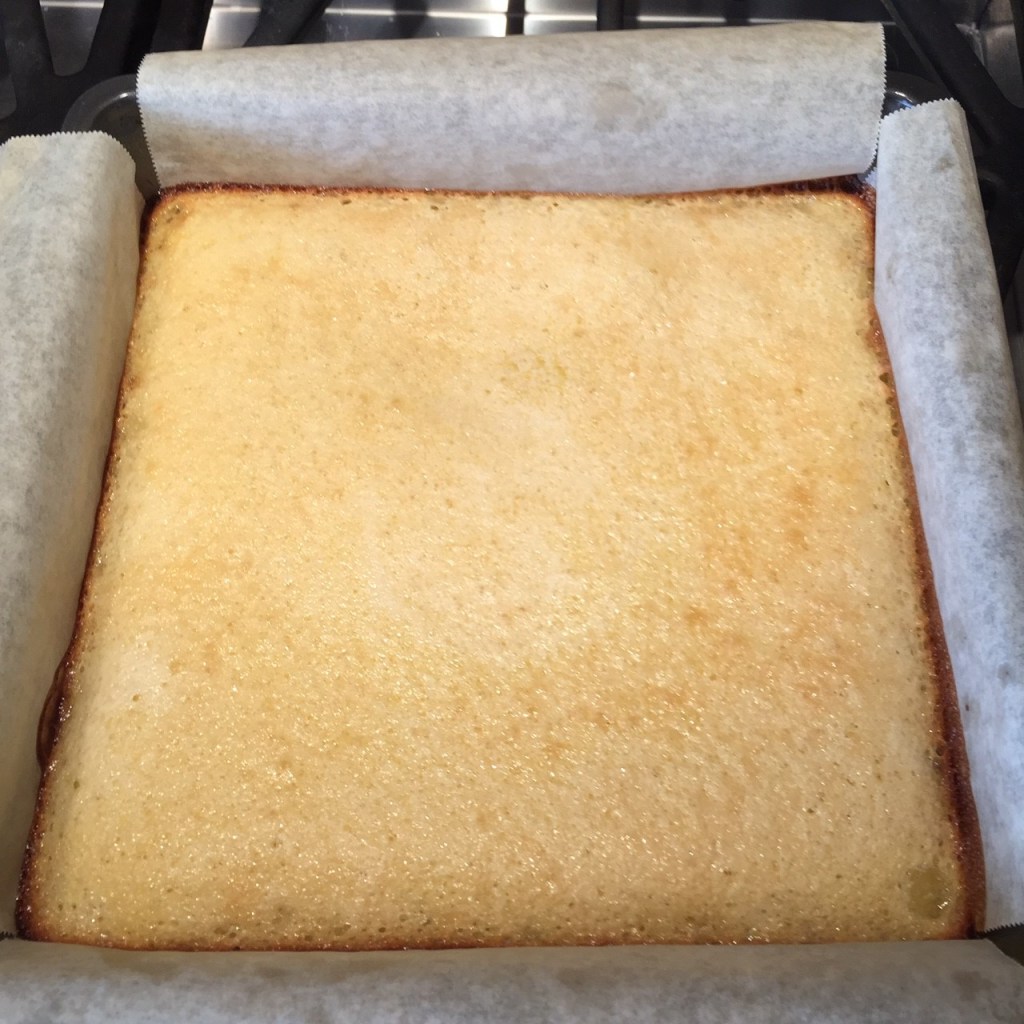
Line a 7.5″ x 7.5″ (19cm x 19cm) metal (preferably) pan with baking paper. The baking paper allows for removal of the bars for clean cuts. If you prefer not to use baking paper, just lightly butter the sides and bottom of the pan.
Prepare the crust:
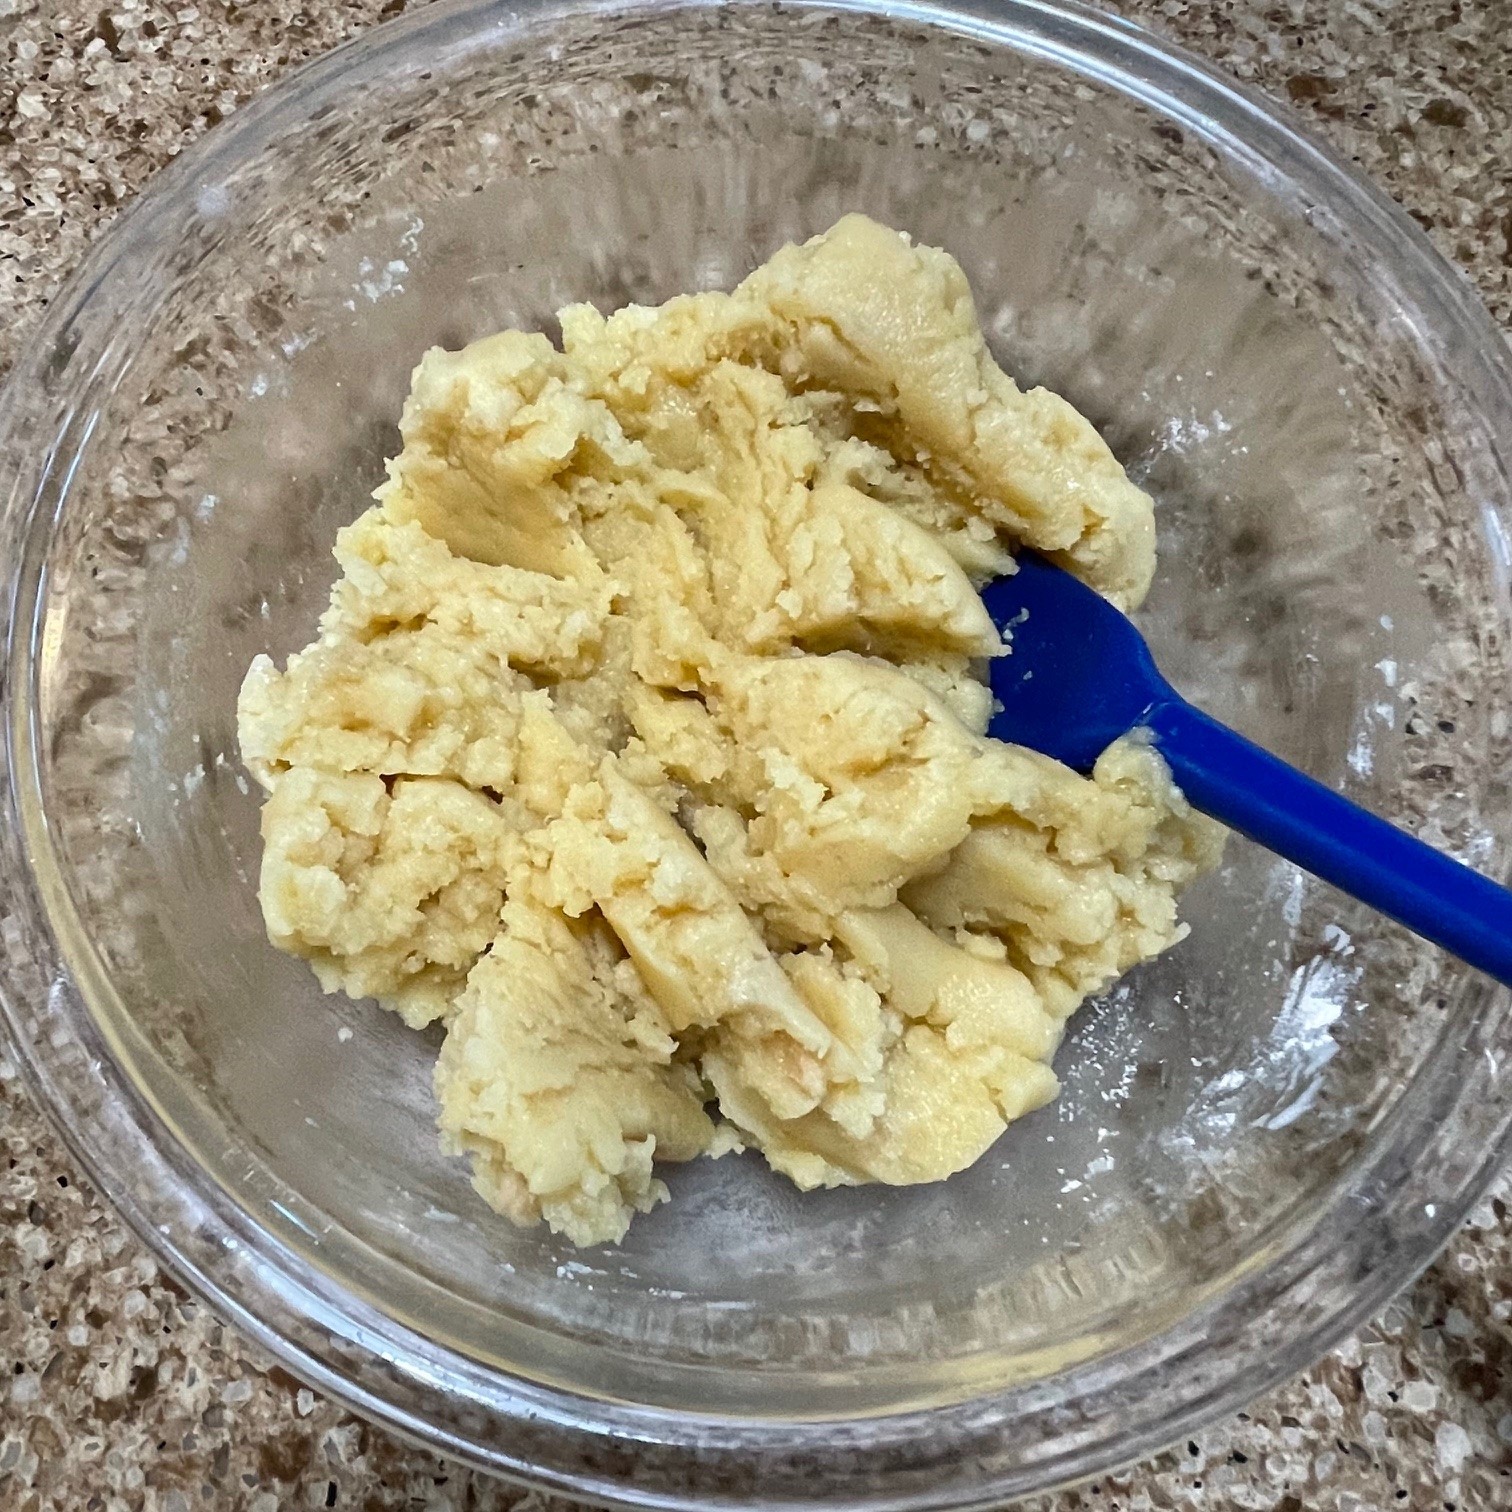
In a bowl, mix together the 147g (1.25 cups) flour, 1/3 tsp salt, and 49g (1/4 cup ) sugar. Add in the 112g (8 T) melted butter and blend with a fork or spatula.
Drop clumps of dough evenly onto baking pan and press with fingers to cover bottom. Compact the dough by lightly pressing down with a spatual or the bottom of a flat cup. Dock dough with a fork and bake in preheated 375°F (190°C) oven until lightly browned – about 23 minutes. Cool in pan.
Prepare the streusel topping:
Into the workbowl of a food processor, place the 94g (1/2 cup) brown sugar, 21g (1/4 cup) oats, 30g (1/4 cup) flour, 3/4 tsp cinnamon, 1/4 tsp cardamom, and 1/4 tsp salt. Pulse about 5 times. Cut the 56g (4 T) cold butter into small pieces and add to processor. Pulse several times to blend. Set streusel topping aside. If you don’t have a food processor, blend the dry ingredients together in a bowl, then cross-cut the cold butter into the mixture.
Prepare apple filling:
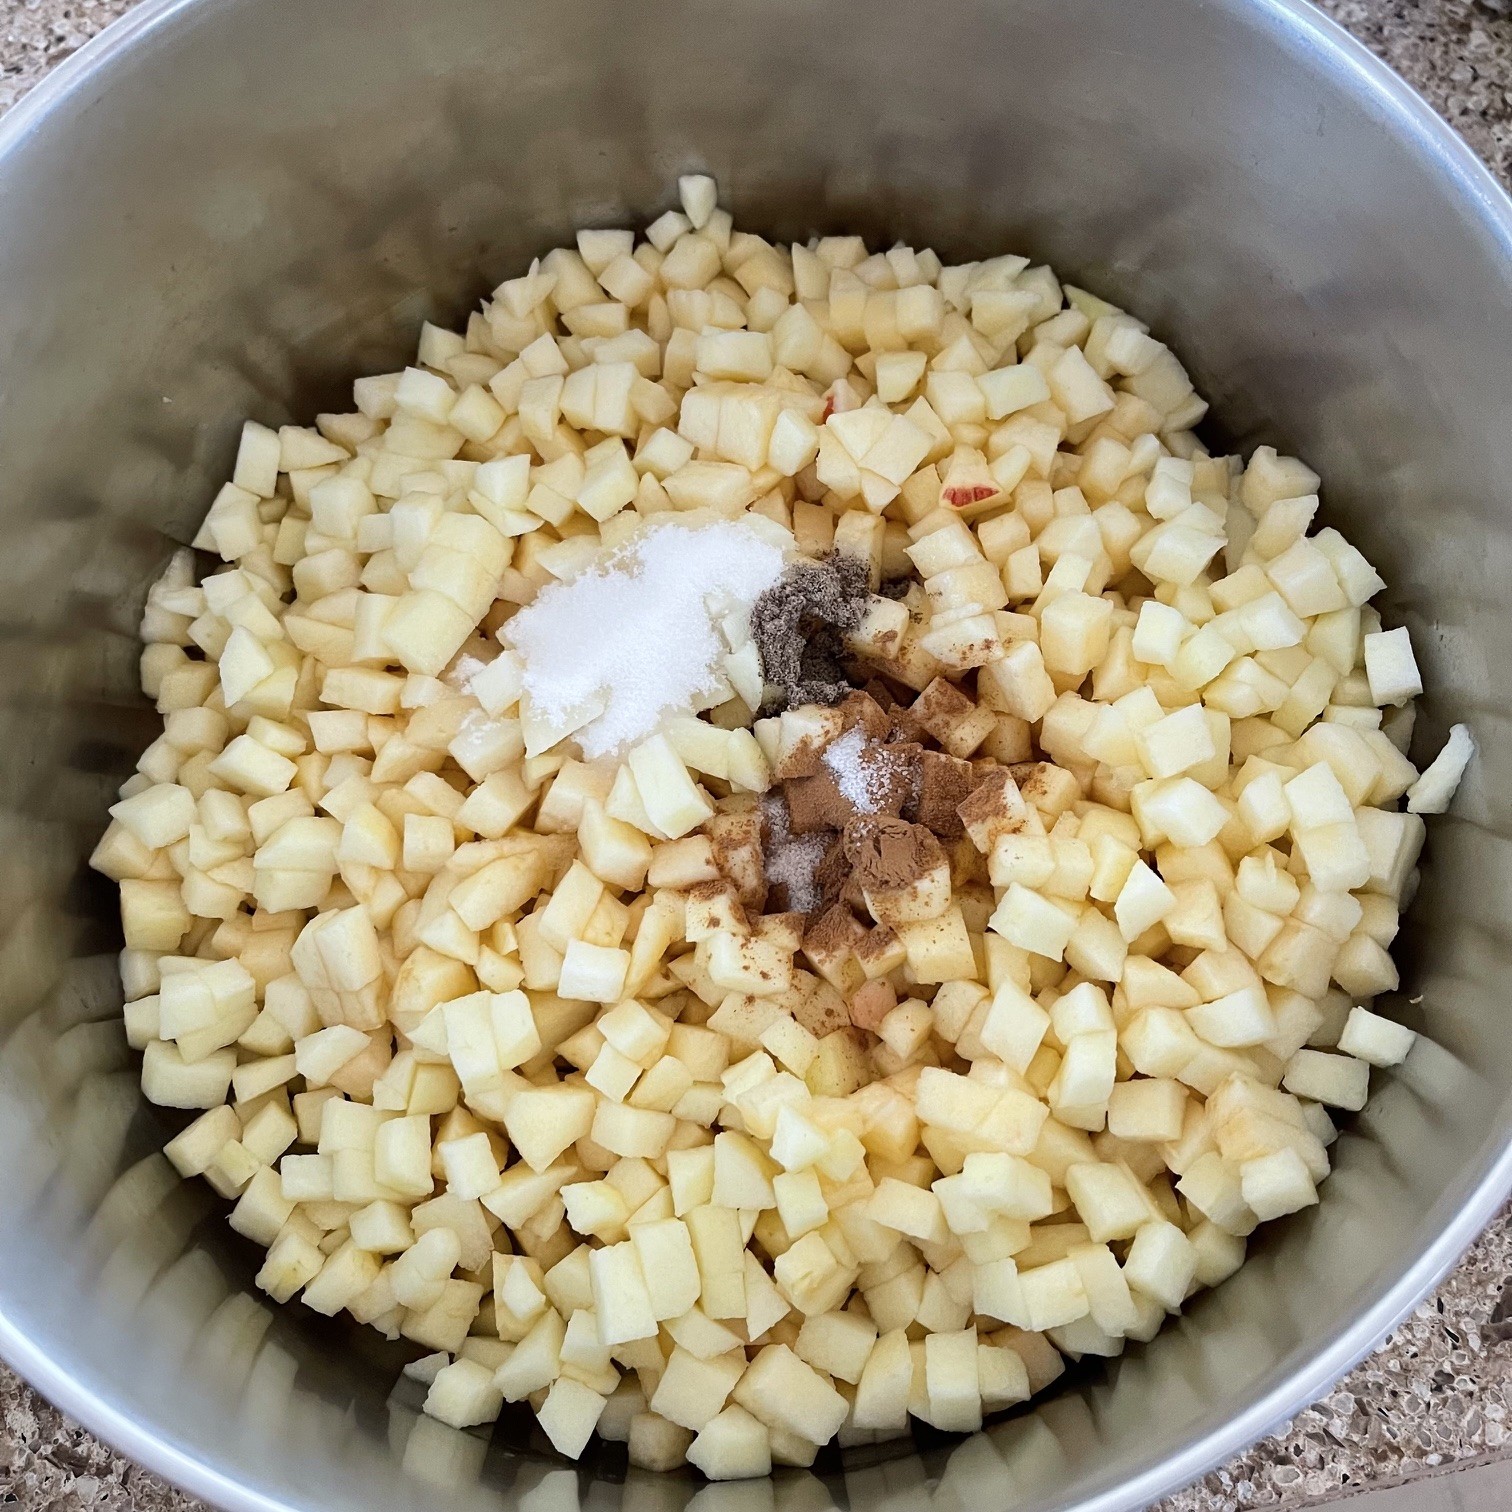
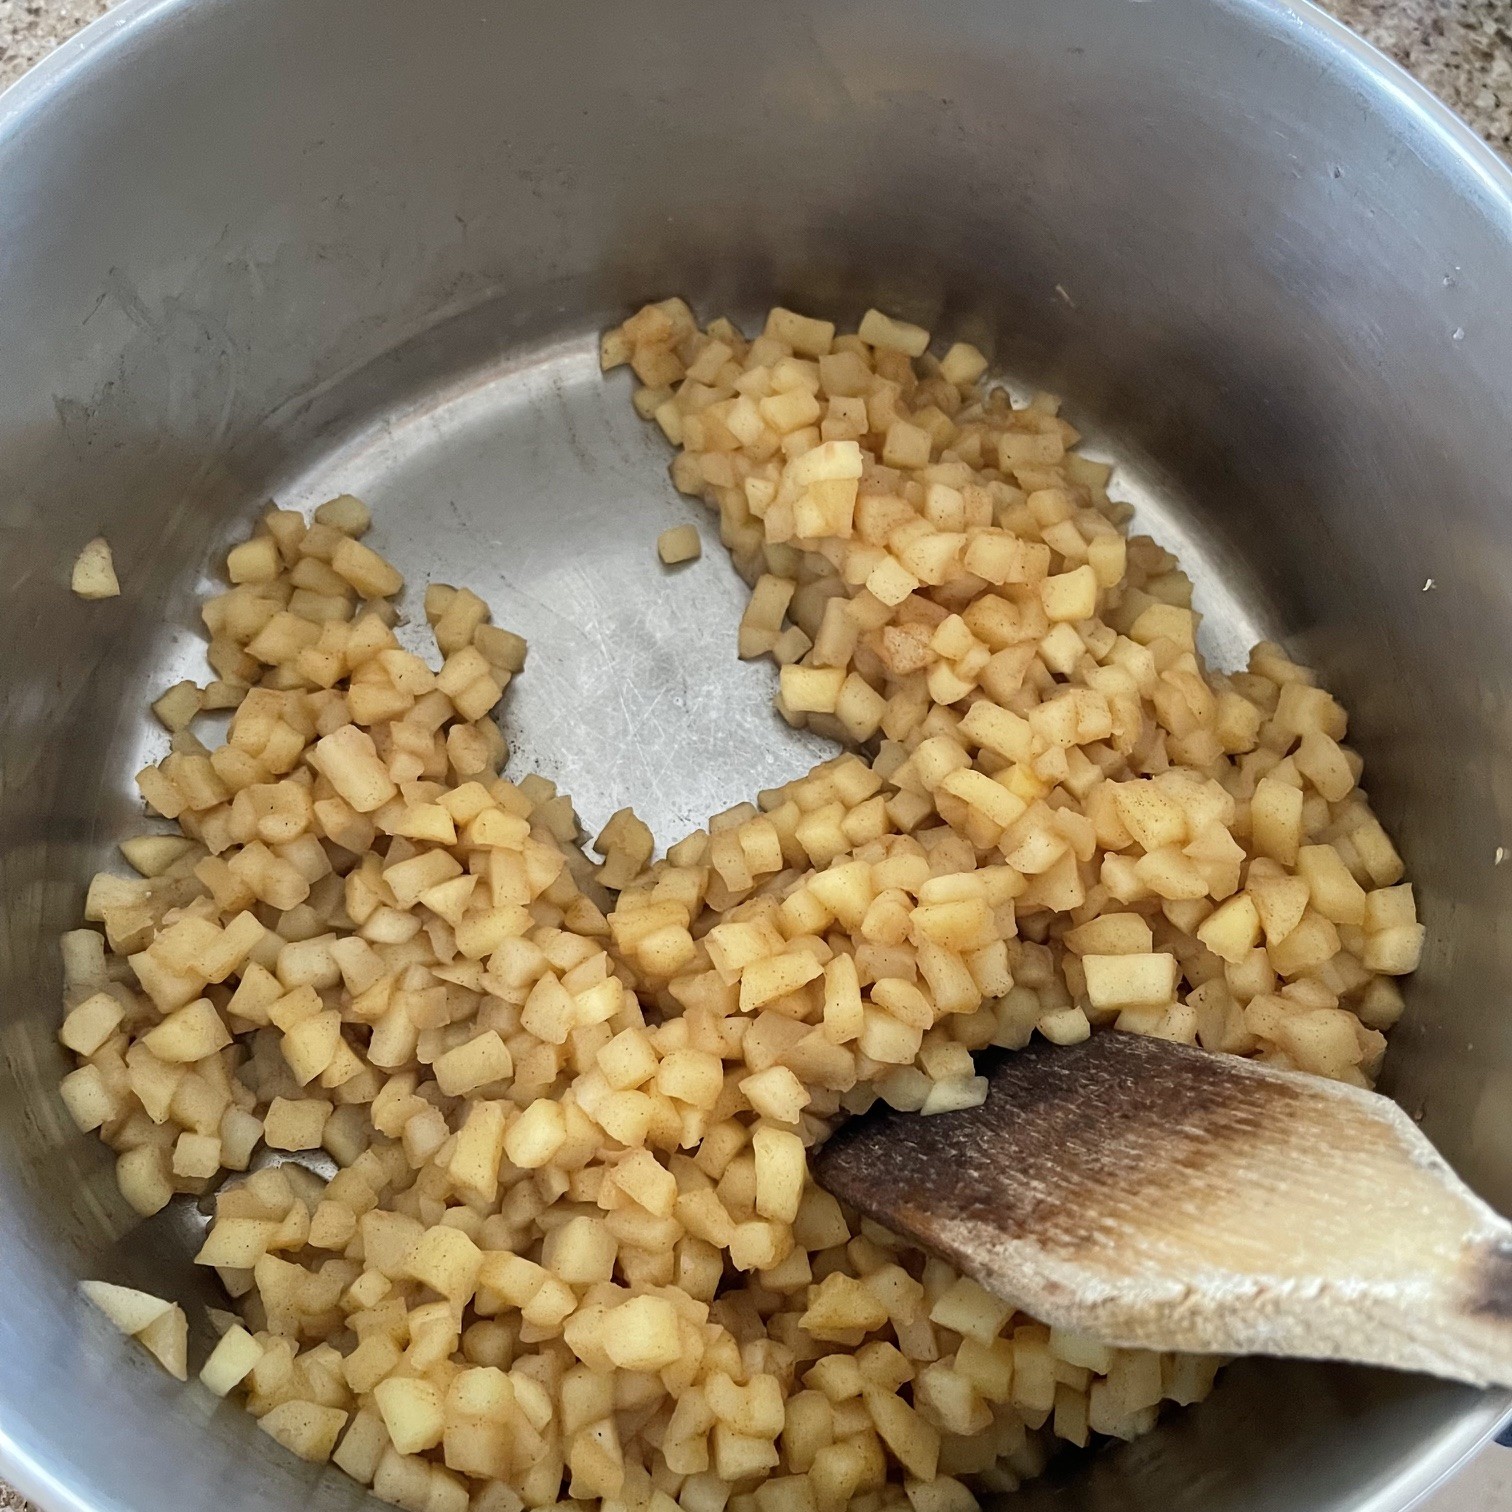
Peel, core, and cut apples into approximate 1.5cm (1/4″) pieces.
In skillet or saucepan, melt the 112g (8 /T) butter. Add in the cubed apples, 10g (1 T) granulated sugar, 1/2 tsp cinnamon, 1/2 tsp cardamom, and 1/4 tsp salt.
Over medium-high heat, cook the apple mixture until the liquid has evaporated – about 20 minutes. (If there’s still liquid remaining after 20 minutes, just pour it off and discard – you don’t want a soggy filling.)
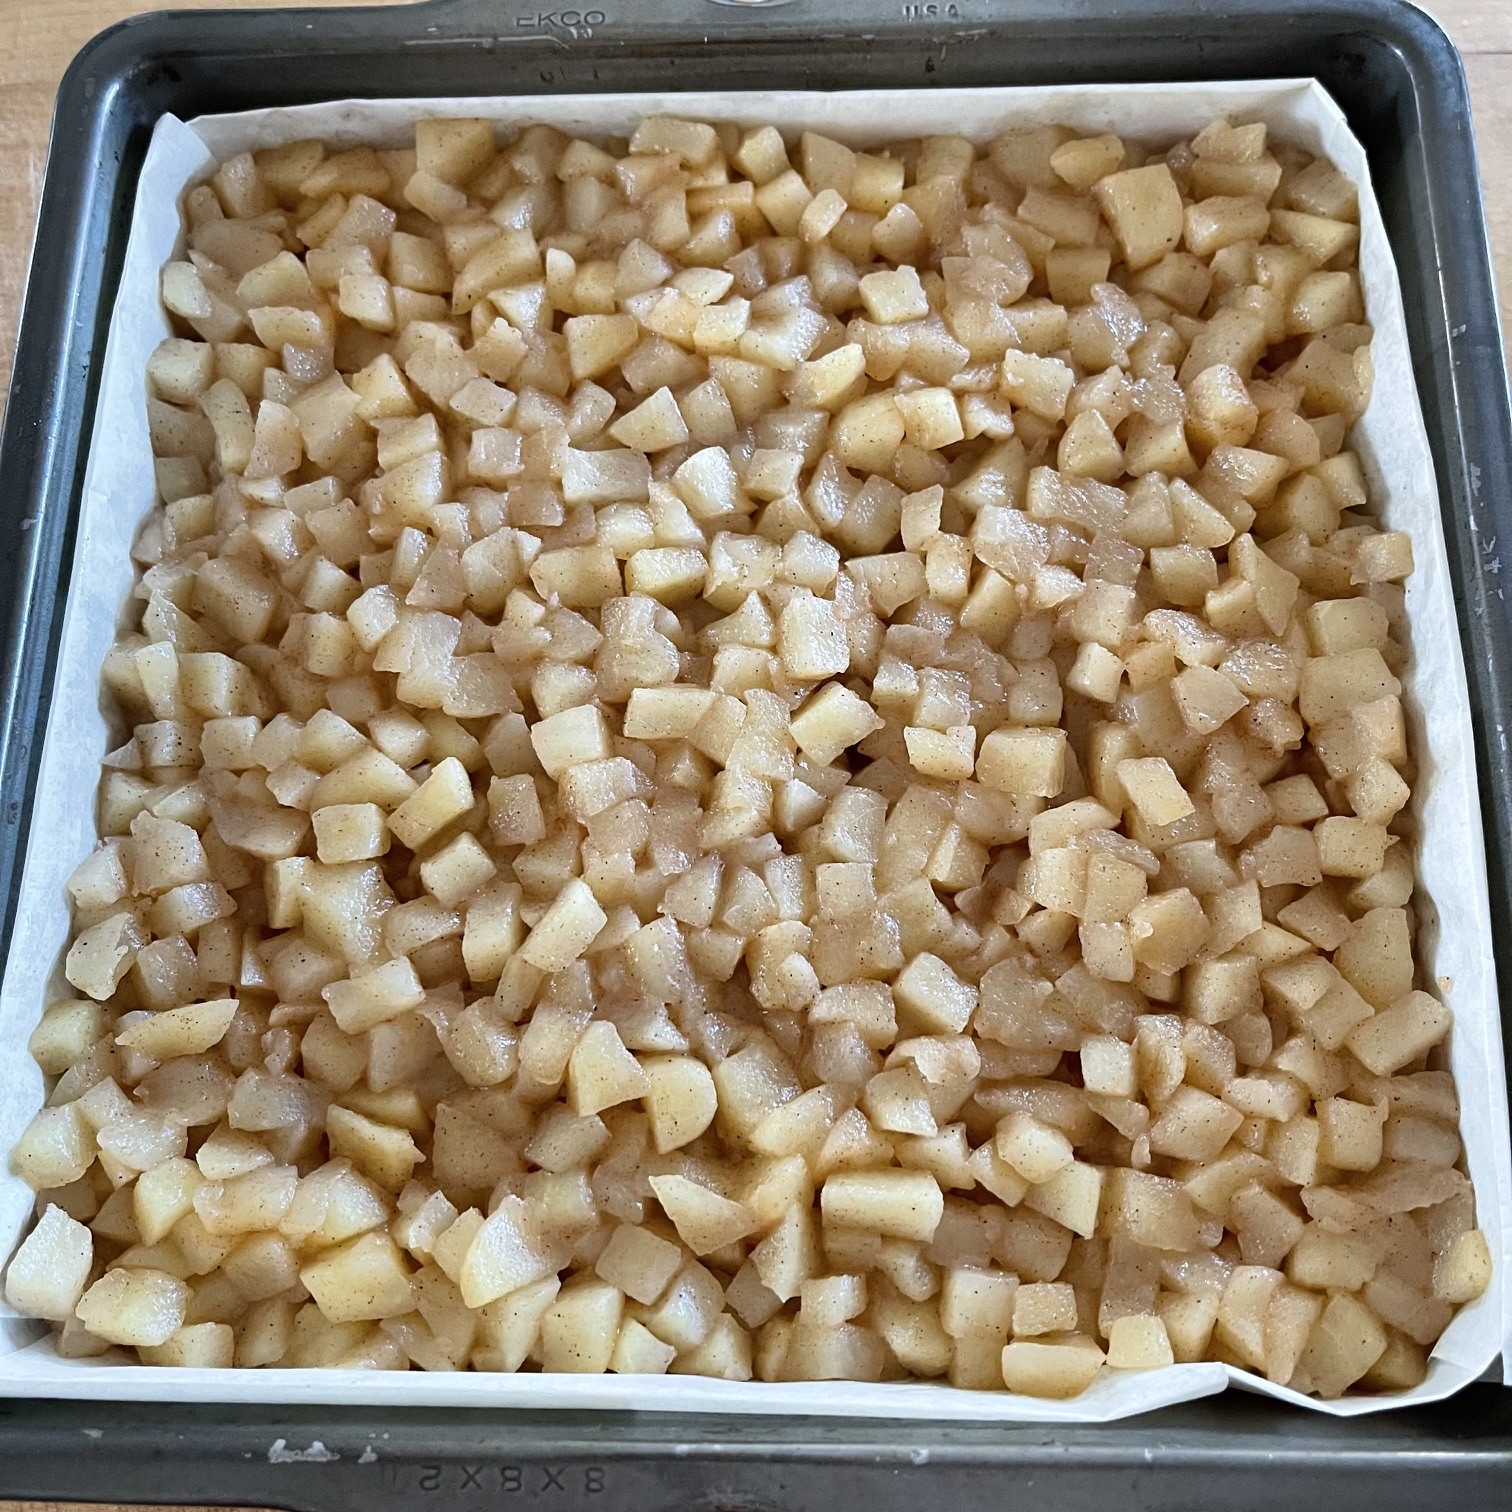
Stir the 13g (2 T) cornstarch into the apple mixture. Pour apple filling onto the cooled crust, spreading evenly. Gently tamp down filling to bind it.
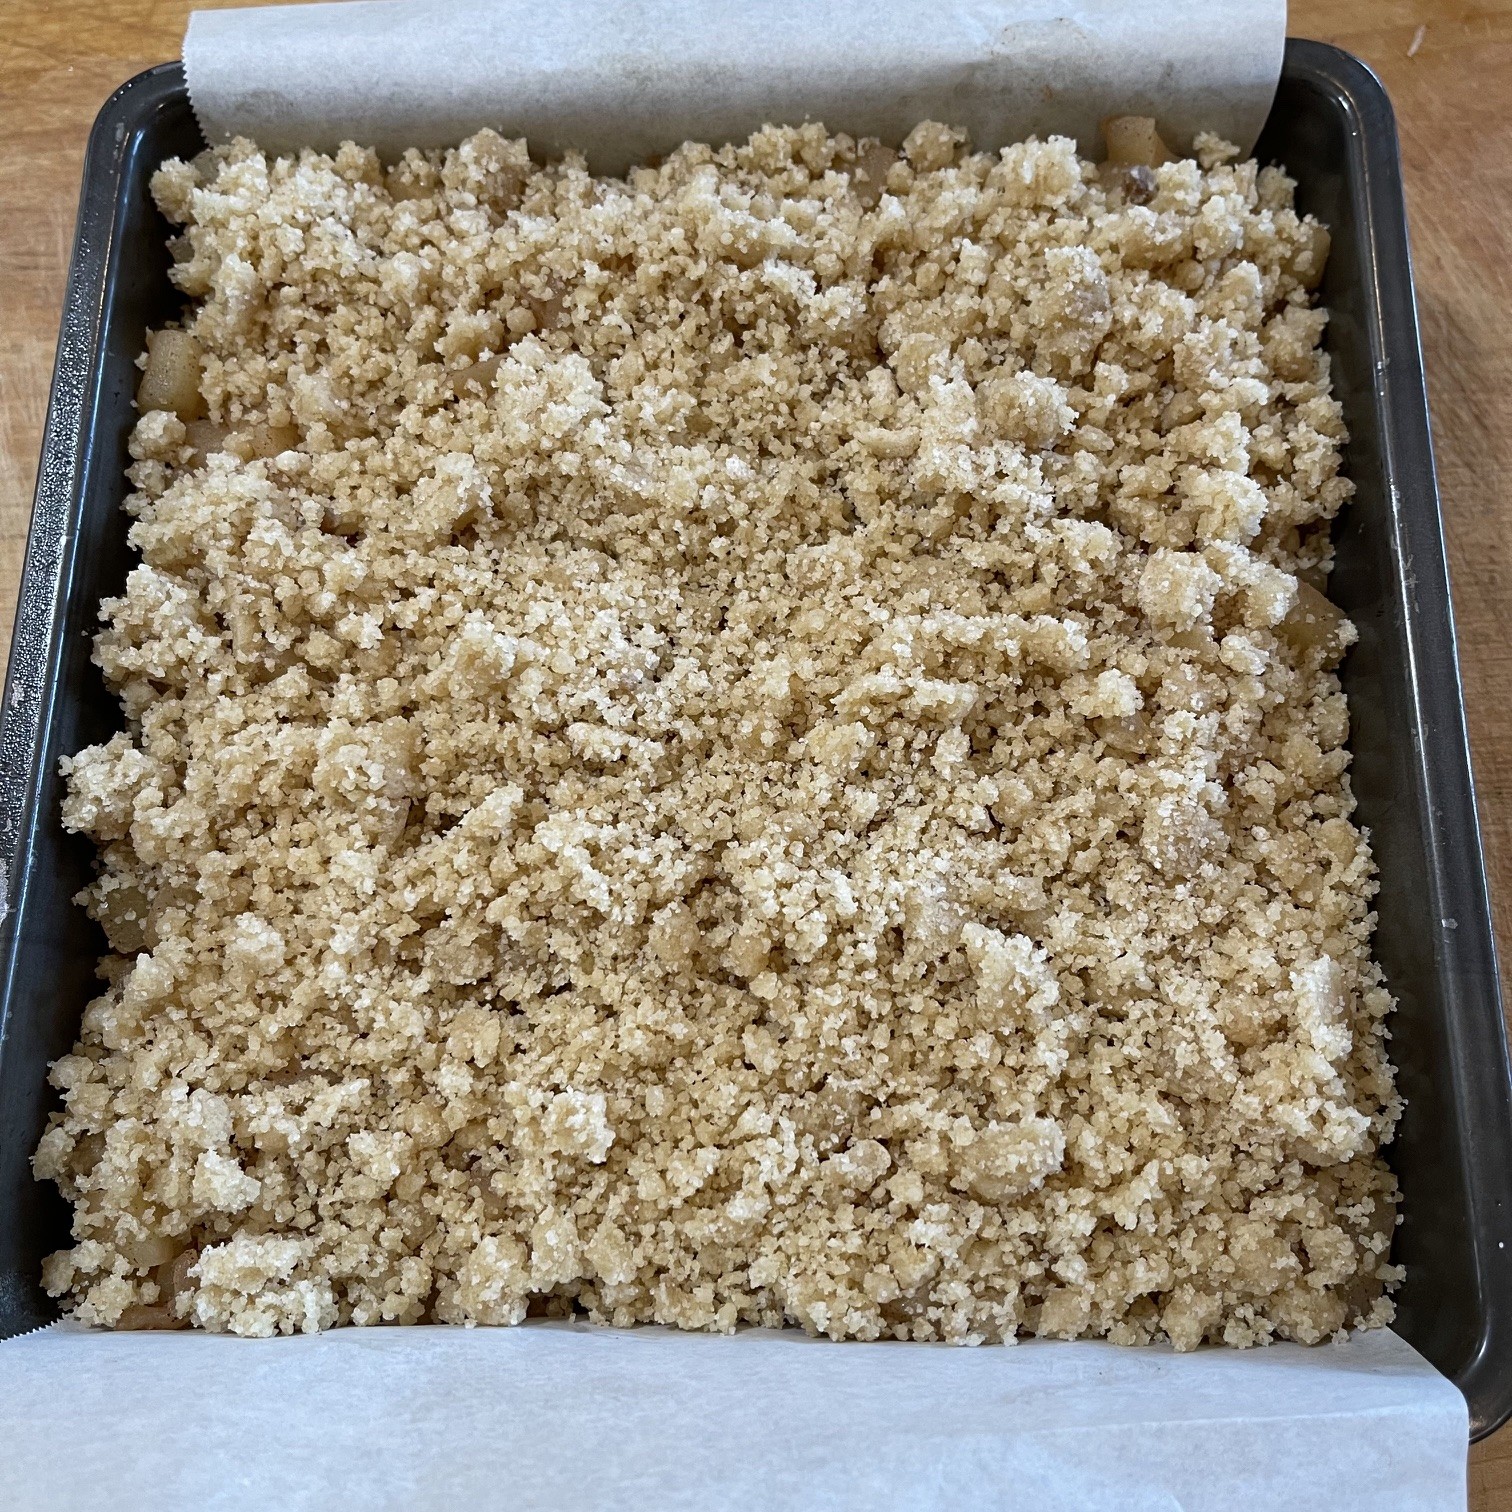
Sprinkle steusel topping over apples, and gently press it down with a fork or spatula.
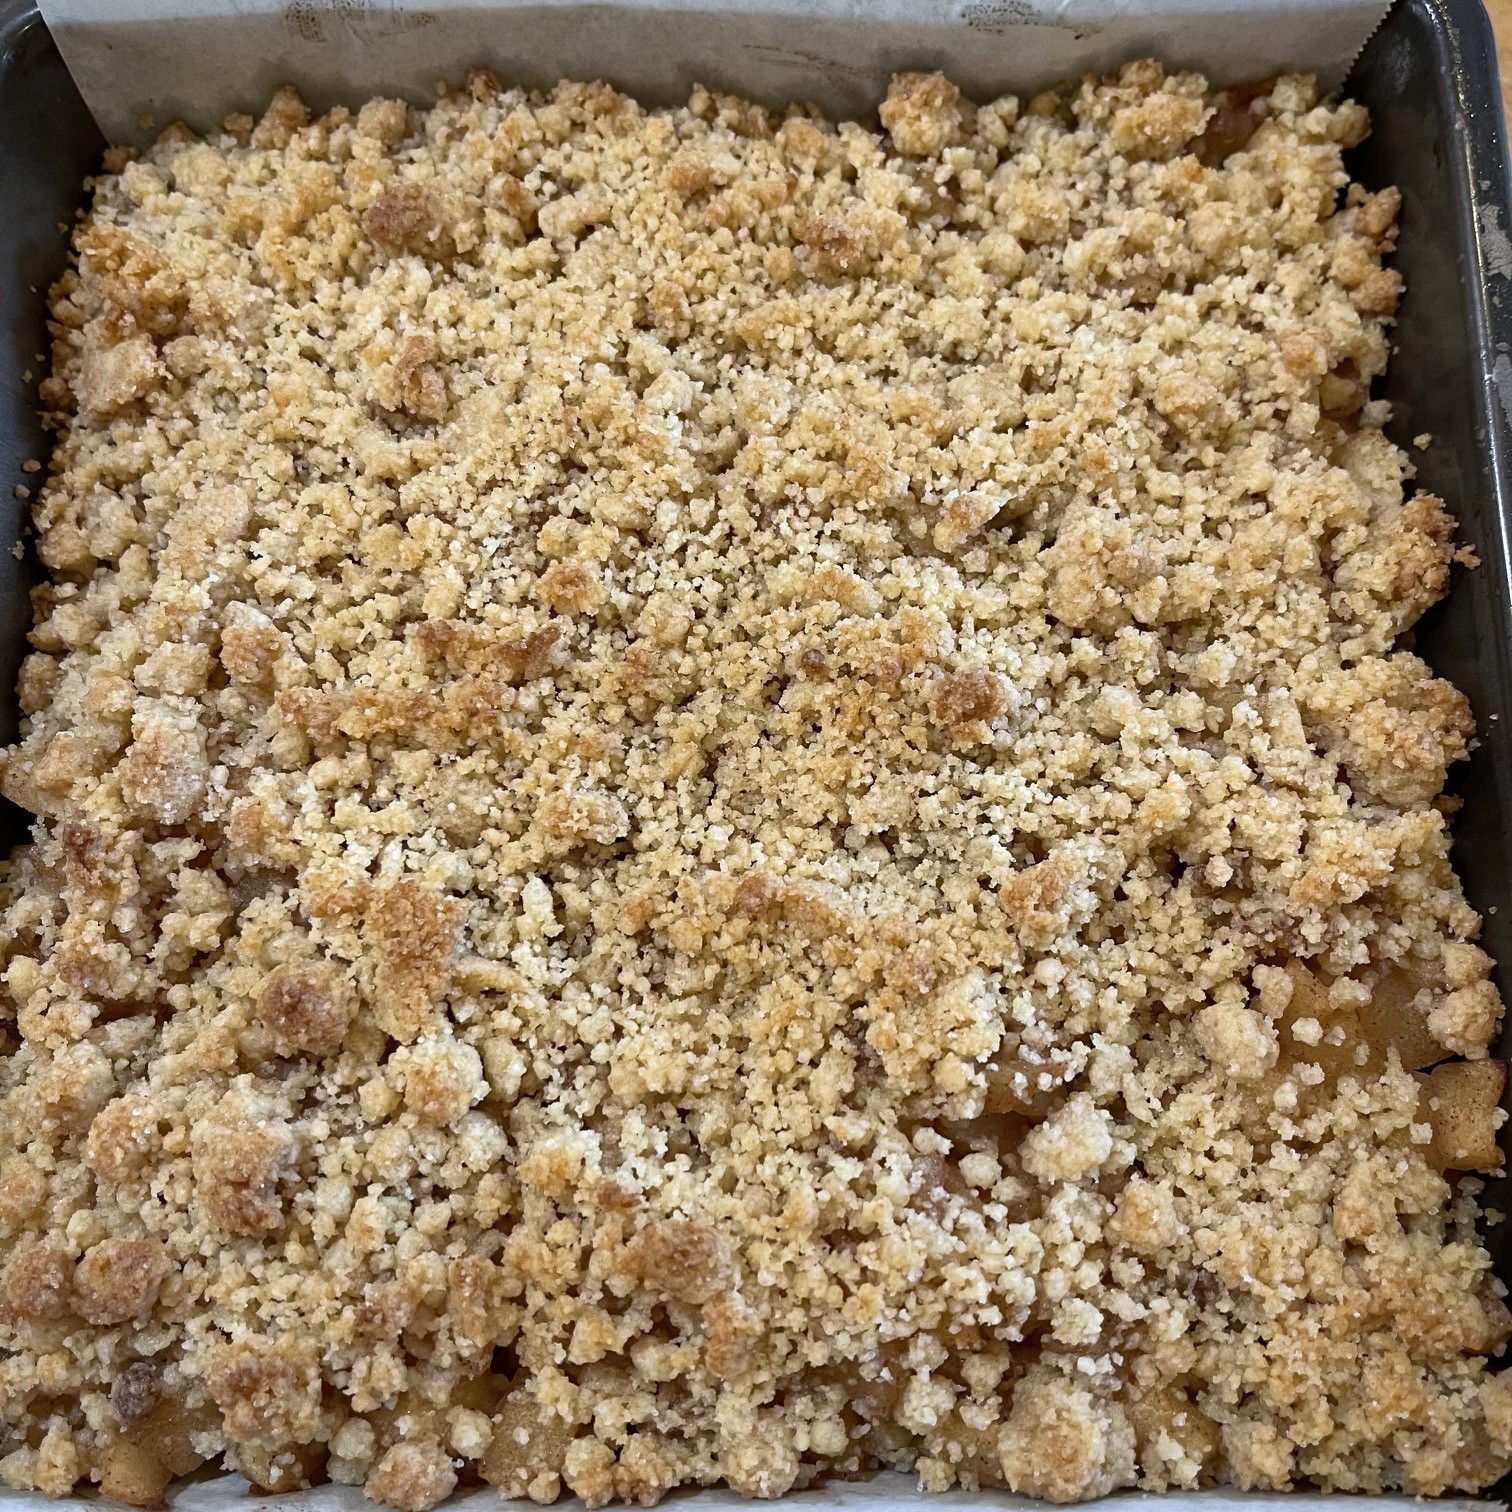
Bake in preheated 375°F (190°C) oven until lightly browned – about 37 minutes.
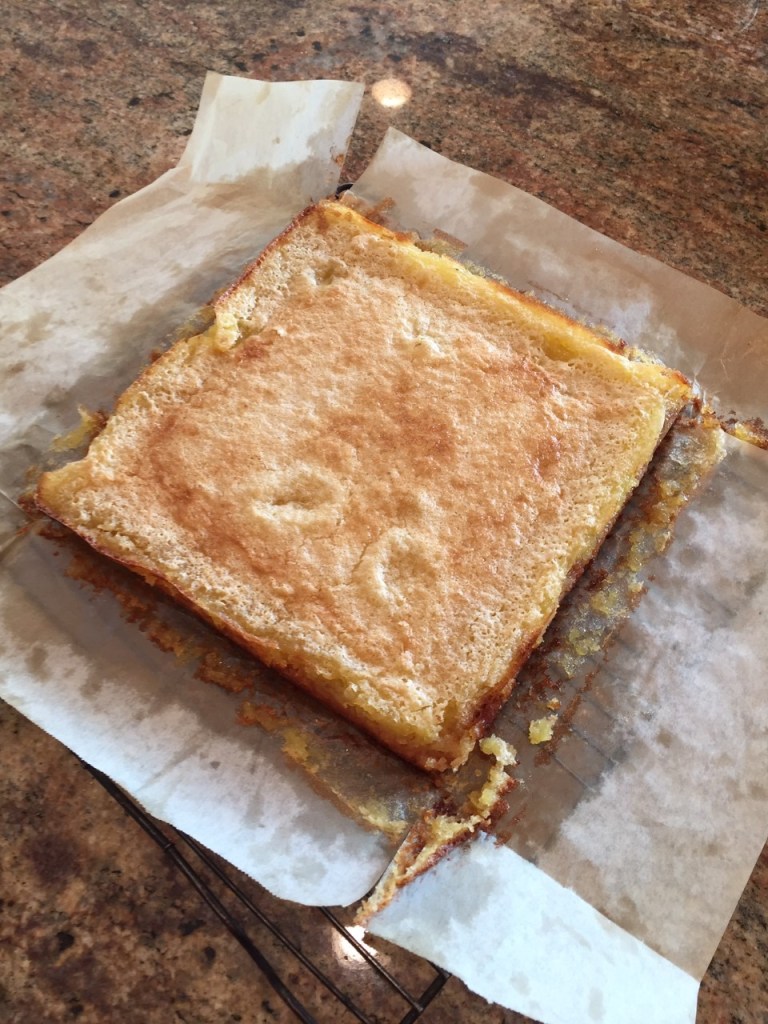
Remove from oven and cool. Then chill several hours to firm up Apple Bars before slicing.
Once the Apple Bars are firmed-up, remove from pan and slice. Serve as is, or top with, perhaps, ice cream or caramel sauce.
a crisp crust (but not rock hard) that allows the cookie to be safely held
the cookie should be 1/3 crust and 2/3 filling
the filling should be firm enough that it doesn’t ooze, but not Jello-like
the filling should be tart
no stove-top cooking of the filling – oven bake only
whole eggs only rather than yolks, if possible
Is that too much to ask? It took MANY attempts but, as it turns out – no, it’s not.
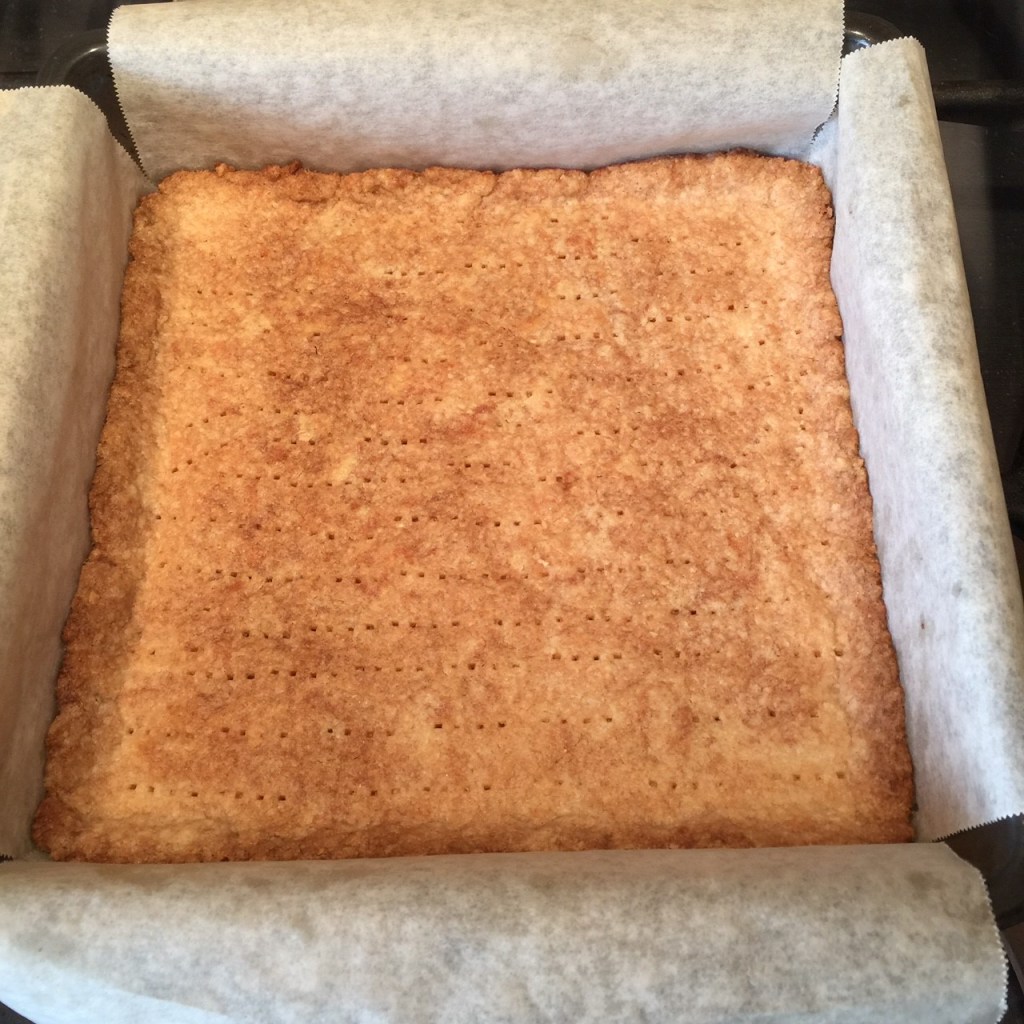
As far as the crust goes, the keys were to use granulated sugar (rather than the often used confectioner’s sugar), and melted butter (rather than soft). Also, freezing the patted out dough for 5-10 minutes, followed by docking it (piercing it with a fork) before par-baking, kept the crust flat.
For the filling, remember – tartness comes from the lemon zest. Adding extra lemon juice only dilutes the curd. Pack the zest when measuring – don’t worry about the zest marring the creaminess, you’ll strain it out before baking. When I got down to the best number of eggs, I could either go with 2 whole eggs plus 2 yolks, or 3 whole eggs. Because the fillings were equal in consistency and flavor (although the ones with yolks were yellower), I went with 3 whole eggs since it was easier.
I started my Lemon Bars journey using a glass 8″ x 8″ pan. In my research, someone wrote metal pans lead to a crispier crust. I happened to have a metal 8″ x 8″, so I switched over. Of course, there were other variables I was doing to the dough, so I’m not sure how important the metal vs glass is. Use what you’ve got before buying something new.
The final piece of the Lemon Bar puzzle was removing them from the pan. I had a heck of a time. I watched tons of videos and they always seemed to just pop out – Ina Garten didn’t even use parchment! – so it may just be me. My problem may have been that I didn’t grease the pan before placing the parchment slings, nor did I grease the parchment itself. When I did grease the pan and the parchment, I was able to pry them out.
I, also, concocted a method of using one large piece of parchment to limit leakage (and using slightly less parchment!). I’ve fine-tuned my folding method since I did my last bake. Pictures and instructions of my latest fold method are at the end of this post, following the recipe. If you have a better method, by all means, use that.
LEMON BARS
Note: I put measurements in grams, cups, and ounces – use what you like.
Crust Ingredients:
115 g (1 cup / 4 oz) all-purpose flour
30g (3 T / 1 oz) granulated sugar
1/8 tsp salt
85 g (6 T / 3 oz) butter, melted
Filling Ingredients:
287 g (1½ cups / 10 oz) granulated sugar
19 g (3 T / ½ oz) all-purpose flour
1/4 tsp salt
1½ T lemon zest – packed (don’t be stingy)
4½ T lemon juice (bottled or fresh)
3 eggs, beaten in a small bowl
1/4 tsp baking powder
confectioner’s sugar for sprinkling
Instructions:
Preheat oven to 350º Fahrenheit / 177º Celsius
Grease an 8″ x 8″ pan (I prefer metal). Line pan with parchment and grease the parchment. You can use the folded 1-sheet insert method (instructions below after the recipe), the 2-sheet sling method in which you have a parchment strip going north-south, and the other going east-west, or any other method you choose.
Start by combining the filling in order to draw out the lemon flavor from the zest: In a bowl, stir together the 287g sugar, 19g flour, 1/4 tsp salt, lemon zest, lemon juice, and beaten eggs. Set aside while you make the crust. The baking powder will be added just before pouring into the crust.
To make the crust, stir together the 115g flour, 30g (3 T) sugar, and 1/8 tsp salt, then pour in the melted butter. Using a fork, stir just until all the flour is incorporated. Sprinkle small clumps of dough evenly over bottom of prepared pan, then press dough to evenly cover bottom. Smooth it as best you can to lessen finger indentations. Freeze 5-10 minutes to firm up.
When oven is heated to 350 F/ 177 C, remove crust from the freezer and liberally dock the crust (pierce it with a fork) to prevent it from rising.
Bake until well-browned – about 19-22 minutes (it needs 21 minutes in my oven). Remove from oven.
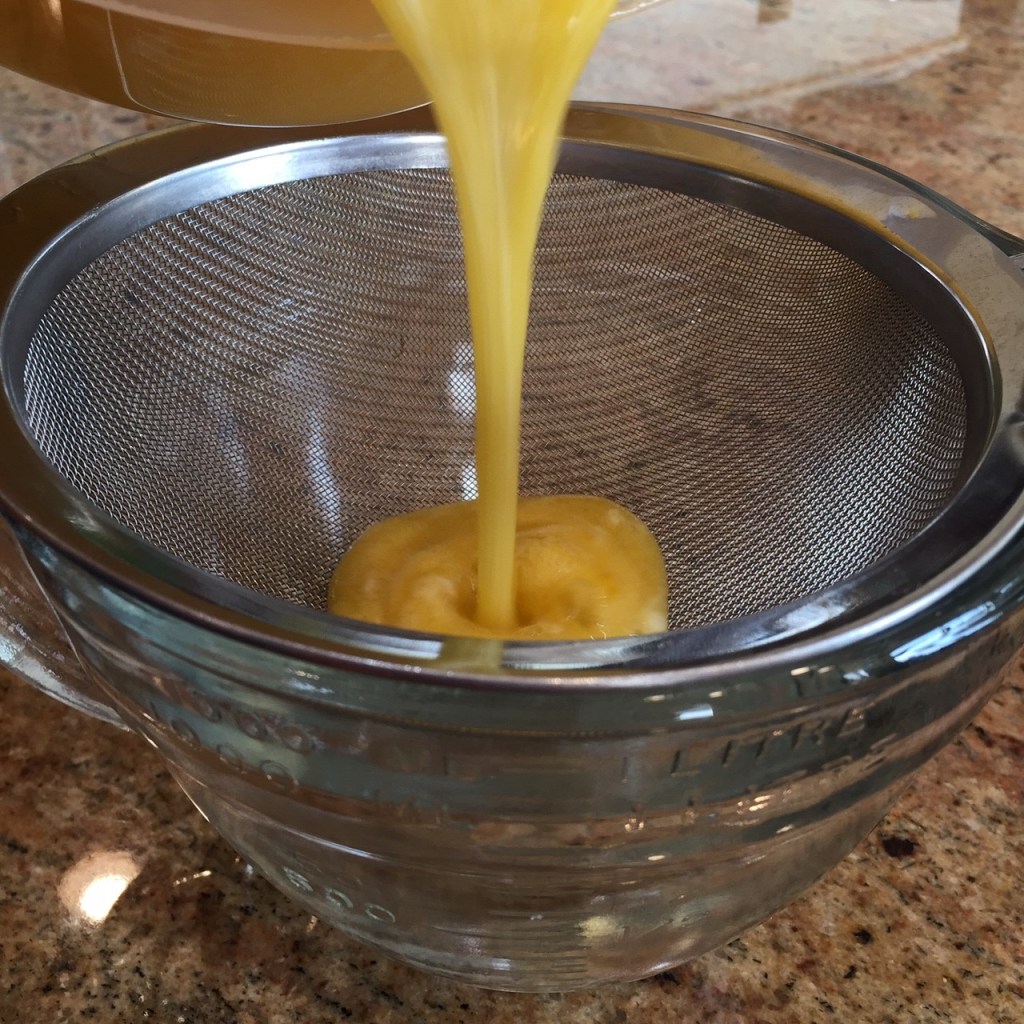
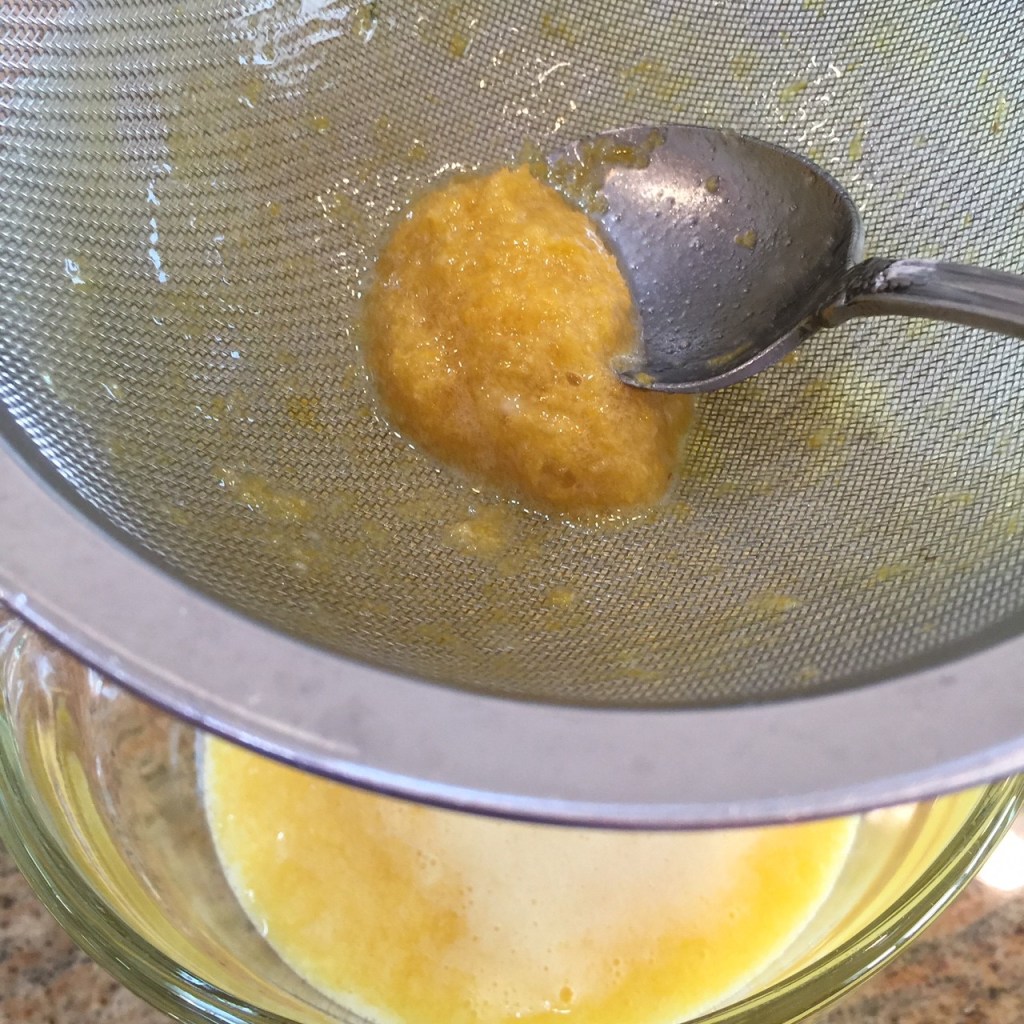
When the crust comes out of the oven, stir the baking powder into the filling, then pour through a strainer into a clean container. Stir the filling in the sieve with a spoon to help the filling flow. Don’t forget to scrap off the filling clinging to the underside of the sieve! (Waste not, want not!)
Discard the bits of zest and egg that remain in the sieve. Yuck!
Pour filling onto the hot crust.
Bake at 350 F / 177 C until the very center of filling still has a slight wobble – 19-21 minutes. (Keep an eye out – the filling cooks quickly at the end). Remove from oven and let rest in the pan for 10-15 minutes.
Run a dull knife between the pan and parchment – the filling tends to leak before it solidifies and needs to be gently dislodged. Gently (notice I use this word again – the crust is still very soft and you don’t want to break it), begin to lift up the bars out of the pan. You’ll probably have to work your way around the parchment ears, lifting….gently. Once it breaks free, place the bars on a wire rack, then peel down the sides of the parchment and let cool completely. Yes, the sides look raggety, but you can cut those away later (or not).
Once the bars are completely cool (and I mean completely!), flip them over by sandwiching them between another wire rack or flat plate. Peel away the parchment and flip them back to right side up.
Slide them onto a flat surface and cover (I have a square Tupperware, or you can use the baking pan.) Refrigerate at least 24 hours. (I know that sounds like a long time to wait, but they need that time to come into their own.) Sprinkle liberally with confectioners sugar and slice away the ratty-looking edges (you can still eat them).
For appearances sake, it’s best to slice the bars with a non-serrated long knife, cutting straight down, using a rocking motion when you get down to the crust. Some people wipe the knife clean after each slice, but I’m not that particular.
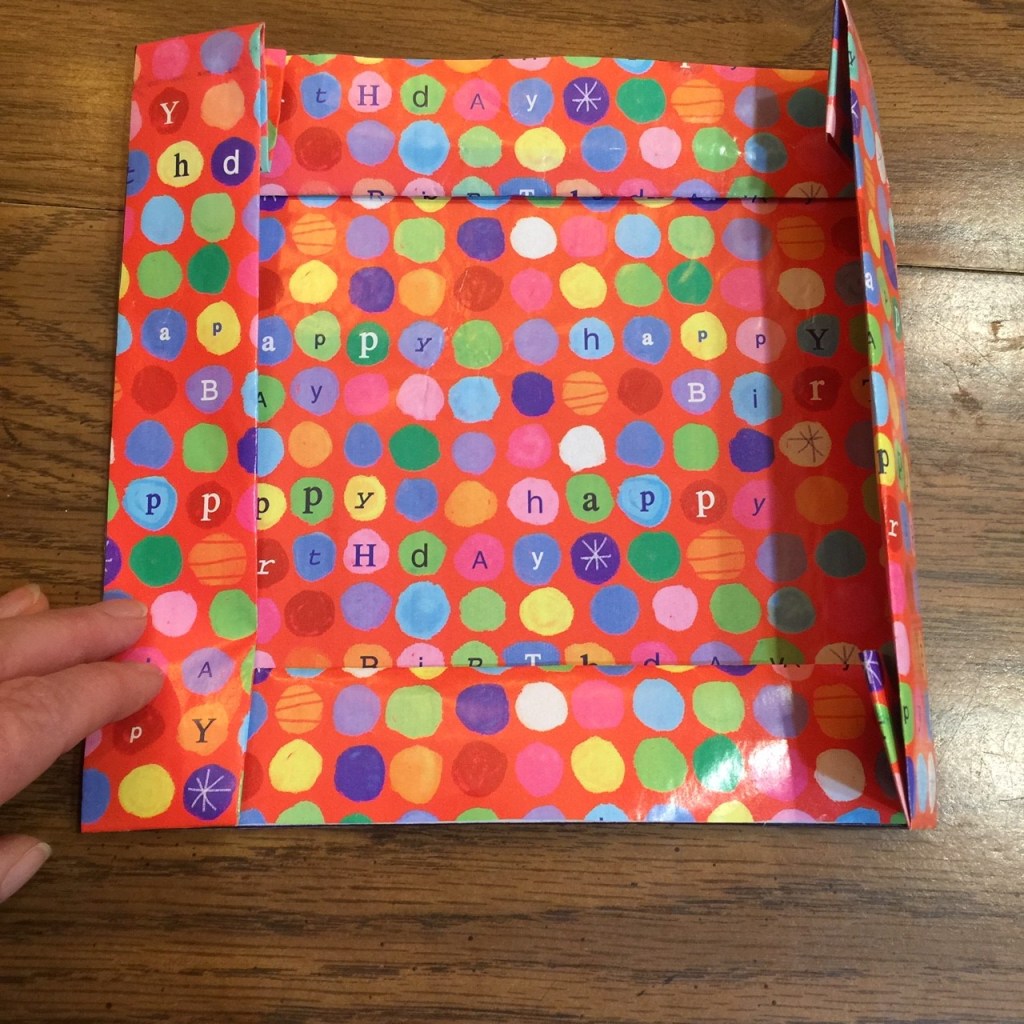
INSTRUCTIONS FOR FOLDING A PARCHMENT INSERT
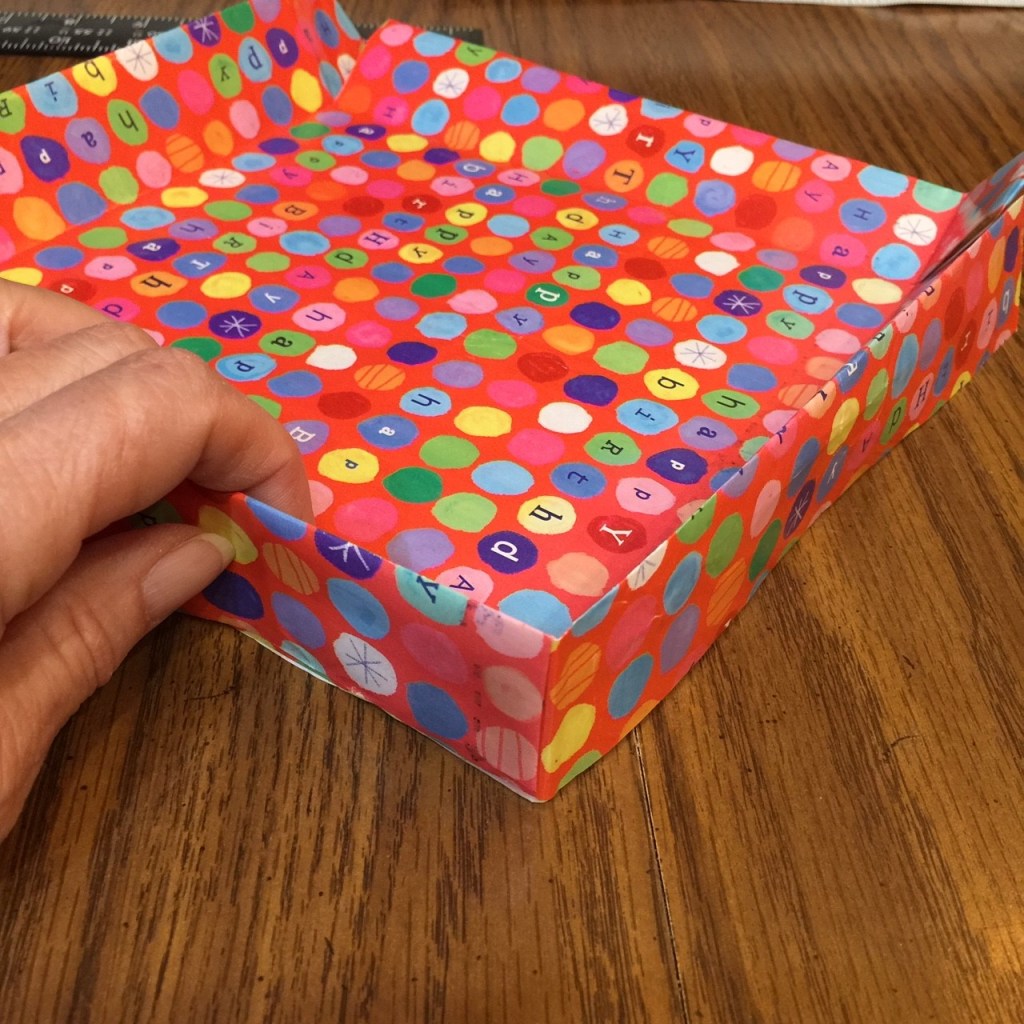
I’m using wrapping paper for this demonstration so you can see which side of the paper goes where. The final product will look like this:
To line an 8″ x 8″ pan, cut out a 14″ x 14″ square (8″ for the pan, plus 3″ for each border. Draw an 8″ x 8″ square in the center of the paper (you don’t have to write the numbers). This will become the bottom of the insert – you don’t want food touching the pencil or ink marks.
2. Fold each border in so the edge meets the ink mark. This fold will be 1.5″ for an 8″ x 8″ pan. There’s no special order to the folding.
3. Flip the paper and fold in each side border, creasing at the ink line. The side border will be 1.5″ tall, double folded. You will now have an 8″ x 8″ square.
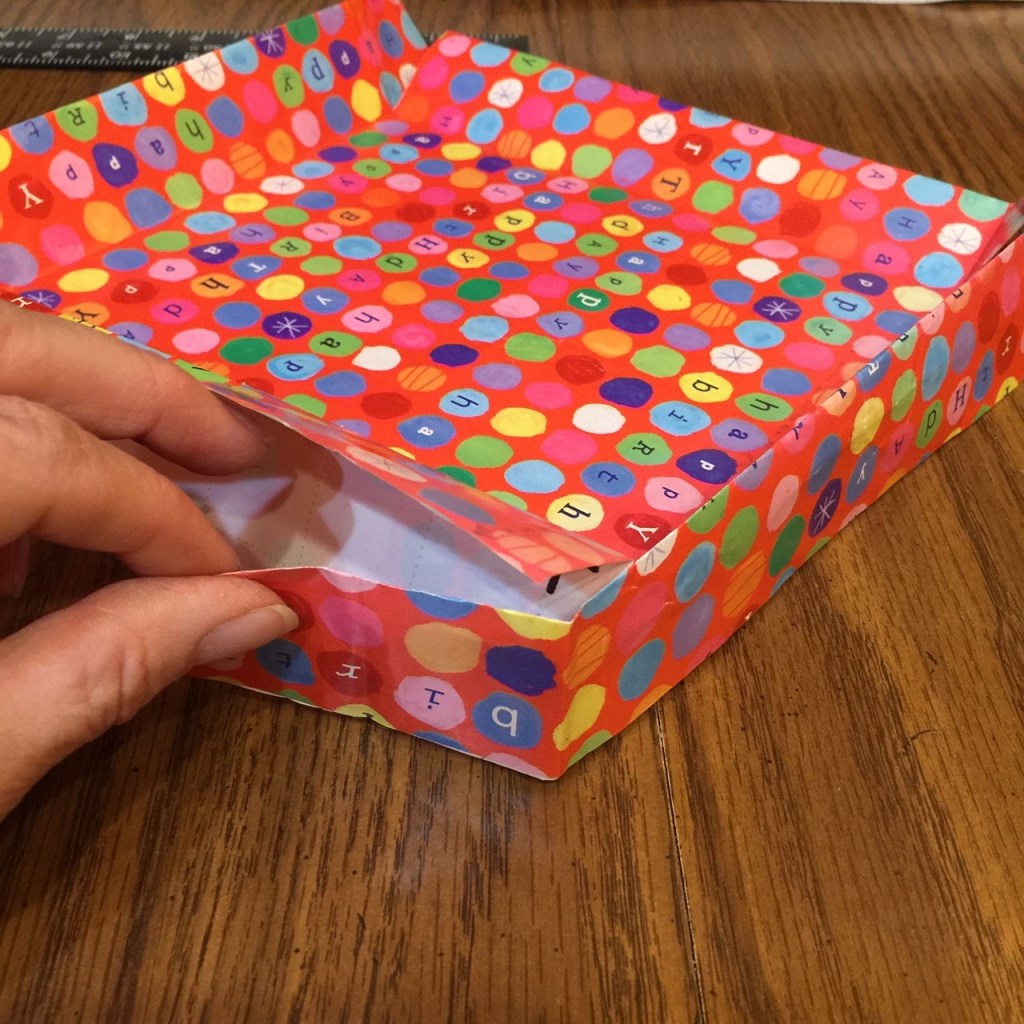
4. Unfold the fold you made in Step 3. In each corner you’ll notice a 1.5″ square created by 2 outside edges and 2 creases. Cut one of the 2 creases in each of the 4 corner squares to the corner point (see the neon green lines in the photo below). It doesn’t matter which of the 2 creases you cut in each square, but only cut 1 crease per square.
5. Unfold the paper from each corner flap.
6. Fold each corner flap underneath the side border next to it.
7. Unfold the side border and nestle the flap inside the side border so it fits snuggly.