PITA BREAD – Pocket Your Sandwich!

pita bread textPeople are often astounded that I bake my own pita bread. I’m not sure if it’s because they don’t understand why I bother, or because they believe it’s difficult to make.

Well, I bother because I like to know what’s in my food, AND because I love to save money. Breads are so cheap to make!

As to the difficulty – it’s not! If you think about it, pita bread has been around for thousands of years. People managed to bake it without the use of machinery or sous chefs. How hard could it be?

The key elements to getting the dough to puff is a HOT oven – 500° F, and rolling them thin (but not too thin). They’ll be the correct thickness if you divide the dough into 6 pieces and roll each 6½ in diameter.

NOTE:  Even if they don’t inflate, they still may have formed a pocket.

If, for some reason, the pita doesn’t inflate or, at least, separate inside so you can stuff them, never fear. They’re still usable! Simply pile the filling on top and fold the bread over like a taco. Some people prefer it that way.
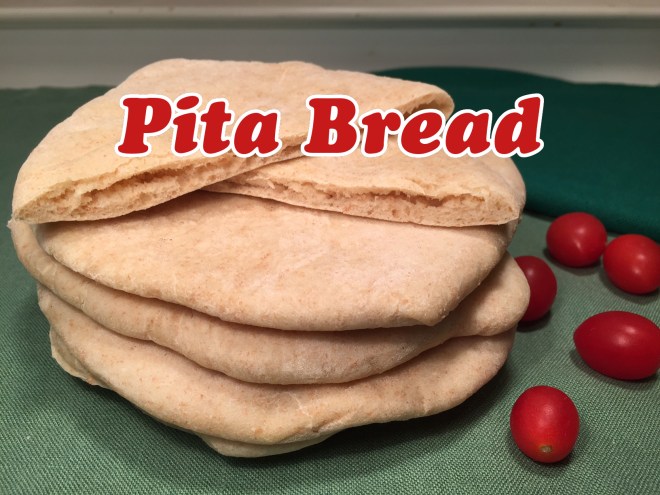
PITA BREAD: makes 6

  • 3/4 cup water
  • 1½ tsp yeast
  • 6 T whole wheat flour
  • about 1¾ cup bread flour
  • 3/4 tsp salt
  • 2 T olive oil

Heat water to 100°-104°. Stir in yeast and let proof for 5 minutes.

Into the work bowl of your food processor put all the wheat flour, 1½ cups of the bread flour, the salt, and oil. Turn on the machine and slowly pour in the yeast water through the pour spout. Let run 30 seconds. Check dough to see if it needs more flour. It should be slightly tacky if you tap it quickly, but not so tacky that it sticks to your finger. Add more flour if it is. Run machine again. Let run another 30 seconds, even if you didn’t need to add more flour.

NOTE: If you don’t have a food processor, you’ll have to mix and knead the dough by hand. During the 10 minutes of kneading, try and figure out how you can afford a food processor!

Pour dough into an oiled bowl, flip dough so it’s oiled on both sides, cover, and let rise for 1 hour.

Punch down dough and divide into 6 equal pieces. Roll each piece into a ball, cover, and let rest 10 minutes to decrease its elasticity.

On a floured surface, roll each ball with a rolling pin into a circle 6½” in diameter. Keep dough covered when not working with it.

Place oven rack on bottom slot, set bread stone or a cookie sheet on top of rack, and preheat oven to 500° F. The time it takes to heat oven allows the dough one final rise.

When oven is ready (make sure it reaches 500° F – don’t get impatient!) gently place as many dough circles as will fit. Cover those that don’t fit and cook them when these are done. Set timer for 4 minutes. DON’T OPEN OVEN DOOR UNTIL TIMER GOES OFF! If you want to watch, turn on the light and peer through the door. For the pitas to puff properly the temperature needs remain really hot.

Stack baked pitas and wrap completely in a tea towel. This allows steam to finish the cooking, plus it keeps them pliable.


Advertisement

ROASTED GARLIC BRUSSELS SPROUTS – Dracula Approved!

ROASTED GARLIC BRUSSEL SPROUTS

ROASTED GARLIC BRUSSELS SPROUTS

I’m a big fan of garlic – and not because I have an irrational fear of vampires. (Although, it doesn’t hurt to play it safe.) It turns a “meh” food (like plain Brussels sprouts) into a “YES!” food (like Roasted Garlic Brussels Sprouts). Adding a splash of balsamic vinegar to this easy-to-prepare dish is the cherry on top.

ROASTED GARLIC BRUSSELS SPROUTS

  • 12 Brussels sprouts
  • 3 T olive oil
  • 2 tsp garlic, pressed
  • 1/2 tsp salt (I use kosher)
  • 1/2 T balsamic vinegar

Wash Brussels sprouts well, removing loose outer leaves. Cut in half, top to bottom.

Mix olive oil, garlic, and salt together in a bowl. Add in sprouts and blend well.

Preheat oven to 400° F.

Lay sprouts on cookie sheet face down. Bake at 400° F for 8 minutes. Turn over and bake another 4 minutes.

Pour  sprouts into previously used bowl (no point in dirtying another bowl), and stir in the balsamic vinegar. Serve immediately.


CHOCOLATE PEANUT BUTTER BALLS – The Gift Of Love!


choc pb balls title

I’m pretty sure there’s some kind of law that Valentine’s Day must include chocolate. Me, being a law-abiding gal (AND a devout chocoholic), am more than happy to do my part. Throw peanut butter into the mix, and you’ve got a winner!

CHOCOLATE PEANUT BUTTER BALLS are a family favorite – and not just my family, but my neighbor’s, as well. But because they involve a bit of time, I only make them for special occasions such as Christmas and Valentine’s Day.

BTW, if you have little ones who like to “help” in the kitchen, this is the perfect recipe. They can assist with the ball rolling and chocolate dipping.

CHOCOLATE PEANUT BUTTER BALLS – makes about 40

  • 1/2 cup butter (1 cube)
  • 1/2 cup chunky peanut butter
  • 1 cup confection’s sugar (powdered sugar)
  • 3/4 cup graham crackers, crushed (3 oz total – about 5 rectangles)
  • about 2 cups semi-sweet chocolate chips

In a saucepan, over a medium flame, melt butter and peanut butter together. Turn off heat. Blend in sugar and graham crackers. Remove from stove and let cool.

peanut butter balls mix1

Roll into 3/4″ balls – don’t make them too big since the chocolate will add to the size. Place them on a cookie sheet lined with waxed paper. Chill until they’re solid – at least an hour.

Over a VERY low heat, melt half of the chips, stirring constantly. Turn off the flame now and then as you’re stirring to keep the temperature down – if the chocolate gets too hot, it solidifies. Once the chips are melted, turn off flame but leave pan on burner to keep the chocolate warm and melted.

One by one, drop peanut butter balls into melted chips, using a spoon to coat with the chocolate. Gently place back on the waxed paper, making a little swirl on top with the chocolate dripping off the spoon. Replenish saucepan with more chips as needed, melting them over a low heat into the remaining chocolate.

Chill the CHOCOLATE PEANUT BUTTER BALLS.

peanut butter balls mix2

Best stored in refrigerator (especially on hot days) so they don’t get melty, but in cold climates, they’re fine on the counter in a covered container – although, they won’t last long once people know they’re there.

POTATO BALLS – Crunchy & Creamy!

POTATO BALLS – Crunchy & Creamy!

potato balls text

Snacks and Super Bowl parties (or, ANY sporting event, for that matter) are a natural combination. Pizza, chips, and impossibly long sandwiches – all laid out for mass consumption in front of energized viewers.

To add to this year’s feast, I decided to make use of leftover mashed potatoes (you know how I hate waste) by making Potato Balls. Rather than dropping them in a vat of hot oil, I encased them in a crust of seasoned panko and baked them. Might as well save calories when I can. Crunchy on the outside, creamy on the inside.

You don’t even need leftover mashed potatoes. Just boil some fresh russets and skip the butter and milk. The Potato Balls are still yummy and have a few less calories since butter and milk haven’t been added.

NOTE: You can use bread crumbs instead of panko, but they won’t be as crunchy.

POTATO BALLS – makes about 28 balls

  • 1½ cups mashed russet potatoes (about 1 lb)
  • 1/4 cup flour
  • 1/4 cup sour cream
  • 2 T dried minced onions
  • 1 tsp salt
  • 1 egg
  • 3/4 cup panko crumbs
  • 3/4 tsp paprika
  • 3/4 tsp oregano
  • 3/4 tsp garlic salt

Peel, chop, and boil the potatoes (unless you’re using leftover mashed potatoes). When they’re easily pierced with a fork, drain and mash.

Beat egg in a medium sized bowl. Mix in potatoes, flour, sour cream, dried onions, and salt.

In a wide mouthed bowl (such as a cereal bowl), mix together the panko, paprika, oregano, and garlic salt. (You need a wide mouthed bowl to allow room for both your hands.)

Using a spoon, drop about 1½ T of the dough into the panko mix.

IMG_1358 (1)

Using your fingers, toss crumbs all over dough, patting them in. Carefully lift covered dough and roll it between your palms. Cover with crumbs again and roll. DON’T try to roll dough before covering with crumbs – it’s much too sticky.

IMG_1363

Place on a greased or nonstick cookie sheet and bake in a preheated 400° F oven for 20-25 minutes, until browned.

Serve hot. They’re delicious plain, but also go well with Ranch dressing or ketchup.