Beurek – A “Handy” Little Treat

Cheese Boerg

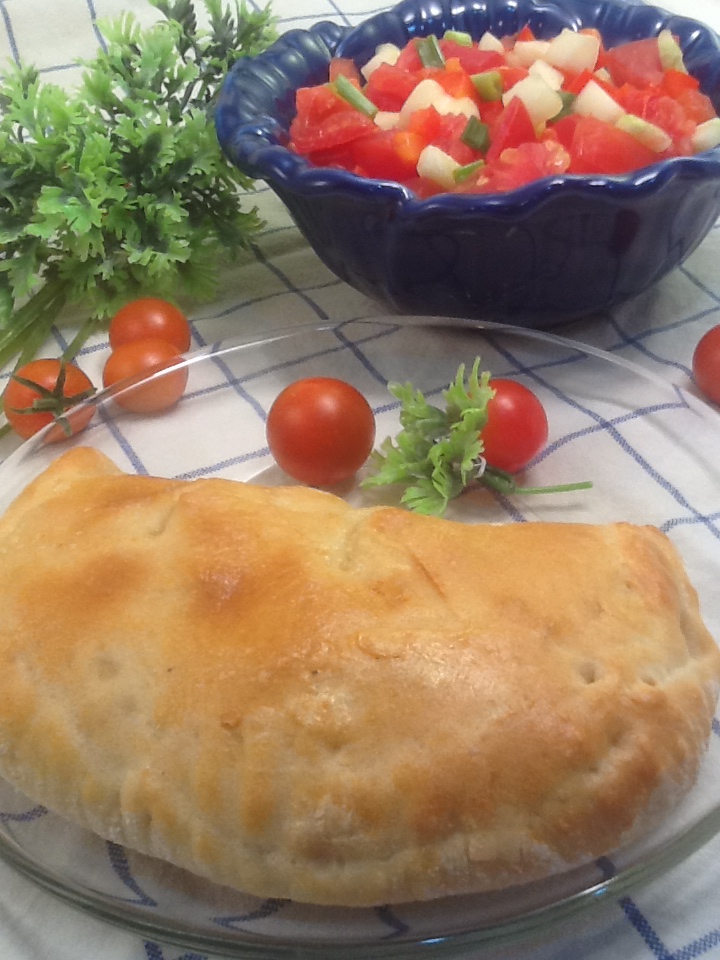
Cheese Beurek served with Armenian Salad.

Like all ethnic families, our Armenian family gatherings centered around food. Stops were pulled, and a feast was enjoyed by all – generally twice in the same day.

A favorite amongst the children was Cheese Beurek (pronounced ‘burr-egg’). They’re similar to the Cornish pasty and Italian calzone. Admittedly, these tasty delights are a bit of work – they’re not difficult, just time consuming.

Now here is the issue of utmost importance with Cheese Beurek:  to ooze or not to ooze. Unless you’re very careful, some of the cheese filling oozes out midway through the baking process, forming a crispy cheese appendage. (See photo below.)
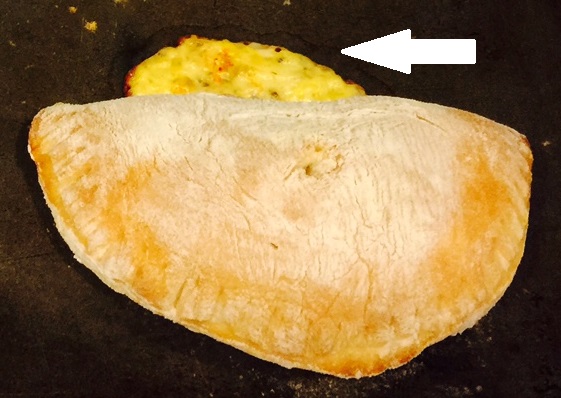
Oozy Beurek

Oozy Beurek

To be honest, I quite like this cheesey bonus disc, and there’s still plenty of cheese inside. But they don’t look very nice and, of course, when they’re completely enclosed, there are no greasy fingers.

I embarked on a mission to discover why the bursting forth of cheese so I would know how to counteract this situation if I wanted to serve Cheese Beurek for company. Oddly enough, the leakage comes from the folded side, not where the edges meet, like you might expect. This is probably because I crimp the heck out of the dough.

So I made countless Cheese Beurek, experimenting with different methods including slitting the top, using less filling, keeping the filling away from the center of the fold, and brushing the dough with egg before placing the filling. What finally worked was using a piece of floured waxed paper to assist in folding the dough, rather than my hands. I guess I was stretching the dough with my palm even though I tried to be careful. The paper keeps the dough stable.

So there you have it!

One thing I should mention is that sometimes beurek is made using a filo or puff pastry dough, rather than bread dough. It’s just a matter of preference.

NOTE:  This recipe involves a rising dough, so allow time for it.

CHEESE BEUREK – makes 12 beurek

  • 2 tsp dry yeast
  • 1¼ cups water, 100º – 104º Fahrenheit
  • 3 1/3 cups all purpose flour, approximately
  • 1 tsp sugar
  • 1½ tsp salt
  • ¼ cup shortening (I use Crisco)
  • ½ lb Muenster cheese, shredded
  • 1 egg, beaten and divided
  • ½ tsp black ground pepper
  • ¼ tsp garlic salt
  • ½ tsp salt

Stir yeast into the water and let proof (foam) for about 5 minutes. Put 2½ cups of flour into the work bowl of your food processor.  Add in sugar, salt, and shortening.  Turn on the machine and slowly pour in the yeast water. Turn off machine and sprinkle in a few more tablespoons of flour. Turn on machine. The goal is for the dough to form a ball. Keep adding in flour a little at a time until the ball forms – you may not need all the flour. If you don’t have a food processor, you’ll have to mix in a bowl and knead by hand. (Start saving your pennies, you really should have one!)

Pour the dough onto a floured bread board. Pick up the ball from the flour-y bottom and fold the dough onto itself, so now floured dough surrounds it and the sticky dough is encased. (I HATE touching sticky dough with my hands.) Gently toss the ball to dislodge excess flour. Plop the dough into a greased bowl, press down, then flip the dough. Now the ball is greased on both sides and your hands should still be clean. Cover with a tea towel and let rise for about an hour.

Prepare the filling while the dough is rising. Into a mixing bowl blend the cheese, half of the egg, the pepper, garlic salt, and salt. Into a smaller bowl make an egg wash by beating the other half of the egg and 1 tablespoon water.

When the dough has risen, pour it onto a well floured board and cut into 12 pieces. Form each piece into a ball, then flatten with the palm of your hand. Let the dough rest about 10 minutes so it’s easier to roll out.

One by one (unless you’re doing an assembly line with helpers) roll out a dough circle to be about 5½” in diameter. Place this on a lightly floured square of waxed paper. Spread about 2½ tablespoons of the filling on one half of the dough, leaving a 3/8″ border from the edge. Dip your finger in water and run it around the entire border to moisten dough. Put your palm under the waxed paper and fold the dough in half.  (See picture below.)

Fold dough using waxed paper.

Fold dough using waxed paper.

UPDATE: I’ve just discovered an even better method to prevent leakage:  form 12 oblong cheese balls from the filling, place on waxed paper, and freeze. Place frozen balls on dough circles, wet edges with water, and fold dough over cheese ball, being careful not to poke the frozen cheese through the dough.

Press edges together, then crimp well with a fork.boereg crimped

Place on a greased or non-stick cookie sheet – don’t crowd. One standard sheet will hold 6. With a dry pastry brush, whisk away excess flour.

Preheat oven to 450º Fahrenheit. Do this after beureks are assembled to give them a bit of a rest as the oven is heating.

When the oven is heated, brush the tops of the Cheese Beurek with egg wash. Bake for 12 minutes, until top is golden brown. Serve hot.


Brussels Sprouts Amandine – Try It, You’ll Like It!

FullSizeRender (3)

In a recent post, I made mention of Beaver Cleaver’s (from tv’s Leave It To Beaver) successful encounter with a Brussels sprout. It reminded me of a delicious Brussels sprout recipe I had tucked away. As a creature of habit where vegetables are concerned, I tend to serve the usual broccoli, mushy peas, carrots, and cauliflower. For some reason, I forget about these mini cabbage morsels.

So I rifled through my recipe box and found the Brussels Sprouts Amandine recipe card. To those of you under the age of 25, a recipe box is where index cards with recipes printed on them are stored. (Yes, I’m that old)

Every time I make this recipe, I wonder why I don’t make it more often. It’s one of those hater-converters. Never heard the term? That’s because I just made it up. A hater-converter is a recipe so yummy that it alters your negative view of a certain ingredient, such as Brussels sprouts, into something you love…or, at least, like enough to tolerate because it’s good for you.

TIP: Brussels Sprouts Amandine taste best when freshly made. So prepare the sauce ahead of time, leaving it in the saucepan for a quick reheat. Have the Brussels sprouts cleaned, halved, and sitting in the steamer basket ready to be cooked. They only take about 5 minutes. This way, you can turn on the burner as your meal preparation is winding down, quickly dress them, and they’re ready to go.

BRUSSELS SPROUTS AMANDINE – makes 2 cups

  • 2 cups Brussels sprouts
  • 2 T slivered almonds, toasted
  • ½ T butter
  • ½ T Dijon mustard
  • 1 T red cider vinegar
  • 1½ T dark brown sugar, packed

Trim the base of Brussels sprouts and remove loose leaves.  Slice them in half lengthwise and place in steamer basket.  DON’T FORGET THE WATER UNDERNEATH!  (Been there, done that.)

In a small saucepan, melt together the butter, mustard, vinegar, and sugar.  Turn off burner and set sauce aside.

When it’s about 5 minutes until meal time, steam the Brussels sprouts.  You want them cooked, but not mushy.  They’ll become vibrant green just before they’re ready – test with a fork.  Remove from heat.

Quickly reheat sauce and mix with sprouts and almonds.  Serve immediately.


Chilly Weather Is Chili Weather!

IMG_0451

When the weather turns teeth-chattering, there’s nothing like a big bowl of hot and hearty chili. It’s almost obligatory. Can’t you just picture it? Howling wind and pouring rain outside. You huddled beside a roaring fire, woolen blanket on your lap, fortifying yourself with a thick chili topped with cheese and maybe a few (which translates to a large handful) Fritos.

As an ex-carnivore who still has fond memories of chili teeming with beef and/or pork, I just couldn’t accept the typical vegetarian version which generally replaces the meat with various vegetables such as zucchini, eggplant, and carrots. Now, I love vegetables as much as the next person, but there’s no way a mushy zucchini or eggplant will have the same bite as meat.

That’s where imitation meats (heretofore referred to as ‘fake’) comes in. Their purpose is to serve as foundation for the other ingredients in a dish by offering a texture similar to the real thing – without leaving a taste in your mouth that makes you run to the nearest sink to empty your mouth. Been there, done that!  If you’ve tried a fake chicken, for example, that brings to mind cardboard – try again with a different brand. Or, perhaps, try cooking it less. Fifteen seconds too long with fake hamburgers can turn a tender patty into a hockey puck.

Fortunately, my chili recipe calls for ground “beef”. (Reminder – quote marks mean fake.) Since all the ingredients simmer together, there’s no worry about overcooking. I love using Morningstar’s Crumbles (found in the frozen food section), but since taste is subjective, use what suits you.

This dish is one of those throw-everything-together-in-a-pot-and-then-simmer recipes. And, unless you have the flame too high and forget to stir, it’s fail proof. If you like this chili, I wouldn’t be living up to my title of Queen of Freeze if I didn’t recommend doubling or tripling (which is what I do) the recipe, then freezing in portion sizes for future use. Cook once, clean once, enjoy homemade meals for months to come!

NOTE: Because I’m a bit obsessive about saving money (cheap!) and cooking from scratch, I buy raw pinto beans and cook them myself ahead of time. It takes about 1½ cups of uncooked beans to make the 2 cups called for. If you’re going to do this, allow a couple of hours, at least. No surprise, I actually buy a large bag of beans, cook the entire amount, then freeze the unused in 1 cup increments.

BONNIE’S VEGETARIAN CHILI – makes 9 cups

  • 2 lbs fake ground beef (I use 2 pouches Morningstar Crumbles)
  • 2 cloves garlic, pressed
  • 1 onion, chopped (I use my food processor to finely chop)
  • 1  28-oz can whole tomatoes, chopped (remove stem end, skin, & any flaws)
  • 1  15-oz can tomato sauce
  • 1½ tsp dried oregano
  • 1 tsp cumin
  • 4 T chili powder
  • 3 T paprika
  • ¼ tsp ground pepper
  • 1 T salt
  • 2 cups cooked pinto beans

Put all the ingredients into a large stockpot. Bring to a boil over a medium heat, stirring now and then. Lower the flame to keep chili at a simmer, uncovered, for an hour. Stir often enough that the bottom doesn’t burn. A flat headed wooden stirrer is perfect for this.