VEGETARIAN DOLMA: Satisfies The Craving When My Armenian Roots Call!

Holidays in my house were always spent with my Armenian father’s side of the family. As it so often is with immigrant gatherings, food played a major role. The main meal was served in the early afternoon. Then came the clean-up, followed by a second round of the main meal. Armenians love to eat!

Dolma (stuffed grape leaves) was a favorite and always plentiful. My grandmother’s recipe was the absolute best! (My Lebanese friend, Deborah, claims her grandmother’s is the best…but we’ll have to agree to disagree.)

Of course, once I became a vegetarian, my grandmother’s beef and lamb filled dolmas became a happy memory, testing my willpower at holiday dinners. Oh, yes, I made many attempts at a vegetarian version, but they never came close.

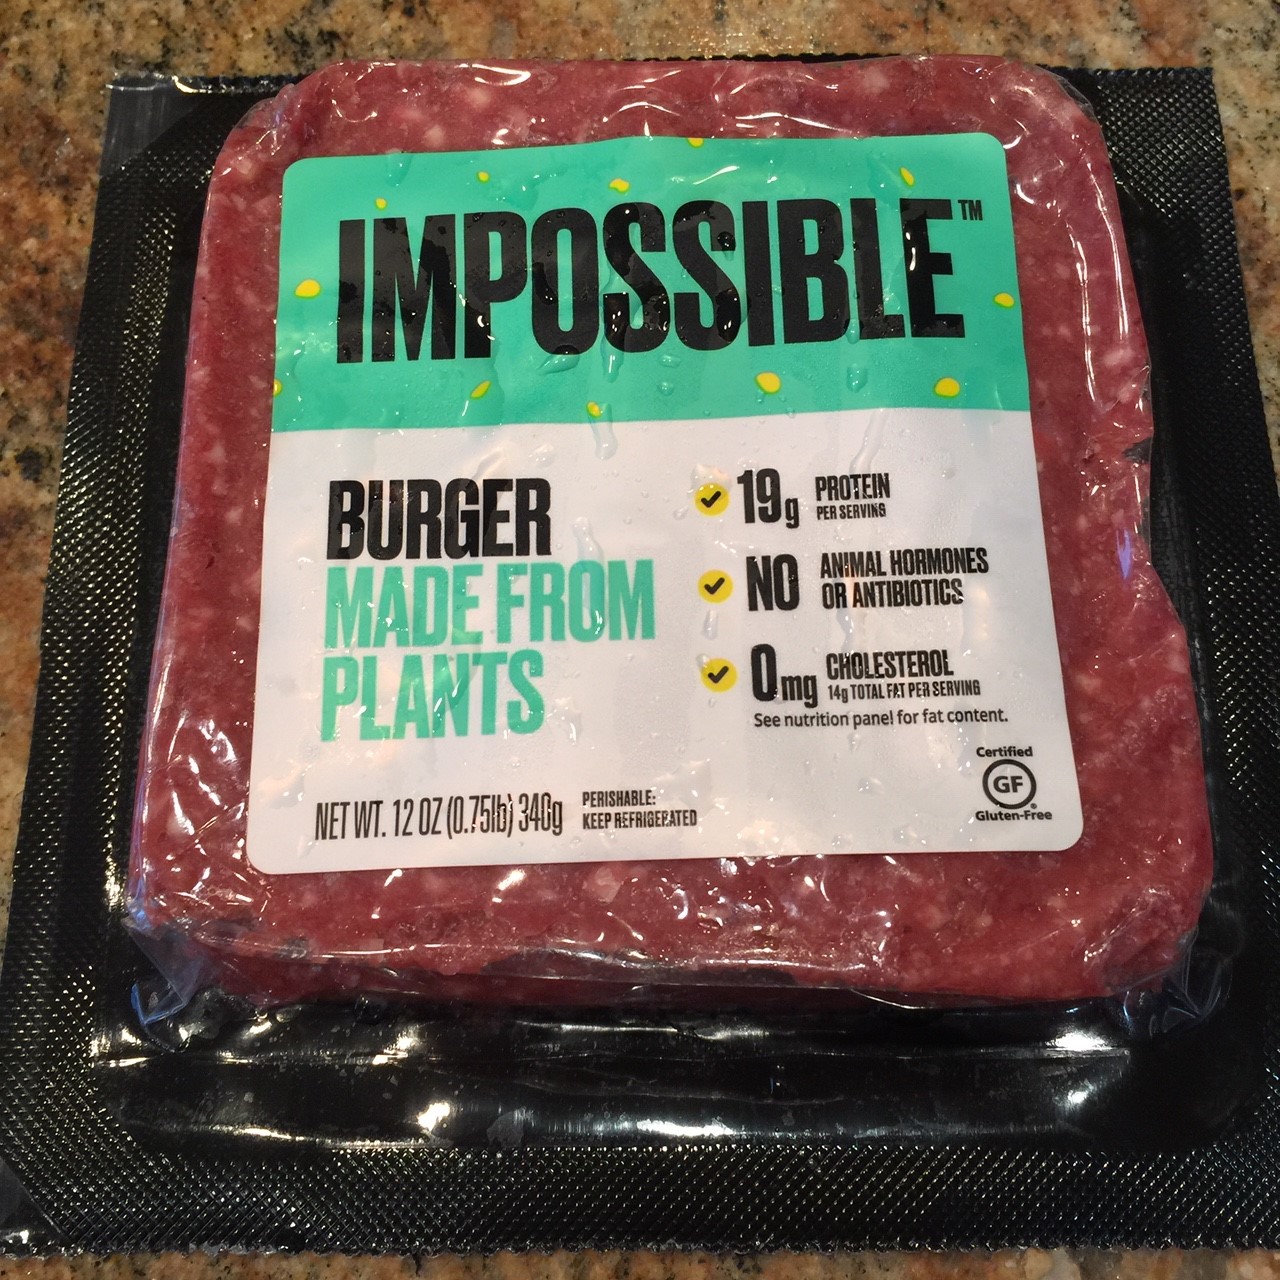
Finally, food technology caught up. Imitation meats were getting better and better. When Impossible Burger became available at my local market, I decided to substitute it in for the beef and lamb (there doesn’t seem to be any imitation lamb yet). I added in a few shiitake mushrooms and Worcestershire sauce for the umani flavor, plus some flour to bind the filling logs so they don’t fall apart. After much tweaking of my recipe, I’m now prepared to serve them to my dolma-loving brother.

Note: I’m recommending Impossible Burger brand for this recipe. (No, they’re not paying me!) This product forms a firmer log so it mimics the filling made with beef and lamb.

Note: While you can grow and brine your own grape leaves, it’s much easier to buy them. Most supermarkets carry them, but you have to search. They’re usually in with the olives, and packaged in glass jars. You may not have much choice in brands. Be aware that they can be very difficult to remove from the jar – quite often I end up tearing a third of them, which makes them unusable. A brand with a wide mouth is best. To remove the leaves, you have to grasp a roll, then gently pull up while twisting. It’s very maddening.

Queen of Freeze note: Unused leaves can be stacked, rolled, and frozen for future use.

VEGETARIAN DOLMA – makes about 26-31, depending on leaf size

  • 340g / 12 oz / 3/4 lb Impossible Burger
  • 3 T parsley, chopped
  • 62 g / 2 oz shiitake mushrooms, coarsely chopped
  • 50 g / 1/3 cup / 1.75 oz uncooked Chinese-style rice (or any white rice)
  • 100 g / 3.5 oz onions, chopped
  • 286 g / 10 oz canned tomatoes plus their juice
  • 1/4 tsp ground black pepper
  • 2 tsp salt
  • 1 T vegetarian Worcestershire sauce
  • 30 g / 4 T all-purpose flour
  • at least 40 grape leaves (you won’t use them all, but it’s good to have extra)

To get 286 g (10 oz) of the canned tomatoes plus juice, you’re going to have to buy a larger can and weigh out the amount. (Using the entire 15 oz can is too much for this recipe.) Pour the juice into a 4qt (4 litre) or larger cooking pot. Remove and discard the stem area of the tomatoes, and any skin or defects. Chop into small pieces.

Thoroughly wash mushrooms, discarding the stem (it’s too woody). Chop cap into 1cm (3/8″) sized pieces.

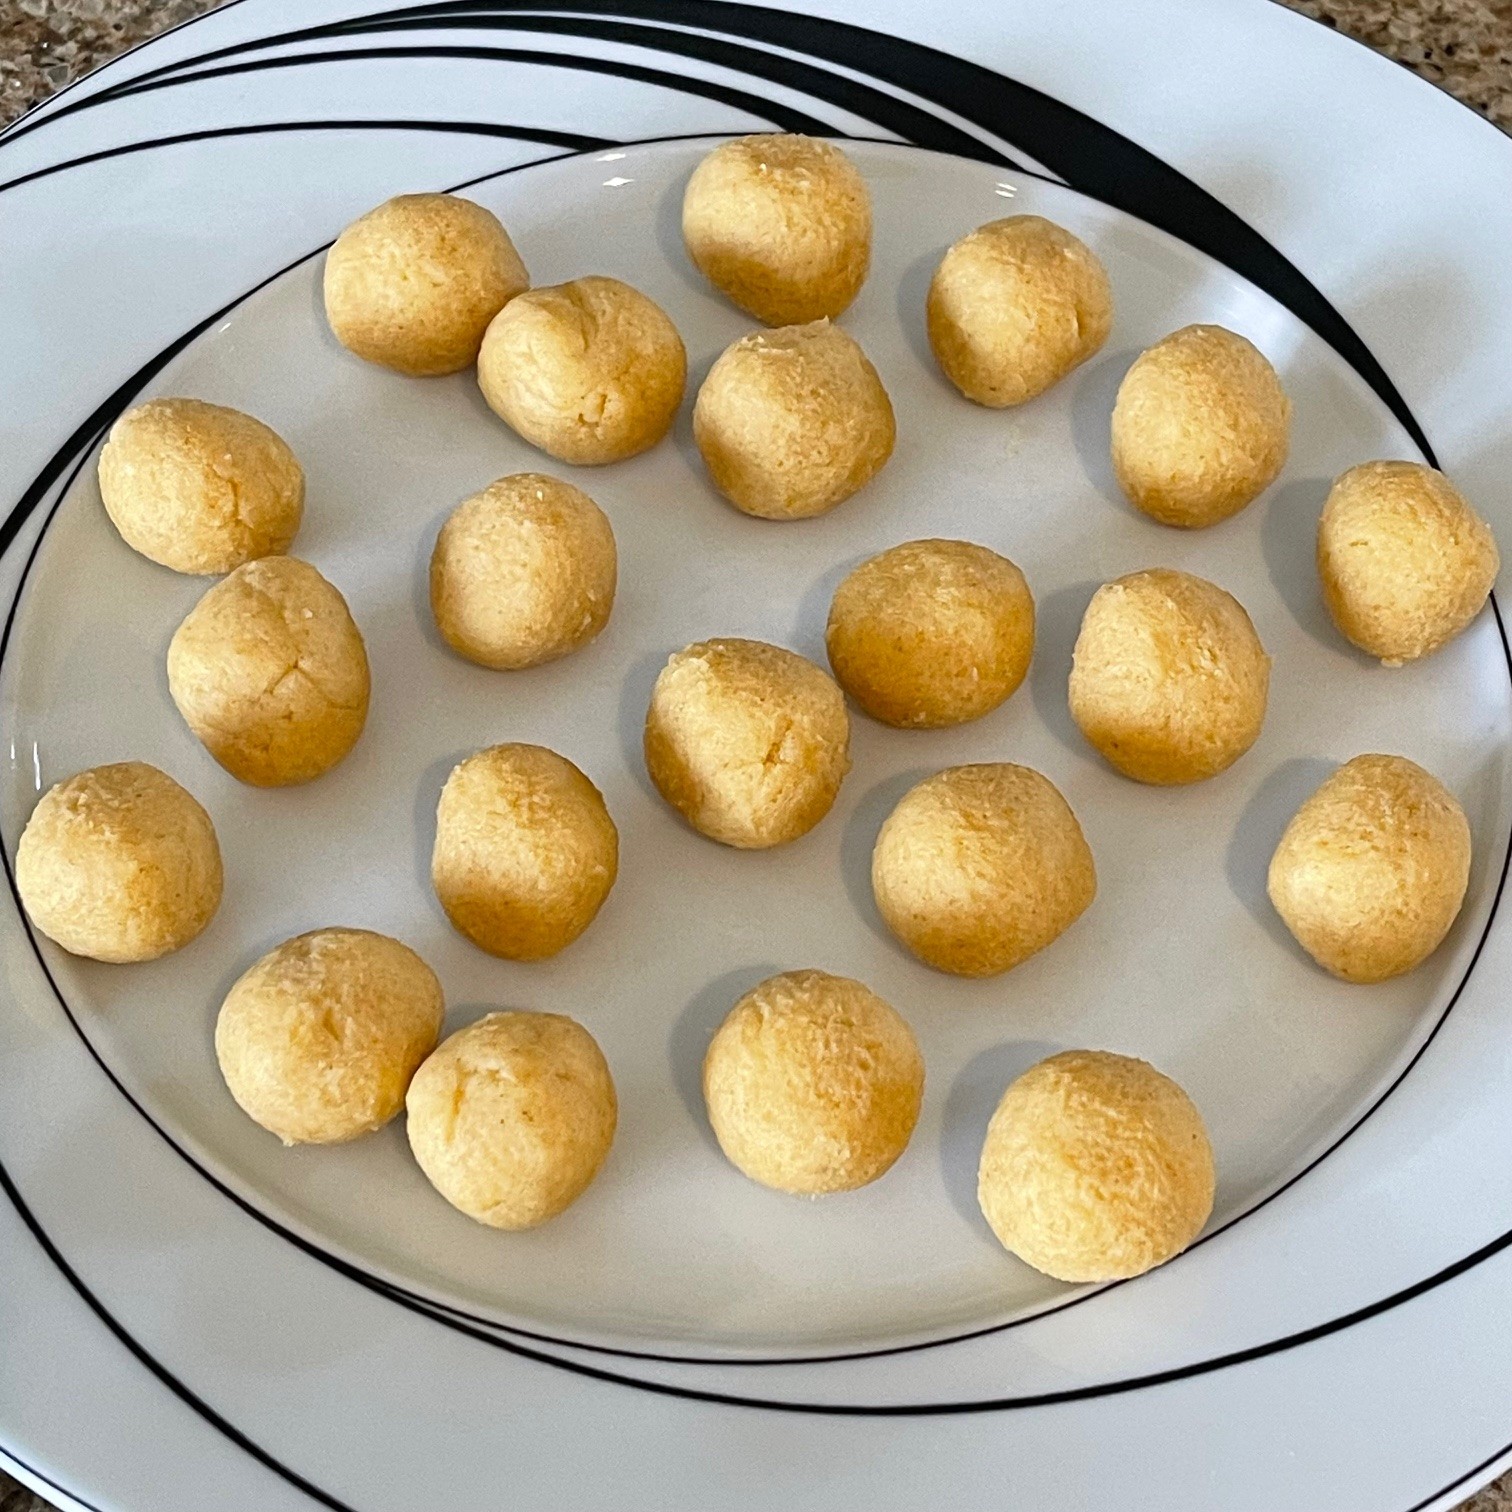
Into a large bowl, put the tomatoes, Impossible Burger, parsley, mushrooms, rice, onions, pepper, salt, and Worcestershire sauce. (You’ll add the flour later.)

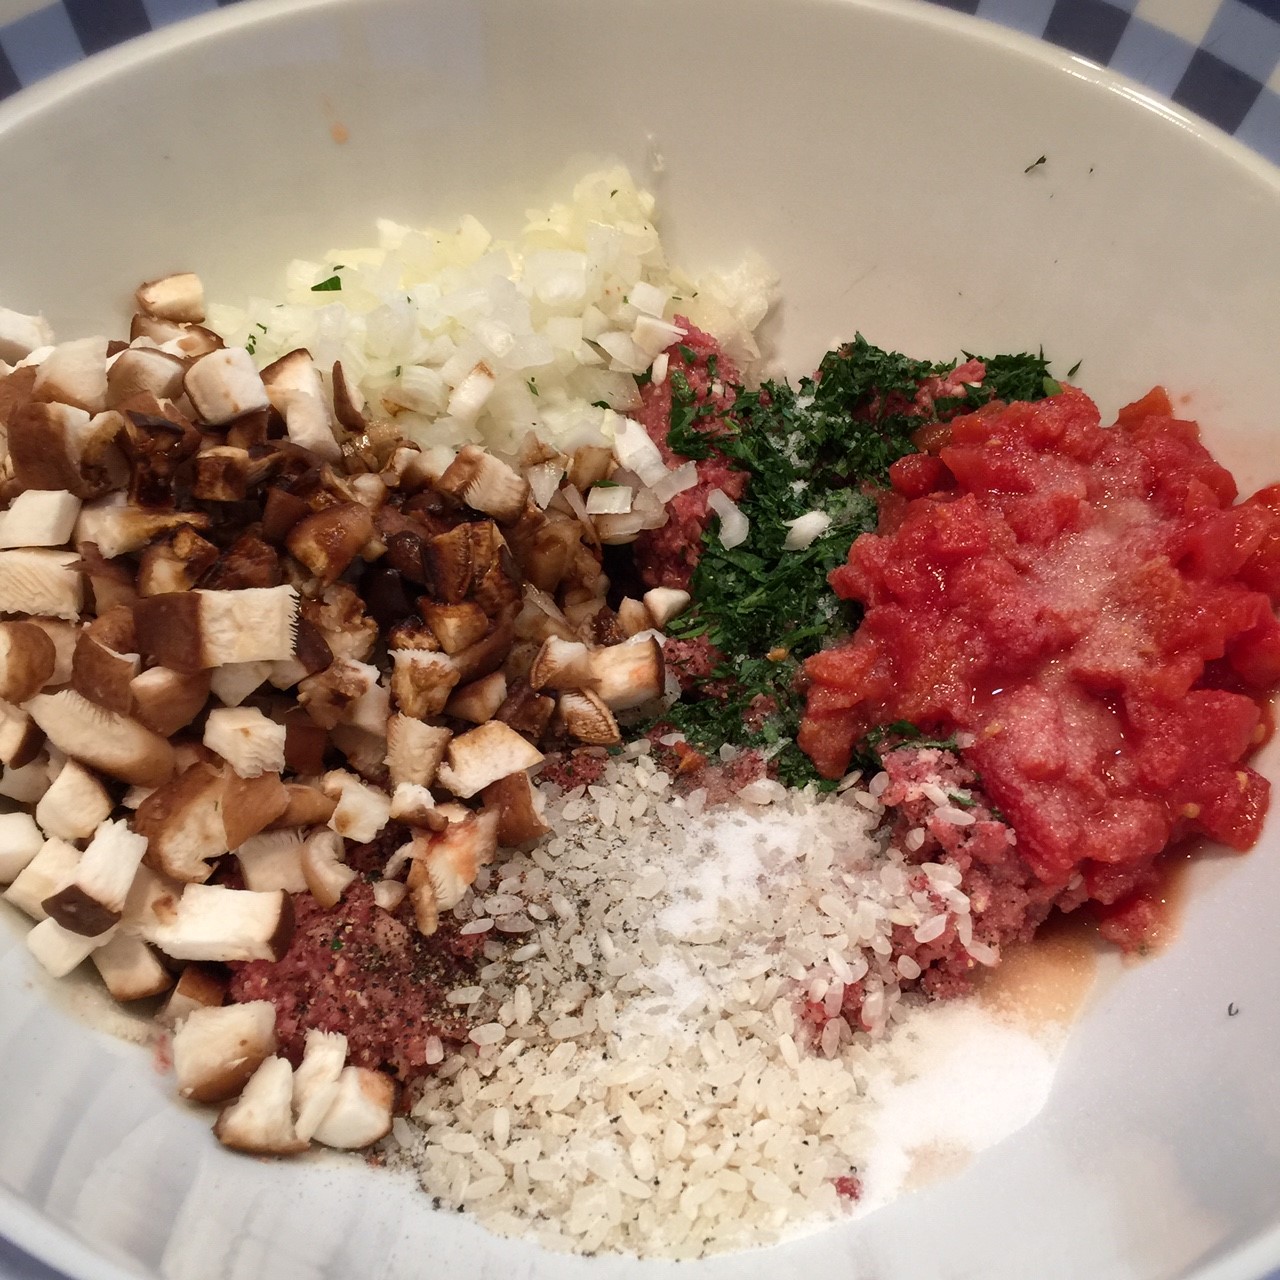
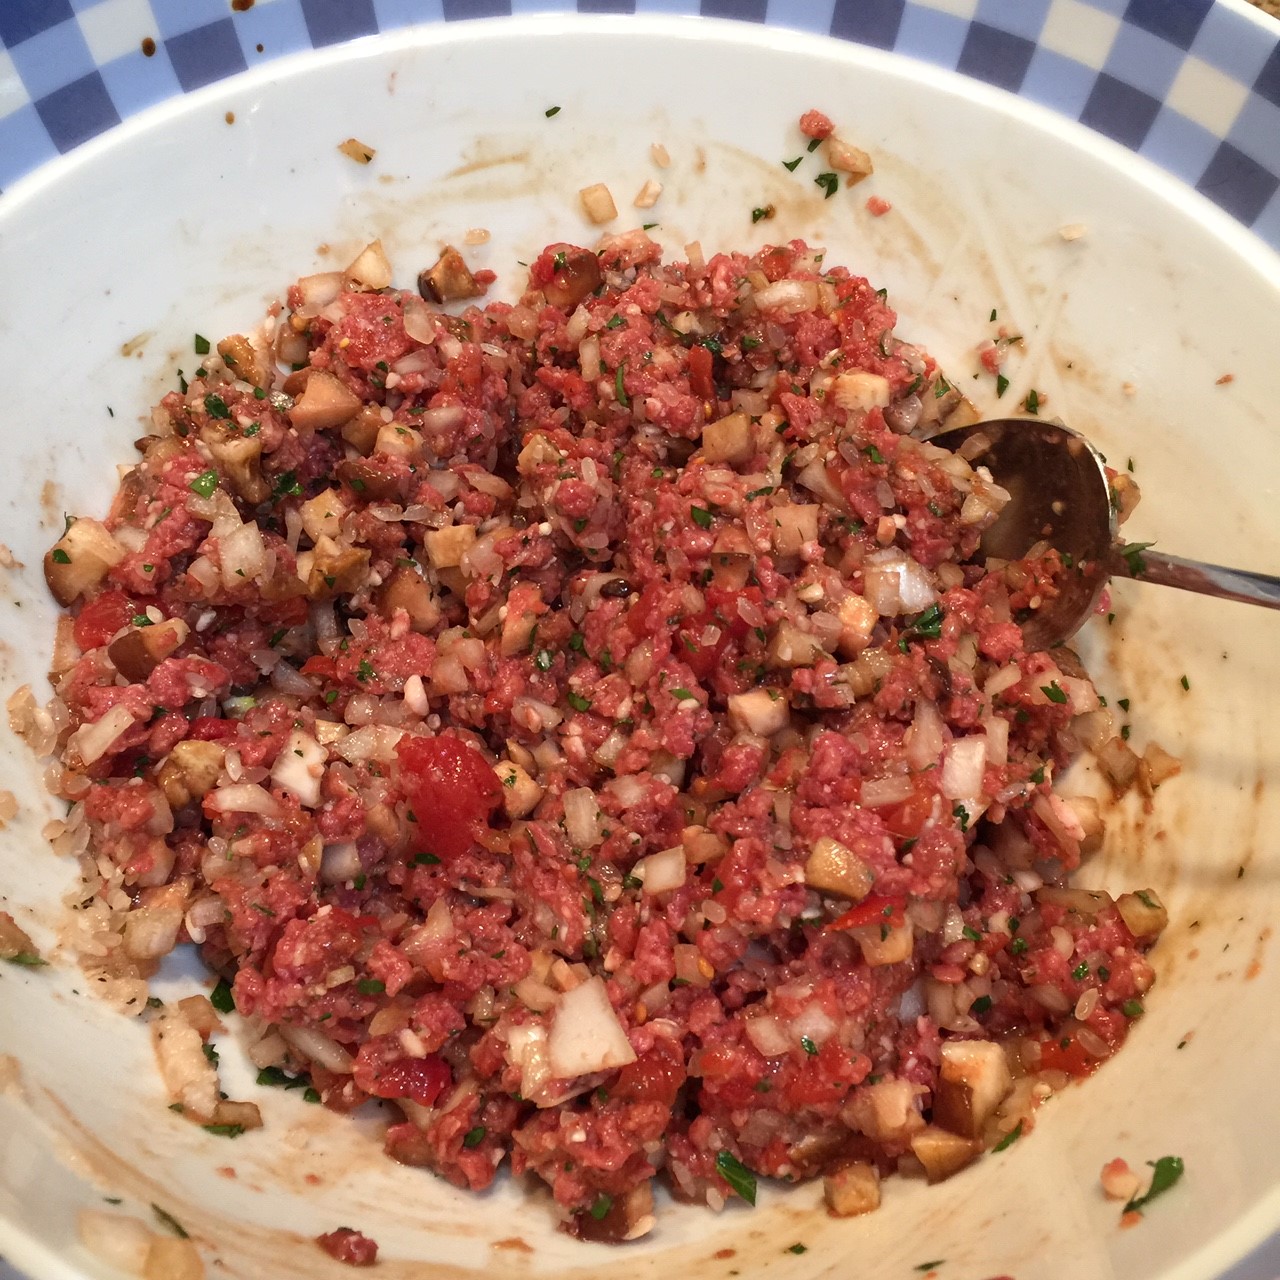
Stir mixture to blend.

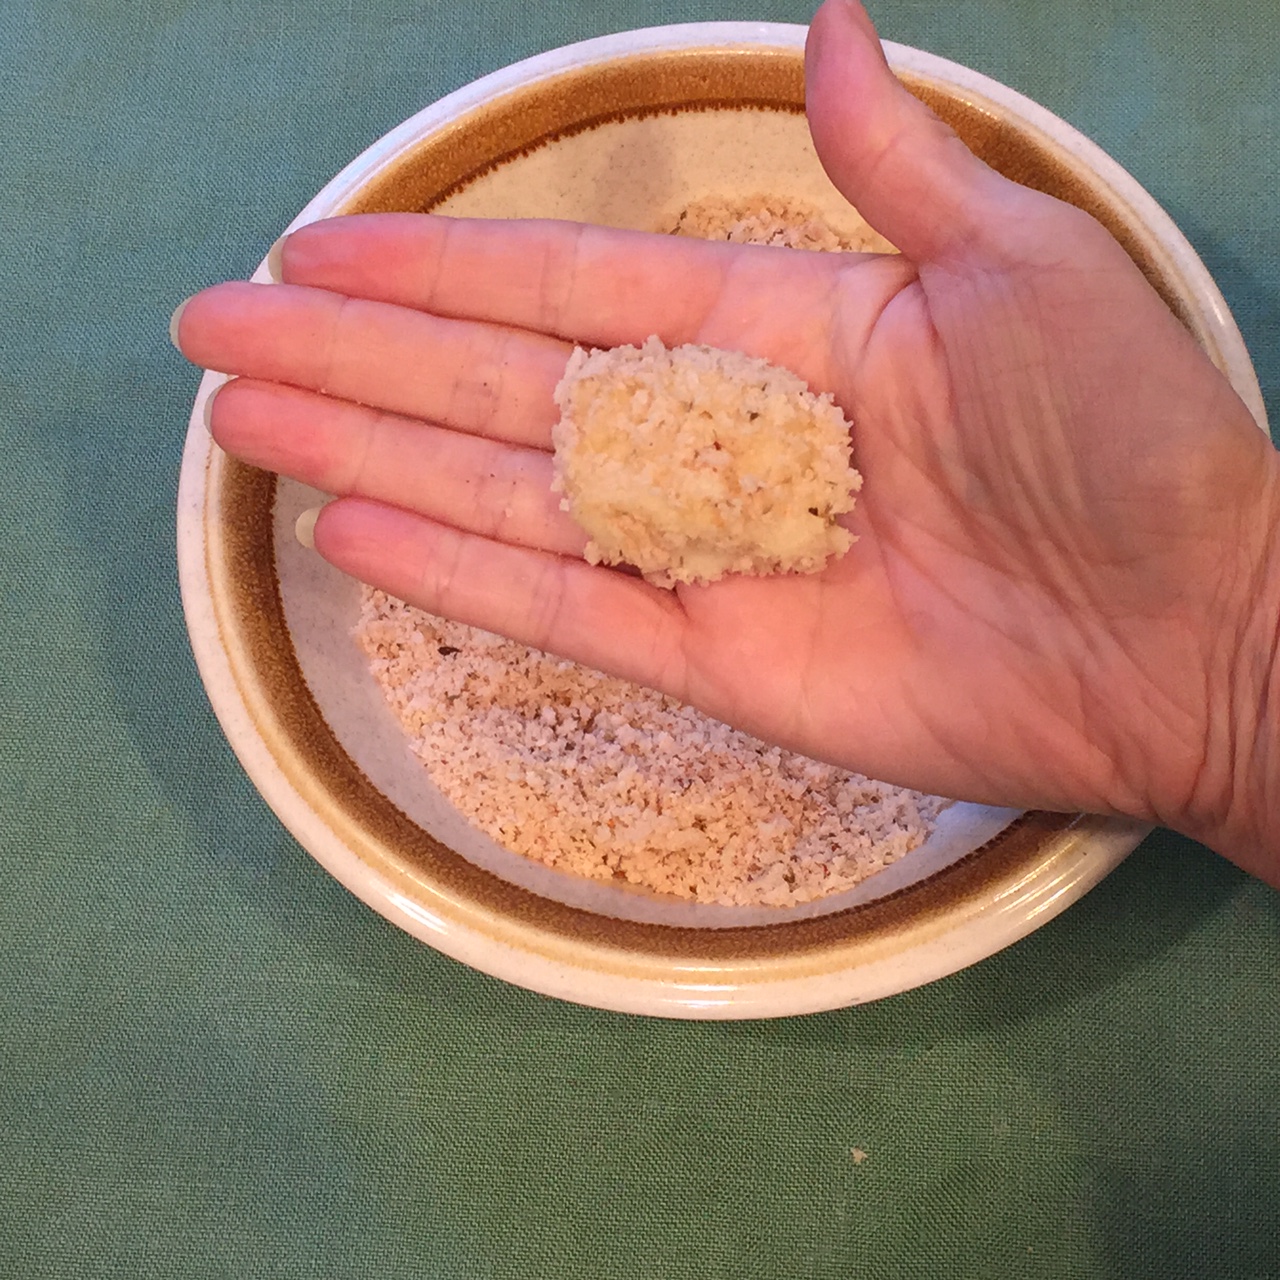
Before adding in the flour, prepare the grape leaves. Depending on the brand, it can be very tricky to remove them from the jar without tearing many. Torn leaves are pretty useless. So, do your best. You’ll need between 20-40 intact leaves. (The number is dependent on the size of the leaves and how generous you are with the filling.)

After removing the grape leaves from the jar, unroll them and cut off the stems to the nub. Some people rinse off the brine, but I don’t – I like the salty flavor.

Depending on how much room you have, lay out several leaves, vein-side up, to work in an assembly-line manner.

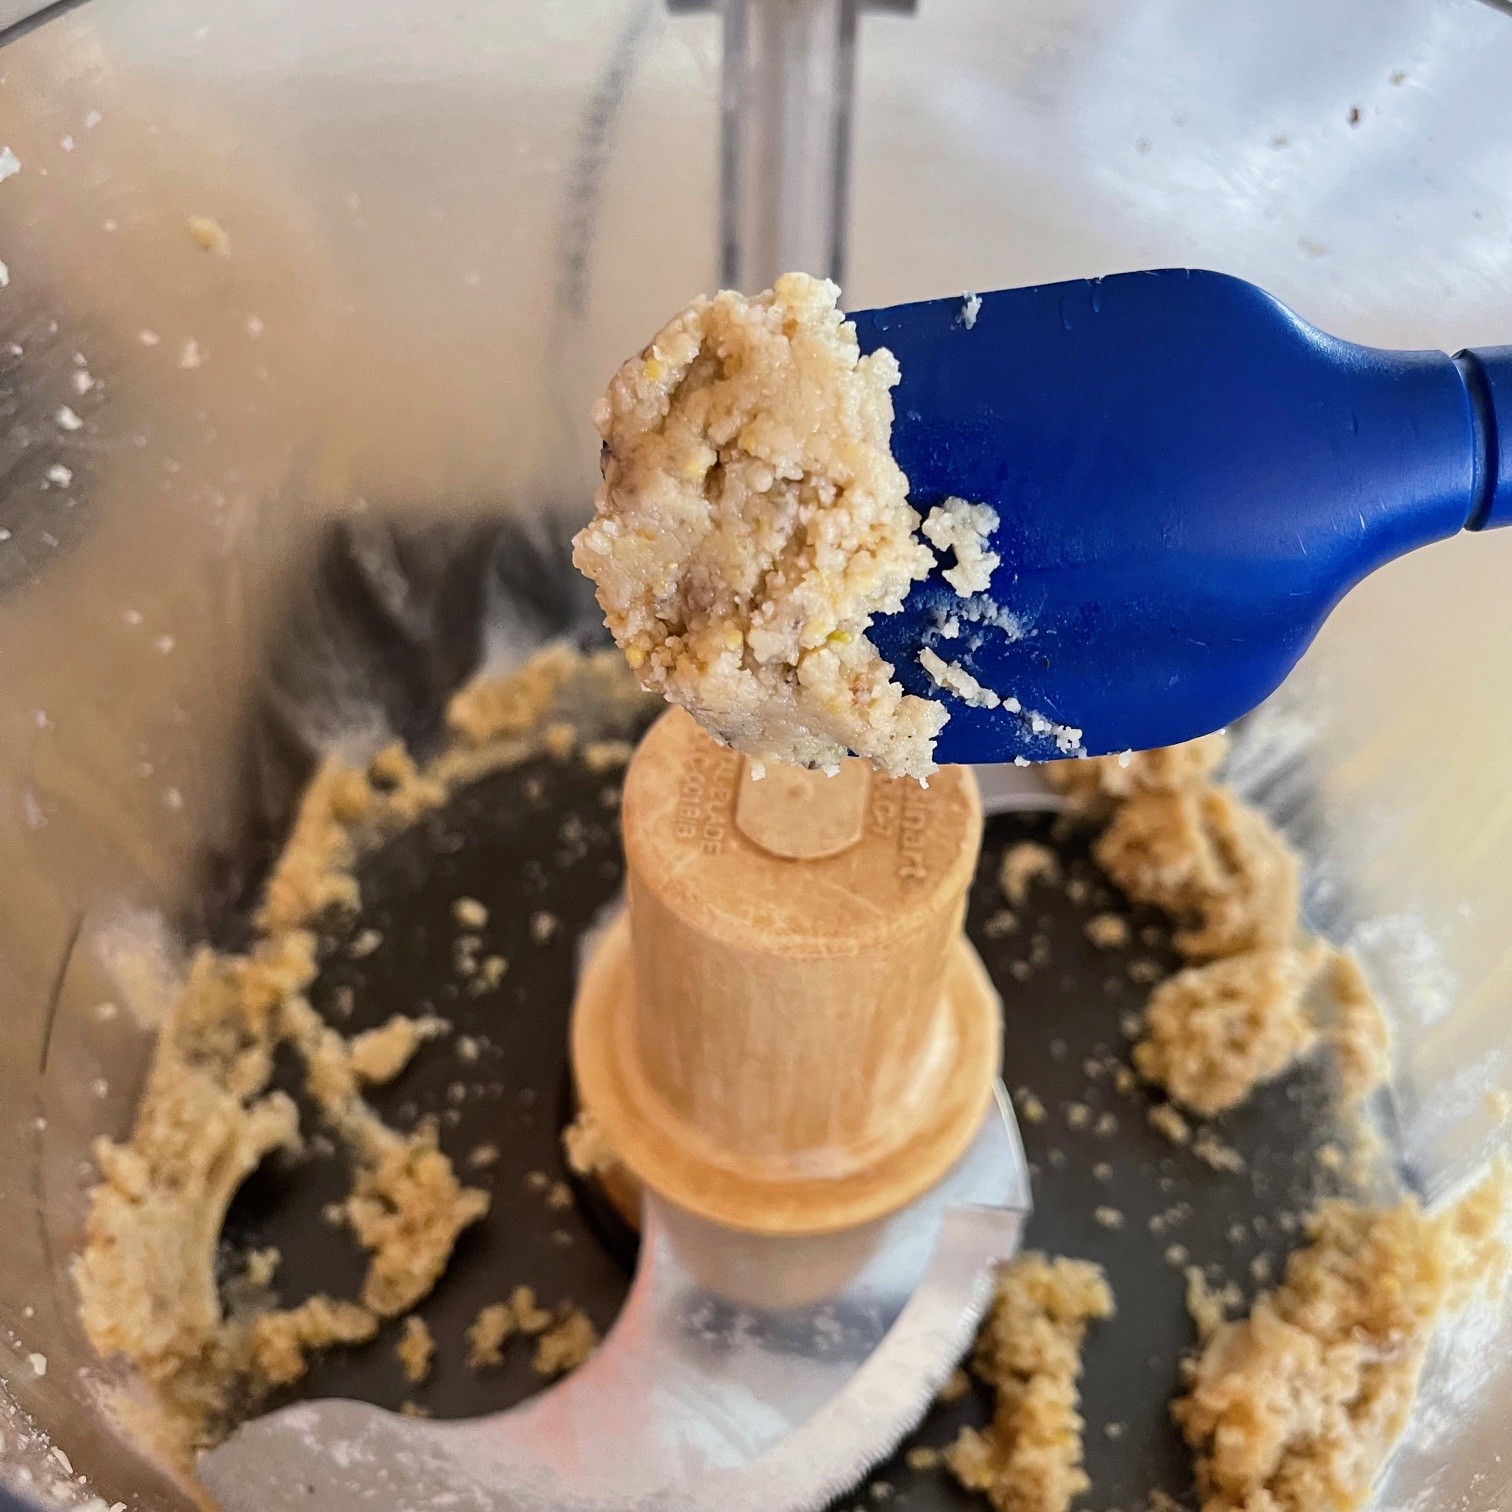
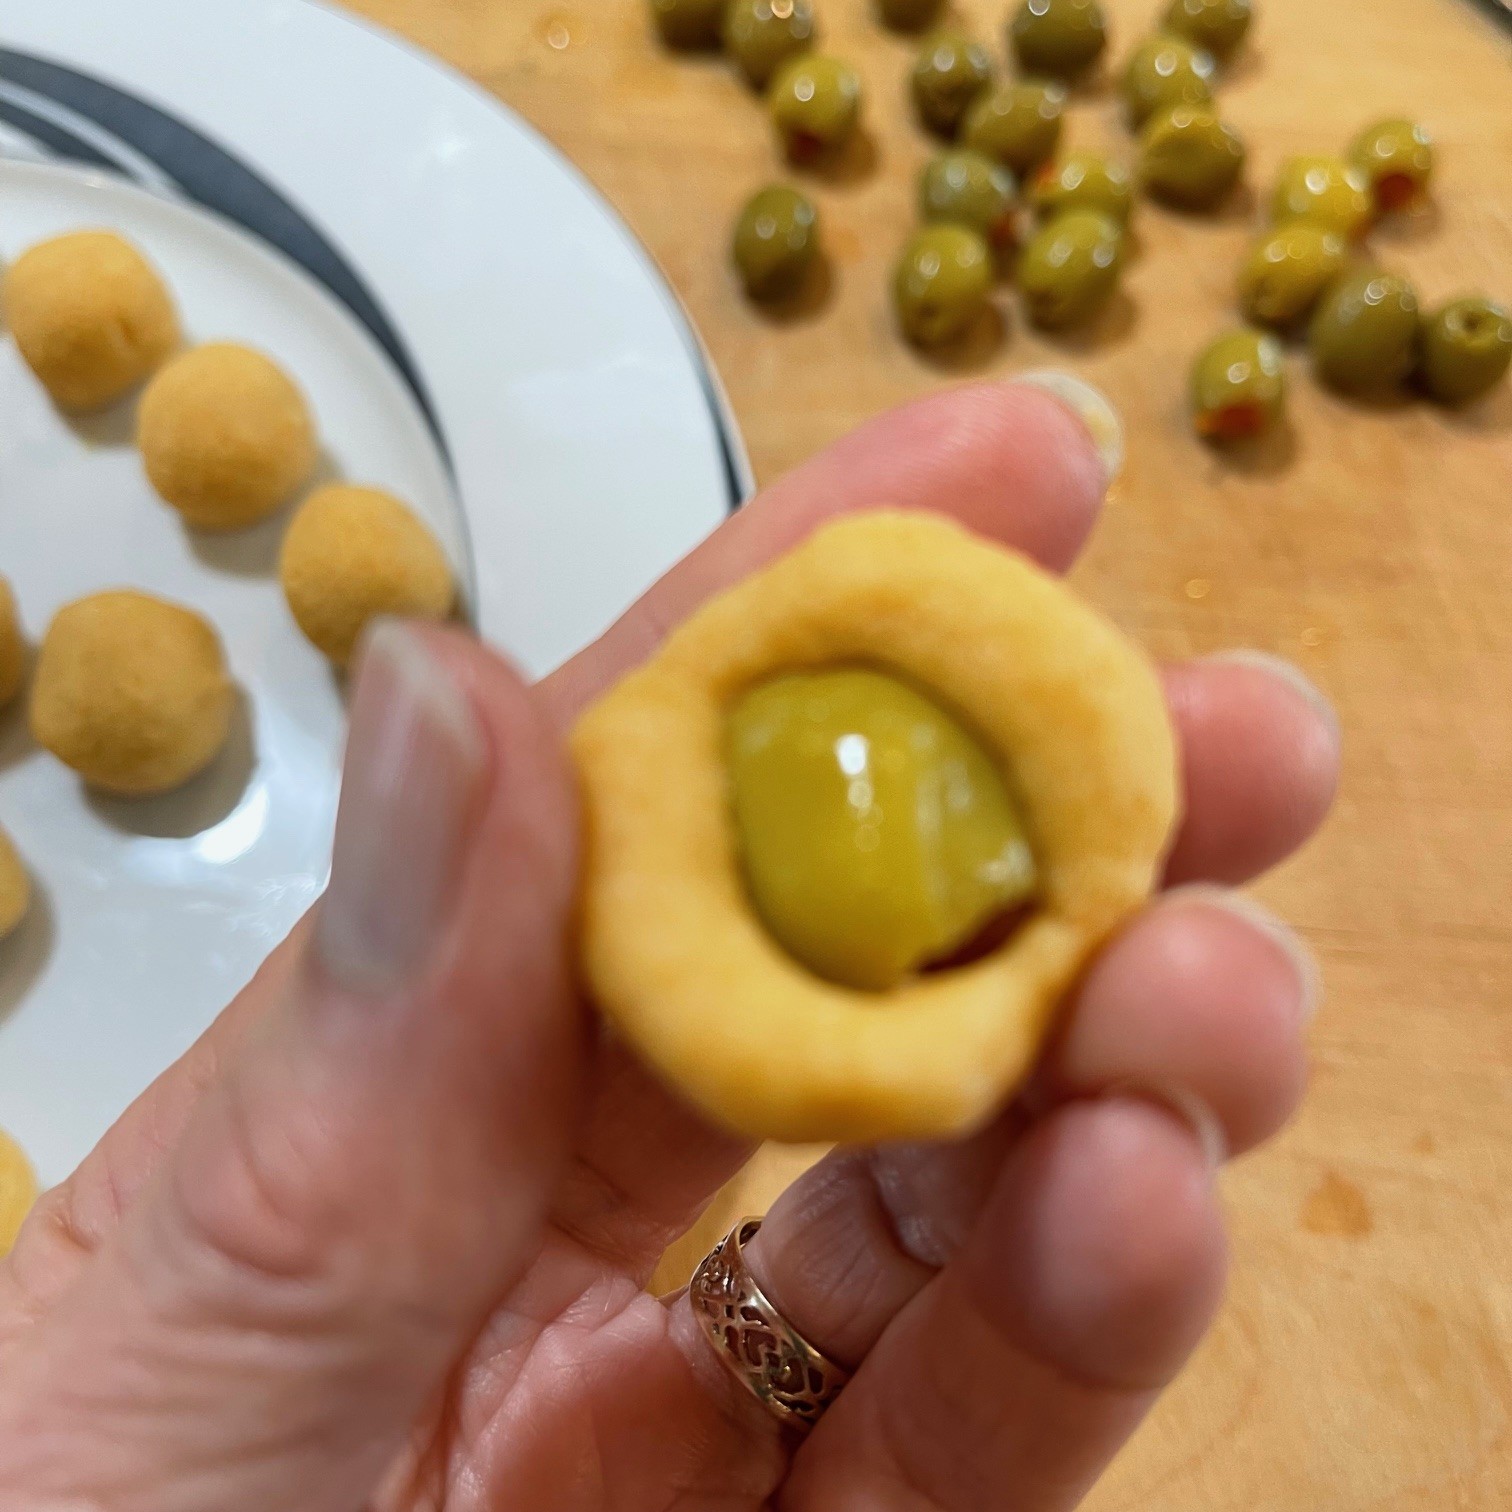
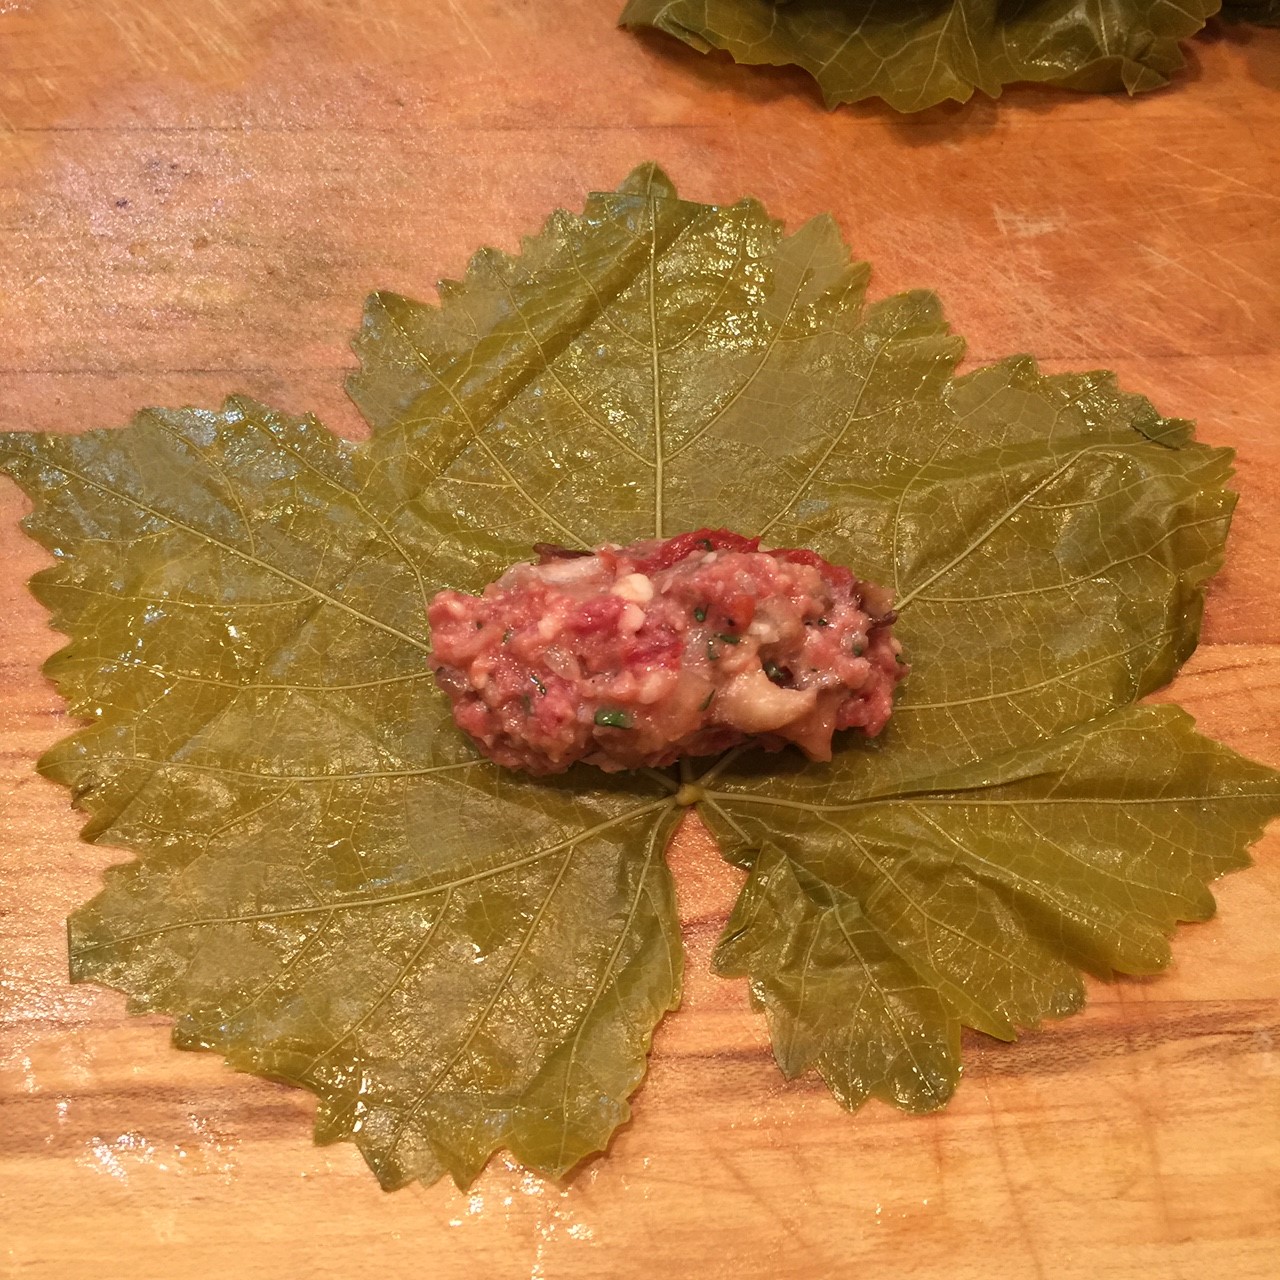
Add the flour to the filling and mix in. (I like to wait until the last minute to add in the flour.) Spoon out some filling and form a tight log. The amount will depend on the size of the leaf. If you over-stuff, the roll will come apart in the cooking – you need plenty of leaf to fold and roll as you can see from the photo below.

Wrap one of the lower flaps around the filling, tucking in the flap. (Don’t wrap too tightly – the rice will expand with cooking and you don’t want them to burst.)

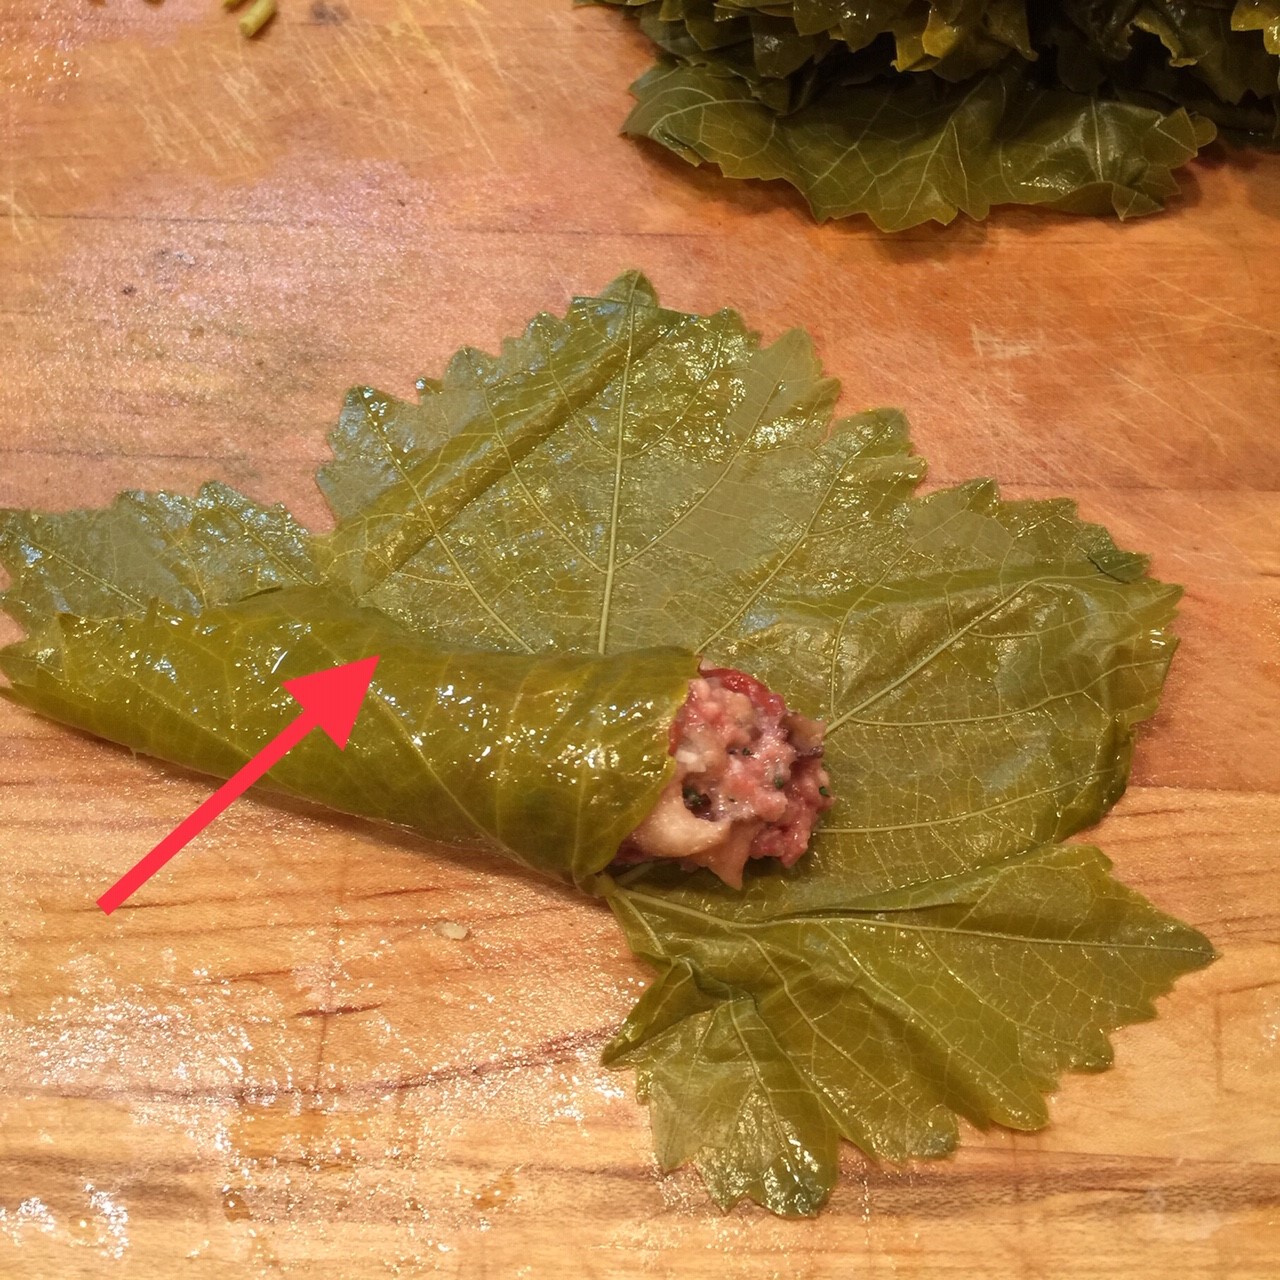
Wrap the other lower flap around filling as before.

Wrap one of the side flaps toward the center (this seals in the side of the filling).

Fold in the other side flap.

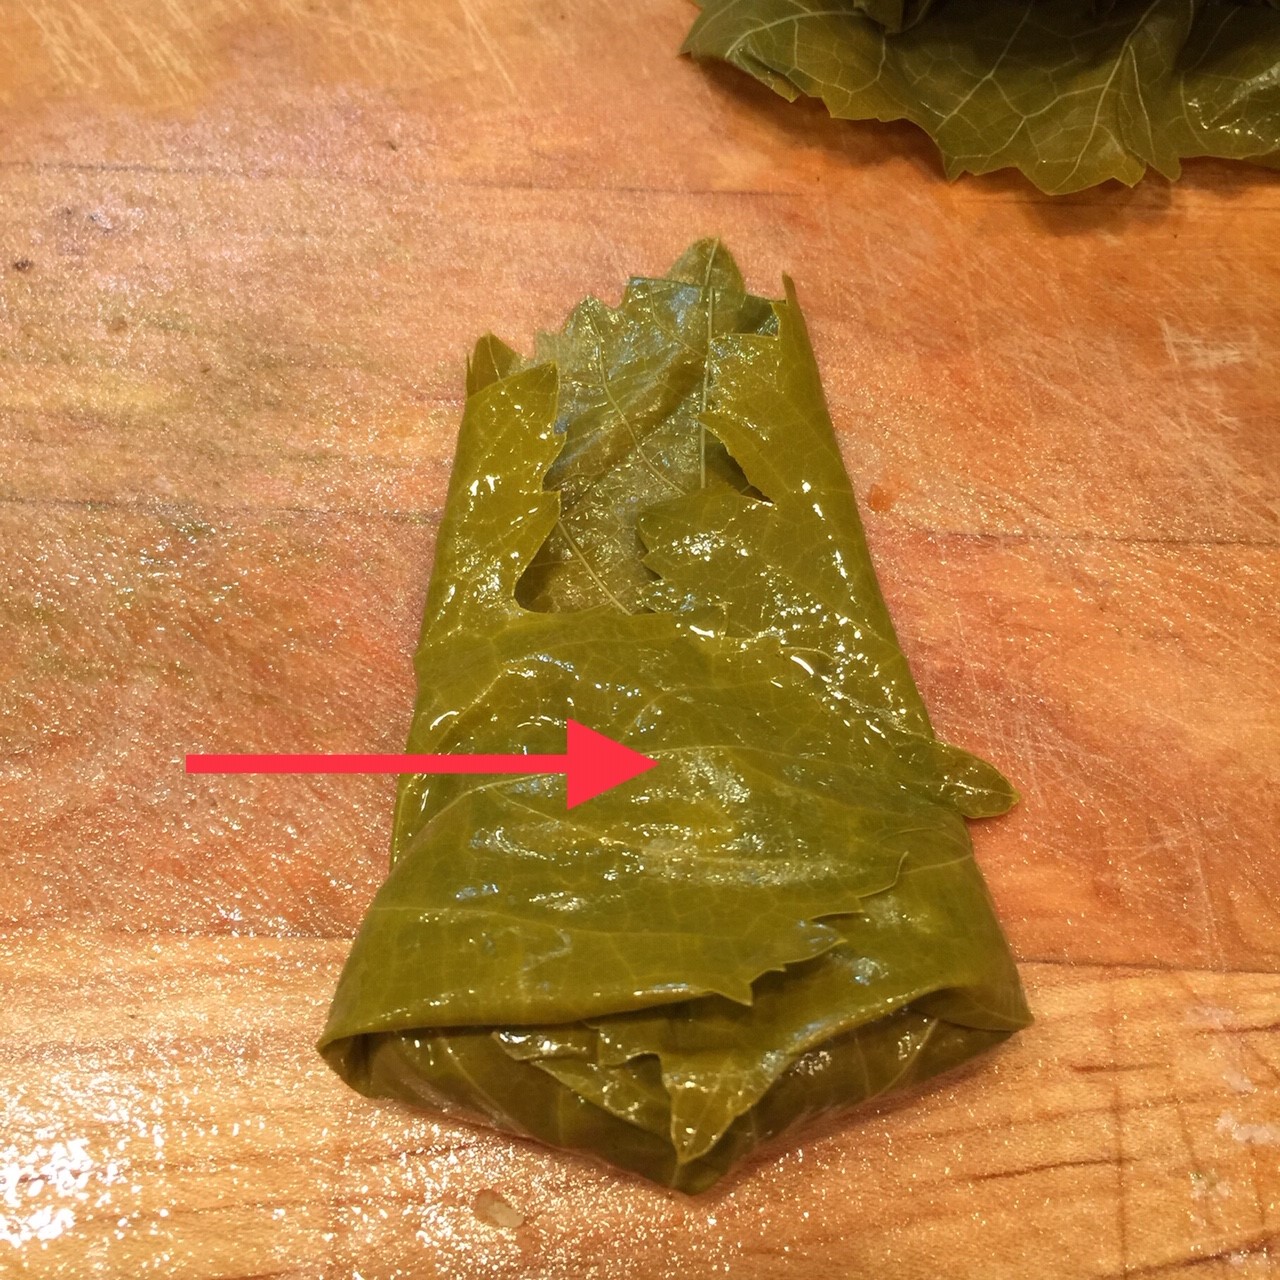
Finally, roll up the dolma starting at the filling end. (Again, don’t roll too tightly.)

Place rolled dolmas in the pot with the tomato juice.

Line them up as you go, creating a second layer, as needed.

Once all the dolmas are wrapped and placed in the pot, cover with water. Place an upturned plate on top to weigh down the dolmas – otherwise, they’ll float.

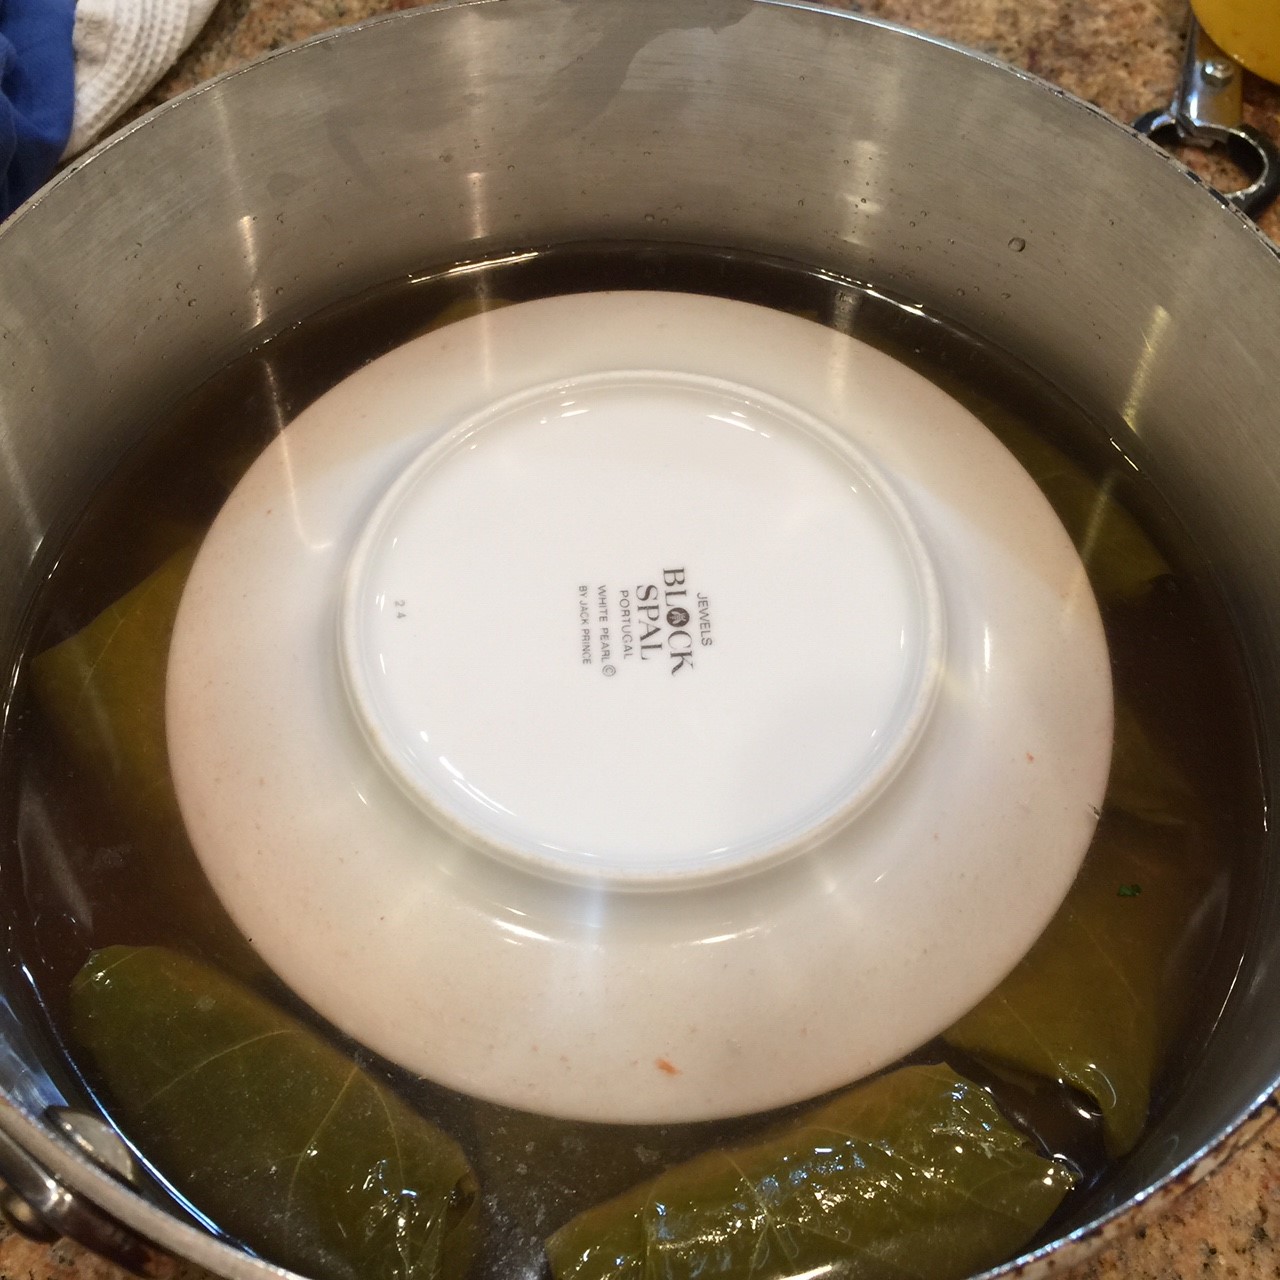
Bring to a boil, cover pot, and reduce heat to just maintain a simmer. Cook 1 hour. Remove plate and let dolma cool about 15 minutes or more before serving. In my family we eat them plain. You might prefer a dipping sauce, such as tzatziki.

Advertisement

PIMENTO DIP: Bring Something New To The Party!

pimental dip textIt’s summer party time and that, of course, means food – particularly finger foods to snack on. Yes, we all love our onion dip, guacamole, salsa, and bean dip. But isn’t there room for something new?

Pimento Dip can be made in minutes if you have a food processor. If you don’t have one, then it will take a little longer since you’ll have to shred the cheese. (I keep my machine on the counter, so it’s nice and handy.)

PIMENTO DIP – makes about 1 2/3 cups

  • 8 oz extra sharp cheddar cheese
  • 4 oz jar diced pimentos, drained
  • 1/4 cup mayonnaise
  • 1 T Dijon mustard
  • 1½ tsp red wine vinegar
  • 1/8 tsp celery salt
  • 1/8 tsp ground black pepper
  • pinch garlic salt

Using the shredding disc of your food processor, shred the cheese and leave it in workbowl. Change out the disc for the steel blade and add in the remaining ingredients.pimental dip1
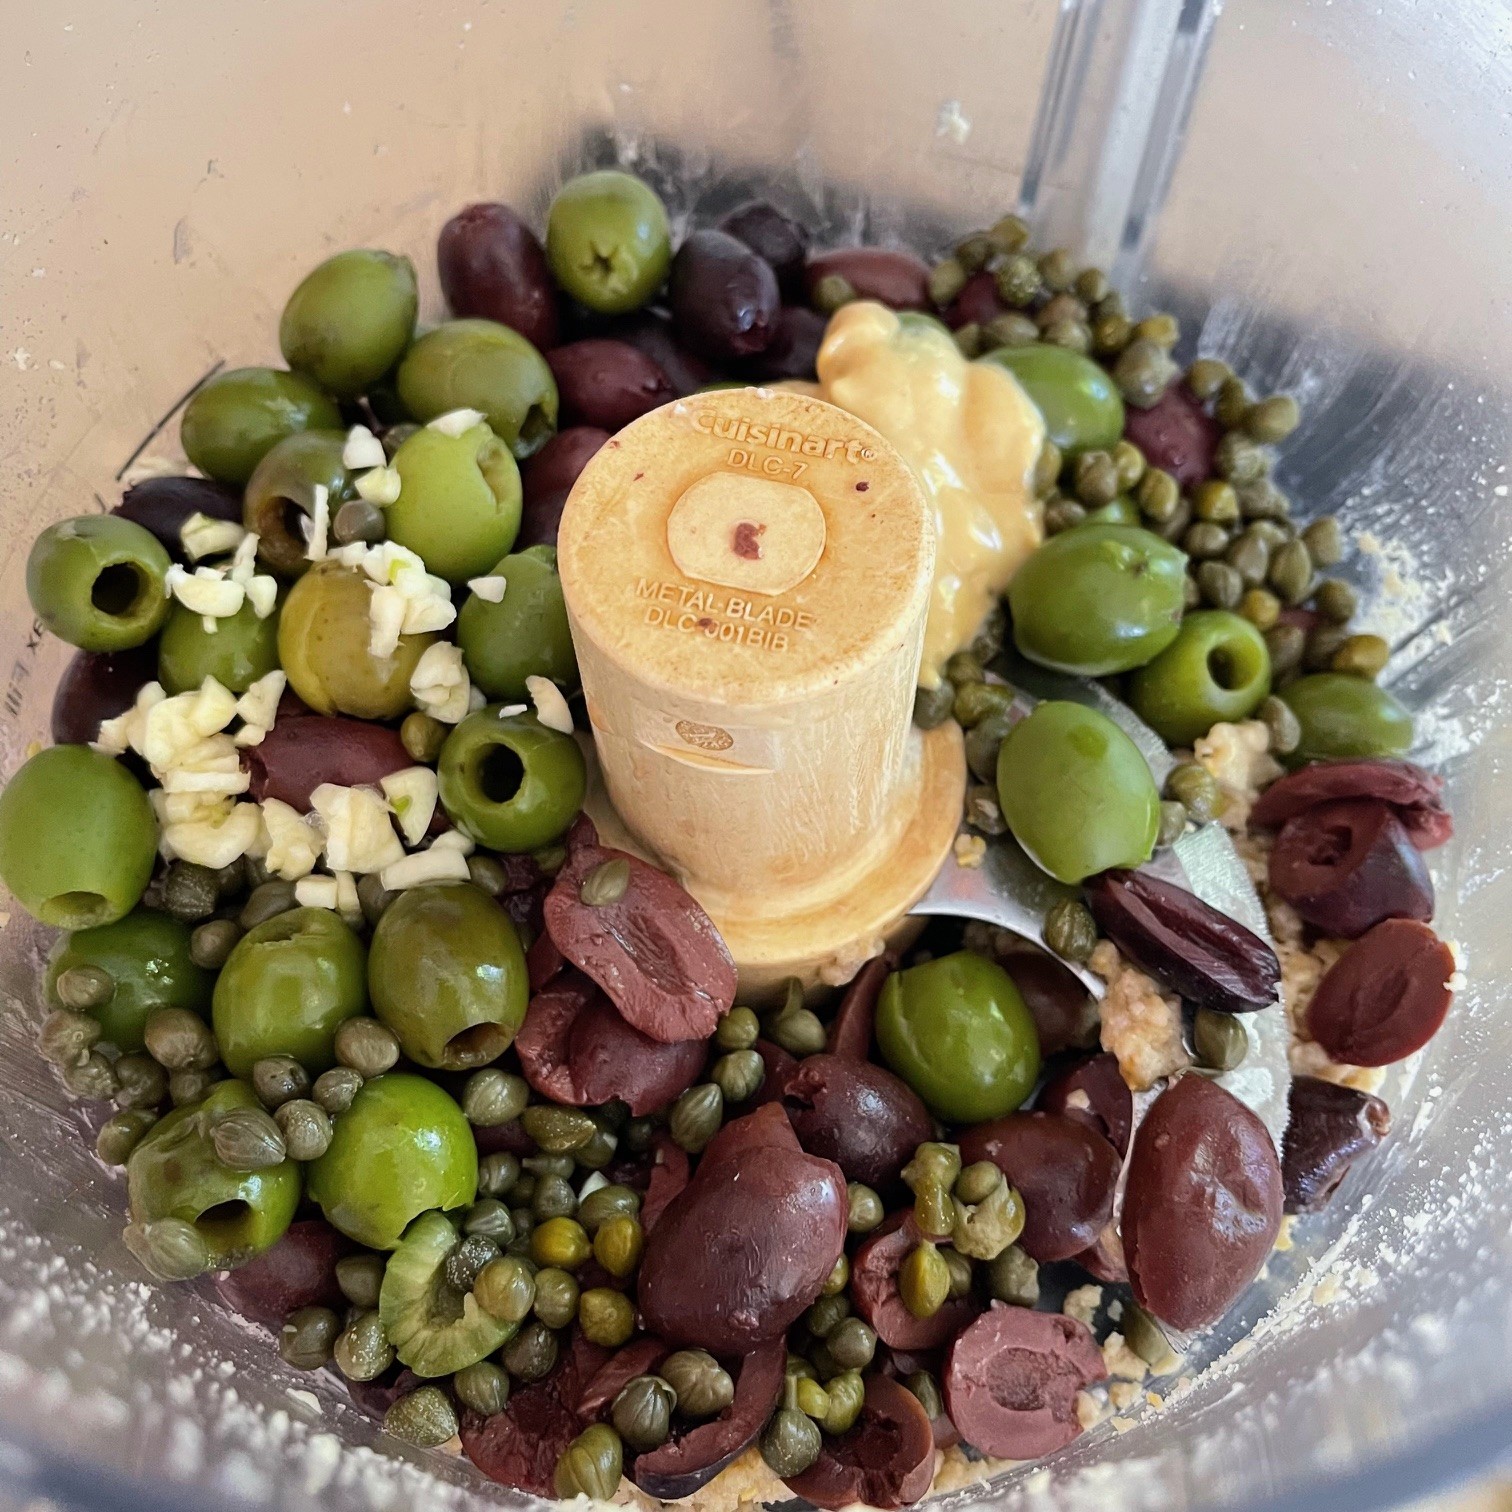
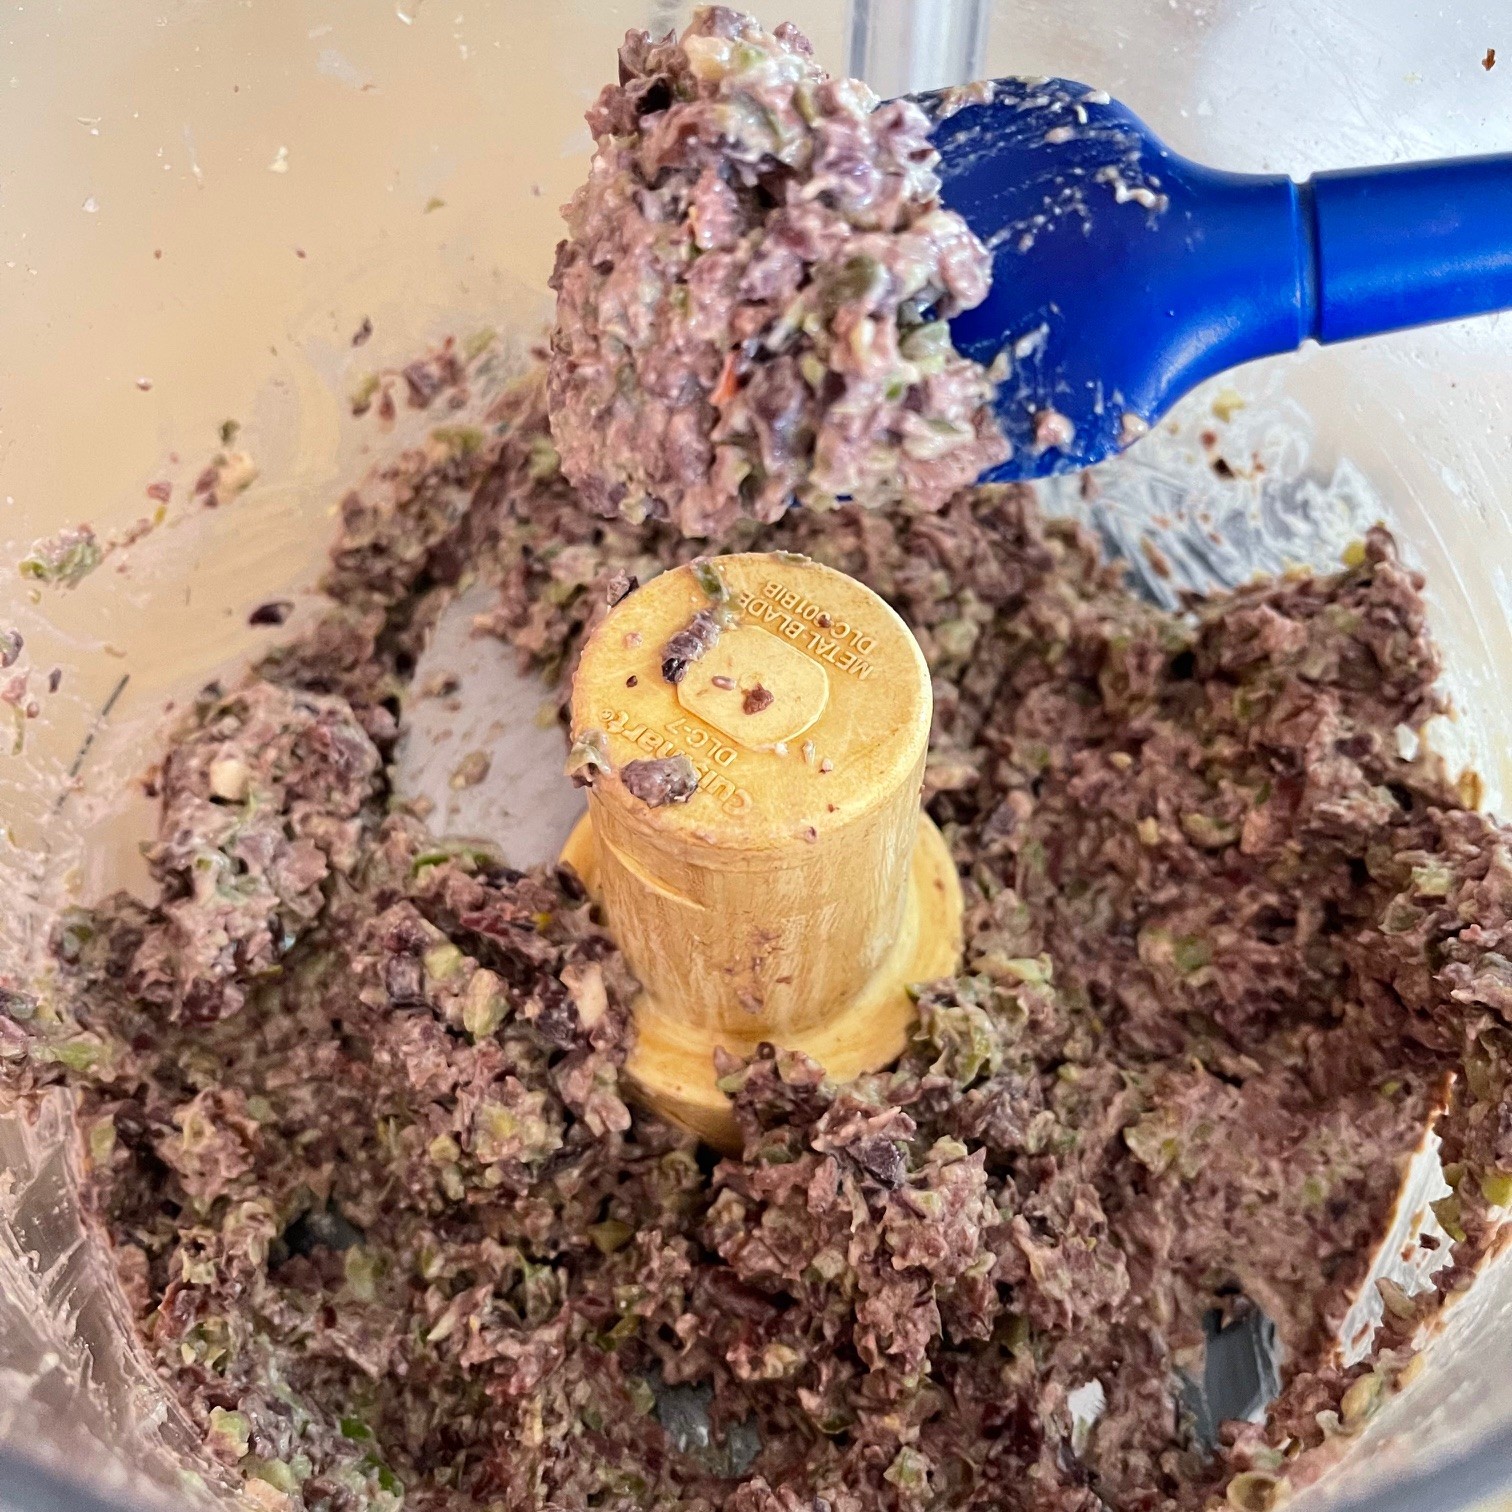
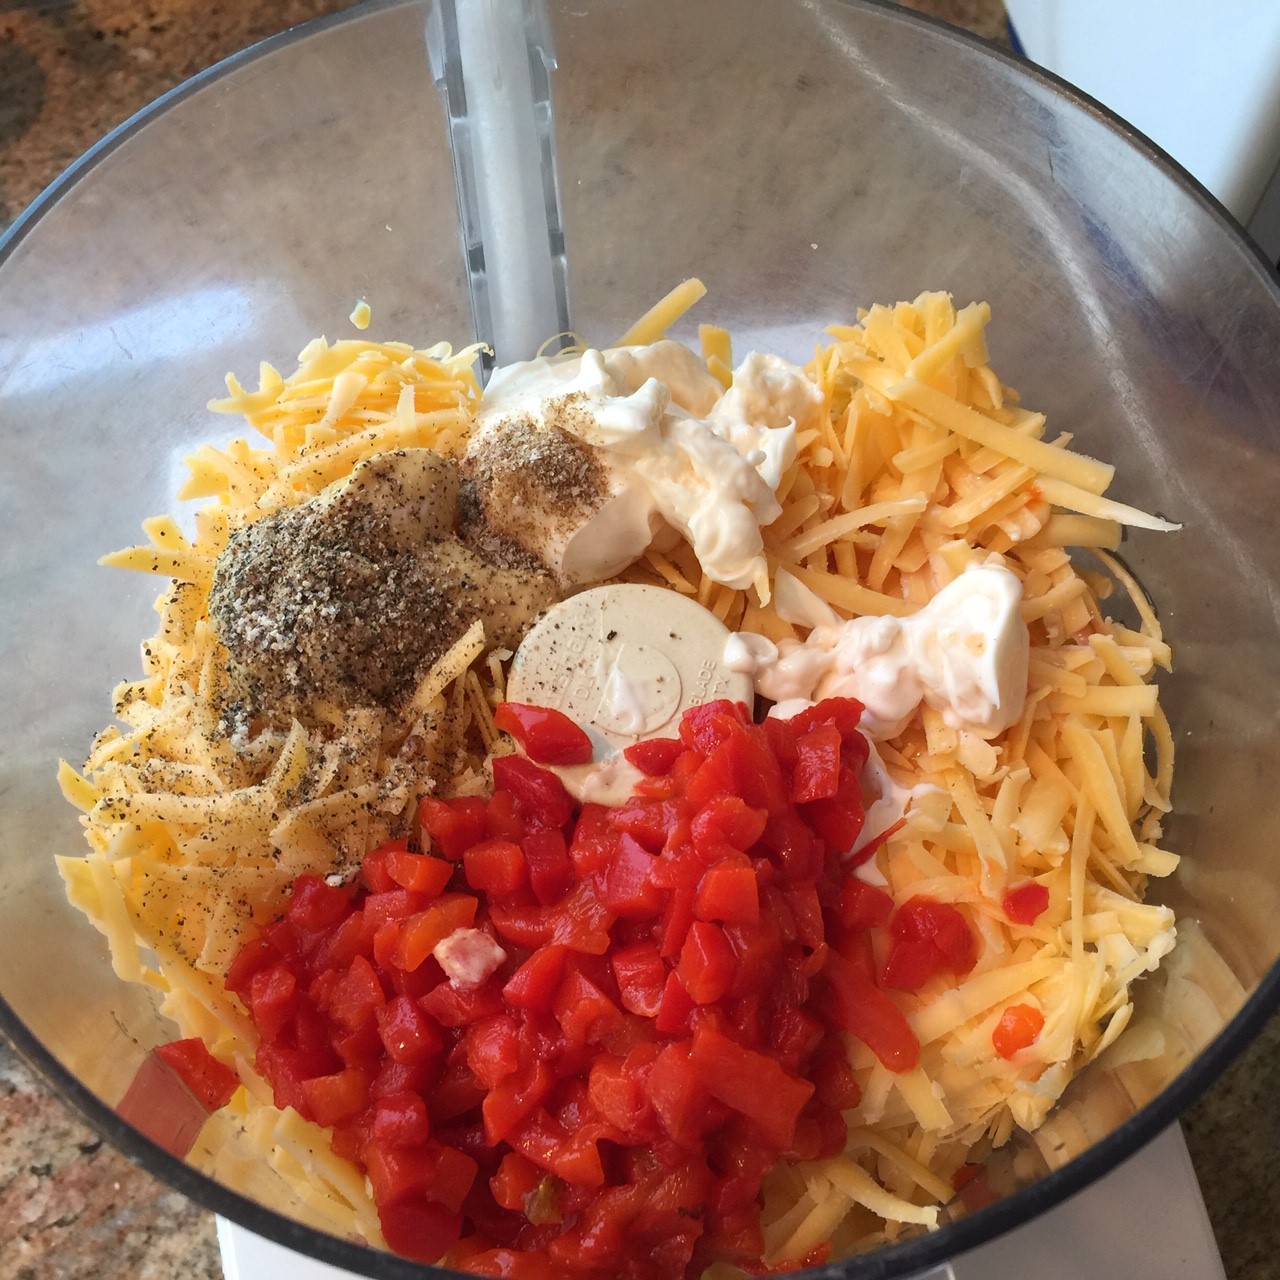
Pulse until blended, but not pureed – you want some chunkiness to the dip. Scrap down sides of bowl, as needed when you pulse.pimental dip2
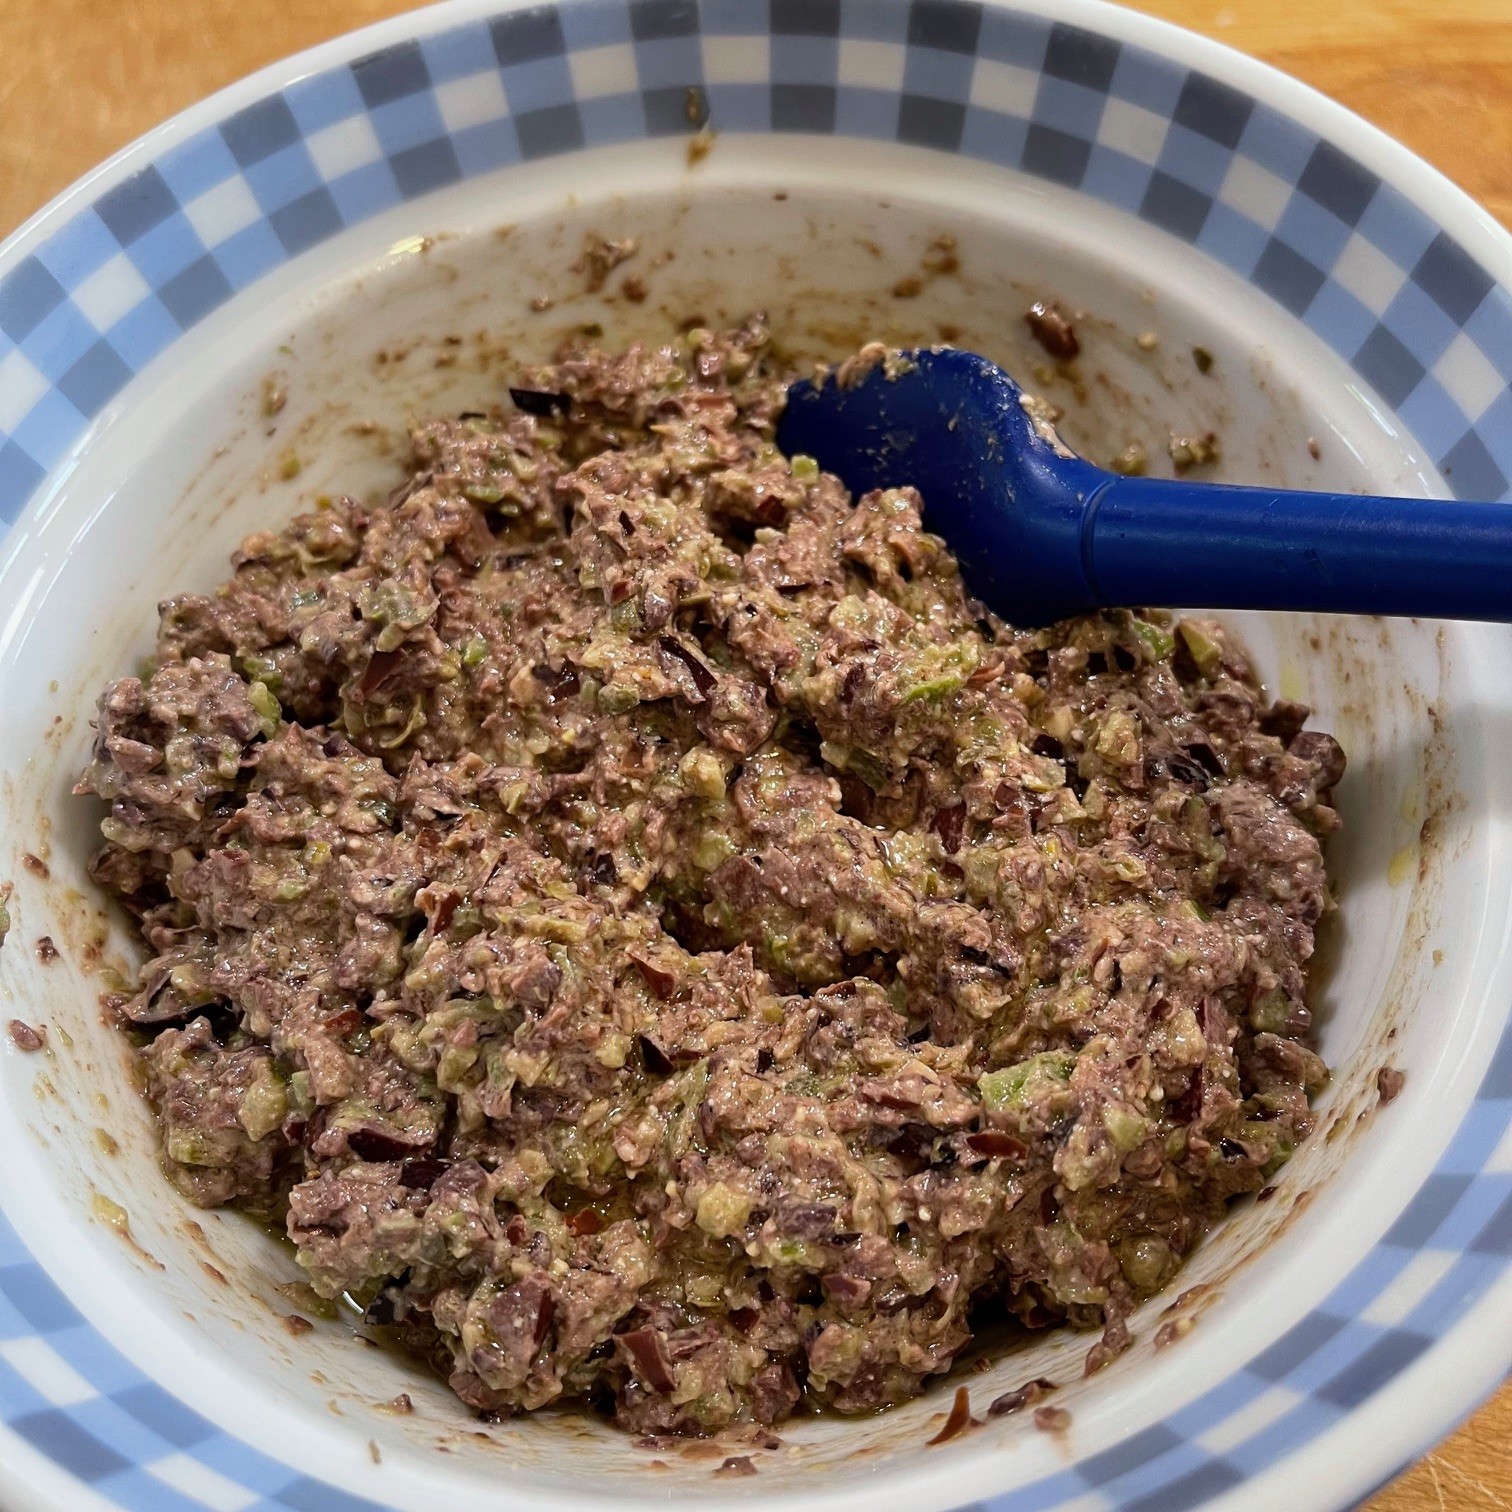
You can serve dip as it, or heat it in the microwave for a total of 2 minutes, stopping every 30 seconds to stir. Serve with a substantial chip such as bagel or tortilla chips.

GLUTEN-FREE CRACKERS: So Easy, So Good!

crackers textI’ve been a from-scratch cook for as long as I can remember, pushing the boundaries over the years as to what I would make and what I would buy. (Puff pastry and filo dough are still on my “never in a million years” list.)

While I whip up homemade tortillas, pasta, yogurt, and pie crusts without a thought, it never occurred to me to make crackers. I don’t even buy them unless we have company. But then I came across an America’s Test Kitchen recipe for paleo crackers and I was intrigued.

Of course, I tried them. Not only were they easy, but very tasty. The only issue I had was rolling them evenly since they’re so thin. I ended up buying rolling pin rings (they’re rubber bands) that fit on either side of the pin, allowing for a consistent depth. I used the 1/16″ size.

NOTE: It’s really best to weigh flours to get an accurate dough consistency.

GLUTEN-FREE CRACKERS

  • 2¼ oz (3/4 cup) almond flour
  • 1/2 oz (2 T) coconut flour
  • 1/2 oz (2 T) arrowroot flour (or arrowroot powder found in the spice section)
  • 1½ tsp sesame seeds, toasted, divided
  • 1½ tsp fennel seeds, toasted, divided
  • 1½ tsp poppy seeds, divided
  • 1/2 tsp salt, divided
  • 1/8 tsp black pepper
  • 1/8 tsp onion powder
  • 2½ T extra virgin olive oil
  • 1½ egg whites, divided
  • 1 T water

Preheat oven to 375º Fahrenheit.

Toast sesame and fennel seeds in a toasteroven or dry skillet. (You don’t need to toast poppy seeds.) Watch carefully – they can burn quickly. (Toasting brings out their flavor.)

Into a small bowl combine the 1/2 tsp sesame seeds, 1/2 tsp fennel seeds, 1/2 tsp poppy seeds, and 1/4 tsp salt. Set aside.cracker2Into a bowl combine the almond flour, coconut flour, arrowroot flour, remaining 1 tsp sesame seeds1 tsp fennel seeds1 tsp poppy seeds, 1/4 tsp salt, pepper, and onion powder.cracker3 
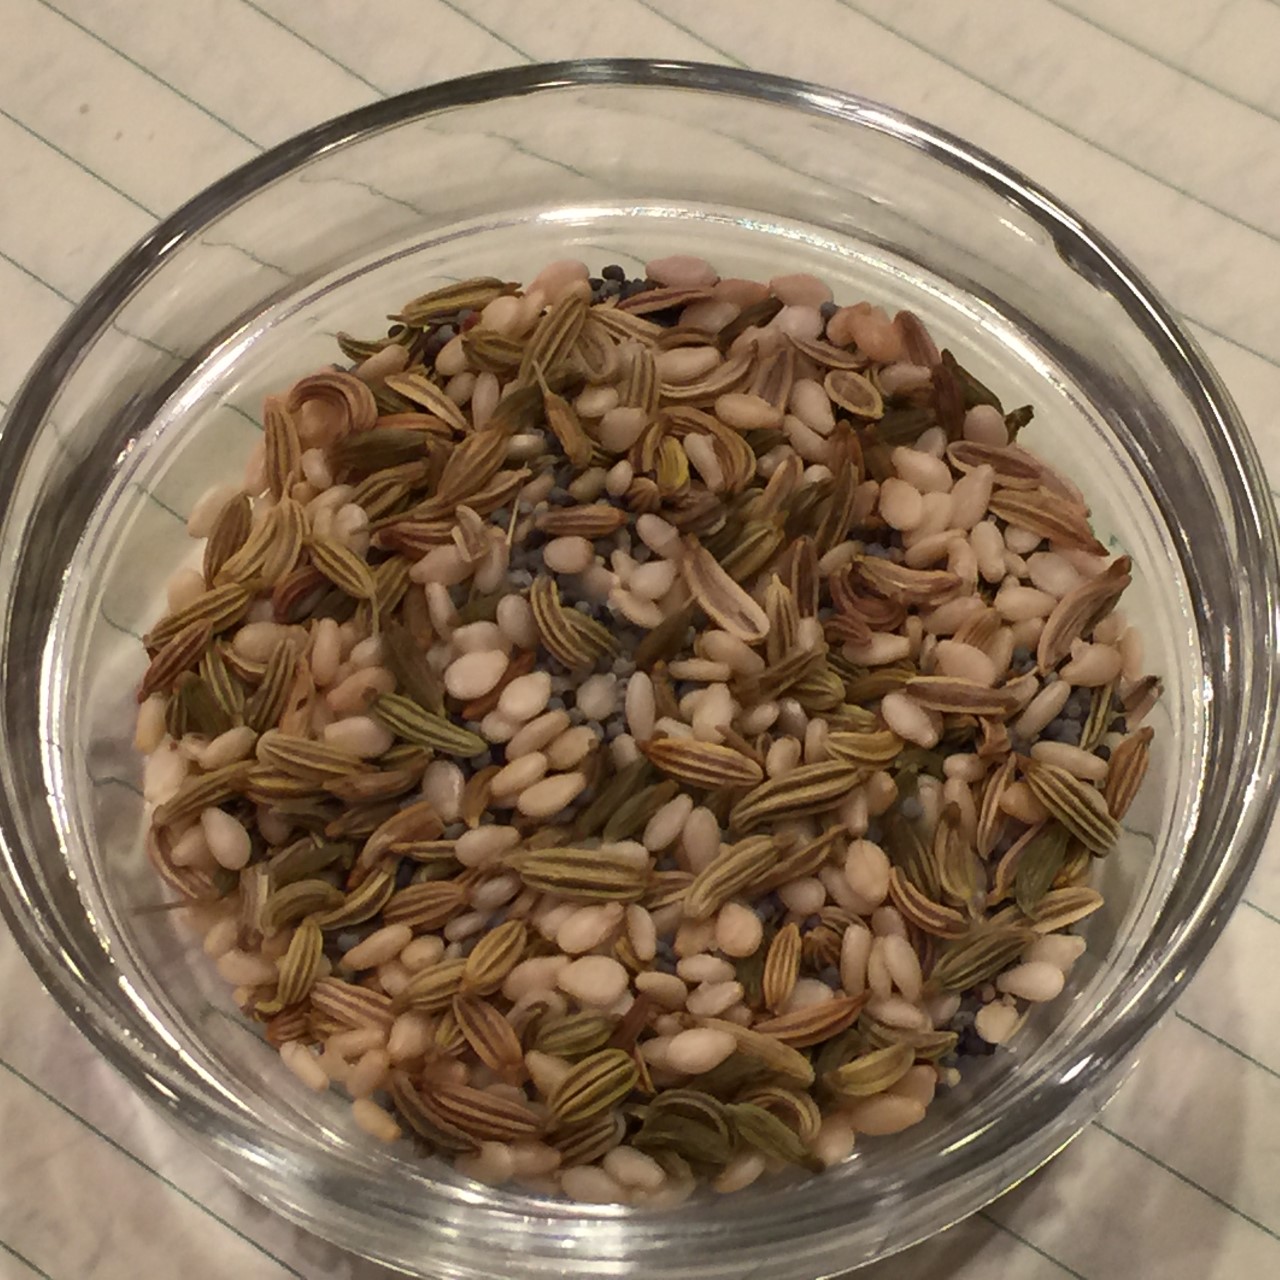
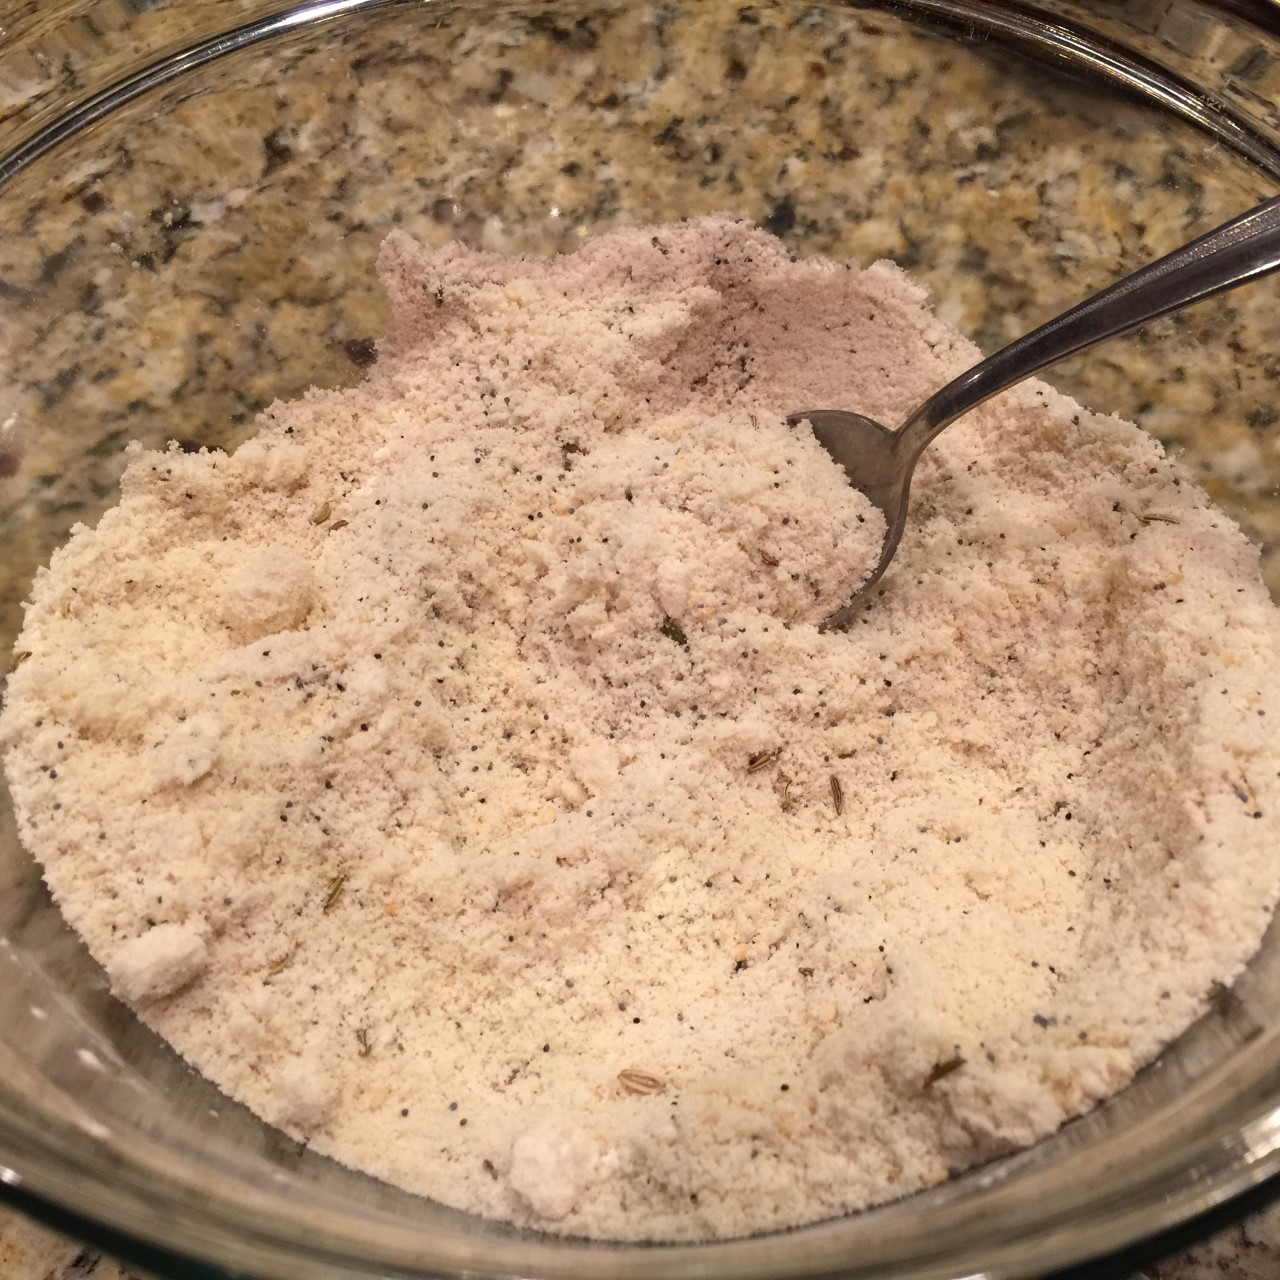
In another small bowl whisk 1 egg white to break it up. Then whisk in the olive oil and the 1 T water. cracker1Pour egg white mix into the flour mixture and blend together with a spoon, until all flour is incorporated.cracker7 Lay out a sheet of parchment paper (NOT waxed paper). Place the dough in the middle and form it into a square with your hands – this will help the dough roll into a rectangular shape.cracker11 Cover with waxed paper (or parchment). Roll out the dough to a 12″x10″ rectangle – or as close as you can get. Mine was nowhere near that – it really doesn’t matter. The dough should be of even thickness – 1/16th inch. The bands really helped with that.cracker13 
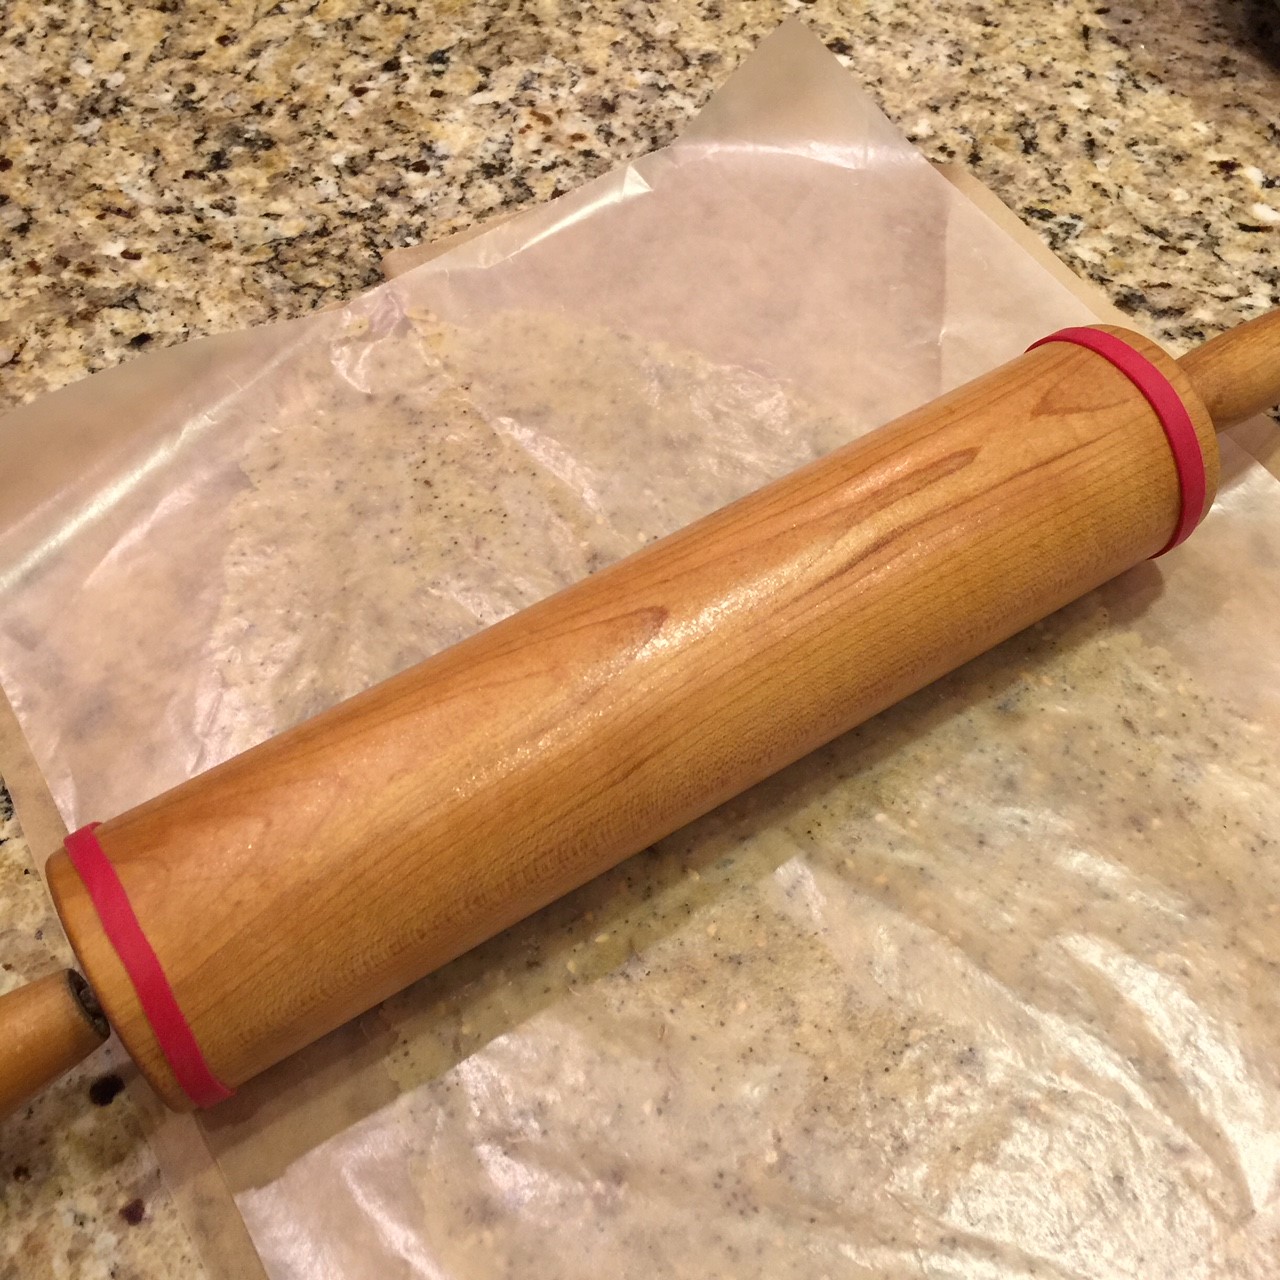
Carefully remove waxed paper and set it aside. cracker6Beat the remaining 1/2 egg white and generously brush entire top of dough. You won’t need all of the white so you can put the leftover in a small container and freeze it for next time (waste not, want not).cracker10 Sprinkle on the seed blend you set aside. Cover with the waxed paper and gently run your hand over top to press in the seeds. (Without the waxed paper the seeds will stick to your hand.) Remove and discard waxed paper. Lightly score top with a dull knife to desired shapes. cracker5Slide parchment onto a rimless baking sheet (I prefer silver colored). Bake at 375º F for 14-18 minutes, rotating sheet halfway through baking time to promote even baking, until lightly browned. The edges always turned darker for me.cracker4Slide parchment onto wire rack to cool completely. Break apart crackers at scored lines.

GLUTEN-FREE CRACKERS go great with hummus. Here’s my super-easy recipe: HUMMUS


TAPENADE – A Little Something To Tide You Over!

tapenade2 text
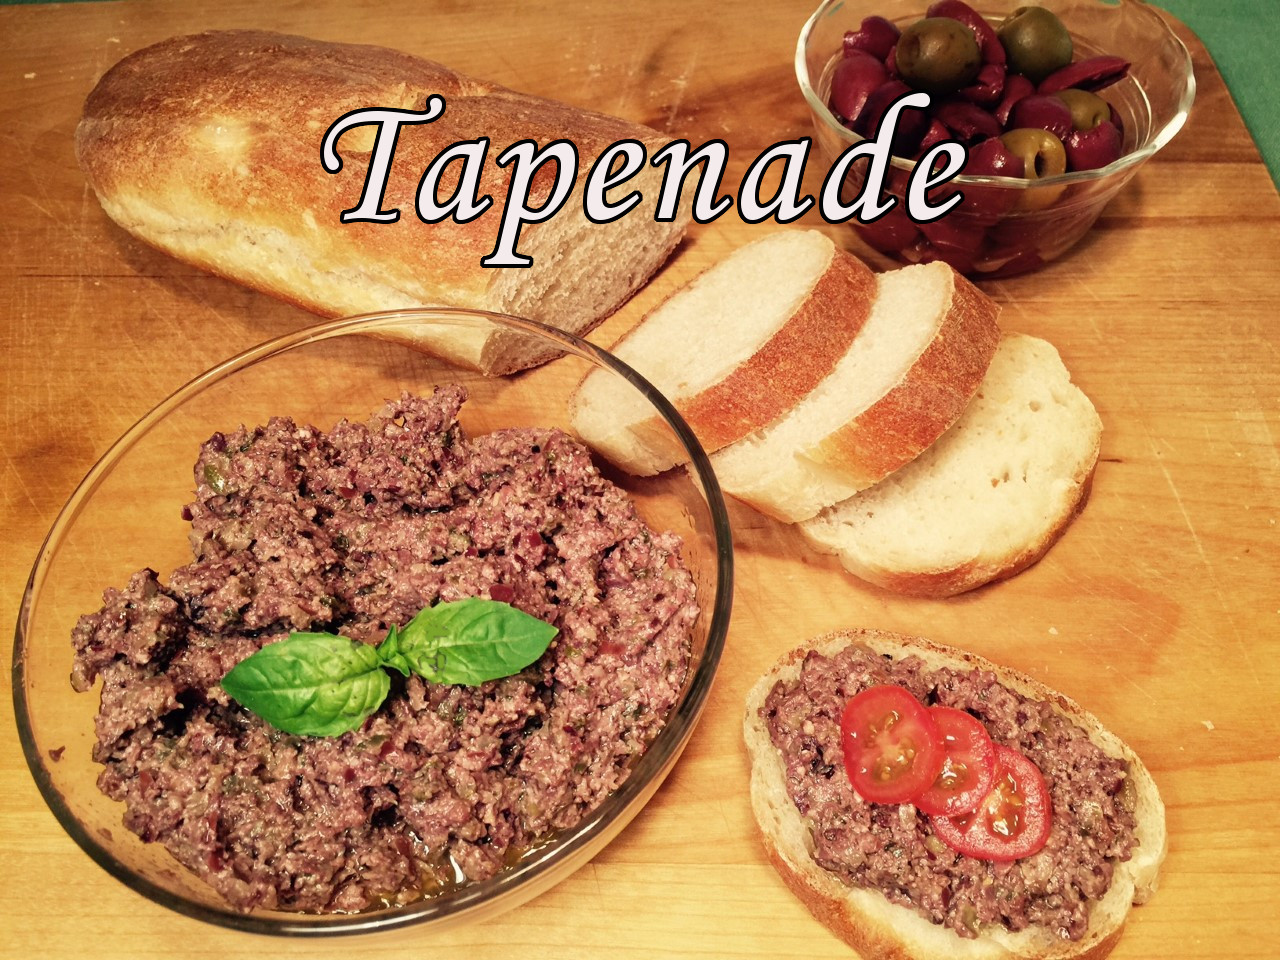
It’s tricky business when you have guests for dinner. I usually gear my meal to be ready half an hour after the designated arrival time. But there’s the rub. Sometimes people are late, or worse, early. They’re hungry, but you don’t want them to fill up on weighty appetizers.

I’ve recently discovered tapenade, a spread consisting of olives, capers and olive oil. (Carnivores will add anchovies, too.) It’s just enough to keep the hunger pangs at bay, but doesn’t ruin your appetite.

I’ve found that a hearty white bread, such as a French baguette or Italian loaf perfectly complements the saltiness of the spread.

Naturally, I make my own baguette (for my recipe click on French Bread Baguette – it’s très simple). But, of course, you can purchase it.

Tapenade is made in a flash via the food processor (hopefully, you have one!).

TAPANADE – makes about 2 cups

  • 1/3 cup pine nuts, raw
  • 1½ cups Kalamata olives, pitted
  • 1/2 cup salt cured green olives, pitted
  • 3 T capers
  • 1 clove garlic
  • 2 tsp Dijon mustard
  • 1/4 cup extra virgin olive oil

Put pine nuts in food processor and whirl until they form a paste. Pulse in olives, capers, garlic, and mustard.

Pour olive mixture into a bowl and stir in the olive oil. (Don’t be tempted to pour the oil in the food processor with the other ingredients – it will emulsify.)

Serve with white bread.

CHILI CON QUESO – Si, Si, Si!

chili con queso text

Festivities abound in summertime and when people get together, there’s food.

Next time you’re asked to bring a potluck dish, don’t groan. Instead, try my Chili Con Queso dip. There are only 3 ingredients and all you do is heat them together. You can do that, right?

NOTE:  For those of you who want to go that extra step, you can make your own salsa.

CHILI CON QUESO – makes about 2 cups

  • 1 cup salsa (I use thick & chunky, medium spice)
  • 1/4 lb Jack cheese, shredded
  • 1/4 lb medium cheddar cheese, shredded

Combine all ingredients in a saucepan. Over low heat, stir until cheese is melted. If you heat it too high, it may “seize”, which means the cheese doesn’t melt properly – it kind of clumps. If this happens, re-name the dish, “Rustic Chili Con Queso”, and pretend this is how it should be. It will still taste yummy.

If you like, top with olives, cilantro, tomatoes, etc. Serve with tortilla chips.


POTATO BALLS – Crunchy & Creamy!

POTATO BALLS – Crunchy & Creamy!

potato balls text

Snacks and Super Bowl parties (or, ANY sporting event, for that matter) are a natural combination. Pizza, chips, and impossibly long sandwiches – all laid out for mass consumption in front of energized viewers.

To add to this year’s feast, I decided to make use of leftover mashed potatoes (you know how I hate waste) by making Potato Balls. Rather than dropping them in a vat of hot oil, I encased them in a crust of seasoned panko and baked them. Might as well save calories when I can. Crunchy on the outside, creamy on the inside.

You don’t even need leftover mashed potatoes. Just boil some fresh russets and skip the butter and milk. The Potato Balls are still yummy and have a few less calories since butter and milk haven’t been added.

NOTE: You can use bread crumbs instead of panko, but they won’t be as crunchy.

POTATO BALLS – makes about 28 balls

  • 1½ cups mashed russet potatoes (about 1 lb)
  • 1/4 cup flour
  • 1/4 cup sour cream
  • 2 T dried minced onions
  • 1 tsp salt
  • 1 egg
  • 3/4 cup panko crumbs
  • 3/4 tsp paprika
  • 3/4 tsp oregano
  • 3/4 tsp garlic salt

Peel, chop, and boil the potatoes (unless you’re using leftover mashed potatoes). When they’re easily pierced with a fork, drain and mash.

Beat egg in a medium sized bowl. Mix in potatoes, flour, sour cream, dried onions, and salt.

In a wide mouthed bowl (such as a cereal bowl), mix together the panko, paprika, oregano, and garlic salt. (You need a wide mouthed bowl to allow room for both your hands.)

Using a spoon, drop about 1½ T of the dough into the panko mix.

IMG_1358 (1)

Using your fingers, toss crumbs all over dough, patting them in. Carefully lift covered dough and roll it between your palms. Cover with crumbs again and roll. DON’T try to roll dough before covering with crumbs – it’s much too sticky.

IMG_1363

Place on a greased or nonstick cookie sheet and bake in a preheated 400° F oven for 20-25 minutes, until browned.

Serve hot. They’re delicious plain, but also go well with Ranch dressing or ketchup.


Deck The Halls With OLIVE CHEESE BALLS!

OLIVE CHEESE BALLS

OLIVE CHEESE BALLS

When planning for company, hors d’oeurves often take a backseat to the main course and dessert. Open a bag of chips or buy a party platter and you’re good to go, right? WRONG! You can do better than that!

You want yummy tidbits that whet the appetite and, more importantly, keep hungry guests from hovering around the kitchen asking how much longer.

My mother was a very unadventurous cook. I’m not sure if it was because she lacked interest or confidence. But she did have a knack for accumulating good recipes that she served for company. Olive Cheese Balls were a constant when she entertained. While they have to be baked just before serving, they can be prepared well ahead of time. The uncooked balls can even be frozen.

They’re easy to prepare, but do take a bit of time. When I was a child, this was my job. So put the kids to work! Olive Cheese Balls are a great recipe to introduce them to cooking.

OLIVE CHEESE BALLS – makes 24

  • 1 cup sharp cheddar cheese, shredded
  • 1/4 cup butter, softened
  • 1/2 cup all-purpose flour
  • 1/4 tsp salt
  • 1/2 tsp paprika
  • 24 pimento stuffed green olives

Into the workbowl of a food processor, put the cheese, butter, flour, salt, and paprika. Pulse several times until mixture is blended. If you don’t have a food processor, blend the cheese and butter together in a bowl. Stir in the flour, salt, and paprika. Then make a mental note to put “food processor” on your holiday wish list!

Divide dough into 24 pieces. Roll into balls. One by one, flatten each ball, place an olive in the middle, pimento side down, and wrap dough around olive, pinching it closed. Use the liquid from the olive to help facilitate this. Squeeze the ball to compact it, then roll into a smooth ball. It works best if you wash your hands after every 4th or 5th to prevent the dough from starting to stick to your fingers. They can be refrigerated at this point, if you like.

To bake, place on a greased or nonstick cookie sheet. They spread, so don’t crowd them. Bake in a preheated 400ºF oven for 10-15 minutes. Let rest 5 minutes on cookie sheet before removing. Serve immediately.

Want A Spicy Date? Try SWEET & SPICY STUFFED DATES!

SWEET & SPICY STUFFED DATES

SWEET & SPICY STUFFED DATES

I love to entertain. Even though I plan mass quantities of food for the meal and desserts (notice the plural – there are always at least 3 desserts), hors d-oeurves are a fact of life. There has to be a selection of tidbits to tide everyone over because guests arrive at various times and, quite often, cooking takes longer than expected (sigh!).

My criteria for appetizers is that they don’t fill everyone up and can be made ahead of time. (There are exceptions to the last rule – but only when I don’t have a hundred things to do during meal prep.)

SWEET & SPICY STUFFED DATES are a delightfully diverse combination of sweet and tangy, creamy and crunchy…with a kick! The filling is easy to prepare, and the dates can be stuffed ahead of time. Apply the pistachio nut topper at the last minute to make sure it’s nice and crisp.

NOTE:  Cayenne pepper is potent stuff – a little goes a long way. Vary the amount to suit yourself. But bear in mind, the spiciness gets diluted by the date, so don’t just try the filling – put some on a date to taste-test.

SWEET & SPICY STUFFED DATES – makes about 19

  • 18-20 dried dates (I used 19), pitted
  • 1/4 cup cream cheese
  • 1½ rounded T pistachio nuts
  • 18-20 additional pistachio nuts for topping
  • 1/4 – 1/2 tsp cayenne pepper (I use 1/2 tsp)
  • 2 T capers with 1/4 tsp of the liquid

Slice open each date by sticking the tip of a blade of your kitchen shears into one pit hole and cutting lengthwise to the other pit hole (see photo).

IMG_7800

Finely chop (but don’t grind)  the 1½ T pistachio nuts. (I used the small pitcher of my Oster blender since I hate to chop).

Mix together the cream cheese, chopped pistachios, cayenne pepper, and capers.

The easiest way to stuff the dates is to spoon mixture into a pastry bag (see photo) and squeeze the filling out. This works great, especially if you’re making a lot. But you can, also, just use a spoon to fill the dates.

Hold open slit date and squeeze in filling.

Hold open slit date and squeeze in filling.

If you’re not serving these immediately, cover and refrigerate. To serve, top each with a whole pistachio nut.


Macadamia Cheese Biscuits -Tasty Tidbits

Macadamia Cheese Biscuits

Macadamia Cheese Biscuits

Go into any furniture shop and artfully placed amongst the tables, dressers, and credenzas, you’ll find tchotchkes (pronounced: choch’-keys).  You’re probably not even consciously aware of them – they’re the bits and bobs that decorate a room, turning a house into a home.  A crystal bowl filled with colorful balls. A hand-painted glass plate. A ceramic vase.

Why am I talking furniture in a vegetarian cooking blog? Because I see this week’s topic, Macadamia Cheese Biscuits, as the tchotchkes of the food world. They’re not the main event, but they add to the overall effect of the party.

What I love about these biscuits is that you can nibble at them discreetly as you converse with friends and colleagues. They’re not messy, so you won’t be embarrassed when taking a bite and the remainder somehow ends up on the front of your outfit, or worse – the host’s freshly cleaned carpet. Rather than enjoying yourself, your evening suddenly becomes about stain removal.

While they’re not exactly low in calories (I figure each one is about 58 calories), if you nurse at a Macadamia Cheese Biscuit in one hand and a drink in the other, this can keep you occupied enough so you don’t reach for the mini-quiches and bacon wrapped hot dogs.

Preparing the biscuit dough is a snap. Then roll into a log and refrigerate until it’s time to bake. Yay! I love party foods that are done ahead of time. I don’t know about you, but I turn into crazy-woman about 2 hours before guests arrive. The dough can even be frozen, so keep one on hand for drop-in guests.

MACADAMIA CHEESE BISCUITS – makes about 36 biscuits

  • 1½ cups all-purpose flour
  • ½ tsp salt
  • ½ cup butter
  • 8 oz Swiss cheese, shredded
  • 1 egg
  • 1/3 cup macadamia nuts, chopped and lightly toasted

In a food processor pulse flour, salt, and butter several times to break up butter. Add in cheese, egg, and nuts. Whirl until the dough forms a large ball.

With your hands roll the dough ball into a long log, 1½” in diameter. Wrap in waxed paper and refrigerate.

slice dough into 1/4" discs

slice dough into 1/4″ discs

When ready to serve, preheat oven to 400º degrees Fahrenheit. Slice log into ¼” discs and place on greased or non-stick cookie sheet. They don’t spread, so you can place them fairly close together. Bake about 14 minutes – until lightly brown. Let set on cookie sheet for a minute or two, then remove to serving plate or wire rack.


Spicy Walnuts – Score A Twofer!


Spicy Nuts

Spicy Walnuts

Who doesn’t love a bargain?!  Twofer, BOGO (buy one, get one free) – such a deal.

I make no secret of the fact that I am quite fond of making my money stretch (yes, I’m cheap!).  That’s one of the reasons I like to make things from scratch.  Every time you buy a convenience food (shredded cheese, bagged lettuce, jarred spaghetti sauce), there’s a price to pay.

Along this same line, I’m ecstatic (Yes, ecstatic – I’m an actress. I’m overly dramatic!) when a food I make can be used more than once – and I’m not talking leftovers. I mean you make a dish, change it up a bit, and voilà – a brand new dish.

I would now like to introduce to you my Spicy Walnuts recipe. When you use walnut halves you have a snack food to set out in a bowl at parties or to chomp on watching TV.  When you chop the halves into 4 or 5 pieces, you have a tasty add-in to salads and casseroles.

As the name implies (SPICY Walnuts), they have a kick to them.  If it’s too much for you, ease off on the cayenne pepper. Also, since this is a vegetarian blog, I’m recommending vegetarian Worcestershire sauce – there are several brands.  Spicy Walnuts are easy to make, but they do take about 20 minutes to bake.

NOTE:  You aren’t obligated to use walnuts.  Try almonds, peanuts, cashews – whatever you fancy!

For you visual learners (or those just curious to see me in action), click on SPICY WALNUTS and I’ll show you how to make them.

SPICY WALNUTS

  • ¾ pound walnuts, halves or broken into large pieces (break them by hand rather than chopping to prevent unusable bits)
  • 3 T butter
  • 3 T vegetarian Worcestershire sauce
  • ¾ tsp salt
  • ½ tsp ground cinnamon
  • ¼ tsp garlic powder
  • ¼ tsp cayenne pepper (also called red pepper spice)
  • about 4 drops Tabasco sauce (shake bottle well)

Heat oven to 350º Fahrenheit.

In skillet or saucepan, melt butter.  Add in Worcestershire sauce, salt, cinnamon, garlic powder, cayenne, and Tabasco.  Stir over low heat to blend. Pour in walnuts and coat with sauce. Spread walnuts onto a jelly roll pan (a cookie sheet with 4 sides).  If you use a regular cookie sheet, you’re more than likely going to have to retrieve fallen nuts from the oven bottom.  Not fun!!! (Believe me!)

It takes a total of 16-25 minutes for the walnuts to brown, stirring every 5 minutes.  Please heed this advice:  set 2 timers!  One for the total of 20 minutes, and one to set every 5 minutes.  Five minutes is just enough time to find one ‘quick’ thing to do. Either this thing ends up taking longer than expected, OR we find another ‘quick’ thing to do and suddenly it’s 10 minutes later. I think you get my point. It’s important to stir them every 5 minutes so they brown evenly.

It’s worth noting, I use a dark jelly roll pan.  Dark pans cook things faster, so my Spicy Walnuts took 17 minutes.  That’s why I put a wide cooking range (16-25 minutes).  The cooking time will vary depending on your oven and the type of baking pan you use. You want the nuts browned and crispy, but not blackened.

WARNING:  These Spicy Walnuts are very addictive.  Like the old Lays Potato Chip advert – I bet you can’t eat just one!