BLONDIES – Locked & Loaded!

blondies2 textI’ve finally achieved my idea of the perfect blondie. (A blondie is a cross between a chocolate chip cookie and a brownie.) While there may not such a thing as a BAD blondie, there are definitely sub-par ones.

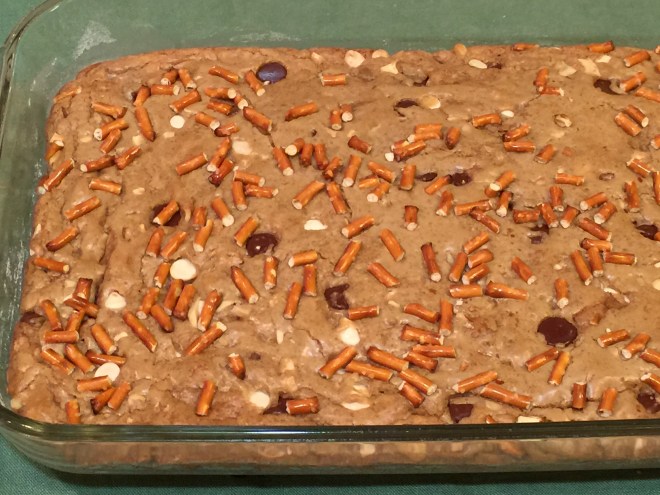
I was looking for a moist, chewy, chocolatey blondie with a salty crunch. Is that asking too much? NO!!! Tinkering around with a pretty good recipe, I decided to brown the butter rather than simply melt it, as directed. This added a deeper flavor.

I also found that removing them from the oven promptly at the 22 minute mark (cooking directions suggested 22-25 minutes) was key to a moist result. Even if you don’t think they’re done, fear not – they’ll continue to bake in the hot pan out of the oven.

A bonus feature of my Blondies is that they’re actually better the next day, once they’re firmed up a bit. I love recipes you can make ahead of time! (Don’t get me wrong – they’re DELICIOUS the same day! It’s just they’re still kind of soft and gooey….not exactly a bad thing, but a little messy for guests.

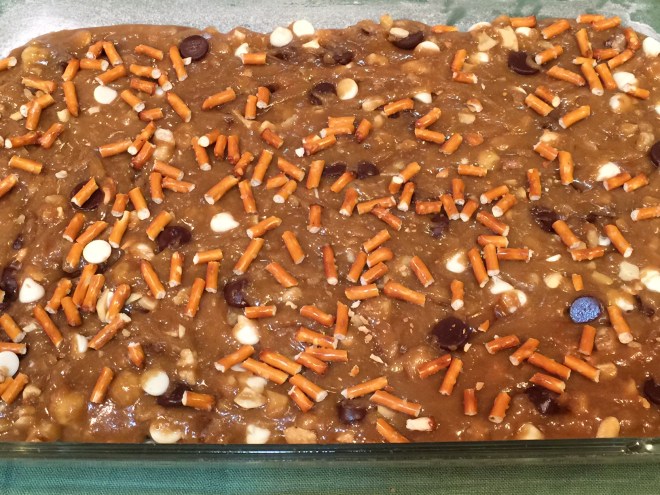
Finally, I added 1/2 cup of 60% cocao bittersweet chocolate chips (Ghirardelli was best) AND white chocolate chips, then topped with toasted pretzel bits for a salty crunch.

NOTE: For the flour and brown sugar I put measurements in both weight and cups. Weight is a far more accurate measurement, which is important in baking. So if you have a scale, use it.

BONNIE’S BLONDIES

  • 7 oz all-purpose flour (1 2/3 cups)
  • 1 tsp baking powder
  • 1/2 tsp salt
  • 12 T salted butter
  • 10.5 oz dark brown sugar (1¾ cups)
  • 2 eggs
  • 1½ tsp vanilla
  • 1 cup walnuts (or pecans, cashews) – chopped & lightly toasted
  • 1/2 cup 60% bittersweet chocolate chips (I use Ghirardelli)
  • 1/2 cup white chocolate chips (I use Nestle’s)
  • 1/3 cup pretzel sticks, broken by hand into small pieces & lightly toasted (unless the bag is fresh)

NOTE: Take care when breaking the pretzels that you don’t knock off the salt.

Mix together the flour, baking powder, and salt. Set aside.

Melt butter in a skillet over medium heat, swirling often. Keep cooking until butter darkens and becomes aromatic, but doesn’t burn. Remove from heat and pour into a large mixing bowl. Let cool a few minutes.

butter browned

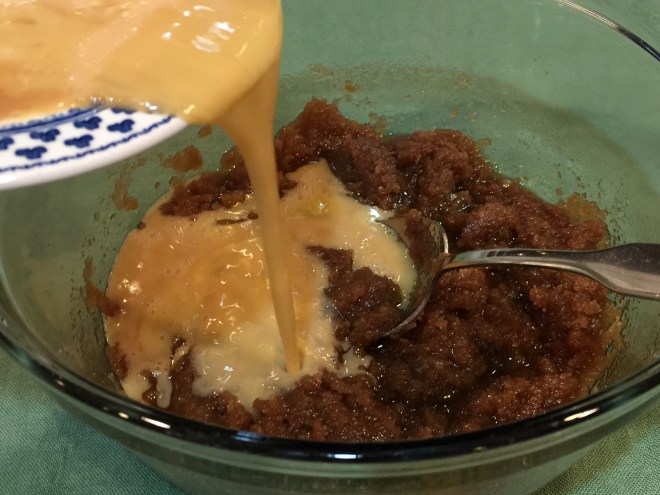
Mix the sugar into the melted butter. Stir well, smashing out any lumps.

IMG_3270

Beat the eggs and vanilla together in a small bowl. Pour approximately half the eggs into sugar mixture and blend. When smooth, stir in the rest of the eggs.

IMG_3272

Preheat oven to 350º Fahrenheit.

Pour in the flour mixture, folding gently until most of the flour is incorporated.

IMG_3273

Add in the chips and nuts, blending just until flour disappears – over mixing toughens the Blondie.

IMG_3264

IMG_3274

Pour into a greased and floured 9″ x 13″ baking dish. Spread batter to cover entire pan, smoothing top. The batter is very thick, so take care when spreading that you don’t scrap off the greased/floured coating – just gently push the top toward the edges.Sprinkle the pretzels on top, lightly pressing into the batter so they stick.

IMG_3276

Bake at 350º Fahrenheit for 22 minutes exactly.  Don’t worry if they don’t look quite done – they’ll continue to cook in the hot dish. Place on a wire rack to cool for, at least, 3 hours before slicing.

IMG_3278


CHILI SPOONBREAD – Creamy Goodness!

chili spoonbread1 text
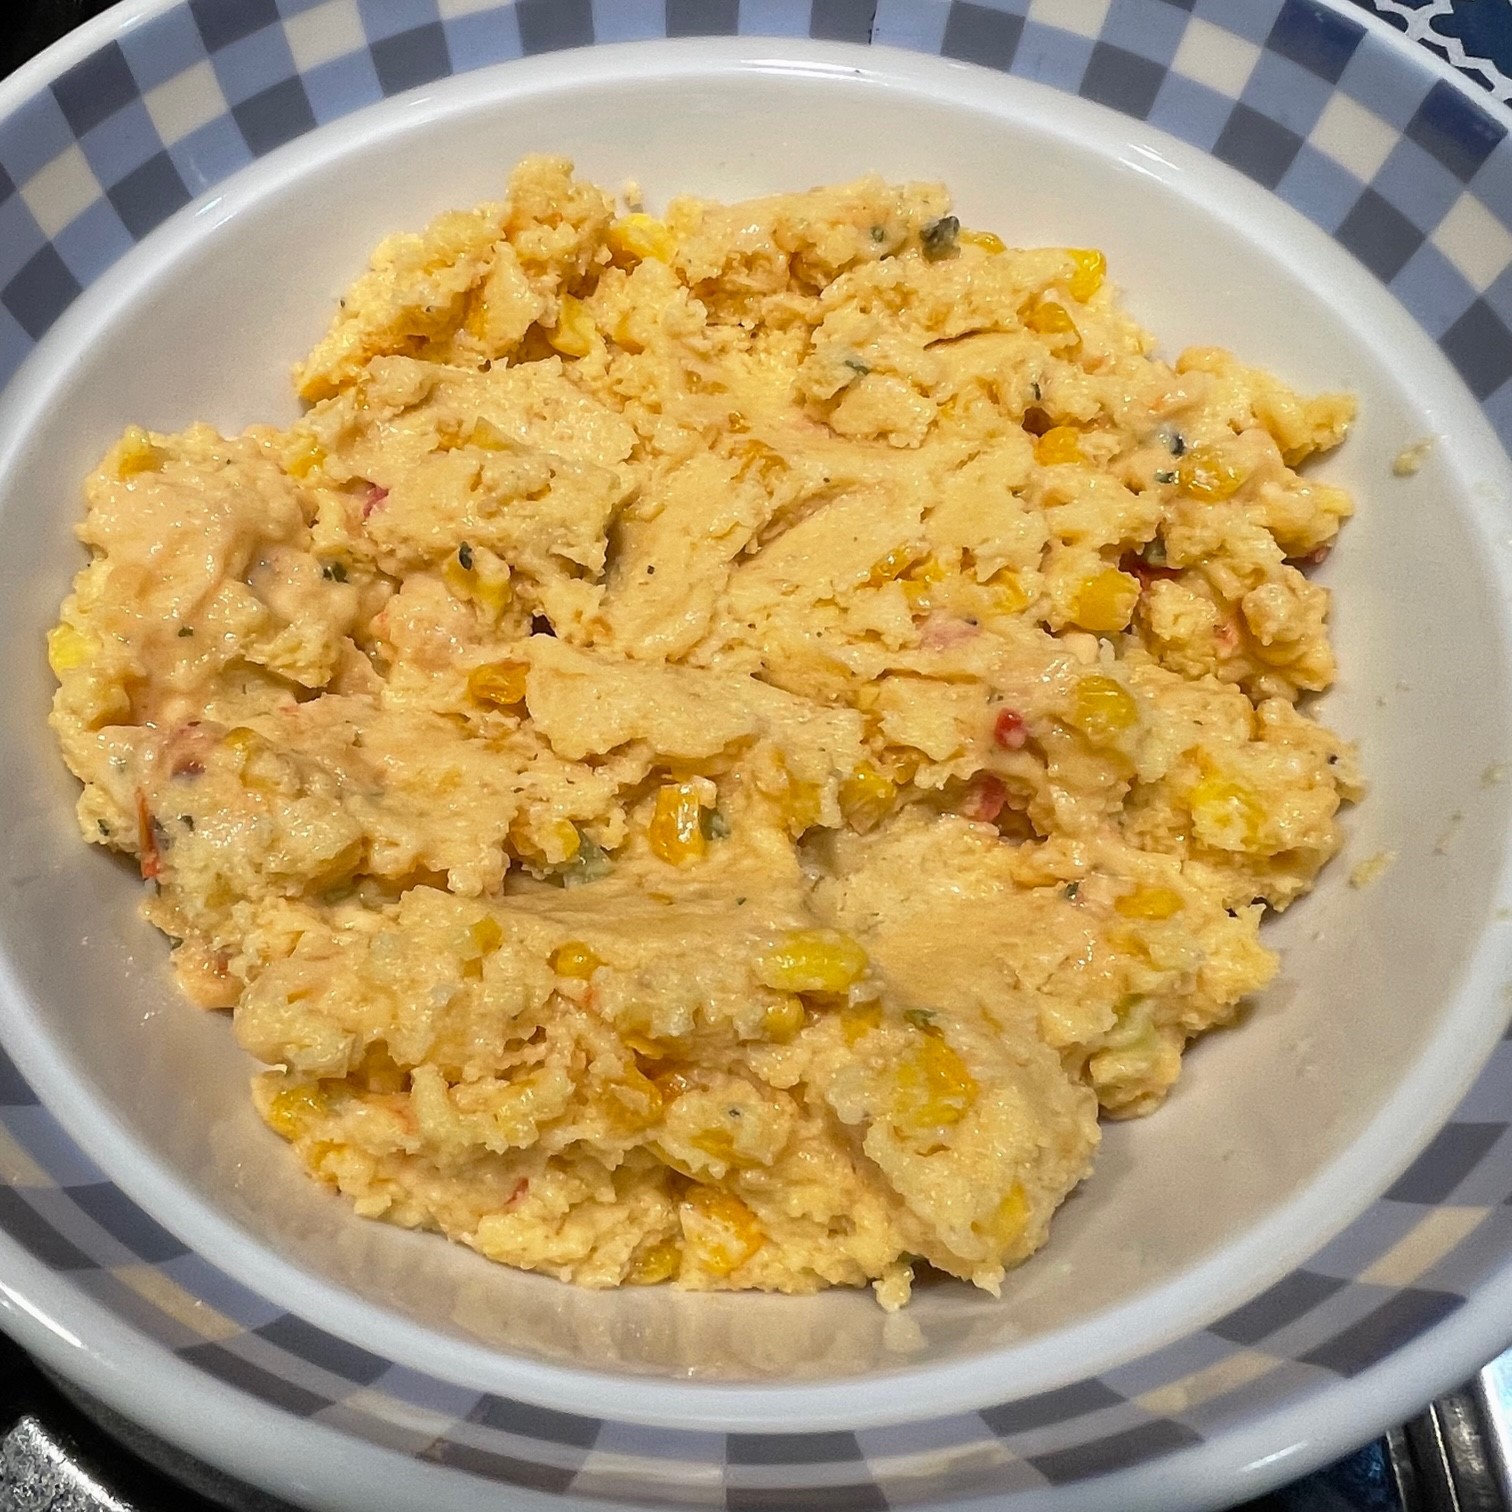
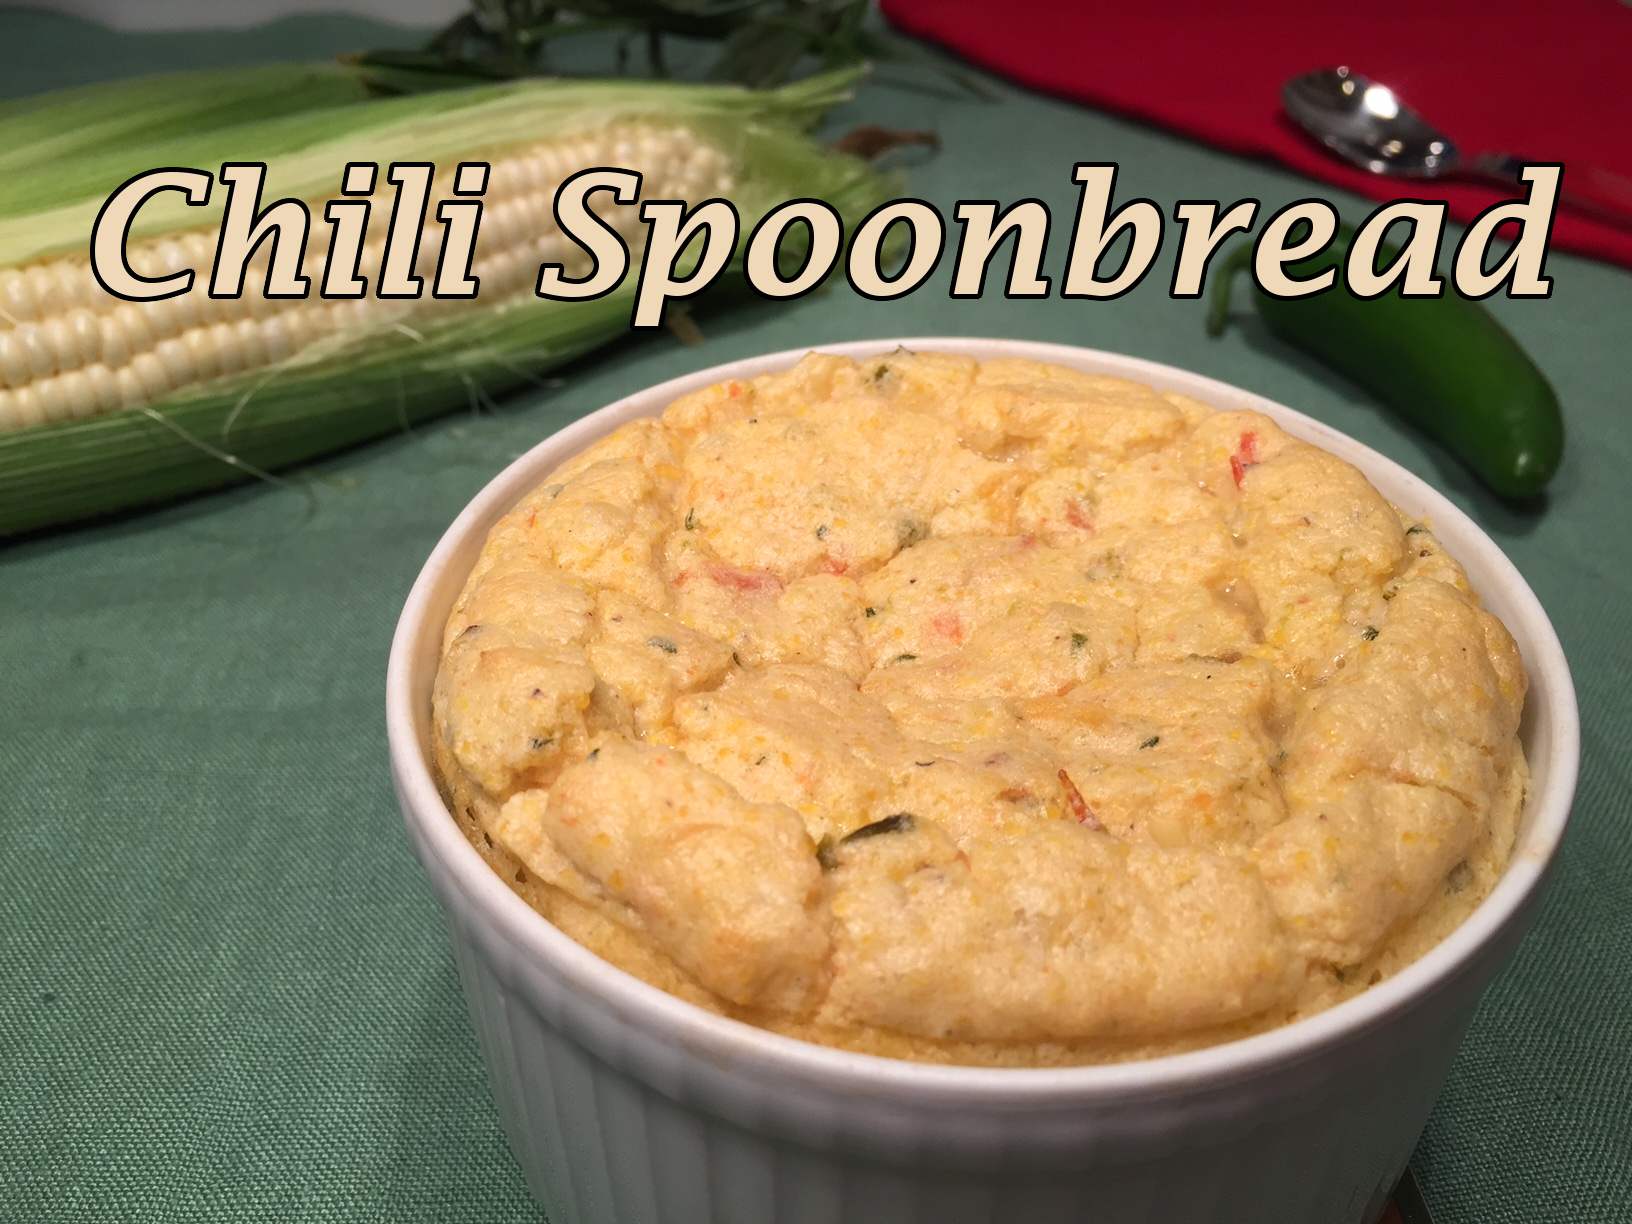
Never heard of spoonbread? Neither had I, but I saw it on America’s Test Kitchen and it looked delicious. A popular dish in the southern United States, it’s kind of a cross between cornbread and a soufflé.

As is my usual practice, I followed the recipe the first time I made it. It was good, but I doubted I’d ever make it again (even though it was pretty simple). Then I spied the leftover CHILI CON QUESO from a previous blogpost. Hmmm! I wondered if it could be incorporated into the spoonbread to kick it up a notch.

Oh, yeah! Worked like a charm. Turned out to be a wonderful twofer bonus: improved the spoonbread, AND made use of the Chili Con Queso before I could grab the Doritos and scarf down the lot….uh, just so it wouldn’t go to waste.

NOTE: This recipe calls for 3 whole eggs and 1 egg white. As self-proclaimed Queen Of Freeze, I feel it my duty to suggest you beat the unused yolk with a tablespoon of water and freeze this for future use as an egg wash or to use in a recipe that calls for egg yolks only.

CHILI-CHEESE SPOONBREAD – makes 4 individual servings

  • 157g (1 cup) fine-grind cornmeal (Bob’s Red Mill makes this)
  • 561g (2¼ cups) milk (any kind – I use nonfat)
  • 2 raw cobs of fresh corn (white or yellow) OR 170g (1.5 cups) frozen or canned corn
  • 56g (4 T) butter
  • 1 tsp salt
  • 1 tsp sugar
  • 1 cup chili con queso  OR 63g (1/3 cup) red salsa
  •                                               57g (2 oz) Jack cheese, shredded
  •                                               57g (2 oz) med. cheddar cheese, shredded
  • 3 eggs, separated
  • 1 egg white
  • 1/3 tsp cream of tartar

In a bowl, combine the cornmeal and milk. This will soften the cornmeal so it’s not so gritty. Set aside while you prepare the rest of the recipe.

Butter 4  1¼ cup soufflé dishes.

If you don’t happen to have chili con queso, make it by combining the salsa and cheeses in a saucepan over a low flame, until the cheese is melted. Cool. (You can do this ahead of time.)

Remove the husk and silk from the corn cobs, then wash and dry them. Next (this may sound daunting, but I promise you it’s not) holding each cob at an angle, remove the kernels by running a sharp knife down the sides. It’s easiest to begin a couple of inches from the top and work downwards, away from you. Then flip the cob, and remove the bit that was at the top in the same manner. You’ll get about 3/4 cup of corn from each cob – I found that amazing.

In a saucepan, melt the butter and cook corn over medium flame, until it begins to brown – about 15 minutes. Stir often.

Then add in salt, sugar, and cornmeal/milk mixture. Cover and let steep 10 minutes.

Bring corn mixture to a simmer and stir until it thickens – about 5 minutes. Shut off flame and stir in the chili con queso.

Pour mixture into a large bowl and let cool 20 minutes.

Preheat oven to 200°C {400ºF) in middle position.

Stir the yolks together in a small bowl, then mix into the batter once it’s cooled for 20 minutes (you don’t want to cook the egg yolks).

Using an electric mixer on high, beat the egg whites and cream of tartar together until stiff peaks form.

Spoon about 1/3 of beaten whites into the batter and whisk in – you don’t have to be excessively gentle with this just yet.

Once those whites are incorporated, pour the rest of whites into the batter and very gently whisk them in by dipping the whisk into the batter then lifting it out. OR, you can use a rubber spatula and fold the whites in. These whites are going to cause the batter to rise, so you don’t want to deflate them by stirring too vigorously.

Divide batter amongst the 4 soufflé dishes and put in preheated 200°C (400°F) oven. (It’s easier to manage if you place the dishes on a cookie sheet.)

IMMEDIATELY TURN OVEN DOWN TO 180C° / 350º

Bake for 20-22 minutes, if you like a creamy center (I do!). If you jiggle the soufflé dish, the center should wobble. But, if you want the center cooked like the sides (more bread-like), then bake another 2 minutes – the center won’t jiggle.

If there are leftovers, store Chili Spoonbread in the soufflé bowls. Then microwave about 1 minute 15 seconds when ready to eat.

CHILI CON QUESO – Si, Si, Si!

chili con queso text

Festivities abound in summertime and when people get together, there’s food.

Next time you’re asked to bring a potluck dish, don’t groan. Instead, try my Chili Con Queso dip. There are only 3 ingredients and all you do is heat them together. You can do that, right?

NOTE:  For those of you who want to go that extra step, you can make your own salsa.

CHILI CON QUESO – makes about 2 cups

  • 1 cup salsa (I use thick & chunky, medium spice)
  • 1/4 lb Jack cheese, shredded
  • 1/4 lb medium cheddar cheese, shredded

Combine all ingredients in a saucepan. Over low heat, stir until cheese is melted. If you heat it too high, it may “seize”, which means the cheese doesn’t melt properly – it kind of clumps. If this happens, re-name the dish, “Rustic Chili Con Queso”, and pretend this is how it should be. It will still taste yummy.

If you like, top with olives, cilantro, tomatoes, etc. Serve with tortilla chips.


FRENCH ONION SOUP – Magnifique!

french onion soup text

Who can resist FRENCH ONION SOUP, with its cheesey bread topping, encrusted over a savory soup?!

You may think FRENCH ONION SOUP is one of those foods only obtainable at a restaurant. (And when I worked in a fancy Beverly Hills restaurant, we did serve it.) But it’s actually easily made at home, and my vegetarian version (no beef or chicken stock) is every bit as tasty as that expensive version ordered out.

Three points of caution:

  1. It’s essential to use soup crocks that are broiler-proof.
  2. Allow 4 hours from beginning to end. Don’t fret, though! Nearly all that time is hands off.
  3. Make sure your Dutch oven or saucepan has handles & knobs that can withstand high oven heat.

FRENCH ONION SOUP – serves about 7

  • 4 lbs yellow onions, thinly sliced
  • 3 T butter
  • 1 T olive oil
  • 1½ tsp salt, divided
  • 1/2 cup Sherry
  • 8 cups vegetable stock (if purchasing, use one that’s not too flavorful)
  • 1/2 tsp dried thyme
  • 1 bay leaf
  • 1/2 tsp pepper
  • 1/2″ slices of baguette or rustic bread (don’t use sandwich – it’s too mushy)
  • about 2 cups Gruyère cheese, shredded
  • about 1/2 cup Parmesan cheese, grated

In an oven proof Dutch oven or large saucepan, put the onions, butter, olive oil, and 1 tsp salt. Stir together (don’t worry that the butter isn’t melted yet) and cover tightly with lid. Put in a 400º Fahrenheit oven and cook 1 hour without disturbing.

After an hour, stir onions and replace lid but leave it slightly askew to allow steam to escape. Let bake 1½ hours, undisturbed.

Place saucepan on stove and cook over medium heat for 15 minutes to develop a nice dark fond (the baked-on food that sticks to the bottom – it’s full of flavor!). Stir occasionally.

NOTE: If you’re using a saucepan with a handle, I suggest you put an oven mitt or towel on the handle to remind yourself how hot it is. Remember it’s been in that 400º F oven!

Now you’re going to deglaze the fond by pouring in 1/4 cup water and stirring over medium heat, until the water is gone and new fond develops – about 5 minutes. Do this 3 more times (total of 1 cup water).

Pour in the Sherry for a final deglazing. Cook until Sherry evaporates (about 5 minutes).

Add the vegetable broth, 1/2 tsp salt, thyme, and bay leaf to pot. Bring to boil, cover, lower heat, then let simmer for 30 minutes.

Add in pepper and remove bay leaf.

Leaving room for the bread, ladle soup into BROILER-PROOF crocks. Top with bread, then sprinkle on Gruyère, followed by the Parmesan. Place crocks about 3″ under broiler element, and cook until toasty brown. Keep an eye out – it takes about 6 minutes, but that can vary.


PESTO TRAPANESE – Presto Pasta!

pesto trapanese2 text

PESTO TRAPANESE should be called PESTO TRAPAN-EASY!  It’s one of the fastest homemade meals you’re likely to come across. The time it takes to boil the pasta water and cook the spaghetti noodles, is the time it takes to make this dish. Impossible, you say?! Not at all. While the pasta is cooking, you prepare the pesto. It’s that fast.

For those of you who make your own pasta (like I do), the time is only slightly longer. I’ll prep the pesto ingredients (which only takes about 5 minutes), THEN put the water on to boil. While the water is heating up, I roll out the pasta dough. Generally, by the time the pasta is made, the water is at a full boil. Perfect!

PESTO TRAPANESE – serves about 3-4 (depending on how hungry people are)

  • 1/4 cup slivered almonds, toasted
  • 2½ cups sweet cherry tomatoes
  • 1/2 cup fresh basil, chopped
  • 1 tsp salt
  • 1/4 tsp red pepper flakes
  • 2 T deli-sliced jalapeño peppers (I use ‘tamed’ spice level – but if you want more kick, go to ‘hot’)
  • 1/3 cup extra virgin olive oil (use a good quality)
  • 1/2 cup (+ extra for sprinkling) Parmesan cheese, grated
  • 1 lb spaghetti noodles

Bring a large pot of salted water to a full boil.

While water is heating, toast the almonds, wash the tomatoes and basil, and measure the salt, red pepper flakes, jalapeños, olive oil, and parmesan. Chop basil.

When pasta goes in the boiling water, put the almonds, tomatoes, basil, salt, flakes, and jalapeños in a blender or food processor. Pulse several times to break up ingredients. Then let machine run continually as you slowly pour in the olive oil to emulsify the pesto. Adjust seasoning, if needed.

Drain pasta when cooked, then return to empty pot. Stir in pesto and the 1/2 cup Parmesan. Serve, sprinkling on extra Parmesan, if you like.


BROCCOLI-CASHEW PASTA SALAD

broccoli cashew salad text

BROCCOLI-CASHEW PASTA SALAD is one of my all time favorites. Not only is it visually appealing, but it’s one of those “I’ll just have a little bit more” dishes.

The orecchiette pasta (which means ‘little ears’) is a perfect shape to capture all the goodies, so each mouthful is a tasty combination of crispy broccoli and red pepper, subtle mushrooms, salty cashews, all coated with a savory dijon dressing. If you use a spoon, you might be able to finagle everything in one bite.

This salad can be prepared in the time it takes to boil the water, then cook the pasta. It can be served warm, but I prefer to chill mine for about 20 minutes.

BROCCOLI-CASHEW PASTA SALAD – makes about 5-6 cups

  • 230g (1/2 lb) orecchiette pasta
  • 200g (3 cups) broccoli, cut into bite sized pieces
  • 1/2 T olive oil
  • 58g (1/2 cup) onions, chopped
  • 6 oz mushrooms (about 8), chopped
  • 1 red pepper, chopped
  • 100g (1/2 cup) mayonnaise
  • 1 tsp dijon mustard
  • 25g (2 T) red wine vinegar
  • 60g (1/2 cup) salted cashews, lightly toasted (do this even if you buy them roasted)

Put a large pot of salted water to boil.  When it reaches a full boil, add in the pasta and cook until done. Drain immediately, but don’t rinse or shake.

While pasta is cooking, put the broccoli in a steamer basket (don’t forget the water!). The goal is to break down the fibers enough to eat, but still leave a little crunch. Turn heat to high, cover, and set timer for 3 minutes. Remove pan from heat and take off lid. Let sit in pot while you do the next step – this allows the broccoli to complete cooking.

Heat oil in a skillet and add the onions and mushrooms. Sauté 2-3 minutes.

Add in the red pepper. Continue to cook another 2 minutes. Remove from heat.

In a small bowl, whisk together the mayonnaise, mustard, and vinegar until smooth. Cool in refrigerator.

Combine the mushroom mixture, broccoli, and dressing.

If you’re serving the dish warmish, add the cashews.

If you want the salad chilled, place the pasta mixture in the fridge. At serving time, stir in dressing and cashews.

GINGERBREAD COOKIES WITH CHOCOLATE CHIPS – Chewy Goodness!

gingerbread cookies text
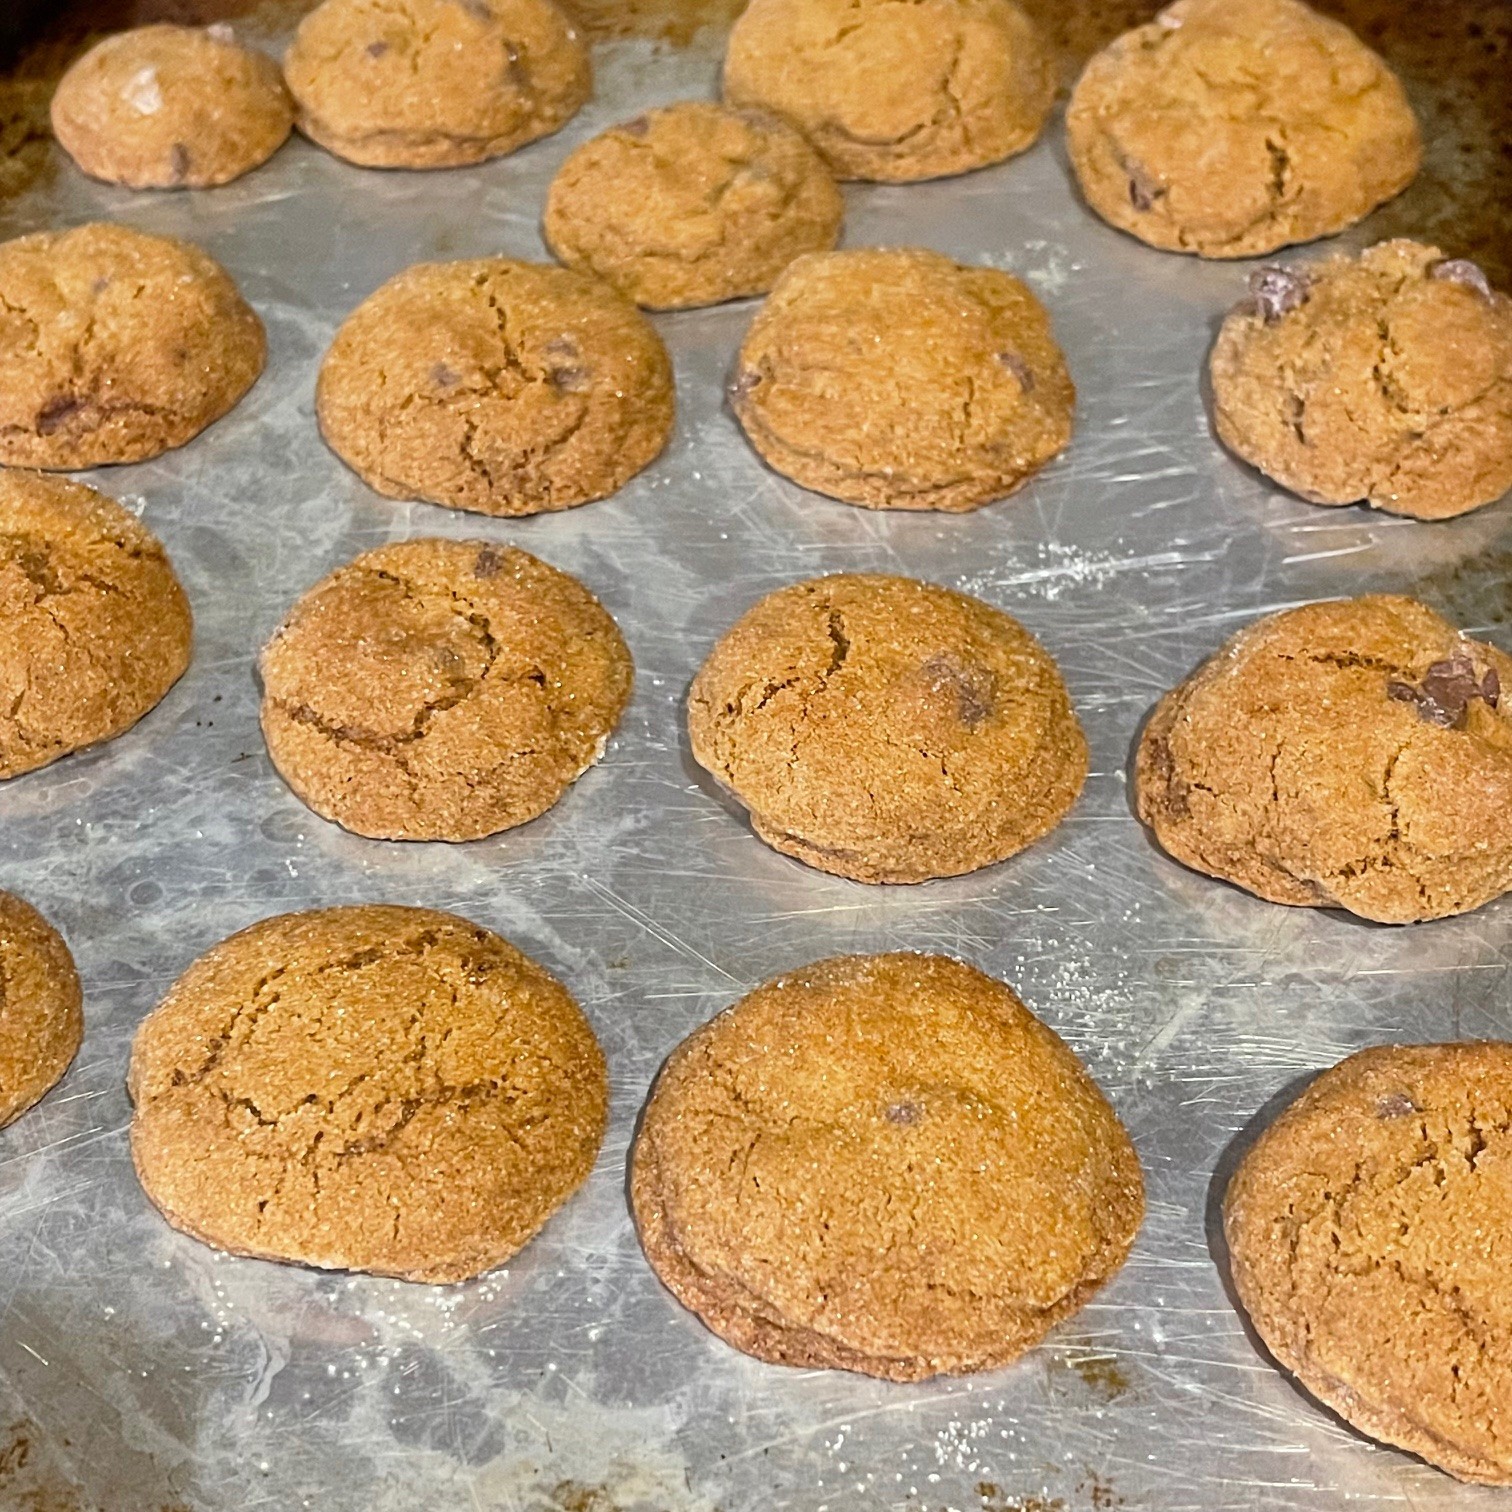
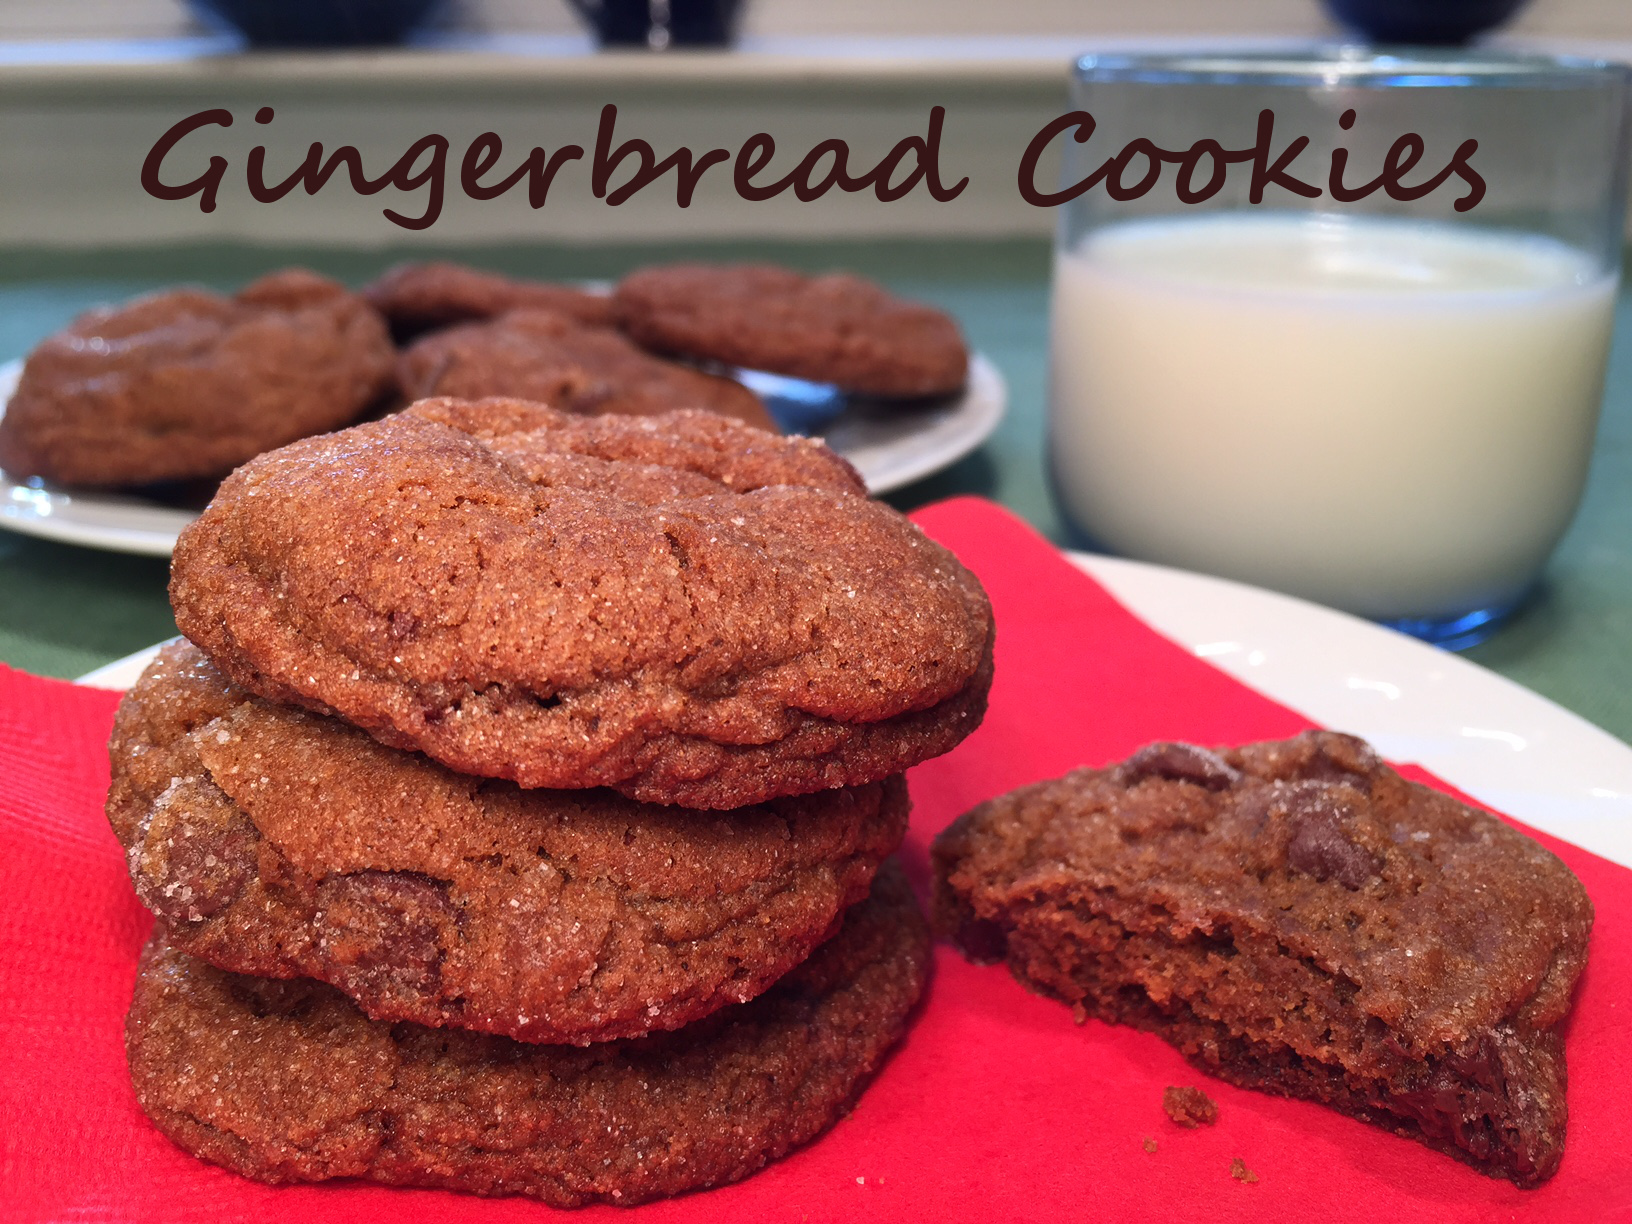
Gingerbread Cookies with chocolate chips are my kids’ favorite. They’re soft cookies with a flavorful bite from ginger, cloves, and cinnamon. The chocolate chips balances them out with with a creamy sweetness.

Once the dough is made, it needs to be refrigerated and then rolled into balls – a great task for little ones (with very clean hands) who want to help. At this point, the dough can be frozen, ready and waiting to be popped in the oven for a last minute dessert.

GINGERBREAD COOKIES WITH CHOCOLATE CHIPS – makes about 3 dozen

  • 2¼ cup (265g / 9.25 oz) all-purpose flour
  • 2 tsp baking soda
  • 1½ tsp dried ginger powder
  • 1¼ tsp cinnamon
  • 1/2 tsp ground cloves
  • 1/2 tsp salt
  • 3/4 cup (168g) butter, softened
  • 1 cup (168g / 6 oz) dark brown sugar, packed
  • 1 egg
  • 1/4 cup (75g by weight / 2.5oz) molasses
  • 1 cup (155g / 5.4 oz) semi-sweet chocolate chips
  • about 1/3 cup granulated sugar for rolling dough into

In a small bowl combine the flour, baking soda, ginger, cinnamon, cloves, and salt. Set aside.

Using a standing mixer, cream butter and brown sugar for 3 minutes at medium-high. Don’t short-change this – you want the batter to blend together.

Mix in egg and molasses. This will take 1-2 minutes to get to a creamy texture.

I

Add the flour mixture to the batter on low speed until the flour is almost completely incorporated. It will be clumpy – this is normal.

Stir in chocolate chips on low speed, just until all the flour is incorporated and dough starts holding together.

Cover bowl (I use a plate) and refrigerate dough for 1 hour to make it easier to handle.

After the chill time is up, PREHEAT OVEN TO 375°F.

Remove chilled dough from fridge. If dough is too solid to work with, let it sit for a bit. You want it firm, but not rock-hard. Put the 1/3 cup sugar in a cereal bowl. Roll the dough into 1″ balls, then roll each ball in the sugar, coating it completely.

Place coated balls on a greased or parchment lined baking sheet as you go.

Bake at 375º Fahrenheit 10-12 minutes. Don’t overbake or you’ll get a dry cookie. Remember, they’ll continue to cook on the hot cookie sheet out of the oven. The edges should look done, but the center should look slightly underdone.

Let cookies set for 5 minutes before removing them to a wire rack to completely cool.

TIP: If you want to freeze the uncooked dough balls for future use (I’m AM the self-proclaimed Queen of Freeze, after all), put the dough balls (without rolling in sugar) on a non-greased cookie sheet and place in freezer until solid. Gather them into a container for storage. When ready to bake, roll them firmly into granulated sugar and place them on prepared cookie sheets, letting them thaw about 20 minutes. Bake as directed.

AREPAS – A Central American Favorite

arepas text
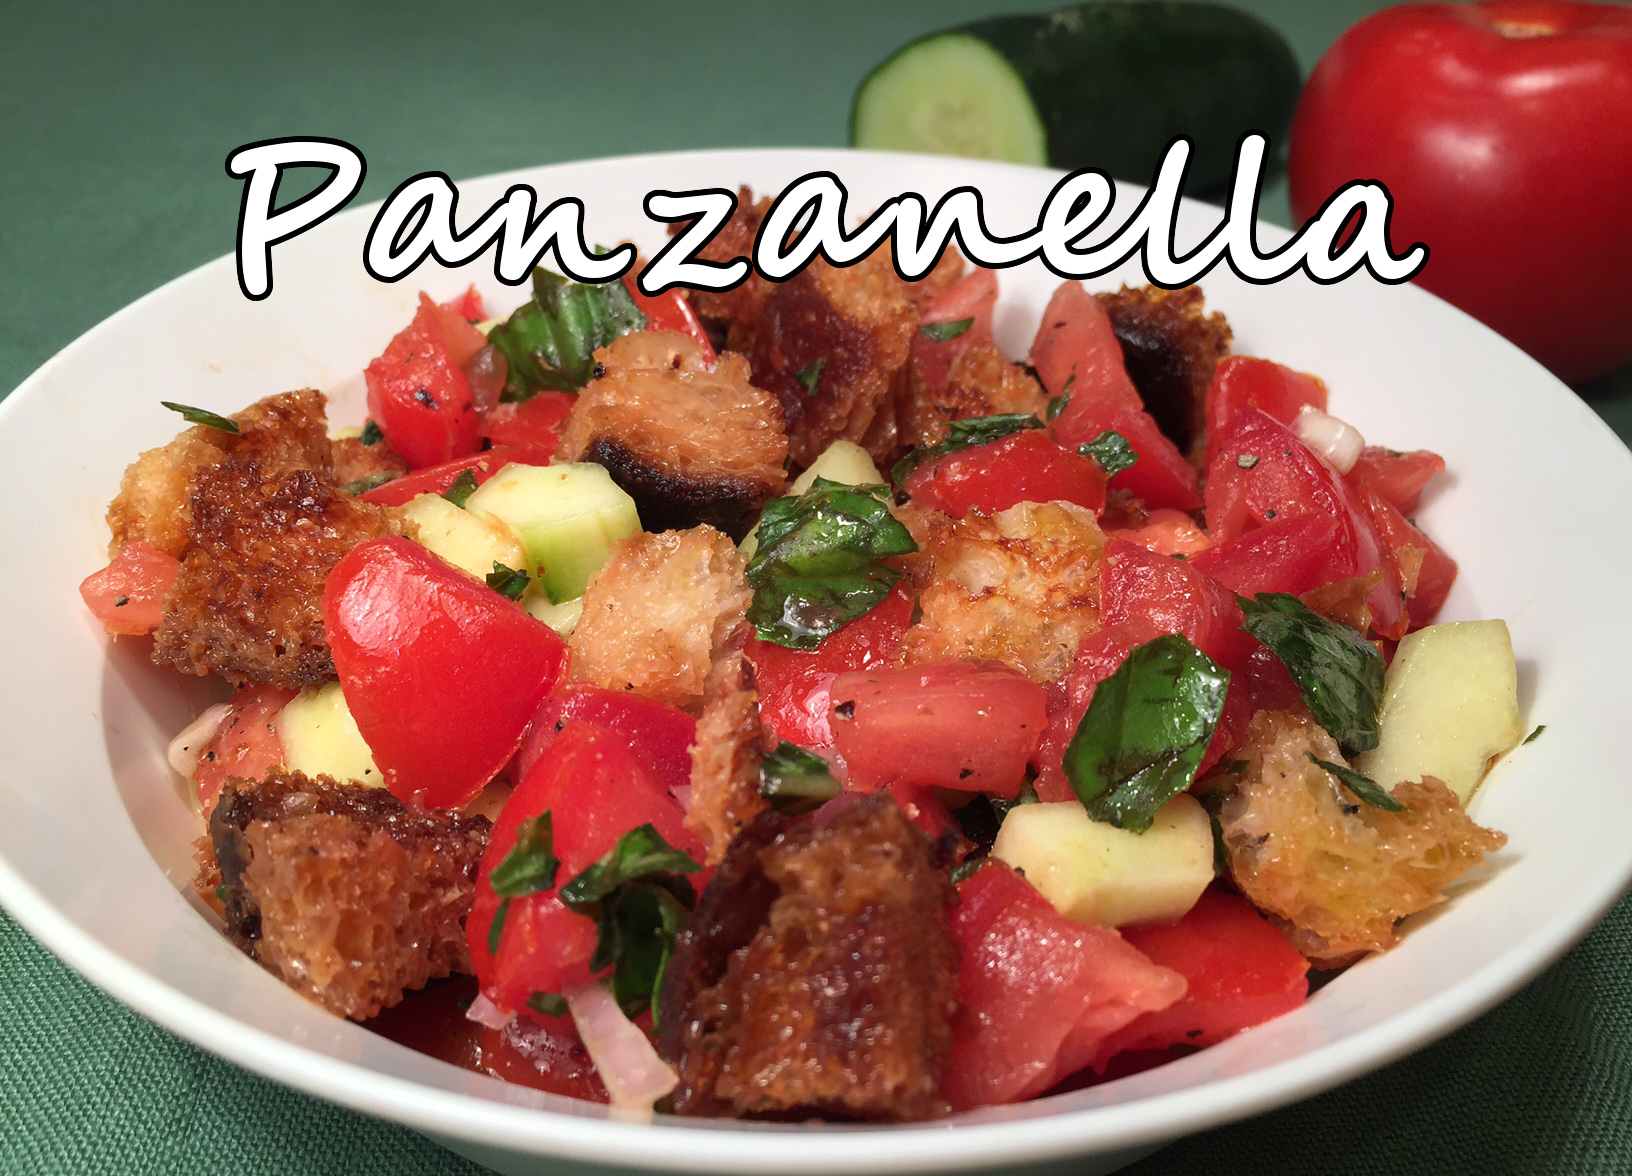
I’ve been on a mission to try making foods from scratch that you would normally never think of, such as tortillas (flour and corn), Italian rustic bread, yogurt, cream cheese, and pasta. I think you get the idea.

But all the aforementioned foods have been homemade for centuries, and without the aid of modern kitchen conveniences.  How hard could it be? So far – not very. Yes, it takes more time than buying ready-made, but at what price? When I cook, I know what’s in my food. Plus, the price mark-up is incredible. Did I mention that I’m cheap?

Arepas are cornmeal flat, round bread patties (like an English muffin) that are slit open and stuffed with whatever you like. I’ve included a recipe for my favorite filling. You can even spread them with jam or honey. Use your imagination. They are amazingly easy it make – even kids (with very clean hands) can prepare the dough.

NOTE: The most common masarepas is PAN Harina. Below is a photo of what I bought. PAN is a brand, but others make it, too. You may need to go to a specialty store for hispanic foods (I had to). PAN Harina is NOT the same as masa harina, which is used for corn tortillas.

FullSizeRender (18)

TIP:  Store masarepas, and all extra flours & grains, in the freezer until use to prevent bugs and keep them fresh. Bring to room temperature before using.

AREPAS – makes 6

  • 2 cups (310g / 10 6/8 oz) masarepas
  • 1 tsp salt
  • 1 tsp baking powder
  • about 2½ cups  (650 ml) water
  • about 1/4 cup (60 ml) vegetable oil

Put the masarepas, salt, and baking powder is a bowl. Use your dominant hand to mix it. (Yes, you’re going to mix the dough with your hand – it’s the easiest way.) With your non-dominant hand, pour in about 1 cup of the water. Slowly squish the mixture until water is absorbed. Add another cup of water and slowly squish. (If you squish quickly, the water squirts and makes a mess.) The end result should be a soft dough (softer than Playdoh), but not so soft that it sticks to your hand and won’t stay formed. Add more water, if needed…or more masarepas, if you’ve added too much.

Divide dough into 6 equal pieces. Shape each into a patty 4″ in diameter and about 1/2″ thick.

Preheat oven to 400º Fahrenheit.

Have ready a wire rack sitting on a cookie sheet.

Over medium flame, heat 2 T oil in a 10″ skillet, or 4 T oil in a bigger skillet. When oil is hot, place in as many discs that will fit. When bottom is browned (about 3 minutes), flip cooking again until browned. Place on wire rack. Add more oil to skillet with each batch.

When all arepas are fried, place cookie sheet into oven for 10 minutes. Remove and cool until you can slice them in half without burning yourself.

BLACK BEAN & RICE FILLING – makes about 2 cups

  • 1 cup cooked black beans, mashed
  • 1/2 cup cooked rice (I use Brown Rice Medley from Trader Joe’s)
  • 1/2 cup SALSA VERDE
  • 1/2 cup tomatoes, chopped
  • 1/2 cup avocado, mashed
  • 1/2 cup jalapeño jack cheese, shredded
  • 1/4 tsp salt
  • 1  2.25 oz can jalapeño sliced black olives

Blend all ingredients together.

PANZANELLA: It’s Fresh Tomato Time!

panzanella text2

Many of you know by now that I’m the self-proclaimed Queen of Freeze. Not only do I cook in bulk and then freeze the extras in portion sized containers for future use, but I also freeze unused ingredients that I don’t need at the moment – for example, egg whites when I only need the yolk, or the remaining tomato paste when I only need a tablespoon. I’ve been teased about my frugality, but these bits and bobs have saved a trip to the market many a time.

Quite often I have partial loaves of homemade bread laying in my deep freezer. I generally use them in bread pudding or an omelette casserole. But recently I found a recipe from America’s Test Kitchen for Panzanella, a bread and tomato salad.

It’s quite simple to make, but you need to allow 15 minutes for the bread cubes to toast and the tomatoes to drain, and 10 minutes for the toasted bread cubes to marinate in a vinaigrette, so plan your timing accordingly.

PANZANELLA – makes about 5 cups

  • 6 cups rustic Italian or French loaf, cubed in bite sized pieces
  • 8 T extra virgin olive oil, divided
  • 3/4 tsp salt, divided
  • 1½ lbs tomatoes
  • 3 T red wine vinegar
  • 1/4 tsp pepper
  • 1 cucumber, seeded and sliced
  • 1/4 cup fresh basil, chopped (TIP: chop in a cup using kitchen shears)
  • 1 shallot clove, sliced thin

Combine bread cubes, 2 T olive oil, and 1/4 tsp salt. Use your hands to mix – it’s easier than a spoon. Pour onto jelly roll pan and bake at 400º fahrenheit for 13-17 minutes (tossing midway), until browned.

While bread is toasting, slice tomatoes in half along the equator and poke with your finger to loosen seeds. Shake halves over sink to remove them. Chop tomatoes into bite sized pieces and put into a strainer that’s resting on a container to catch the juice. Make sure the bottom of the strainer isn’t touching the bottom of the container. Sprinkle on 1/2 tsp salt and mix with hands. The salt will draw out the excess juice. Let drain for, at least, 15 minutes. You’ll use the strained juice in the vinaigrette, so don’t throw it out!

Whisk together 1/4 cup of the strained tomato juice, 6 T olive oil, vinegar, and pepper in a large bowl. Add in the toasted bread cubes and mix to coat. Let marinate for 10 minutes.

To the bread cube marinade add the tomatoes, cucumber, basil, and shallots. Toss gently to mix and serve immediately.


TOMATO SOUP – Mmm Mmm Good…For Your Waistline!

tomato soup text

It’s that time of year when the temperature starts to rise and the clothing starts to shed. No more bulky sweaters to hide those extra pounds.

Years ago there was a soup commercial with a girl hanging a yellow polka dot bikini on her wall as incentive to stick to her diet. To aid in her endeavor, she would eat soup for lunch – all the while singing “she wore an itsy bitsy teeny weeny….”.

It’s really not a silly idea. Soup is low in calories and filling enough to get you away from the table unscathed by a grilled cheese sandwich and French fries.

I found an easy recipe from America’s Test Kitchen for creamy tomato soup – without the cream (or any dairy at all, for that matter). Of course, I adjusted it for vegetarians by substituting vegetable stock for chicken stock.

Here’s the important thing: DON’T BUY TOMATOES FROM A SUPERMARKET! They were picked green and have no flavor. Either grow them yourself, or buy them from a local farmer’s market. Otherwise, buy canned whole tomatoes (Muir Glen brand is rated best), which is what you’ll have to do most of the year.

TOMATO SOUP – makes about  5 cups

  • 3-4 T extra virgin olive oil, divided
  • 1/2 cup yellow onion, finely chopped
  • 3 garlic cloves, pressed
  • 1 bay leaf
  • 1/4 tsp red pepper flakes
  • 28 oz can whole tomatoes OR 2 lbs fresh Roma tomatoes
  • 3 slices white bread, crust removed
  • 1 T brown sugar (I used dark brown sugar)
  • 2 cups vegetable stock (here’s my recipe for homemade: VEGETABLE STOCK)
  • 2 T brandy (optional)
  • salt and pepper to taste (I used 1/2 tsp salt)

Heat 2 T oil in large saucepan, then add onions, garlic, bay leaf, and red pepper flakes. Sauté about 5 minutes.

Remove stem ends and any skins or impurities from tomatoes. Coarsely chop (don’t worry too much about this – they’re going in the blender eventually) and add to onions, continuing cooking.

Tear bread into pieces and stir into soup, along with brown sugar. Cover pot and let simmer 5 minutes. Remove lid and cool 15 minutes. DISCARD BAY LEAF!! This is very important – you don’t want it blended with the soup or you’ll have to throw it out.

Purée the soup in a blender. Depending on the size of the pitcher, this will require 1-2 batches. With each batch, add in 1 T olive oil before blending.

Clean out saucepan (or use another) and pour in puréed soup. Add in the vegetable broth and bring to a simmer, stirring until heated through. Stir in brandy, if using. Adjust seasoning, as needed.