Brussels Sprouts Amandine – Try It, You’ll Like It!

FullSizeRender (3)

In a recent post, I made mention of Beaver Cleaver’s (from tv’s Leave It To Beaver) successful encounter with a Brussels sprout. It reminded me of a delicious Brussels sprout recipe I had tucked away. As a creature of habit where vegetables are concerned, I tend to serve the usual broccoli, mushy peas, carrots, and cauliflower. For some reason, I forget about these mini cabbage morsels.

So I rifled through my recipe box and found the Brussels Sprouts Amandine recipe card. To those of you under the age of 25, a recipe box is where index cards with recipes printed on them are stored. (Yes, I’m that old)

Every time I make this recipe, I wonder why I don’t make it more often. It’s one of those hater-converters. Never heard the term? That’s because I just made it up. A hater-converter is a recipe so yummy that it alters your negative view of a certain ingredient, such as Brussels sprouts, into something you love…or, at least, like enough to tolerate because it’s good for you.

TIP: Brussels Sprouts Amandine taste best when freshly made. So prepare the sauce ahead of time, leaving it in the saucepan for a quick reheat. Have the Brussels sprouts cleaned, halved, and sitting in the steamer basket ready to be cooked. They only take about 5 minutes. This way, you can turn on the burner as your meal preparation is winding down, quickly dress them, and they’re ready to go.

BRUSSELS SPROUTS AMANDINE – makes 2 cups

  • 2 cups Brussels sprouts
  • 2 T slivered almonds, toasted
  • ½ T butter
  • ½ T Dijon mustard
  • 1 T red cider vinegar
  • 1½ T dark brown sugar, packed

Trim the base of Brussels sprouts and remove loose leaves.  Slice them in half lengthwise and place in steamer basket.  DON’T FORGET THE WATER UNDERNEATH!  (Been there, done that.)

In a small saucepan, melt together the butter, mustard, vinegar, and sugar.  Turn off burner and set sauce aside.

When it’s about 5 minutes until meal time, steam the Brussels sprouts.  You want them cooked, but not mushy.  They’ll become vibrant green just before they’re ready – test with a fork.  Remove from heat.

Quickly reheat sauce and mix with sprouts and almonds.  Serve immediately.


Chilly Weather Is Chili Weather!

IMG_0451

When the weather turns teeth-chattering, there’s nothing like a big bowl of hot and hearty chili. It’s almost obligatory. Can’t you just picture it? Howling wind and pouring rain outside. You huddled beside a roaring fire, woolen blanket on your lap, fortifying yourself with a thick chili topped with cheese and maybe a few (which translates to a large handful) Fritos.

As an ex-carnivore who still has fond memories of chili teeming with beef and/or pork, I just couldn’t accept the typical vegetarian version which generally replaces the meat with various vegetables such as zucchini, eggplant, and carrots. Now, I love vegetables as much as the next person, but there’s no way a mushy zucchini or eggplant will have the same bite as meat.

That’s where imitation meats (heretofore referred to as ‘fake’) comes in. Their purpose is to serve as foundation for the other ingredients in a dish by offering a texture similar to the real thing – without leaving a taste in your mouth that makes you run to the nearest sink to empty your mouth. Been there, done that!  If you’ve tried a fake chicken, for example, that brings to mind cardboard – try again with a different brand. Or, perhaps, try cooking it less. Fifteen seconds too long with fake hamburgers can turn a tender patty into a hockey puck.

Fortunately, my chili recipe calls for ground “beef”. (Reminder – quote marks mean fake.) Since all the ingredients simmer together, there’s no worry about overcooking. I love using Morningstar’s Crumbles (found in the frozen food section), but since taste is subjective, use what suits you.

This dish is one of those throw-everything-together-in-a-pot-and-then-simmer recipes. And, unless you have the flame too high and forget to stir, it’s fail proof. If you like this chili, I wouldn’t be living up to my title of Queen of Freeze if I didn’t recommend doubling or tripling (which is what I do) the recipe, then freezing in portion sizes for future use. Cook once, clean once, enjoy homemade meals for months to come!

NOTE: Because I’m a bit obsessive about saving money (cheap!) and cooking from scratch, I buy raw pinto beans and cook them myself ahead of time. It takes about 1½ cups of uncooked beans to make the 2 cups called for. If you’re going to do this, allow a couple of hours, at least. No surprise, I actually buy a large bag of beans, cook the entire amount, then freeze the unused in 1 cup increments.

BONNIE’S VEGETARIAN CHILI – makes 9 cups

  • 2 lbs fake ground beef (I use 2 pouches Morningstar Crumbles)
  • 2 cloves garlic, pressed
  • 1 onion, chopped (I use my food processor to finely chop)
  • 1  28-oz can whole tomatoes, chopped (remove stem end, skin, & any flaws)
  • 1  15-oz can tomato sauce
  • 1½ tsp dried oregano
  • 1 tsp cumin
  • 4 T chili powder
  • 3 T paprika
  • ¼ tsp ground pepper
  • 1 T salt
  • 2 cups cooked pinto beans

Put all the ingredients into a large stockpot. Bring to a boil over a medium heat, stirring now and then. Lower the flame to keep chili at a simmer, uncovered, for an hour. Stir often enough that the bottom doesn’t burn. A flat headed wooden stirrer is perfect for this.


Potato Cheese Soup = A United Family Meal

You know those kids who happily eat (or, at least, TRY) any food that’s put before them? Well, unfortunately, none of them lives in my house. My children have never exactly been culinarily curious.

I suppose I should have insisted like June Cleaver did on Leave It To Beaver when The Beav refused to try his Brussels sprouts. Mom & Dad made him stay at the table until he took a bite. Naturally, he grudgingly sampled one, loved it, and everyone rejoiced in the glow of Brussels sprout bliss.

Often times I’ve felt like a short order cook – making one meal for my husband and me, and one for the kids (sometimes each child even got his own selection). This may sound like a lot of work, but for me it was just simpler to crank out the food so I could enjoy dinner without the wheedling, bribing, threats, and anger.

There were, thankfully, a few meals that satisfied the entire family. It goes without saying that I prepared those frequently.

Potato Cheese Soup is high on the preferred list. Not only is it easy to prepare, but because it’s creamed in a blender (or food processor), you can add in a little spinach, etc., and the kids will never know. (We moms have to be a bit sneaky – it’s for their own good….they’ll thank us later.) Also, you can plop in broccoli or cauliflower – the soup is kind of like a cheese sauce.

As noted, this recipe requires a blender or food processor. I haven’t nagged about owning one or both of these appliances in awhile, so with the after-holiday sales, I’ll suggest these items go on your purchase list, if you don’t already own them. Both are invaluable in the kitchen. I use my food processor and blender nearly everyday.

POTATO CHEESE SOUP – makes  7 – 8 cups

  • 42g (3 T) butter
  • 264g (2 cups) onions, coarsely chopped
  • 1 tsp garlic, minced
  • 917g (2 lbs) russet potatoes, unpeeled and coarsely chopped
  • 82g (1 large) carrot, unpeeled and coarsely chopped
  • 710g (3 cups) vegetable stock, purchased or homemade (recipe:  https://vegcookingforcarnivoresblog.com/2014/04/14/back-to-basics-vegetable-stock/)
  • 1 tsp dried dill
  • 245g (1 cup) milk (I use nonfat)
  • 1 tsp salt
  • ¼ tsp pepper
  • 144g (5 oz) cheese, shredded (I use medium cheddar)

Melt butter in a stockpot. Sauté onions over a medium flame for about 7 minutes, stirring often.

Add in the garlic, potatoes and carrots, and continue to sauté another 10 minutes.

Add in the stock, dill, salt, and pepper. Bring to a boil, then turn down flame to simmer the soup. Cover and cook until the vegetables are tender – test if carrots are easily pierced with a fork.

Remove the lid and let cool about 10 minutes – you don’t want to put boiling liquid in your blender.

Add milk to the pot, then pour into a blender or food processor.  Puree until smooth. (Depending on the size of your blender, you may have to do this in batches and, because of this, a second pot will be needed into which you empty the puréed batches.)

Place shredded cheese in the empty pot.

Pour the pureed sauce on top. Heat to melt the cheese and blend into the soup.

This soup is delicious served with homemade French bread – https://vegcookingforcarnivoresblog.com/2014/05/18/ooo-la-la-les-baguettes-tres-simple/

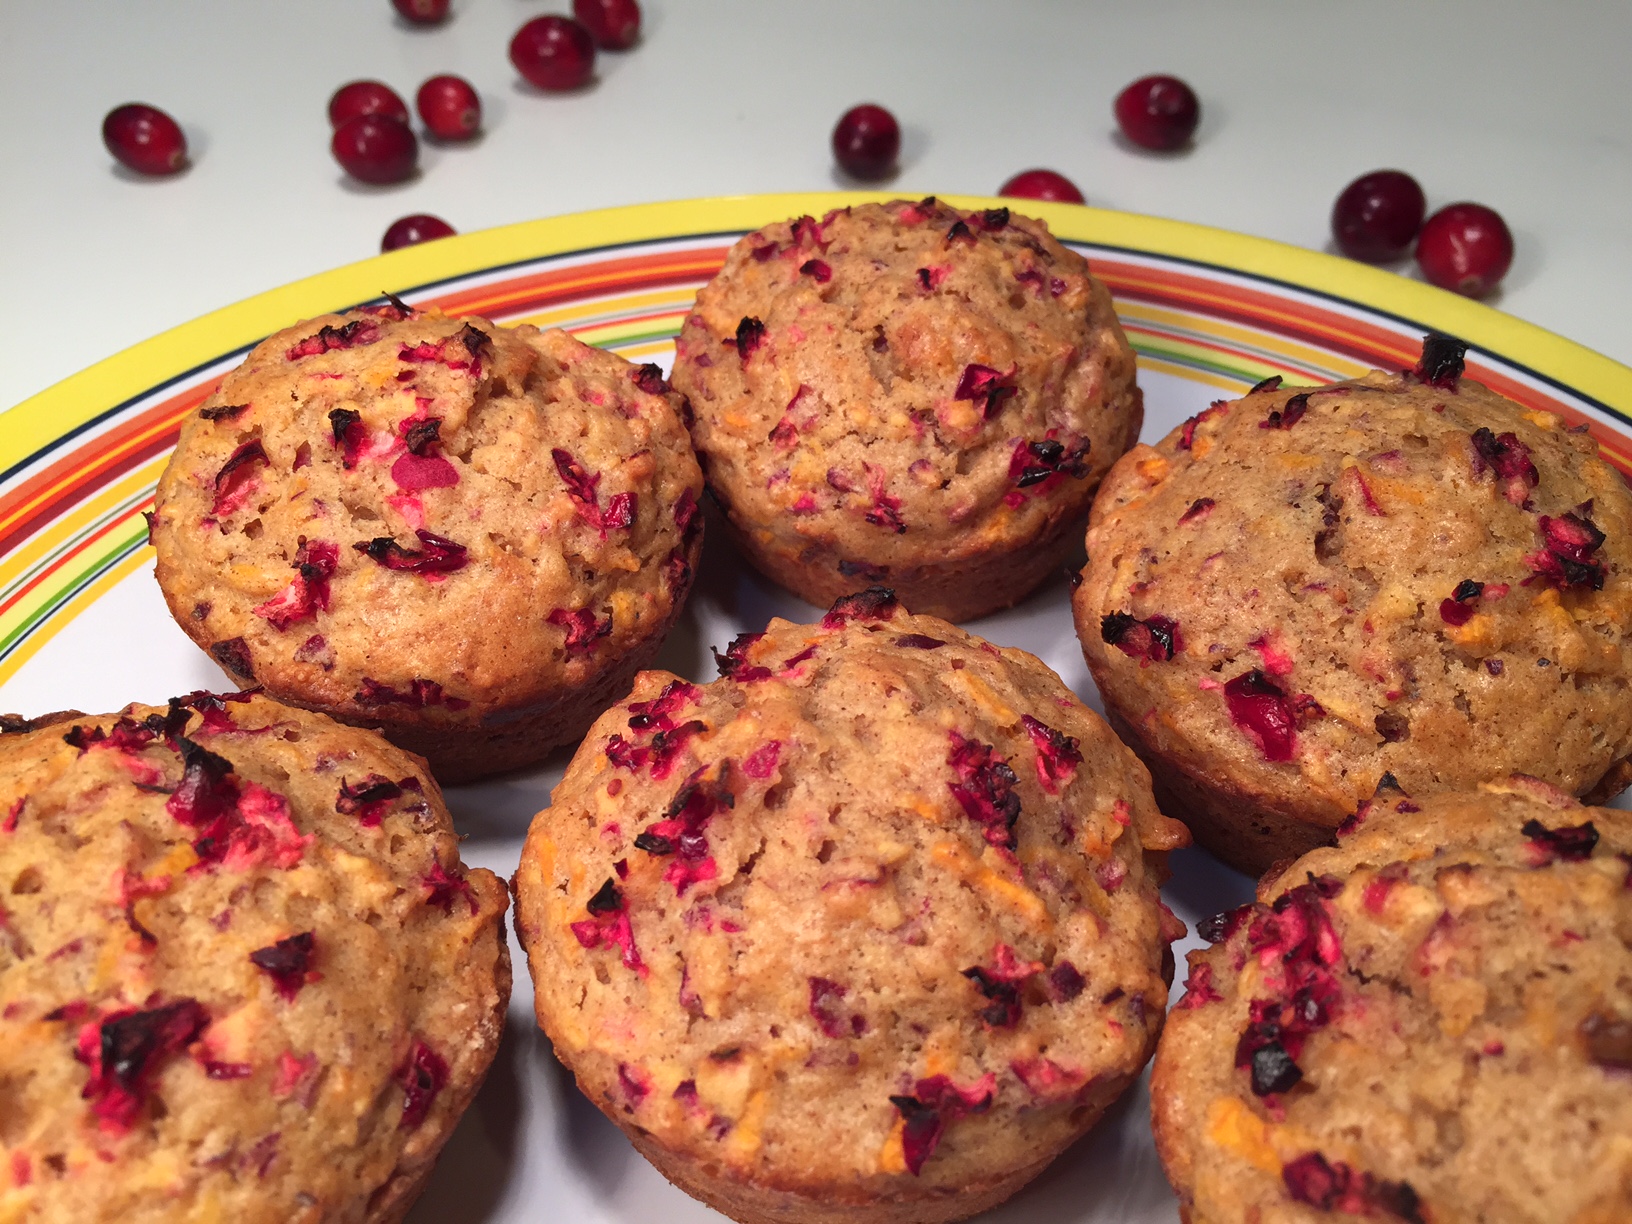
Necessity Is The Mother Of Inventing CRAN-YAM MUFFINS!

Cran-Yam Muffins

Cran-Yam Muffins

Although I’m generally not the most organized person around the house (open any closet or drawer in my home and you’ll know what I’m talking about), there is one area in which I do excel: I keep scrupulous records of holiday menus. Who attended, what was served and the quantity, if the amount was adequate, and how long things took to cook are all jotted down in my 3-ring binder.

Every year after Thanksgiving dinner I write the same note – that very little cranberry sauce and yams were eaten, and NOT to make them again. And every year I get guilted into making them because “it’s tradition”.

This year, in a vain attempt to be thrifty, I only used half the bag of cranberries to make my sauce, and didn’t use all the yams I bought. A wise move, but not wise enough. The majority of both dishes still went untouched. “I swear, I will never make cranberry sauce and yams for Thanksgiving again!” (You have to imagine me doing a Scarlett O’Hara impersonation while saying that.)

So post-Thanksgiving I had half a bag of cranberries and a yam unused. As you may know by now – I hate waste! Although I’m the self-proclaimed Queen of Freeze, I decided against freezing the cranberries – I knew they would get lost in the frigid abyss and I’d forget all about them. But what else could I do with cranberries?

Pulling out my trusty Joy Of Cooking (a must-have for any kitchen!), I looked up ‘cranberry’ in the glossary. There they were: cranberry muffins. Yes! “What if I added shredded yam and spices to the muffins?” I pondered. Perfect!!!

It took several batches to produce the look and flavor I’d envisioned. (And, yes, I actually had to buy more cranberries and yams. Oh, the irony!) But I’m now ready for future leftover cranberries and yams….even though I WON’T be making them next Thanksgiving. Really.

NOTE:  While paper liners for the muffin tin make life easier in the sense that you don’t have to grease the muffin cups (a job I kind of hate), I suggest you forego the liners for this recipe. The paper (and even foil liners) tend to stick to muffins, making it difficult to remove them without losing a good portion of the muffin. Again: hate waste! So bite the bullet and grease the cups.

CRAN-YAM MUFFINS – makes 12 muffins (standard size)

  • 1¾ cups all-purpose flour
  • 2/3 cup granulated sugar
  • 1 tsp salt
  • 2 tsp baking powder
  • 1 T cinnamon (notice the measure is tablespoon)
  • ½ tsp nutmeg
  • 1 tsp ginger
  • 2 eggs
  • ¾ cup milk (I used nonfat)
  • 4 T salted butter, melted
  • 1¾ cups chopped raw cranberries (measure AFTER chopping), divided
  • 1 cup yam, shredded (I used garnet)

In a medium sized bowl put the flour, sugar, salt, baking powder, cinnamon, nutmeg, and ginger. Mix well with a large spoon.

In another bowl (it can be a little smaller) beat the eggs well. Stir in the milk, cups of the cranberries, and the yams. Add in the melted butter and mix.

Pour the liquid ingredients into the dry. Using the large spoon mix together, working with as FEW strokes as possible. Over mixing will yield tough muffins. It’s fine if there’s some flour not incorporated. The batter will be thick.

Preheat oven to 400º Fahrenheit.

Spoon the batter into the greased muffin cups, dividing the batter equally. Sprinkle the reserved ¼ cup of chopped cranberries on top.

Bake at 400º F for about 23 minutes – the top will be starting to brown. Remove from oven and let cool in tin for 2 minutes. Run a dull knife around each muffin, lifting them up at the end of the circle to loosen. Remove to wire rack.

Let cool at least 15 minutes before eating so they’ve had time to set, but are still warm. Delicious with a cold glass of milk, hot tea, or coffee. To reheat, toast in toaster-oven for 1-2 minutes.


Mom’s Fudge! A Holiday Indulgence!

IMG_0245

Best ever Chocolate Fudge

People love tradition – especially at holidays. It’s comforting as we hearken back to days of yore. (Yes, I said, “hearken” and “yore” – don’t judge!)

When I was a child, every Christmas Eve my Aunt Judy and Uncle Don came over. My dad prepared his cheese fondue and my mother made her famous fudge. It’s widely accepted that my mother’s fudge is the best ever. In fact, about three weeks before Christmas, she and I (when I got old enough) would make mass quantities of her fudge and give platefuls away to everyone we knew. Friends, family, teachers, the postman, the paperboy – all rejoiced with this delectable gift.

Now, when I say “my mother’s fudge”, I don’t mean my mother created the recipe. She was NOT an adventurous cook. But she did have the ability to find fabulous recipes that others developed. Fudge was at the top of her list. I wish I could credit the person who actually came up with this recipe, but all I know is mom found it in the newspaper.

An interesting coincidence occurred in college. I was bragging to a friend about my mother making the best fudge. She bragged back that HER mother made the best. We compared recipes and they were identical. We discovered that our mothers clipped them out of the same newspaper!

While this fudge recipe isn’t difficult, cooking the sugar liquid can be a little tricky. If you cook it at too high a temperature, the fudge will turn out hard. Follow the directions and you shouldn’t have any problems.

BONUS: When you pour the molten fudge from the mixing bowl into the casserole dish to set, there’s always some remaining in the bowl. Those of you who follow my blog will know that I hate waste. So my family and I always have spoons ready to scoop all the dregs. (Every year I seem to leave more of the fudge behind.) Try it and you’ll completely understand!

NOTE: This is not the time to try to reduce calories. Fudge is fattening! If you mess around with the ingredients, you’ll mess around with the consistency and taste.

MOM’S FUDGE

  • 18 oz semi-sweet chocolate chips (I use Nestle’s) – this measures out to 3 rounded cups
  • 2 cubes salted butter (½ pound), cut into pieces so it melts quicker
  • 1 cup walnuts, chopped and lightly toasted
  • 16  1″ marshmallows, cut into quarters so they melt quicker
  • 1 tsp vanilla extract
  • 1 can evaporated milk, 12 oz can
  • 4½ cups granulated sugar

Put the chocolate chips, butter, walnuts, marshmallows, and vanilla into a large bowl. It needs to be ready to go when the syrup is done.

Into a Dutch oven (large saucepan) put the sugar and evaporated milk. Turn the flame to low-medium and stir – preferably with a flat-headed stirrer – until the sugar is mixed in. Then turn the flame up a bit and stir continuously until it begins to boil. Turn the flame down slightly, keeping the liquid at a slow boil for 10 minutes, continuing to constantly stir. Adjust the flame as needed.

NOTE: Rather than indicating a final temperature, the recipe directed the syrup to be cooked for 10 minutes. This isn’t a very accurate way to cook candy. So I measured the final temperature at the 10 minute mark when I made my last batch. It was 210º Fahrenheit. Use this as a guide. If your temperature is near 210º, you should be okay. If it’s a lot higher, you’ve cooked the syrup at too high a temperature. I’m not sure if cooling it before pouring it into the chocolate chips mixture will salvage it or not. A syrup too hot yields rock-hard fudge.

When the 10 minutes are up, IMMEDIATELY pour the syrup into the chocolate chips mixture and begin to stir with a large spoon. You have to work fast. The goal is for the butter, marshmallows, and chocolate to melt and blend together. If you stir too slowly, the liquid will cool before everything can melt, and it will begin to set. When the last streak of marshmallow (that’s usually the last thing to melt) disappears, IMMEDIATELY pour into a 9½” x 13″ glass casserole dish. Working quickly, spread the fudge evenly. Let cool before covering, then refrigerate overnight.

Now, grab your spoons and dig into the hot fudge that’s still clinging to the mixing bowl! Waste not, want not!


Kitchen Gifts For Giving Or Receiving

kitchen gifts2

It’s that time of year when we rack our brains trying to come up with gifts for our friends, loved ones, and conversely, for ourselves.

I’m a practical person and love gifts that serve a purpose. Maybe it’s a sign of getting older, but just how many knick-knacks does one need? So, today’s blogpost is a list of kitchen items that (in my opinion) every well-stocked kitchen should have. They range from inexpensive to pricey, and are listed in no particular order. There is a multitude of other kitchen equipment that can be bought and, naturally, I own many of them. But this is a list of my must-haves:

NOTE:  You won’t see a bread maker on my list. They’re expensive, bulky, heavy, and can only do one thing:  make bread. The most difficult thing about making bread is kneading it – you can do that in a food processor.

  • FOOD PROCESSOR – (Did you notice the nice segue way?) I love my Cuisinart, but there are many brands. It can be used to knead dough (bread, pizza, tortillas, pasta), chop vegetables (tomatoes, onions), purée (hummus, soup), shred vast quantities in seconds (carrots, cheese, cabbage), finely grind (graham crackers, nuts), and, I’m sure, other things for which I don’t need.  I use mine almost daily!
  • BLENDER – I actually own 2:  the large jet-engined VitaMix, and the smaller Oster.  I use them both. The VitaMix is great for yogurt shakes (which I make almost daily) because it can handle the ice cubes. Also, because it has such a large pitcher I can blend soups, etc. in fewer batches. On the other hand, I use my smaller Oster to make small batches of soup or pesto (even if I triple the recipe, it’s still not enough for the VitaMix.)
  • COOKIE SHEETS – You should have at least 2 flat sheets and 1 jelly-roll pan (it has 4 sides). I generally prefer to use my dark non-stick sheet – cookies cook a little faster, brown better, and I don’t have to grease the pan. But sometimes you don’t want any of that, so it’s good to have the silver kind, too. Don’t waste your money of the cushioned kind – it has a layer of air between 2 sheets. It’s not that they’re bad, it’s just that things don’t cook any better on it. Save your money.
  • PIZZA WHEEL – This is not just for cutting pizza. I use mine for quickly slicing dough, such as when I make Corn Dogs.
  • GARLIC PRESS – There are several different types. Make sure you get a sturdy one – these things have to undergo a lot of pressure. I use mine all the time.
  • POTS AND PANS – This is an obvious need for a kitchen. It’s nice to have a variety of sizes. I use the 1 quart size the most and own 4. The 1½ qt., 2 qt.,  3 qt., and Dutch ovens often come as sets and are worth the money. An ultra large stockpot is invaluable to me for making huge batches of spaghetti, chili, and vegetable stock so I can freeze it in portion sized containers for future use. I also love the tiny ½ cup and 1 cup sizes for melting butter. A 10″ skillet is a must for sautéing and making omelettes. Brands where the lids are see-through and have a steam escape hole are great. I also love handles that are metal, so they can go in the dishwasher. My black-handled Revere Ware pots are greyed and getting brittle after years of dishwasher cleaning.
  • ELECTRIC FREE-STANDING MIXER – Absolutely essential for making cakes, cookies, frosting, whipped cream, and meringues. Don’t get a hand-held. Yes, they’re much cheaper, but you’ll never use it because when mixing you need one hand to scrape and one hand to turn the bowl. There are no hands left to hold the mixer. Plus, it gets heavy even after a short while. As to brand, I cringe when I see the price of KitchenAids. Outrageous! They’re not worth it. I’m still using the Sunbeam I’ve had my whole adult life. You don’t need a motor that powerful to beat cake batter. Sure, KitchenAids come with dough blades, but use your food processor for kneading dough.
  • MIXING BOWLS – You can never have too many. A set of pretty nesting bowls are nice for presentation and usage. Add to that a variety of different sized glass bowls. It’s nice to have at least one huge bowl – it doesn’t get used that much, but comes in handy now and then.
  • MEASURING CUPS – There are different cups for dry and wet ingredients. You’ll need both. Cups for dry ingredients come in nesting sets and are flat on top so you can level off the excess.. I have 4 sets and it’s the perfect number for me. Nothing is more frustrating than needing a ½ cup for sugar after you just used it for shortening. The best sets include ¼ cup, 1/3 cup, ½ cup, 2/3 cup, ¾ cup, and 1 cup. Measuring cups for wet ingredients have a handle and spout. You’ll need at least one of a 1 cup, 2 cup, 4 cup, and 8 cup. The larger ones should be plastic because they’re lighter and easier to manage.
  • MEASURING SPOONS – You should have at least 2 sets. The best kind are metal and have the size etched into them. The paint eventually wears off the plastic ones making it hard to figure out the size. A set that includes 1/8 and 3/4 tsp, as well as the usual sizes is the best.
  • LARGE WOODEN BREAD BOARD – Not only can this be used for rolling out dough, but you can cut fruits and veggies on them. I make so much dough that I keep a floured board in a large drawer I had specially made. Before that, I put brackets under my overhead cabinets so I could slide it in and out without throwing out the flour.
  • PASTRY SHEET – These are great for rolling out pie crusts. Mine is Tupperware, but there may be other brands out there. To dispose of leftover flour, just lift up the sides and empty into the trash. The sheet folds up small and can be stored away easily.
  • MUFFIN PANS – Cupcakes are very popular nowadays. I made the switch from whole cakes to cupcakes – they’re great for portion control. One cupcake = 1 serving. Done. Two pans are nice so you don’t have to cook in batches.
  • LOAF PANS – These are great for baking bread, “meat”loaves, quick breads, and loaf cakes. They come in glass and metal. I really don’t have a preference. I own both and generally use the glass.
  • POTATO PEELER – This is just a small item, but essential for peeling potatoes, yams, apples, and carrots. You don’t need an expensive one – the cheapies work well.
  • GRATER – I use mine constantly for grating cheese, and occasionally for a small amount of shredded carrots. (I use the food processor when I need a larger amount.) Buy one that has small holes (for hard cheeses) and large holes (for soft cheeses). I don’t like the kind that have four sides and stand upright – I tend to cut myself with those.
  • DEEP FREEZER – Okay, this is a large item but if you have room, I highly recommend them. Not only can you stock up on flours, frozen foods, and leftovers, you can cook multiple batches of foods that freeze well (such as spaghetti sauce and chili), and then freeze in portion sized containers. Cook and clean once, then eat for months to come. Just because you’re tired doesn’t mean you can’t have a home-cooked meal.
  • STORAGE CONTAINERS – You can never have too many containers – everything from ¼ cup size up to giant cake holder size.
  • SIEVES – These are necessary for draining. It’s nice to have a large, medium, and tiny size.
  • WOODEN STIRRERS – Using wood prevents scratching up your pots and pans. You should have both spoons and flat stirrers, and at least two of each. The more expensive ones aren’t necessary – the cheap ones work fine.
  • ROLLING PIN – Absolutely needed for rolling pie crusts, some cookies, and tortillas. They have marble ones, but I don’t like them.  They’re heavy, expensive, and break if you drop them. The wooden ones work best.
  • TOASTER OVEN – Rather than having a pop-up toaster, the toaster oven will do the job of making toast, plus a multitude of other tasks. I’ve never had much luck with baking in them, but I toast nuts, cook fake bacon, and make toasted open faced sandwiches in it. Mine is used nearly everyday. It’s better to use the toaster oven than heat up my big oven for small things.
  • THERMOMETER – After years of using and breaking the glass candy thermometers, I finally bought a digital one. It’s fabulous. Mine adjusts for Celsius and Fahrenheit, which is nice.
  • WIRE RACKS – You need at least one large one or two smaller ones. Baked goods need to be cooled on a rack to set properly.
  • UTENSILS – You can never have too many spatulas, slotted spoons, tongs, wine bottle openers, etc.  It’s a giant category – not very exciting but extremely necessary.

And that’s my list! Repeat: MY LIST. I’m sure there are those of you out there who couldn’t live without your tortilla maker or mortar & pestle. We all have different wants and needs. But I guarantee, just about any item on this list would be welcomed by most people who actually use their kitchen for cooking. Happy shopping!


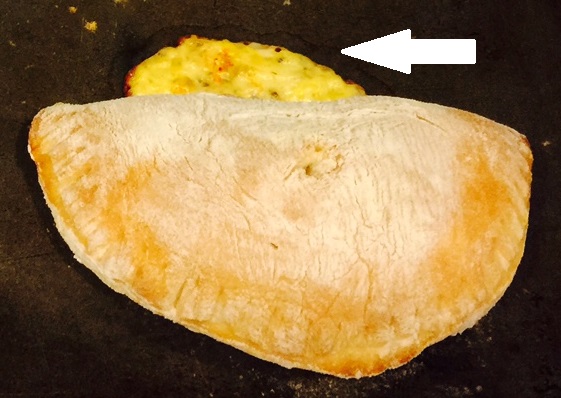
Macadamia Cheese Biscuits -Tasty Tidbits

Macadamia Cheese Biscuits

Macadamia Cheese Biscuits

Go into any furniture shop and artfully placed amongst the tables, dressers, and credenzas, you’ll find tchotchkes (pronounced: choch’-keys).  You’re probably not even consciously aware of them – they’re the bits and bobs that decorate a room, turning a house into a home.  A crystal bowl filled with colorful balls. A hand-painted glass plate. A ceramic vase.

Why am I talking furniture in a vegetarian cooking blog? Because I see this week’s topic, Macadamia Cheese Biscuits, as the tchotchkes of the food world. They’re not the main event, but they add to the overall effect of the party.

What I love about these biscuits is that you can nibble at them discreetly as you converse with friends and colleagues. They’re not messy, so you won’t be embarrassed when taking a bite and the remainder somehow ends up on the front of your outfit, or worse – the host’s freshly cleaned carpet. Rather than enjoying yourself, your evening suddenly becomes about stain removal.

While they’re not exactly low in calories (I figure each one is about 58 calories), if you nurse at a Macadamia Cheese Biscuit in one hand and a drink in the other, this can keep you occupied enough so you don’t reach for the mini-quiches and bacon wrapped hot dogs.

Preparing the biscuit dough is a snap. Then roll into a log and refrigerate until it’s time to bake. Yay! I love party foods that are done ahead of time. I don’t know about you, but I turn into crazy-woman about 2 hours before guests arrive. The dough can even be frozen, so keep one on hand for drop-in guests.

MACADAMIA CHEESE BISCUITS – makes about 36 biscuits

  • 1½ cups all-purpose flour
  • ½ tsp salt
  • ½ cup butter
  • 8 oz Swiss cheese, shredded
  • 1 egg
  • 1/3 cup macadamia nuts, chopped and lightly toasted

In a food processor pulse flour, salt, and butter several times to break up butter. Add in cheese, egg, and nuts. Whirl until the dough forms a large ball.

With your hands roll the dough ball into a long log, 1½” in diameter. Wrap in waxed paper and refrigerate.

slice dough into 1/4" discs

slice dough into 1/4″ discs

When ready to serve, preheat oven to 400º degrees Fahrenheit. Slice log into ¼” discs and place on greased or non-stick cookie sheet. They don’t spread, so you can place them fairly close together. Bake about 14 minutes – until lightly brown. Let set on cookie sheet for a minute or two, then remove to serving plate or wire rack.


SAVORY MUSHROOM GRAVY – Vegetarians Give Thanks!

Savory Mushroom Gravy

Savory Mushroom Gravy

My husband and I have always had this unspoken agreement regarding the distribution of household duties. For example: I do the weeding and pruning, he mows the lawn. I make the home repairs, but when it’s something I can’t do, he calls the service people and deals with them. I do all the cooking, but he handles the barbecue. It’s a system that’s evolved over the course of our marriage, and works for us.

But here’s the kicker: Even though I plan, shop, and prepare the massive amount of holiday dishes, my husband is hailed with accolades for his one contribution:  gravy. Apparently, gravy is THAT important to my family.

So this year, I’m fighting fire with fire. Sharing the table with hubby’s giblet gravy will be Bonnie’s Savory Mushroom Gravy, which is my tweaked version from The Taste For Living Cookbook. Onion, shiitake mushrooms, and soy sauce form the base. Throw in a little sage and thyme for flavor. Then thicken with rice flour. You now have yourself a creamy, savory brown gravy with no fat! Add to this the fact that it’s the easiest gravy EVER, and this recipe will be on your table every time you serve mashed potatoes…or rice…or vegetables. (Can you see where I’m going with this?)

NOTE: This gravy is also vegan friendly.

Bonus:  Mushroom Gravy freezes well. Take it from the self-proclaimed Queen of Freeze (that would be me), if you like this recipe – double or even triple it next time, and freeze in portion sized containers.

SAVORY MUSHROOM GRAVY – makes about 2½ cups

  • ½ T oil
  • 1 cup (110g) onions, coarsely chopped
  • 1 cup (95g) shiitake mushrooms, coarsely chopped (cleaned well)
  • 3½ (811g) cups water
  • ¼ (60g) cup soy sauce
  • 1 tsp dried thyme
  • ¼ tsp dried sage
  • 1/3 (42g) cup rice flour, tamped down

Heat oil in a saucepan over low flame. Add in onion, mushrooms, thyme, and sage. Cover and cook for about 10 minutes, stirring often. Towards the end of the 10 minutes the mushrooms will have exuded moisture and the onions will have separated.

Mix in water and soy sauce. Cover and cook 10 minutes.

Sprinkle in rice flour, using a whisk or fork to blend.  Don’t worry too much about lumps since they’ll be strained out. Bring to boil, then lower flame to simmer gravy for 10 minutes uncovered, stirring often.

Pour through a sieve and either serve immediately or save for later. Can be made a few days in advance.

Barbecue Pulled “Pork” Sandwiches – Oh, Yeah!

BBQ "pork" sandwich with roasted carrots,  mushy peas, and a nice cool beer.

BBQ “pork” sandwich with roasted carrots, mushy peas, and a nice cool beer.

I’m NOT a southern gal, but after trying this Barbecue Pulled “Pork” Sandwich, all I can say is ‘hoo-weee!’

As an ex-carnivore, one of the things I miss most is BBQ – shredded pork or beef sandwiches, to be specific. It occurred to me that maybe there was something I could substitute for the meat. Thanks to the internet, I discovered that people were using jackfruit. What the heck was a jackfruit, I wondered? (Yes, aloud.) I learned it was an ugly looking fruit, popular in the Asian community, and you can buy it canned.

Off I went to the Asian market. Apparently, canned jackfruit is VERY popular because there were numerous brands, most of them in syrup. YOU DO NOT WANT THAT KIND!!! Look carefully, possibly in another section, and you’ll find jackfruit in brine. That’s what you want.

I began this Pulled “Pork” journey with Blissful Basil, a vegan blog, who posted about a jackfruit barbecue sandwich. Naturally, I had to put my own spin on it after trying her recipe. I opted to make my own barbecue sauce, which gave those sandwiches quite a kick. My nose was a-runnin’ and perspiration was a-beadin’ (sorry – it’s the spices a-talkin’)…but, I liked it! This Barbecue Pulled “Pork” Sandwich really satisfied that hankerin’ (I’ll stop now, I promise) for BBQ.

NOTE:  You can use bottled barbecue sauce, if you’d like, instead of making it.

BARBECUE PULLED “PORK” SANDWICH – makes 6-7 sandwiches

  • 2 cans jackfruit in brine, drained
  • 1 T oil (I used canola)
  • 1½ cups onions, chopped
  • 1½ T chili powder
  • 1 tsp cumin
  • ¼ tsp cayenne pepper
  • 1½ cups barbecue sauce, recipe follows below

Cut off and discard any tough core bits from the jackfruit. Slice the pieces into thin strips.

In a large skillet, sauté onions in oil for  several minutes. Stir in chili powder, cumin, cayenne powder, and continue to cook another minute to bring the spices to life. Add the jackfruit and barbecue sauce and bring to a low boil. Cover and simmer for 25 minutes, stirring now and then. As this cooks, the jackfruit will soften and you can break it up even more with a flat wooden stirrer.

Pour mixture onto a jellyroll pan and bake at 350º Fahrenheit for 20 minutes, stirring once or twice.

Spoon onto whatever you fancy and serve.

BARBECUE SAUCE – makes 1½ cups

  • ¼ cup oil (I used canola)
  • 1 T garlic, minced
  • 1 cup ketchup
  • ¼ cup red cider vinegar
  • 2 tsp hot sauce (use more or less, depending on your spiciness preference)
  • 4 tsp dark brown sugar, packed
  • 4 tsp dijon mustard

Sauté garlic in oil until you can smell it but it hasn’t browned – about 1 minute. Add in ketchup, vinegar, hot sauce, brown sugar, and mustard. Bring to a low boil and cook for 10 minutes, stirring frequently. At first, the oil will be floating on top, but by the end of cooking time it will be incorporated.

This sauce freezes well, so if you like it make a lot and freeze. It’s excellent on pizza!


Vegetable Curry Stew – A Winter Warm Up!

Curry Stew

Vegetable Curry Stew

There’s nothing better on a chilly evening than a nice savory stew. If you’re a curry lover, you’ve got to try my Vegetable Curry Stew. The combination of coconut milk, spices, and vegetables is the stuff of which dreams are made.

Besides warming the cockles of your heart (and stomach), this stew has the benefit of being low in calories. Who couldn’t use THAT as we begin our journey down Weight Gain Road. Even though Halloween is behind us, leftover candy certainly isn’t. Coming up are the food related holidays of Thanksgiving, Christmas, Hanukkah, New Year’s Eve, and the parties that go along with them.

You may be wondering how Vegetable Curry Stew could possibly be low in calories when coconut milk is involved. As always, it’s all about portion control. Instead of using canned coconut milk, I buy powdered. That way, I can use less but still get that luscious coconut milk flavor. If your store doesn’t carry powdered, just buy it online. I use Maggi brand, but I expect they’re all good.

Next, you may be wondering if you can just use part of the can and dilute it with water. While I’ve never done it, I see no reason why you can’t. But the reason I don’t is the powdered is so much easier to use, and it takes up less space in the pantry (always a plus.) Also, I don’t have to worry about what to do with the leftover (you know how I hate waste!). I’m not sure how well coconut milk freezes. Of course, you can double the recipe and use up the can that way.

Finally, you may be wondering how I know what you’re wondering. It’s a gift!

NOTE:  Don’t get frightened by the long list of ingredients.  Most of them are spices – all of which a well-stocked kitchen should have. The thing about herbs and spices is that they’re initially expensive.  BUT once you’ve bought them they last a long time.  Don’t believe those people who say you have to throw them out after a year. Buy the spices and cook from scratch – you are going to save money in the long run.

VEGETABLE CURRY STEW – makes 4 to 5 cups

  • 3 T butter
  • 1 cup onions, chopped
  • 2 garlic cloves (about 1½ tsp), minced
  • 1 tsp coriander
  • ½ tsp dried ginger
  • 1 tsp cumin
  • ½ tsp cardamon
  • ½ tsp dried mustard
  • 1/8 tsp ground cloves
  • ½ stick cinnamon
  • 1/8 tsp cayenne pepper
  • ½ tsp tumeric
  • ½ tsp salt
  • 1/3 cup coconut powder (or half can coconut milk)
  • ¾ cup water (eliminate this if you’re using canned coconut milk)
  • 1 cup carrots, chopped
  • 1 T lemon juice (fresh or bottled)
  • 1 cup potatoes, chopped (I use Yukon)
  • 1 cup yam, chopped (I use garnet)
  • 1 cup cauliflower, chopped
  • 2 mushroom, chopped
  • 1 cup broccoli, chopped

WHEW!  That’s a lot of typing. If you’re one of those cooks that likes to have everything prepared before you start cooking, go for it.  But I’m going to give you instructions for the fastest way to prepare this stew. There’s a lot of down time when various ingredients are simmering, so that’s when I prepare the next lot.

Melt the butter in a large pot. As it’s melting, chop the onions and skin the garlic. Add the onions and press the garlic into the pot. Sauté for 10 minutes.

As the onions are cooking (make sure you stir them now and then), assemble your spices, measuring spoons, coconut powder, water, and lemon juice. Chop the carrots.

When the 10 minutes are up, turn off the burner and add the spices. Sauté over a low heat for 2 minutes. Add in the coconut milk, water, carrots, and lemon juice. Bring to a simmer. Cover and let simmer for 10 minutes.

While this is simmering (stir now and then), prepare the potatoes, yam, cauliflower, and mushrooms.

When the 10 minutes are up, add in the chopped potatoes, etc. Cover and simmer 10 minutes.

As this is simmering, prepare the broccoli.

When the 10 minutes are up, add in the broccoli. Simmer 5 minutes.

Serve immediately or reheat later.