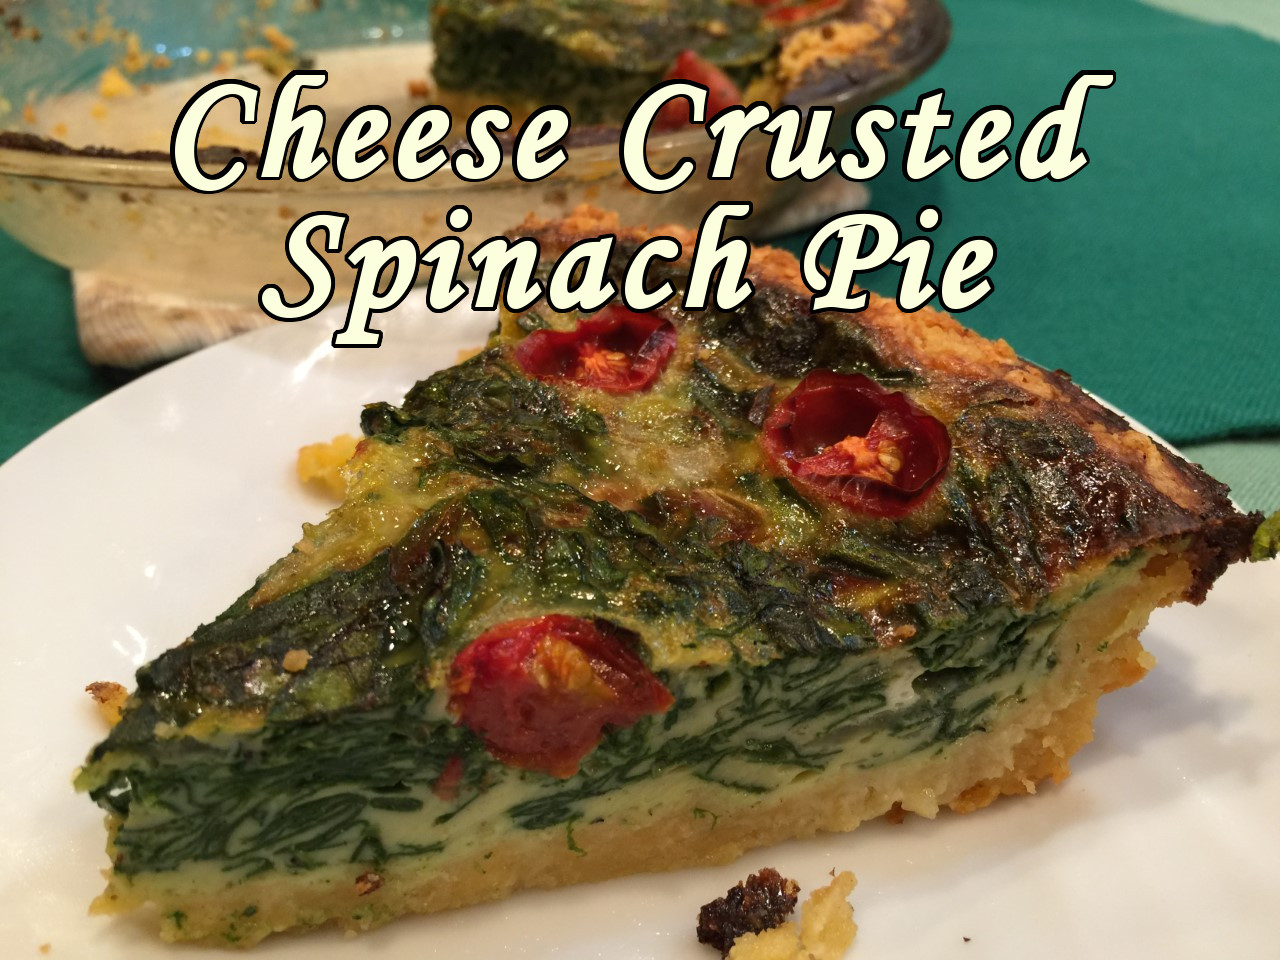
Cheese Crusted Spinach Pie is a tasty quiche-like pie that incorporates cheese into the crust rather than the filling. It’s quick and easy to put together (unless you’re like me and insist on washing EVERY spinach leaf thoroughly), but do allow an hour from the time it goes into the oven to when it can be served.
CHEESE CRUSTED SPINACH PIE
Crust
173 g (1.5 cups; 6 oz) sharp cheddar cheese, grated
97 g (3/4 cup; 3.5 oz) all-purpose flour
1/2 tsp salt
1/4 tsp dry mustard
99 g (7 T; 3.5 oz) butter, melted
Filling
240g (1 cup milk) (I use 1% or 2%)
14 g (1 T; 1/2 oz) butter
66 g (1/2 cup; 2.25 oz) onion, chopped
1/2 tsp nutmeg
1 tsp salt
227 g (8 oz) fresh spinach, stems discarded, coarsely chopped
4 eggs, beaten
12 cherry tomatoes, sliced in half
Preheat the oven to 400° Fahrenheit (200° Celsius).
In a mixing bowl, combine cheese, flour, 1/2 tsp salt, and dry mustard.
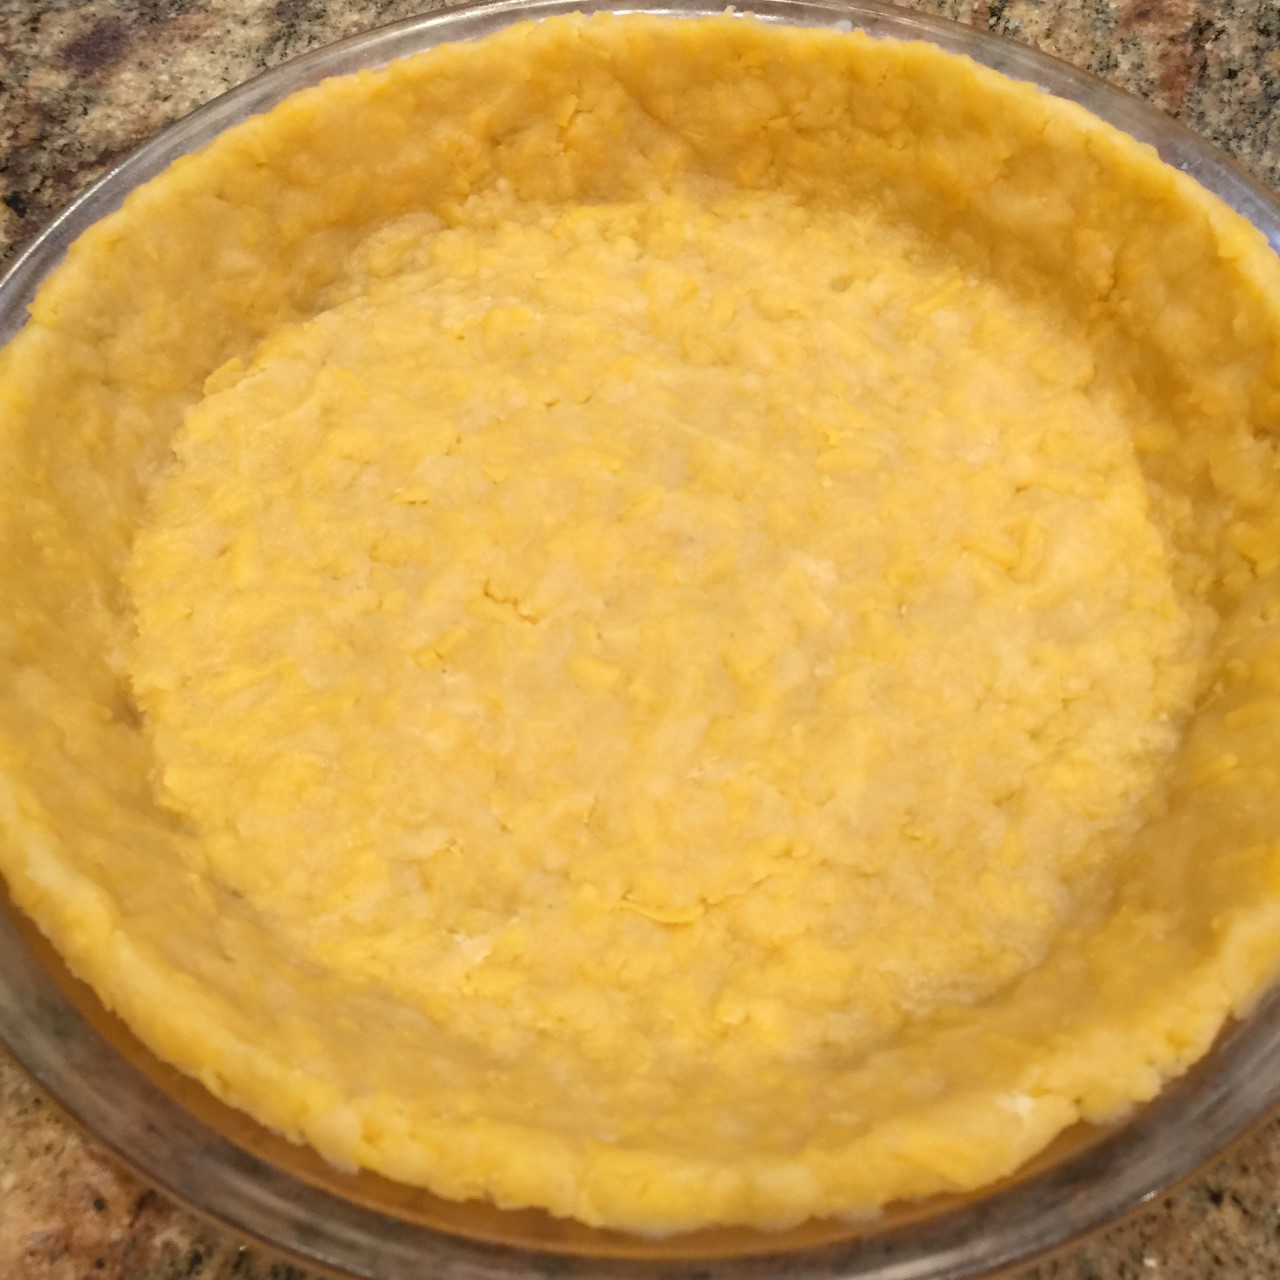
Using a fork, mix in the 99 g (7 T) melted butter – dough will be clumpy. Pour into a 9″ pie plate, spreading evenly.
Using your fingers, press dough firmly into the bottom and sides, pushing tightly into the corners (this will allow more surface area for the filling).
Into a large pot (when you add the spinach, you’ll understand why you need a large pot), add the milk, 14g (1 T) butter, onion, nutmeg, and 1 tsp salt. Bring mixture to a simmer. Turn off heat but leave pot on burner to keep the liquid warm as the spinach wilts.
Add in spinach, occasionally stirring until spinach wilts.
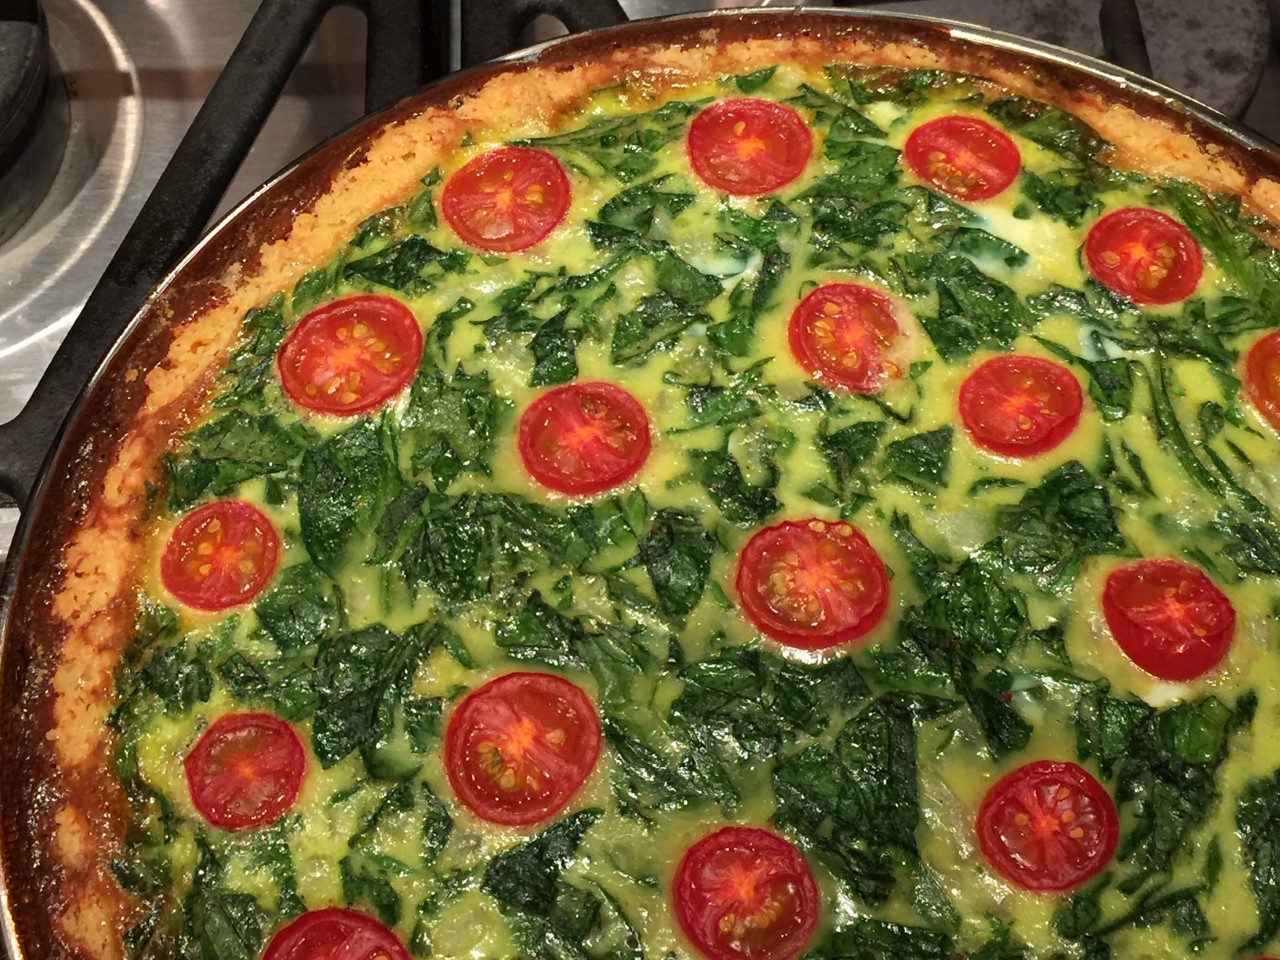
Place the pie plate on a rimmed cookie sheet to catch any spills. Mix beaten eggs into the spinach mixture, then pour into the crust to just below the brim. Arrange cherry tomatoes around top, cut side up.
CAREFULLY place in preheated oven – trying your best not to spill. (You can also place the unfilled crust on a cookie in the oven and then pour in the filling, if you prefer.)
Bake pie at 400° F (200° C) for 20 minutes – SET TIMER! Then decrease oven temperature to 350° F (175° C) and continue cooking pie until filling is set – about 15-20 minutes. (This is in bold to remind you!) Remove from oven and let gel for, at least, 15 minutes before serving.
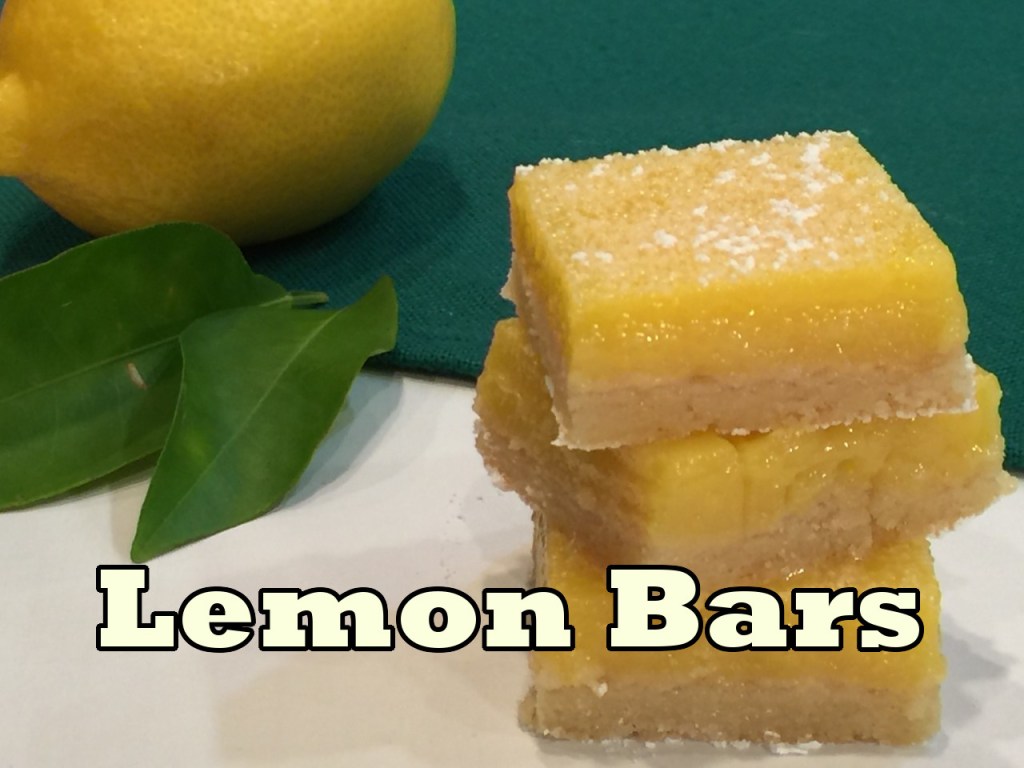
a crisp crust (but not rock hard) that allows the cookie to be safely held
the cookie should be 1/3 crust and 2/3 filling
the filling should be firm enough that it doesn’t ooze, but not Jello-like
the filling should be tart
no stove-top cooking of the filling – oven bake only
whole eggs only rather than yolks, if possible
Is that too much to ask? It took MANY attempts but, as it turns out – no, it’s not.
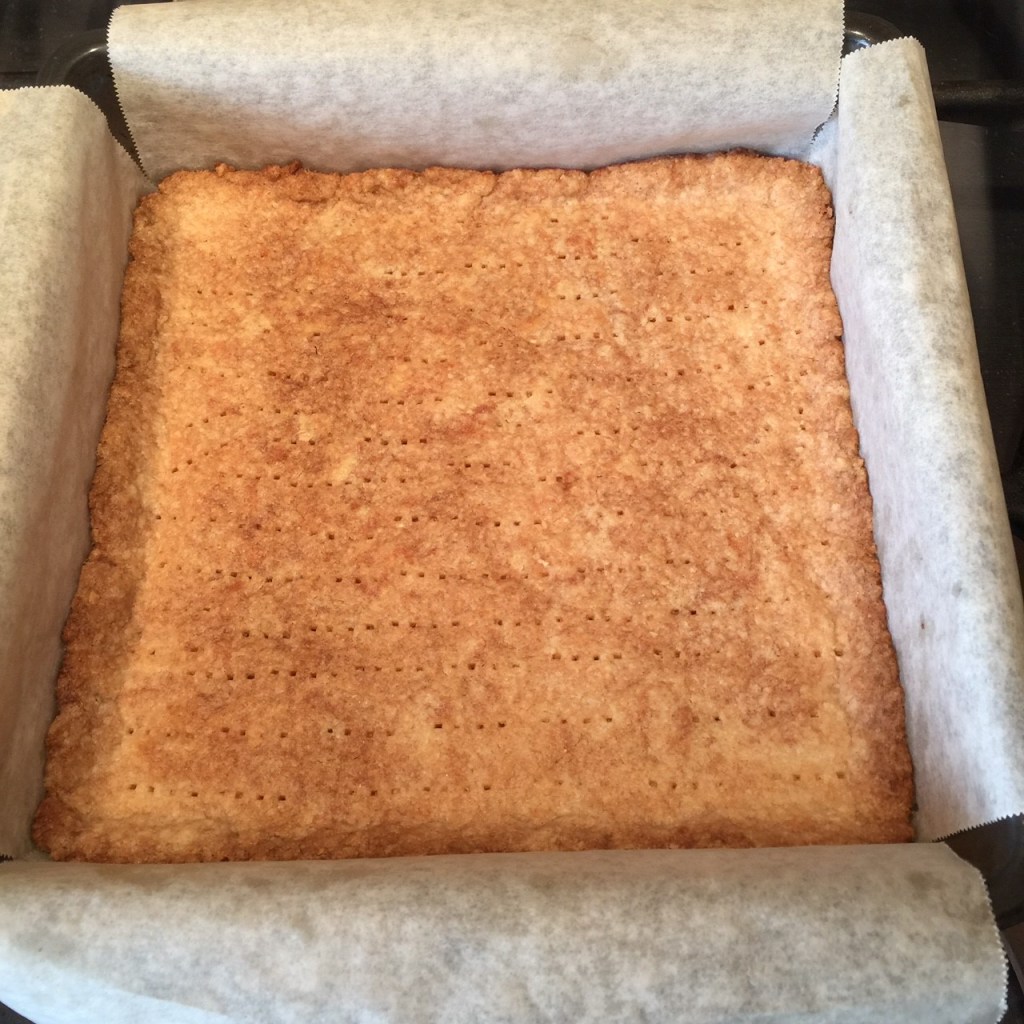
As far as the crust goes, the keys were to use granulated sugar (rather than the often used confectioner’s sugar), and melted butter (rather than soft). Also, freezing the patted out dough for 5-10 minutes, followed by docking it (piercing it with a fork) before par-baking, kept the crust flat.
For the filling, remember – tartness comes from the lemon zest. Adding extra lemon juice only dilutes the curd. Pack the zest when measuring – don’t worry about the zest marring the creaminess, you’ll strain it out before baking. When I got down to the best number of eggs, I could either go with 2 whole eggs plus 2 yolks, or 3 whole eggs. Because the fillings were equal in consistency and flavor (although the ones with yolks were yellower), I went with 3 whole eggs since it was easier.
I started my Lemon Bars journey using a glass 8″ x 8″ pan. In my research, someone wrote metal pans lead to a crispier crust. I happened to have a metal 8″ x 8″, so I switched over. Of course, there were other variables I was doing to the dough, so I’m not sure how important the metal vs glass is. Use what you’ve got before buying something new.
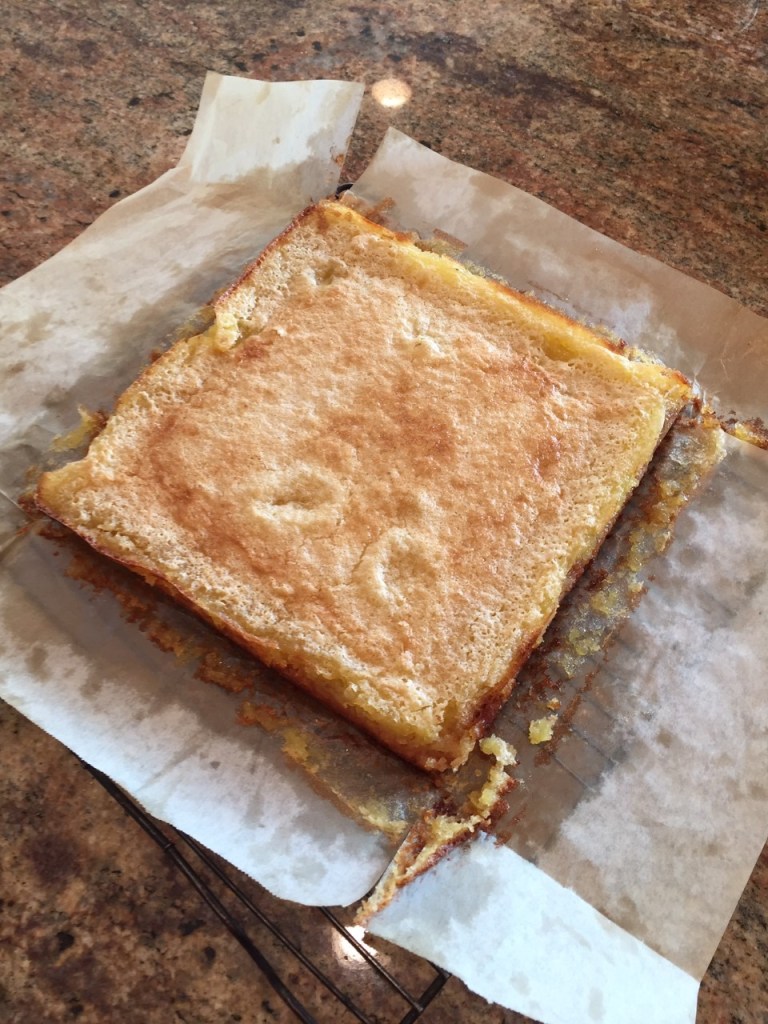
The final piece of the Lemon Bar puzzle was removing them from the pan. I had a heck of a time. I watched tons of videos and they always seemed to just pop out – Ina Garten didn’t even use parchment! – so it may just be me. My problem may have been that I didn’t grease the pan before placing the parchment slings, nor did I grease the parchment itself. When I did grease the pan and the parchment, I was able to pry them out.
I, also, concocted a method of using one large piece of parchment to limit leakage (and using slightly less parchment!). I’ve fine-tuned my folding method since I did my last bake. Pictures and instructions of my latest fold method are at the end of this post, following the recipe. If you have a better method, by all means, use that.
LEMON BARS
Note: I put measurements in grams, cups, and ounces – use what you like.
Crust Ingredients:
115 g (1 cup / 4 oz) all-purpose flour
30g (3 T / 1 oz) granulated sugar
1/8 tsp salt
85 g (6 T / 3 oz) butter, melted
Filling Ingredients:
287 g (1½ cups / 10 oz) granulated sugar
19 g (3 T / ½ oz) all-purpose flour
1/4 tsp salt
1½ T lemon zest – packed (don’t be stingy)
4½ T lemon juice (bottled or fresh)
3 eggs, beaten in a small bowl
1/4 tsp baking powder
confectioner’s sugar for sprinkling
Instructions:
Preheat oven to 350º Fahrenheit / 177º Celsius
Grease an 8″ x 8″ pan (I prefer metal). Line pan with parchment and grease the parchment. You can use the folded 1-sheet insert method (instructions below after the recipe), the 2-sheet sling method in which you have a parchment strip going north-south, and the other going east-west, or any other method you choose.
Start by combining the filling in order to draw out the lemon flavor from the zest: In a bowl, stir together the 287g sugar, 19g flour, 1/4 tsp salt, lemon zest, lemon juice, and beaten eggs. Set aside while you make the crust. The baking powder will be added just before pouring into the crust.
To make the crust, stir together the 115g flour, 30g (3 T) sugar, and 1/8 tsp salt, then pour in the melted butter. Using a fork, stir just until all the flour is incorporated. Sprinkle small clumps of dough evenly over bottom of prepared pan, then press dough to evenly cover bottom. Smooth it as best you can to lessen finger indentations. Freeze 5-10 minutes to firm up.
When oven is heated to 350 F/ 177 C, remove crust from the freezer and liberally dock the crust (pierce it with a fork) to prevent it from rising.
Bake until well-browned – about 19-22 minutes (it needs 21 minutes in my oven). Remove from oven.
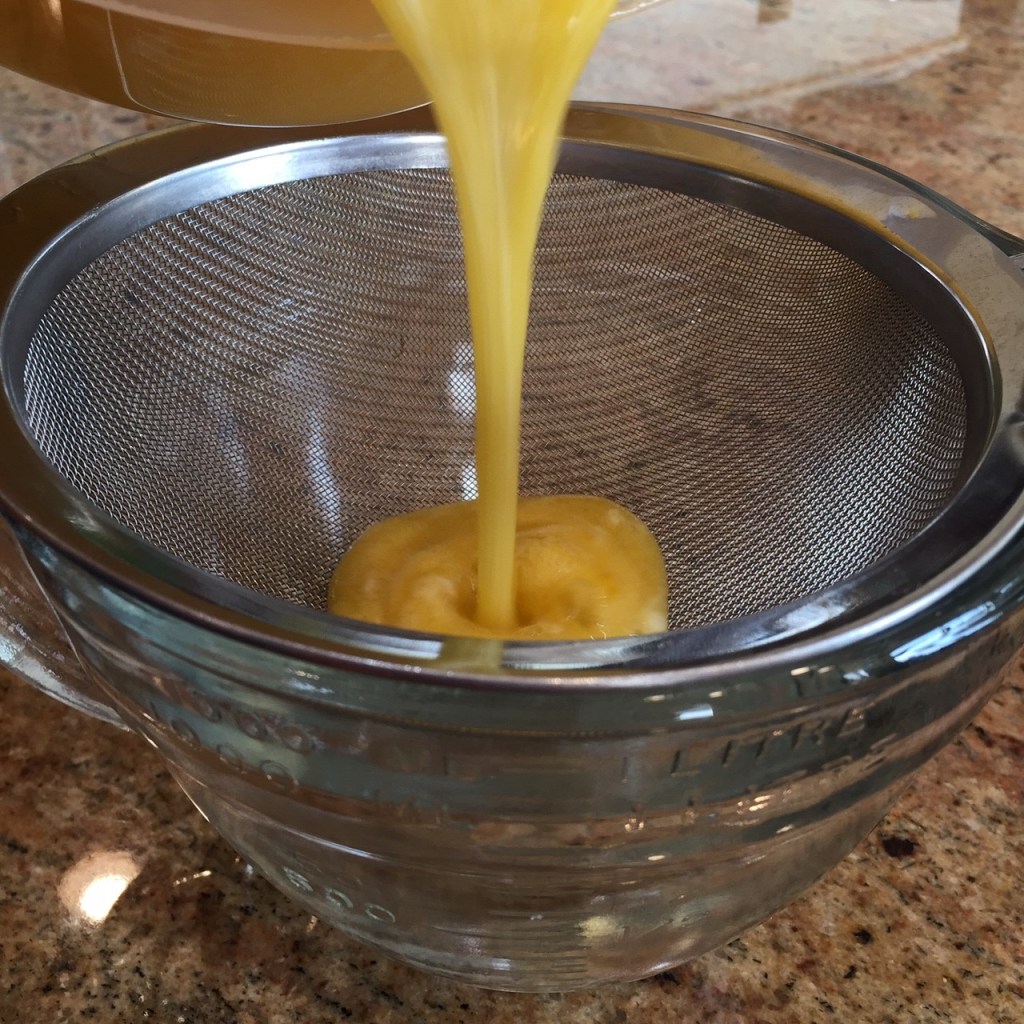
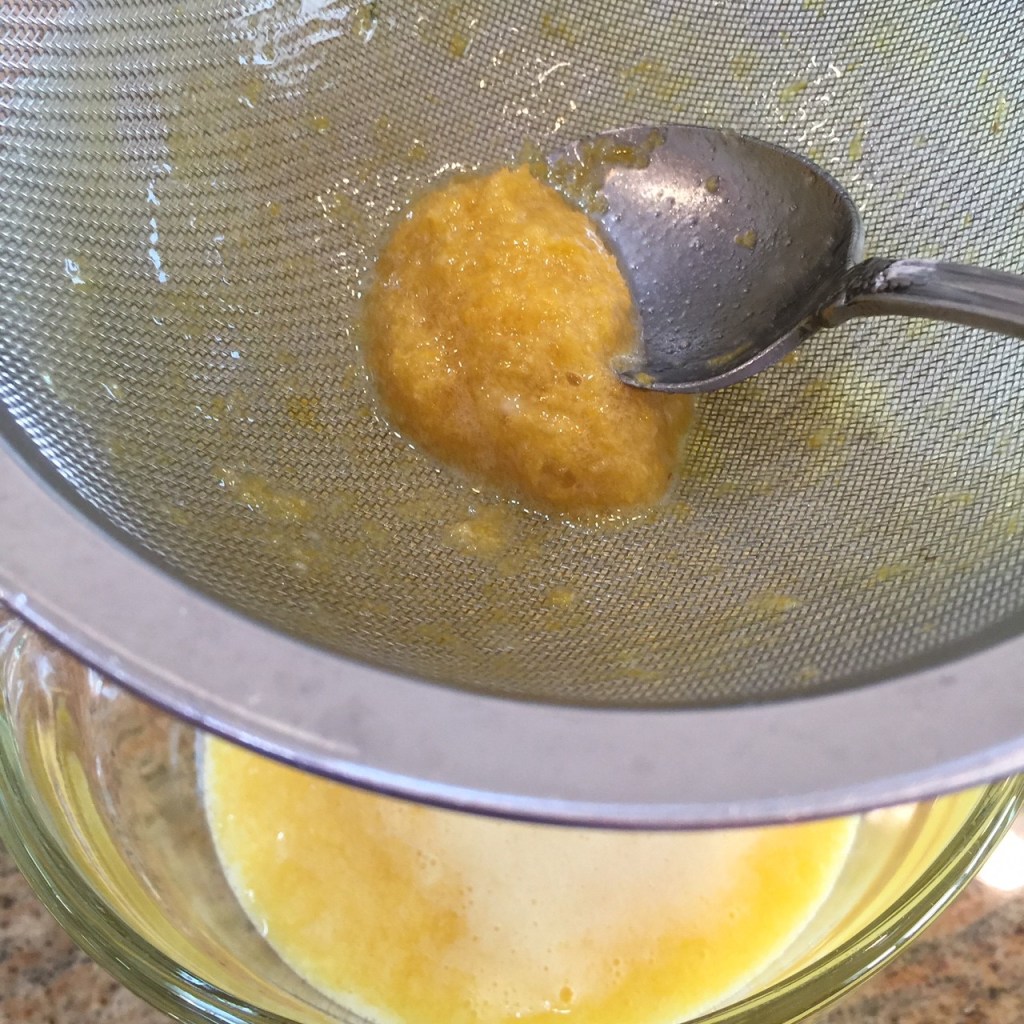
When the crust comes out of the oven, stir the baking powder into the filling, then pour through a strainer into a clean container. Stir the filling in the sieve with a spoon to help the filling flow. Don’t forget to scrap off the filling clinging to the underside of the sieve! (Waste not, want not!)
Discard the bits of zest and egg that remain in the sieve. Yuck!
Pour filling onto the hot crust.
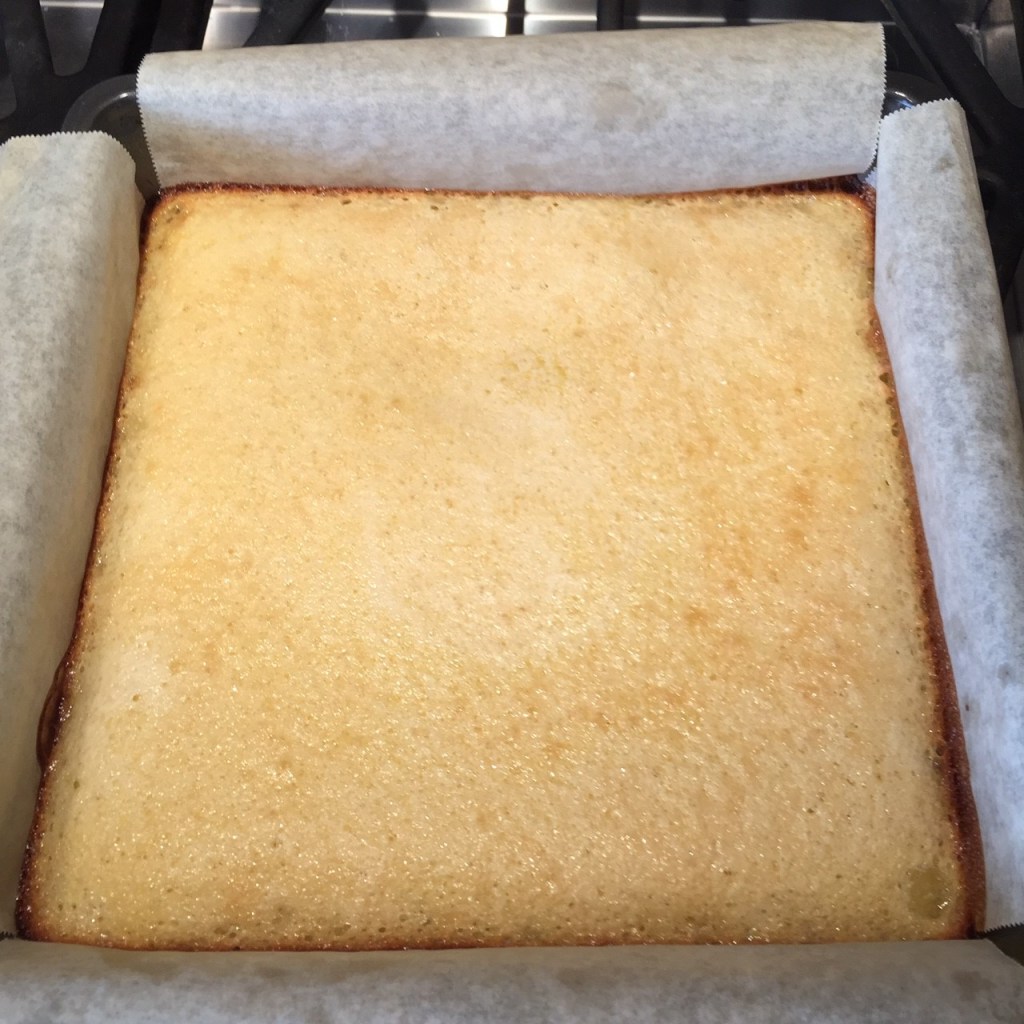
Bake at 350 F / 177 C until the very center of filling still has a slight wobble – 19-21 minutes. (Keep an eye out – the filling cooks quickly at the end). Remove from oven and let rest in the pan for 10-15 minutes.
Run a dull knife between the pan and parchment – the filling tends to leak before it solidifies and needs to be gently dislodged. Gently (notice I use this word again – the crust is still very soft and you don’t want to break it), begin to lift up the bars out of the pan. You’ll probably have to work your way around the parchment ears, lifting….gently. Once it breaks free, place the bars on a wire rack, then peel down the sides of the parchment and let cool completely. Yes, the sides look raggety, but you can cut those away later (or not).
Once the bars are completely cool (and I mean completely!), flip them over by sandwiching them between another wire rack or flat plate. Peel away the parchment and flip them back to right side up.
Slide them onto a flat surface and cover (I have a square Tupperware, or you can use the baking pan.) Refrigerate at least 24 hours. (I know that sounds like a long time to wait, but they need that time to come into their own.) Sprinkle liberally with confectioners sugar and slice away the ratty-looking edges (you can still eat them).
For appearances sake, it’s best to slice the bars with a non-serrated long knife, cutting straight down, using a rocking motion when you get down to the crust. Some people wipe the knife clean after each slice, but I’m not that particular.
INSTRUCTIONS FOR FOLDING A PARCHMENT INSERT
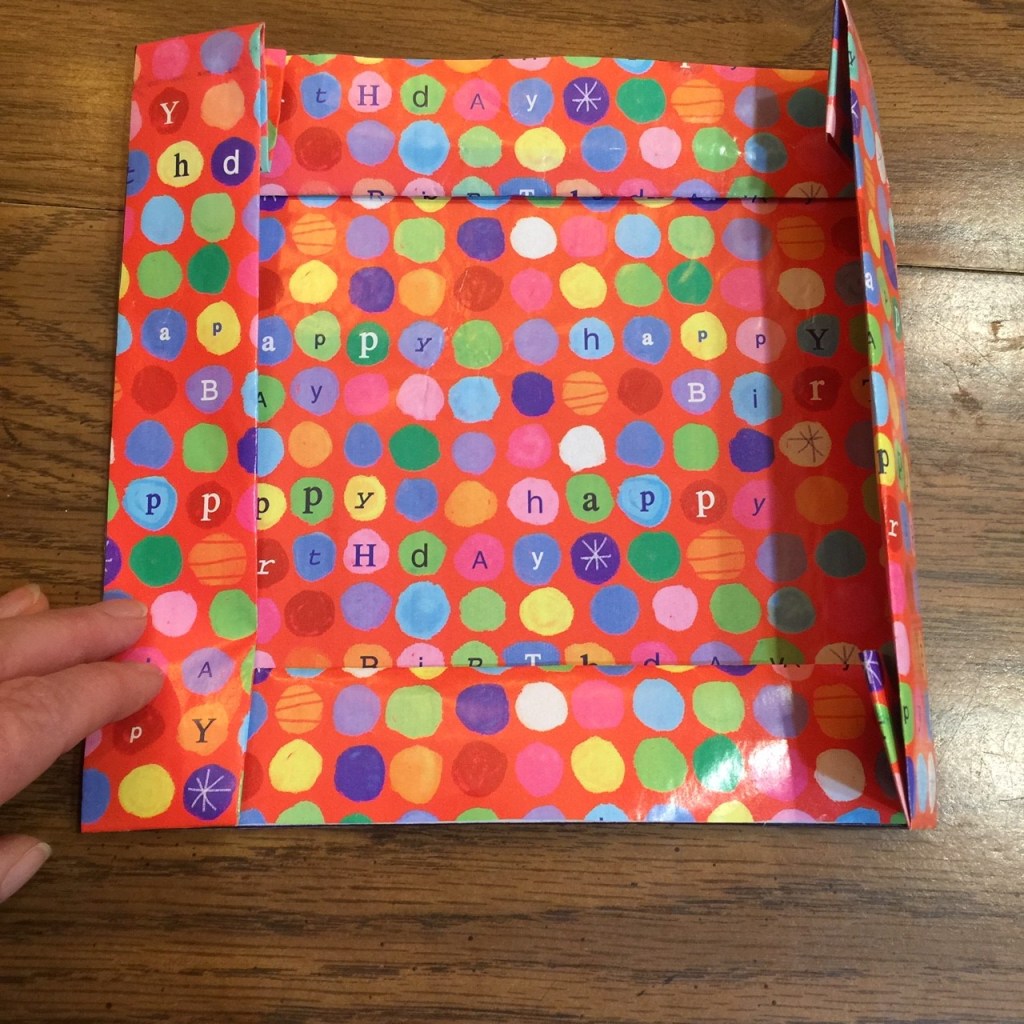
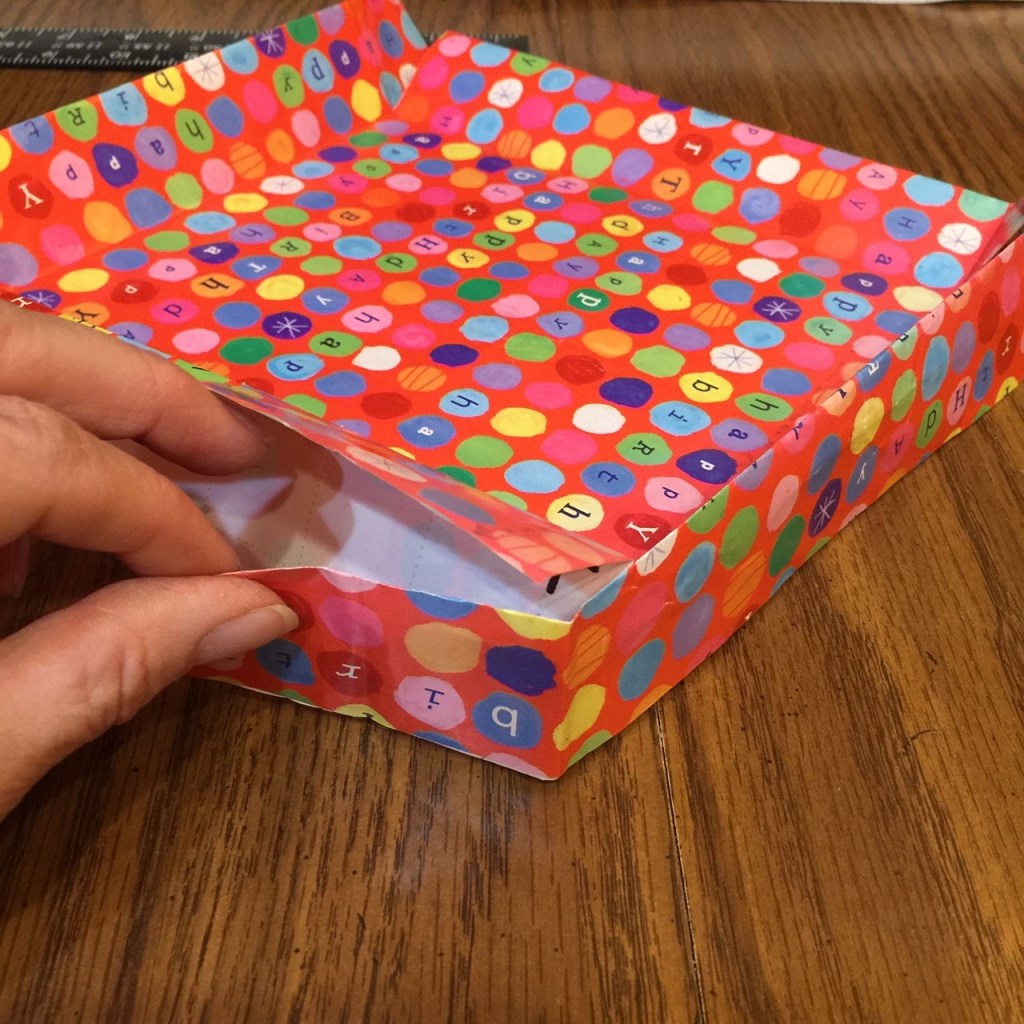
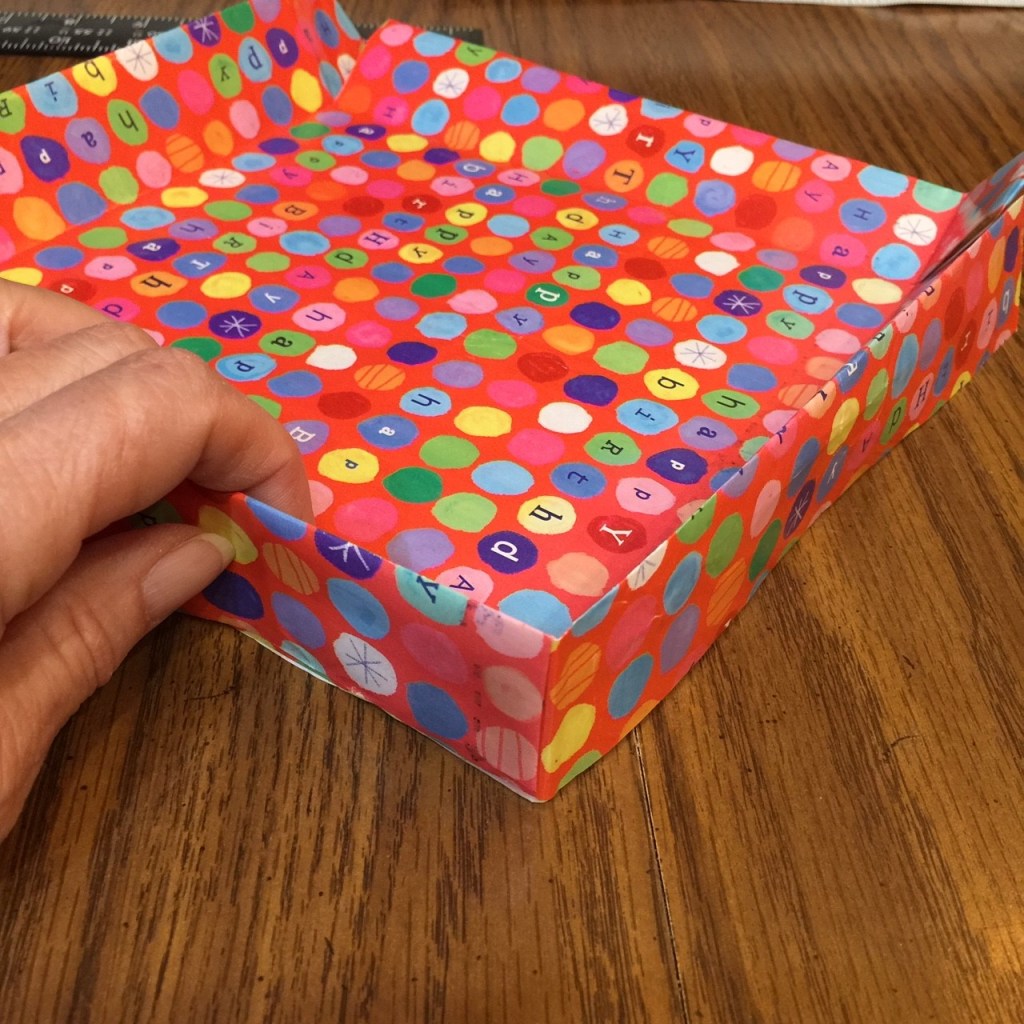
I’m using wrapping paper for this demonstration so you can see which side of the paper goes where. The final product will look like this:
To line an 8″ x 8″ pan, cut out a 14″ x 14″ square (8″ for the pan, plus 3″ for each border. Draw an 8″ x 8″ square in the center of the paper (you don’t have to write the numbers). This will become the bottom of the insert – you don’t want food touching the pencil or ink marks.
2. Fold each border in so the edge meets the ink mark. This fold will be 1.5″ for an 8″ x 8″ pan. There’s no special order to the folding.
3. Flip the paper and fold in each side border, creasing at the ink line. The side border will be 1.5″ tall, double folded. You will now have an 8″ x 8″ square.
4. Unfold the fold you made in Step 3. In each corner you’ll notice a 1.5″ square created by 2 outside edges and 2 creases. Cut one of the 2 creases in each of the 4 corner squares to the corner point (see the neon green lines in the photo below). It doesn’t matter which of the 2 creases you cut in each square, but only cut 1 crease per square.
5. Unfold the paper from each corner flap.
6. Fold each corner flap underneath the side border next to it.
7. Unfold the side border and nestle the flap inside the side border so it fits snuggly.
Every now and then I come across a long-forgotten recipe. Such was the case the other day while thumbing through my old Joy of Cooking cookbook. Boston Steamed Brown Bread!
For those of you unfamiliar with Boston Steamed Brown Bread, it’s a flavorful quick bread that’s cooked in a can and steamed in a water bath. It’s sliced into discs and can be eaten plain, smeared with cream cheese, paired with egg salad – really, the ideas are endless!
This bread takes minutes to prepare, but 3 hours to steam (which is hands off, of course), so make sure you get your timing worked out.
Traditionally, Boston Steamed Brown Bread was cooked in a coffee can, but I found that a 28-oz can – such as the can from whole tomatoes – is the perfect size to contain the entire recipe. You can, also, divvy up the batter between tomato paste cans or the slightly larger soup can, if you’re looking to make canapes. I would suggest making sure the can is BPA free (it will say it on the label).
BOSTON STEAMED BROWN BREAD – makes 1 loaf
1 cup (250 ml) buttermilk
3/8 cup (114g / 4 oz) dark molasses or treacle
1/2 cup (63 g) raisins
1/2 cup (76 g, 2+5/8 oz) cornmeal – I’ve used medium & coarse grind
1/2 cup (56 g, 2 oz) rye flour
1/2 cup (76 g, 2+5/8 oz) graham flour
1/2 tsp salt
1 tsp baking soda
Combine the buttermilk, molasses, and raisins in a bowl.
In a larger bowl, combine the cornmeal, rye, graham, salt, and baking soda.
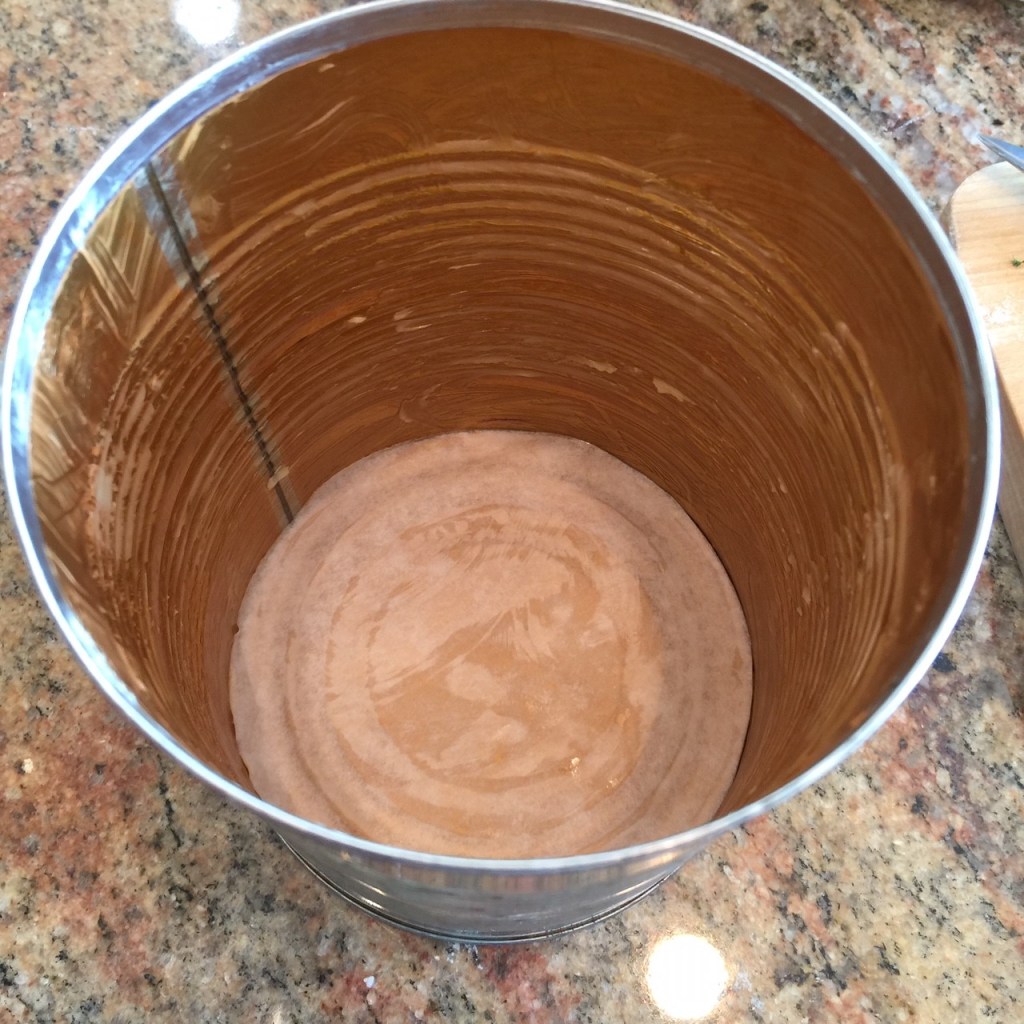
Prepare your can by buttering the bottom and sides thoroughly. Cut out a parchment circle to fit the can bottom and lay it flat on the can floor – you don’t have to butter it.
Put about 1½” of water into a pot that’s taller than the can.
Pour the wet ingredients into the dry and gently stir to combine.
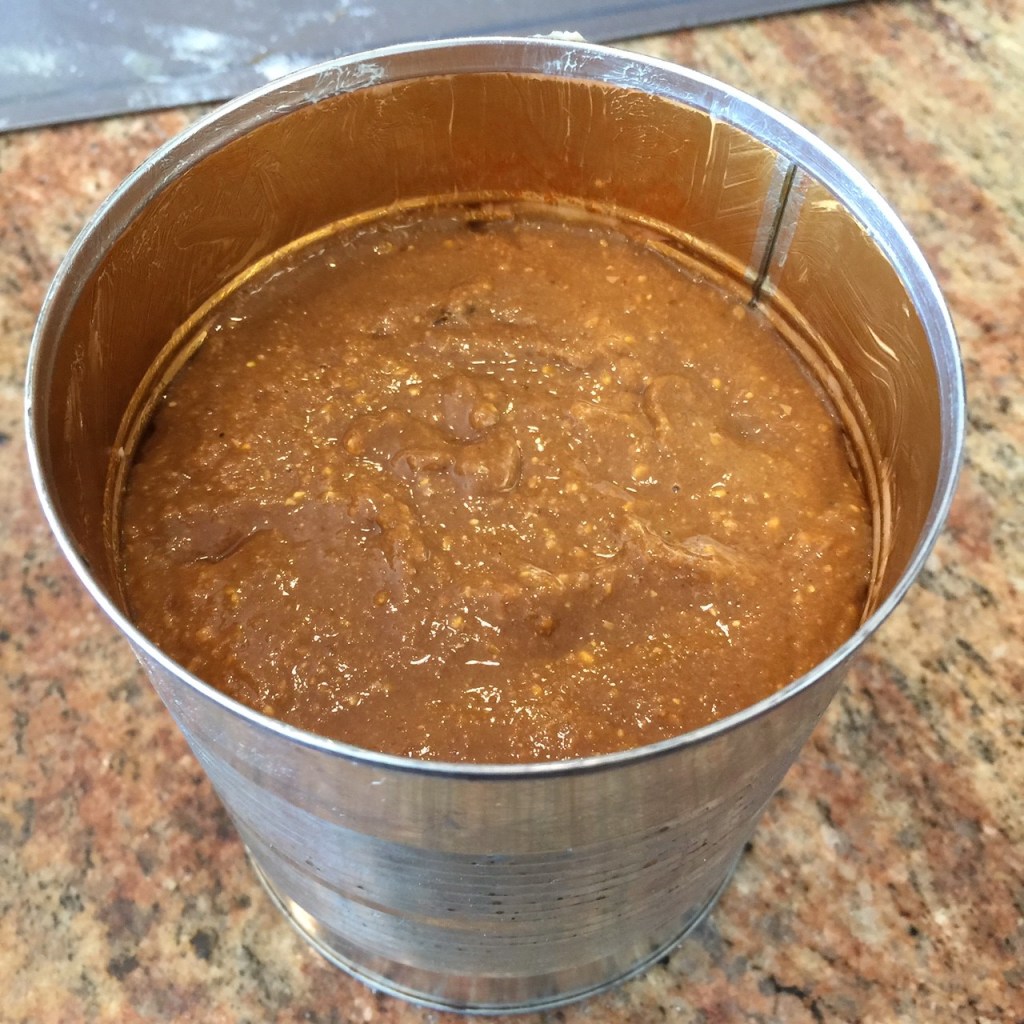
Pour into prepared can so it’s no more than 3/4 full. (This recipe is the perfect amount for a 28 oz (794 g) can. Cover top tightly with foil with an overhang of about 1″ (2 cm).
Place in water bath, turning flame on high to bring a slow boil. Turn down flame to maintain a simmer, cover pot with lid, and steam for 3 hours. SET A TIMER – 3 HOURS IS LONG ENOUGH YOU MAY FORGET WHEN YOU STARTED! (Uh, this may have happened to someone I know.)
After 3 hours, remove can from water bath and discard foil.
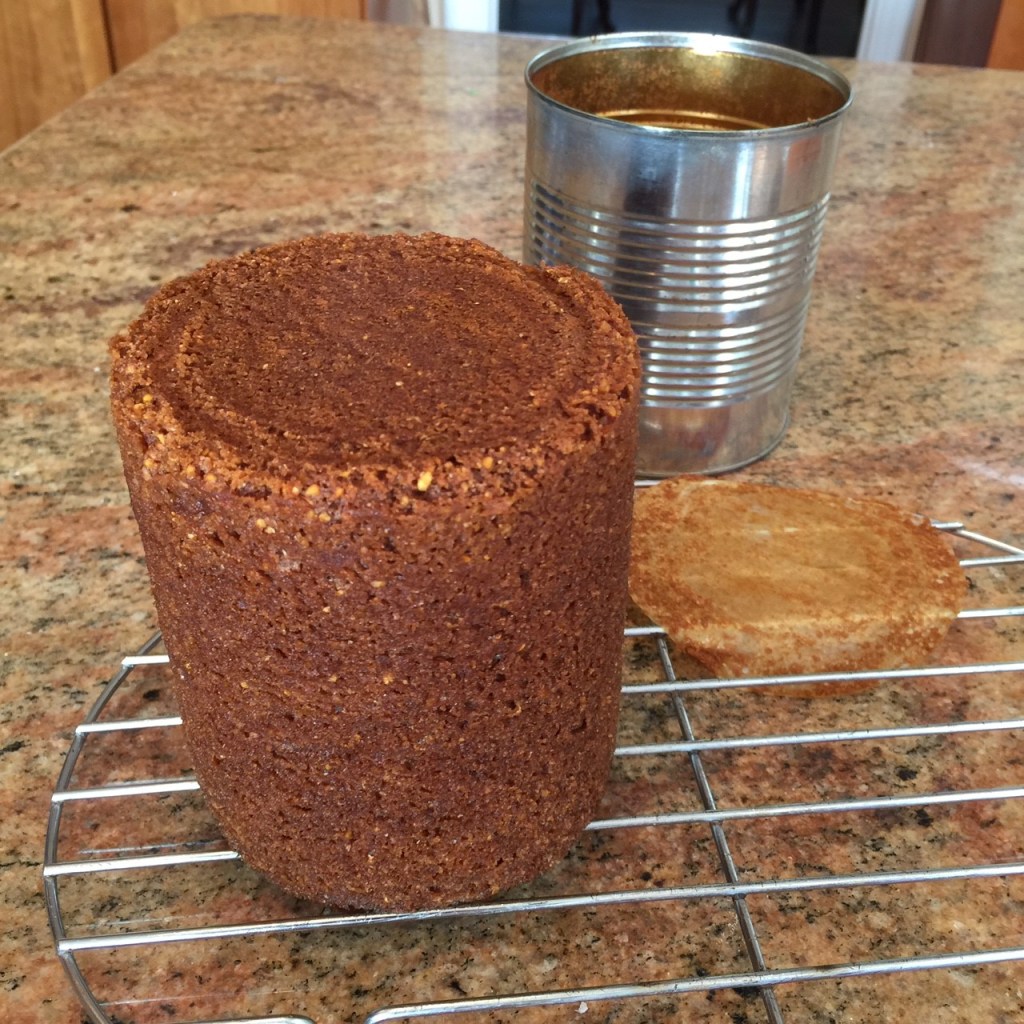
Let set 20 minutes then flip can and let bread slowly drop out. Discard parchment. Let loaf cool, at least, an hour before slicing. (A proper bread knife will give you nice clean slices!)
Needless to say, having a food blog, I cook a lot! Not only do I prepare tried and true favorites, but I’m always on the search for something new. As we all have preferences in tastes, I often tweak other’s recipes to suit myself.
But every now and then, there’s a recipe upon which I write in bold letters: DON’T MAKE AGAIN!!! (yes, I include the exclamation points). That’s what happened when I made the original recipe for Lentil-Chickpea Soup. However, due to my frugal nature and disdain for waste, I thought long and hard about what could be added to make it, at least, palatable. I always have Feta cheese on hand, so I figured, “why not”.
This dish instantly went from 0 to 100! Lesson learnt.
Note: Prepare all the ingredients ahead of time. There’s quite a bit of very short-term cooking before adding the next ingredients. If everything is ready to go, you can zip through a lot faster.
LENTIL-CHICKPEA SOUP – makes about 6 cups
2½ T olive oil
122g (1 cup) onion, chopped
53g (1 stalk) celery rib, chopped
1/2 T fresh ginger, grated or minced
3 cloves garlic, pressed or minced
1 tsp paprika
1 tsp coriander
1/2 tsp cumin
1/4 tsp cinnamon
1/4 tsp red pepper flakes
14g (1/4 cup + 2 T) cilantro, divided
2 T parsley
900g (4 cups) vegetable stock (homemade or store-bought)
425g (15-oz) can chickpeas (also called garbanzo beans), drained & rinsed
Wash the Swiss chard, then remove and discard the spine. Chop the greens into 1″ (approximately) pieces.
In a large saucepan, heat the oil over medium/high heat and add in the onions and celery. Sauté until the onions start to get a little brown – about 7 minutes. Add in the ginger, garlic, paprika, coriander, cumin, cinnamon, and red pepper flakes – bloom 1 minute. (Blooming brings out the flavors.)Add in the 1/4 cup cilantro – bloom for another 1 minute. Add in the vegetable stock, chickpeas, and lentils. Bring to a boil, then reduce heat to maintain a simmer. Cover with the lid slightly askew and let simmer for 20 minutes. Add in the tomatoes (plus their juice) and orzo. Partially cover and let simmer for 7 minutes. Add in the Swiss chard (or whatever greens you want) and cook for 5 minutes. Remove from heat. Add in the lemon juice, the parsley, the 2T cilantro, and Feta. Taste for seasoning. (I added 1/2 tsp salt.)
Ah, summer! Longer days, sunny weather, and fresh produce. Besides fresh-from-the-vine tomatoes, corn on the cob ranks at the top.
Of course, delicious as eating a perfectly cooked corn on the cob is, it’s one of those foods best eaten in privacy or with close friends/family. No one looks to impress with a kernel or two stuck between their teeth.
And that’s where Spicy Corn Salad comes to the rescue! You get the mouth-pleasing crunch of fresh corn with the kick of serrano thrown in, all the while flashing those pearly whites without fear.
Spicy Corn Salad is a fast and easy side dish that can be eaten warm or cold.
SPICY CORN SALAD
42g (3 T) sour cream
25g (3 T) lime juice
13g (1 T) mayonnaise
1/4 tsp + 1/2 tsp salt, divided
1-2 serrano chilis (use your own judgment – 1½ was our preference)
6 ears (450g) (4.5 cups) of white corn (or yellow)
2 T + 1 tsp vegetable oil, divided
2 cloves garlic, pressed or minced
1/2 tsp chili powder
117g (1 cup) Feta cheese, crumbled
3/4 cup (15g) cilantro, chopped
3 scallions, white and green part, sliced
Remove and discard the ends on the serranos. Slice into thin discs, leaving the seeds and ribs intact. In a large bowl, whisk the sour cream, lime juice, mayonnaise, 1/4 tsp salt, and the sliced chilis. Remove the husk and silk from the corn cobs, then wash and dry the ears. Next (this may sound daunting, but I promise you it’s not), holding each cob at an angle, remove the kernels by running a sharp knife down the sides. It’s easiest to begin a couple of inches from the top and work downwards, away from you. Then flip the cob, and remove the bit that was at the top in the same manner. (You can help cut down on flying kernels by holding the ear in a large bowl.) You’ll get about 3/4 cup of corn from each cob – I found that amazing. In a large nonstick skillet, put 1 T of the oil, half (approximately) of the corn, and 1/4 tsp of the salt. Spread corn out evenly in the skillet. Turn heat to medium/high, cover and let cook untouched for 3 minutes – this will char the corn. Remove covered skillet from burner and let set for an additional 15 seconds to allow the corn to stop popping before removing the lid. Pour cooked corn into into the sour cream mixture. Repeat the charring process with 1 T oil, the remaining corn, and 1/4 tsp salt. Pour into bowl. In the now empty skillet, put 1 tsp oil in the center. Top the oil with the garlic and chili powder and cook for about 30 seconds to bloom the flavors. Add to the corn mixture and stir together. Let cool for 15 minutes. Add in the Feta, cilantro, and scallions. Serve at room temperature or chilled.
Sometimes you just have to shake things up a little.
Growing up, my mother had only one recipe for potato salad: russet potatoes, celery, hard boiled eggs, and mayonnaise. We loved it.
But, as an adult, I’ve since learnt there are other types of potato salads AND other types of potatoes other than russets. This last part is more important than the first – russets tend to crumble and don’t hold firm. Yukon gold or red potatoes are firmer and will hold their shape. While I may return to my mother’s recipe, I will NOT use russet potatoes in potato salad ever again.
Roasted Potato Salad has a bit of a tang due to the vinegar and Dijon. I wouldn’t say it was better nor worse than my mother’s blander potato salad – just different. And, sometimes, different is nice.
Note: If you can find them, use the tiny Yukon potatoes. This way you only have to cut them in half and can let them roast without stirring.
ROASTED POTATO SALAD
2 lbs of 1″ Yukon Gold (or red potatoes)
1 shallot, cut in half lengthwise
4 cloves of garlic, whole
2 T olive oil
1/2 tsp + 3/4 tsp salt, divided
1/2 tsp + 3/4 tsp ground black pepper, divided
1 red bell pepper, de-seeded and chopped into 3/4″ pieces
1/2 cup mayonnaise
1 T white wine vinegar
1 tsp Dijon mustard
2 stalks celery, chopped fine
1/4 cup chives, chopped
Preheat oven to 425º Fahrenheit.
Wash potatoes, leaving skin intact. If using 1″-ish sized potatoes, cut in half. If using larger sized, cut into bite-sized pieces.
Place cut potatoes in a bowl and mix in the shallot, garlic, olive oil, 1/2 tsp salt, 1/2 tsp ground pepper, and the red pepper. Pour onto a rimmed sheet with the potatoes laying cut side down. Roast undisturbed in the preheated 425º F oven for 25 minutes. Remove from oven and let cool a little while you mix the dressing. In the same bowl you used to mix the potatoes (you don’t have to wash it), mix together the mayonnaise, vinegar, Dijon, 3/4 tsp salt, 3/4 tsp ground pepper, and celery. When cool enough to handle, chop the roasted shallot and garlic, and add to the dressing. Mix in the potatoes. You can serve it as a warm salad or chilled – it’s up to you. Just before serving, mix in the chopped chives.
Brazilian Cheese Rolls – where have these been all my life?! Crusty outside, stretchy inside. An added bonus for those of you who have a problem with gluten: they’re gluten-free!
I recently watched an America’s Test Kitchen episode that featured these yummy rolls. The gluten-free aspect caught my attention. Even though I’m not gluten-free myself, I like to expand my horizons and post recipes for people with a variety of needs.
Note: It can be a little tricky to find the tapioca flour (also called tapioca starch). It, most likely, will be found in the area where the alternative flours in small bags are kept. I was only able to find Bob’s Red Mill brand in my area.
Note: Weighing flour is always the best way to go – especially with tapioca flour. It’s very powdery (like cornstarch), and using a measuring cup will give you vastly different amounts, which may make a difference.
Note: If you like, you can try different cheeses.
BRAZILIAN CHEESE ROLLS – makes 8 3″ rolls
12 oz (about 3 cups) tapioca flour
2 tsp kosher salt (or 1 tsp of table salt)
1/4 tsp baking powder
2/3 cup + 2 T milk (175 ml) (I used 1% milk)
1/2 cup (125 ml) olive oil (you can use vegetable oil, too)
1½ T butter
2 eggs
3½ oz (1¼ cups or 50 grams) Parmesan cheese, grated
3½ oz (1¼ cups or 50 grams) Pecorino-Romano cheese, grated
optional: egg wash – 1 egg + 1 T water + pinch of salt), beaten together
In the large bowl of your electric mixer (if you don’t have an electric mixer, just use a large bowl and mix by hand), put the tapioca flour, salt, and baking powder. Gently swirl together to blend. Put the milk, olive oil, and butter in a small saucepan. Over a low/medium flame, bring just to a boil, stirring constantly. Immediately pour into the flour. Turn the mixer on low and beat until all the flour is incorporated – about 1-2 minutes. (It will look rough and crumbly.) Add in the eggs and mix on low speed. Once it looks creamy (like frosting), continue to beat another minute. Add in the cheeses, and mix just to blend on low. Scrap down the dough and smooth top. Cover bowl and refrigerate at least 2 hours – this will firm up the dough, making it easier to work with.
Preheat oven to 450º Fahrenheit, rack in the middle position. (Don’t short-change the temperature.)
If using an egg wash, beat together 1 egg with 1 T water and a pinch of salt. I highly recommend using an egg wash – it gives the rolls an appetizing sheen.
Score the dough into 8 even wedges. Using a large spoon, scrap out each wedge and roll into a smooth ball (it helps to have one of your hands wet so the dough doesn’t stick). Place each ball on a parchment lined baking sheet. They’re going to rise as they bake, so make sure to space them. One large sheet will hold all 8 rolls. Using a pastry brush, paint the sides and tops of rolls with the egg wash. I’m going to use all caps because this is important!: PLACE SHEET IN OVEN, THEN IMMDEDIATELY LOWER TEMPERATURE TO 375º F. (The initial high heat is important to give the rolls a spring, but you need to lower it so they don’t burn.) Bake for about 40 minutes (yes, this is a long time). Remove to wire rack to cool enough to handle – about 5 minutes before eating.
I hate waste – particularly of food. Unless it’s gone bad, I find a way to use it or save it (thus my self-proclaimed moniker of Queen of Freeze!) So I often find myself with bits and bobs which need to be eaten.
The bane of my cooking is getting it right with pasta. I often over-estimate how much to cook, then find myself with too much cooked pasta (which can’t be frozen). Finally, I decided to Google ‘leftover pasta’ and found a frittata recipe which sounded promising. Once I had this idea, I looked around for other things to put into it. At that time I had a little pesto, part of a red pepper, a couple of mushrooms, and a few scallions that were on the verge. I mixed it all up with a few eggs and cooked it up in a cast iron skillet.
The base of this frittata is pasta and eggs (you really need at least 4). Go from there, using your imagination and what you have.
LEFTOVER PASTA FRITTATA
4 or more eggs
leftover cooked pasta (I use about 1½ cups of cooked spaghetti)
peas (I always have frozen peas, so I toss them in)
olives (I always have Kalamatas)
scallions, shallots – these don’t need to be pre-cooked, which I like
some sauce (pesto, bbq, go-chu-jang), if you have it
cheese (I like to use Feta & Pecorino-Romano)
whatever else you’d like to throw in
oil for frying (I use olive oil)
Beat the eggs in a mixing bowl. Stir in remaining ingredients.
Heat oil over medium/high heat in a cast iron skillet (I use a 10″). Pour in the batter and let cook until starting to set and bottom is well browned – about 7 minutes. Here comes the tricky part – you’re going to need to flip the frittata to brown the other side. Loosen the bottom using a metal spatula. Once the bottom is no longer stuck, carefully slide the frittata onto a large plate. (Or, you can place a plate on top of the skillet and, using oven mitts, flip the skillet letting the frittata drop onto the plate.) Cover with another plate and flip. Then, slip the flipped frittata back into the skillet and cook until the bottom is well browned. Let set about 5 minutes before slicing.
Broccoli Garlic Pasta is a new addition to my list of favorite dinners. It’s one of those recipes that I create in order to use up an ingredient that would soon be going bad – in this case, it was mushrooms. I threw in other items I had on hand – the pièce de résistance being the Feta cheese, which made all the difference.
Note: If you make your own pasta (which I do), use a 1 cup flour recipe – more than that is too much pasta for the sauce in this recipe.
BROCCOLI GARLIC PASTA – makes about 6 cups or so
6 oz uncooked pasta (I use spaghetti noodles)
2 T butter
2 T olive oil
2 cups raw broccoli, bite-sized pieces
2 T garlic, pressed (use less if you don’t like a lot of garlic)
1 red pepper, seeded and coarsely chopped
5 oz (2 cups) mushrooms, chopped (I use white mushrooms)
1/2 cup (about 4) scallions, green & white part, sliced
3/4 tsp red pepper flakes
1 T flour
1/4 cup dry white wine (I use vermouth)
1 cup cream
6 oz Feta cheese (I use fat-free), crumbled
2½ oz (1 cup) Pecorino Romano cheese, grated (or any hard cheese)
1/2 cup parsley, chopped
In a large pot, cook the pasta until almost done (al dente) – you want it undercooked so it can absorb the sauce. Drain.
Into the now empty pot, heat the butter and oil. Add in the broccoli, garlic, red pepper, mushrooms, scallions, and red pepper flakes. Over medium/high flame, sauté veggies for 1-2 minutes. Kill heat and sprinkle on flour. Over low flame, stir 1-2 minutes to slightly thicken the liquid and cook-off the flour taste. Add in the wine and cream. Cook over medium heat about 1 minute. Stir in the Feta, Pecorino, and parsley. Stir in the pasta and heat through. Pour into serving bowl (or let remain in pot), cover, and let set for about 5 minutes to allow pasta to absorb the liquid and thicken up.
Due to my frugal nature (some may say, ‘cheap’), I found myself with an abundance of frozen egg whites. It turns out there are many more recipes that call for an extra egg yoke than an extra egg white. Due to my aforementioned frugal nature, I froze the unused whites rather than throw out perfectly good food.
I’d always scoffed at the humble angel food cake – it just seemed so blah. However, I had an America’s Test Kitchen recipe that called for 12 egg whites in their angel food cake. This would make a significant dent in my frozen egg white stockpile, so I made it.
I was stunned at how good it was. A bonus being there are a lot less calories in an angel food cake compared to an equal sized slice of an iced butter cake.
Note: Ideally, you should use an angel food cake pan because it’s tubular, thus providing more surface area for the batter to climb and attach to. Also, it has little legs to allow air to flow underneath as the cake cools. (Angel food cakes are cooled upside down so they don’t collapse.) Use a bundt pan, if you don’t have the proper pan and elevate it.ANGEL FOOD CAKE
3 oz (1 cup) cake flour
10 oz (1½ cups) granulated sugar, divided
1 tsp cream of tartar
1/4 tsp salt
12 egg whites
1½ tsp vanilla
1½ tsp lemon juice
1/2 tsp almond extract
Preheat oven to 325º Fahrenheit.
Make a liner for the cake pan bottom by placing the pan on parchment paper open side up. Run a pencil around the outside of the pan bottom and cut out the circle. Flip the pan so the bottom of the pan is up, and place the cut-out circle on top. Firmly hold the parchment in place and trace the center tube outline with a pencil. Cut out and discard this inner circle. Very lightly grease the BOTTOM ONLY of the cake pan. (Don’t grease the sides – the batter needs to be able to grip it in order to rise.) Line the bottom of the cake pan with the parchment and press it down. The parchment will help the cake release.Into a bowl, sift together the cake flour and 5 oz (3/4 cup) of the sugar. Set aside.
Into another bowl mix together the remaining 5 oz (3/4 cup) sugar, the cream of tartar, and the salt. Set aside.
Into a small bowl, mix together the vanilla, lemon juice, and almond extract. Set aside.
Pour the egg whites into the large bowl of your standing electric mixer. Beat on medium. Large bubbles will form at first, then they’ll decrease in size after about a minute. With the mixer still running on medium, start adding the sugar/cream of tartar mixture to the whites 1 tablespoon at a time. Once all the sugar/tartar has been added, increase mixer speed to high until soft peaks form. Turn off machine, pour in the vanilla mixture, then quickly mix together on low. Here’s where your jaw may drop. If you read other angel food cake recipes, they’ll tell you to FOLD in the flour mixture gently in order not to deflate the meringue. I’m here to tell you that you don’t have to bother. Simply add 3 T of the flour mix to the batter through a sieve, then turn your mixer on the lowest speed for a few seconds to incorporate the flour, running a spatula along the sides and bottom of the bowl. Turn off the mixer, then add another 3 T flour to the batter, turn on the machine to low and mix to incorporate for a few seconds. Continue until all the flour is added and incorporated.
Once all the flour is incorporated, gently pour batter into the cake pan, smoothing top. Rap pan a couple of times on the counter to dislodge any air bubbles (I’m not sure if this is a myth, but it can’t hurt.) Put into the oven and bake about 45-50 minutes – until golden brown and cake springs back when you press it with your finger. Remove from oven and immediately turn upside-down. Let cake remain like this until completely cooled – about 3 hours. When cool, run a dull knife around the sides of the cake (including the tube), making sure you get all the way to the bottom. Flip the cake onto a plate – hopefully, the cake will fall out. (If not, run the knife around again.) Carefully, remove the parchment and let cake sit to completely cool before serving.
















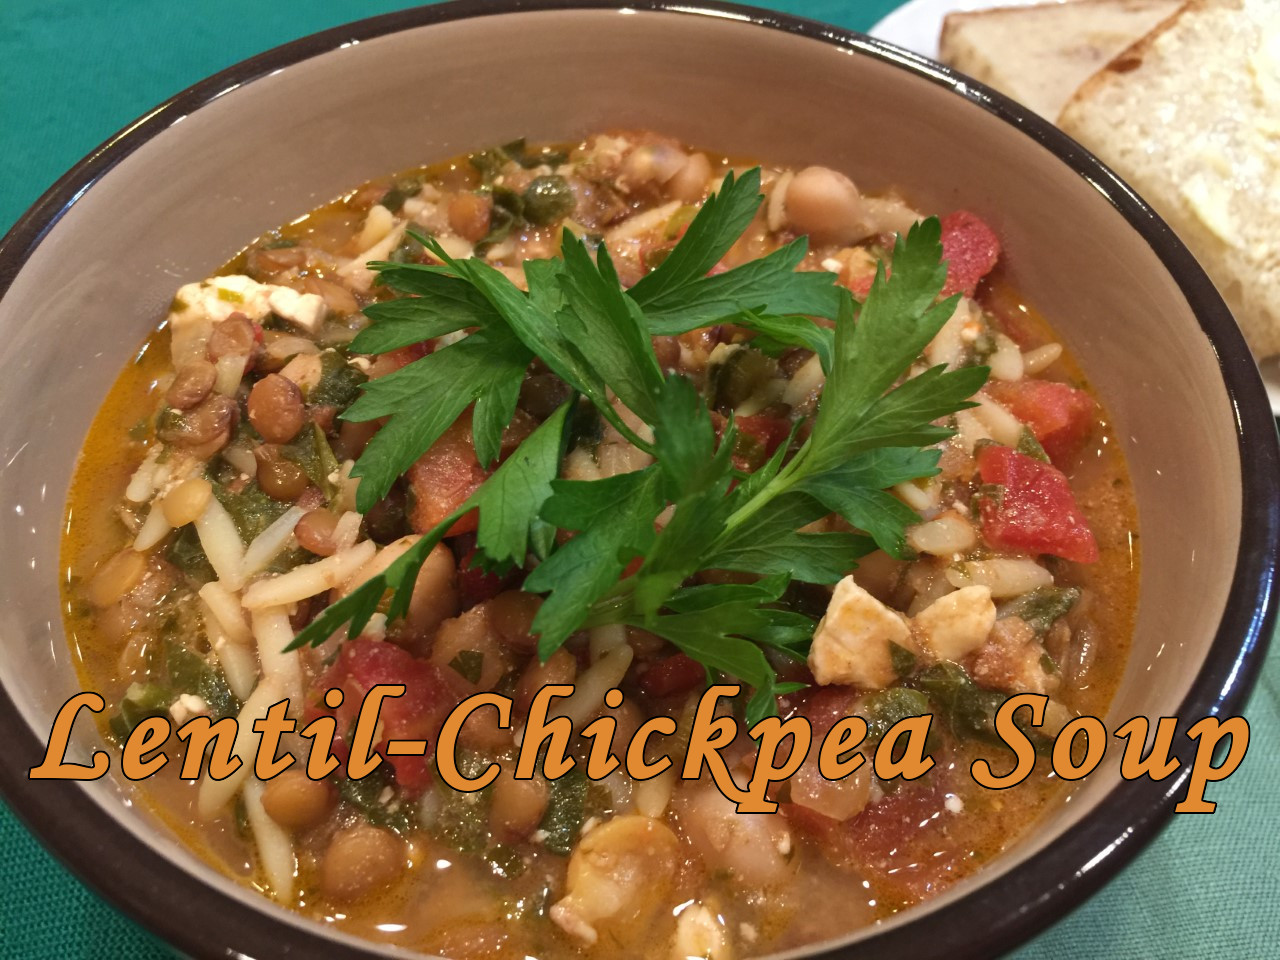 Needless to say, having a food blog, I cook a lot! Not only do I prepare tried and true favorites, but I’m always on the search for something new. As we all have preferences in tastes, I often tweak other’s recipes to suit myself.
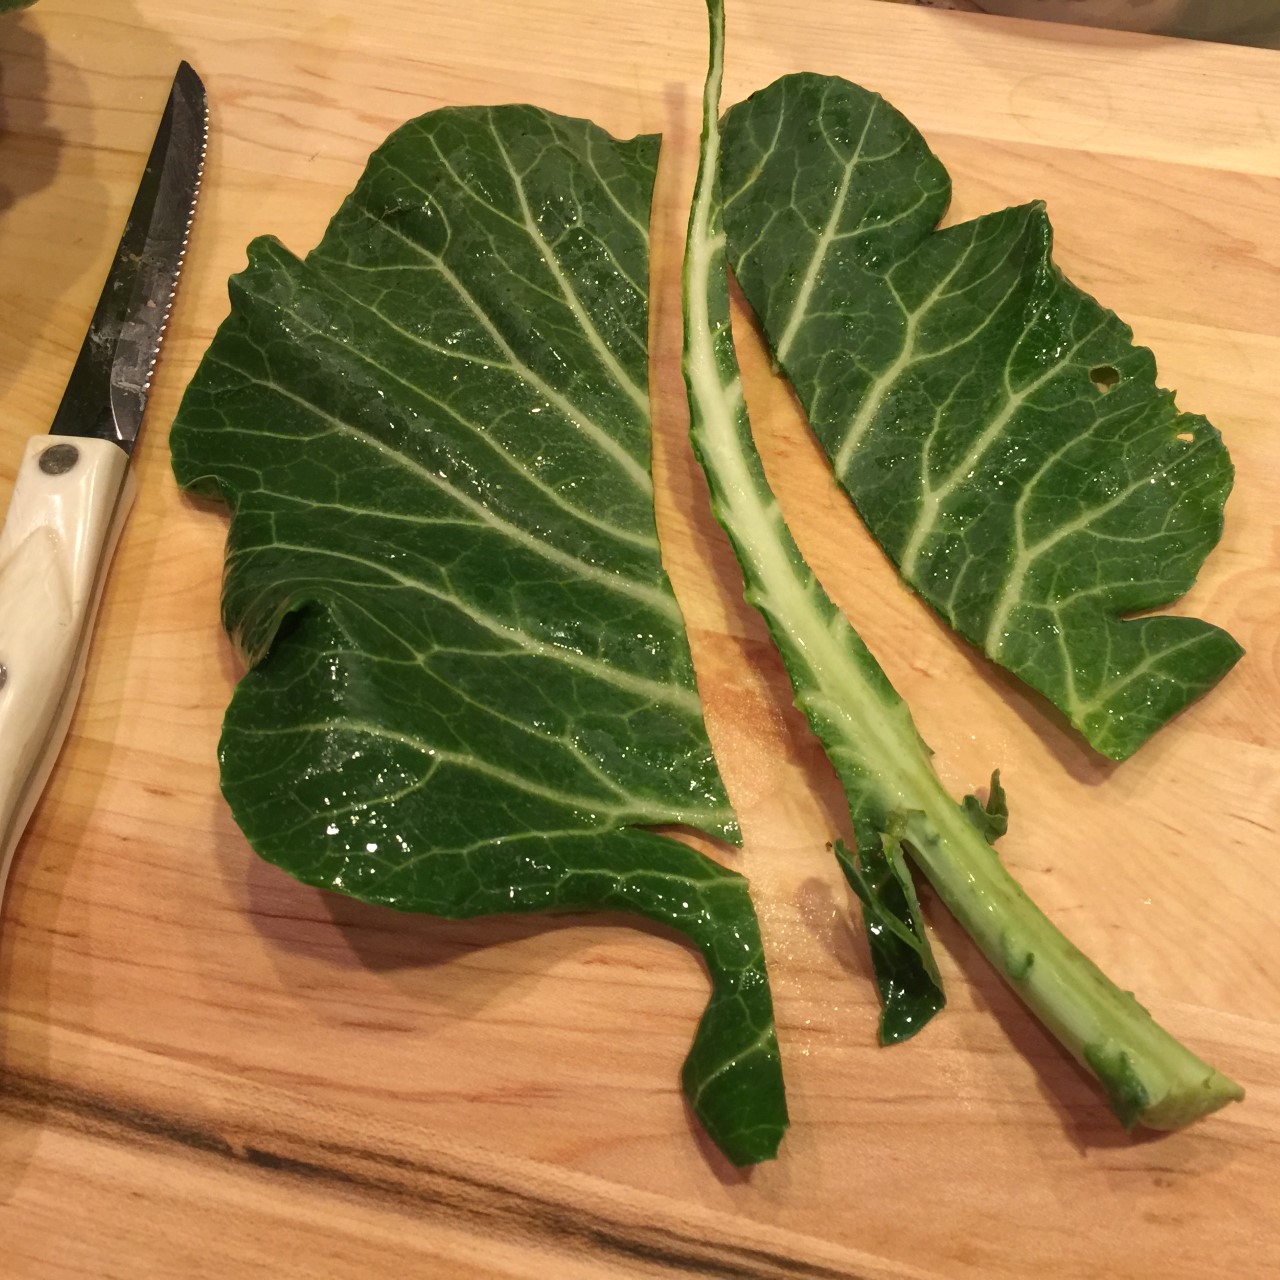 Chop the greens into 1″ (approximately) pieces.
 Add in the ginger, garlic, paprika, coriander, cumin, cinnamon, and red pepper flakes – bloom 1 minute. (Blooming brings out the flavors.)
 Add in the 1/4 cup cilantro – bloom for another 1 minute.
  Add in the vegetable stock, chickpeas, and lentils. Bring to a boil, then reduce heat to maintain a simmer. Cover with the lid slightly askew and let simmer for 20 minutes.
  Add in the tomatoes (plus their juice) and orzo. Partially cover and let simmer for 7 minutes.
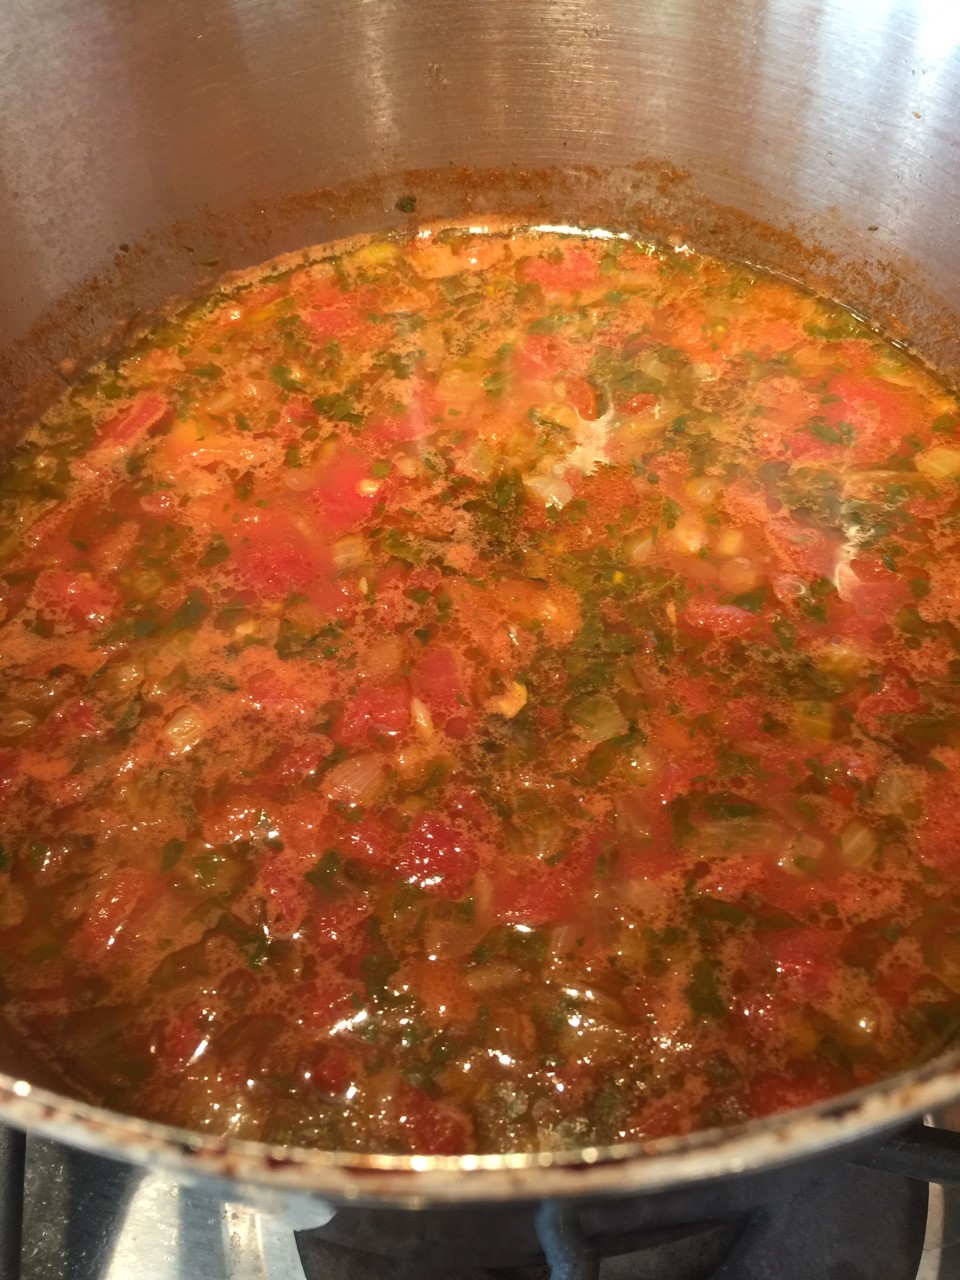 Add in the Swiss chard (or whatever greens you want) and cook for 5 minutes. Remove from heat.
 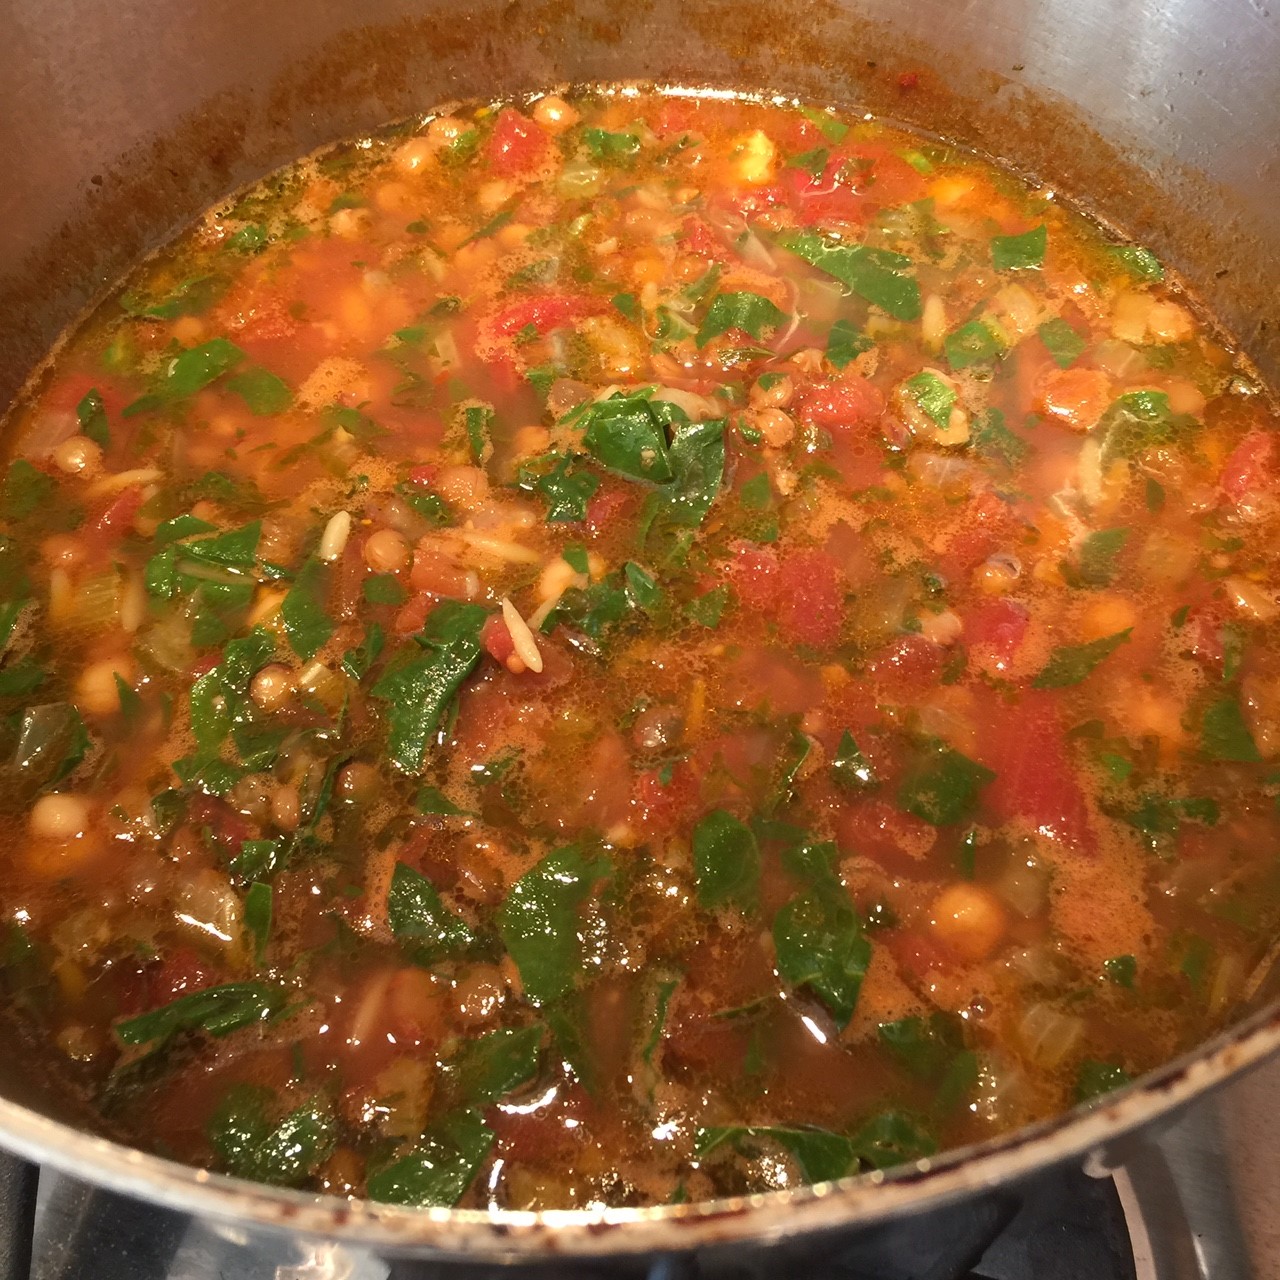 Add in the lemon juice, the parsley, the 2T cilantro, and Feta.
  Taste for seasoning. (I added 1/2 tsp salt.)
 Ah, summer! Longer days, sunny weather, and fresh produce. Besides fresh-from-the-vine tomatoes, corn on the cob ranks at the top.
 In a large bowl, whisk the sour cream, lime juice, mayonnaise, 1/4 tsp salt, and the sliced chilis.
  Remove the husk and silk from the corn cobs, then wash and dry the ears. Next (this may sound daunting, but I promise you it’s not), holding each cob at an angle, remove the kernels by running a sharp knife down the sides. It’s easiest to begin a couple of inches from the top and work downwards, away from you. Then flip the cob, and remove the bit that was at the top in the same manner. (You can help cut down on flying kernels by holding the ear in a large bowl.) You’ll get about 3/4 cup of corn from each cob – I found that amazing.
  In a large nonstick skillet, put 1 T of the oil, half (approximately) of the corn, and 1/4 tsp of the salt. Spread corn out evenly in the skillet.
 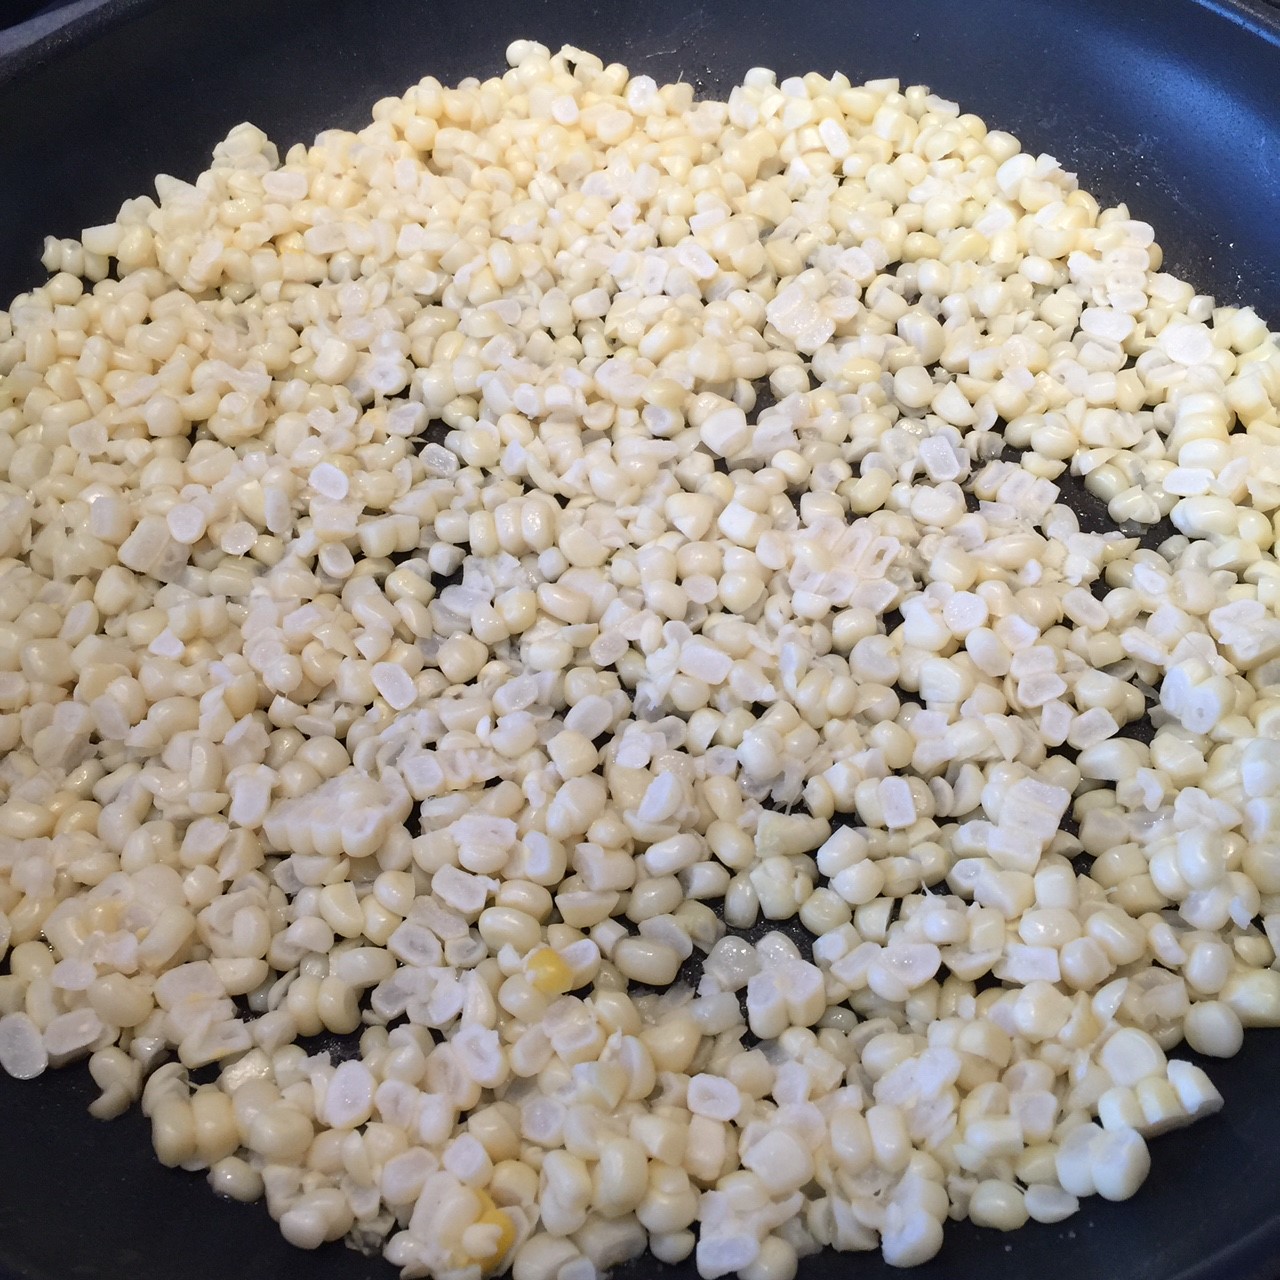 Turn heat to medium/high, cover and let cook untouched for 3 minutes – this will char the corn. Remove covered skillet from burner and let set for an additional 15 seconds to allow the corn to stop popping before removing the lid. Pour cooked corn into into the sour cream mixture. Repeat the charring process with 1 T oil, the remaining corn, and 1/4 tsp salt. Pour into bowl.
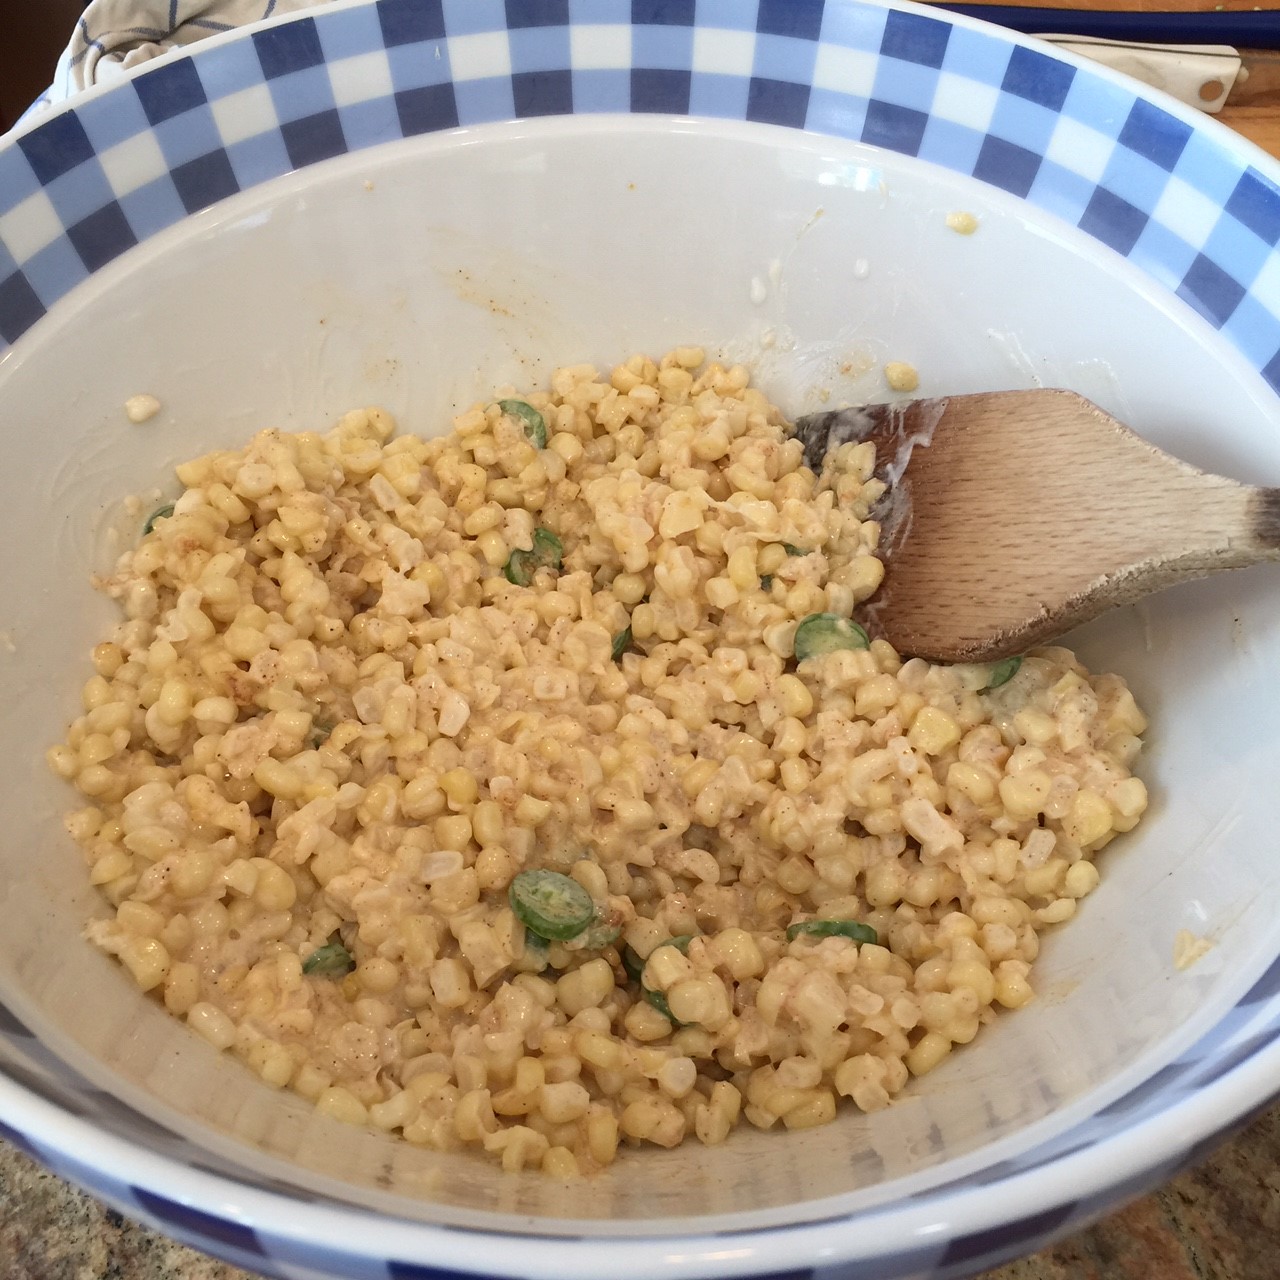 In the now empty skillet, put 1 tsp oil in the center. Top the oil with the garlic and chili powder and cook for about 30 seconds to bloom the flavors. Add to the corn mixture and stir together.
  Let cool for 15 minutes. Add in the Feta, cilantro, and scallions.
  Serve at room temperature or chilled.
 Sometimes you just have to shake things up a little.
 Pour onto a rimmed sheet with the potatoes laying cut side down. Roast undisturbed in the preheated 425º F oven for 25 minutes. Remove from oven and let cool a little while you mix the dressing.
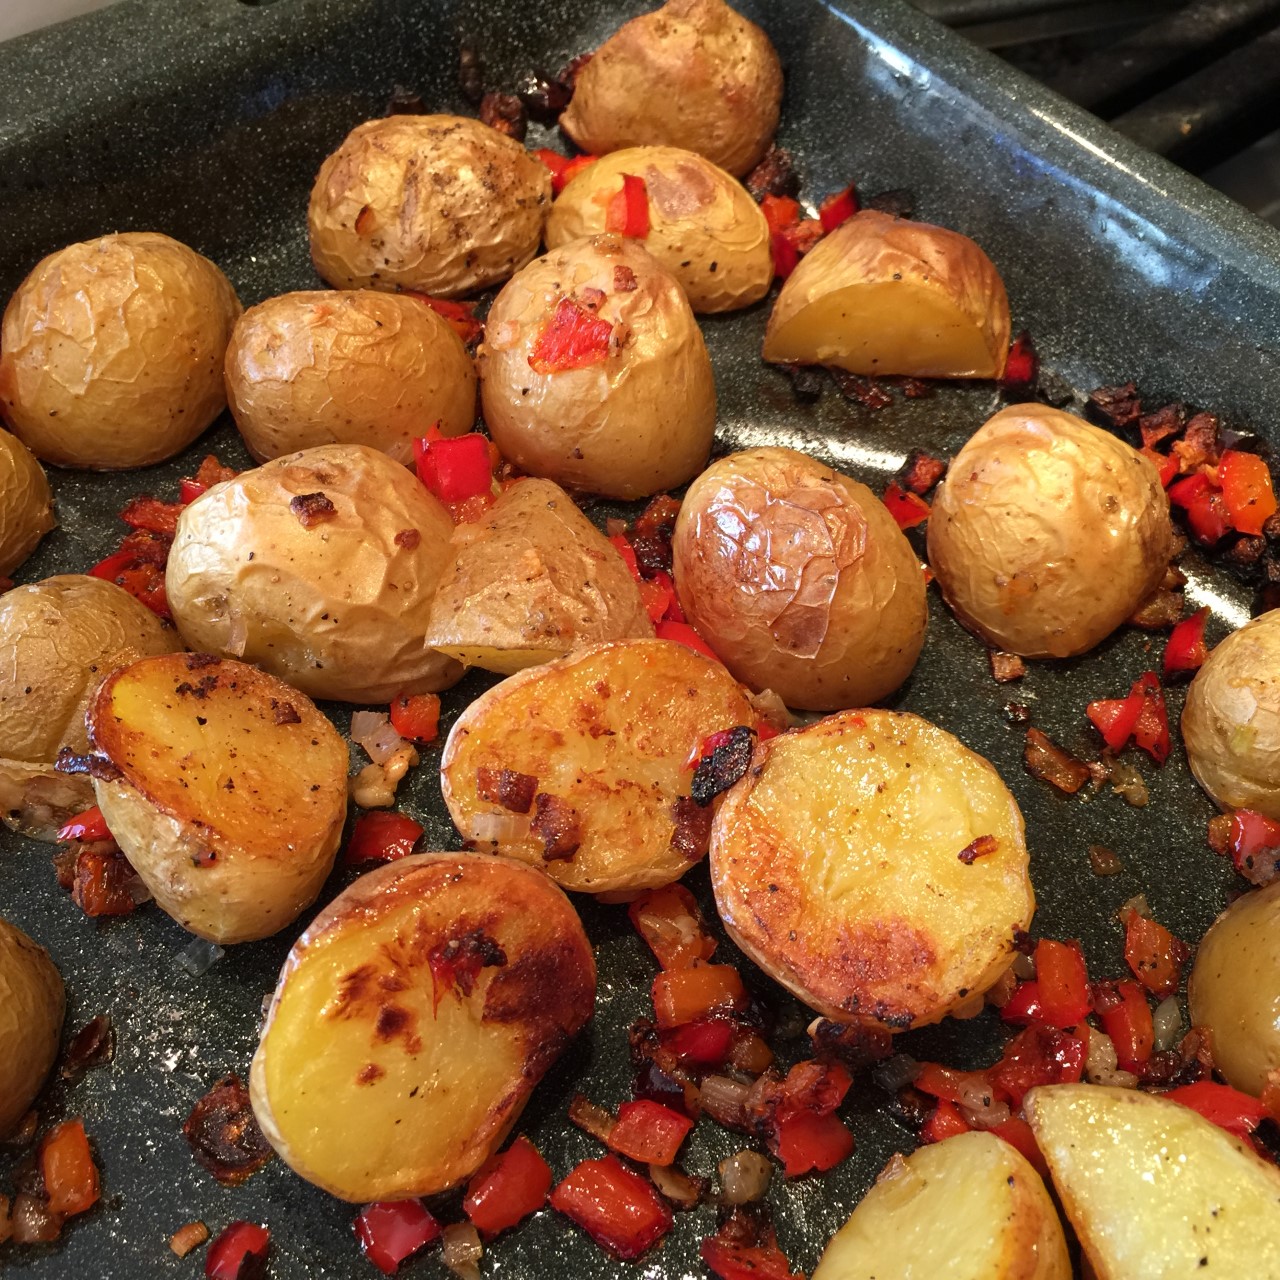 In the same bowl you used to mix the potatoes (you don’t have to wash it), mix together the mayonnaise, vinegar, Dijon, 3/4 tsp salt, 3/4 tsp ground pepper, and celery. When cool enough to handle, chop the roasted shallot and garlic, and add to the dressing. Mix in the potatoes.
 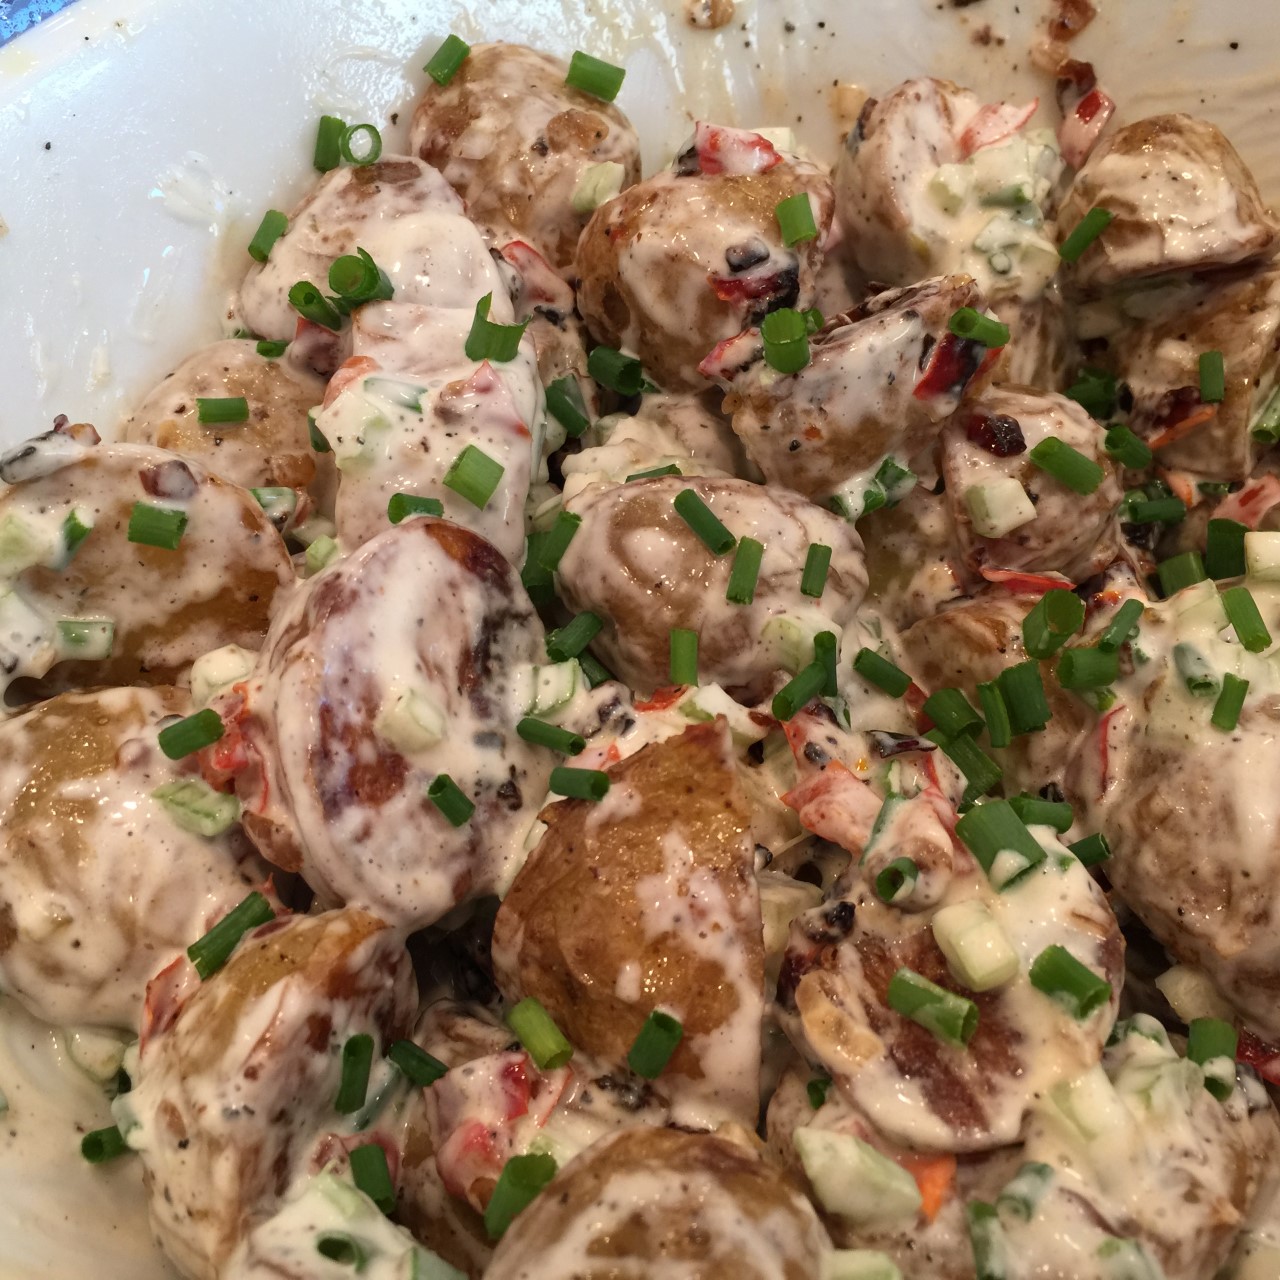 You can serve it as a warm salad or chilled – it’s up to you. Just before serving, mix in the chopped chives.
 Brazilian Cheese Rolls – where have these been all my life?! Crusty outside, stretchy inside. An added bonus for those of you who have a problem with gluten: they’re gluten-free!
 Put the milk, olive oil, and butter in a small saucepan. Over a low/medium flame, bring just to a boil, stirring constantly. Immediately pour into the flour.
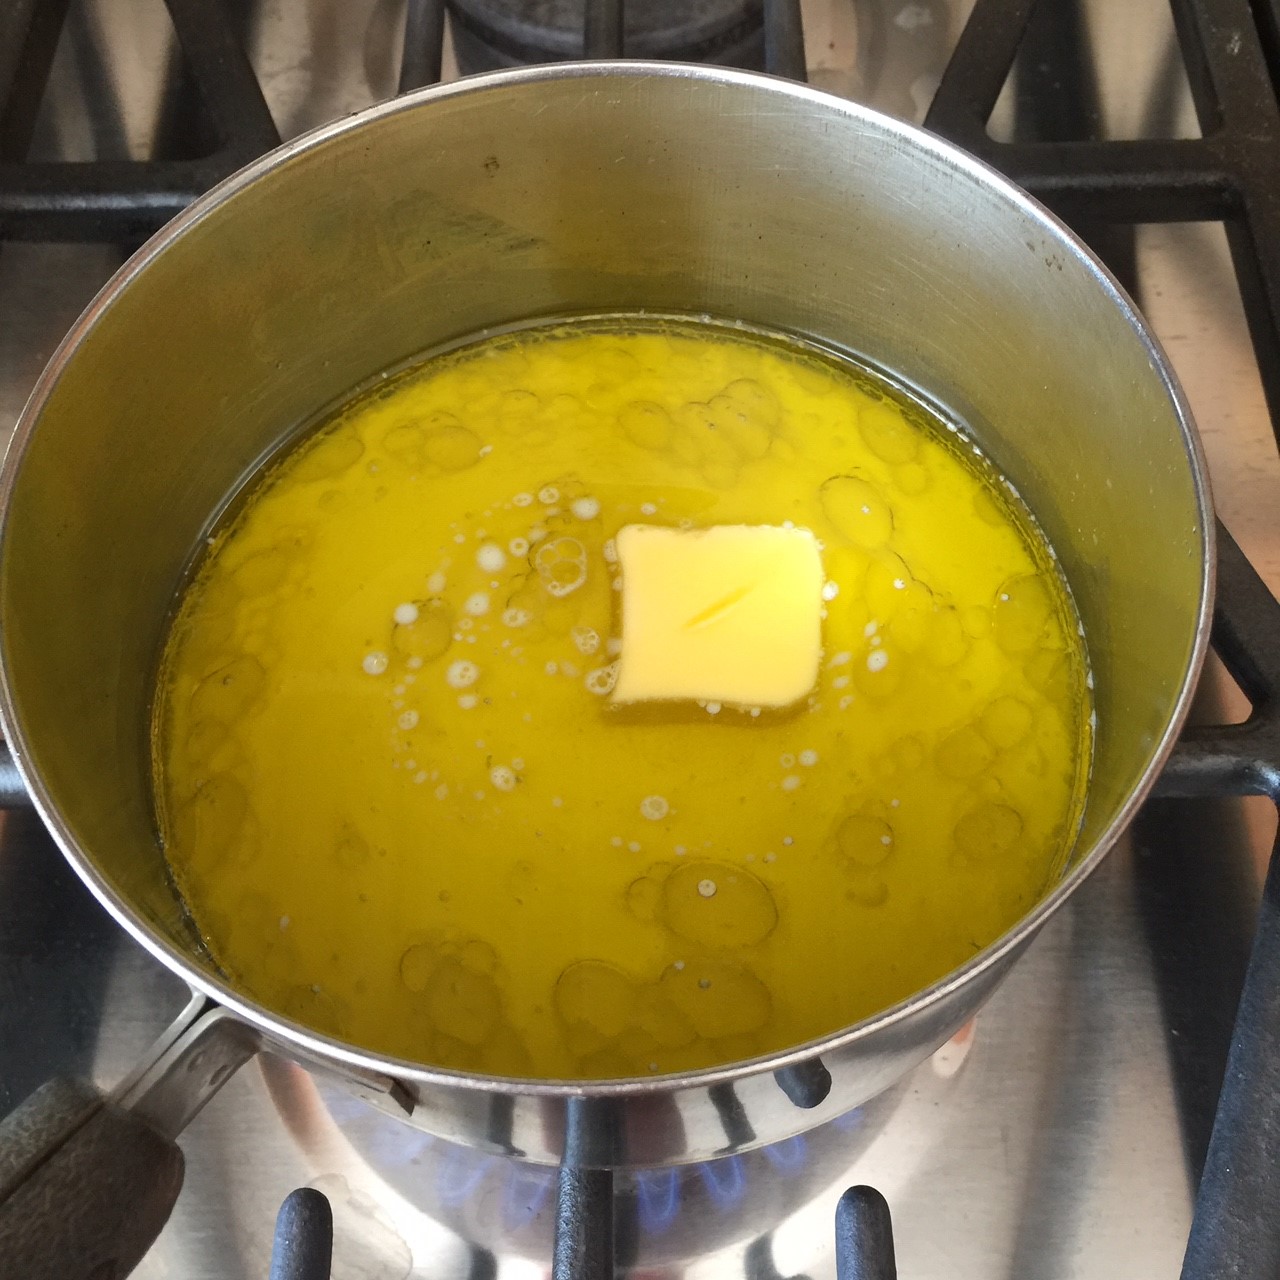 Turn the mixer on low and beat until all the flour is incorporated – about 1-2 minutes. (It will look rough and crumbly.)
  Add in the eggs and mix on low speed. Once it looks creamy (like frosting), continue to beat another minute.
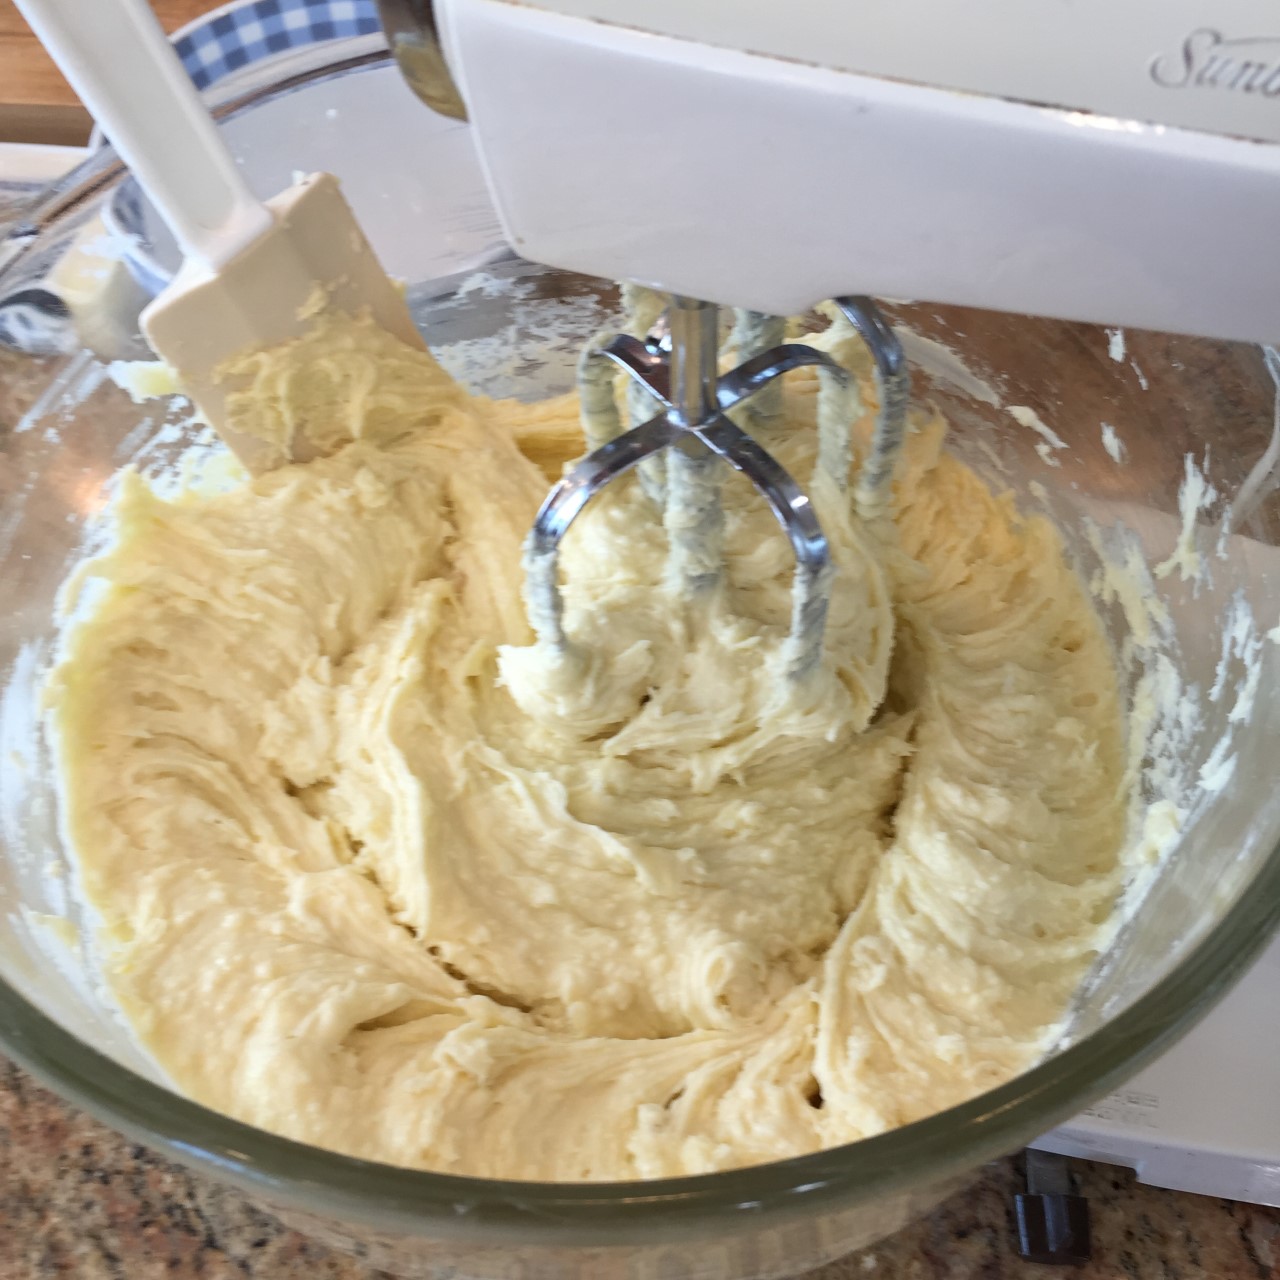
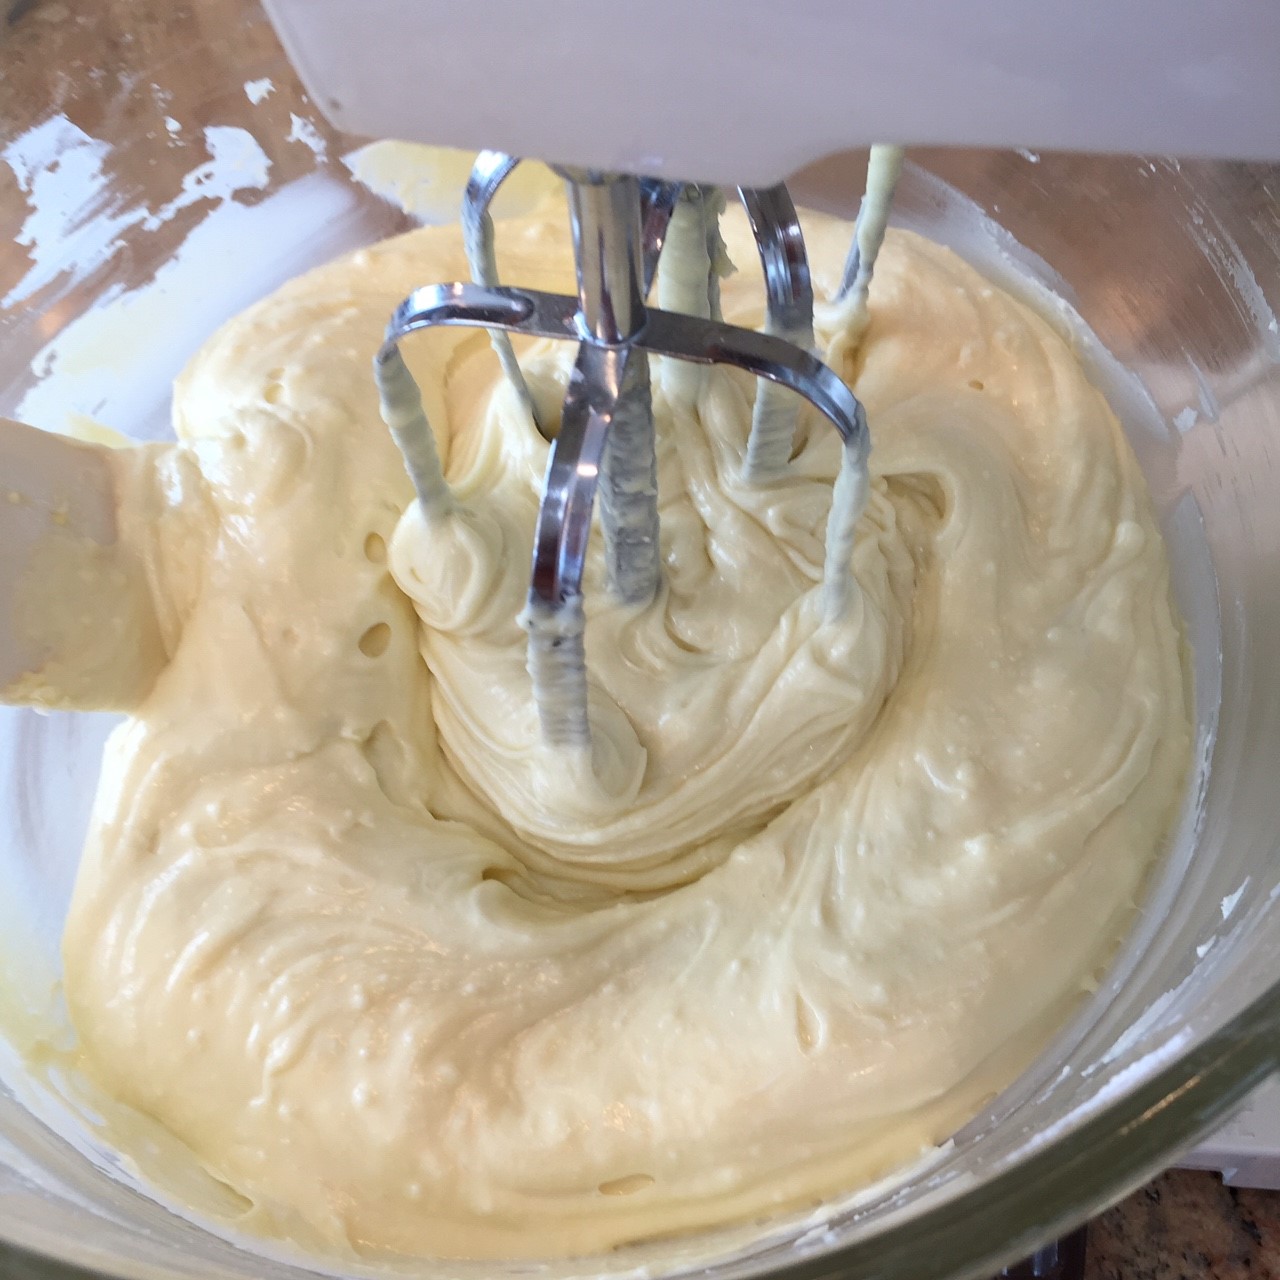 Add in the cheeses, and mix just to blend on low.
  Scrap down the dough and smooth top. Cover bowl and refrigerate at least 2 hours – this will firm up the dough, making it easier to work with.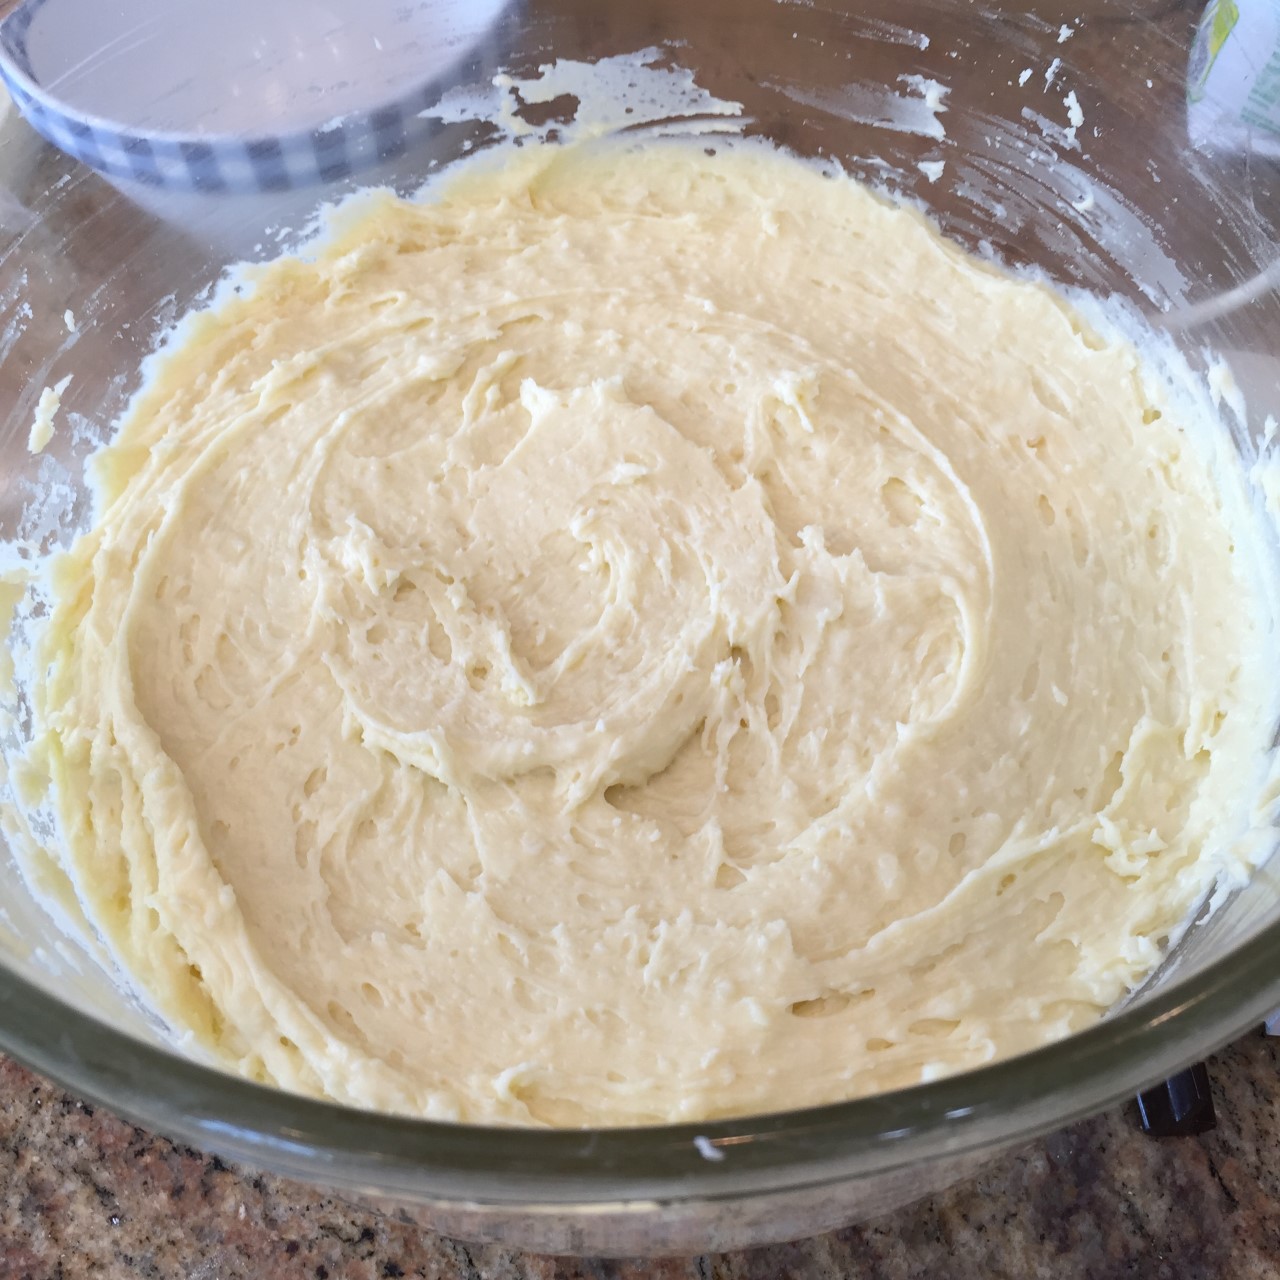
 Using a large spoon, scrap out each wedge and roll into a smooth ball (it helps to have one of your hands wet so the dough doesn’t stick). Place each ball on a parchment lined baking sheet. They’re going to rise as they bake, so make sure to space them. One large sheet will hold all 8 rolls.
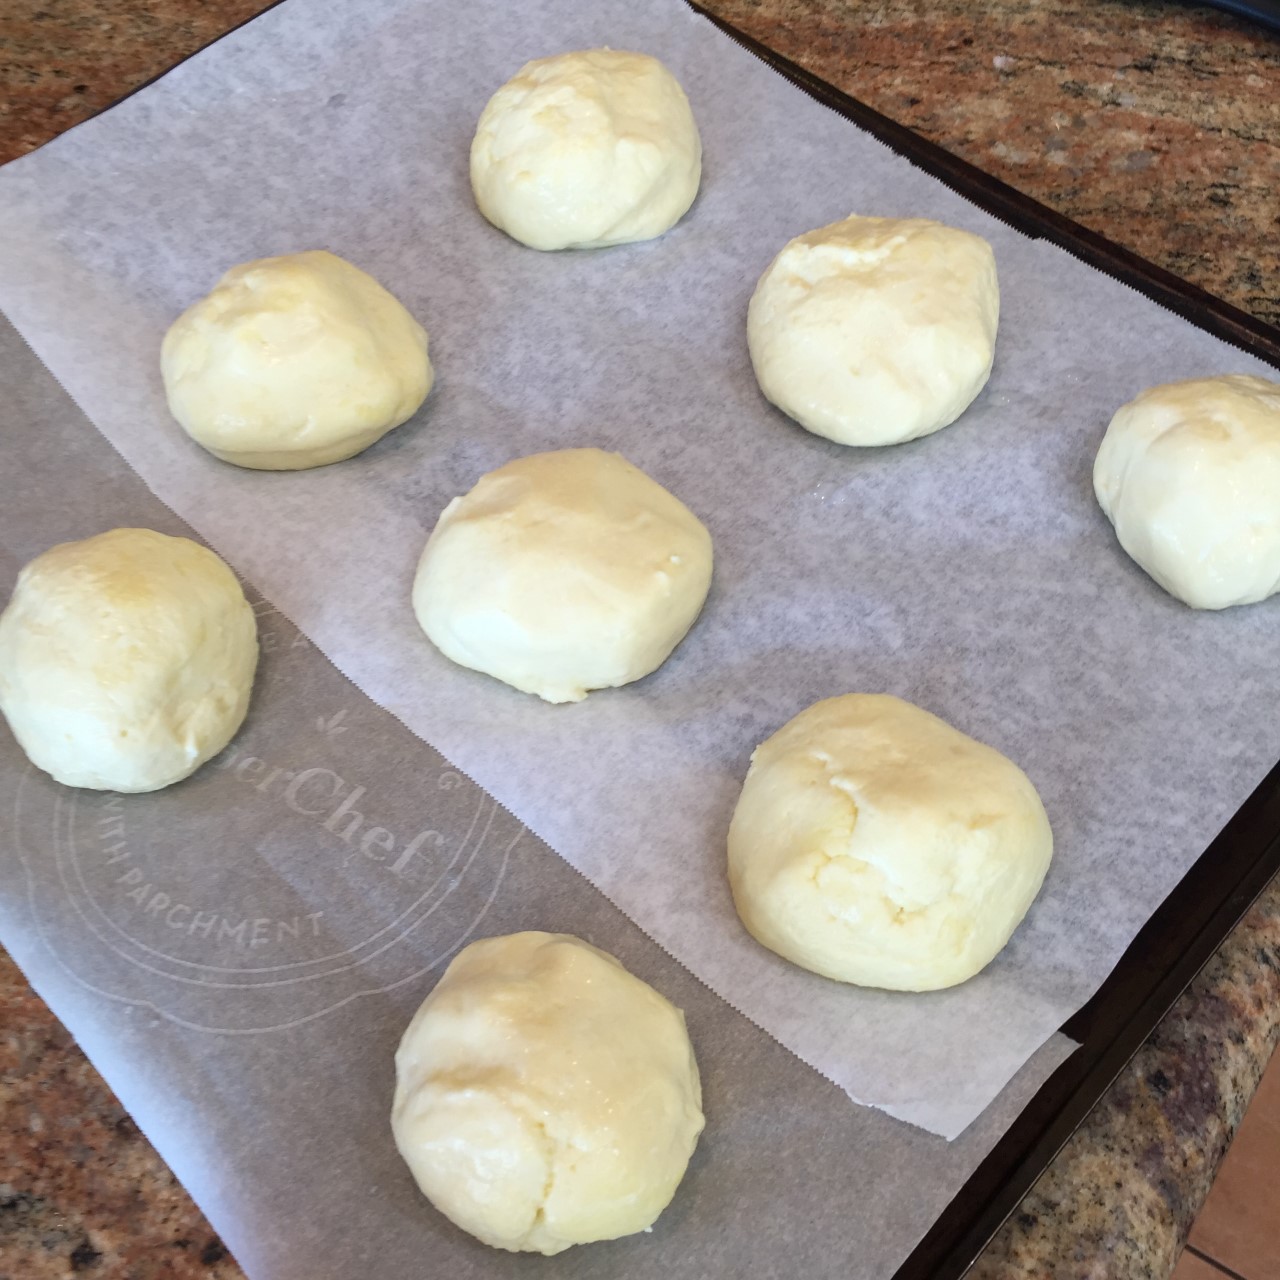 Using a pastry brush, paint the sides and tops of rolls with the egg wash.
  I’m going to use all caps because this is important!: PLACE SHEET IN OVEN, THEN
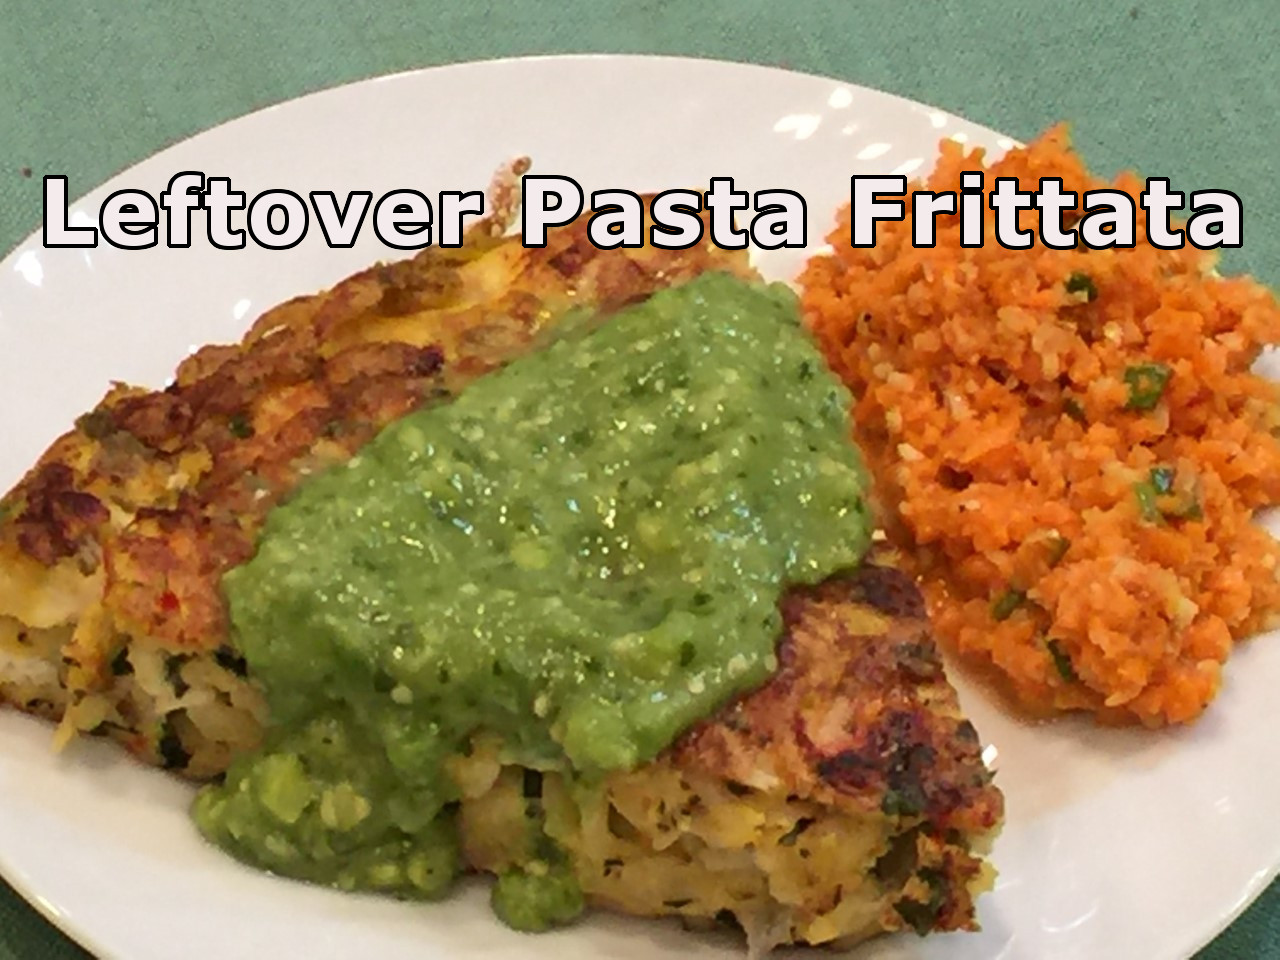 I hate waste – particularly of food. Unless it’s gone bad, I find a way to use it or save it (thus my self-proclaimed moniker of Queen of Freeze!) So I often find myself with bits and bobs which need to be eaten.
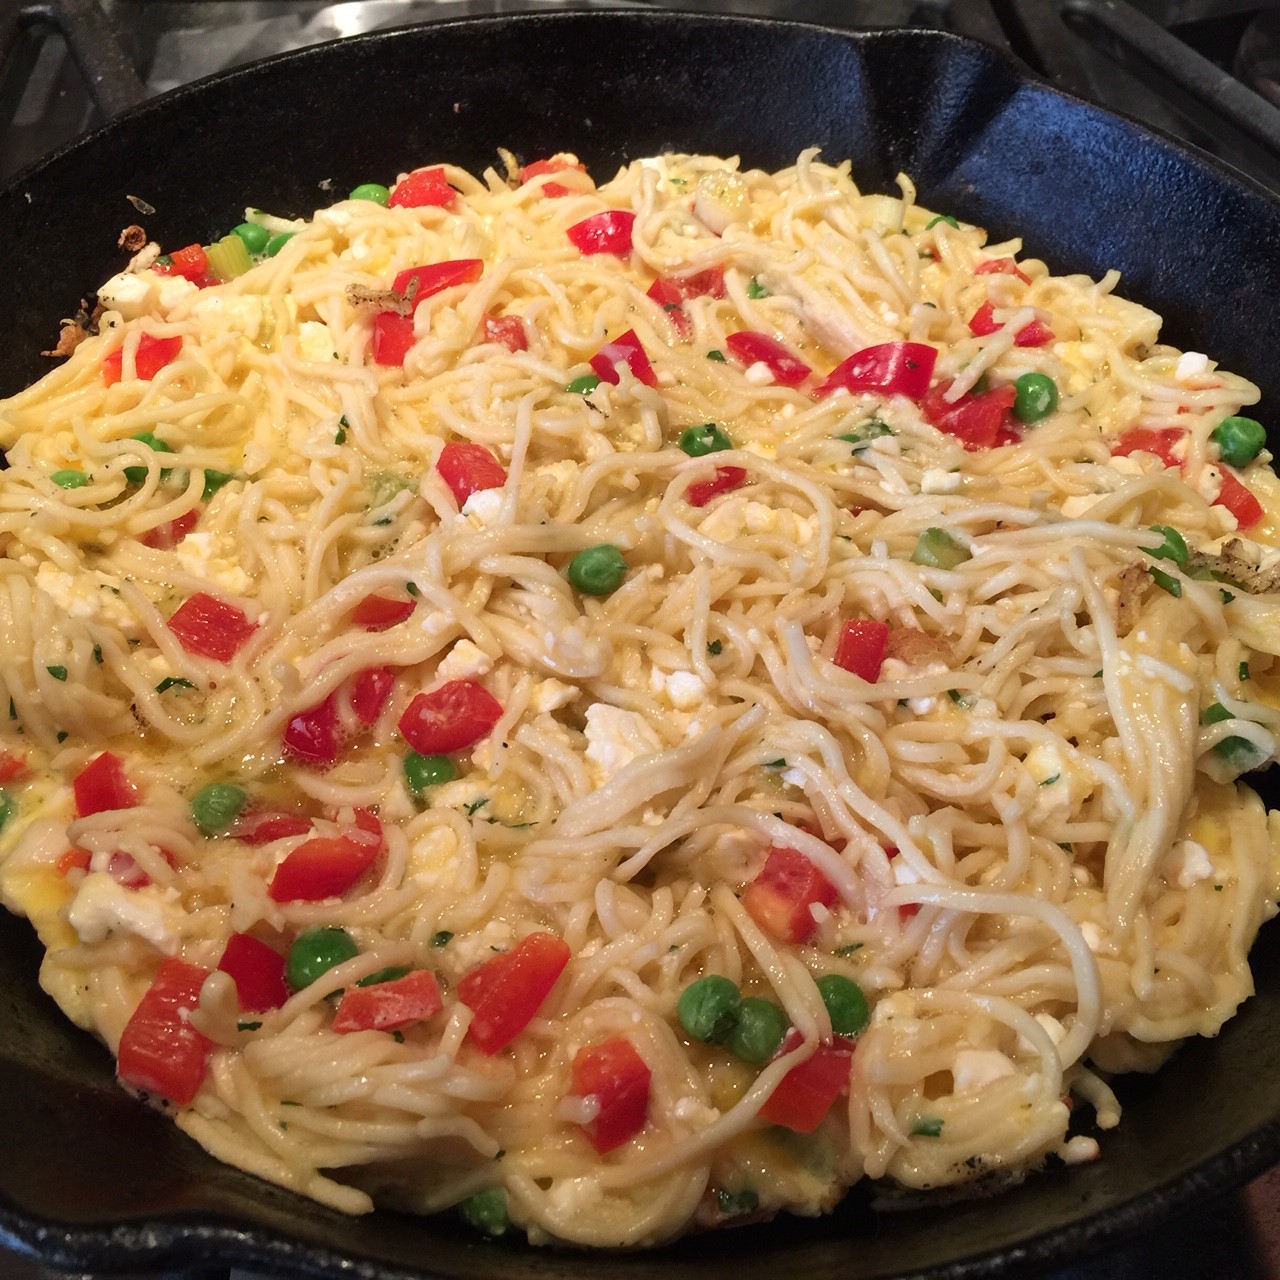 Here comes the tricky part – you’re going to need to flip the frittata to brown the other side. Loosen the bottom using a metal spatula. Once the bottom is no longer stuck, carefully slide the frittata onto a large plate.
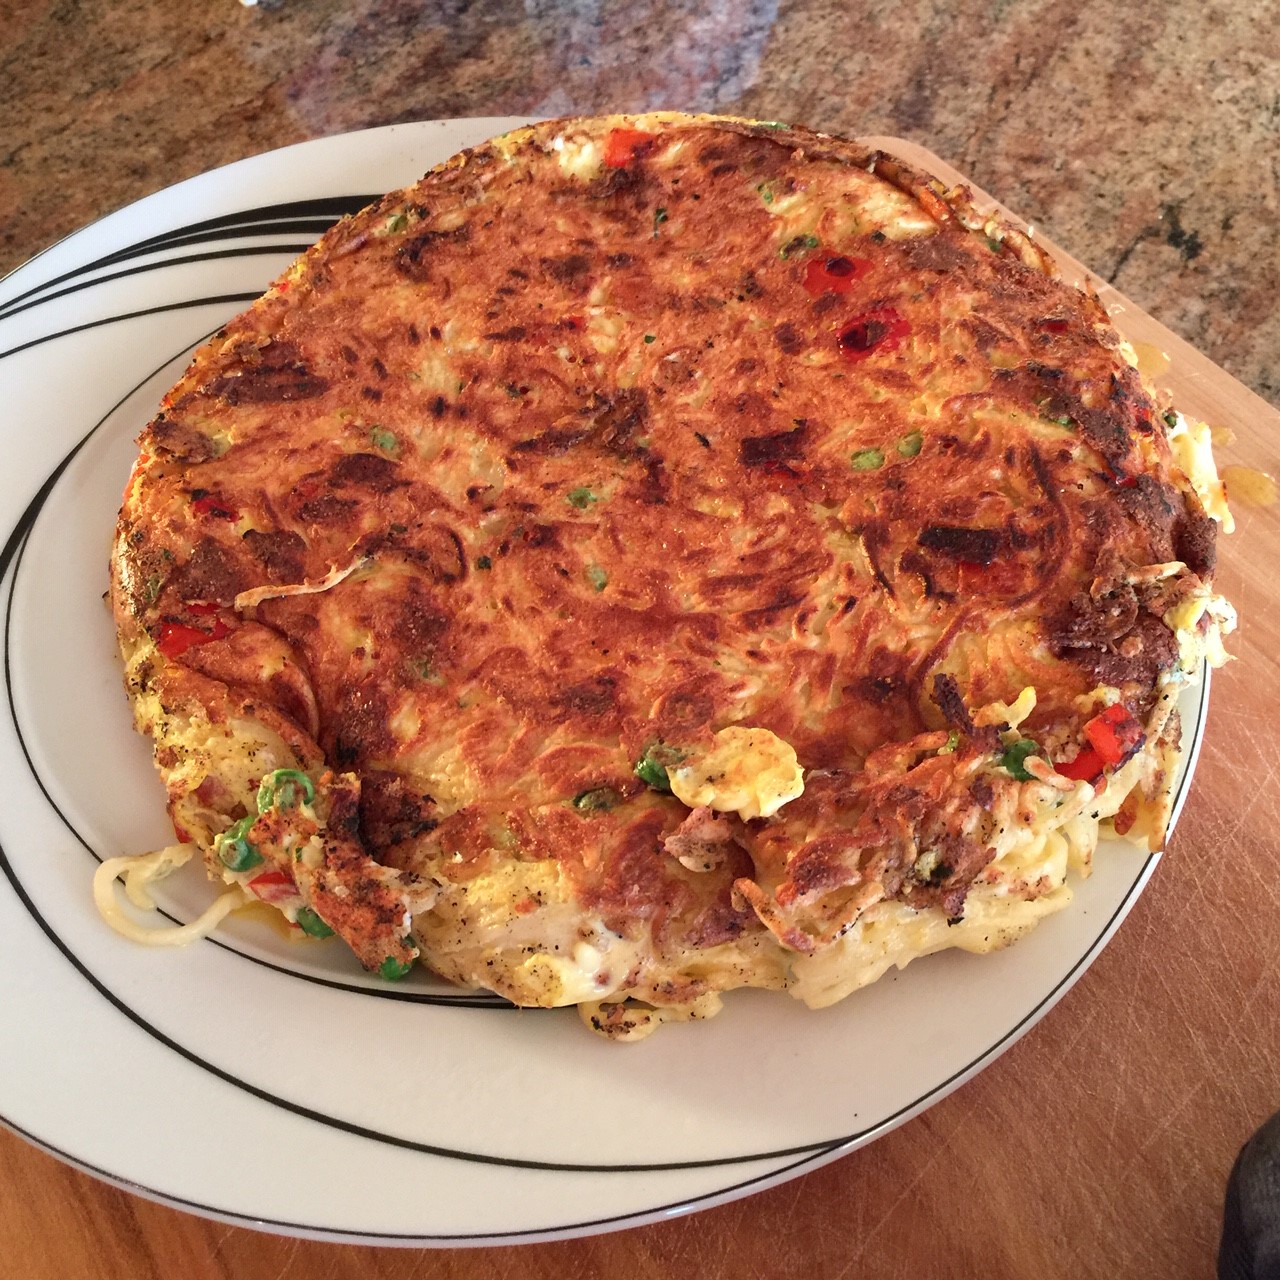 (Or, you can place a plate on top of the skillet and, using oven mitts, flip the skillet letting the frittata drop onto the plate.) Cover with another plate and flip.
  Then, slip the flipped frittata back into the skillet and cook until the bottom is well browned.
  Let set about 5 minutes before slicing.
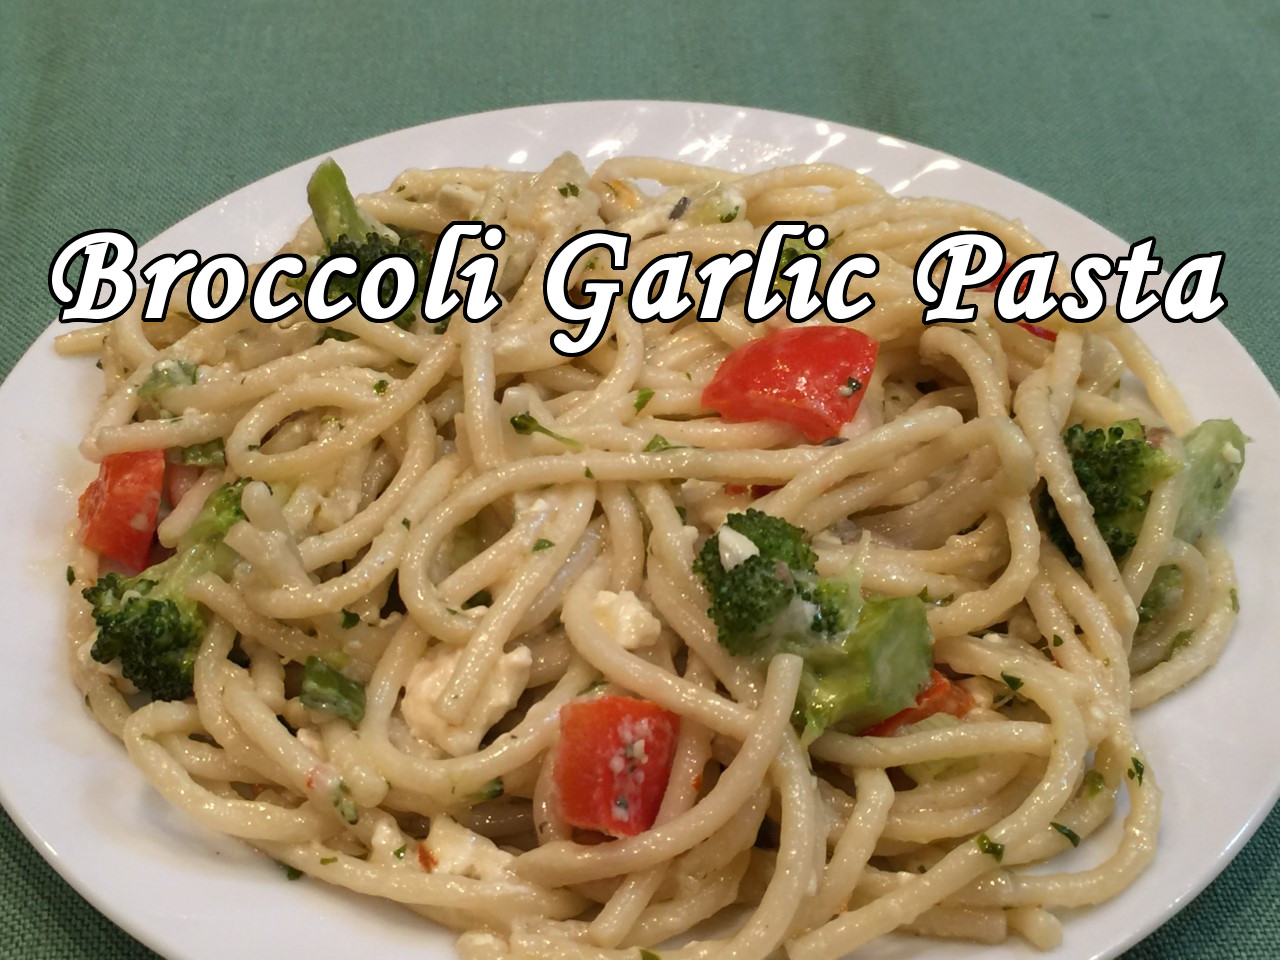 Broccoli Garlic Pasta is a new addition to my list of favorite dinners. It’s one of those recipes that I create in order to use up an ingredient that would soon be going bad – in this case, it was mushrooms. I threw in other items I had on hand – the pièce de résistance being the Feta cheese, which made all the difference.
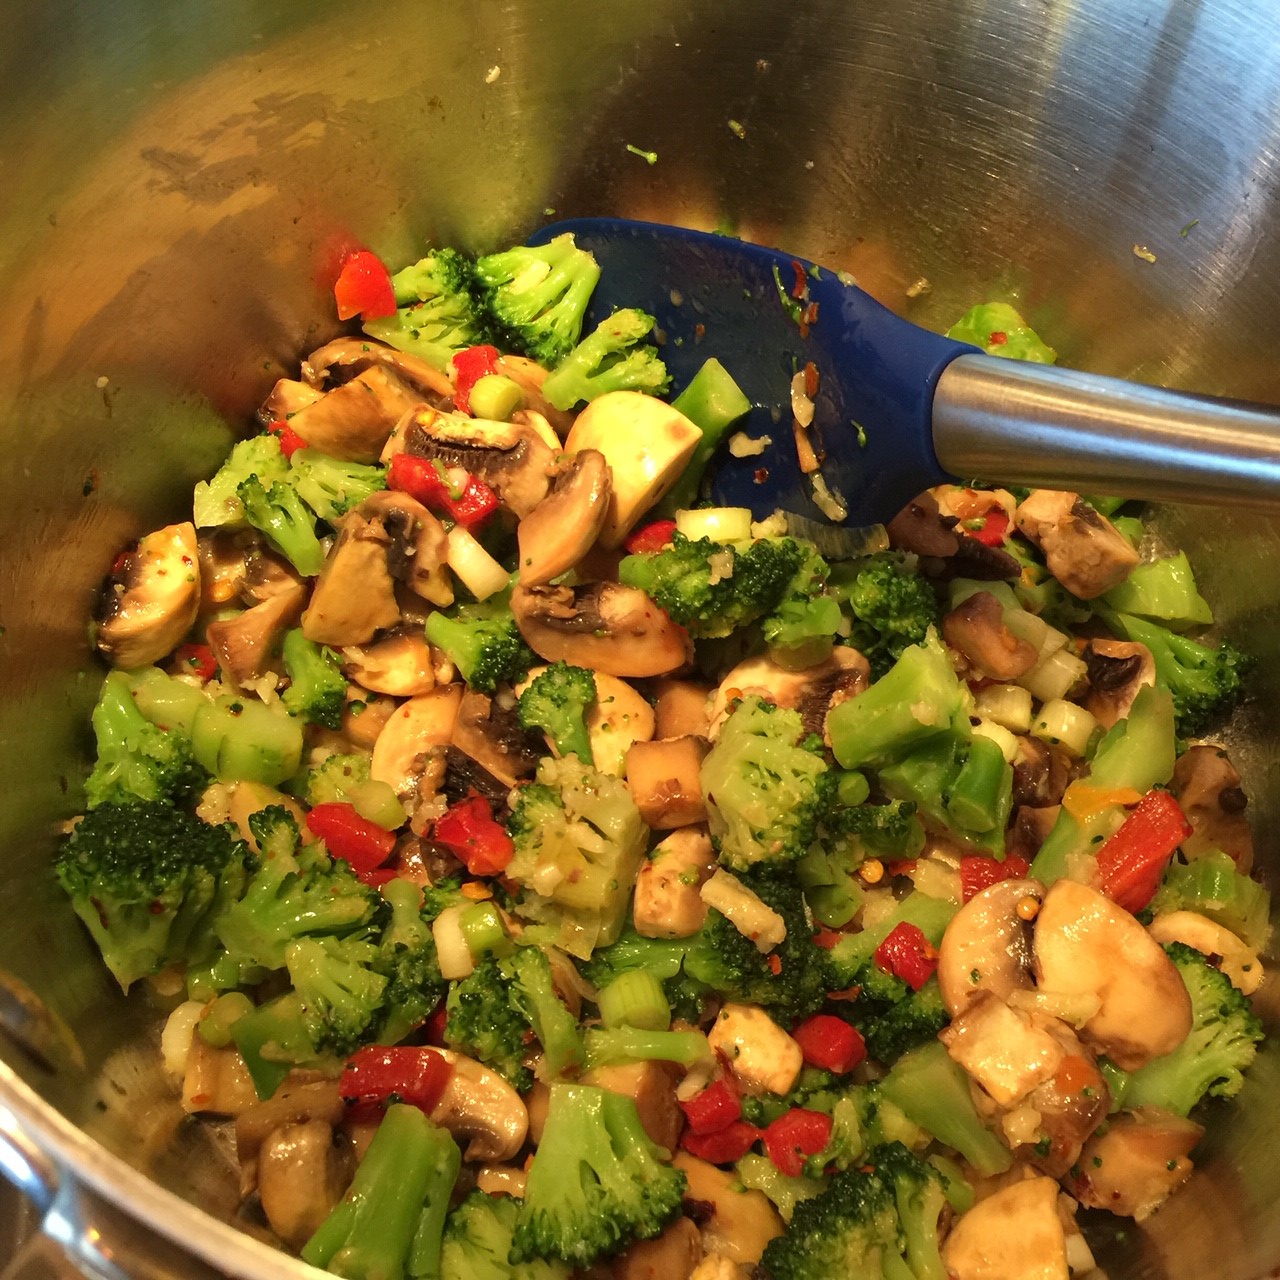 Kill heat and sprinkle on flour. Over low flame, stir 1-2 minutes to slightly thicken the liquid and cook-off the flour taste.
  Add in the wine and cream. Cook over medium heat about 1 minute.
  Stir in the Feta, Pecorino, and parsley. Stir in the pasta and heat through. Pour into serving bowl (or let remain in pot), cover, and let set for about 5 minutes to allow pasta to absorb the liquid and thicken up.
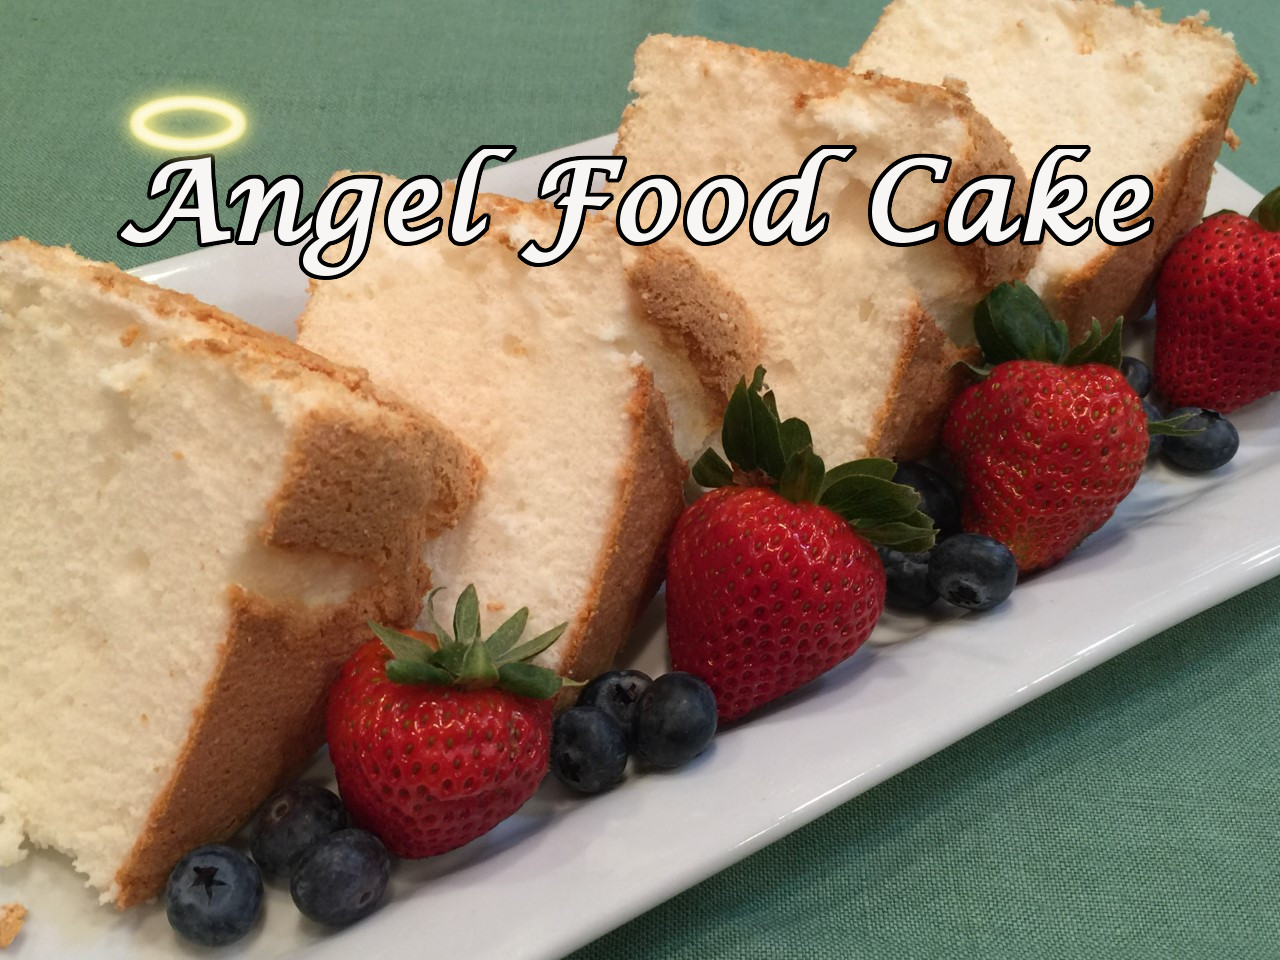 Due to my frugal nature (some may say, ‘cheap’), I found myself with an abundance of frozen egg whites. It turns out there are many more recipes that call for an extra egg yoke than an extra egg white. Due to my aforementioned frugal nature, I froze the unused whites rather than throw out perfectly good food.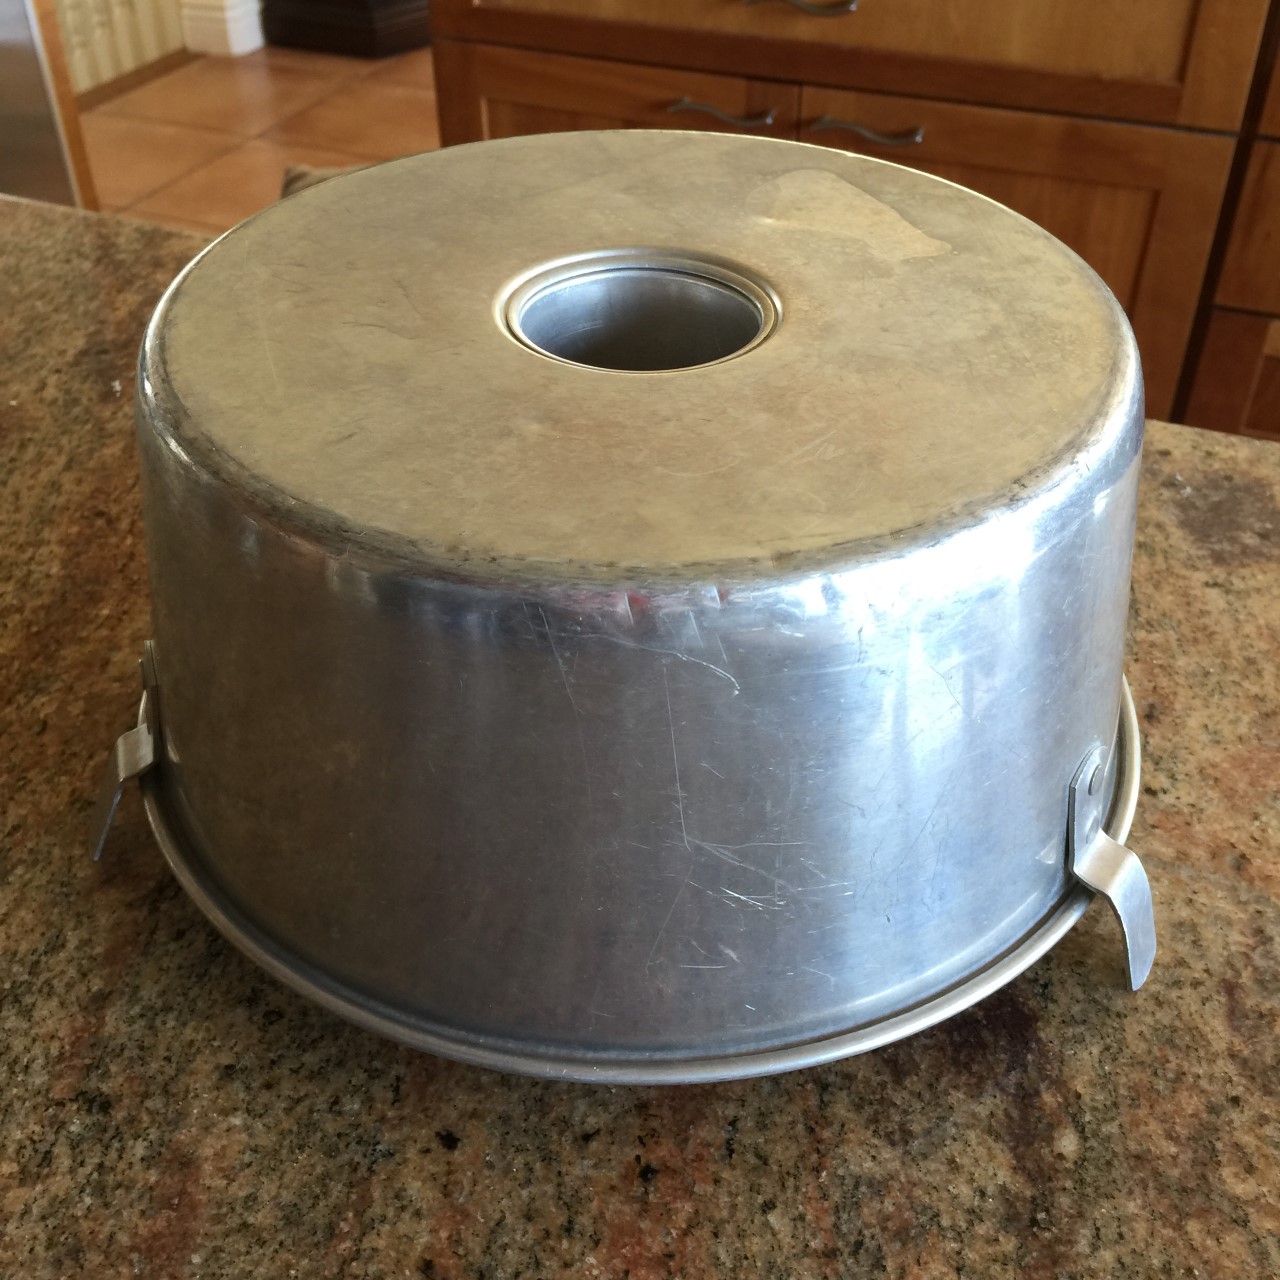
 Into a bowl, sift together the cake flour and 5 oz (3/4 cup) of the sugar. Set aside.
 With the mixer still running on medium, start adding the sugar/cream of tartar mixture to the whites 1 tablespoon at a time.
  Once all the sugar/tartar has been added, increase mixer speed to high until soft peaks form. Turn off machine, pour in the vanilla mixture, then quickly mix together on low.
  Here’s where your jaw may drop. If you read other angel food cake recipes, they’ll tell you to FOLD in the flour mixture gently in order not to deflate the meringue. I’m here to tell you that you don’t have to bother. Simply add 3 T of the flour mix to the batter through a sieve, then turn your mixer on the lowest speed for a few seconds to incorporate the flour, running a spatula along the sides and bottom of the bowl.
 Turn off the mixer, then add another 3 T flour to the batter, turn on the machine to low and mix to incorporate for a few seconds. Continue until all the flour is added and incorporated.
 Put into the oven and bake about 45-50 minutes – until golden brown and cake springs back when you press it with your finger.
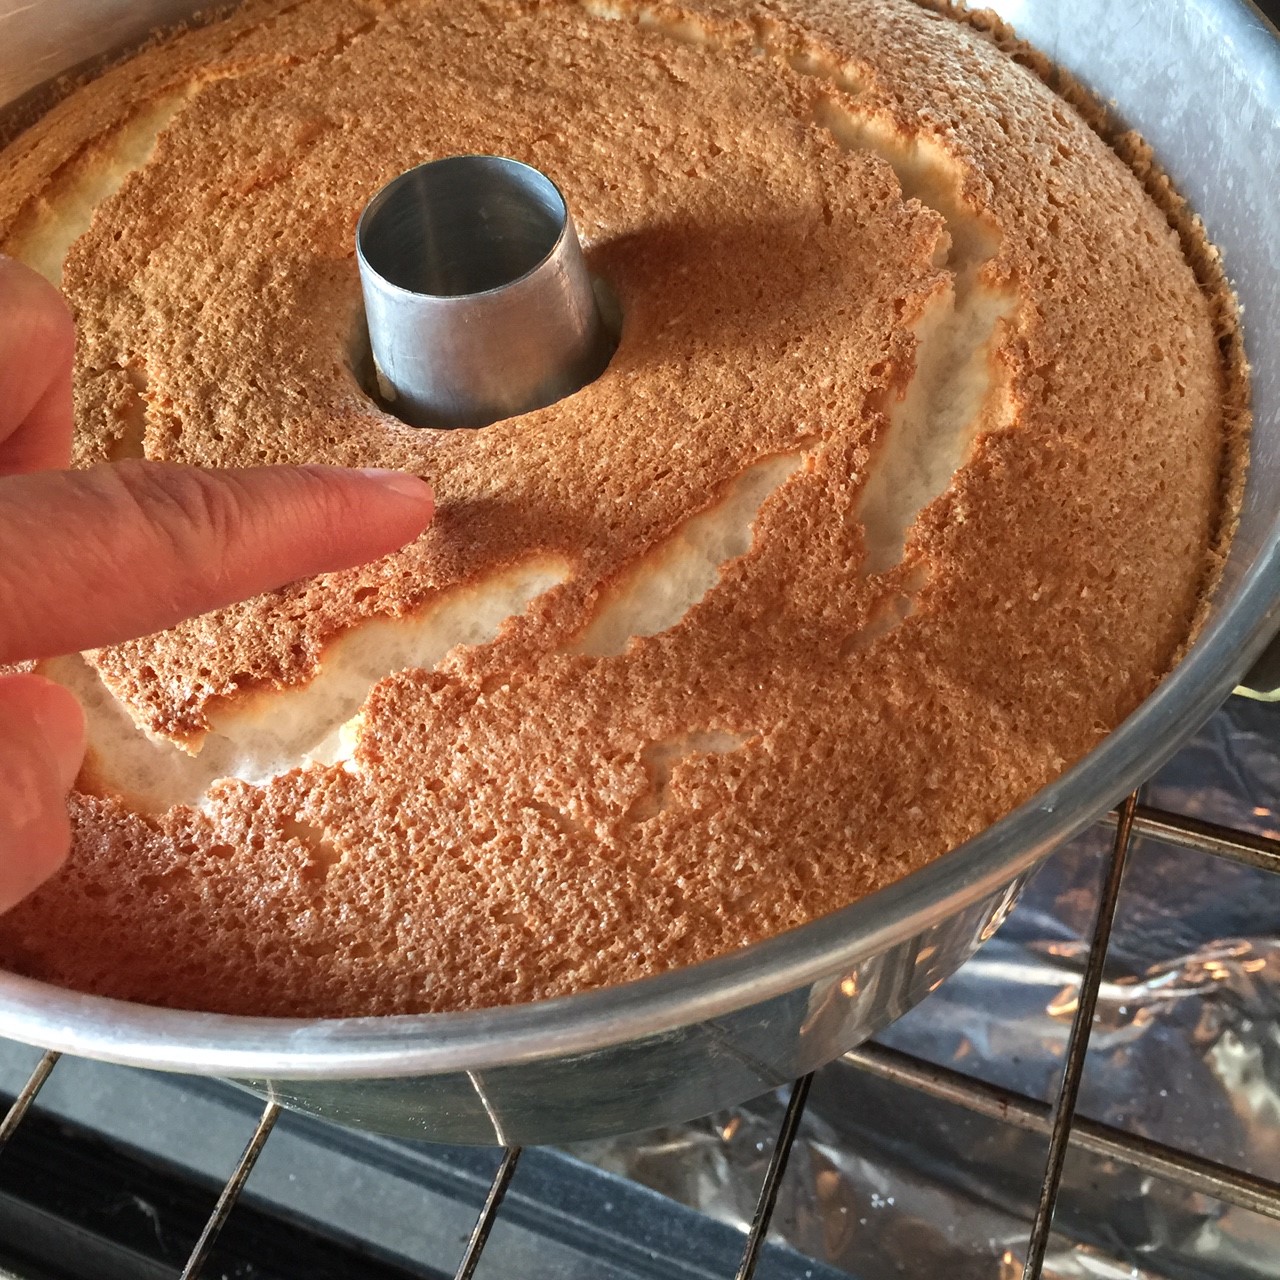 Remove from oven and immediately turn upside-down. Let cake remain like this until completely cooled – about 3 hours.
 Vegetarian Cooking For Carnivores BLOG