
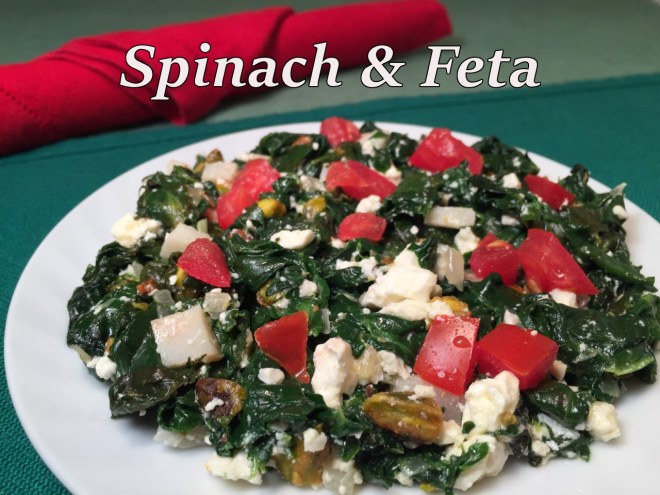
 Cooked spinach is not a looker. It wilts down from a giant amount to a small, dark green mound. On its own it tastes…okay. But doctor it up with some flavor, crunch, and color and now you’ve got something.
If you’ve never cooked fresh spinach, prepare for a surprise. You’ll bring home a mass of leaves and think, “this is way too much”. It’s not, believe me.
Note: I like to buy bundled spinach and wash it myself. But that can be time-consuming and is often hard to find. Stores seem to prefer to carry pre-washed spinach in plastic tubs. If you do buy the bundles, make sure you weigh them – some are larger than others.
SPINACH & FETA – makes about 1 cup
- 8½ oz fresh spinach leaves (about 2 bunches)
- 1 T + 1 tsp extra virgin olive oil, divided
- 2 T shallots, chopped (about 1 large)
- 1/4 tsp salt
- 2 T water chestnuts, chopped (I get them canned, in the Asian section)
- 1 oz Feta cheese, crumbled
- 1 T red wine vinegar
- 2 T pistachio nuts, salted, toasted
- 1 Roma tomato, chopped
Steam spinach over boiling water for 1 minute – set a timer! 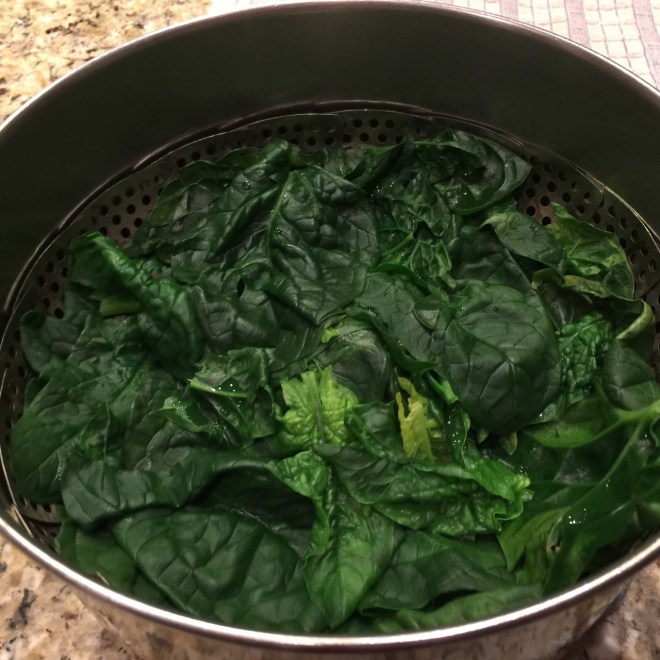 Place spinach in a towel to absorb excess water.
  Roughly chop.
  Heat 1 T oil in a skillet over medium/high. Add in shallots and sauté a few minutes, until browned.
 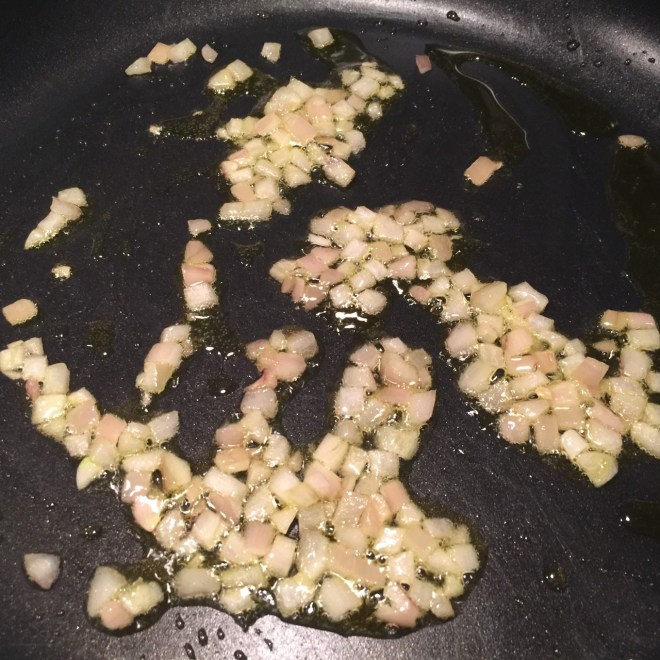 Stir in the spinach and salt – sauté over medium/high about 2 minutes to evaporate excess moisture.
  Reduce heat to low and add in the water chestnuts, feta, 1 tsp olive oil, vinegar, and pistachios.
 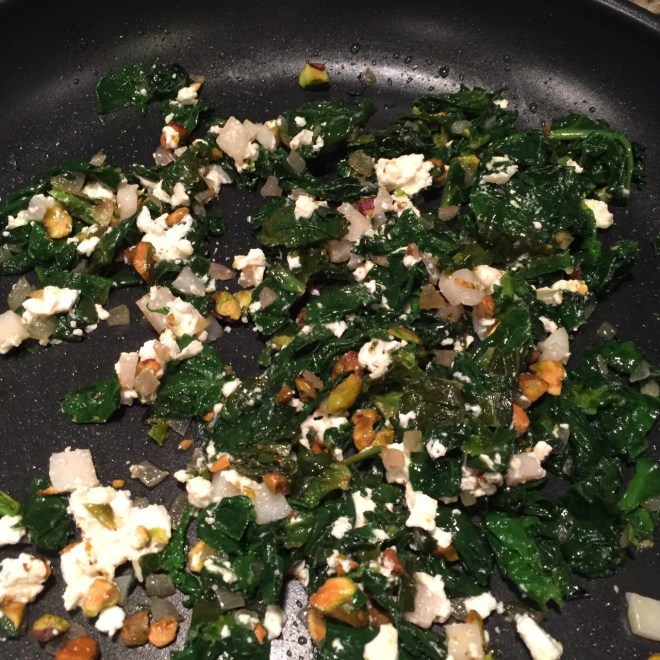 Stir over low heat, just to warm everything. Add in tomatoes and serve.
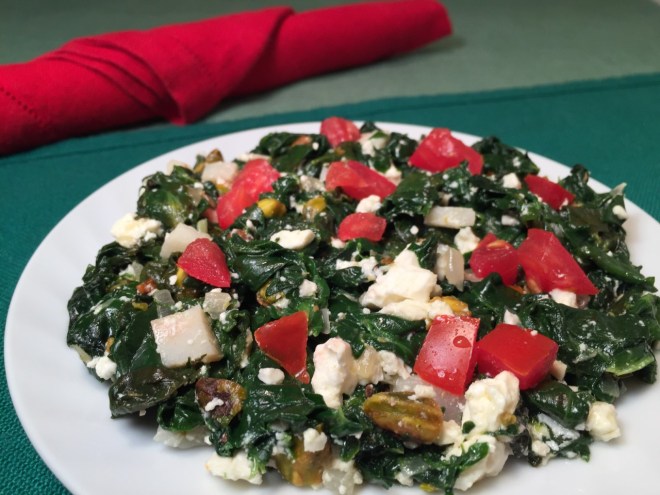
 Why spend a lot of money on store-bought granola when you can make it yourself? You won’t believe how easy it is! Plus you can fine-tune it to suit yourself.
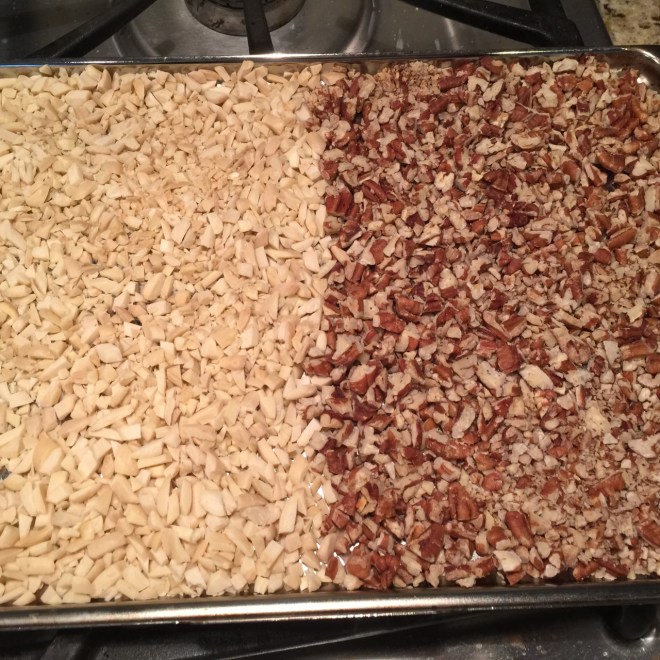 In a very large bowl, mix together the maple syrup, brown sugar, vegetable oil, vanilla, and salt.
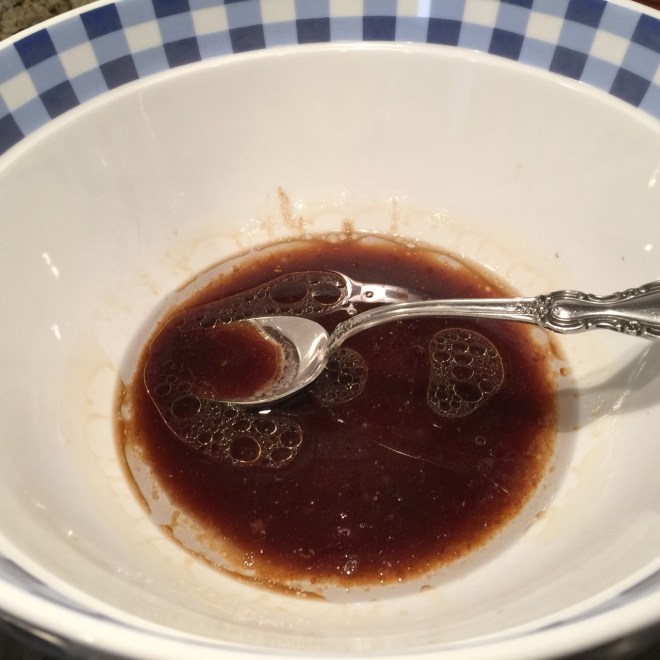 Blend in the oats and toasted nuts.
  Pour onto a parchment paper lined rimmed 16½” x 12″ (inside measure) baking sheet. Spread out and, using a flat implement (such as a potato masher or measuring cup), firmly press down granola evenly. I like to start in the center and work my way to the sides so that the edges aren’t too thin, or they’ll over-bake.
 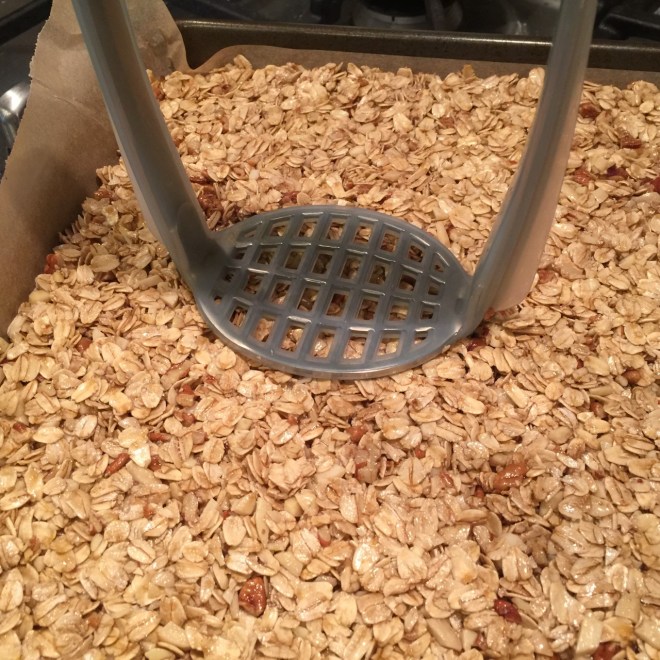 Bake in the upper third of the 325º F oven until medium browned – about 32-45 minutes. (Mine take 32 minutes.)
  Remove from oven and let cool 1 hour on baking sheet. Break apart and add in dried fruit, if using (I never do).
 Store in airtight container.
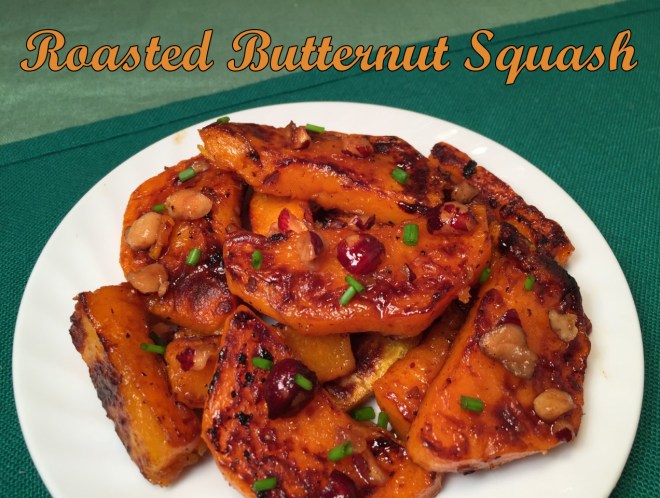 I love roasted vegetables! Their flavor comes to life, enhanced by the sweet caramelization process. Add to that the slight crispiness. Yum!!!
 Slice the body and neck in half lengthwise (yikes!) and remove seeds and fibres. Cut the four halves into 1/2″ pieces.
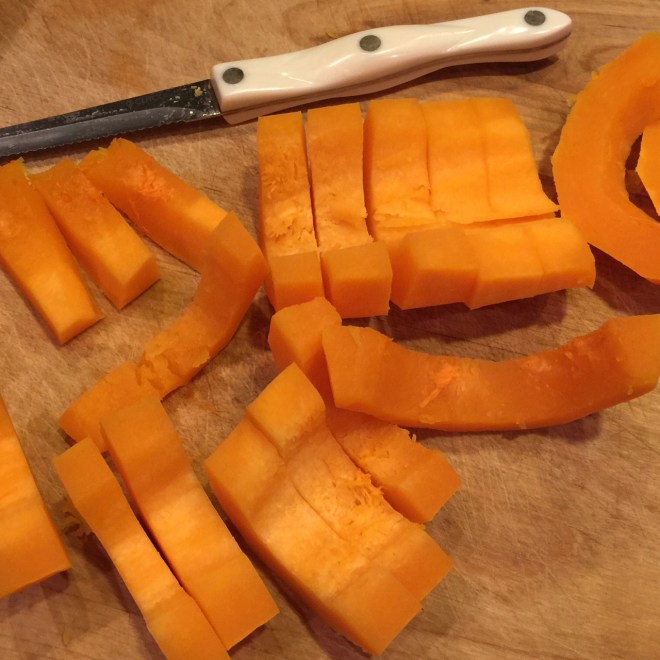
 Lay butternut squash pieces in a single layer on a rimmed baking sheet. Bake in preheated oven for 30-40 minutes, until bottoms are browned. Flip pieces and bake another 10-15 minutes, until well browned on both sides.
  While squash is baking, coarsely chop hazelnuts. In a small skillet or saucepan, melt remaining 2 T butter. Add in chopped nuts and sauté over medium/high heat. Stirring constantly, cook until nuts are browned – about 2 minutes. (The butter will be bubbly at first.)
 Remove from heat and stir in the 1 T water. Let cool a little, then add in the lemon juice and a pinch of salt.
  When squash is cooked, place slices into a mixing bowl (I use the same one from before). Gently stir in the hazelnuts and butter. Sprinkle on chives. Serve while hot.
 We’re all familiar with the POTATO GNOCCHI – awhile back I even posted a recipe for
  But gnocchi are merely dumplings that are made from various things besides potatoes, such as wheat flour, cheese, breadcrumbs, cornmeal, and semolina flour – the basis for this Roman Gnocchi recipe.
 Very slowly pour in semolina, stirring constantly to prevent lumps (a whisk is best for this). Once all the semolina in mixed in, decrease heat to low and cook 3-5 minutes, until it becomes very thick and pulls away from the sides of pan. (Don’t undercook or the gnocchi will taste floury.) Let cool 4 minutes.
  Cut
Cut  Mix in the beaten egg, Gruyère, rosemary, and baking powder.
 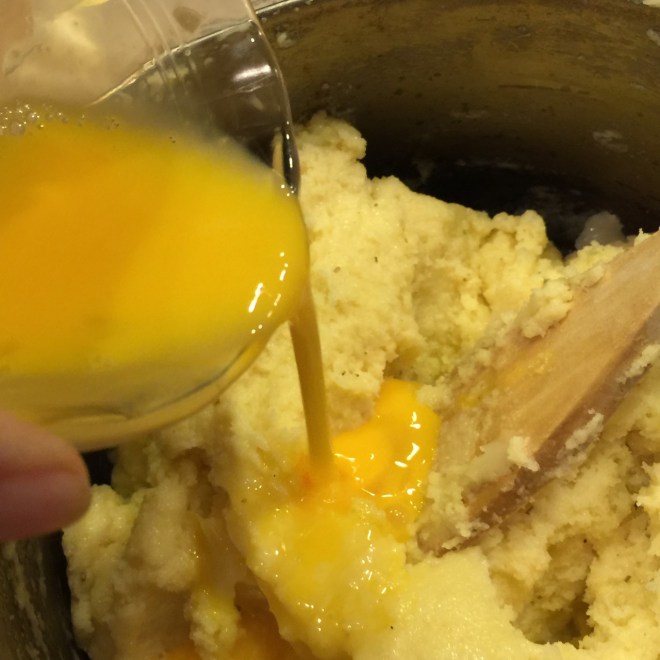 With the remaining
  Chill at least 30 minutes.
 Sprinkle Parmesan on top of gnocchi and bake, uncovered, for 30 minutes. Let cool at least 15 minutes before serving.
 Mashed potatoes can get a little boring. True, they’re filling, easy, cheap, and everyone likes them. But, maybe it’s time to add in mashed parsnips…you know, to shake things up a bit.
 Place potato slices in strainer and rinse well to remove excess starch. Let drain.
 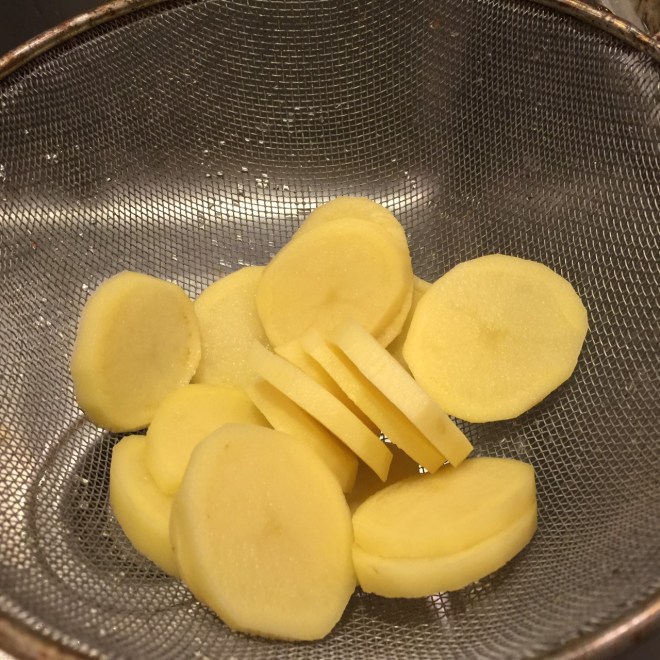 When parsnips have browned, add potatoes to the pot. Cover, decrease heat to low, and cook about 20 minutes – until potatoes are tender. Uncover pot and let set 2 minutes to allow steam to escape.
 Mash mixture until smooth.
 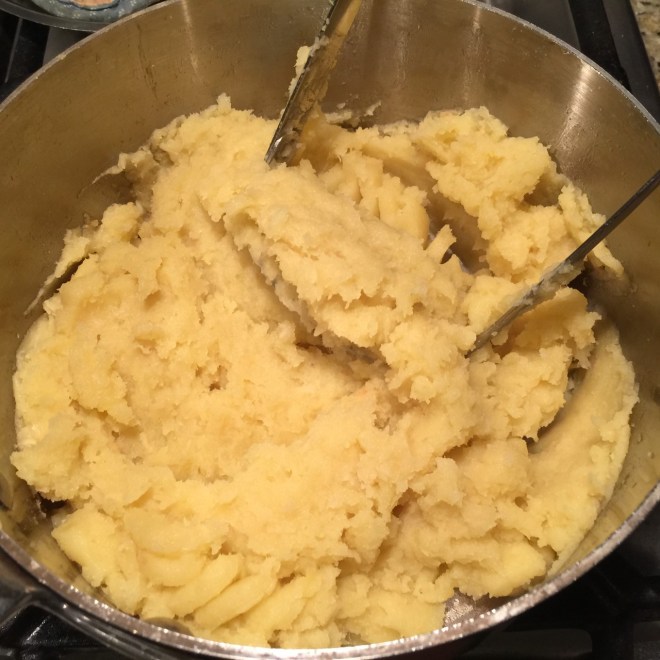 Warm the milk and pour 1/2 cup of it into the potatoes. (Use the rest, if needed. Save it for any leftover mash.) Add in chives and fold mixture gently together. Season with salt and pepper, if needed.
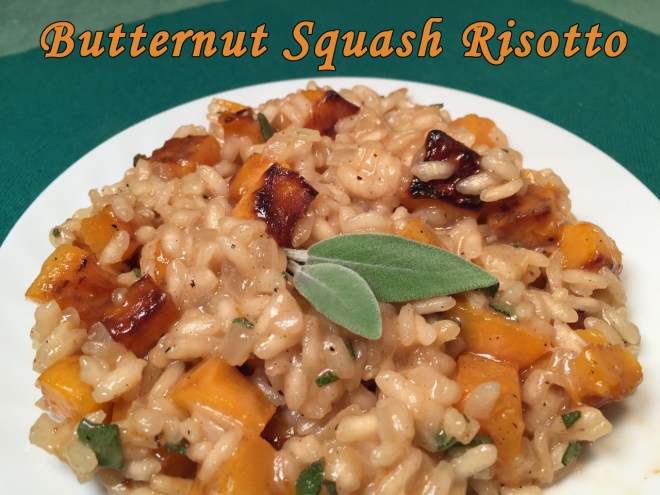 Winter squash comes in many varieties and colors – very tempting to buy as a Fall decoration. Of course, cooking them may seem a bit daunting… what with the potential for slicing off a finger or two.
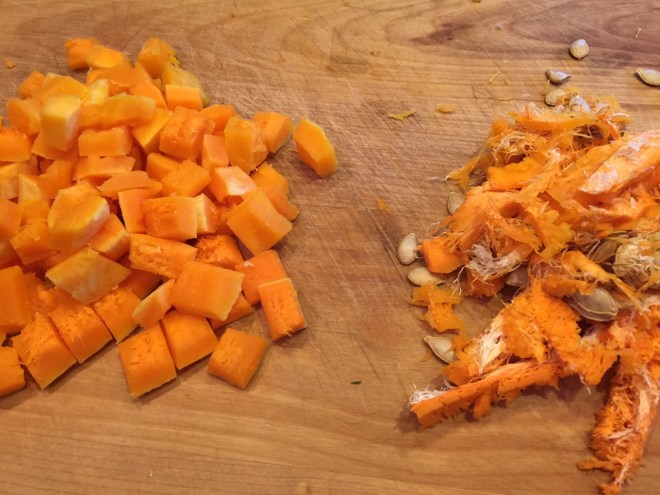 Measure out 1¾ cup of cubes (put any remaining cubes with the skins and seeds for the broth.) Into a 12″ nonstick skillet heat the olive oil over medium/high until shimmering. Add the 1¾ cup of cubed squash, spreading out into a single layer.
 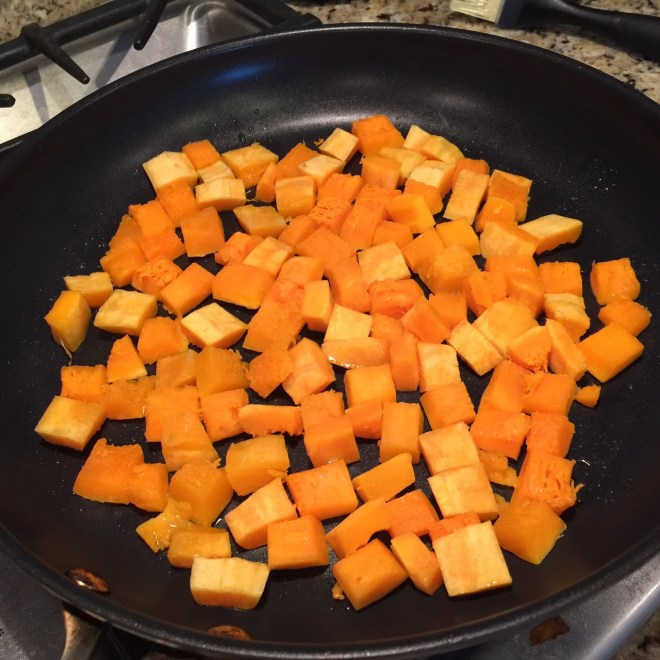 Cook about 5 minutes without stirring, until bottoms are browned. Continue cooking another 4-5 minutes, stirring now and then, trying not to turn them over – you want only one side browned. Remove to a bowl and set aside.
 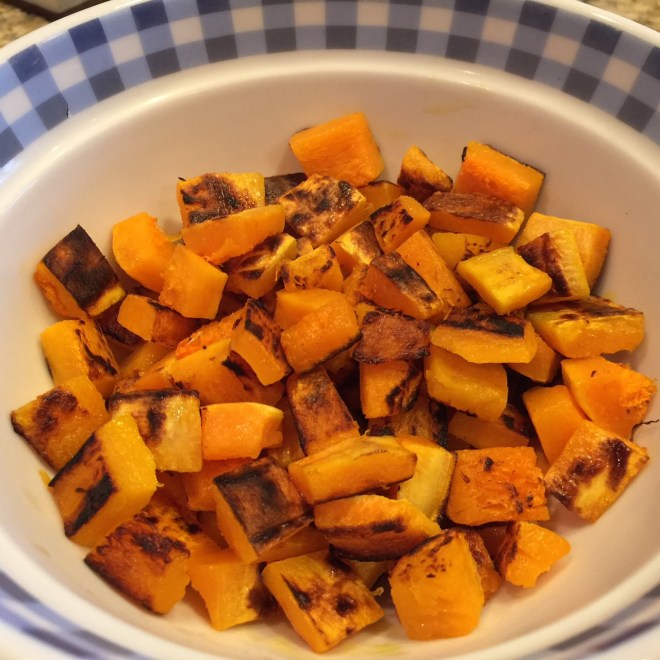 Into the now empty skillet put the seeds and skins, cooking over medium heat about 4 minutes to brown. (Beware of popping seeds as they cook.)
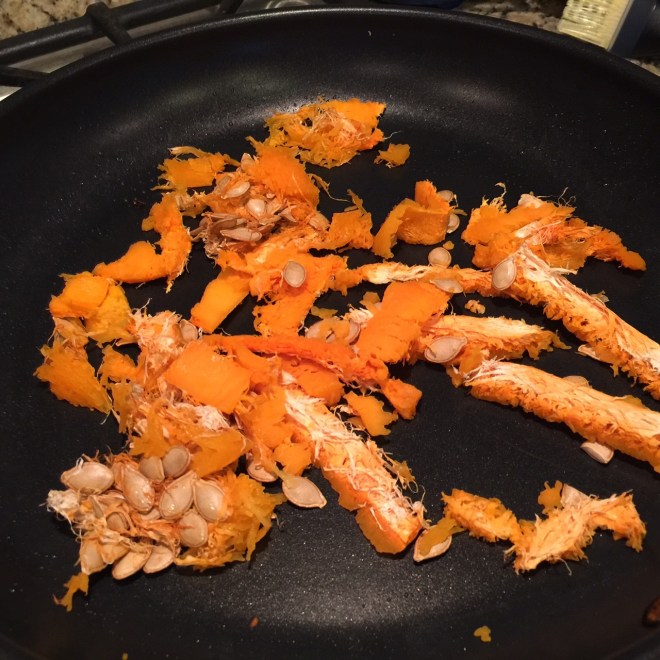 Remove to a small saucepan. Add in the vegetable stock, bring to a simmer, cover, and cook 10-15 minutes.
 Into the empty skillet melt 1½ T butter. Add in the onions, salt, and black pepper. Sauté over medium heat until onions start to brown.
 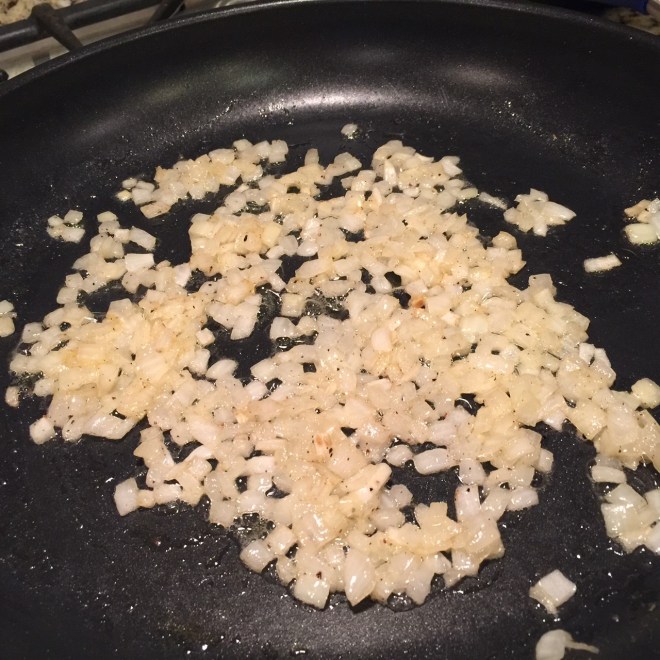 Add in nutmeg, cinnamon, and garlic. Cook another 30 seconds to bloom the spices. Pour the Arborio into the onions and sauté over medium until edges of rice become translucent.
  Add the wine to the rice and cook uncovered over medium high until it evaporates.
  As the wine is cooking, strain the broth made with seeds. Discard strained solids and set broth aside.
 Stir in Parmesan, sage, remaining 1/2 T butter, and lemon juice. Adjust salt and lemon juice, if needed.
 I can’t deny it – I’m a huge potato lover. Mashed, French fried, hash browned, scalloped, and baked: I love them all! (It must be a trait inherited from my Irish mother.)
 Remove skewer and slice in half, lengthwise, along narrow side of potato so they lay flat.
 Carefully, scrap out insides, leaving 1/8″ border to support the skin. (If you scrap a bit too much in a section, just take some of the potato and smash it down to form a patch.) Place potato pulp in a bowl.
 With a fork, mash the potato, breaking down lumps – you don’t need to make it as creamy as you would with mashed potatoes…unless, you want.
  Add in the butter and stir until melted. Then add the buttermilk, sour cream, salt, pepper, cheese, and scallions. Mix gently, but thoroughly.
 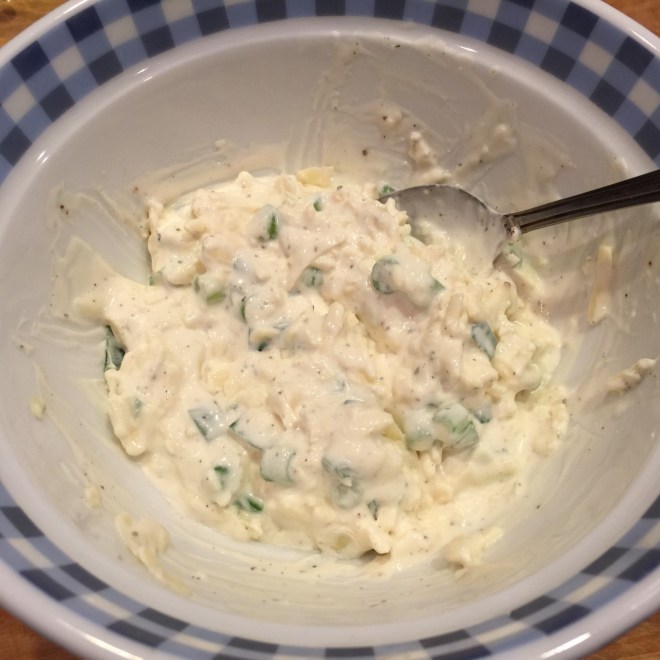 Divide equally and fill potato skins. At this point, you can cover them and complete preparation later.
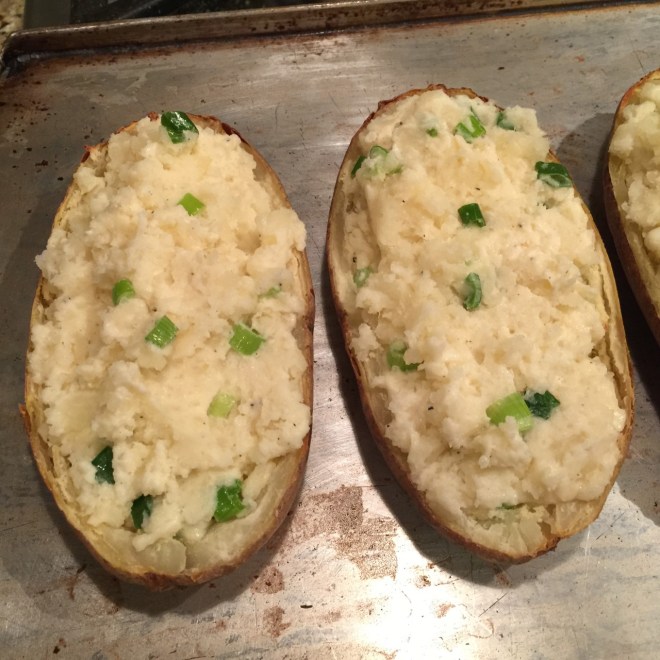 Just before serving time, broil potatoes about 4″ from heating element 10-15 minutes, until spotty brown on top. Serve hot.
 Good old mashed potatoes. Straight forward. Easy to prepare. And, most of all, filling. This last one is important if you have picky eater children (I speak from experience).
 Bring to simmer and cook until easily pierced with fork – about 35 minutes.
 Sauté 5 minutes – until they start to lose volume and become a little browned. Decrease heat to medium and continue cooking until well browned (about 20 minutes or so).
 Add in the port and letter simmer for 5 minutes to evaporate the liquid.
  Set aside.
 Gently fold in melted butter. Add in half & half, bleu cheese, remaining salt, and pepper. Very gently blend together. Taste for seasoning and adjust as necessary.
 Corn on the cob is great, but sometimes one wants to enjoy fresh corn without having to floss our teeth before smiling afterwards.
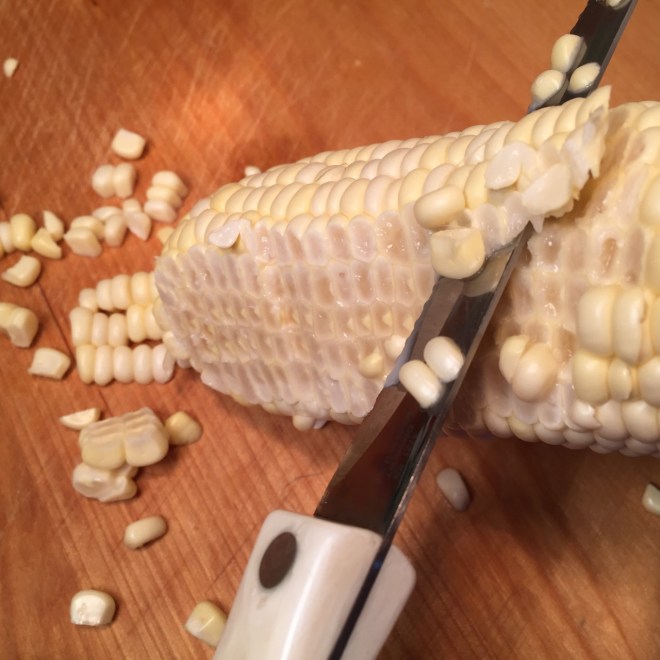 Flip the cob and repeat. Boil kernels in a little unsalted water for about 2 minutes, until done (adding salt at the beginning of cooking can lead to tough corn). Drain.
 Apparently, there’s yet another new-to-me ancient wheat grain called farro. It’s kind of similar to brown rice, but heartier with a nutty taste. As a gal who gets around (well, at least, is nearby) I figured I’d give it a try. After all, I’ve jumped on board the couscous, quinoa, barley, sorghum, and Israeli couscous bandwagons. May as well sample this.
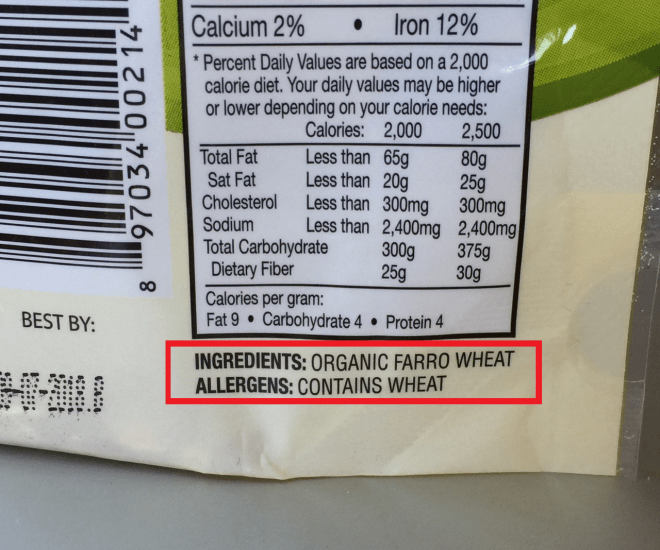 Don’t follow the package directions for cooking. A better way is to cook it in a large pot of water, then drain it (like pasta). This alleviates the possibility (and, for me, the almost certainty) of burning when the water runs out.
 While the farro is cooking, in another pot, bring 2 cups of water to boil. Add in
  Once the farro is done, drain in a sieve and then pour onto a rimmed cookie sheet. Spread out evenly in order to cool and dry the farro. This should take 15-20 minutes.
 To assemble the salad, place the tomatoes, asparagus, snap peas, and Feta in a large bowl. Add the farro on top (this way the dressing will be absorbed into the farro). Whisk the vinaigrette briefly and drizzle on. Stir the ingredients to blend. Let set about 20 minutes to allow the flavors to mix.