
Yummy Homemade Yogurt
After my last post – Roasted Carrots – Shaking It Up A Little – I felt the need to redeem myself in your eyes – to prove to you I AM a frugal (cheap) and careful (paranoid – as in wondering, ‘Whose disease ridden hands have been touching my food?!’) cook. In that post I confessed to using bagged, ready-to-go carrots. I’m planning on buying unbagged carrots next time I shop….unless, of course, the bagged are on sale – in which case all bets are off. Cheap trumps paranoid every time.
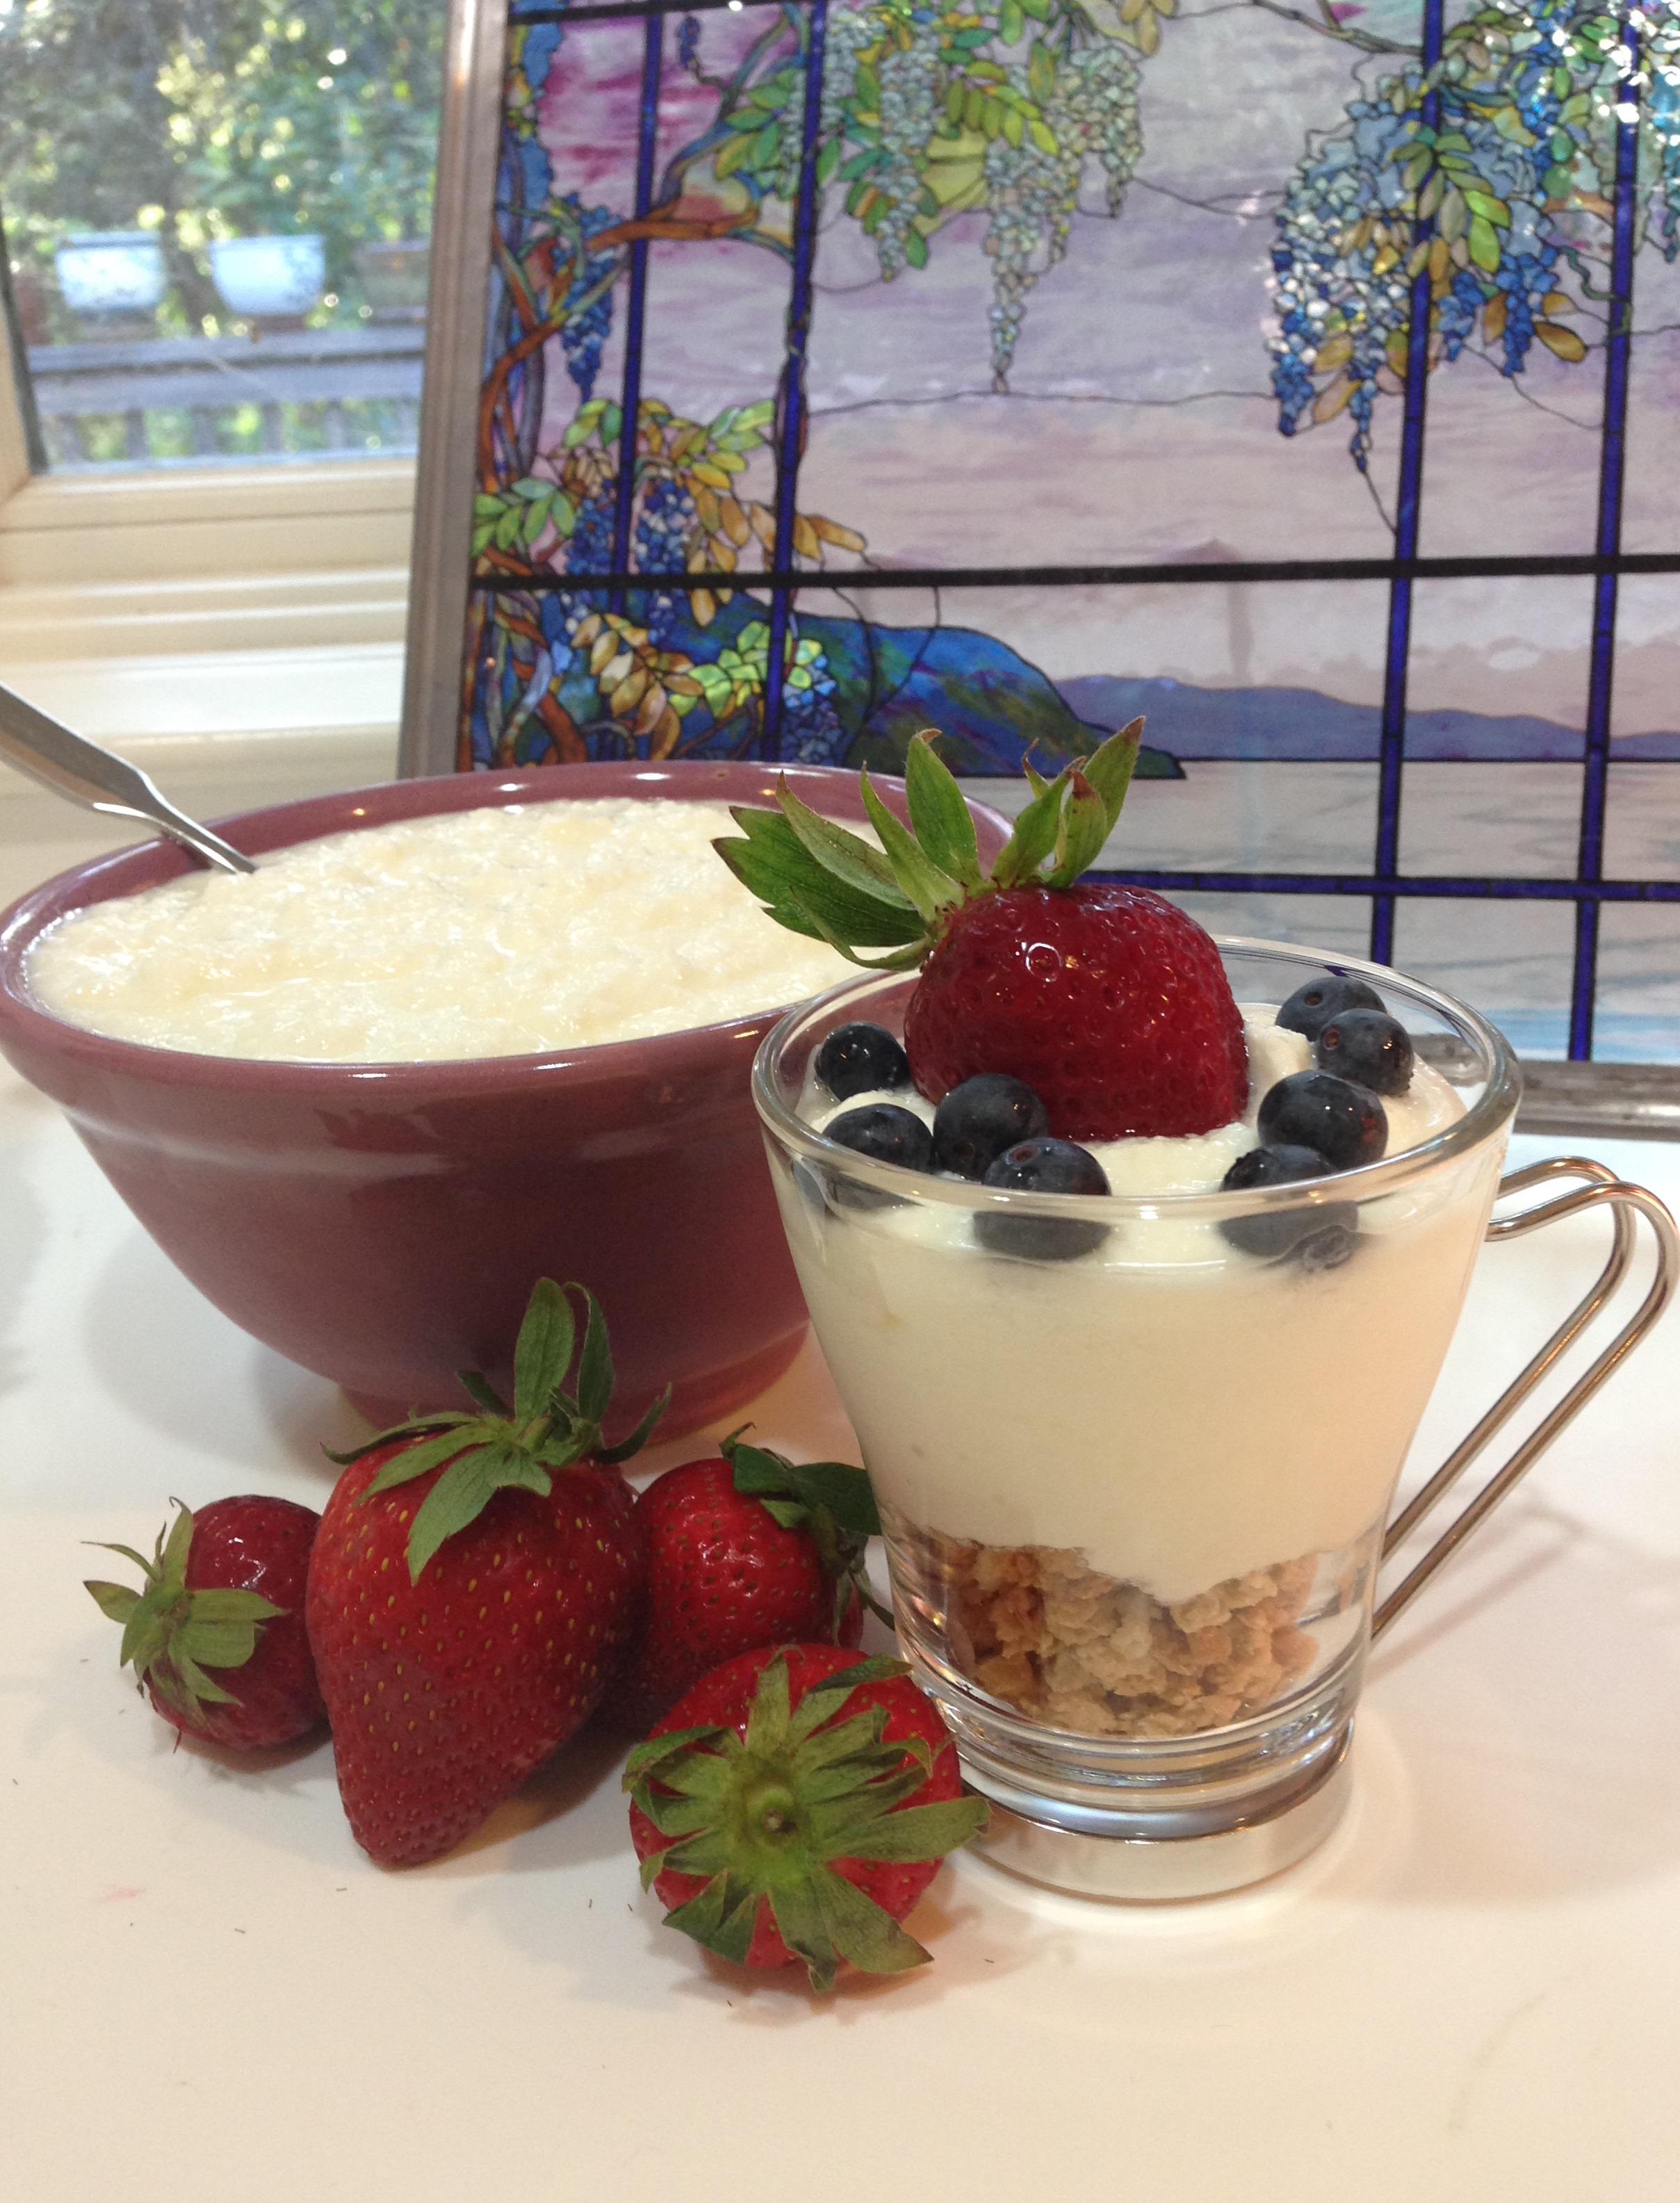
So, how about this: I make my own yogurt! And I don’t mean I buy the plain, then add in fruit. I actually grow my own. People are often astounded when I tell them that. In truth, it’s the easiest thing in the world – once you learn the secret: make it in a thermos. Crazy? Crazy like a fox!
I remember my dad making yogurt, although we called it by the Armenian name – madzoon. I can still see him opening the oven door and removing a stockpot full of fresh yogurt. We used to eat it with crushed strawberries. It was so good. And healthy! I firmly believe that’s why Armenians live to such a ripe old age even though they are often a smidge overweight (I’m trying to be tactful. Holiday dinners were always in 2 parts: Part 1 – the freshly made dinner. Part 2 – everyone had recovered from Part 1, reheated the food, and eaten again.)
When I left home, I bought the container yogurts because that’s what everyone did. You know those container brands: you turned them over and the yogurt plopped out but kept the container shape. My dad’s yogurt never did that. Then I found Yoplait and it was more like the real thing. But, it was expensive. Finally, I decided to make my own and save money (me?). I found a recipe, mixed up my yogurt, and then put it in the oven to grow, the way my dad did. Nothing happened. I threw that batch out and tried again. Again – nothing happened. I wondered if it was my oven – too hot? not hot enough? I gave up – I was throwing money down the drain, rather than saving it.
Then one day I was thumbing through a giant how-to book I’d borrowed from the library. (I love how-to books!) And there it was: make yogurt in a thermos. Now THAT sounded interesting. I tried it and – hurrah! – it worked. When I thought it through, I realized that a thermos was the PERFECT venue to grow yogurt. As Mr. Spock would say, ‘It’s only logical.’ In order for the yogurt culture to grow, you need a constant temperature and it needs to be left alone (like Greta Garbo). What could be better than a thermos?
I used to make my yogurt in a 32 oz mirrored-interior Aladdin thermos. It worked great. If you’d like to see my video for making yogurt, go to: Yogurt Made In A Thermos. Since then, however, I’ve bought a larger and wider mouthed thermos: a 68 oz stainless steel Thermos Brand thermos that I got on Amazon. (My family goes through a lot of yogurt.) With the wider mouth, it’s so much easier to remove the yogurt. Bonus! And, for some reason, the yogurt is coming out creamier. Double Bonus! Finally, the interior will never shatter if you accidentally knock it over – (yeah- I’ve done that twice). Triple Bonus!
Yogurt offers lots of health benefits: it has calcium (good for bones), bacteria (good for the gut), helps boost the immune system, and may reduce blood pressure – to name a few. Google ‘yogurt’ and read about it. It’s amazing! I eat yogurt nearly everyday. In fact, my brother lost 20 pounds and the only thing different in his life was he started eating yogurt every morning. Maybe not scientific proof… but anecdotal. And it couldn’t hurt.
Besides saving tons of money by making it yourself, homemade yogurt has no additives or preservatives or thickeners or added sugars. Take a look at the ingredients list on the side of a carton of store-bought yogurt – almost without exception, there will be things on that list that you’d be better off without. All that should be in yogurt is milk and a bit of culture from your last batch. (I’ve heard you can freeze that starter culture until you’re ready to use it – but I’ve never tried it.)
NOTE: If you’ve never eaten homemade yogurt, it might take some getting used to. Commercial yogurt has sugar to sweeten it up. The real thing is pretty tart. Since I grew up eating it, it doesn’t bother me at all. But you may need to add fruit (which is a great way to fulfill that pesky daily fruit requirement) and/or granola. Just make sure you don’t add anything to the whole batch before setting aside enough to start your next batch.
YOGURT IN A THERMOS – makes 32 oz of yogurt (recipe can be doubled – use a bigger themos)
- 3¾ cups milk (I use organic nonfat)
- ¼ cup PLAIN yogurt (if you don’t have some from your last batch, buy plain yogurt)
- Optional: 1 cup powdered milk (I use this to thicken up my yogurt since I used nonfat milk)
Over a medium-low flame, heat the milk and powdered milk (if using) to 180º F – stirring often. Remove from heat and let cool to 112º F. While it’s cooling, prime your thermos by filling it with hot water – by doing this the warm milk won’t lose heat when it’s poured in. When the milk has reached 112ºF, gently stir in the yogurt starter. Empty the water from the thermos and pour in the milk mixture. I STRONGLY suggest you use a funnel when pouring so you get the milk IN the thermos instead of ON your counter. (I learned THAT the hard way!) Then, set the filled thermos aside where it won’t be disturbed.
The yogurt needs 8-12 hours to grow – the longer it grows, the tarter it gets. There’s no right or wrong – it’s all a matter of preference. I like mine to grow 12 hours or a little less. When time is up, empty the yogurt out of the thermos and into a container. Store in the fridge. If your thermos has a narrow mouth, you’re going to need to be a little creative because the yogurt won’t pour out. I’ve taped a narrow spatula to a long wooden spoon and, also, used the stick end of a really long wooden spoon.
For those of you Greek yogurt fans out there, all you have to do is drain the whey from your homemade yogurt. Let the newly made yogurt cool in the fridge first, then line a large sieve or colander with a tea towel or coffee liners and pour in the yogurt. Make sure you have a container to catch the whey – it starts dripping out immediately. And save the whey for future use (google it) – it can be frozen. You know me – I hate waste!
NOTE: Make sure you have a thermometer that registers as low as 112º F. I used to use a glass candy thermometer, but after breaking two of them, I finally bought a metal digital. I love it!!!
You may have already worked out the math, but if you haven’t, let me warn you: DON’T START MAKING YOUR YOGURT AT A TIME WHEN THE YOGURT WILL BE DONE WHEN YOU’RE ASLEEP OR NOT HOME! It takes about an hour to heat and cool the milk, then the growing time is 8-12 hours. So add up the hours before starting. Yogurt doesn’t shut off when it’s done – you have to remove it from the thermos and cool it in the refrigerator to stop the process.

Pingback: MAPLE/NUT GRANOLA – Super Easy!!! – Vegetarian Cooking For Carnivores BLOG
Pingback: FALAFEL – Nix The Mix – Vegetarian Cooking For Carnivores BLOG
I realize that I write this is a little after this article was published, but I just found it so what can you do?
I just wanted to suggest not using nonfat milk for yogurt. With nonfat milk, you are not getting the full benefit of the fat-soluble vitamins like vitamin A and vitamin E. I personally use 2%, a happy compromise.
Thanks, Jeremy! I agree with you – sometimes I use 2%, 1%, and even whole milk. I sort of change it up a bit depending on what I’m doing with the yogurt (and where my weight is – lol) – besides using it for yogurt shakes almost daily, I also strain it and use it in place of sour cream. I, also, don’t use the powdered milk anymore. I hope you start making your own – then you know what’s in your yogurt, and save money!
I love your tips, Bonnie, and the story of your dad making yogurt! I used a local live bacteria yogurt and whole raw milk – heated first- and the oven light in the 70s and 80s – yum! We sometimes skimmed off the yogurt cream and used for butter.
Now I use coconut milk and the L-ruteri strain (with a longer ferment) and am thinking of using a wood mouthed thermos as well ❤
https://rosecottagecharm.blogspot.com/2023/04/cooking-in-rose-cottage.html