
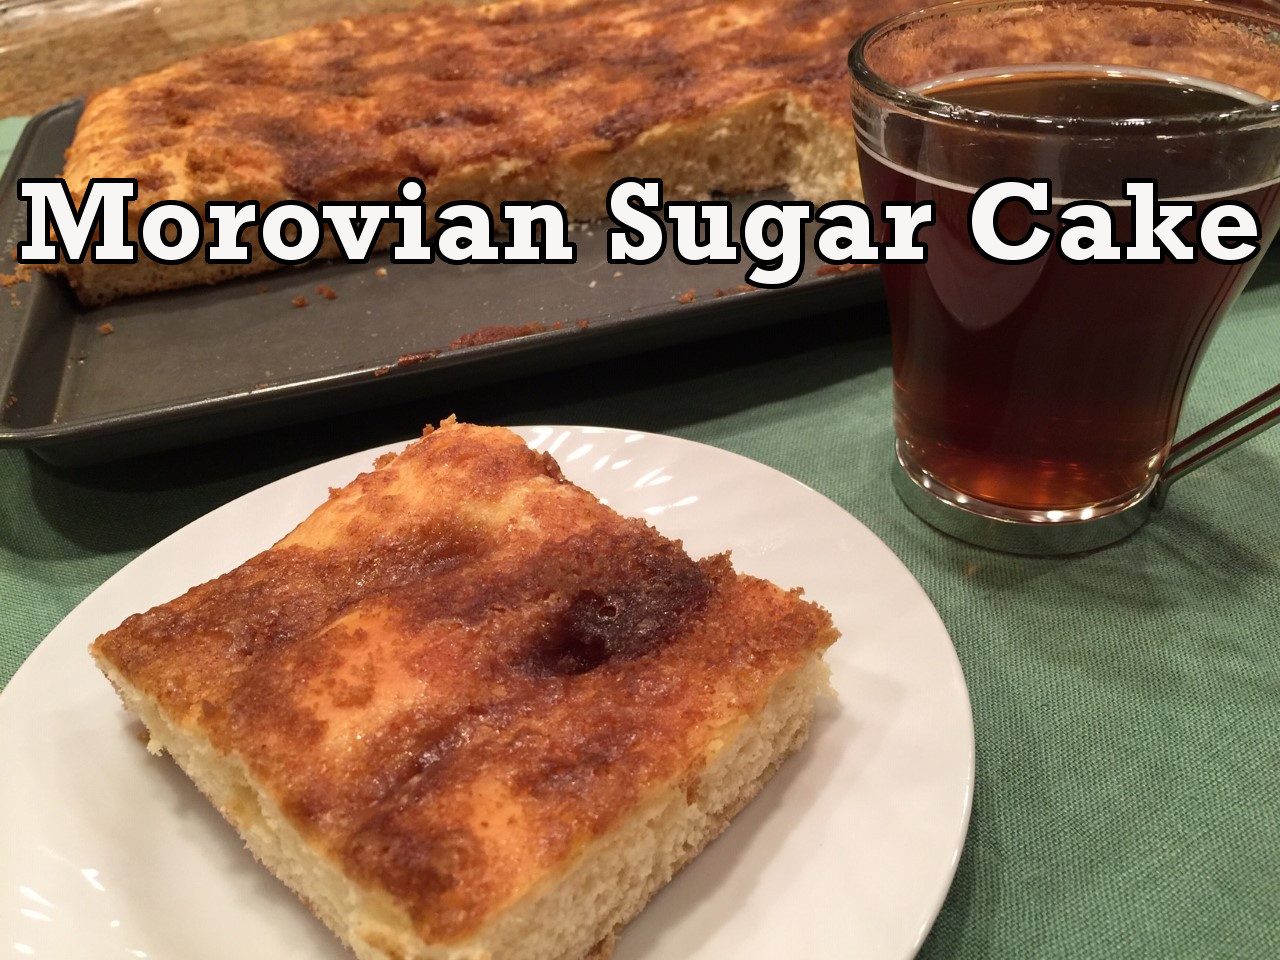
 My introduction to Morovian Sugar Cake was a little bittersweet.
I found the recipe in a newspaper (this was well before the internet!) and it sounded intriguing. Being very young and inexperienced in the kitchen, I didn’t allow myself quite enough time. I was able to get it in the oven before I needed to go to work, but my roommates were left in charge of removing it.
All that remained when I got home was one 3″ X 3″ square. They said it was so good they couldn’t stop eating it. I ate the remains, and it was magnificent. In fact, I was amazed they were able to leave me any.
Note 1: Don’t repeat my mistake – allow enough time for rising!
Note 2: Make sure all ingredients are at room temperature. Chilled ingredients (eggs, flour, potato flakes) will inhibit the rise.
MOROVIAN SUGAR CAKE
- 227g (1 cup) water 100º – 104º Fahrenheit
- 2 tsp yeast
- 101g (1/2 cup) granulated sugar
- 12g (1/4 cup) instant mashed potatoes flakes
- 20g (1/4 cup) instant dry milk
- 1 tsp + 1/8 tsp salt, divided
- 84g (6 T) + 84g (6 T) butter, melted, divided
- 2 eggs
- about 572g (4 ½ cup all-purpose flour
- 96g (1/2 cup) brown sugar (dark or light)
- 1 tsp cinnamon
In a measuring cup stir the water and yeast together. Let proof for 5 minutes. 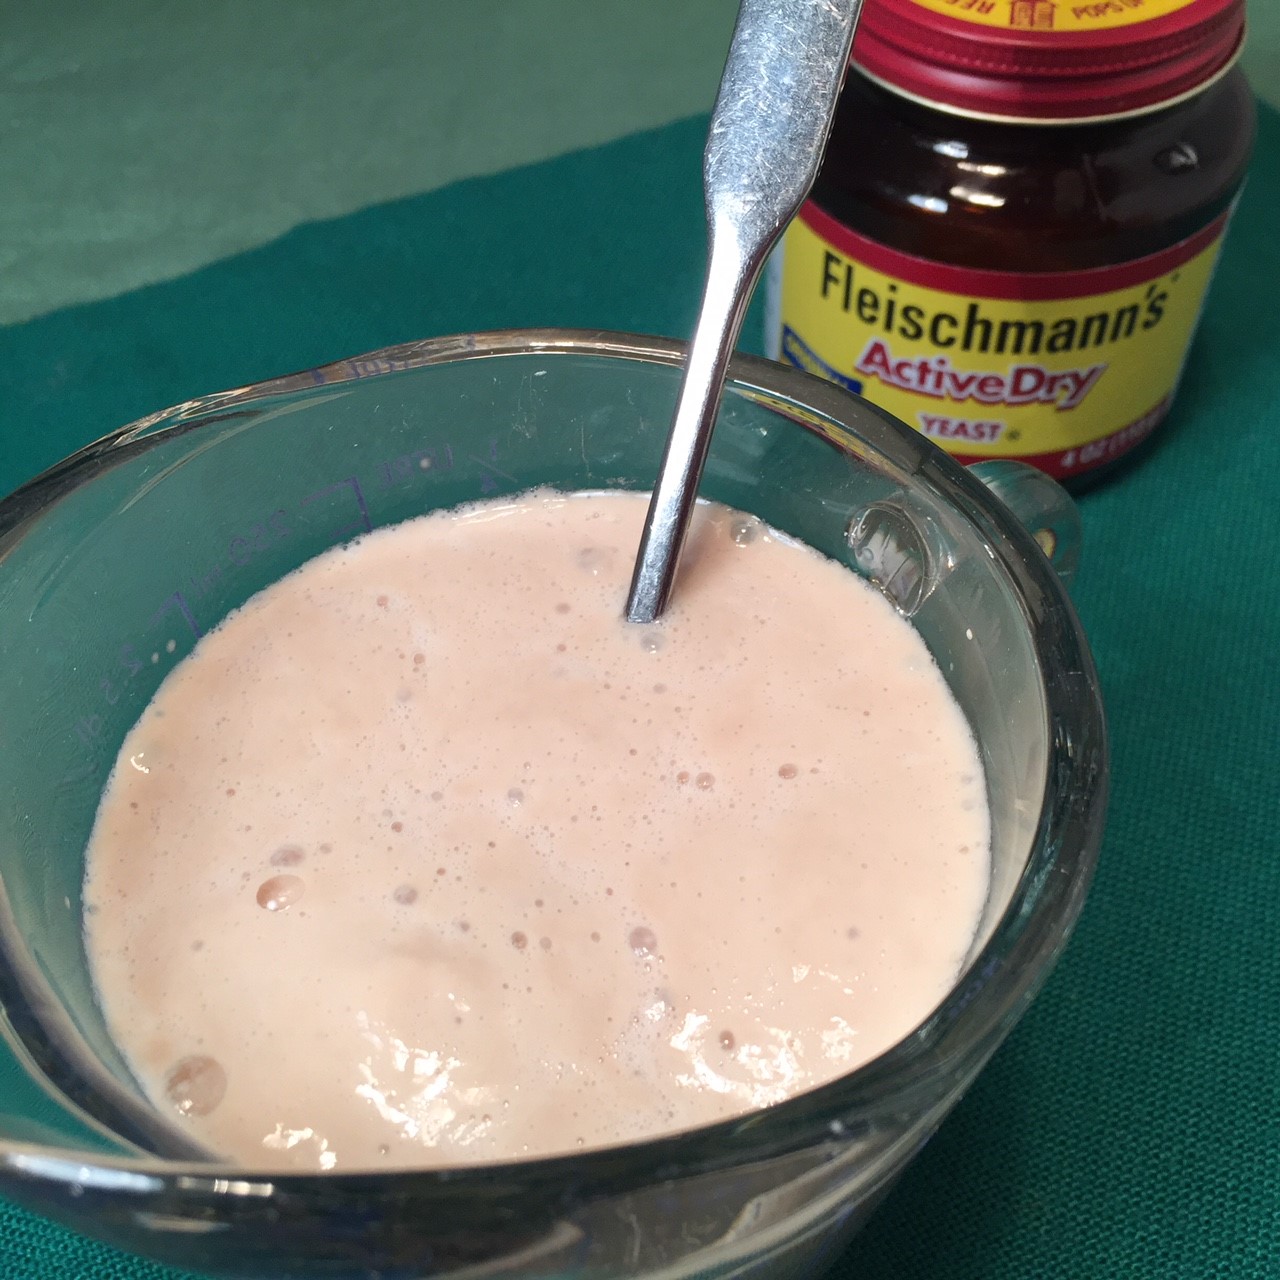
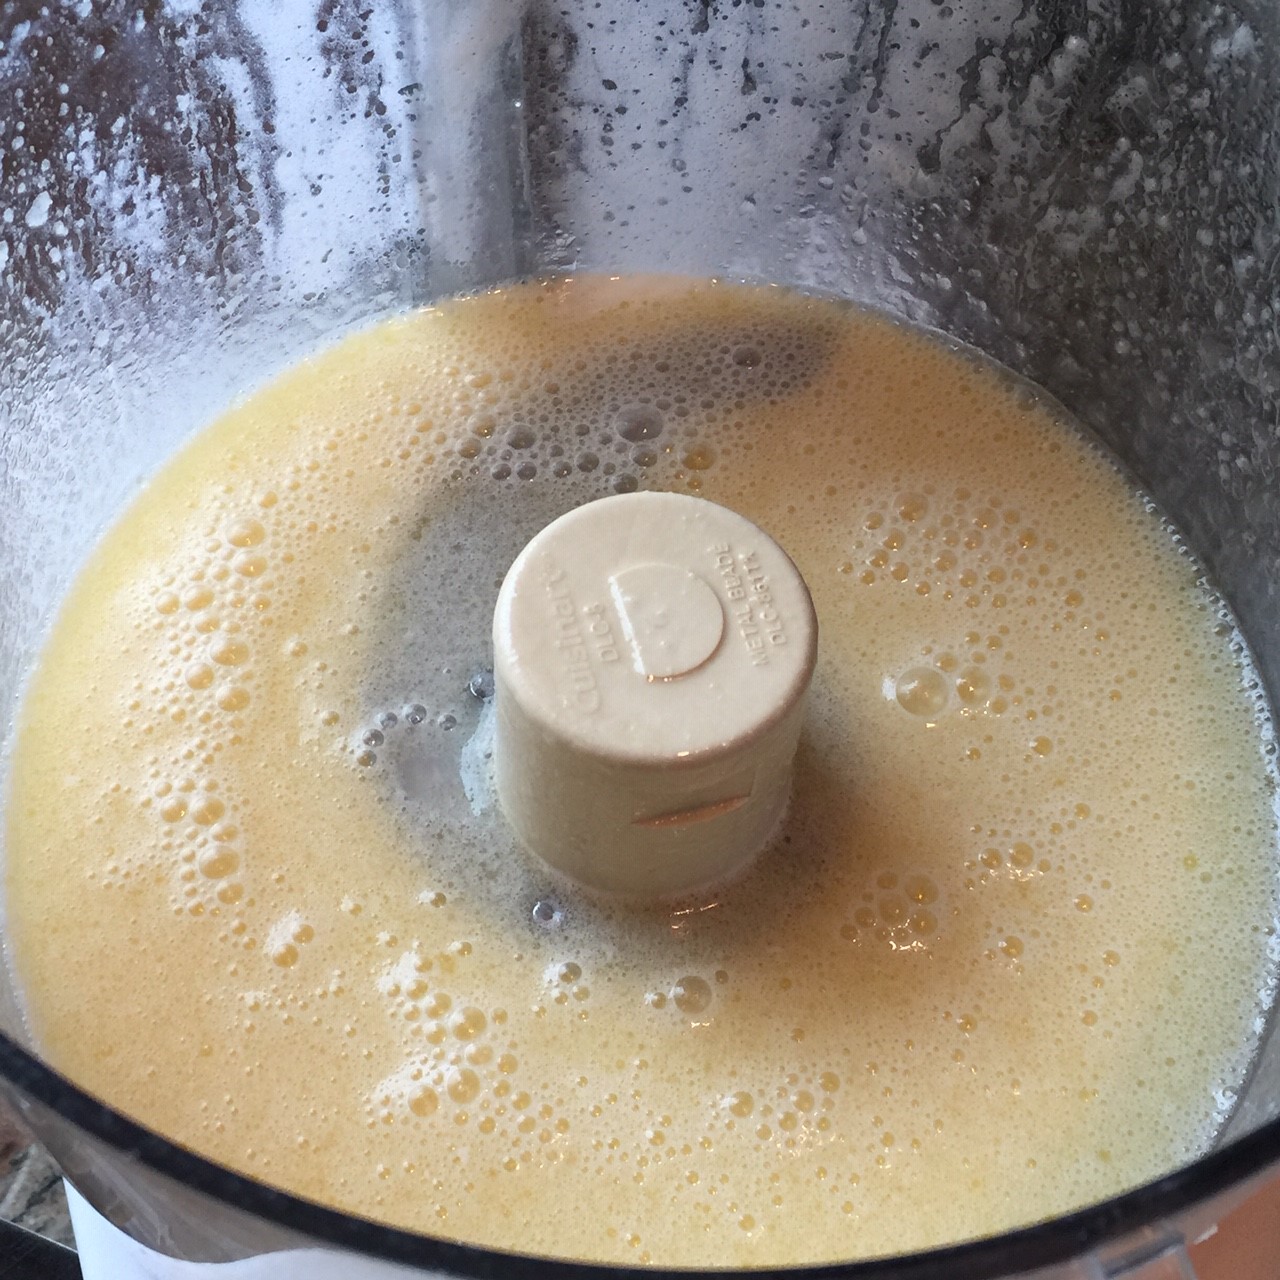
In the food processor, pulse together the granulated sugar, potato flakes, dry milk, and 1 tsp salt. 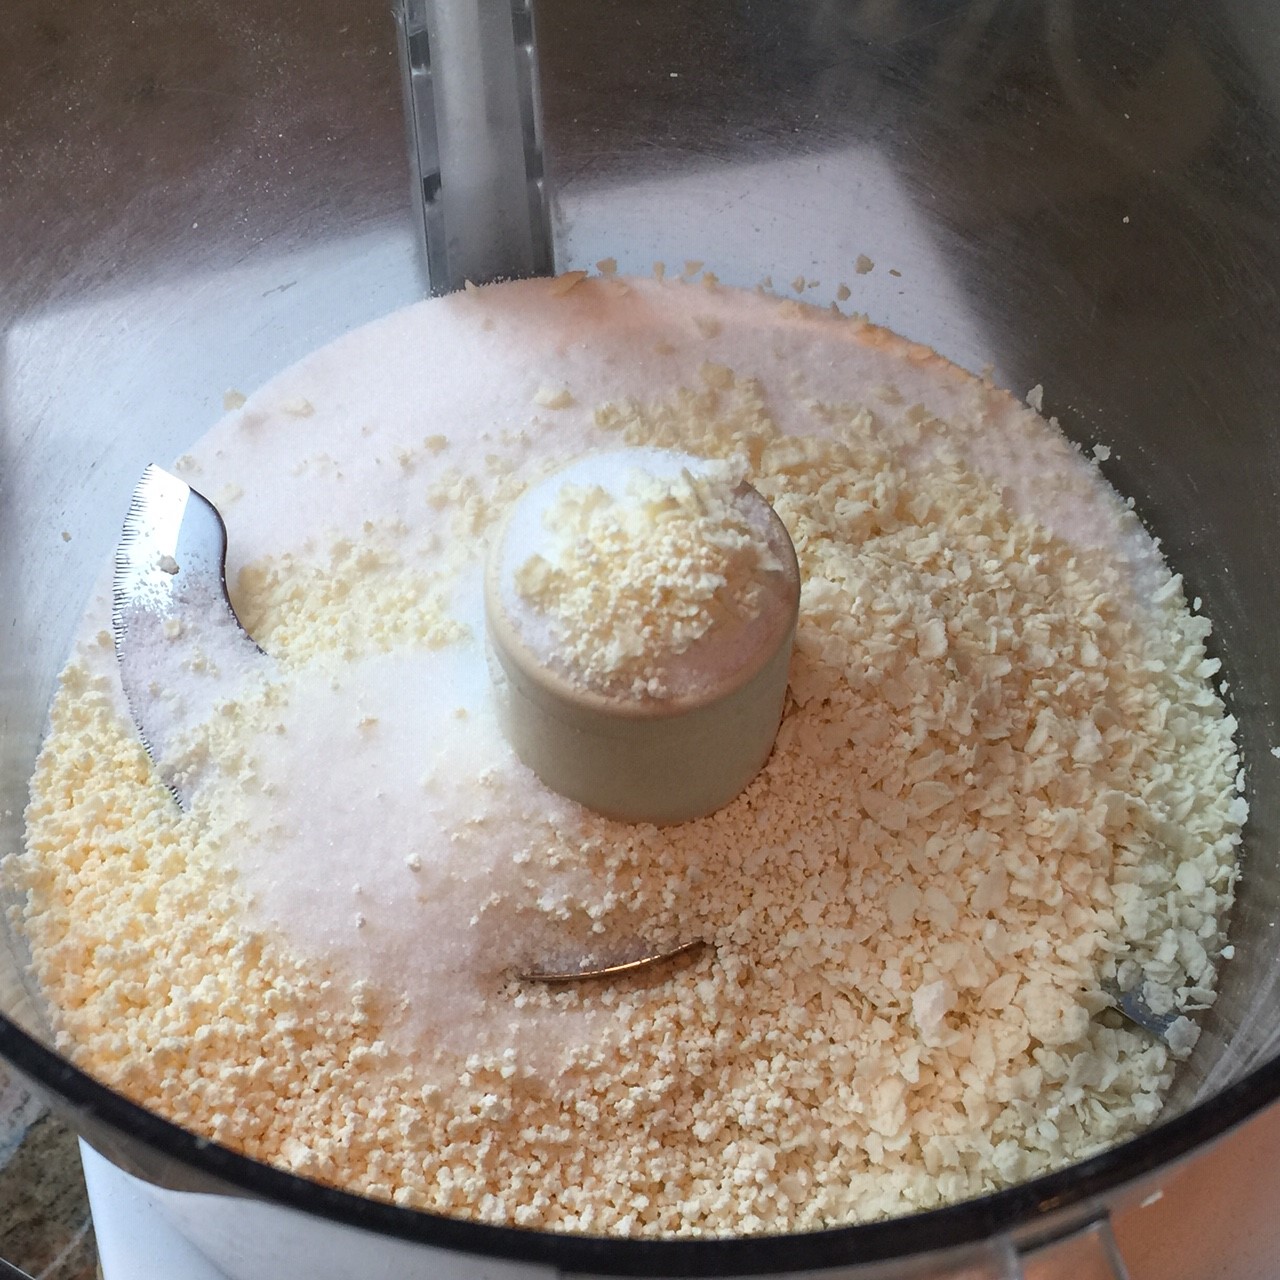 Add in 84g (6 T) butter and eggs. Process to blend.
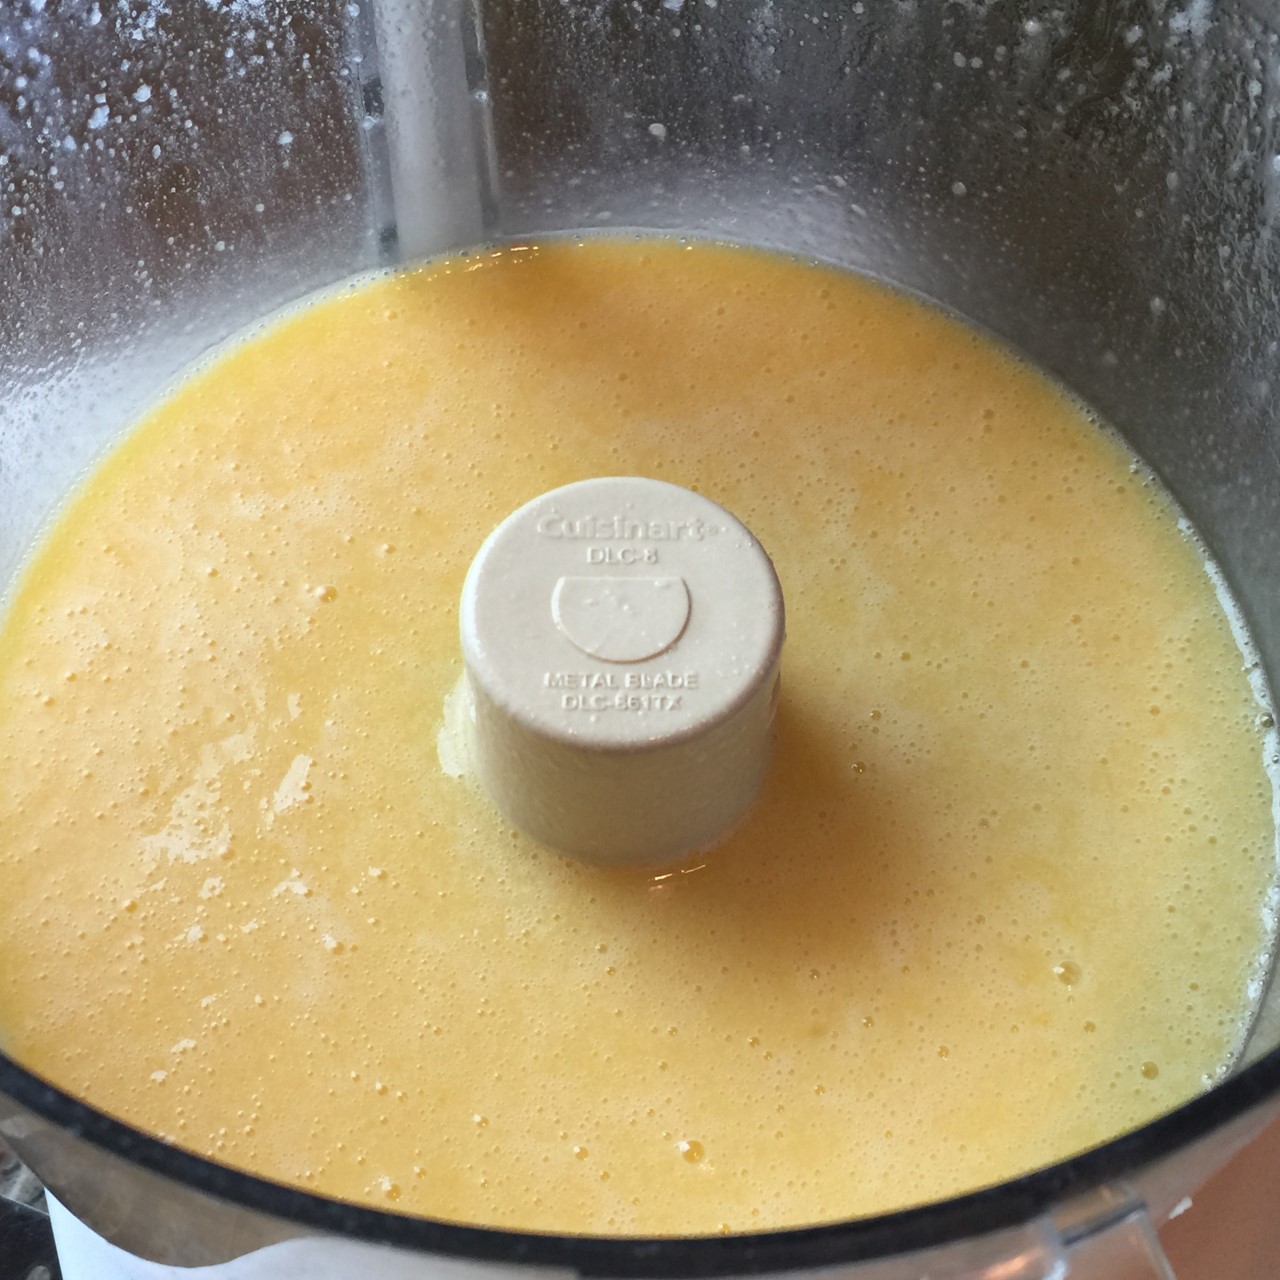 With machine running, pour in the proofed yeast water.
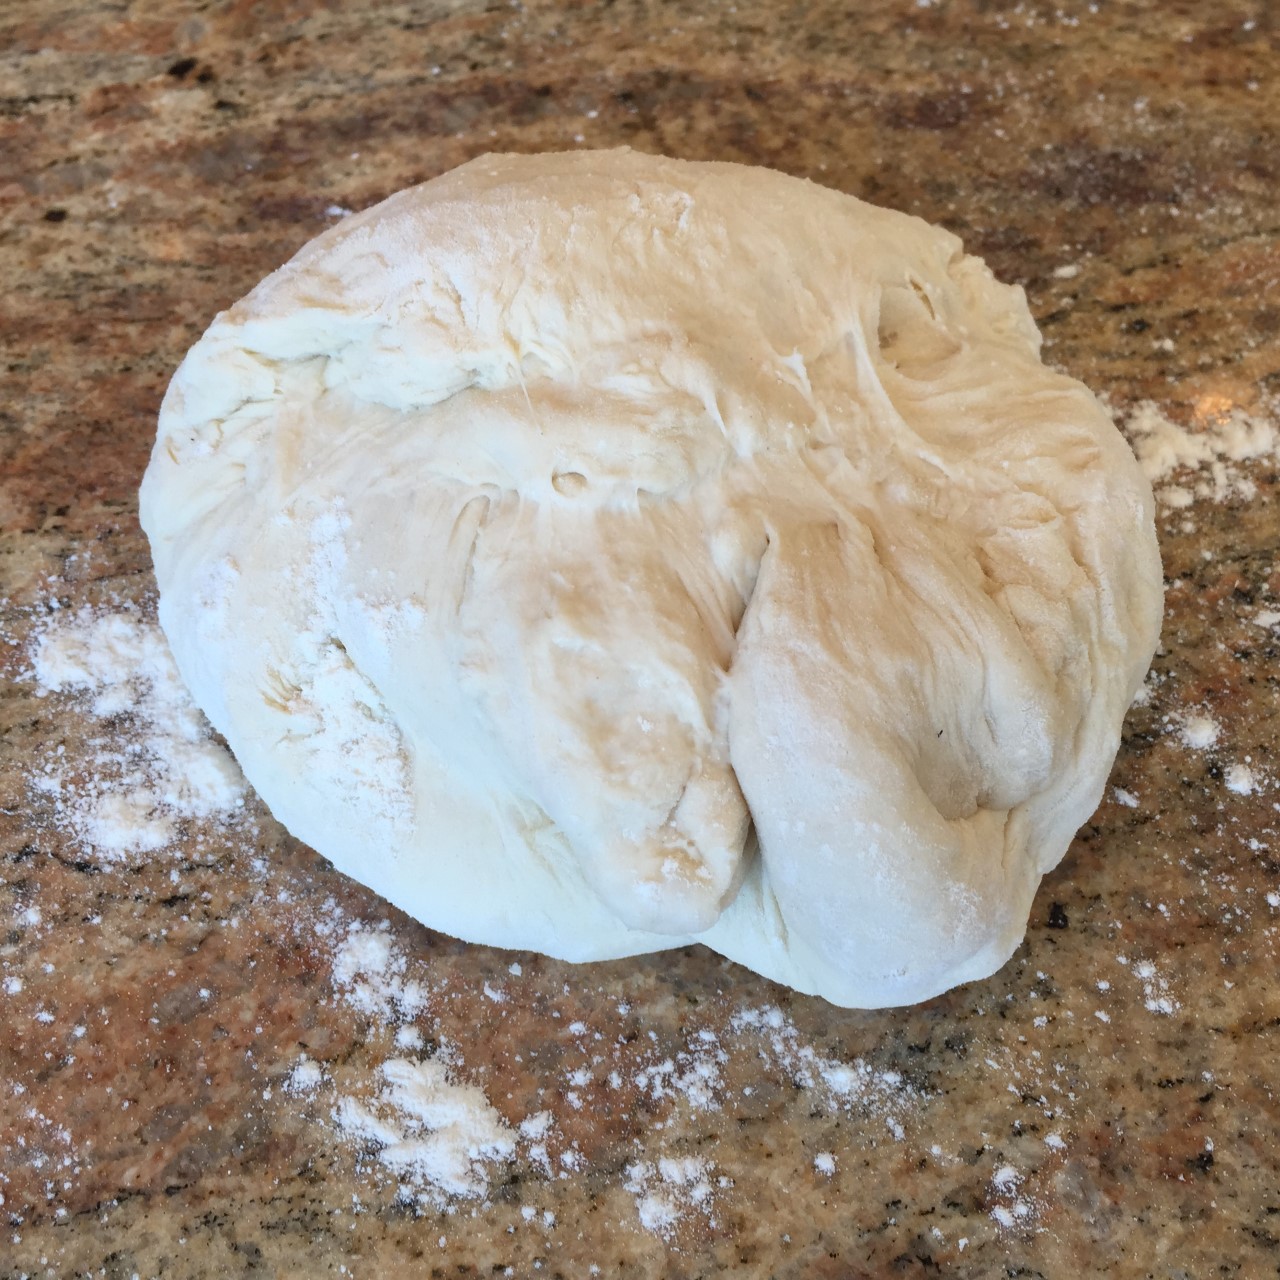
 Add 400g (3½ cups) to processor and blend. Add flour 25g (¼ cup) at a time, processing after each, until dough starts pulling away from sides of the work bowl. Stop adding flour, and run machine another 30 seconds to knead the dough. Empty dough onto a floured surface and knead a few times to bring together.
Place in a greased bowl to rise 1 – 1½ hours.

After dough has risen in bowl, pour into a greased rimmed baking sheet (jelly-roll pan) and pat dough to fill the pan evenly. Cover with a tea towel and let rise about 45 minutes. 
Preheat oven to 350º Fahrenheit.
While dough is rising, in a small bowl, mix together the brown sugar, cinnamon, and 1/8 tsp salt. 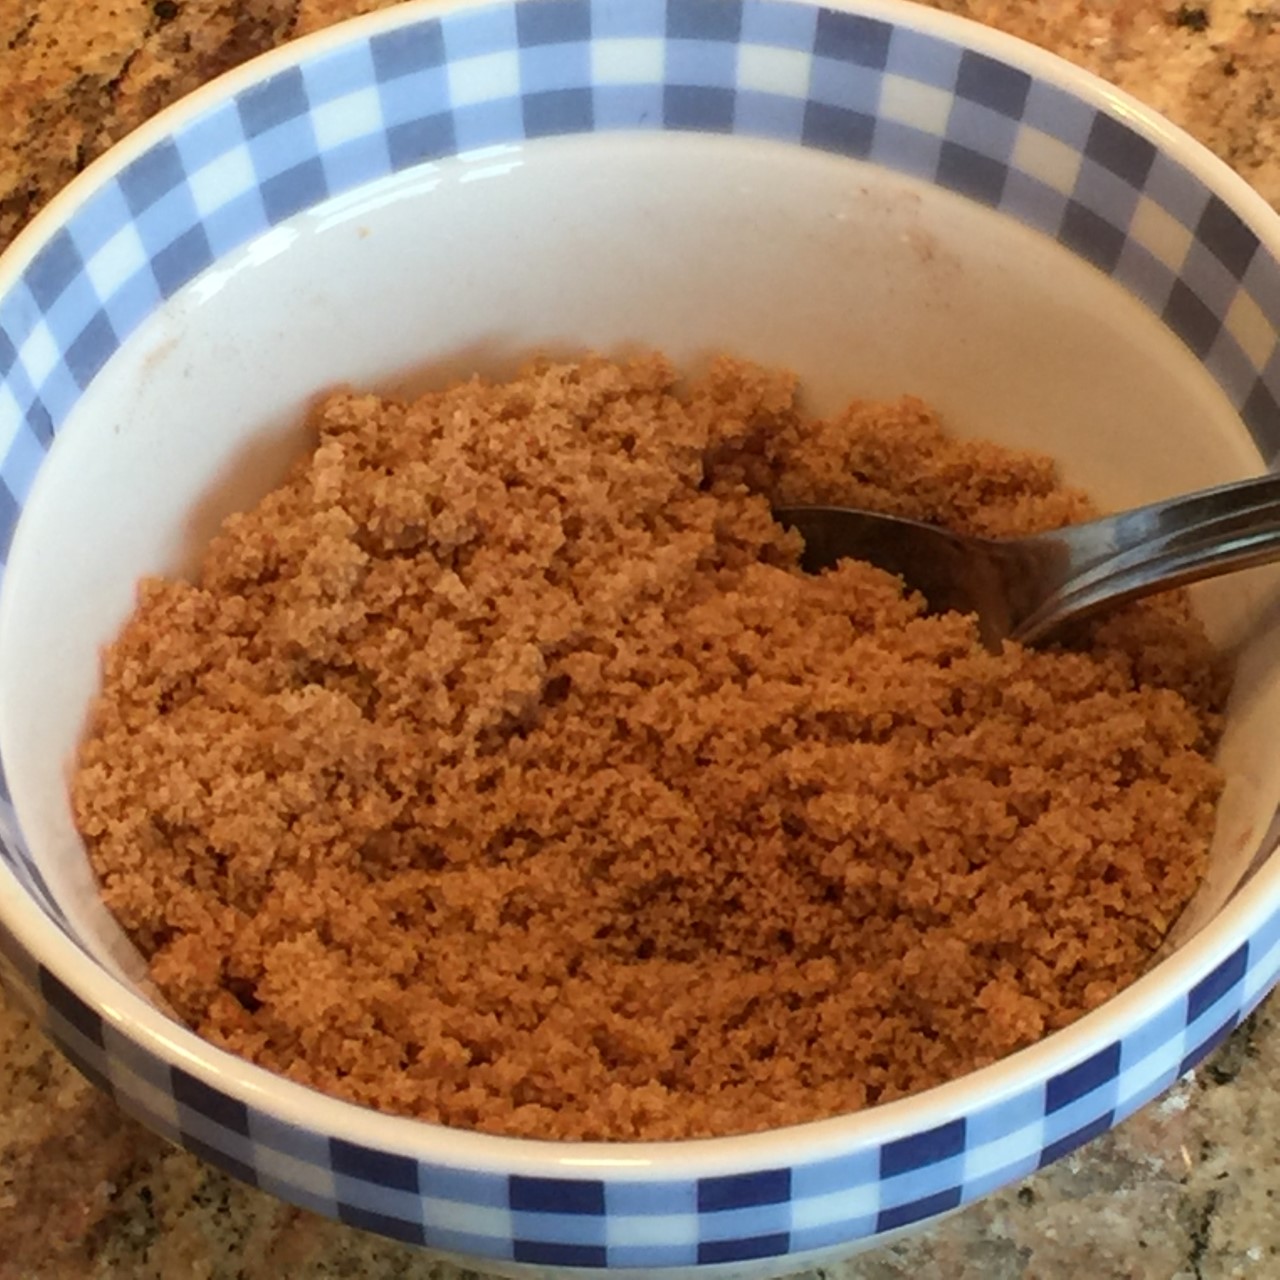 After dough has risen, create pockets with your fingertip, the handle of a wooden spoon, or something else that’s about 1/2″ diameter.
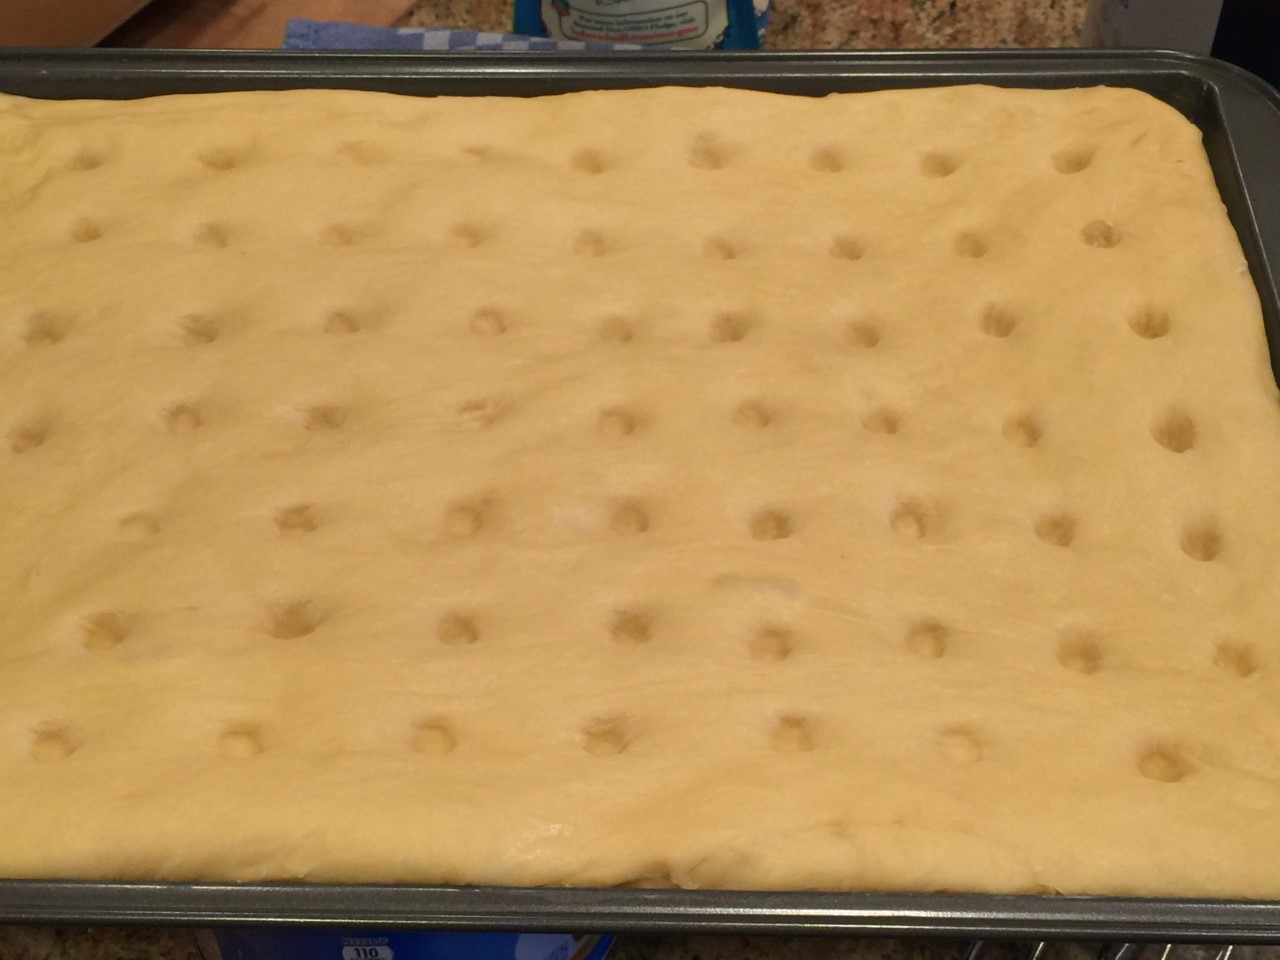 Sprinkle the sugar topping over the entire cake. Drizzle the remaining 84g (6 T) melted butter over all.
  Bake at 350º F for about 20 minutes, until golden brown.
  Cool at least 5 minutes before serving.
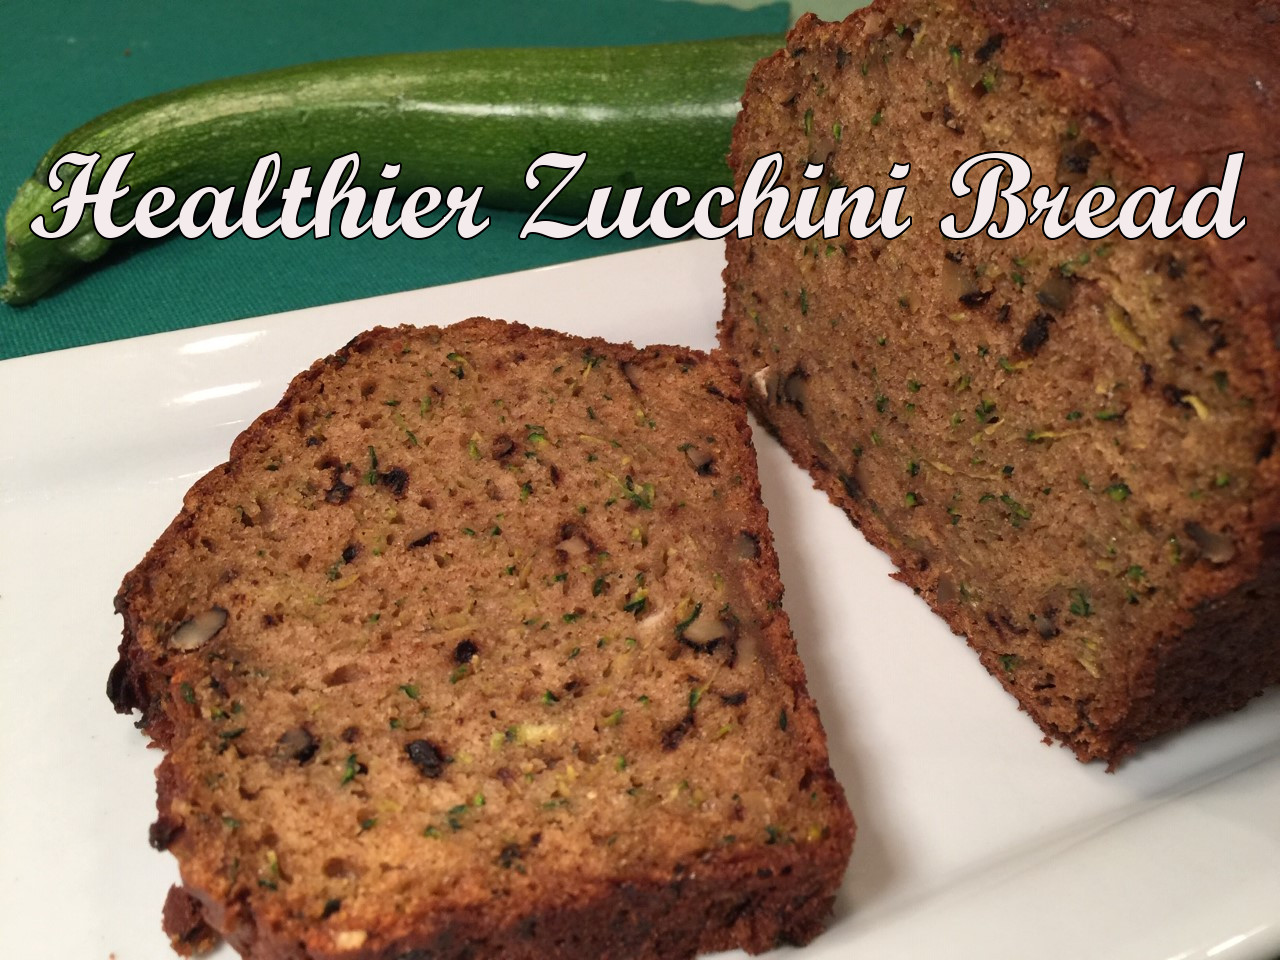 They’re out there and they’re coming – those overzealous gardeners who plant way too much zucchini. You can hear the pleading in their voices – “You want some zucchini? We have lots!”
 Using the large holes of your grater, shred the zucchini. (You can use your food processor or do it by hand.) You’ll have about 5 cups of zucchini. Take a handful of the zucchini and place it in the center of a clean tea towel. Gather the edges together and twist the ball firmly to extract as much liquid as you can. Do this with all the zucchini. (It’s better not to put too much zucchini in the towel at one time.) Discard the liquid, unless you can think of a use for it.
 In a large bowl, beat the egg whites, sugar, oil, vanilla, and vinegar by hand.
 Stir in zucchini.
 Pour in the dry ingredients and gently blend until the flour is incorporated – there can be some flour showing. (Over mixing quick breads can lead to a tough loaf.)
  Pour batter into an oiled metal (or glass, if you don’t have metal) loaf pan and smooth top.
  Bake 60-70 minutes (mine took 65 minutes), until a toothpick comes out clean.
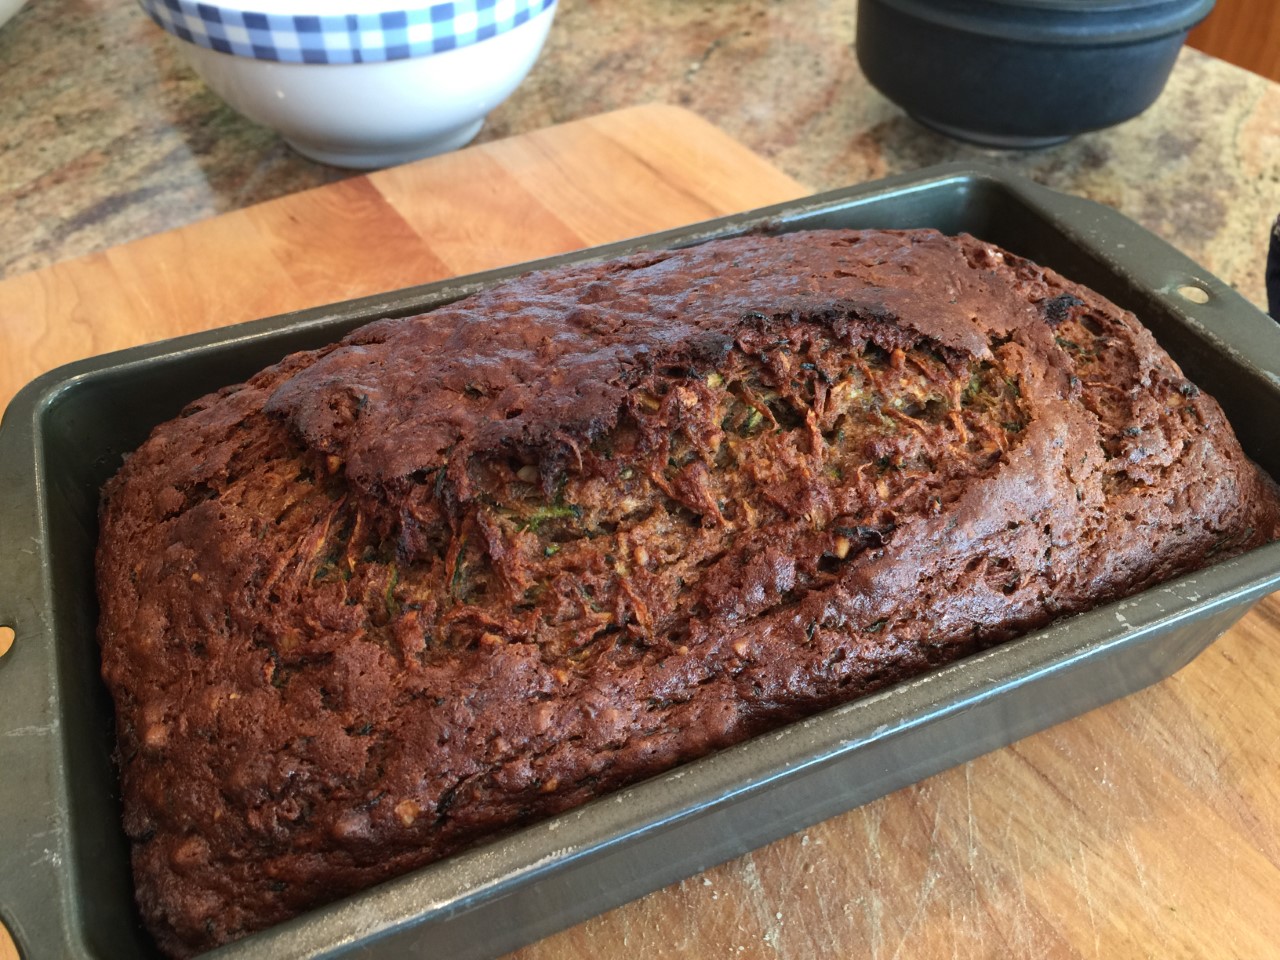 Let sit in the pan for 20 minutes before removing to a wire rack.
  The loaf needs to cool at least 1½ hours to firm up before slicing. Honestly, try and restrain yourself – you’ll get nicer slices if you wait.
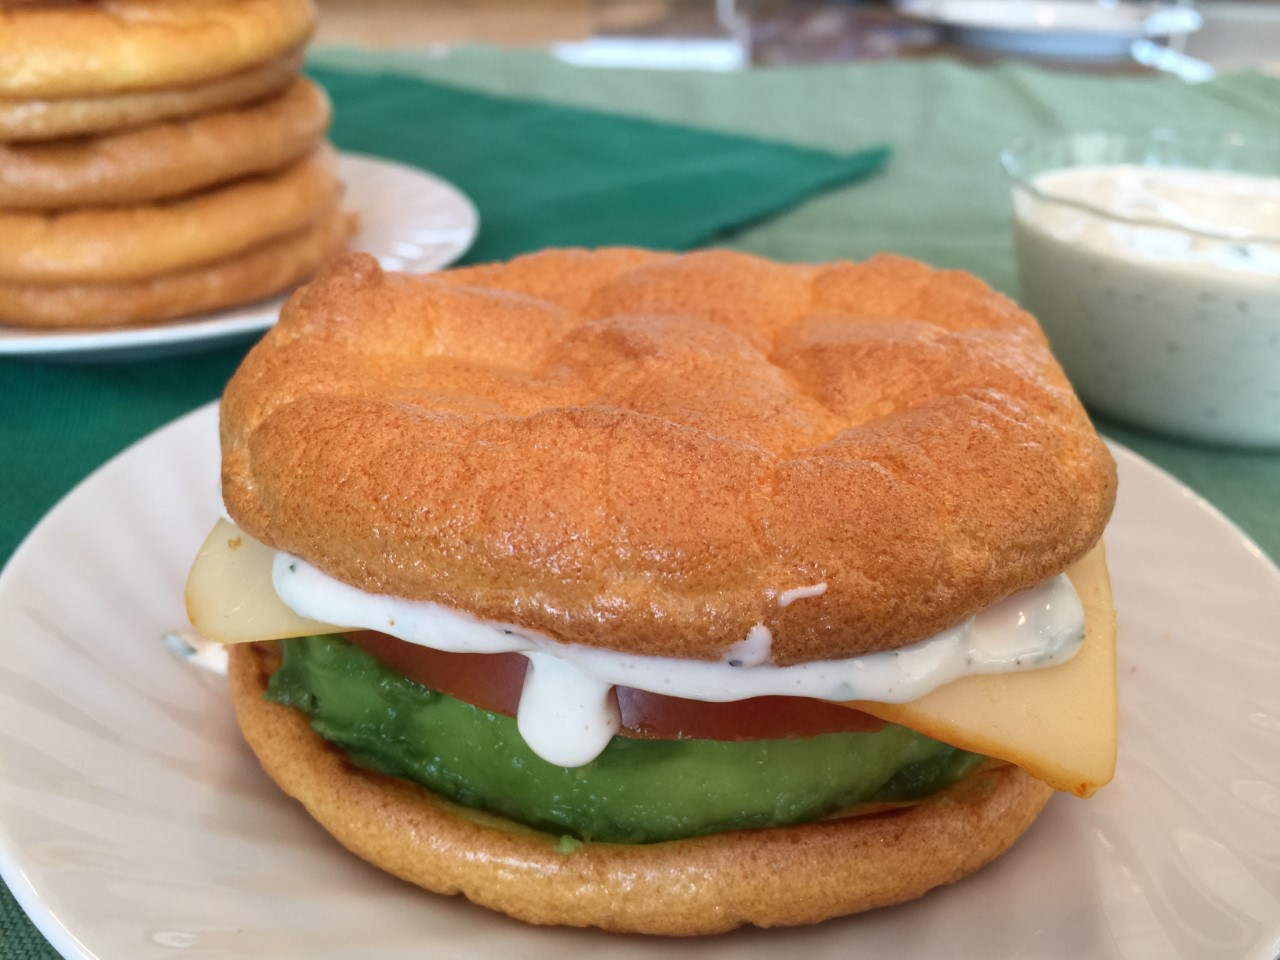
 Turn your electric mixer on medium to break up the whites. When the whites begin to foam, add in the cream of tartar.
 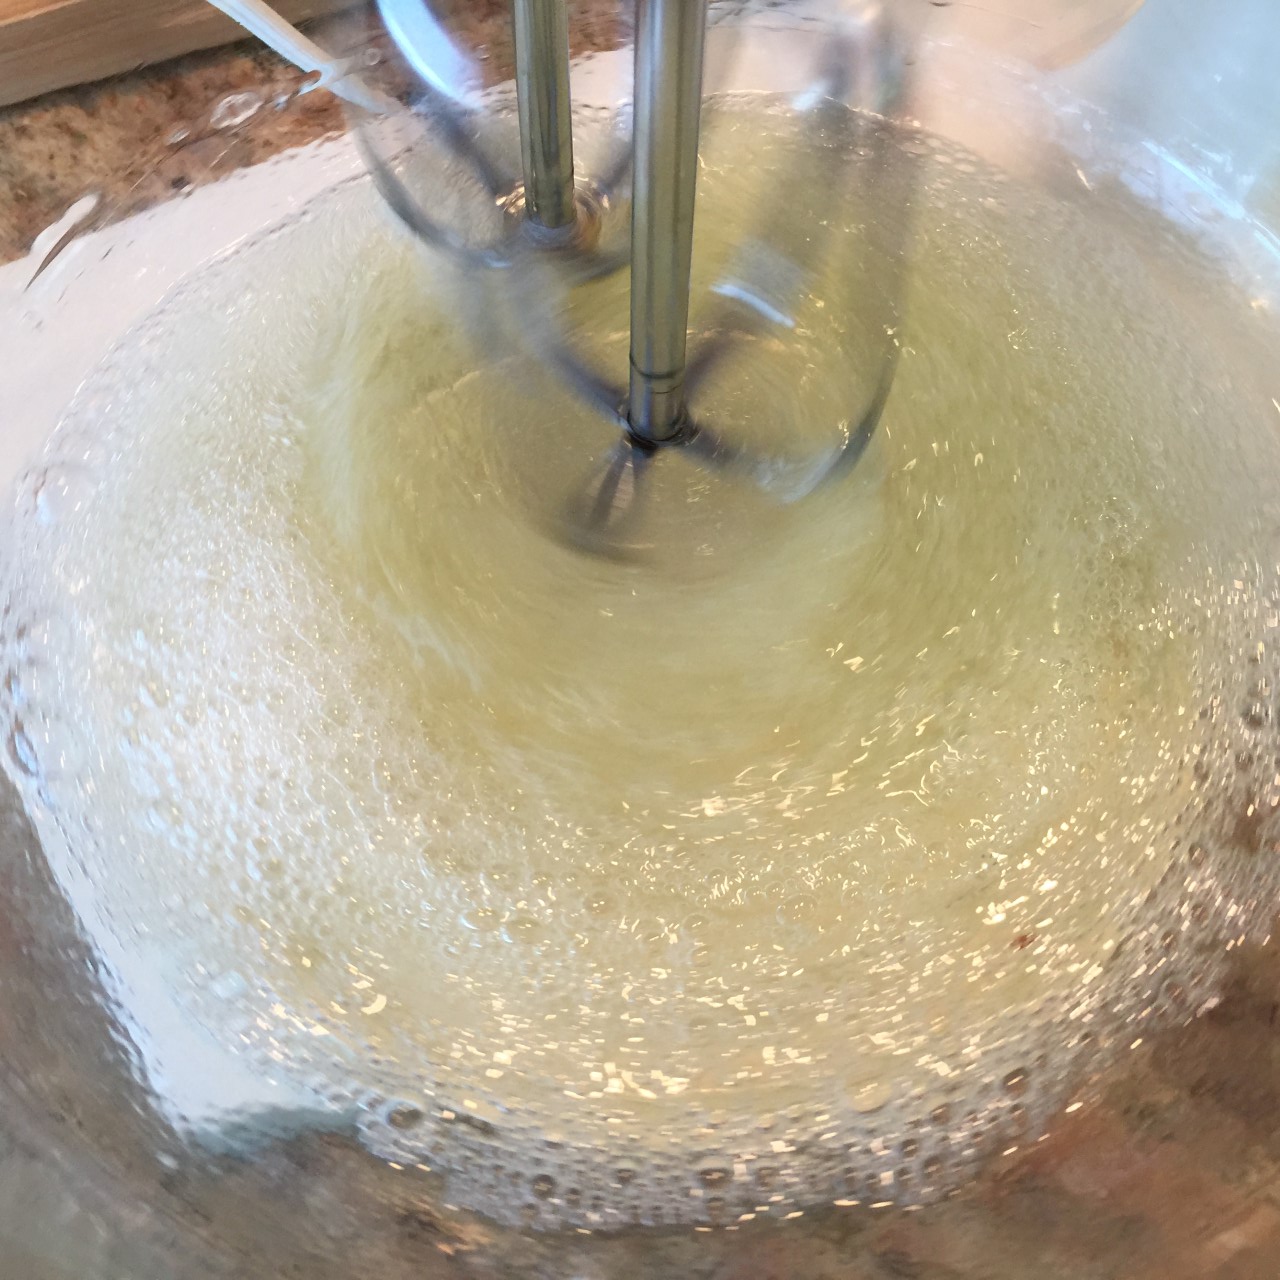 Increase mixer speed to high and beat whites until stiff peaks form.
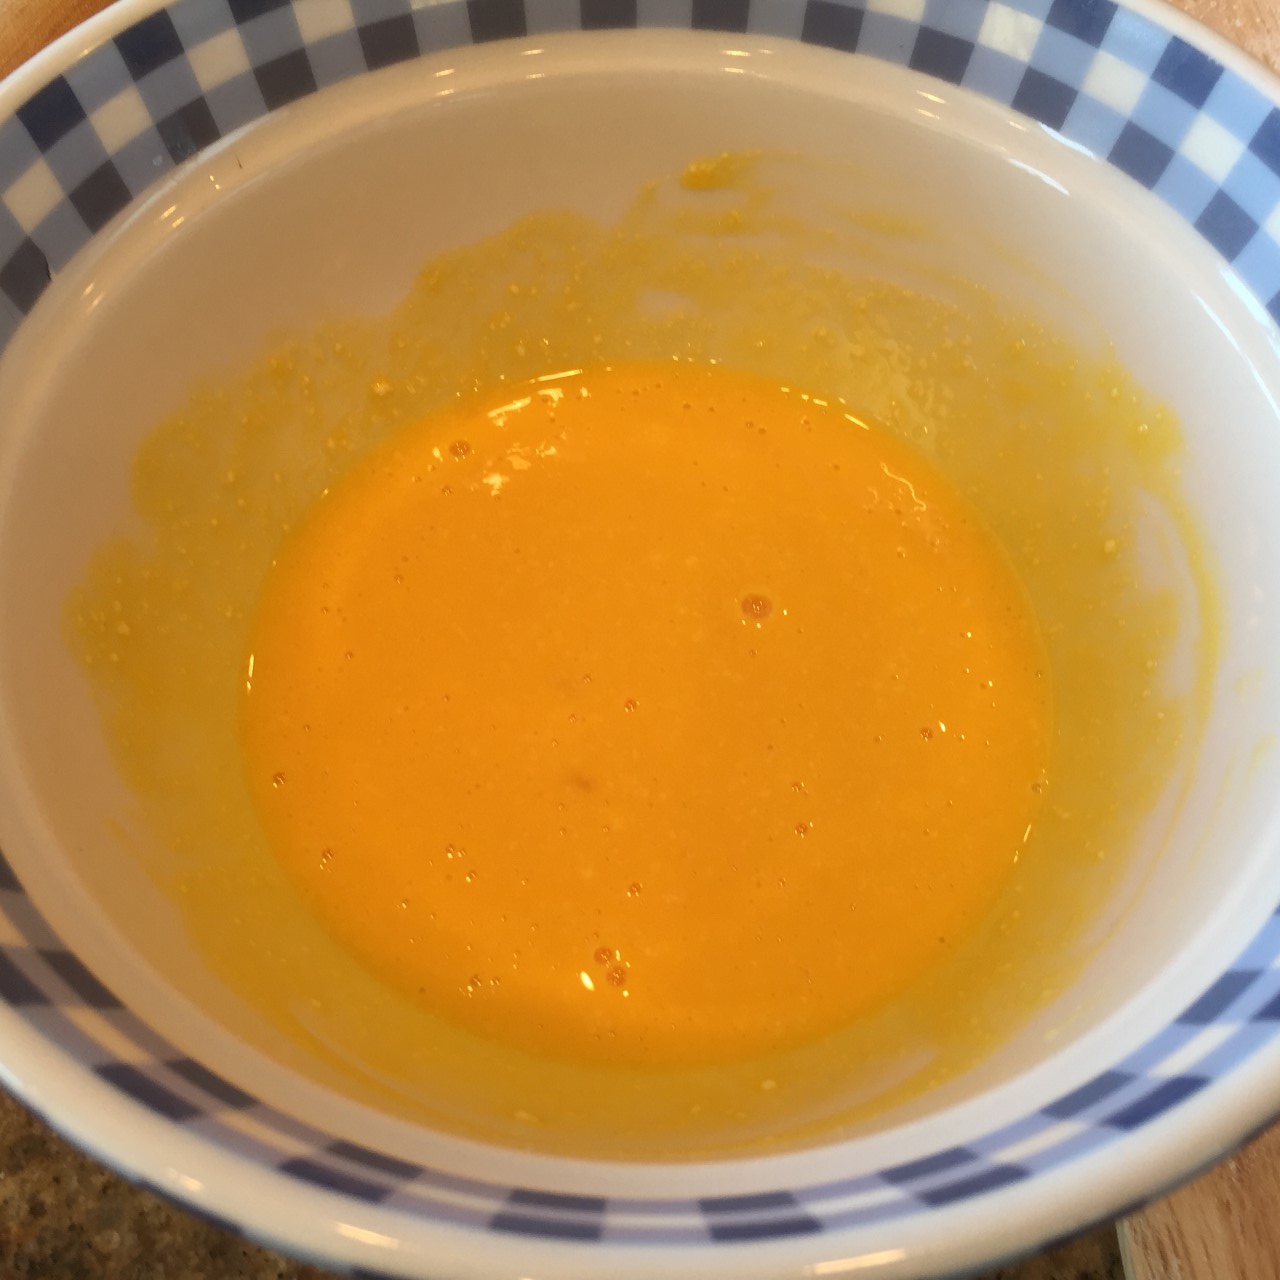
  Pour the yolks/yogurt into the beaten whites and turn on mixer to very low. Beat until the yolks are blended into the whites – this won’t take long. Don’t overbeat – you don’t want to deflate the whites.
 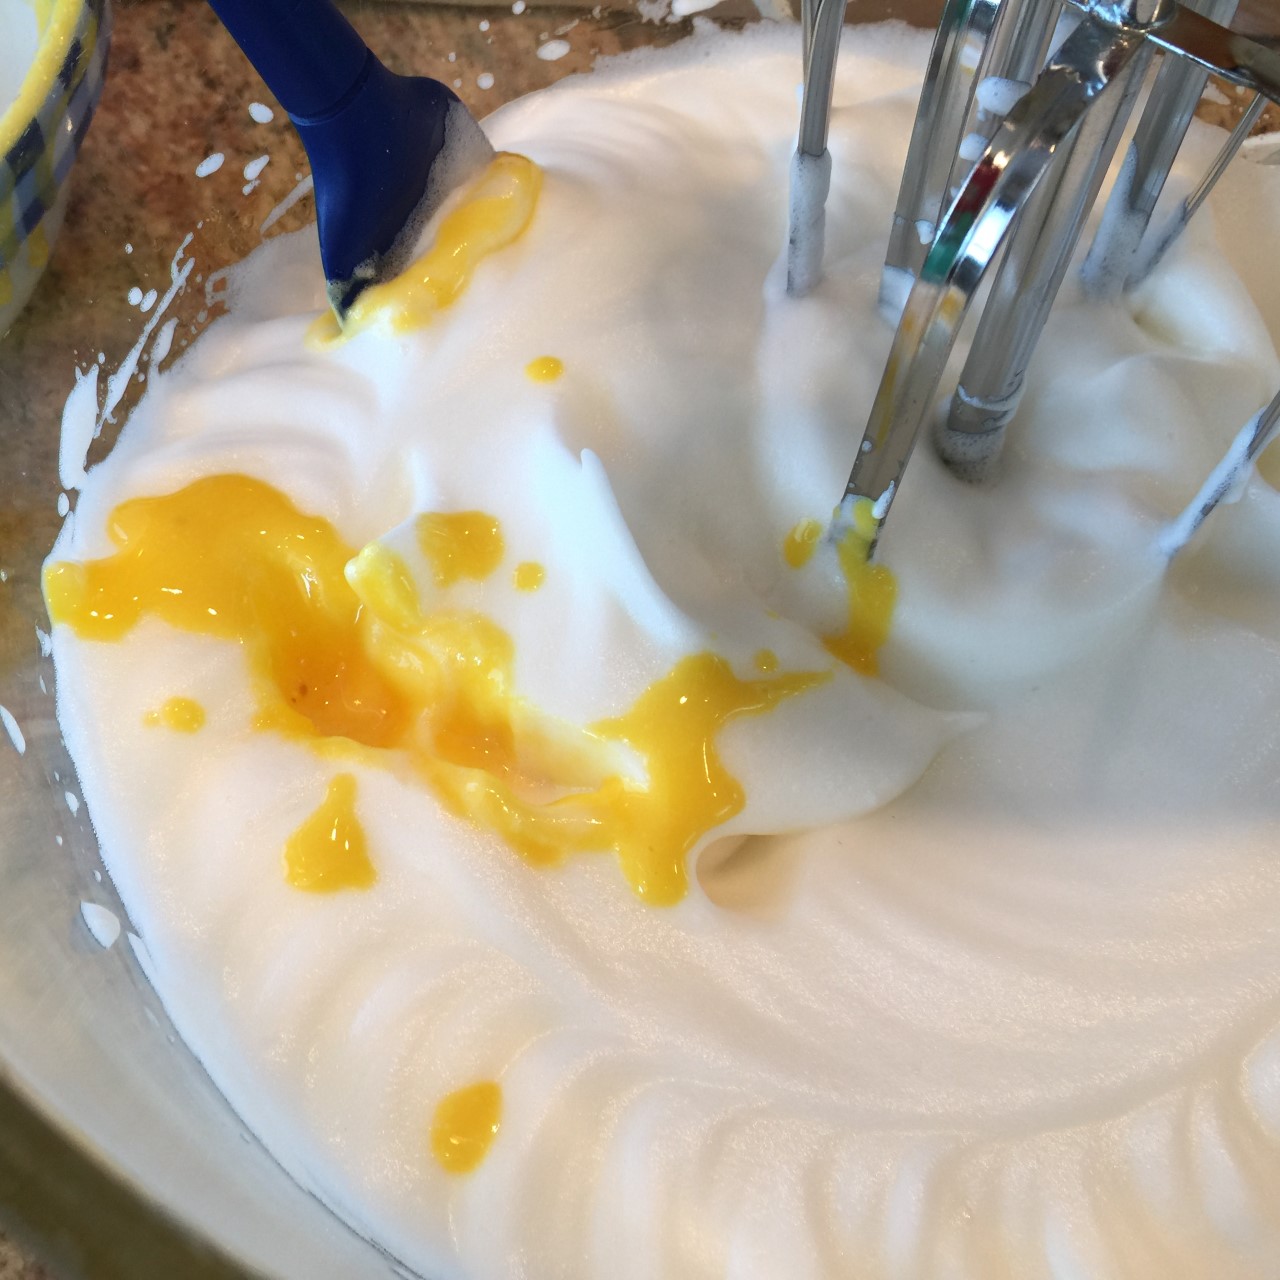 On a parchment lined cookie sheet, ladle out the batter into whatever shape you want, making them about 1/2″ thick. Space them at least 1″ apart.
 Bake in 300º F oven about 25 – 30 minutes (mine took 25 minutes) – until beginning to brown.
 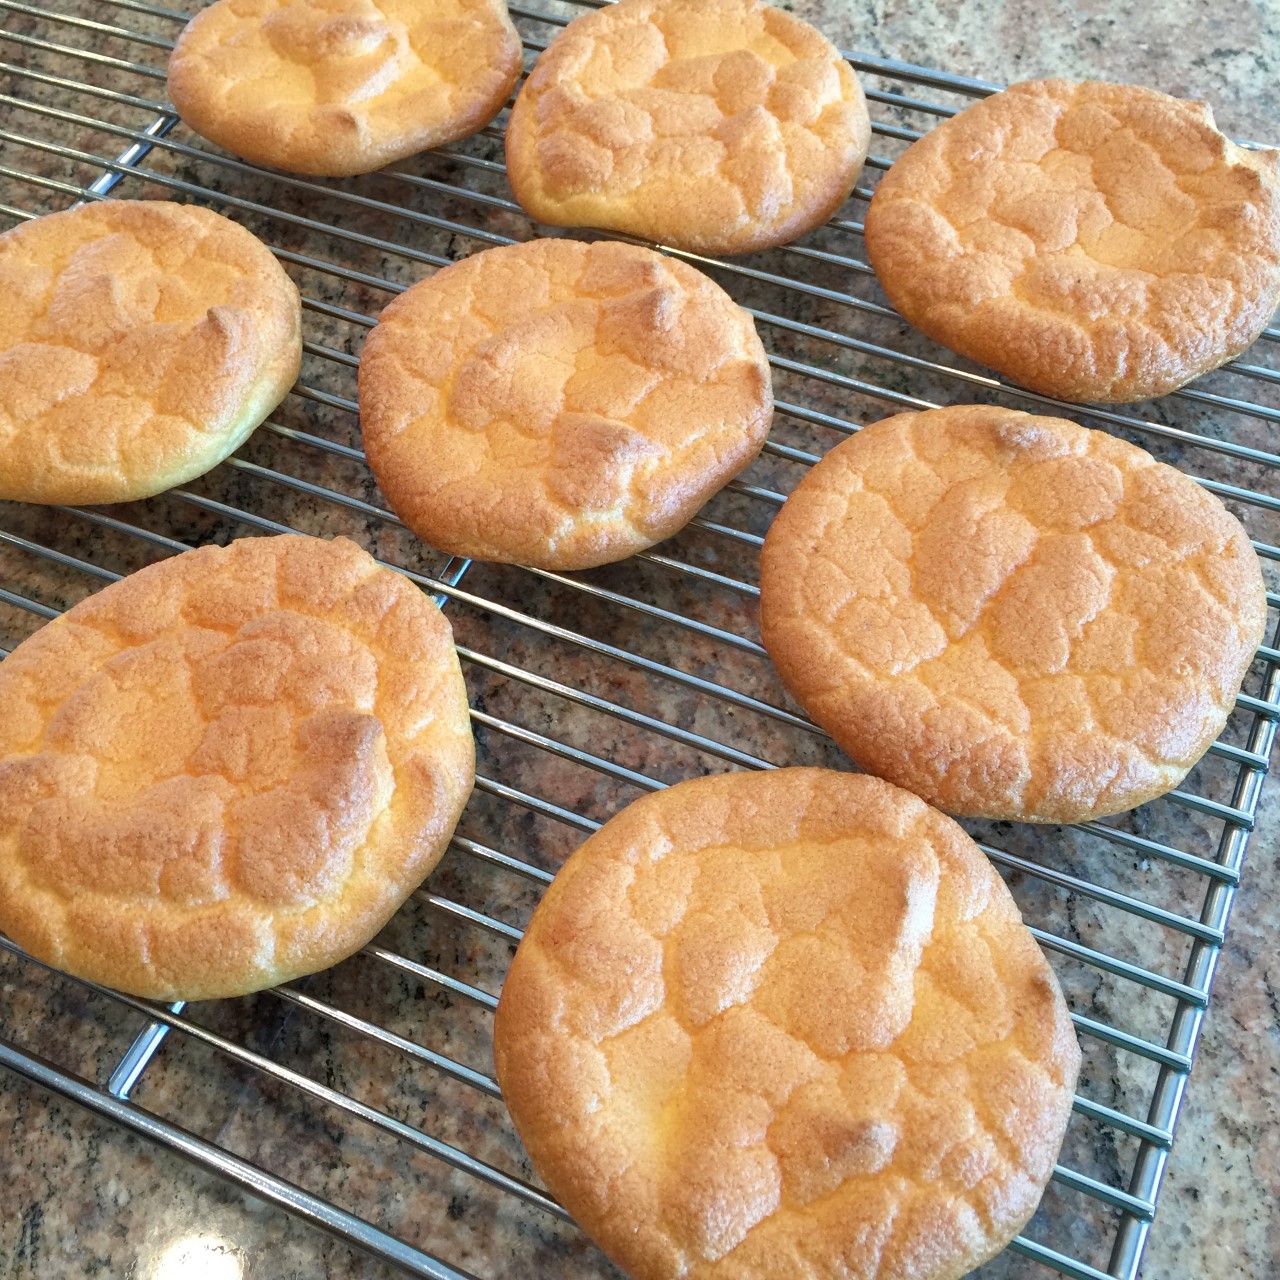 Place the Cloud Bread still on parchment on wire rack. After about 5 minutes, remove bread from paper to wire rack to completely cool. They should really rest at least an hour before using, in order to set. Store in fridge.
 Split in half lengthwise.
  Scoop out the insides, measuring out 1½ to 1¾ cups, and mash.
  The skin and remaining insides are not going to be used.
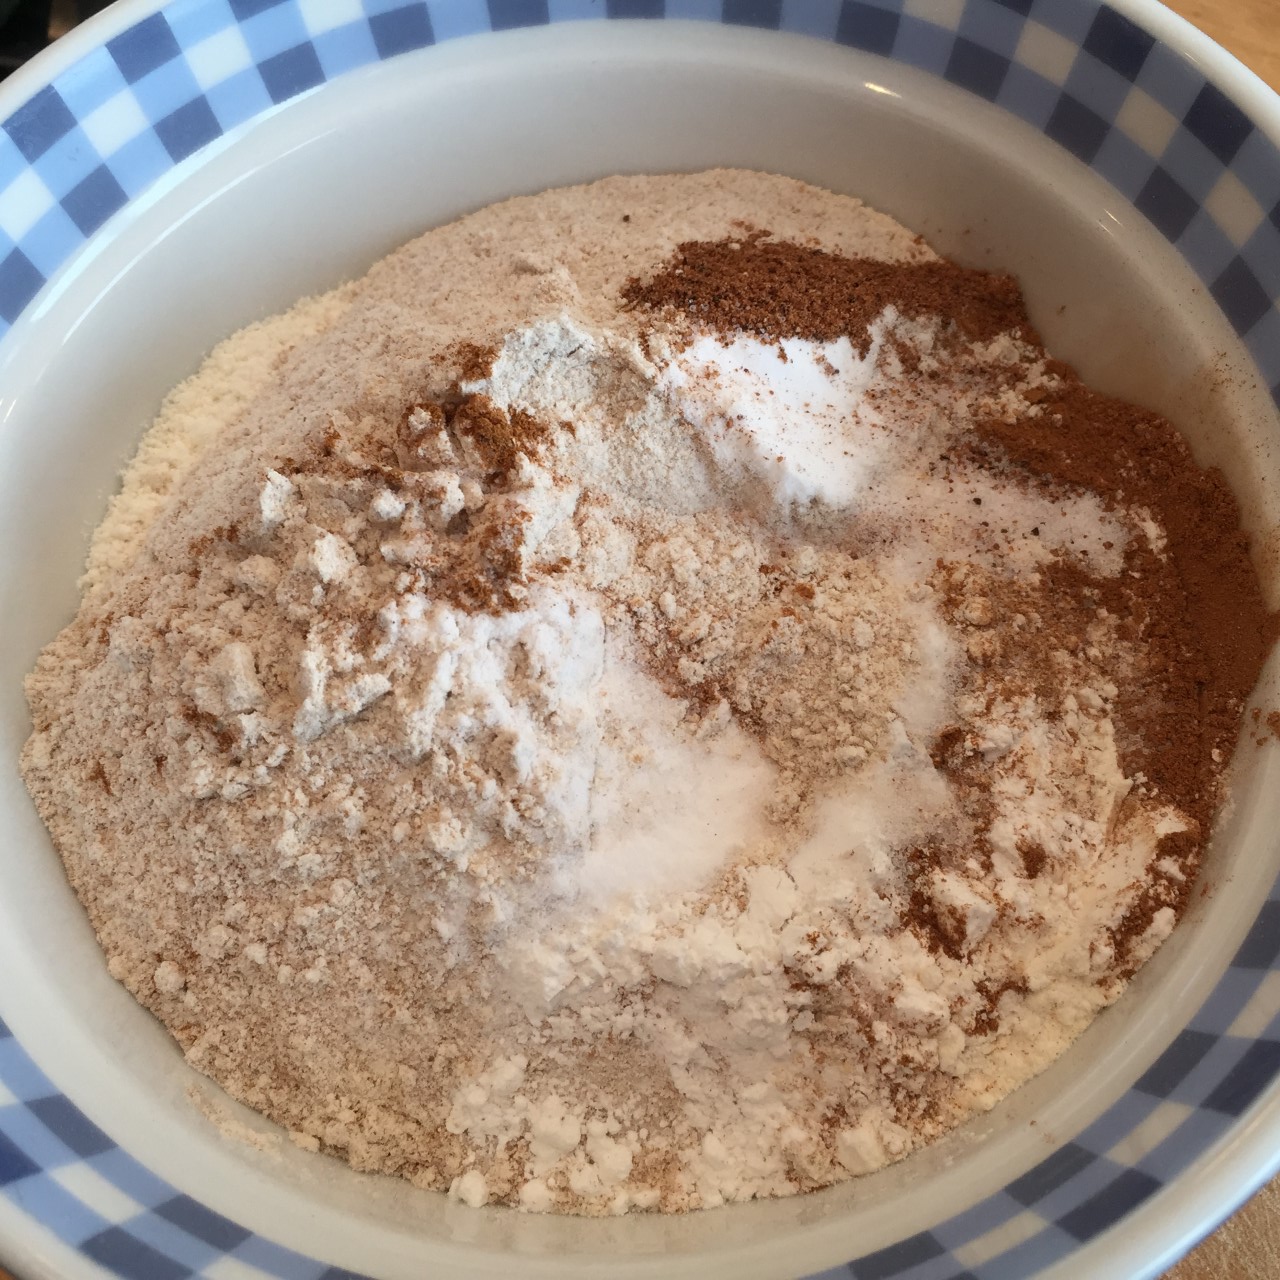
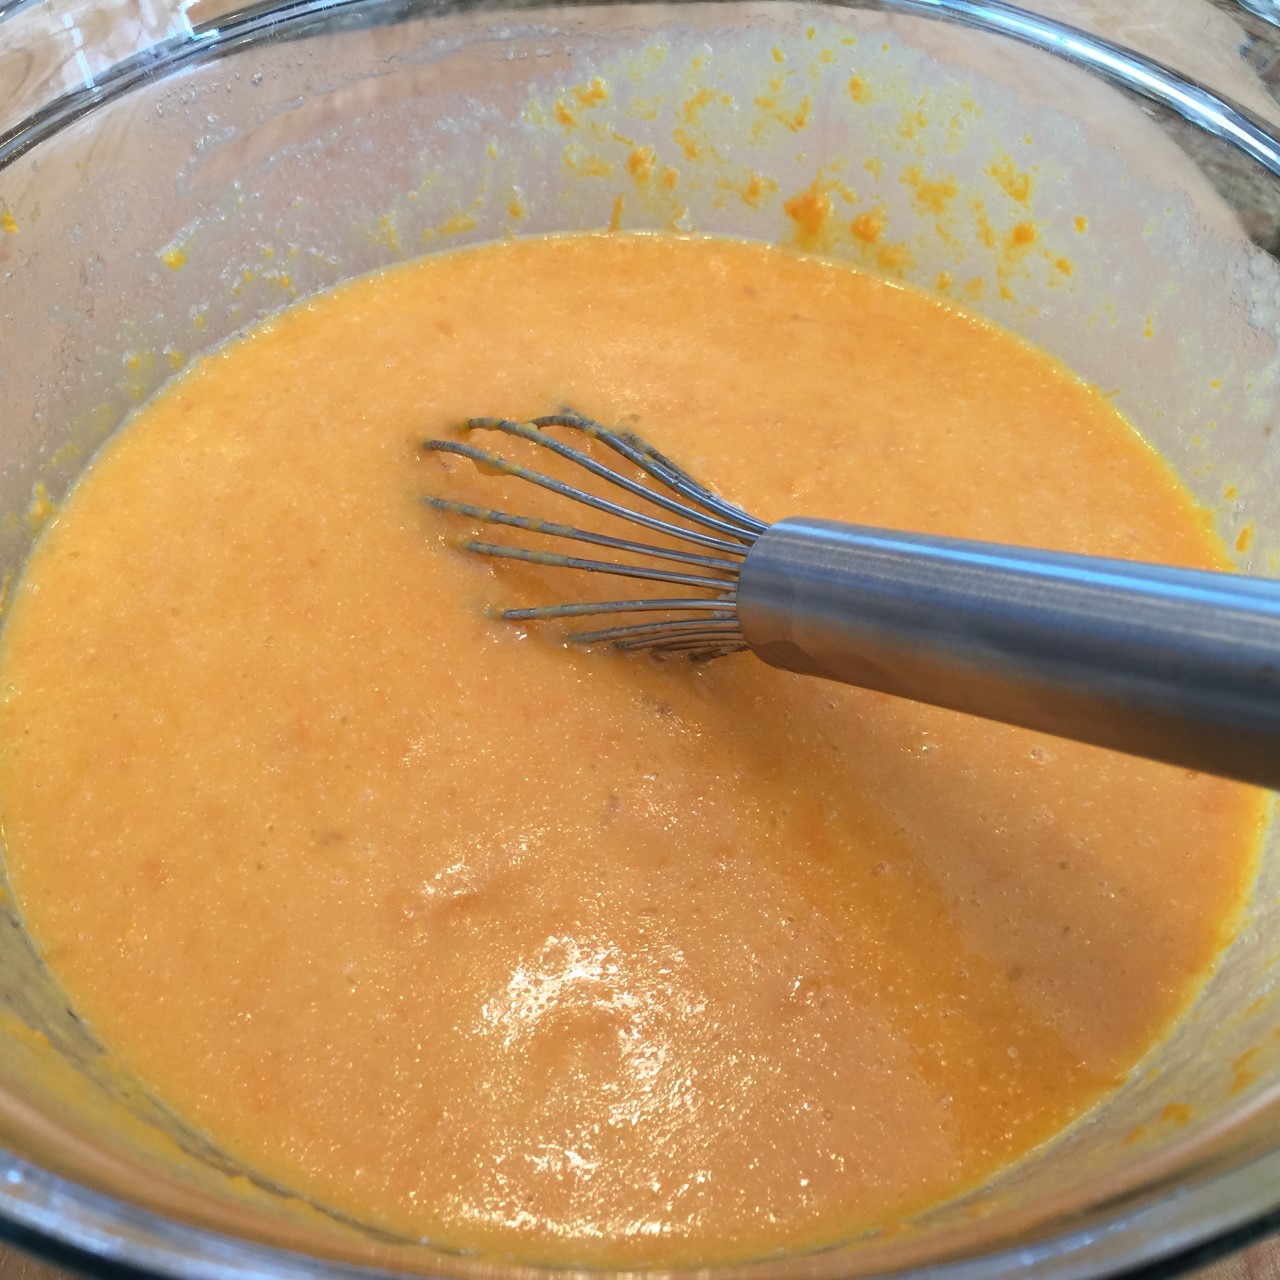 In a separate bowl combine the cornmeal, flour, brown sugar, baking powder, baking soda, and salt.
 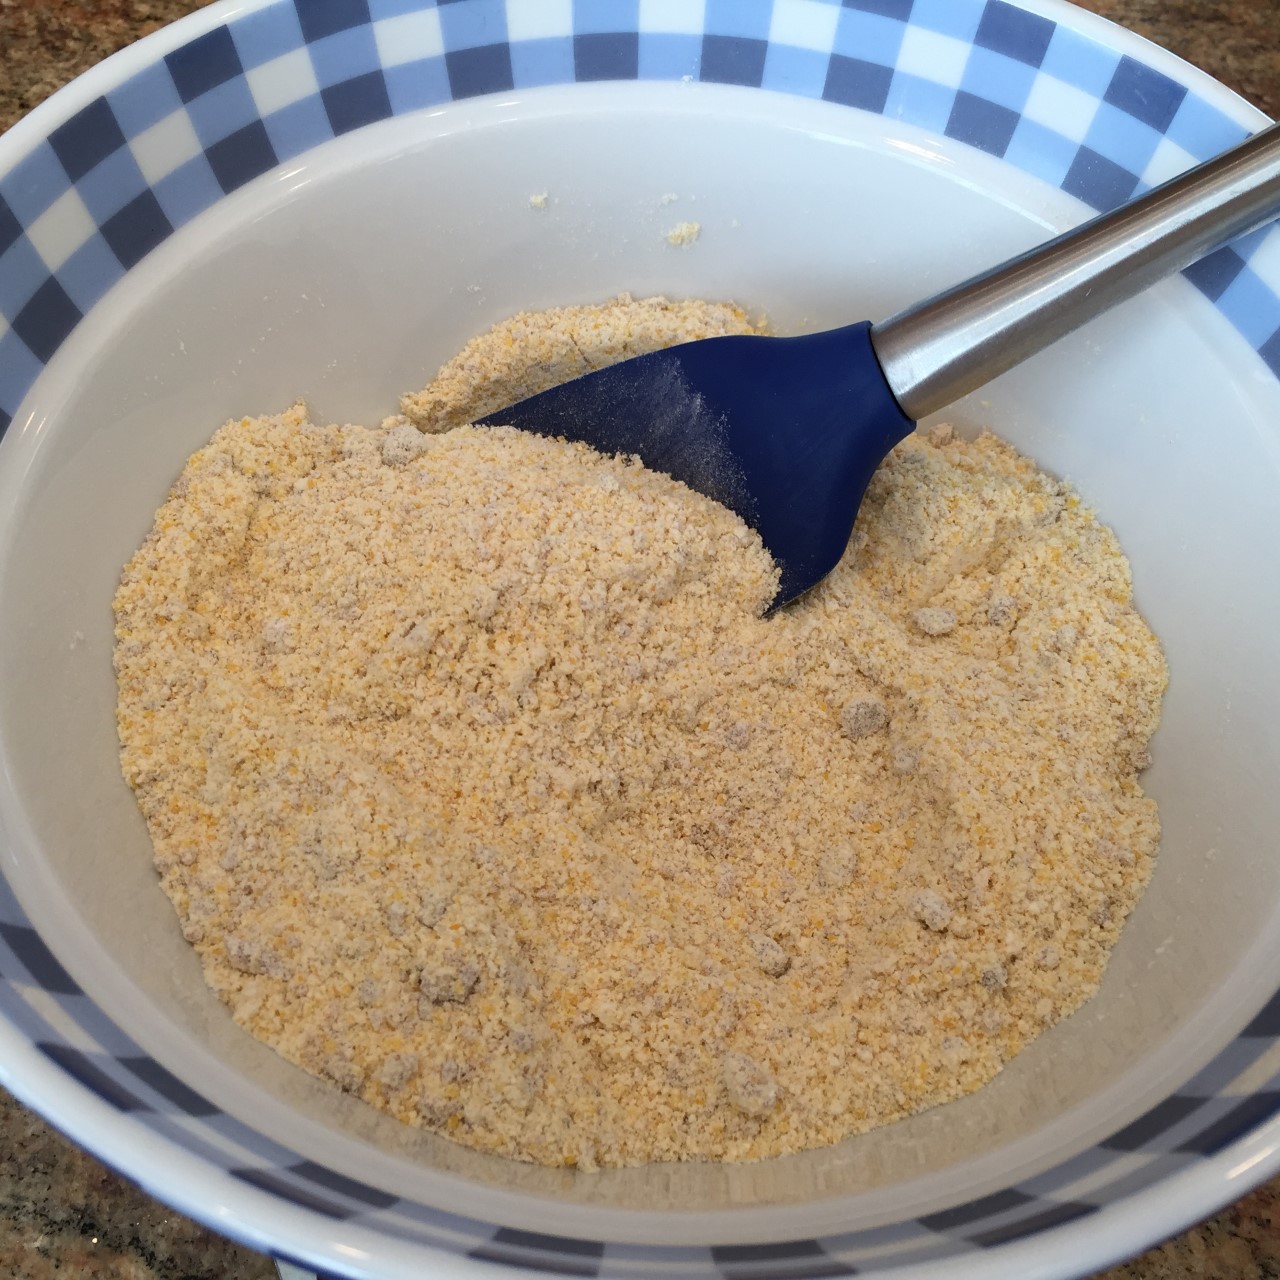 Pour the dry ingredients into the wet and gently mix together just until the flour is incorporated. (Don’t over-mix.) Over medium-high heat, melt remaining 1 T butter in a 10″ non-stick or cast iron skillet until bubbling.
 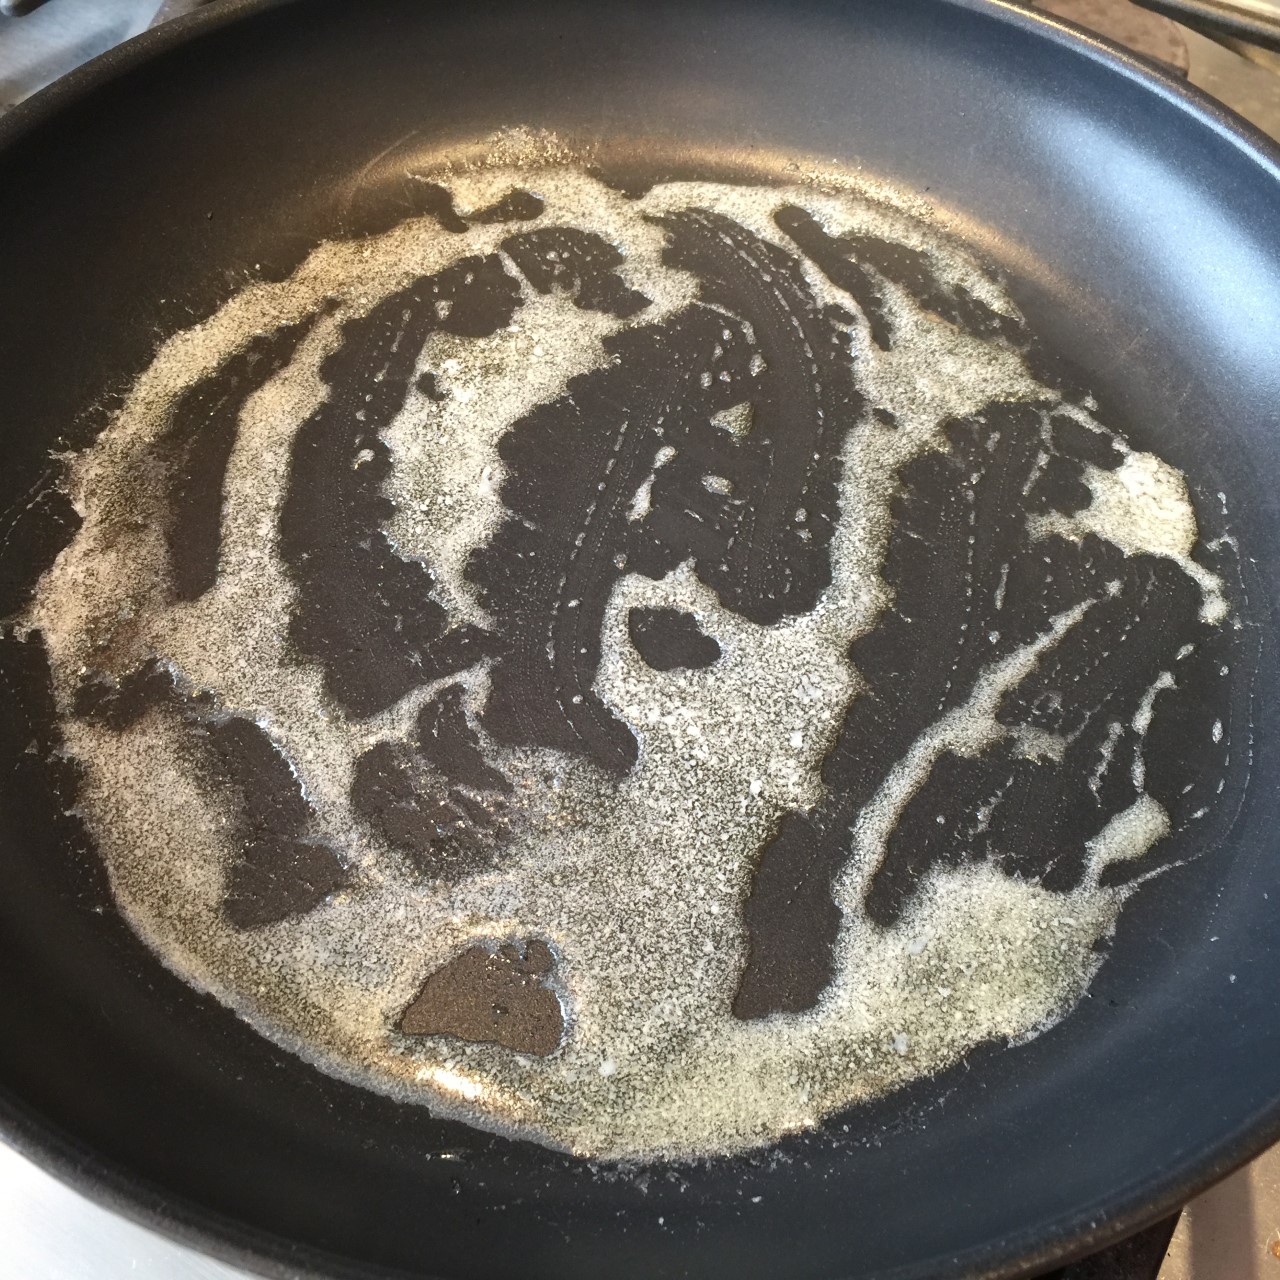 Pour in batter, spreading out evenly.
  Bake at 425º F 25-30 minutes – until toothpick comes out clean.
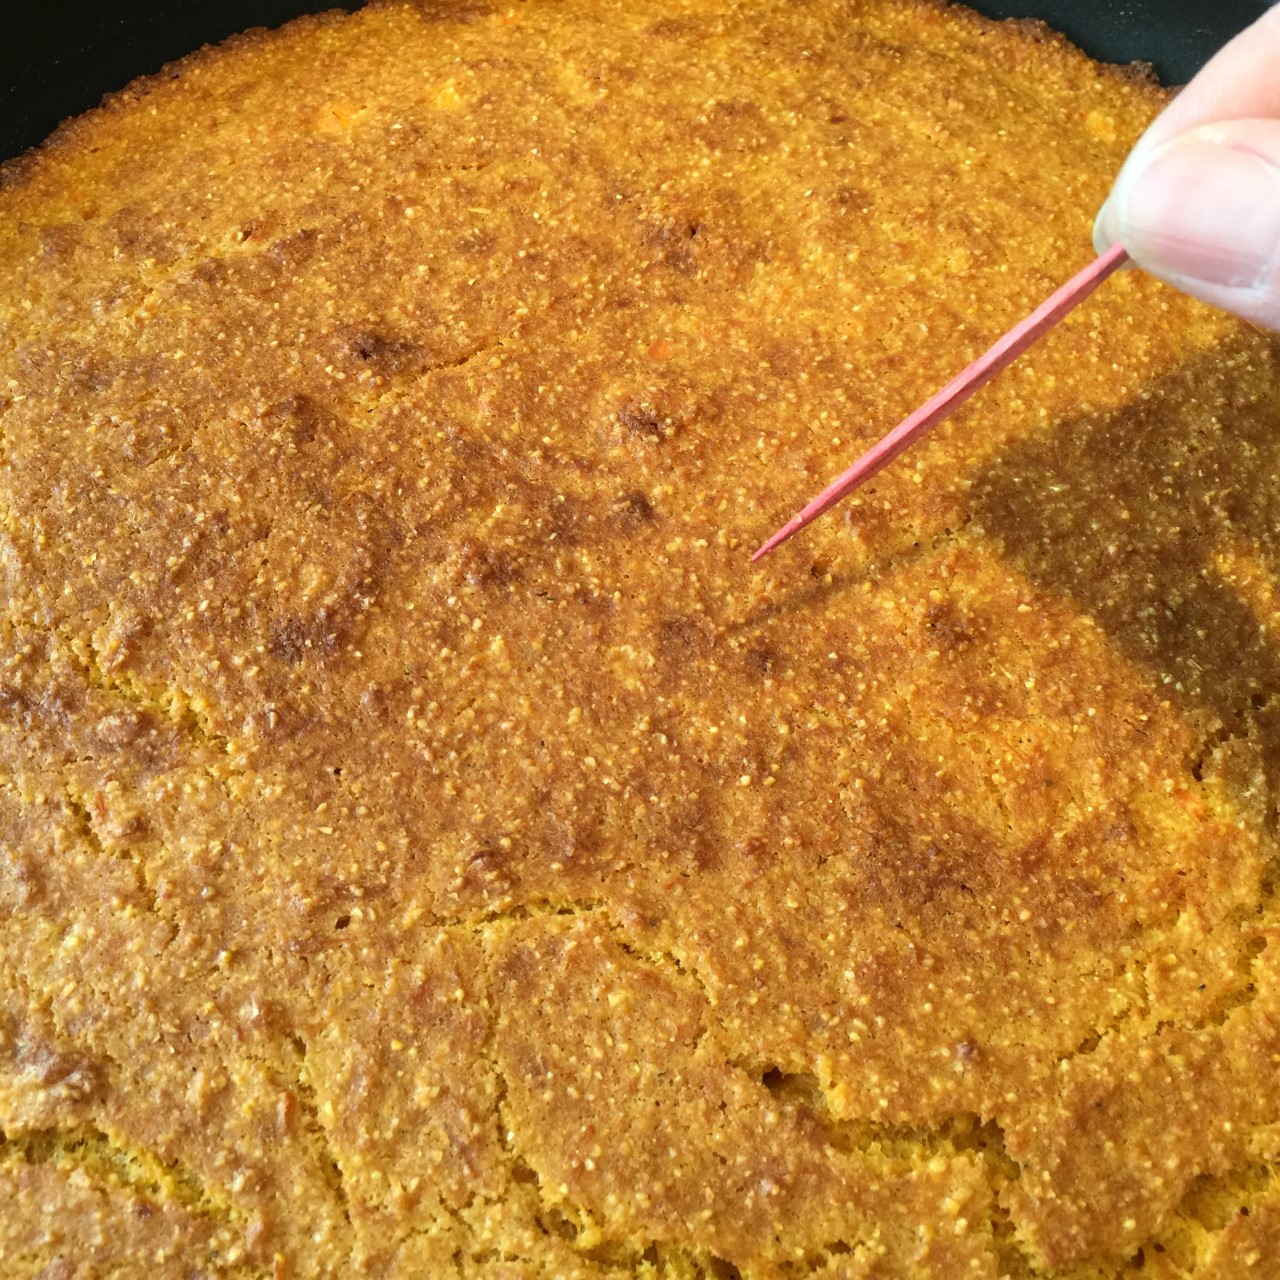 You can eat it plain, or top with butter, maple syrup, honey, etc.
 Who doesn’t love a warm loaf of Italian bread? Well, now you can make one just as good as any bakery….for pennies!
 Cover bowl with a plate or tea towel and let the dough rest on the counter 18 – 24 hours (the longer, the better flavor). You’ll notice a significant change to the dough – it will become wetter and bubbly:
 Cover with lid and place in cold oven. Immediately turn oven on to 450°F. (As the oven slowly heats, the dough will yield more oven rise.) Set timer for 1/2 hour.
  After 1/2 an hour, remove lid and continue baking without the lid until the temperature of the interior of the loaf reaches 209°F.
 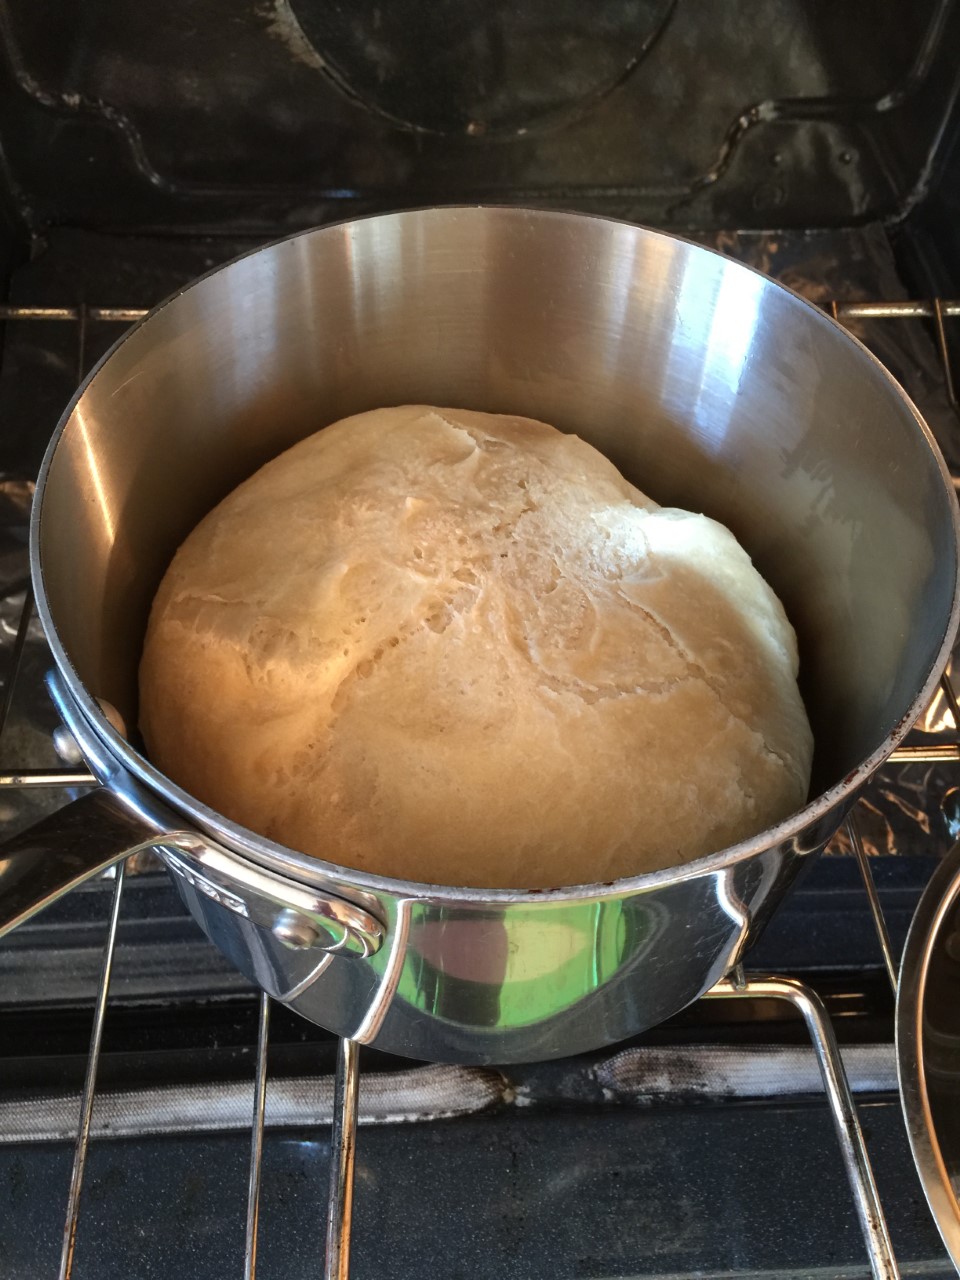 If you don’t have a thermometer, do a visual check – the top should be well browned. Remove the loaf and the bottom should be browned, too.
 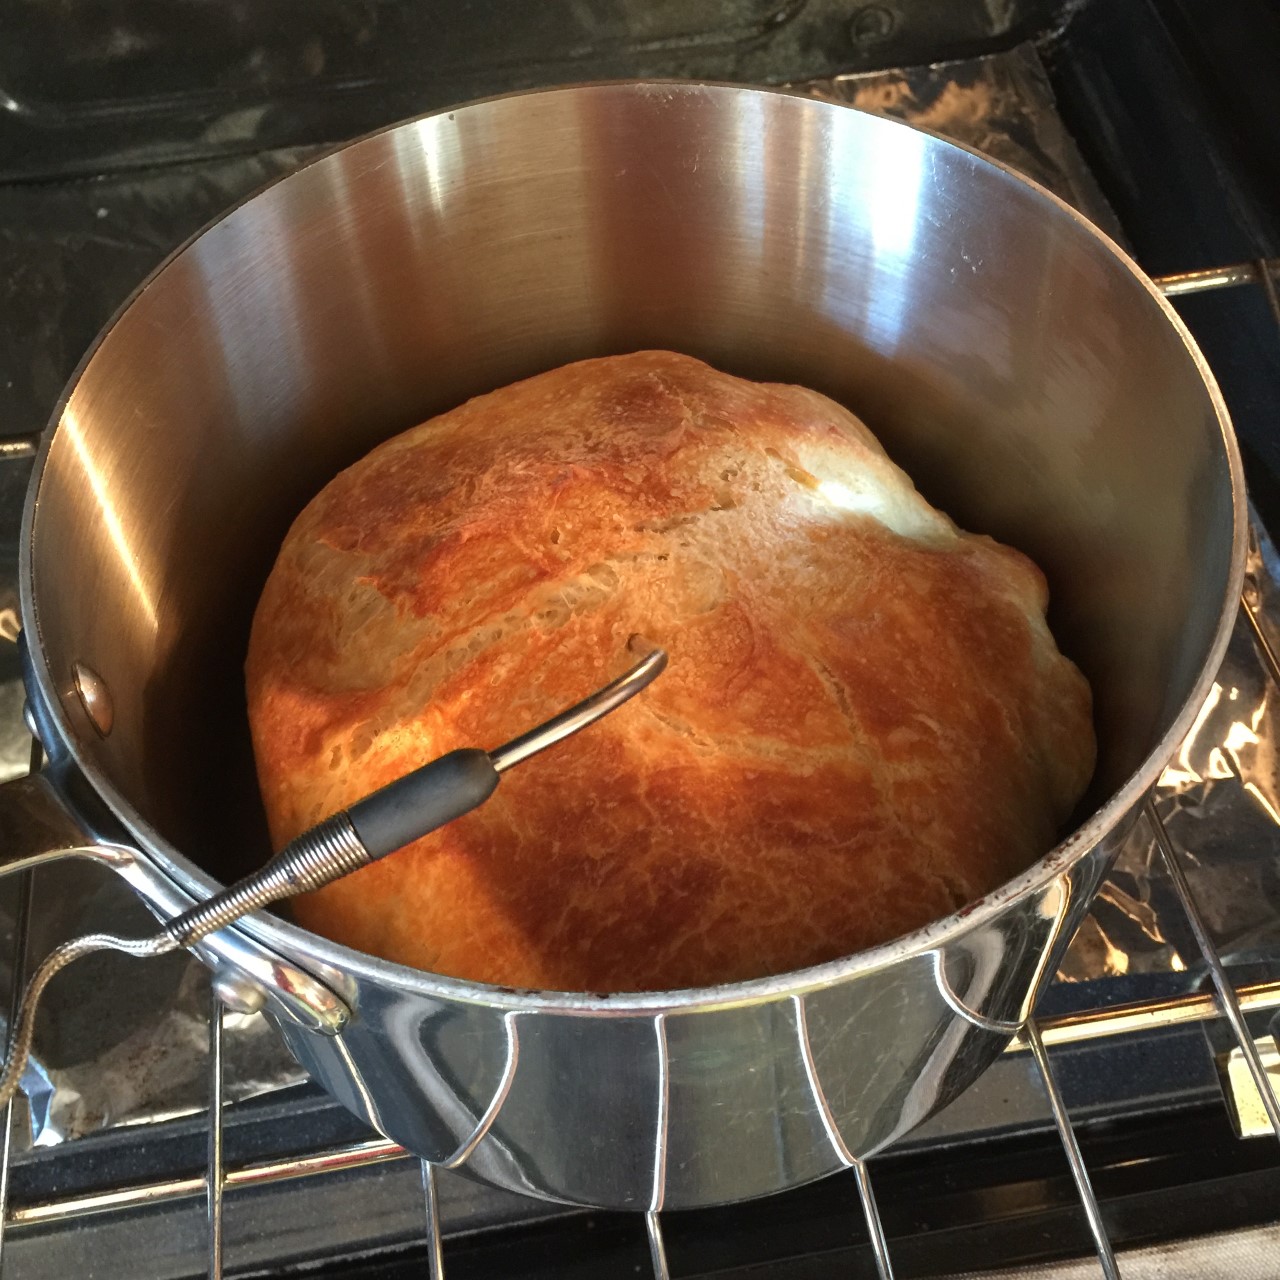 Remove loaf from pan to a wire rack to cool. Let loaf cool at least 20 minutes (this takes some will-power) before slicing in order to get a cleaner slice.
 Some people become vegetarians because they don’t like meat and/or it upsets their body. Not me. I grew up eating some sort of animal everyday – sometimes three times a day and loved it. So when I decided, for humanitarian reasons, to become a vegetarian, it was quite an adjustment.
 When the yeast is proofed, turn on the machine and slowly pour in the yeast water.
  When it’s mixed, add in remaining flour a little at a time, until dough starts to pull away from the sides. You may or may not need all of the remaining cup of flour.
  Empty dough into greased bowl, flipping dough ball so entire ball is greased. Cover with tea towel or plate and let rise 1 hour.
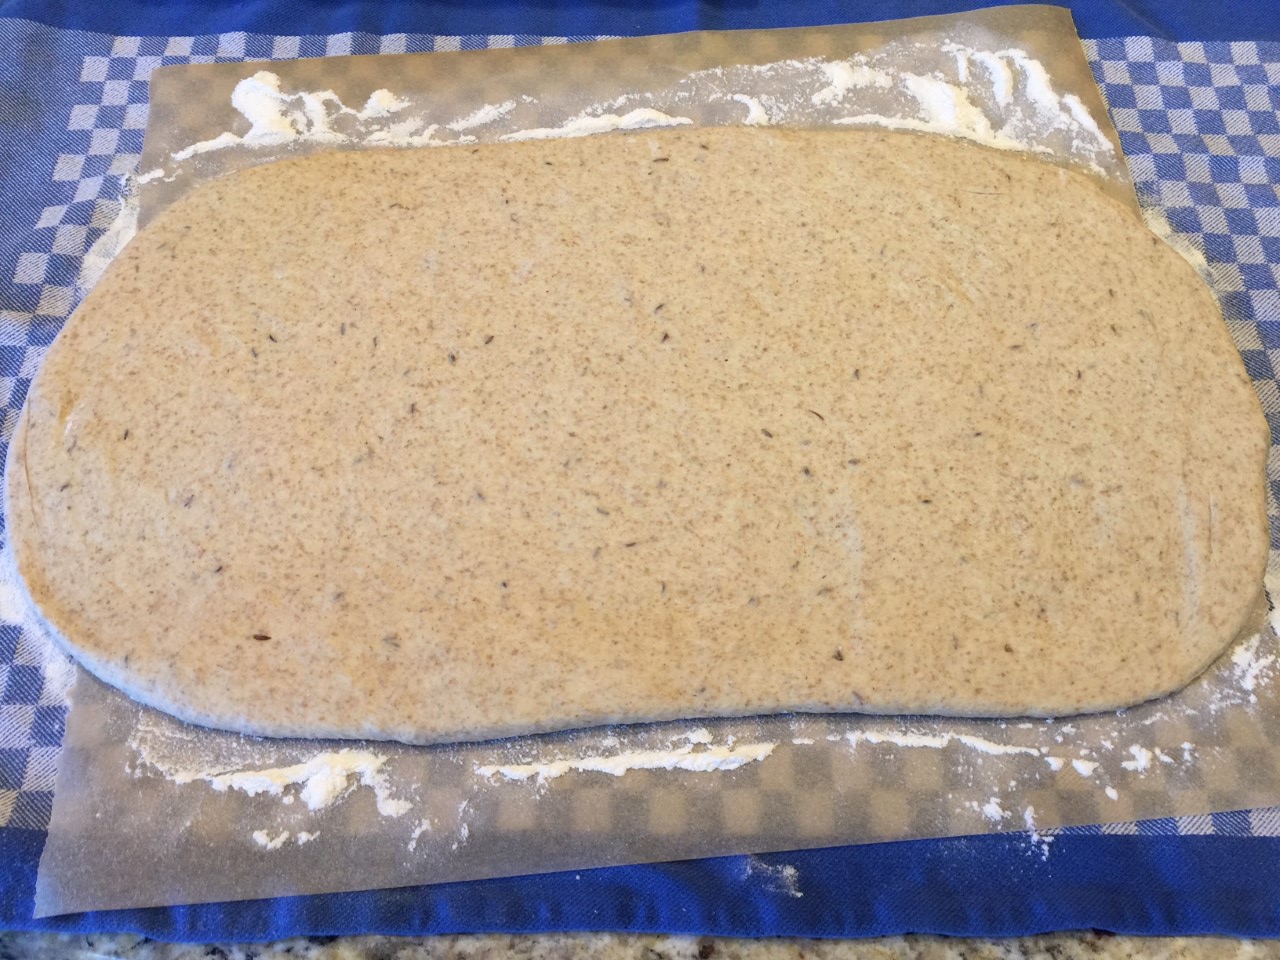 Spread on the “ham”, cheese, then pickles down the center of the dough. Make 1½” cuts along both sides – cut the same number for both sides.
 Fold in one end, then grab the first dough tabs and twist them together, pinching to make sure they stay.
  Keep doing this for all the tabs.
 Slide the parchment onto a large, rimless cookie sheet. Cover loaf with the tea towel and let rise 30 minutes. At this time, preheat oven to 375º F.
 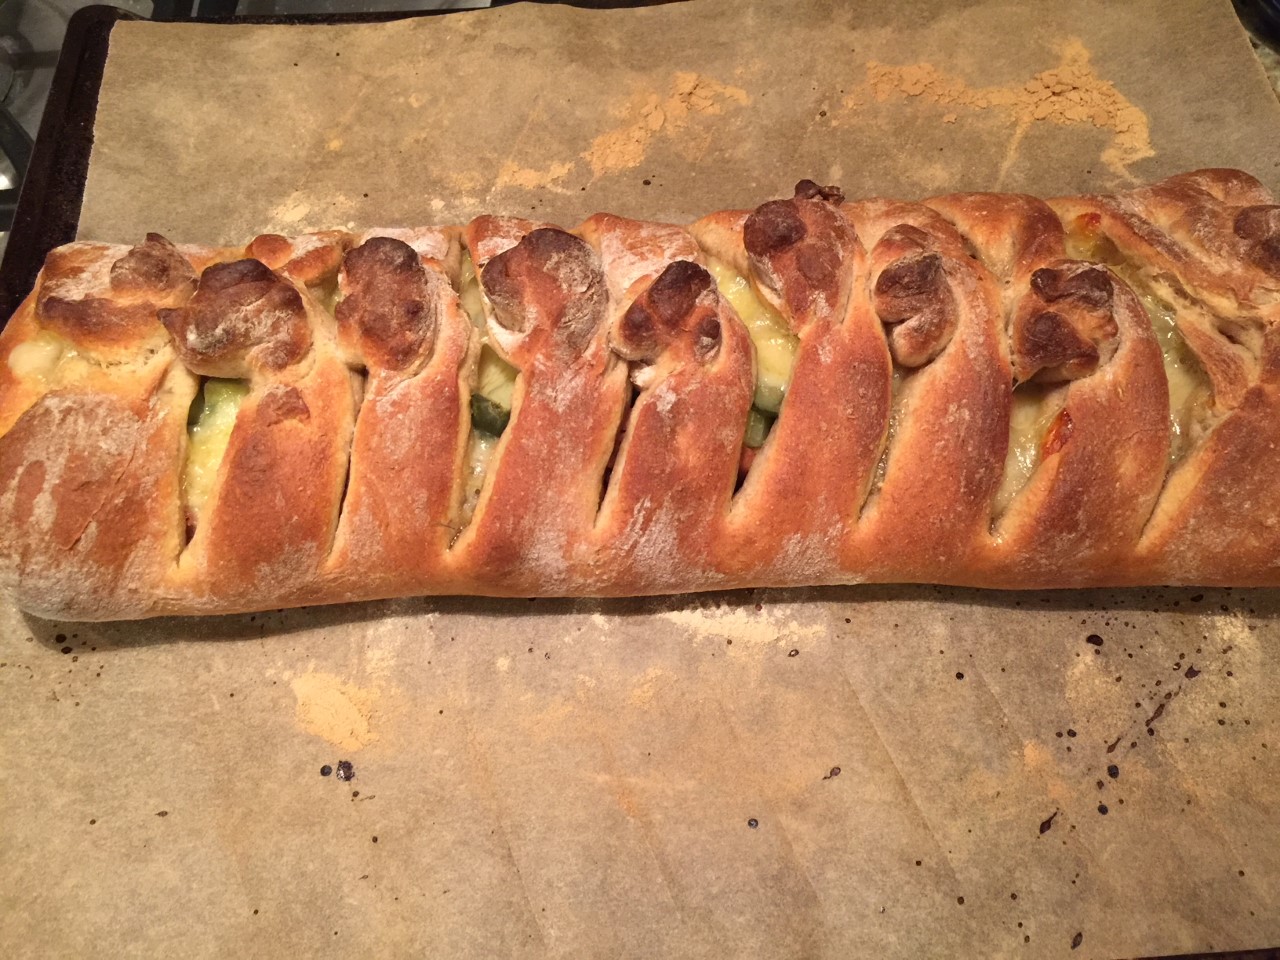 Remove to rack and let set about 15 minutes before serving.
 Being the loving husband his is, my friend, George, was whipping up a batch of fat-free blueberry muffins for his wife, Kathy, while we were visiting. I was curious about his recipe and what was used instead of the fat.
 In a larger bowl combine whites, milk, zest, 1/2 cup sugar, and vanilla. Beat with an electric mixer on low, a hand-crank egg beater, or whisk until bubbles form on top – it takes about 30 seconds.
  Pour the dry ingredients into the wet and gently combine, until most of the flour is incorporated. Don’t overmix or you’ll get tough muffins.
  Add in the blueberries and fold in, just to combine. (Frozen blueberries – which I use – tend to bleed.)
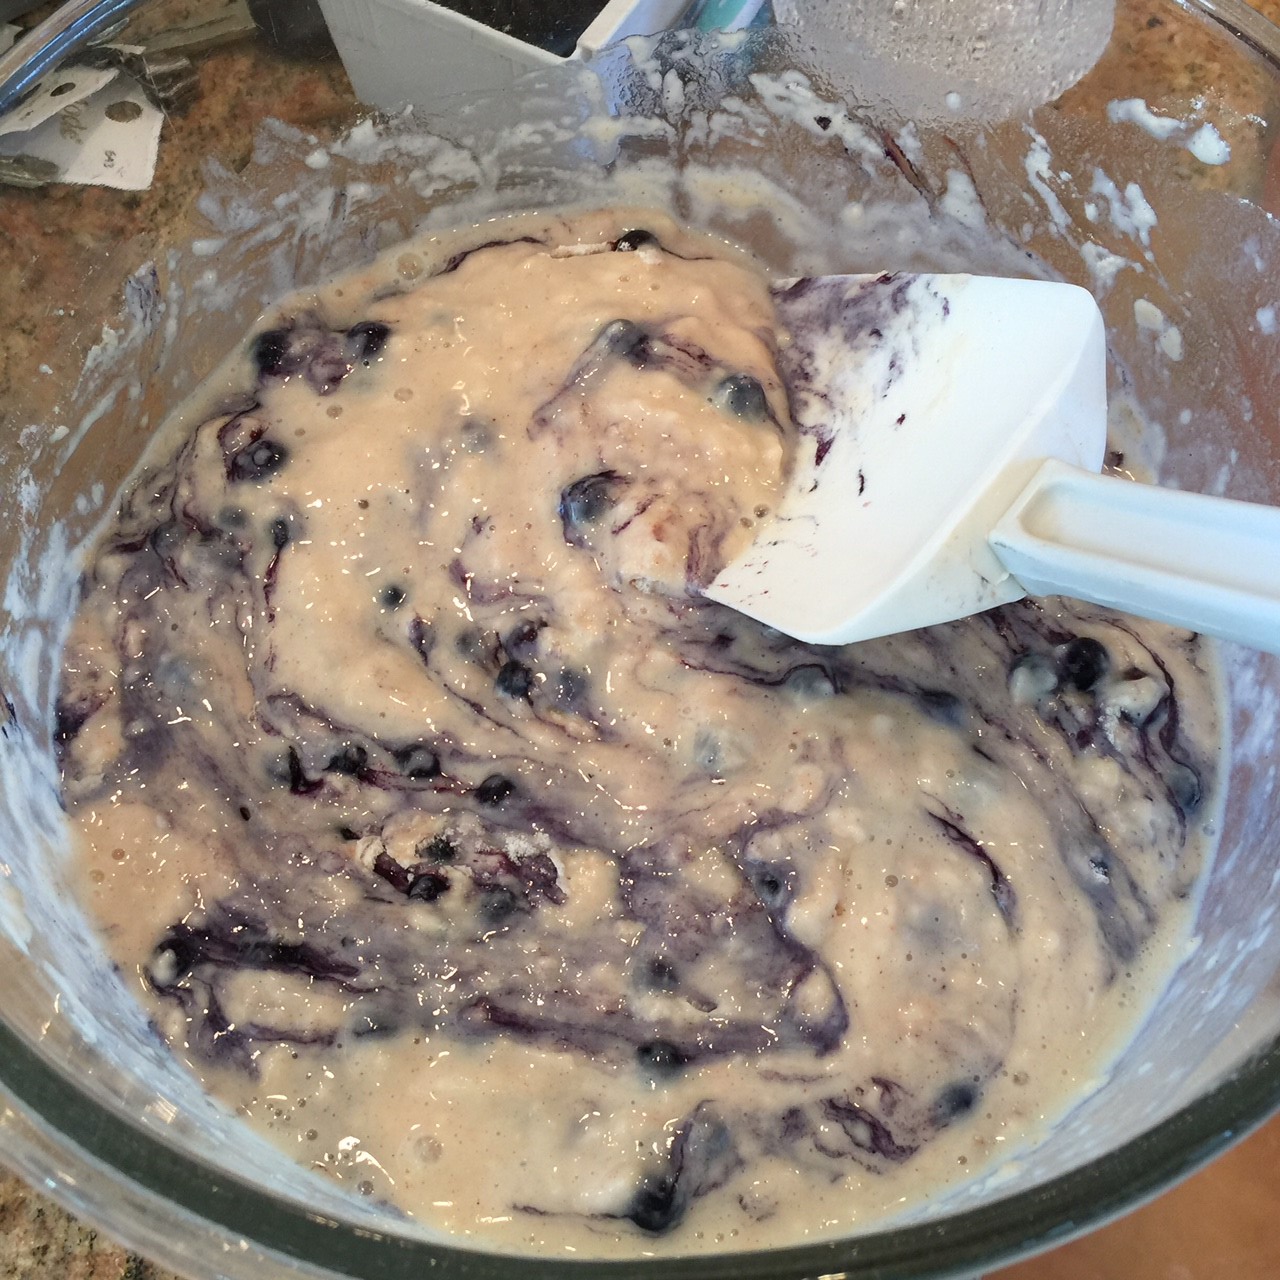 Pour the batter into the prepared muffin tin, dividing batter equally. (An ice cream scooper is perfect for this.) Sprinkle about 1 tsp of sugar onto each.
 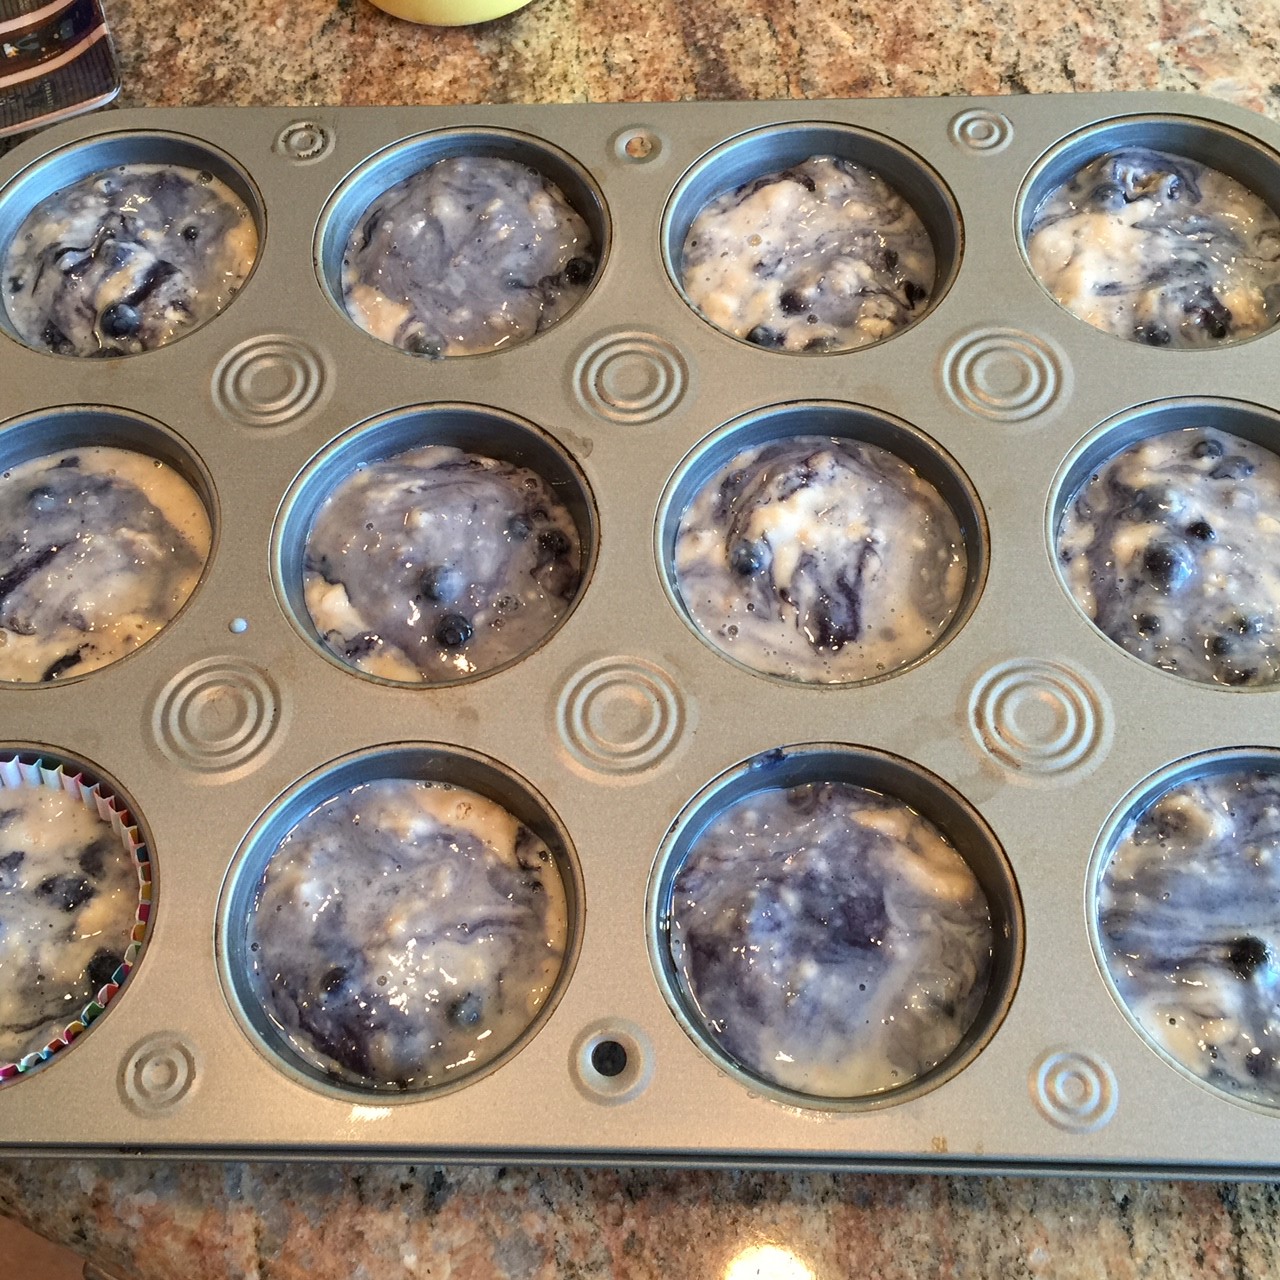 Bake in preheated 400º F oven for about 16 minutes, rotating them halfway through to cook evenly. They should be firm with slightly browned edges.
 Remove from oven and let set in tin about 2 minutes. To remove, run a rounded knife around sides, then start pushing in around the bottom with the knife to help release the muffin.
 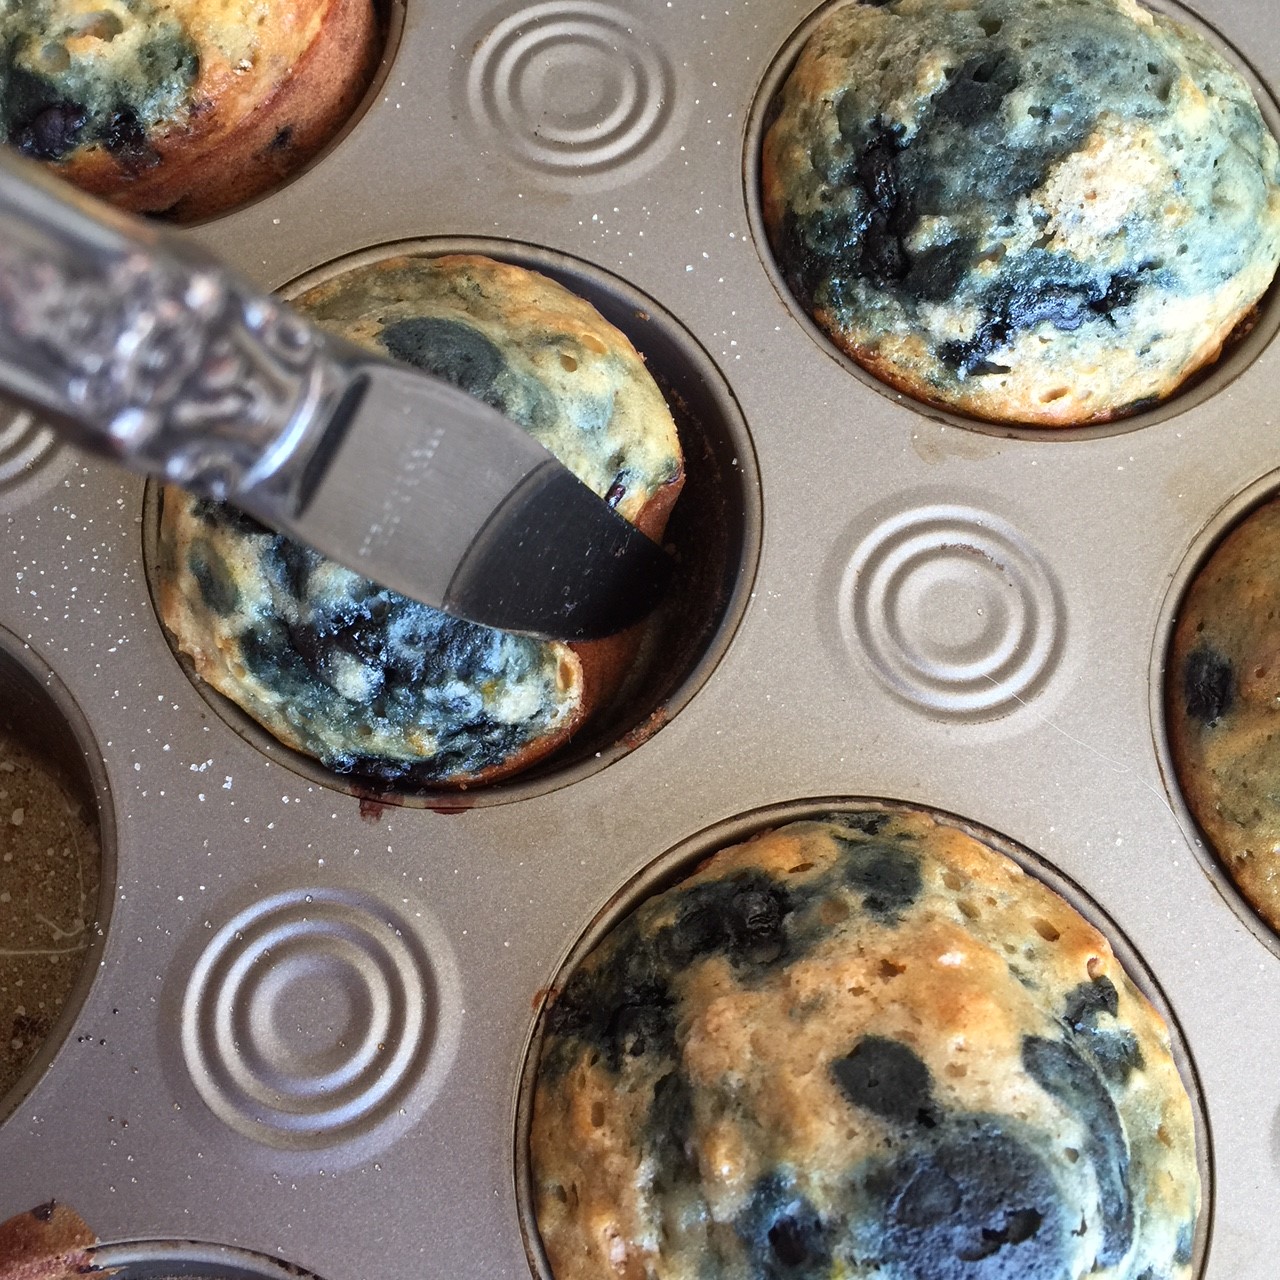 Set muffins on a wire rack to cool a bit before eating.
 I admit that I may be a little obsessive about making things from scratch. I make my own tortillas, pasta, yogurt, desserts, and most breads. The reason? As I’ve gotten older, I’ve become a firm believer in “you are what you eat”.
 Empty dough into a greased bowl, flipping dough to grease both sides.
  Cover and place in a warm area to rise – about 1 hour.
 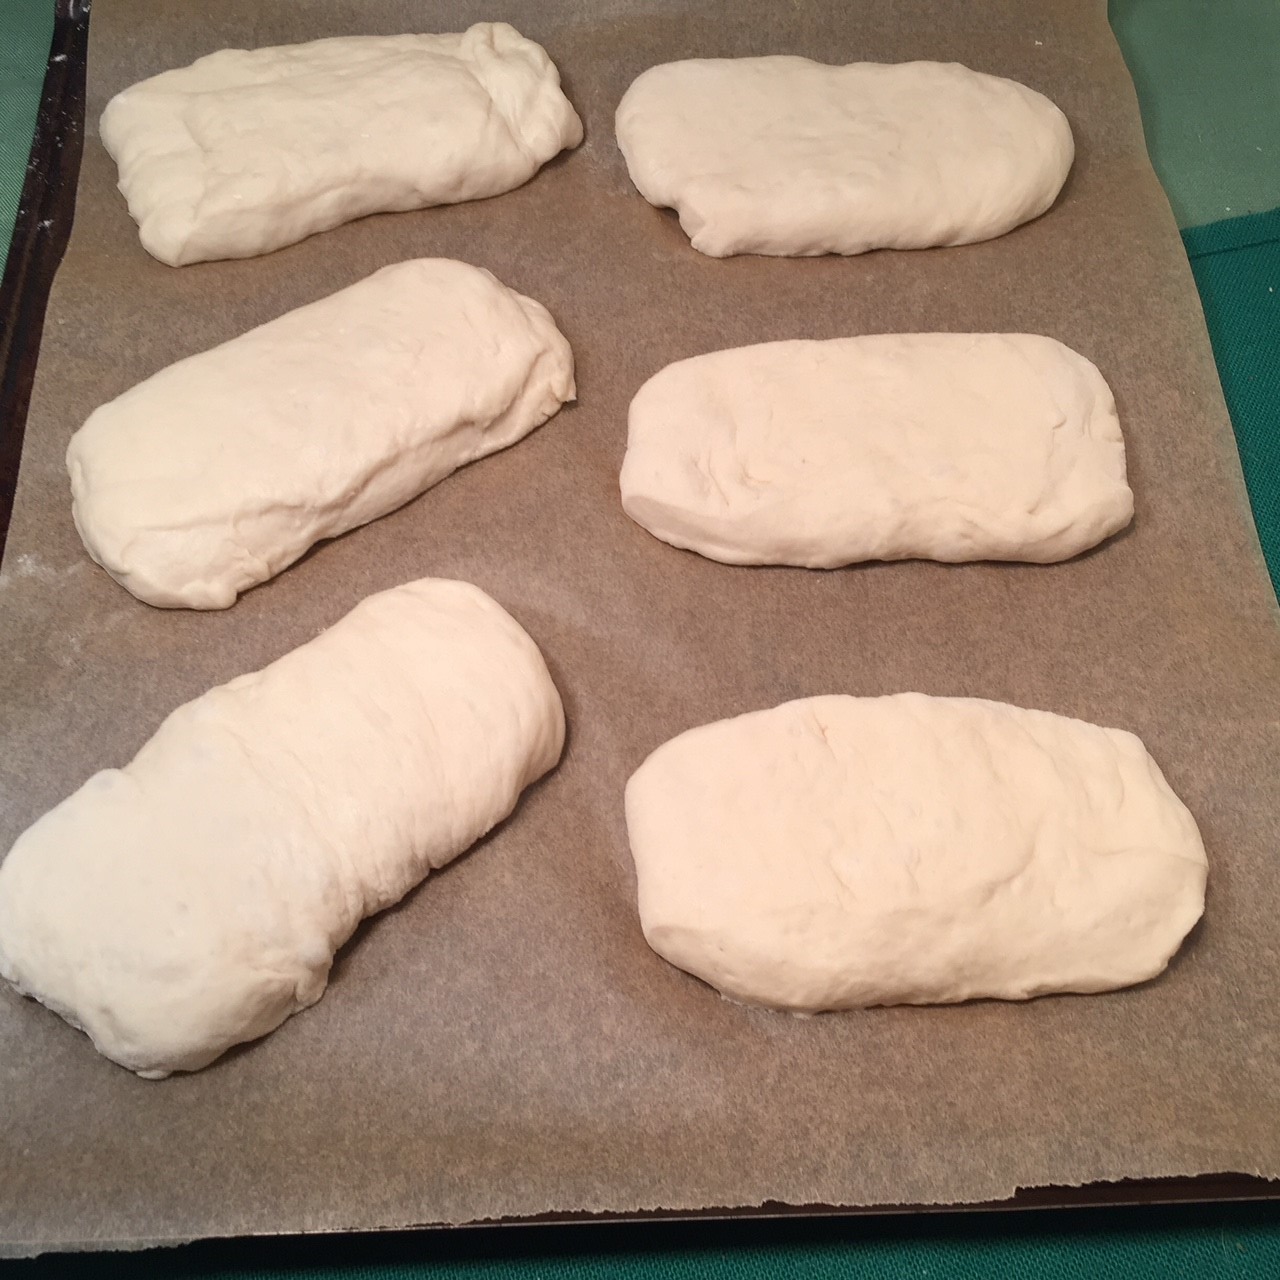 While dough is rising, mix together your topping blend. (I like to use 2 T Parmesan, 2 T dried minced onion flakes, 1/2 tsp garlic powder, and 1/8 tsp salt.)
 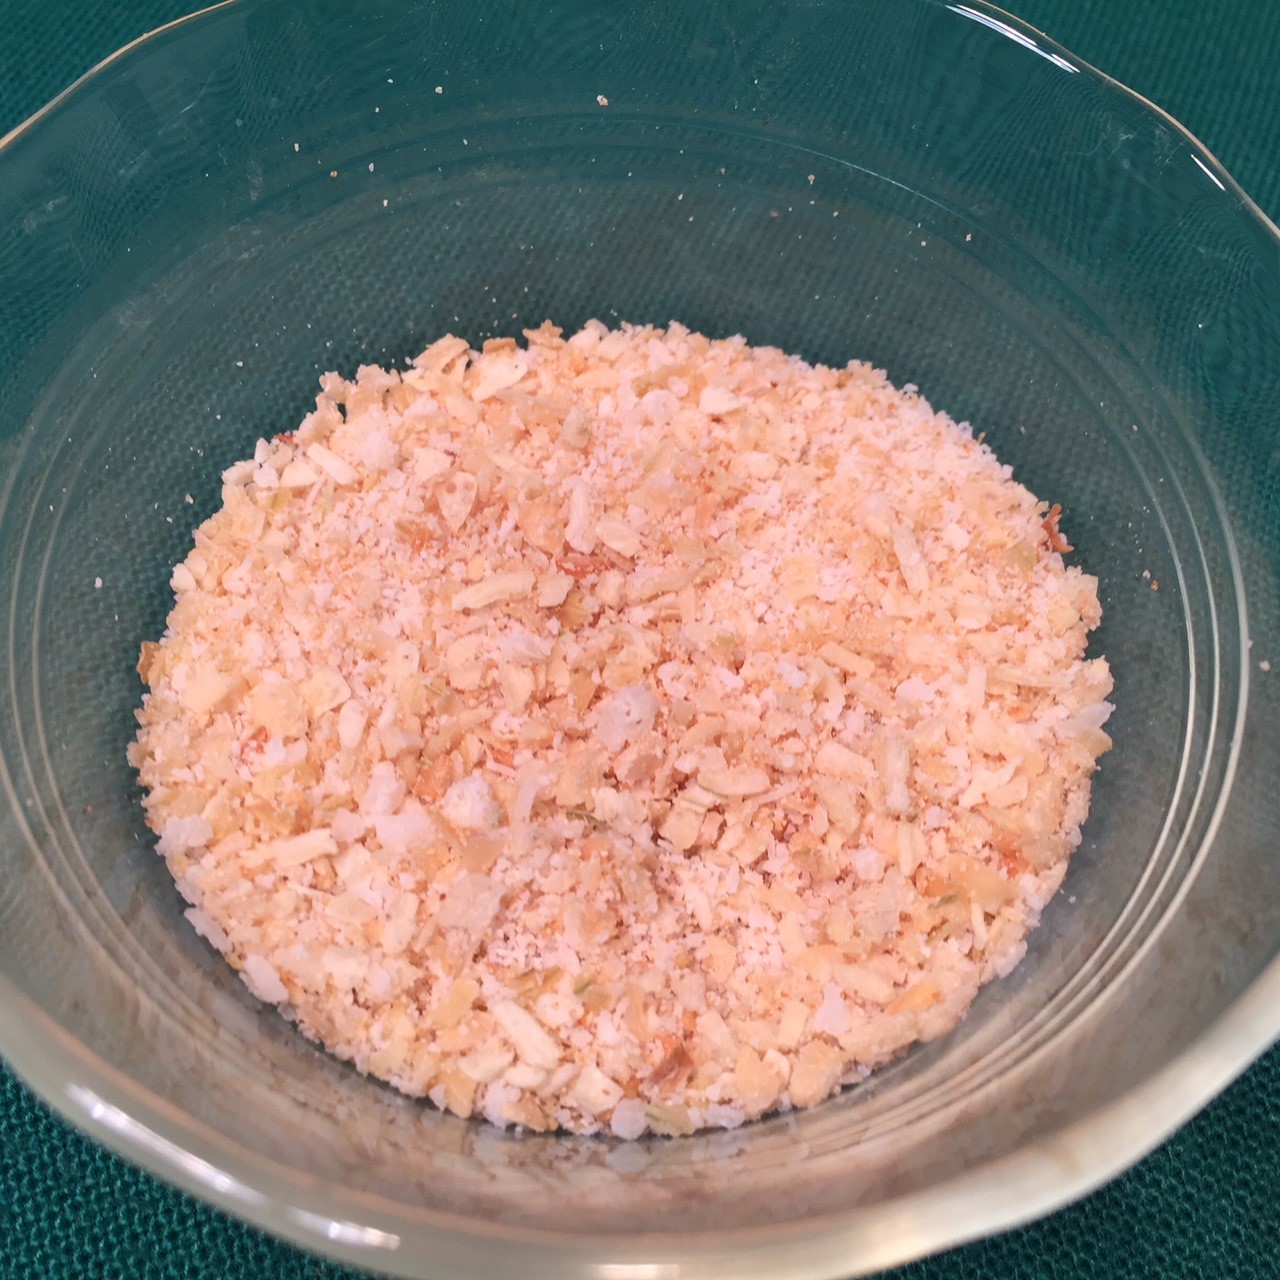 When oven is hot, one by one, gently brush milk onto top of dough then sprinkle on topping. Lightly press down on topping to make it stick.
  Bake at 425º F about 15 minutes, rotating sheet halfway through. You’ll notice significant rise to the rolls after a few minutes. When golden brown, remove from oven to a wire rack.
  Let cool before slicing.
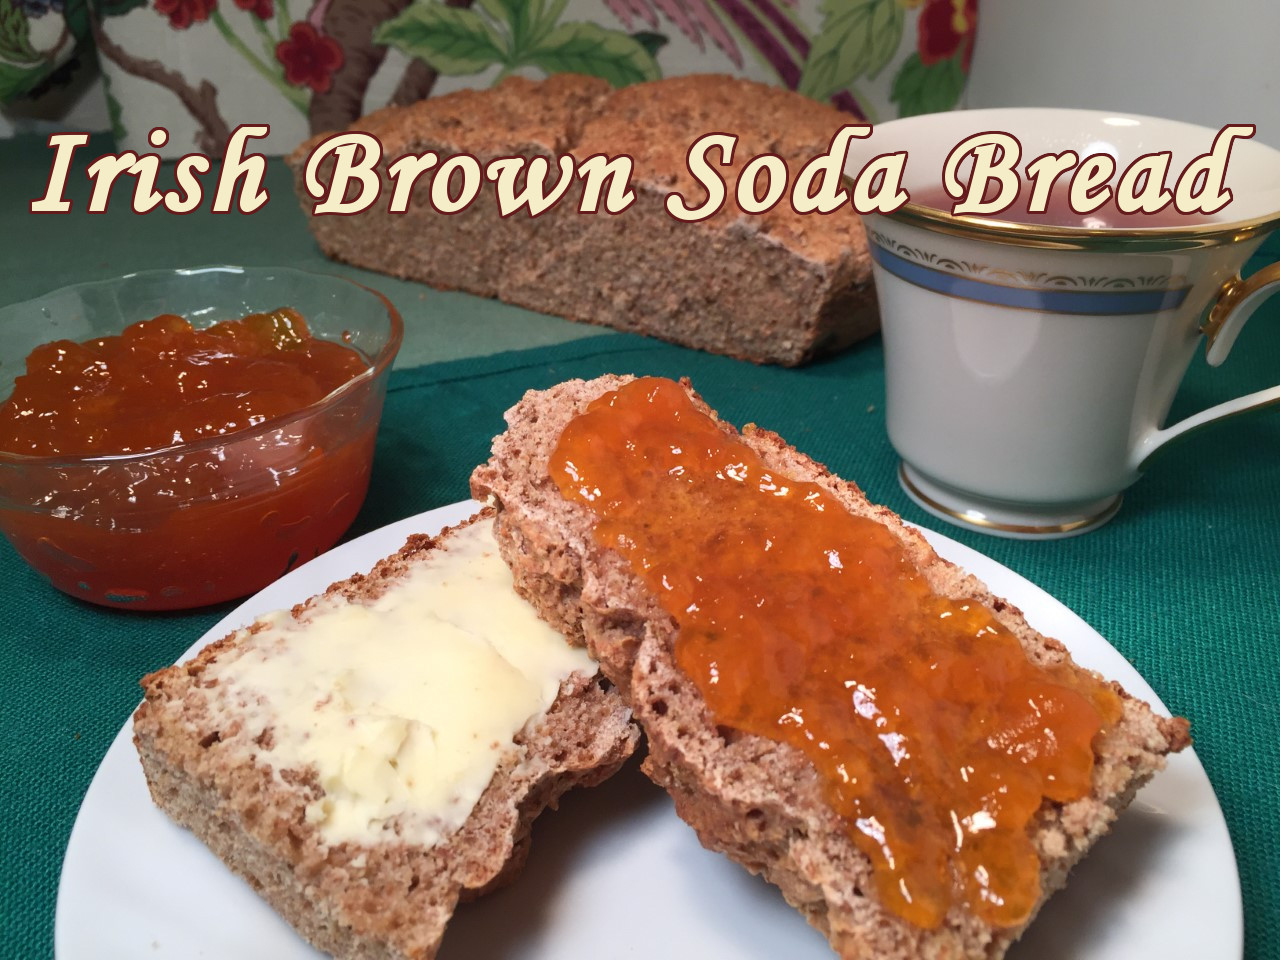 Saints be praised, St. Patrick’s Day is just around the corner, sure.
 Pile the batter into the hot skillet, pushing it all the way into the corners but mounding the batter into a dome. (Only the bottom portion of the batter should touch the sides of the pan – this will create a higher loaf.)
 Slash top to make an ‘X’, 1/2″ deep and 5″ long.
 Bake in the preheated 375º F oven until interior temperature of the bread is 185º F – about 35-45 minutes. If you don’t have a thermometer, look for a golden brown top after 35 minutes.
 Remove hot loaf from skillet and cool at least an hour on a wire rack. Delicious with butter or jam.
 Cornbread often doesn’t live up to expectations. While it may look buttery-moist with it’s vibrant yellow color, one bite sends you reaching for the water glass. The other side of the coin is the cornbread you get at some restaurants, so full of sugar and fat that’s it’s really just a slice of cake.
 Melt the butter and set aside to cool a bit.
 Into the workbowl of your food processor (If you don’t own one, put it on your birthday or holiday list, which is becoming longer by the minute!)), add the corn, sour cream, eggs, and hot sauce. Pulse about 6 times to break up corn.
 Pour the corn mixture into the cornmeal mixture and gently stir a few times. (The dry mixture will buffer the eggs so they don’t cook when the hot butter is added.) Then add in the butter and complete blending the ingredients just to the point where the flour in incorporated. Don’t over mix – overmixing a quick bread (which this is) will produce a tough bread.
 On the stovetop, heat the oil in a 10″ cast iron skillet over high heat until shimmering. Turn off heat and pour in batter (you’ll hear sizzling), spreading it out evenly and smoothing top.
 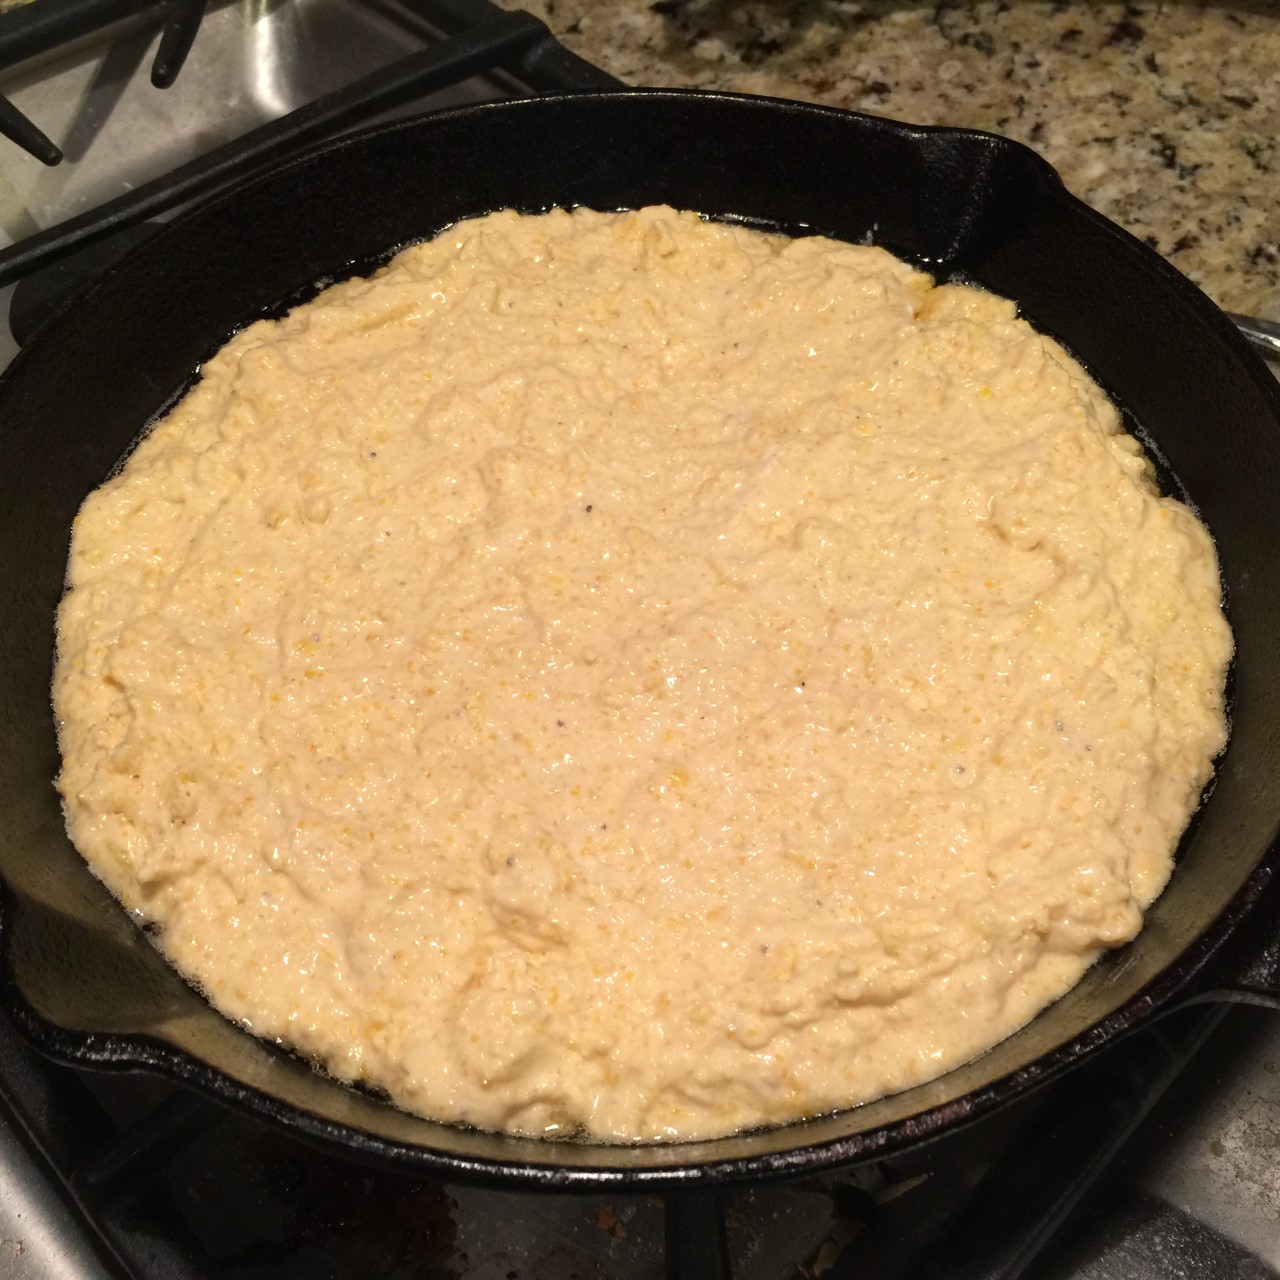 Place in hot oven and bake at 450º F for 18-25 minutes. (Set your timer for 18 minutes and test with a toothpick – when done, it should come out clean. Reset timer and cook longer, if need be.)
  When done, remove from oven and let cornbread set in skillet at least 20 minutes before slicing.