When I heard about a risotto dish featuring Gorgonzola, pears, and walnuts, I was intrigued. Salty, sweet, and crunch combined in a creamy risotto? Whoa! Four worlds colliding! (Seinfeld fans will understand my reference.) I set to work to create the recipe which, surprisingly, only took 2 tries. Delizioso!!!!
NOTE: While any type of pear will do for flavor, I suggest using a deep red pear to add color to the dish.
RISOTTO WITH GORGONZOLA-PEARS-WALNUTS – makes about 3 cups
1T (14g) butter
31g (1/3 cup) shallots, sliced into strips
1/4 tsp salt
1/8 ground black pepper
1/2 tsp dried rosemary
1/2 tsp cumin
20g (1T) honey
135g (3/4 cup) raw arborio rice
57g (1/3 cup) white wine
475 ml (2 cups) vegetable stock
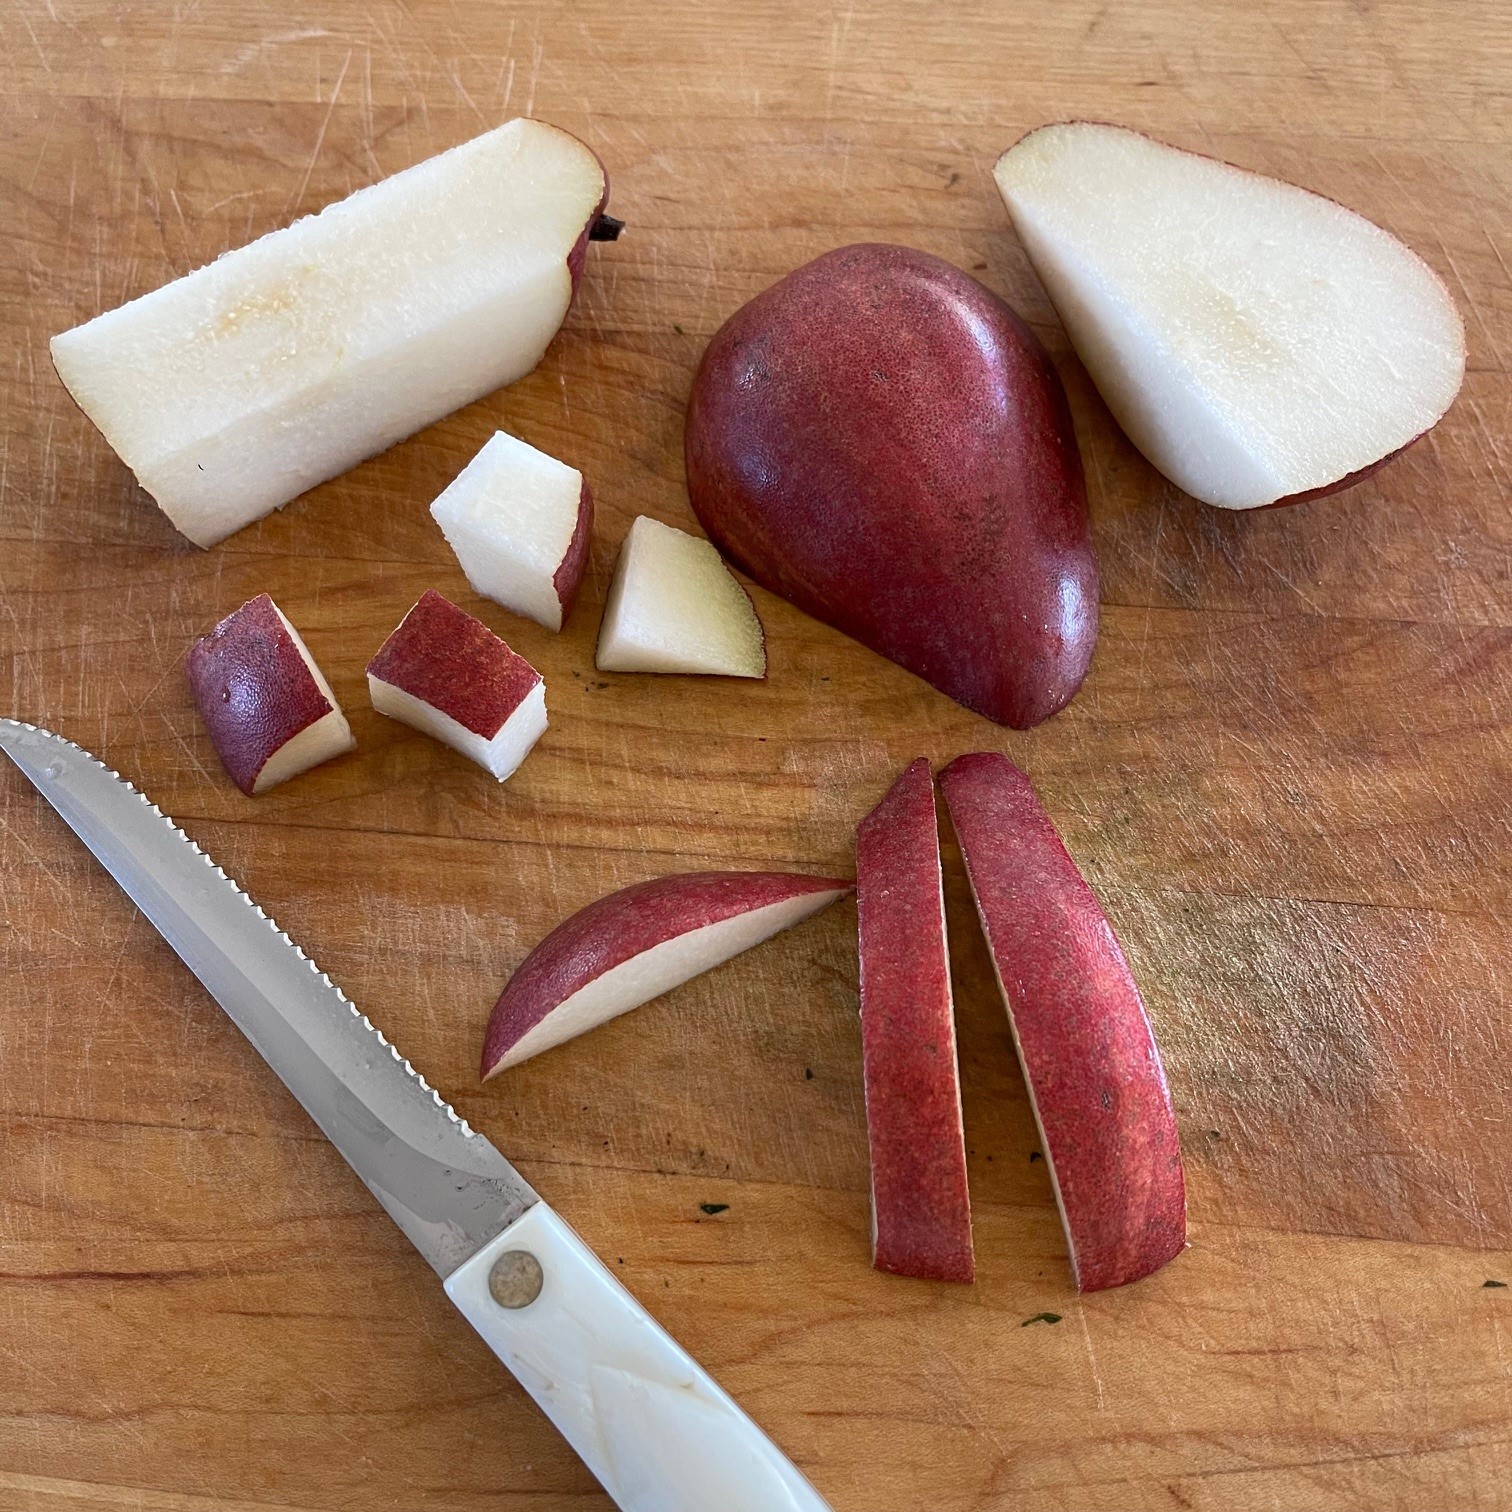
1 pear – not too hard, nor mushy, preferably red for color
40g (1/2 cup) walnuts, chopped & lightly toasted
100g (3.5 oz) Gorgonzola cheese, crumbled
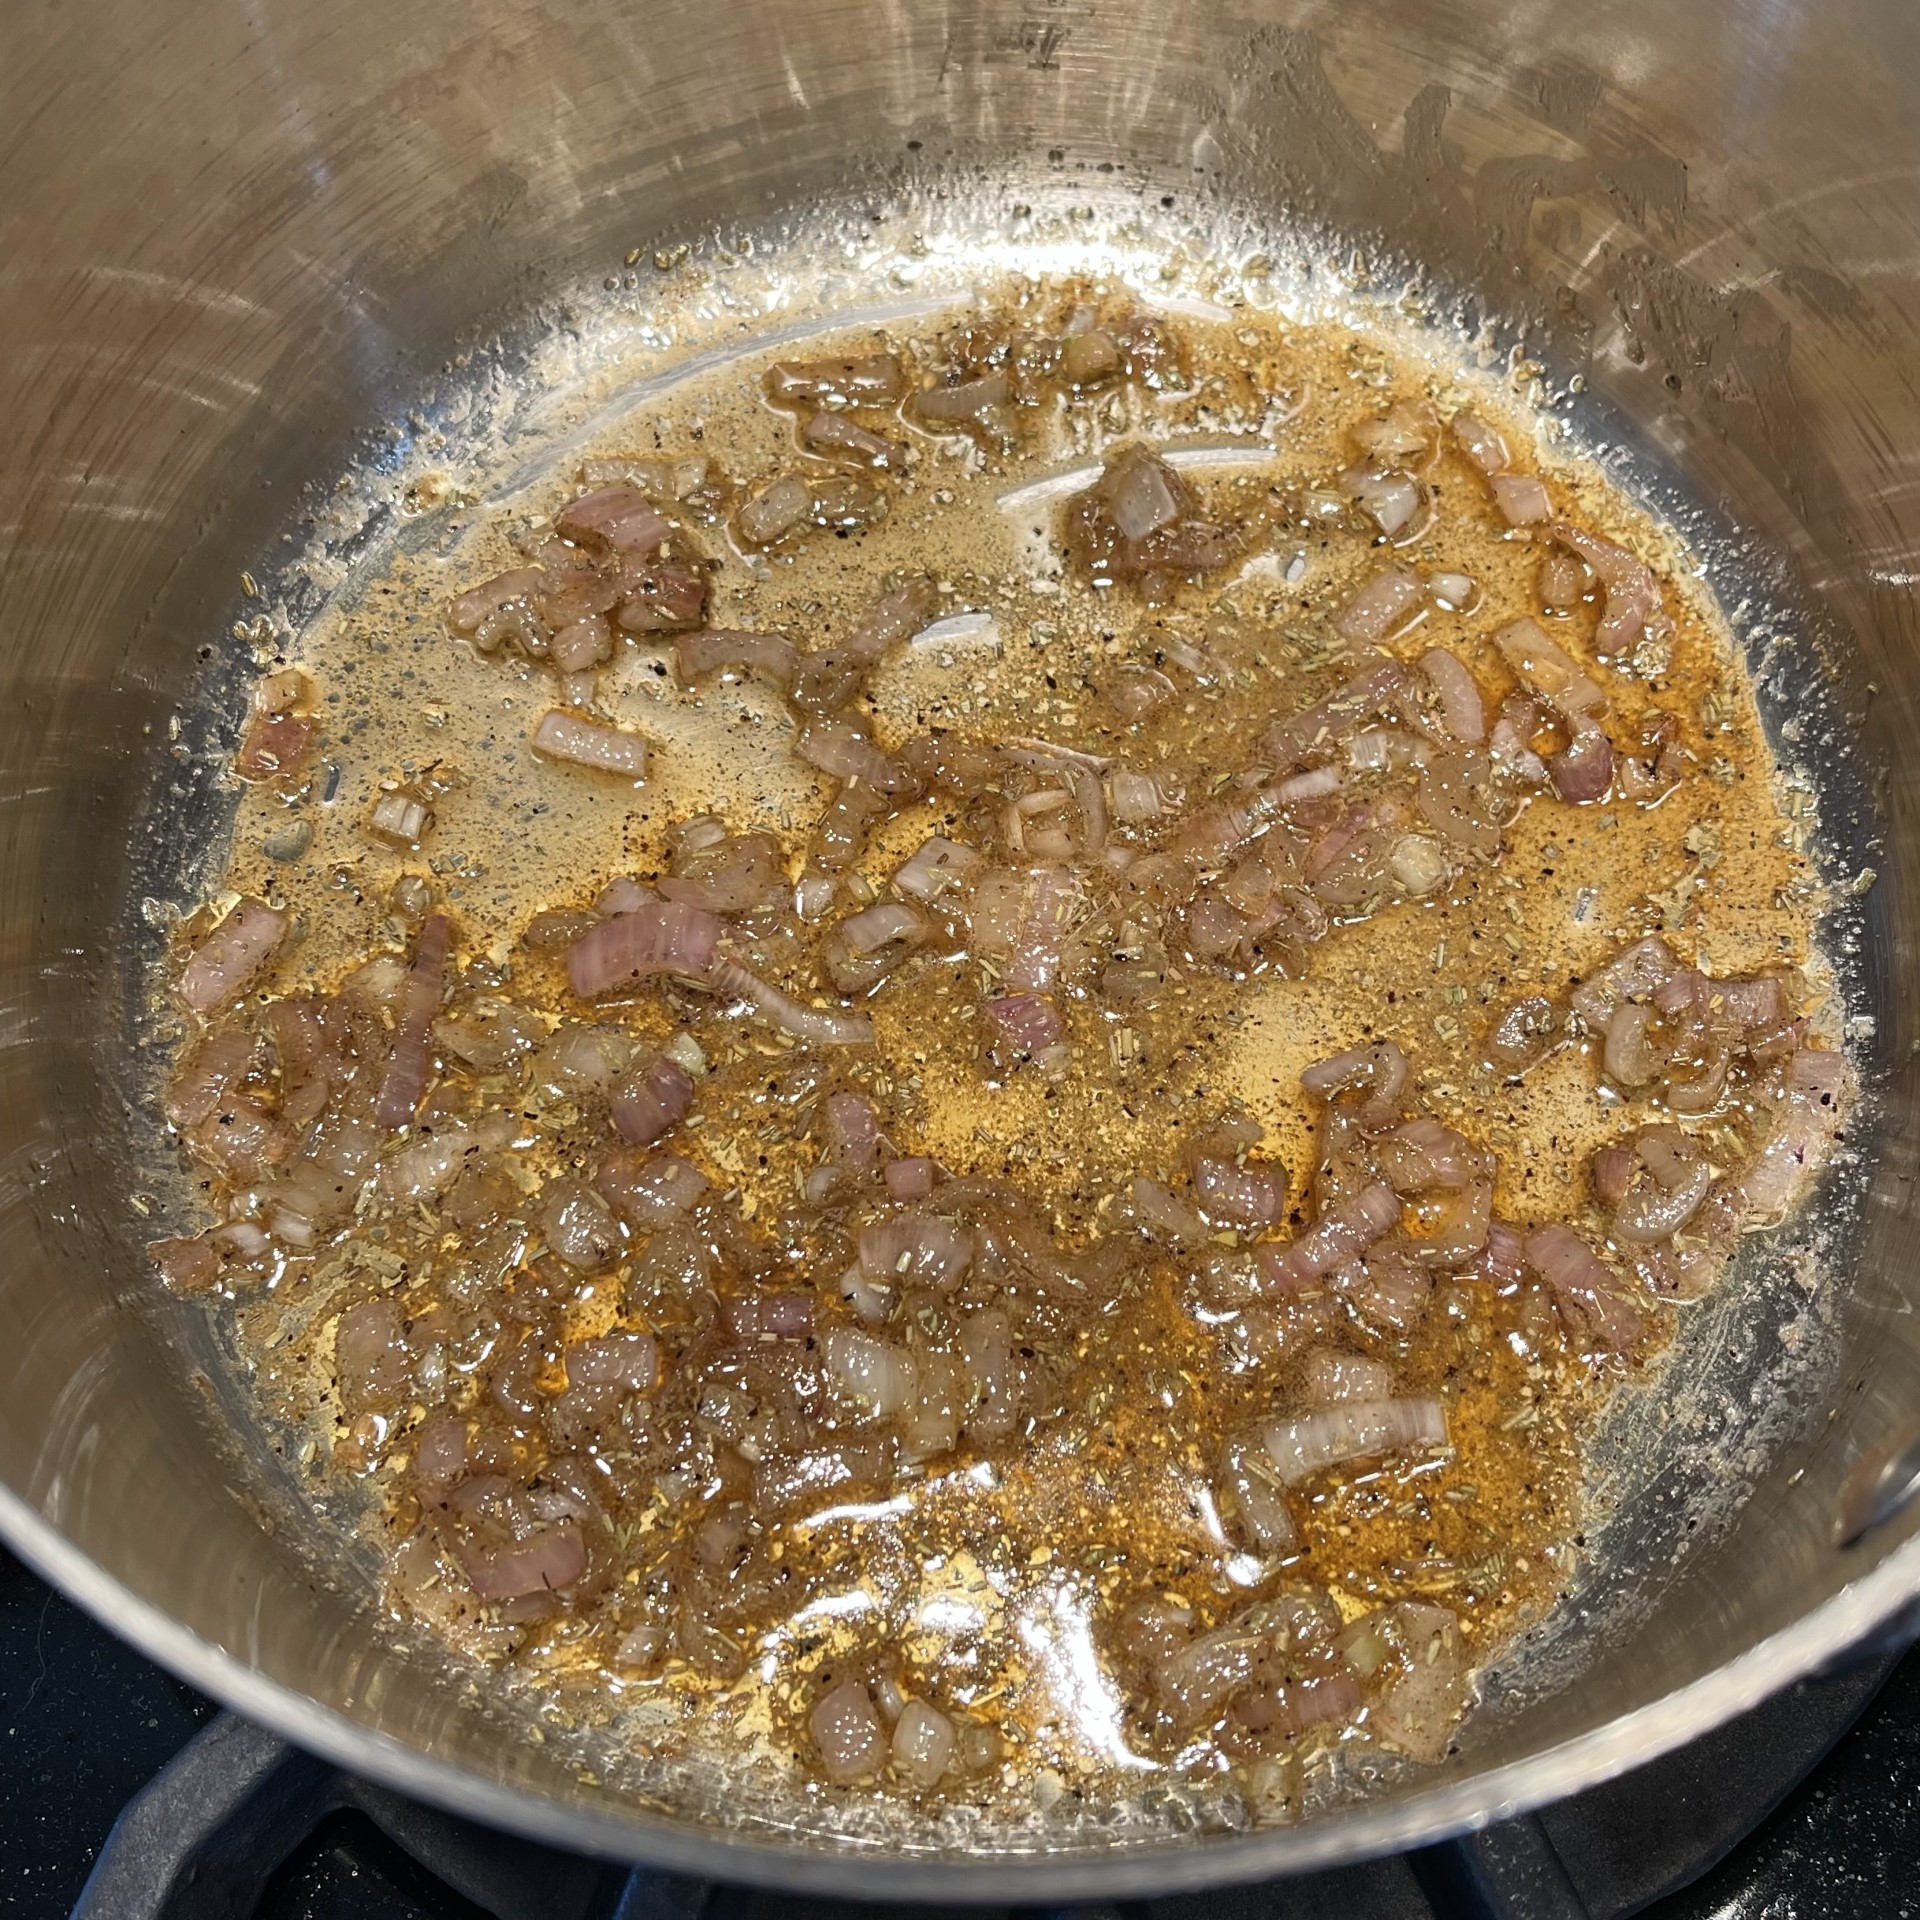
In a medium sized saucepan, melt butter. Add in shallots, salt, and pepper. Over medium flame stir to soften the shallots, but not brown them – about 4 minutes.
Add rosemary, cumin, and honey to pot. Over low heat, stir together for 30 seconds – just to bloom the spices.
Stir in the arborio rice and saute over low heat for 5 minutes.
Pour in the white wine and stir over low heat until the wine has NEARLY evaporated. (This takes just a few minutes so have the vegetable stock ready to go.) Photo shows wine just being added.
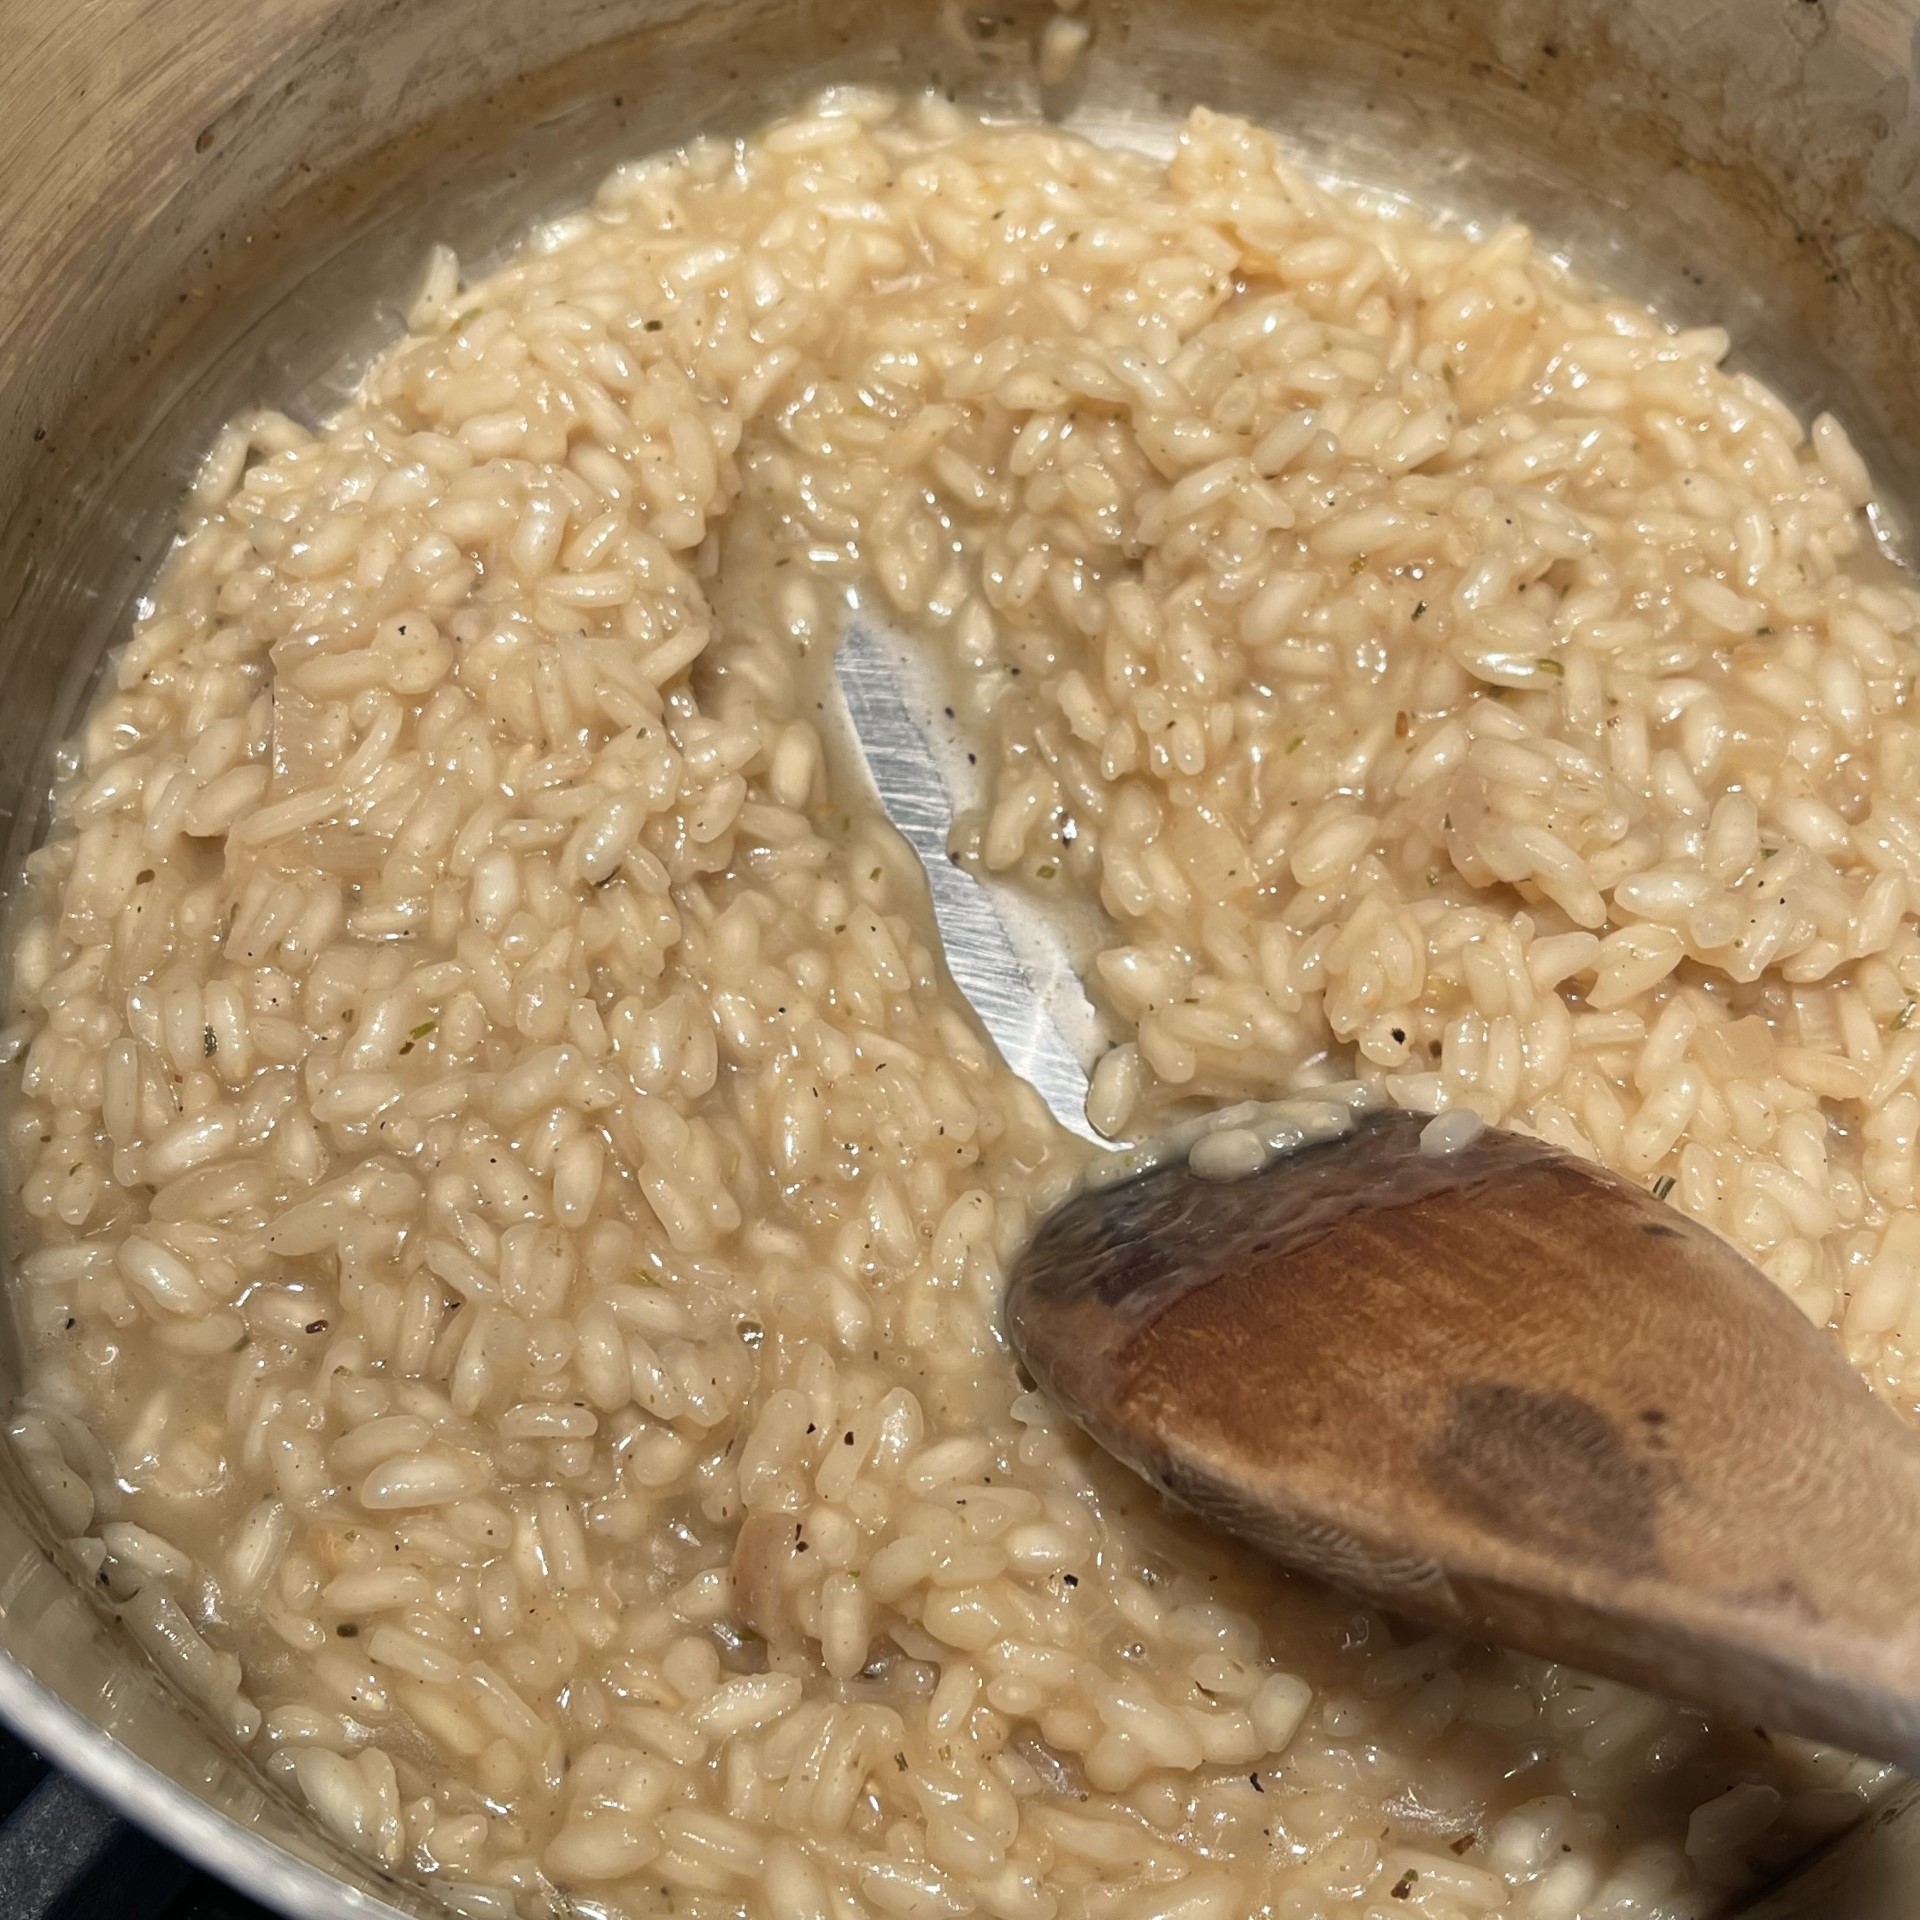
Now comes the part that, while easy, takes time – please don’t rush it. Over medium flame, start adding the stock in about (you don’t have to be precise) 50 ml (1/4 cup) increments, stirring constantly. Add more when the previous amount has been absorbed. Keep going until the final addition – let it absorb somewhat, but not altogether – you want it creamy.
Remove from heat and pour into serving bowl to cool slightly.
Slice pear from top to bottom around core into four slabs. Cut into 2cm (3/4″) pieces. (I prefer to slice my pear just before adding it to the risotto so it doesn’t start to brown.)
Very gently stir in the pears, Gorgonzola, and walnuts, just to blend.
If I’m going to have dessert – and, I AM going to have dessert – it has to be worth the calories. What’s the point in exercising off a dessert I didn’t absolutely love?! So, while I like cheesecake, I rarely eat it since there are so many other choices that I prefer.
That changed recently when I watched an America’s Test Kitchen episode where they featured a lemon cheesecake. It looked so good, I decided I had to make it. And so began the evolution of my Lemon Cheesecake.
As I watched the episode, I copied down the recipe (or so I thought). One of the first steps was to combine 1/4 cup sugar with 1 T lemon zest in a food processor to break down the zest. Did that, no problem. Then, blend this lemon/sugar mixture with an additional 1 cup sugar. Uh oh! For some reason, I forgot to write down that part, so I ended up with a cheesecake batter 1 cup shy of sugar. I did think it strange there was so little sugar called for in the recipe, but waited until I popped the cheesecake in the oven before re-checking the recipe online. The cheesecake had already begun baking by this point so there was nothing to do but carry on and see what happens.
Much to my amazement, the finished cheesecake was delicious even though 80% of the sugar was left out. But that was just the beginning.
The next step came when I decided to make a triple chocolate cheesecake recipe that I found in one of Joanne Fluke’s mysteries. While, as mentioned previously, cheesecake may not be my favorite dessert, chocolate was, especially TRIPLE CHOCOLATE! The thing about the recipe was, besides the obvious cream cheese, it called for 1 cup of mayonnaise! MAYONNAISE???!!!
Well, even though that sounded crazy, the triple chocolate won me over enough to try it. And it was delicious! The mayonnaise lightened up the cheesecake just enough that it held together but wasn’t so thick and stodgy.
I decided to incorporate mayonnaise into ATK’s lemon cheesecake, making a few other changes such as an added egg, using a graham cracker crust, and putting back 48g (1/4 cup) of the 192g (1 cup) sugar that I originally left out. I ended up with a creamy, very lemony Lemon Cheesecake.
NOTE: The cheesecake is baked in a bain marie (water bath). Since you’ll be using a springform pan in which to bake, you’ll need to cover the bottom and sides up to the top rim so the water doesn’t leak into the cheesecake. Springform pans seem very tight, but water can get in. I happen to have a cake pan the does NOT have a false bottom that will contain the springform pan. But if you don’t have one, you can use heavy duty aluminum foil to encase the pan.
ADDITIONAL NOTE: Lemon Cheesecake needs to be made the day before serving. While the actual hands-on work is minimal, there are 7 hours needed for the cake to rest and chill, plus an hour of baking.
LEMON CHEESECAKE
Crust:
163g (1.5 cups) graham crackers
30g (3 T) granulated sugar
77g (5.5 T) butter, melted
Preheat oven to 350°F (177°C).
Crush the graham crackers into fine crumbs using a rolling pin. (Food processors don’t yield an evenly crushed crumb.) Mix the crumbs and sugar in a bowl. Add in the melted butter and blend with a fork.
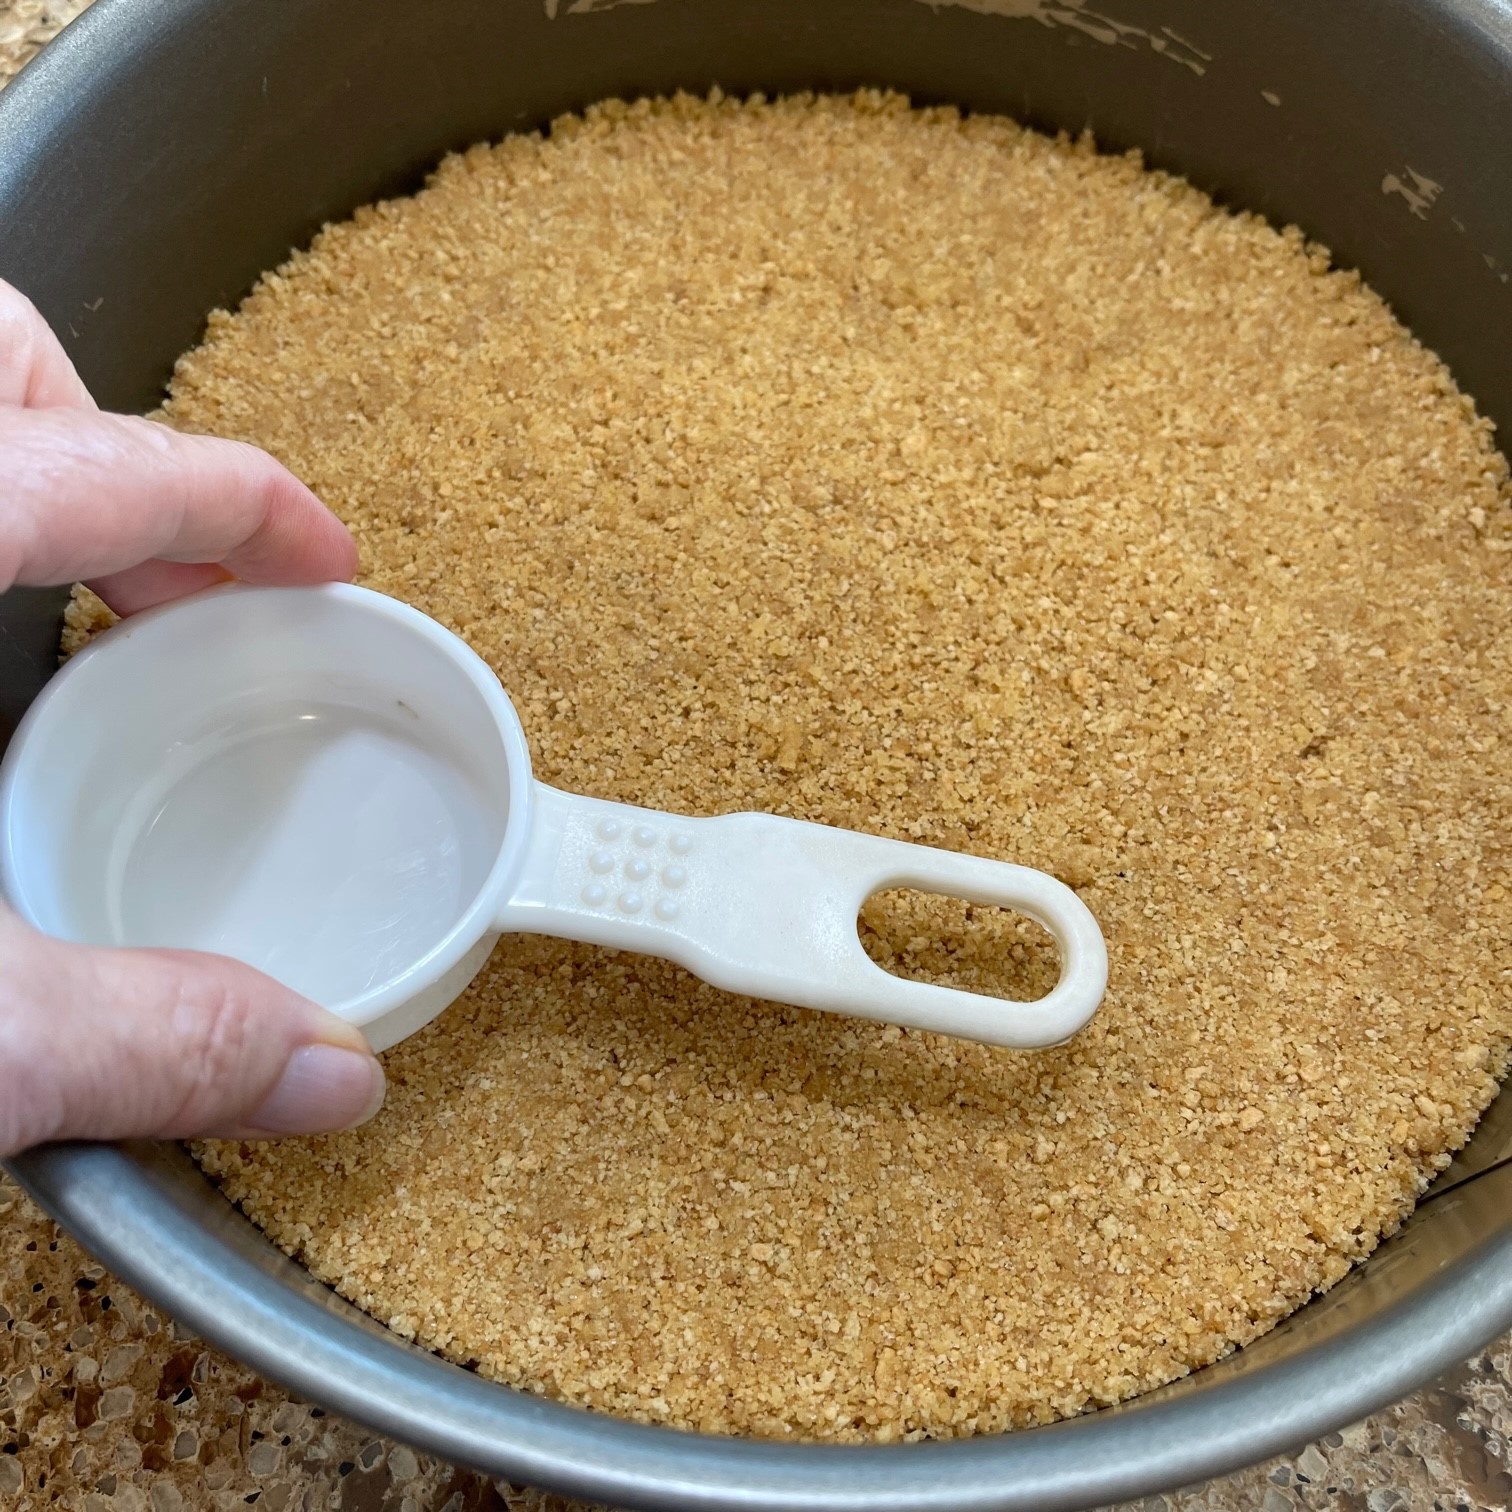
Pour graham cracker mixture into a 9″ (23 cm) springform pan and spread to sides. Pat with finger tips as evenly as possible to the bottom only (not up the sides). Then, go around crumbs with a flat bottomed, circular object such a a glass or measuring cup. Press firmly, but not so much that you make indentations. The goal is a smooth, firm crust.
Bake in preheated 350°F (177°C) oven, until lightly browned around edges – about 13-15 minutes. Remove from oven and let cool while you prepare the filling.
Lower oven temperature to 325°F (163°C).
Filling:
96g (1/2 cup) granulated sugar
1 T lemon zest, packed (don’t be stingy – this is where the lemon flavor come from)
678g (24 oz) (1.5 lb) cream cheese, softened – use the block packaged cream cheese, NOT the whipped cream cheese in a tub
5 eggs
200g (1 cup) mayonnaise
53g (1/4 cup lemon juice
1/4 tsp salt
2 tsp vanilla extract
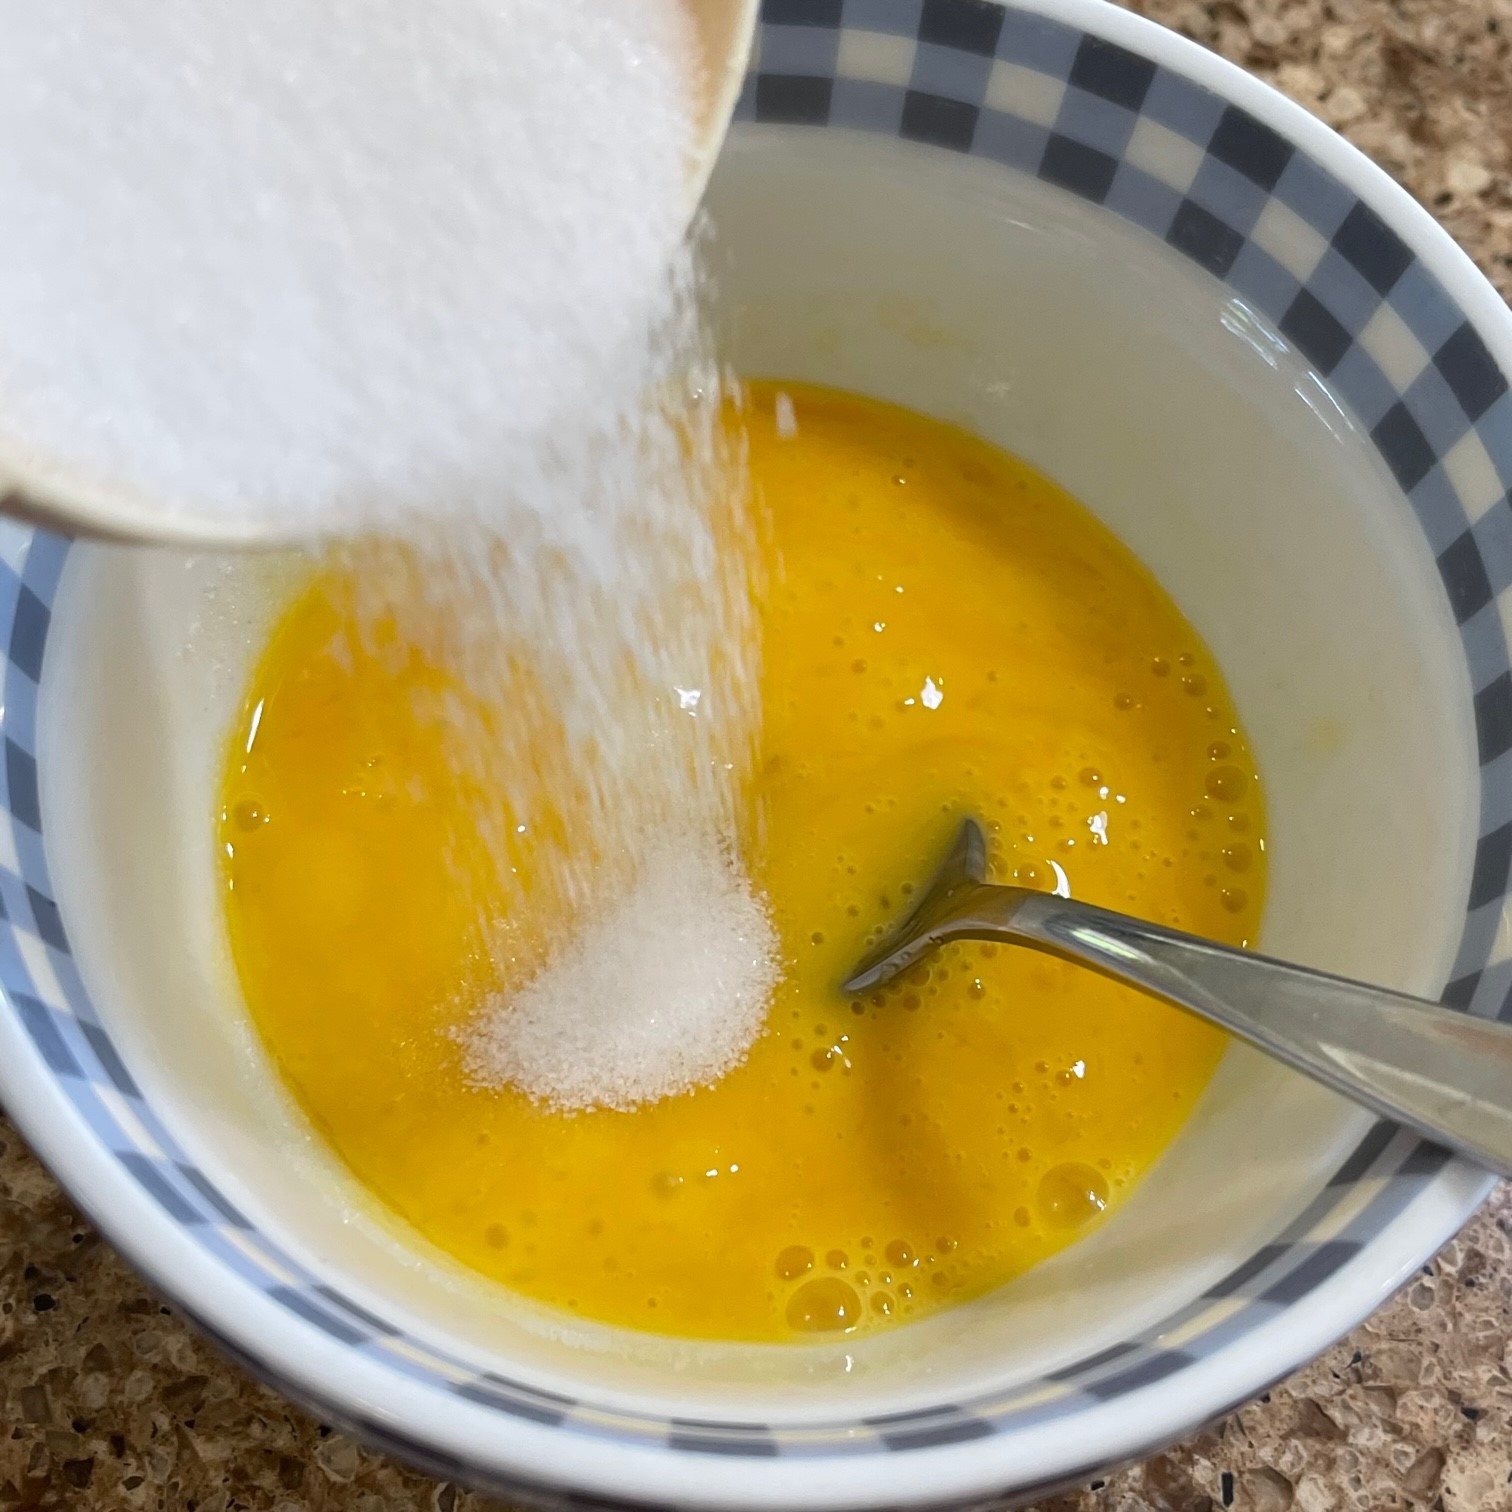
Put sugar and the lemon zest in a food processor or blender. Whirl about 30 seconds to break up zest and infuse the sugar, pausing to scrape down the sides and bottom.
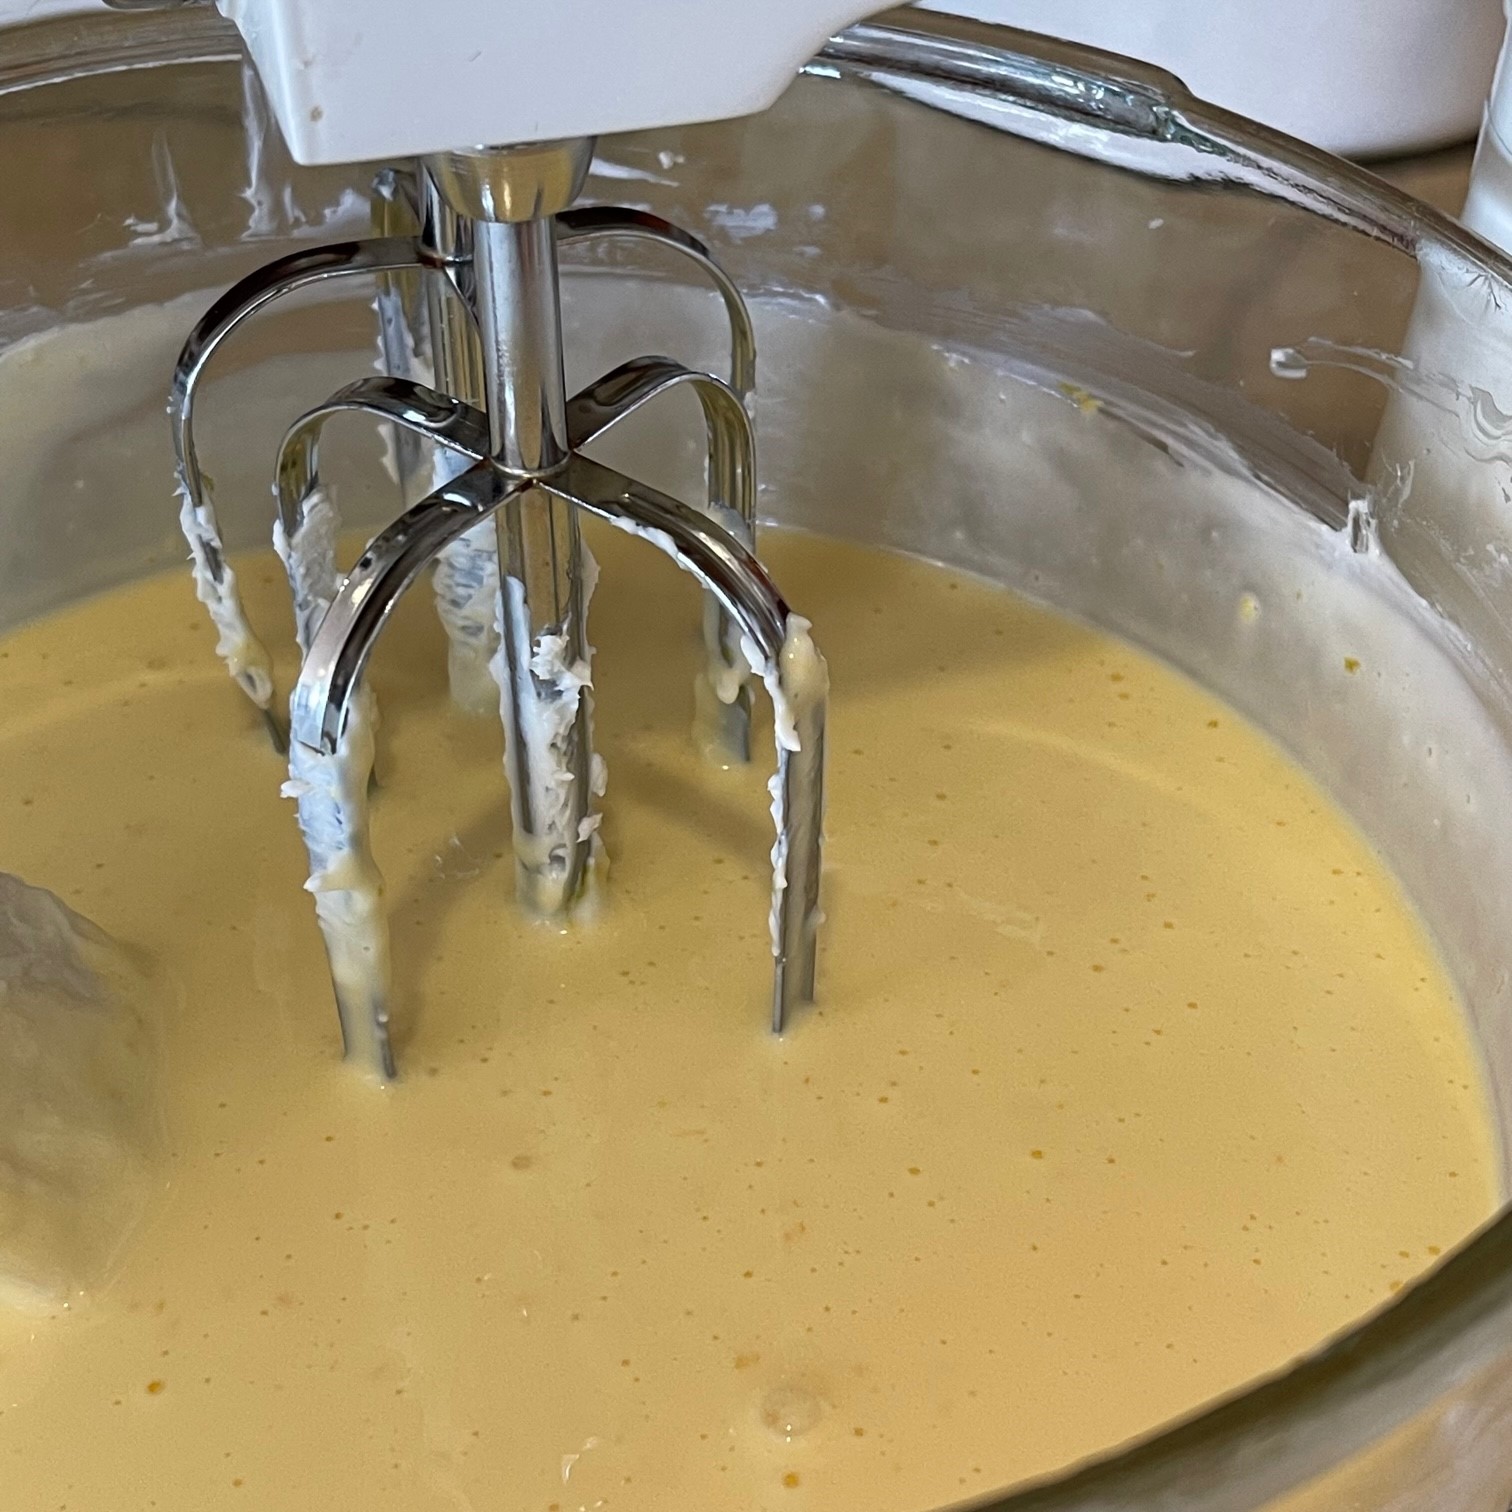
Place the softened cream cheese in an electric mixer and beat on low for about 30 seconds to begin the creaming process. (Yes, I know my spatula has seen better days!)
Add the sugar/zest mixture to the bowl, scraping the sides and bottom of the processor to get every last bit. Beat on medium for 3 minutes – don’t shortchange the time.
Add 2 eggs to the bowl and beat on low just to blend.
Add another 2 eggs and beat on low to blend. Then, add the final egg and the mayonnaise, beating on low just to blend. Finally, add in the 53g (1/4 cup) lemon juice, salt, and 2 tsp vanilla, beating on low just to blend.
Make the bain marie: Place the springform pan with cooled crust either in a slightly larger pan (such as a cake pan that doesn’t have a false bottom) or cover the bottom and sides of the springform pan up to the rim with 1 piece of heavy duty aluminum foil (don’t piece the foil together – the seam would be a port of entry for water). The cake pan or foil will deter water from leaking into the cheesecake.
Place these pans in a large roasting pan, then pour the cheesecake batter into the springform pan. Heat water just before boiling and pour it into the large roasting pan (NOT the cake pan!) about 3/4″ (2 cm) deep. Very carefully place into oven, trying your very best not to slosh the water about. Bake at 325°F (163°C). Set your timer for 45 minutes. The cheesecake is done when the center of the cake registers 150°F (66°C) on your thermometer. It probably won’t be quite done at the 45 minute mark, but better to check early just in case. It takes about 50 minutes in my oven.
When the temperature reaches 150°F (66°C), immediately turn off the oven. Leave the cake in the bain marie in the oven. Crack open the oven door with something like a wooden spoon. Let cheesecake set in oven in the bain marie for 1 hour. Set timer!
After the hour in the oven, remove the springform pan from the bain marie and the cake pan or foil. Don’tunlatch the springform pan – the cheesecake still needs to set. Set springform pan on a wire rack on the counter and run a rounded tipped knife around the sides of the cake just to separate it from the pan. Let set for 2 hours.
Make the lemon curd while the cheesecake is baking.
Lemon Curd:
2 eggs
1 yolk
100g (1/2 cup) granulated sugar
65g (1/3 cup) lemon juice
28g (2 T) butter, cold
1 T heavy cream
1/4 tsp vanilla extract
pinch salt
Beat eggs by hand in a bowl. Slowly pour in sugar, as you continuously beat mixture.
In a small pan, heat the lemon juice to a low simmer. Very gradually (you don’t want to cook the eggs) drizzle the lemon juice into eggs, whisking continuously.
Pour the egg mixture into the now-empty saucepan and cook over medium-low, stirring constantly. At around 160°F (70°C) the mixture will begin to thicken. Continue cooking until the temperature reaches 170°F (77°C). Remove from burner.
Immediately add the cold butter, cream, 1/4 tsp vanilla extract, and salt. Stir until butter is melted. Pour the curd into a strainer which is set upon a clean bowl (don’t forget the bowl or your curd will go down the sink!). Stir the curd in the strainer with a spoon to help the mixture flow through. Remember to scrape off the curd clinging to the underside of the strainer into the bowl (waste not, want not!).
Discard the bits remaining in the strainer – yuck!
Cover bowl and chill.
Once cheesecake has rested for 2 hours, pour curd on top, spreading to edges.
With the latch still locked on the springform pan, chill in fridge at least 4 hours. Release the spring on pan and remove the sides.
Run a long knife under the crust to release it. Carefully, slide the cheesecake onto a serving plate.
Calzoni are a favorite hand-pie in our house. They’re not difficult, but they do take some time because of the rise time of the dough (1-1.5 hours), so plan accordingly. The actual hands-on work isn’t all that much, especially if you knead the dough in a food processor (it’s not cheating!)
Leakage is always a worry with hand-pies. Try not to roll them too thinly, especially in the center (which is a weak point). 6.5″ (17cm) is about as big a circle as you should roll out.
Try to use low-moisture mozzarella. This will help discourage leakage.
TIP: Rather than buying bread flour, I make my own when I need it by mixing Vital Wheat Gluten Flour to my plain (all-purpose) flour. This way I can control the protein percentage of the flour. Store all flours in the freezer to prevent bugs and keep flour fresh.
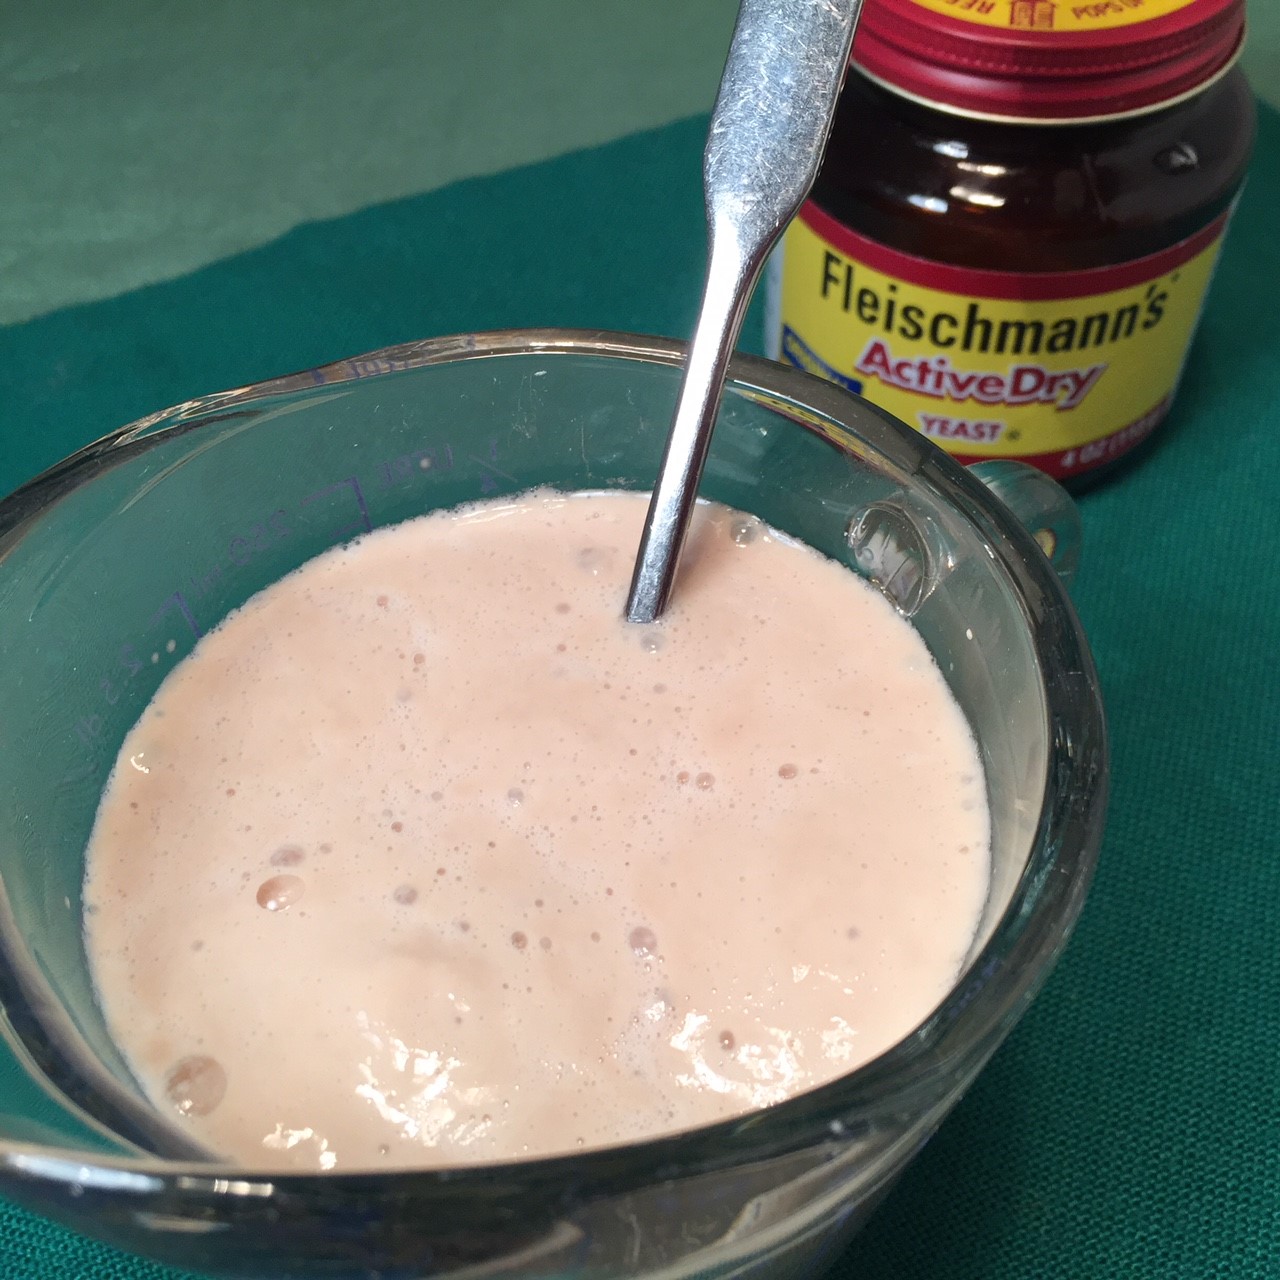
Mix together the warm water and yeast to proof for about 5 minutes. Set aside.
Into the workbowl of a food processor, put the flour, salt, and olive oil. Pulse to blend a couple of times. Once yeast has proofed, run the machine while you slowly pour in the yeasted water. Continue running about 40 seconds – until the dough comes together. You may need to add more flour, but do so in 1 T amounts at a time.
Empty dough onto a lightly floured surface and knead by hand about 6 times, then bring the dough together into a ball.
Place dough into a lightly oiled bowl, then flip the ball over so the oiled side is up – this keeps the dough from drying. Cover (I use a plate) and let rise about 1.5 hours.
While the dough is rising, make the filling.
Filling:
1/2 T olive oil
214g (7.5 oz) (3 cups) white mushrooms, coarsely chopped
60g (2 oz) (1/2 cup) yellow onions, chopped
3 cloves garlic, pressed or minced
1/2 tsp dried oregano
1/2 tsp red pepper flakes
81g (3 oz) broccoli, chopped in 1/2″ pieces
3 T fresh basil, chopped finely
58g (2.25 oz) black olives, sliced
1/2 tsp salt
160g (3/4 cup) ricotta
30g (1 oz) (1/3 cup) Pecorino Romano, grated (or any hard cheese)
111g (4 oz) (1.25 cup) low moisture mozzarella
1/2 cup tomato sauce
Into a saucepan, heat oil. Add in the mushrooms, onions, garlic, oregano, and red pepper flakes. Saute 5 minutes over medium heat.
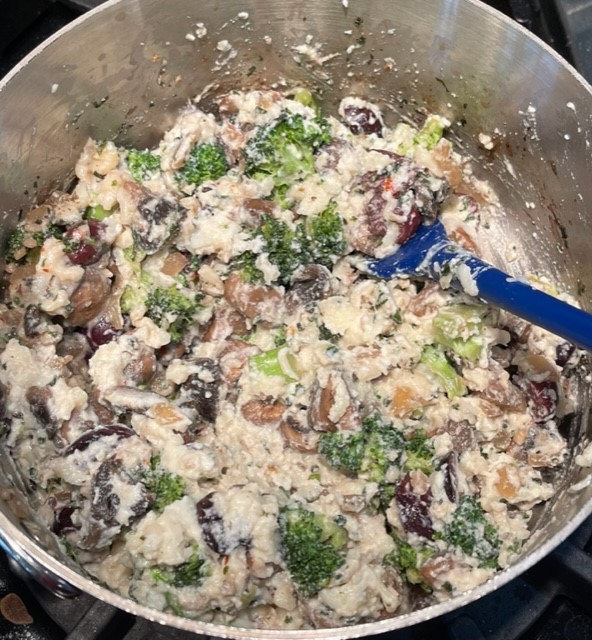
Add in the broccoli, basil, black olives, and salt. Cook over medium-high to evaporate liquid – about 1-2 minutes. Cool.
Stir the ricotta, Pecorino, and mozzarella into the cooled broccoli mixture.
PREHEAT OVEN TO 475°F (250°C)
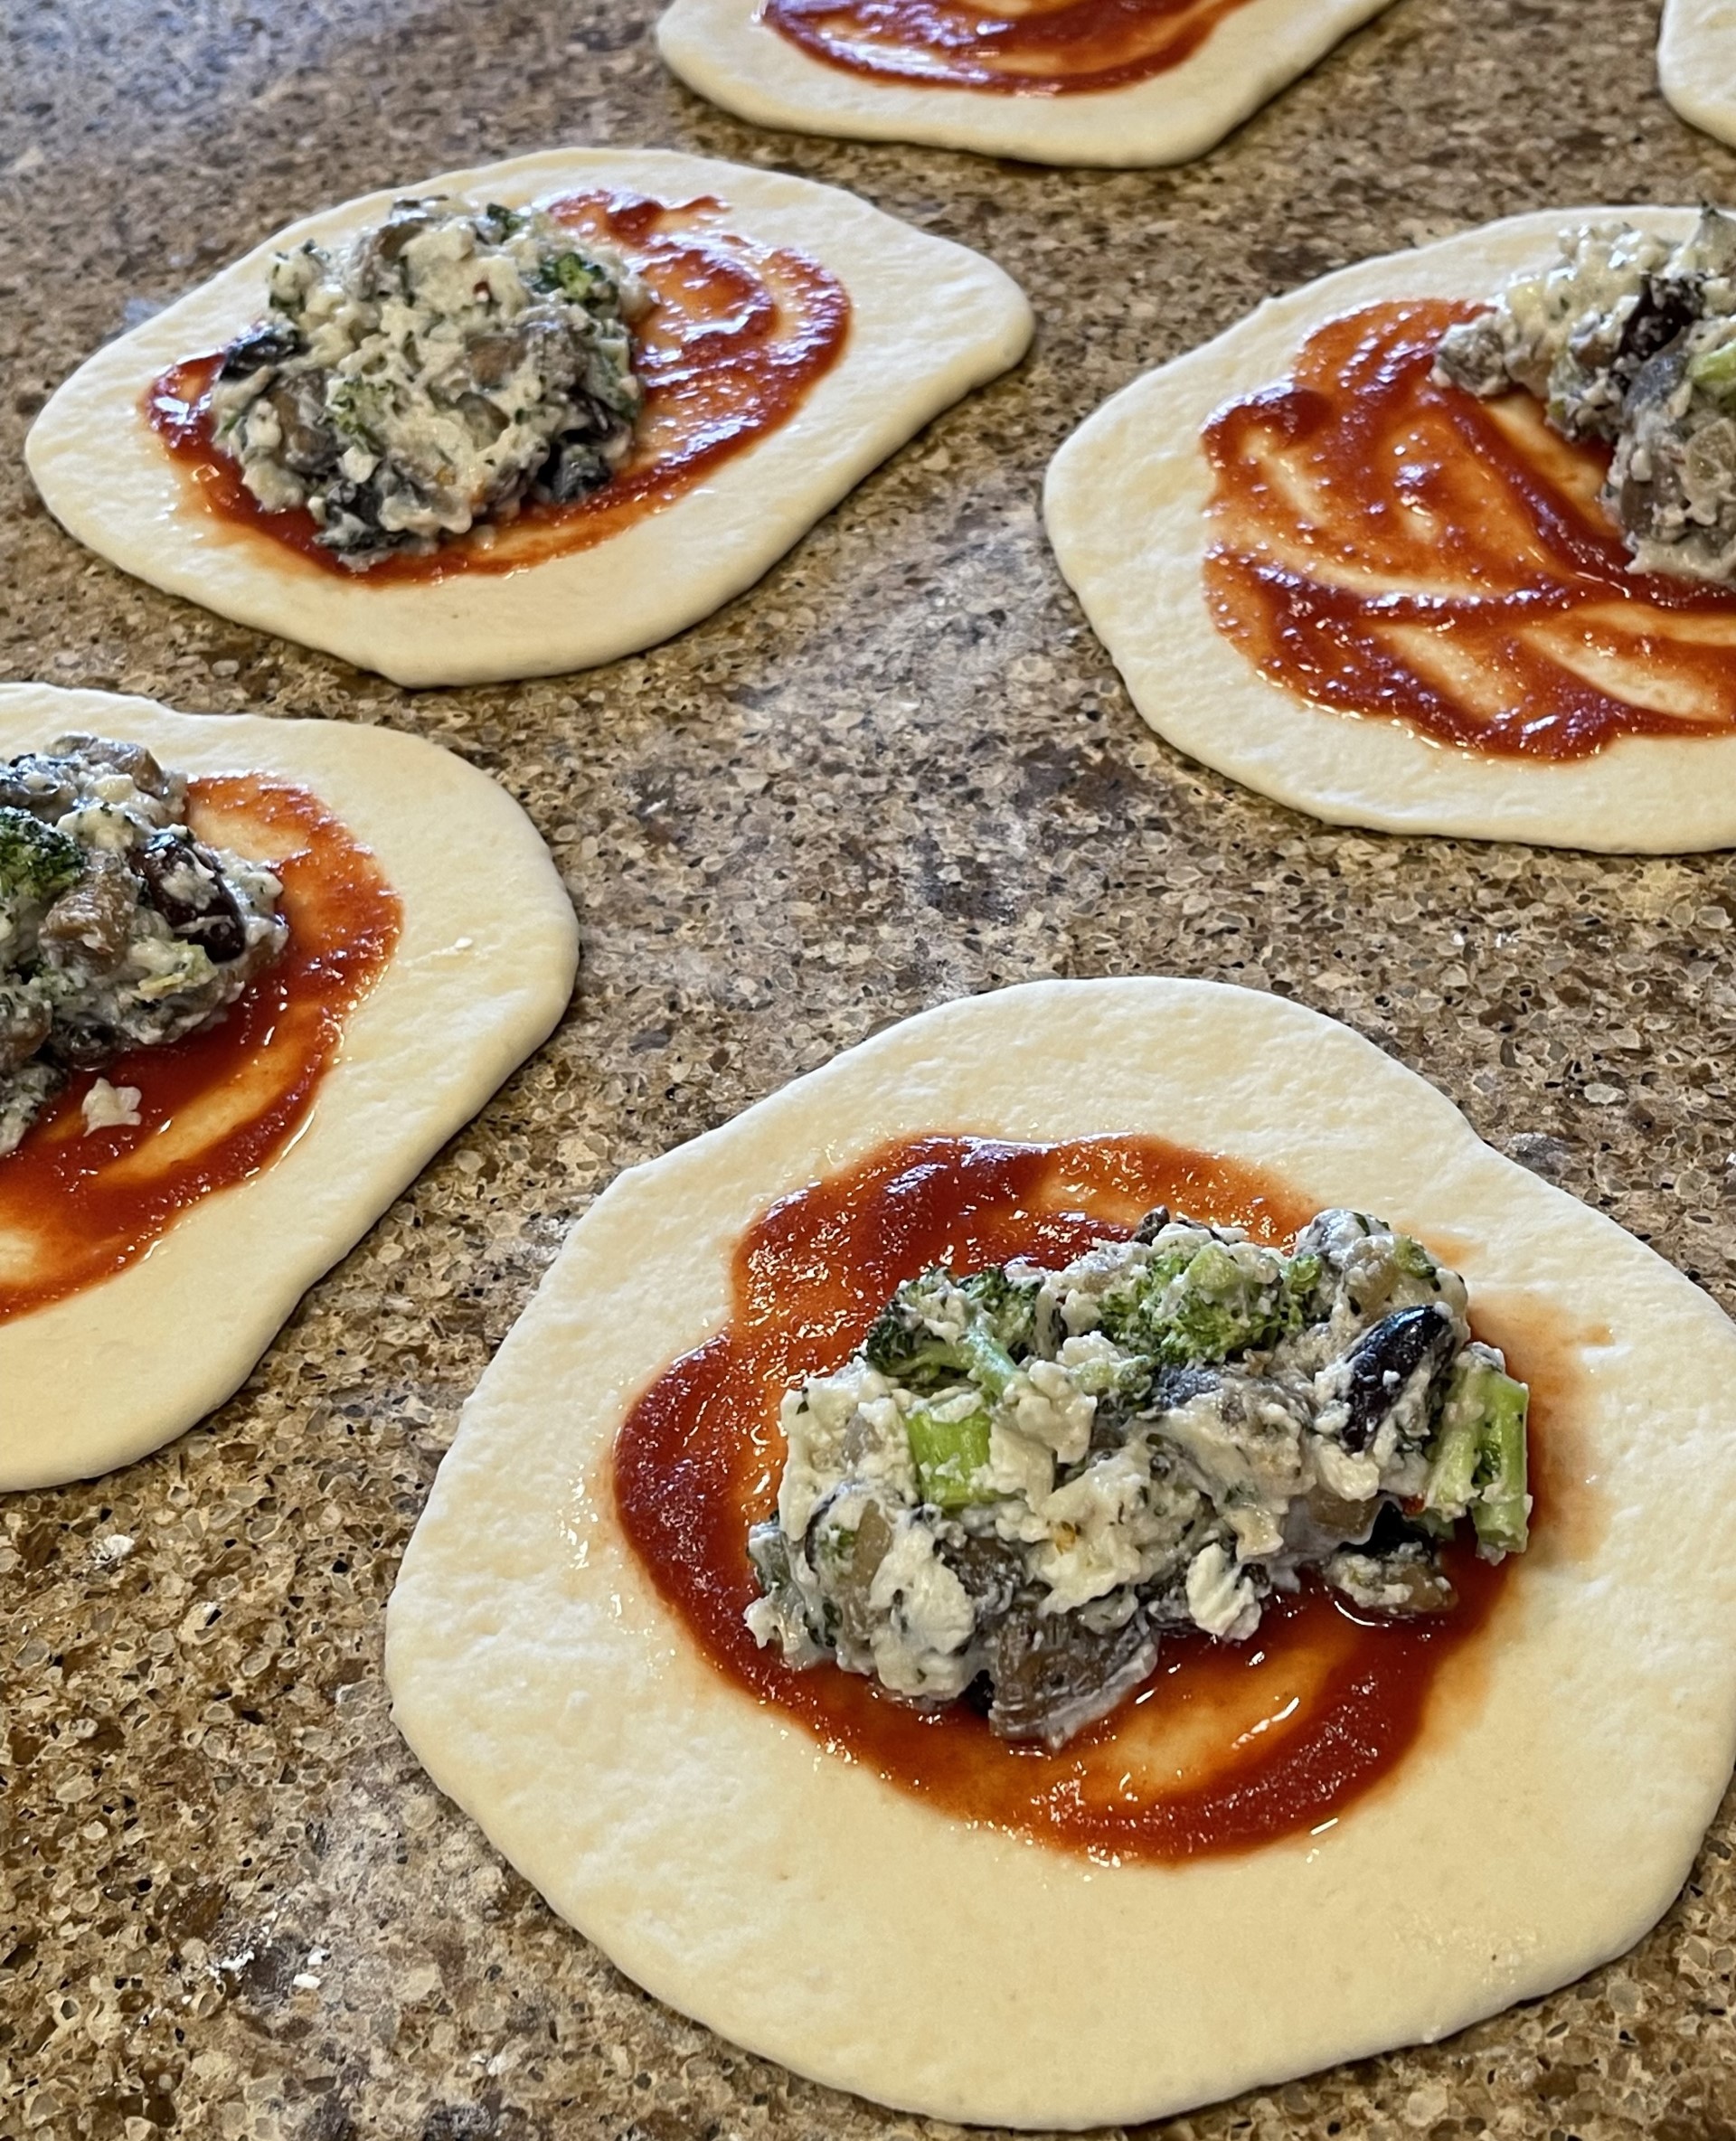
It’s best to fill the calzoni in an assembly-line fashion so you can divide up the filling evenly.
Divide the risen dough into 6 equal segments. On a very lightly floured surface, roll each dough piece into 6.5″ (17cim) circles. After rolling each dough circle, set it out of the way onto a floured area. (The flour will prevent the dough from sticking and tearing to the counter as you move the finished calzone to the baking sheet.)
Spread tomato sauce to within 1″ (2cm) of the circle’s edge. (The dough border will be crimped and requires dough-on-dough contact to stick properly. The tomato sauce will interfere with that.) Top each circle with equally portioned fillings.
If the dough is tacky around the the circle’s edge, go ahead and fold the calzone in half, meeting the edges. If the dough is a little dry, then dip your finger in water and run it around the edge so the dough will stick together. Press down the edges with your fingers, then fold down the two corners and press them down.
Now to begin the crimping process. (Deep breath!) If you’re right-handed, start with the right corner; lefties, start with the left corner. With your NON-dominant hand, press down the corner flap. With your dominant hand, grasp the dough next to the folded corner and fold that in, pressing down. Continue along the entire border, non-dominant hand pressing the previous crimp, dominant hand forming the next crimp.
The idea is to form a ropelike crimp. I’ve never managed to quite get that look, but I’m happy with my version. Find your own way, if you like. The point is to seal in the filling.
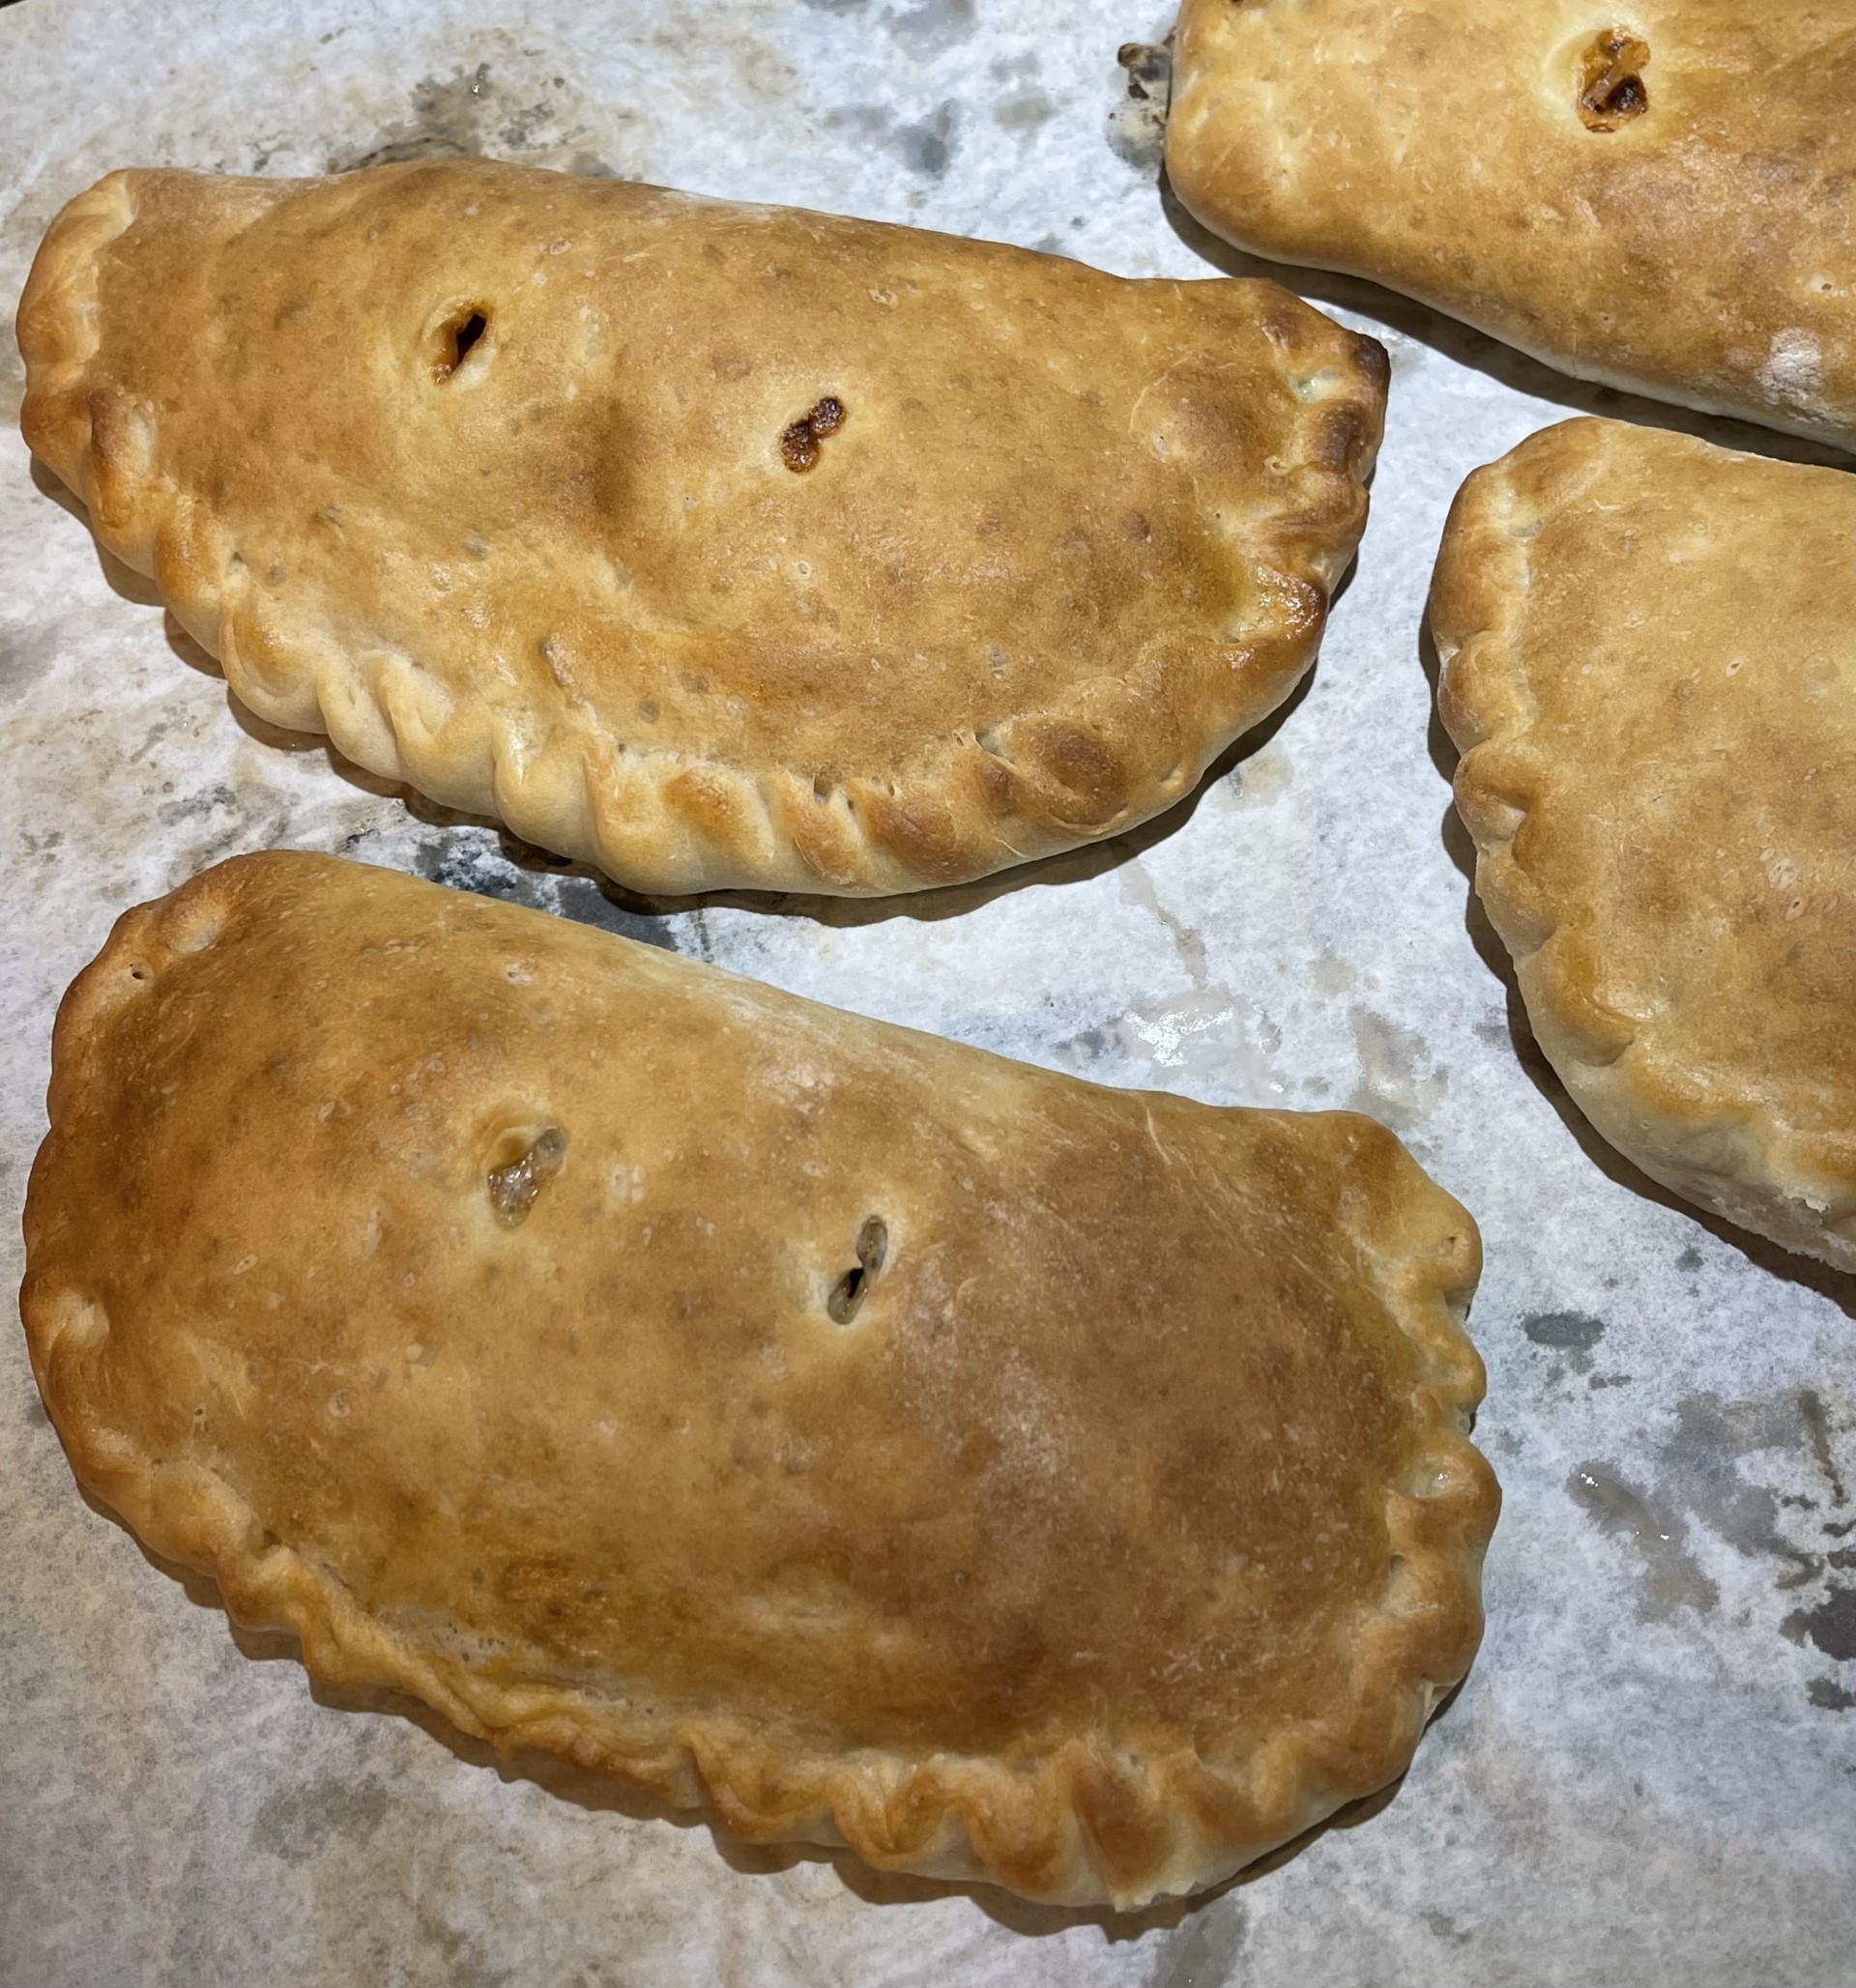
Place crimped Calzoni on a parchment paper lined or greased cookie sheet as you go, taking care not to tear the bottoms of the dough as you lift up each calzone (this is why you floured the counter under the dough circle).
Brush olive on all calzoni tops, including the crimps.
Cut 2 small slits on each top with a knife or scissors to allow steam to escape.
Bake in a preheated 475°F (250°C) oven with fan (if you have a convection oven) or without fan (if you have a conventional oven). Bake until golden brown – about 15-20 minutes.
I’ve been making burritos with homemade tortillas for years. And they were good. But one day I thought I’d make enchiladas (which I hadn’t made in years), and decided to make the enchilada sauce from scratch. Afterwards, I had some leftover sauce and, as a woman who hates waste, decided to make burritos, covering them with said sauce. Wow! Game changer! Those burritos went from good to “I could eat these everyday” great!!!
This fast and easy recipe makes about 2 cups of sauce. As Queen of Freeze, I would be remiss if I didn’t suggest you double the recipe (try it first, to be sure you like it), then freeze it in portion sized containers for future use. At this point I haven’t tripled or more the recipe. Note: this sauce can be doubled well, but some recipes don’t fare well made in bulk.
ENCHILADA SAUCE: makes about 2 cups
21g / 3T all-purpose or whole wheat flour (I use AP flour)
4g / 2 tsp chili powder
1/8 tsp ground cinnamon
1g / 1 tsp cumin
1g / 1/2 tsp garlic powder
1/4 tsp dried oregano
1/3 tsp salt
3T olive oil
27g / 2T tomato paste
475 ml / 2 cups vegetable stock
1 tsp red wine vinegar
1/4 tsp ground black pepper
Into a small bowl, combine the flour, chili powder, cinnamon, garlic powder, oregano, and salt.
Into a saucepan, heat the oil over medium flame. Add in the flour mixture, stirring for 1 minute. This will heighten the spice flavor.
Stir in the tomato paste and cook 1 minute to deepen the flavor of the paste.
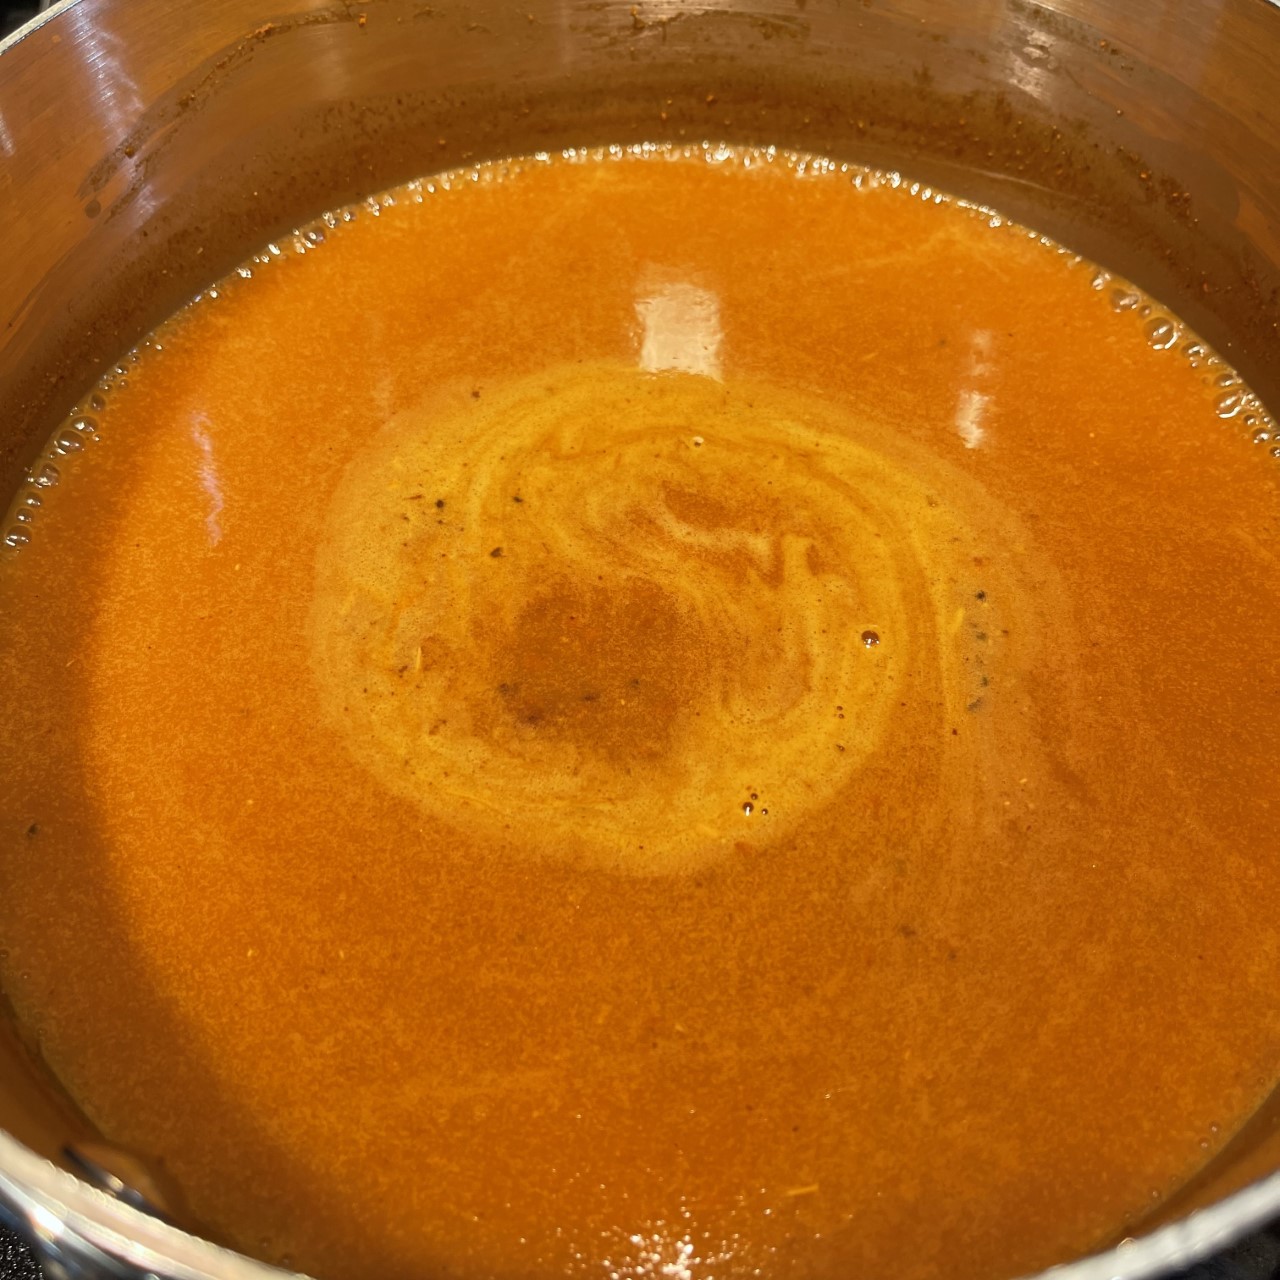
VERY SLOWLY add the vegetable stock, smashing the lumps as you go, until well blended. (I like to use a flat-headed spatula.) Bring to simmer over medium/high flame.
Maintain the simmer by adjusting the flame as needed until the sauce is thickened somewhat – about 5-7 minutes. (The sauce will NOT be thick like a cream sauce – just a little thickened.) Remove from heat.
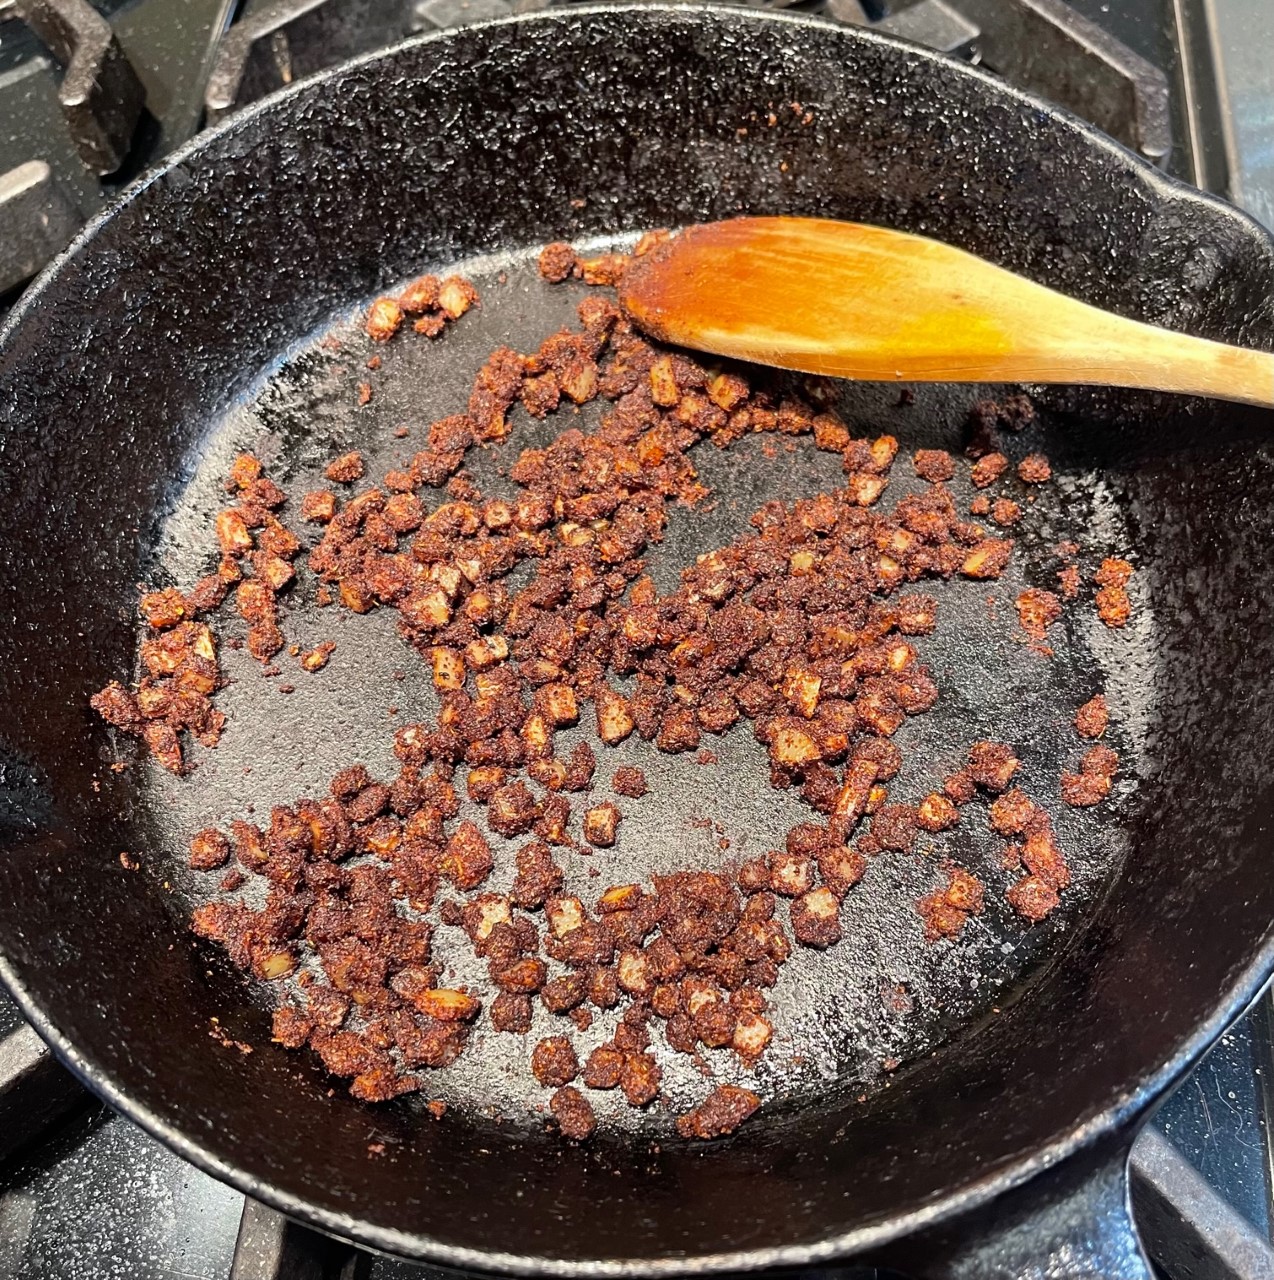
Tamale Pie is one of my favorite meals to prepare. Not only is it delicious, but it’s quick to assemble and bake….that is, IF you’ve already made my HOMEMADE VEGETARIAN “GROUND BEEF” or use purchased imitation ground beef (such as Impossible Burger or Morningstar Crumbles). For this reason, I always keep 1 lb (1/2 kg) portions in my freezer. In the morning, I set it out to thaw.
NOTE: As a woman who prefers to wash as few dishes as possible, I use a cast iron skillet for this recipe since it can go from stovetop to oven. You can also use a different type of skillet, as long as the handle is able to go into the oven. Alternatively, saute the onions in a small saucepan, then mix everything together in a bowl and bake in a casserole dish.
Into a skillet, combine the oil, chili powder, and onions. Saute over medium heat for 5 minutes.
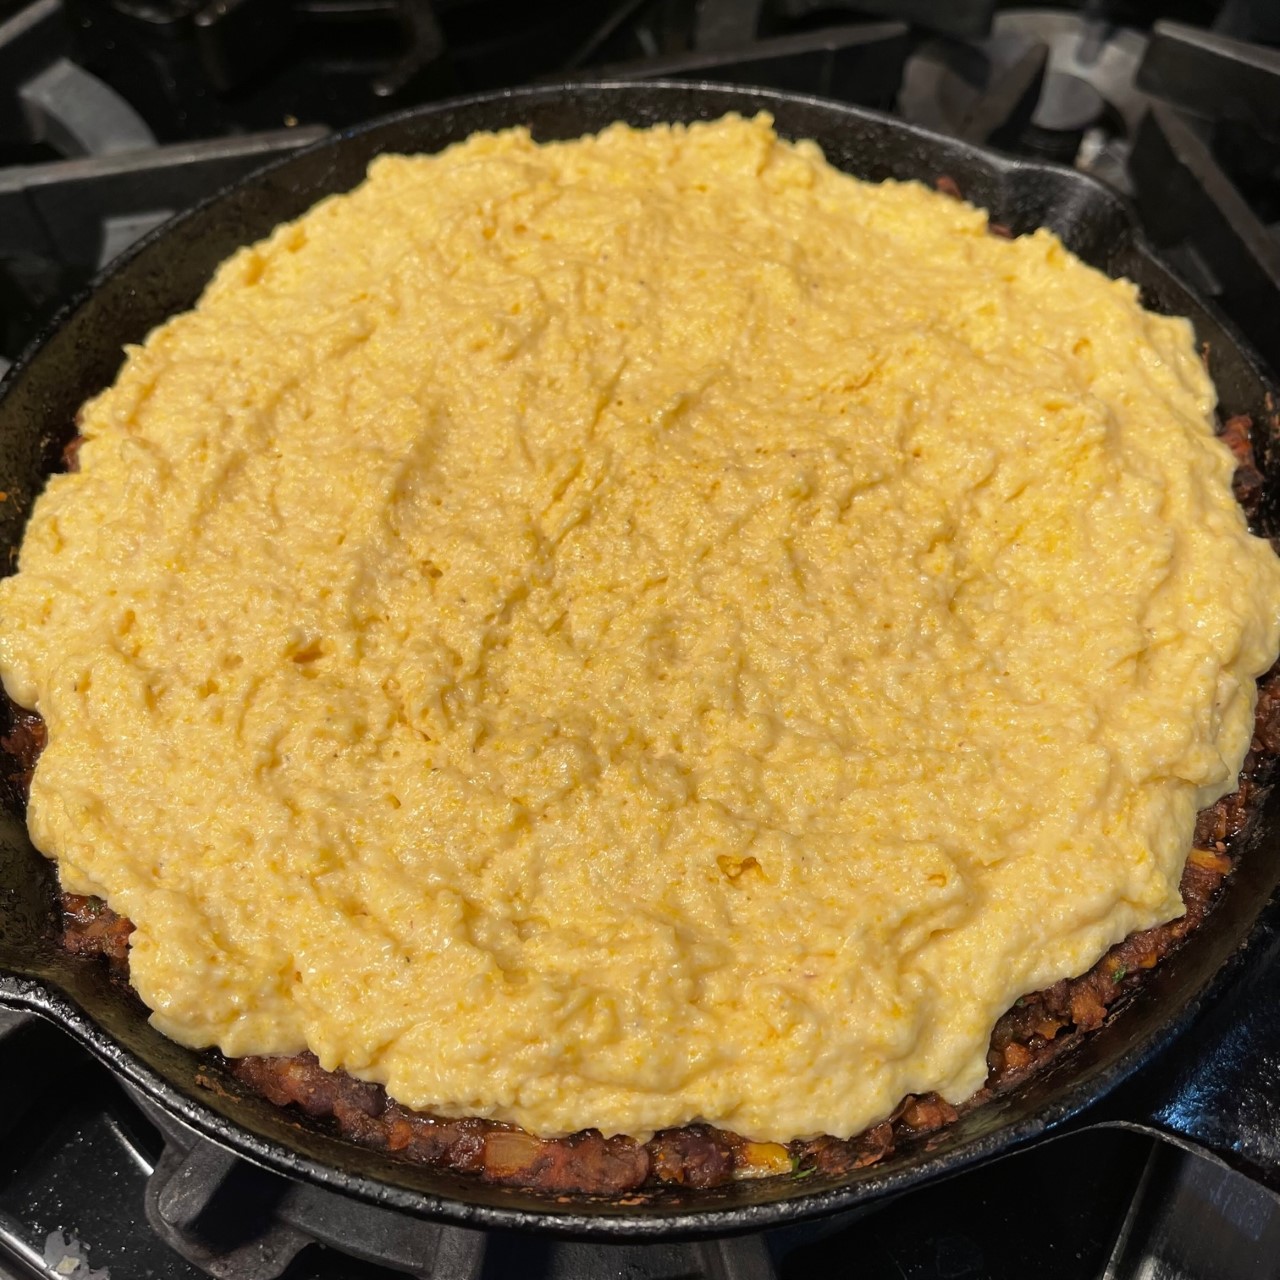
Pour cooked onions into a bowl. Add in the imitation ground beef, black beans, olives, salsa, cilantro, and cheese. Mix together and pour back into skillet, smoothing top.
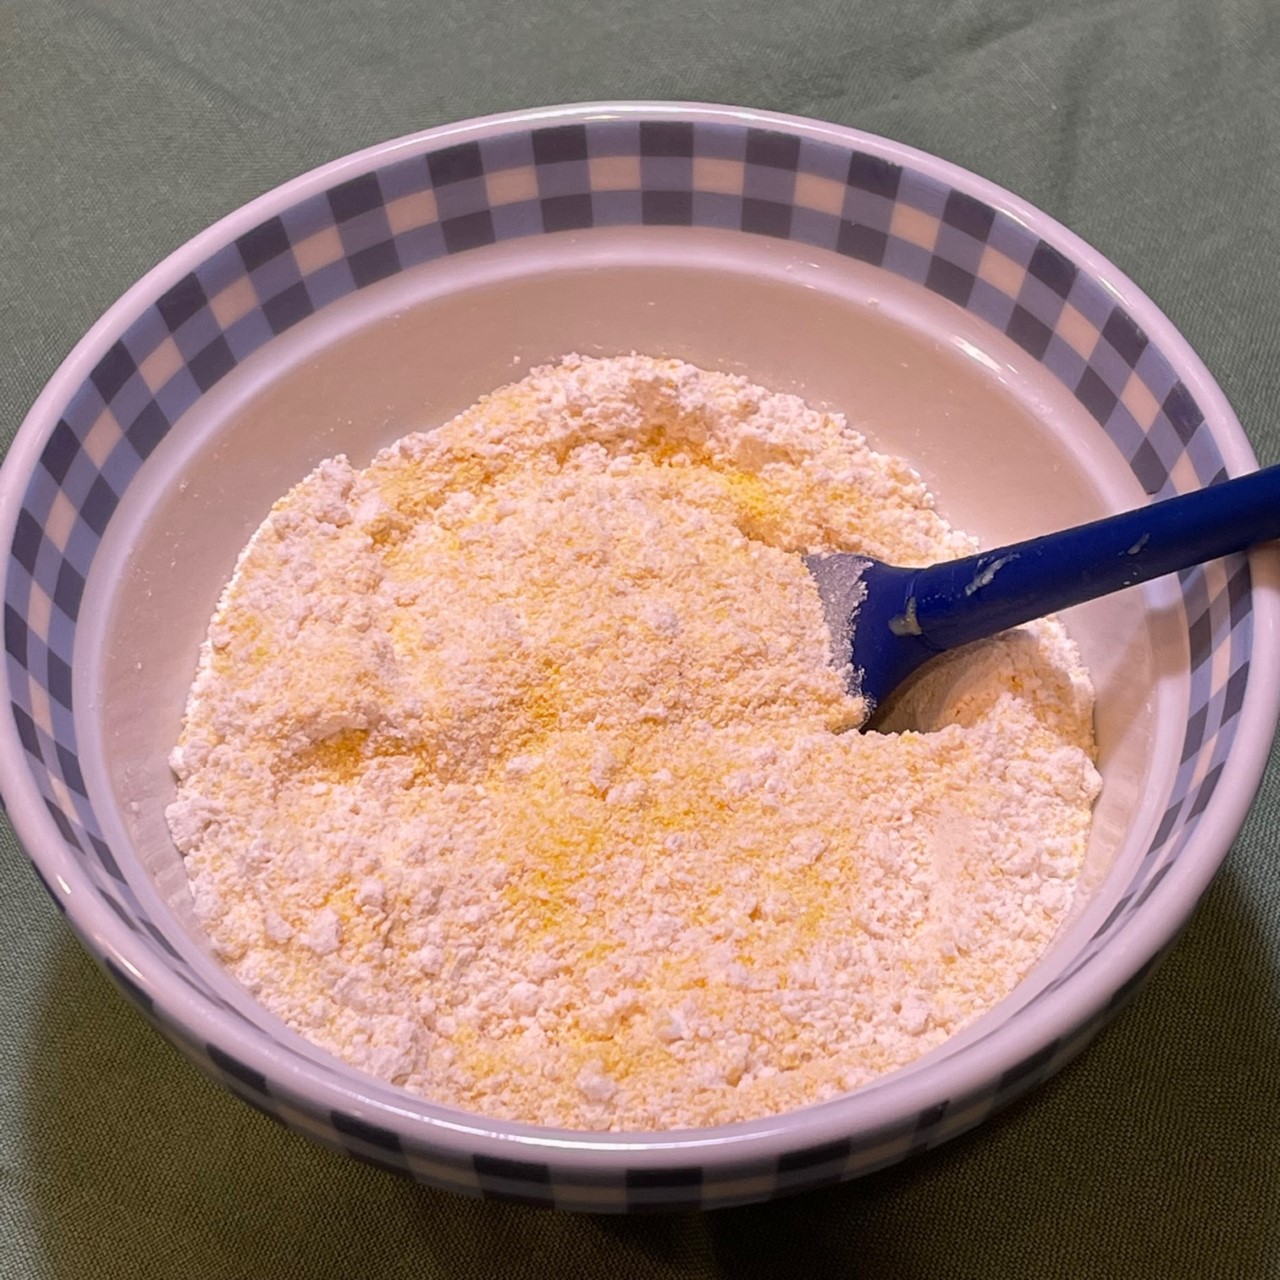
Into a bowl (it can be the same bowl you used for the filling), combine the cornmeal, flour, sugar, salt, baking powder, and baking soda.
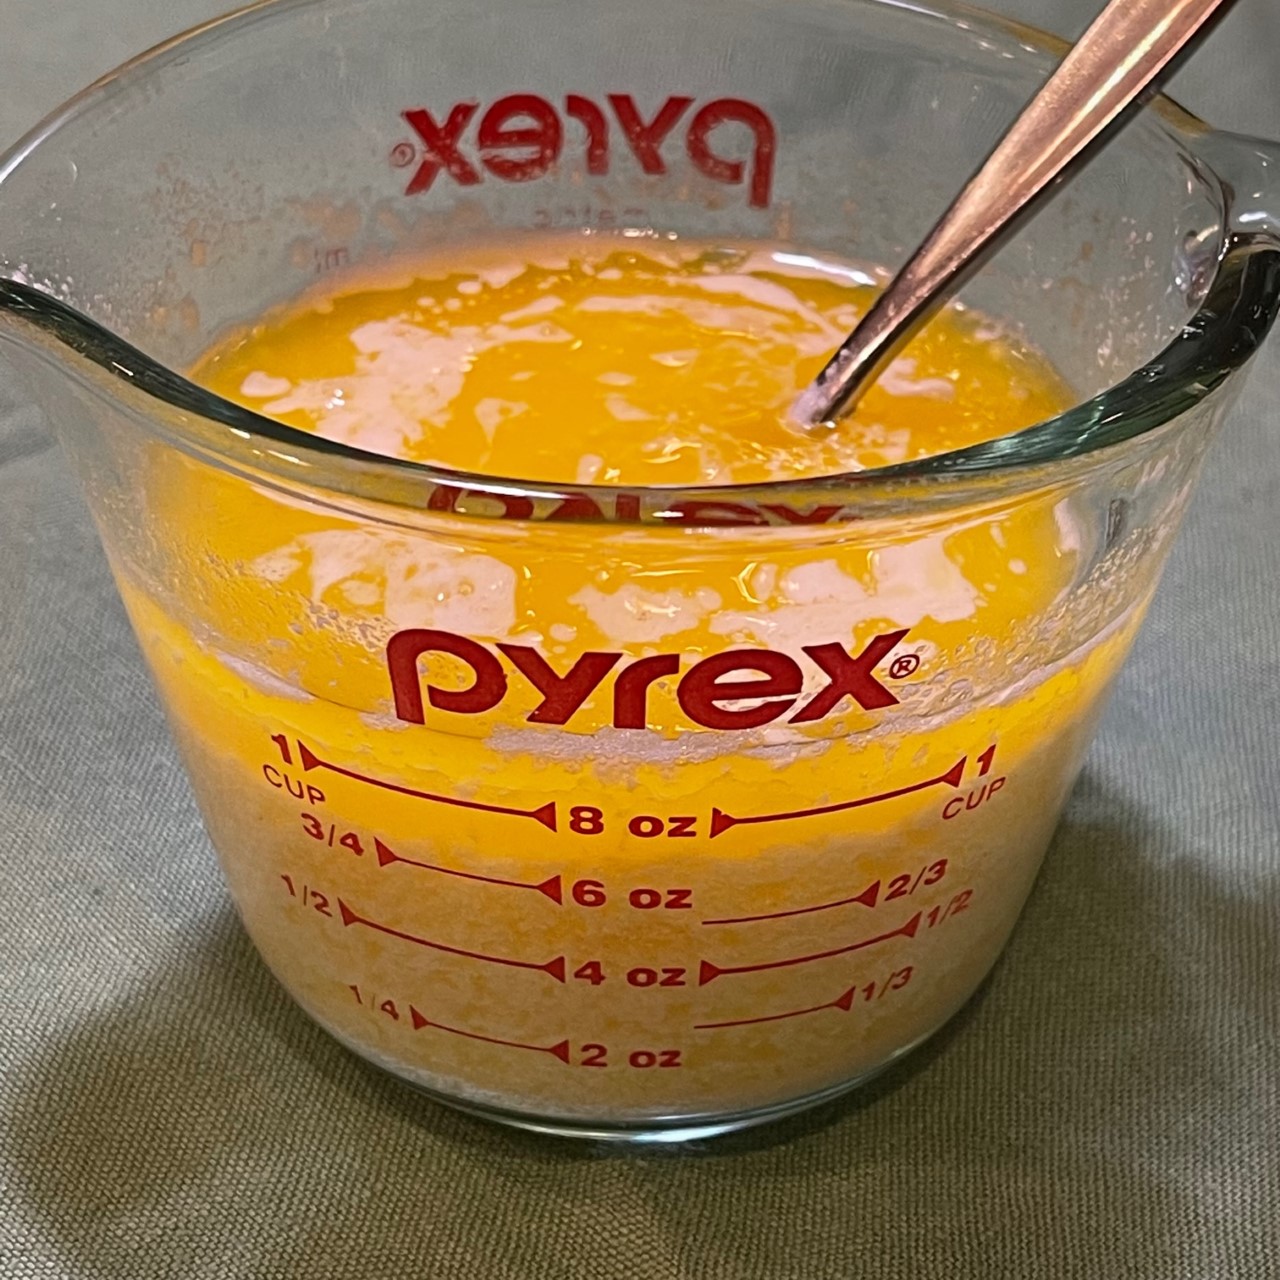
Melt butter and let cool a few minutes. Into a measuring cup or bowl, beat the egg with a fork. Then beat in the buttermilk and melted butter.
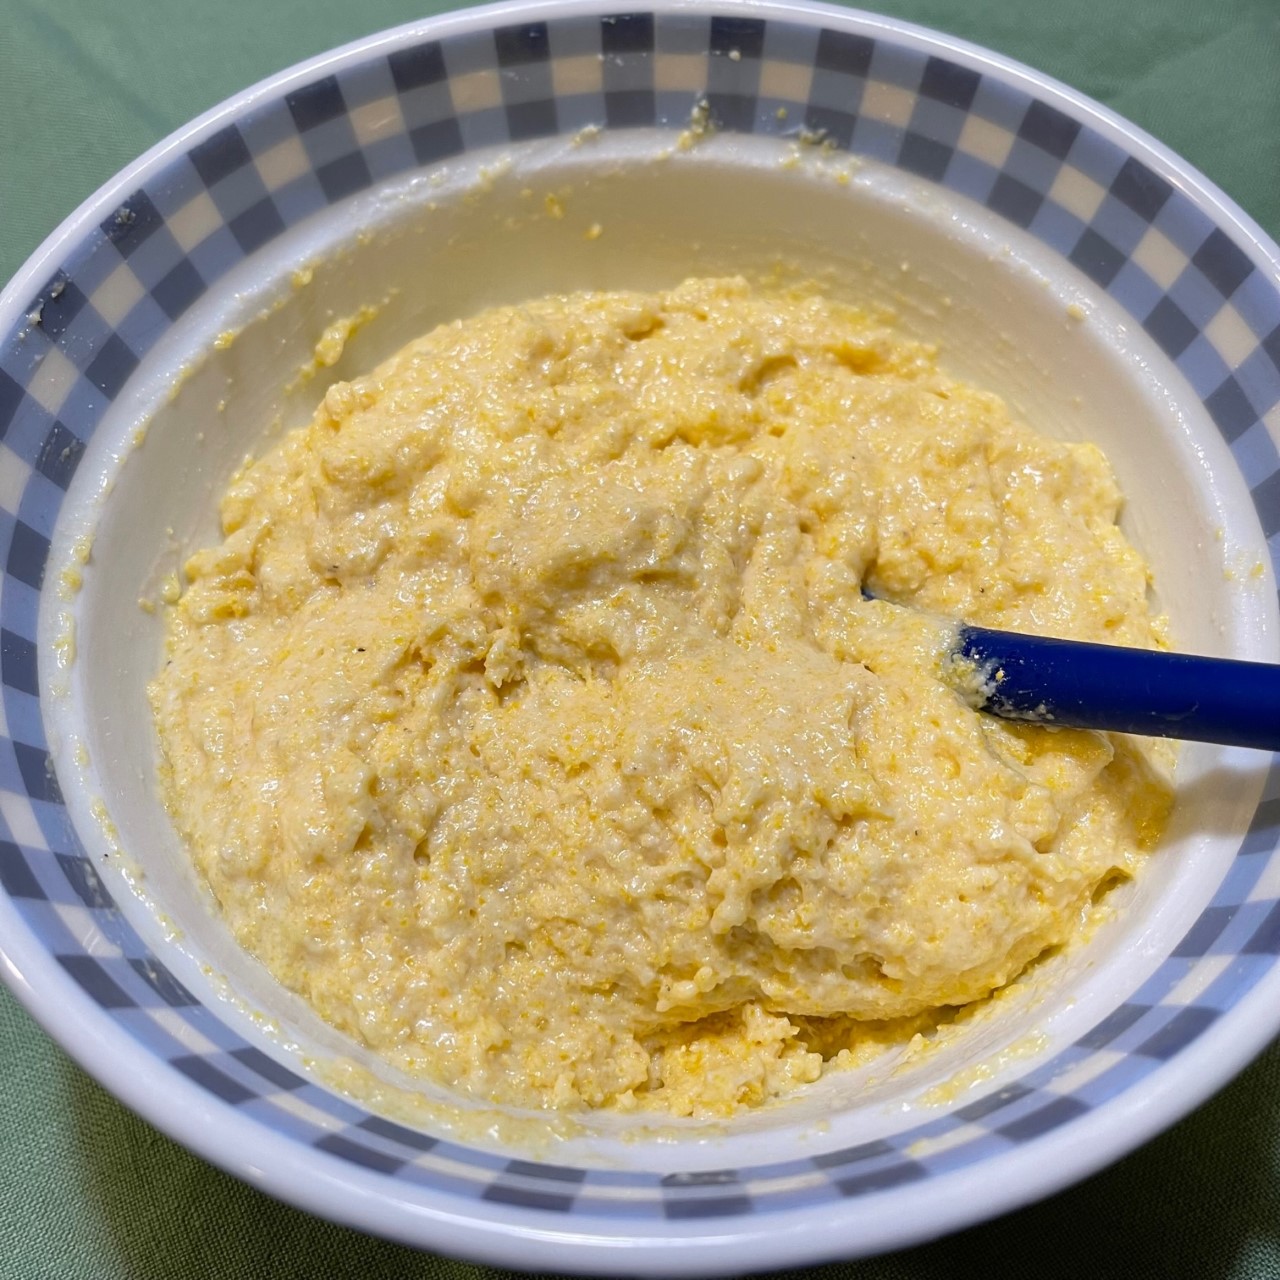
Pour the buttermilk mixture into the cornmeal mixture and combine until just blended (don’t over mix).
Spread cornmeal mixture on top of filling, smoothing top.
Bake at 230°C (450°F) about 15 minutes – until top begins to brown.
Let me state up-front: this HOMEMADE VEGETARIAN GROUND BEEF recipe is NOT designed for a patty – it’s too mushy to form a firm burger. What it’s fabulous for is as a substitute when you need ground beef for a recipe and you’re a vegetarian or vegan. I’ve used it successfully in shepherd’s pie, burritos, tamale pie, and Greek moussaka.
It’s not a difficult recipe, but it takes about 25 minutes to cook off the liquid at the end. Because of this, I double or triple the recipe then, as Queen of Freeze, I freeze it in 1 lb or 1/2 lb portions for future use. This way, if I decide to make a shepherd’s pie, tamale pie, or burrito, the bulk of the work is done.
VEGETARIAN GROUND BEEF – makes at least 1.5 lbs
10g OR 1 T olive oil
112g OR 4 oz OR 1 cup onions, chopped small
1/2 tsp salt
4 cloves garlic, pressed
43g OR 1 oz OR 2 T tomato paste
125 ml OR 1/2 cup red wine (I use a Cabernet)
2 tsp paprika
2 tsp oregano
1/2 tsp red pepper flakes
425g OR 15 oz canned chickpeas (garbanzo beans), drained
227g OR 8 oz whole cremini mushrooms
411g OR 14.5 oz canned whole tomatoes, discard stem end and any flaws, chop, KEEP JUICE – YOU’LL NEED IT!
NOTE: I suggest you try the single recipe before making a larger batch just in case you don’t like it.
ADDITIONALNOTE: If you’re doubling or more this recipe, use a Dutch oven or larger.
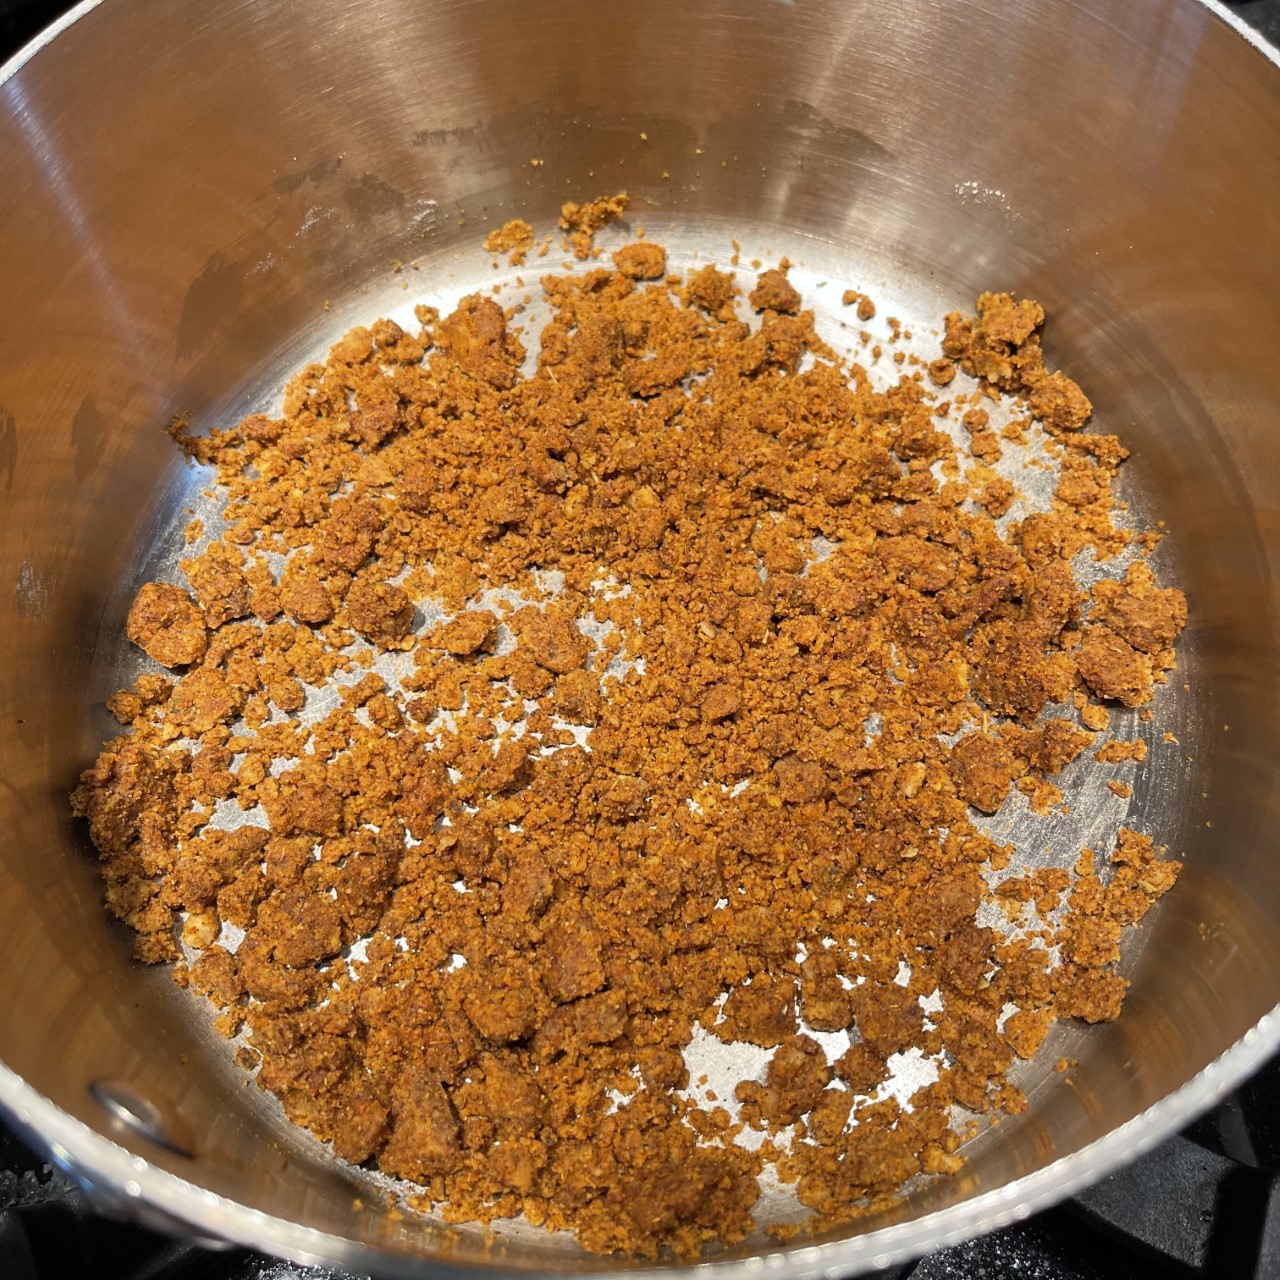
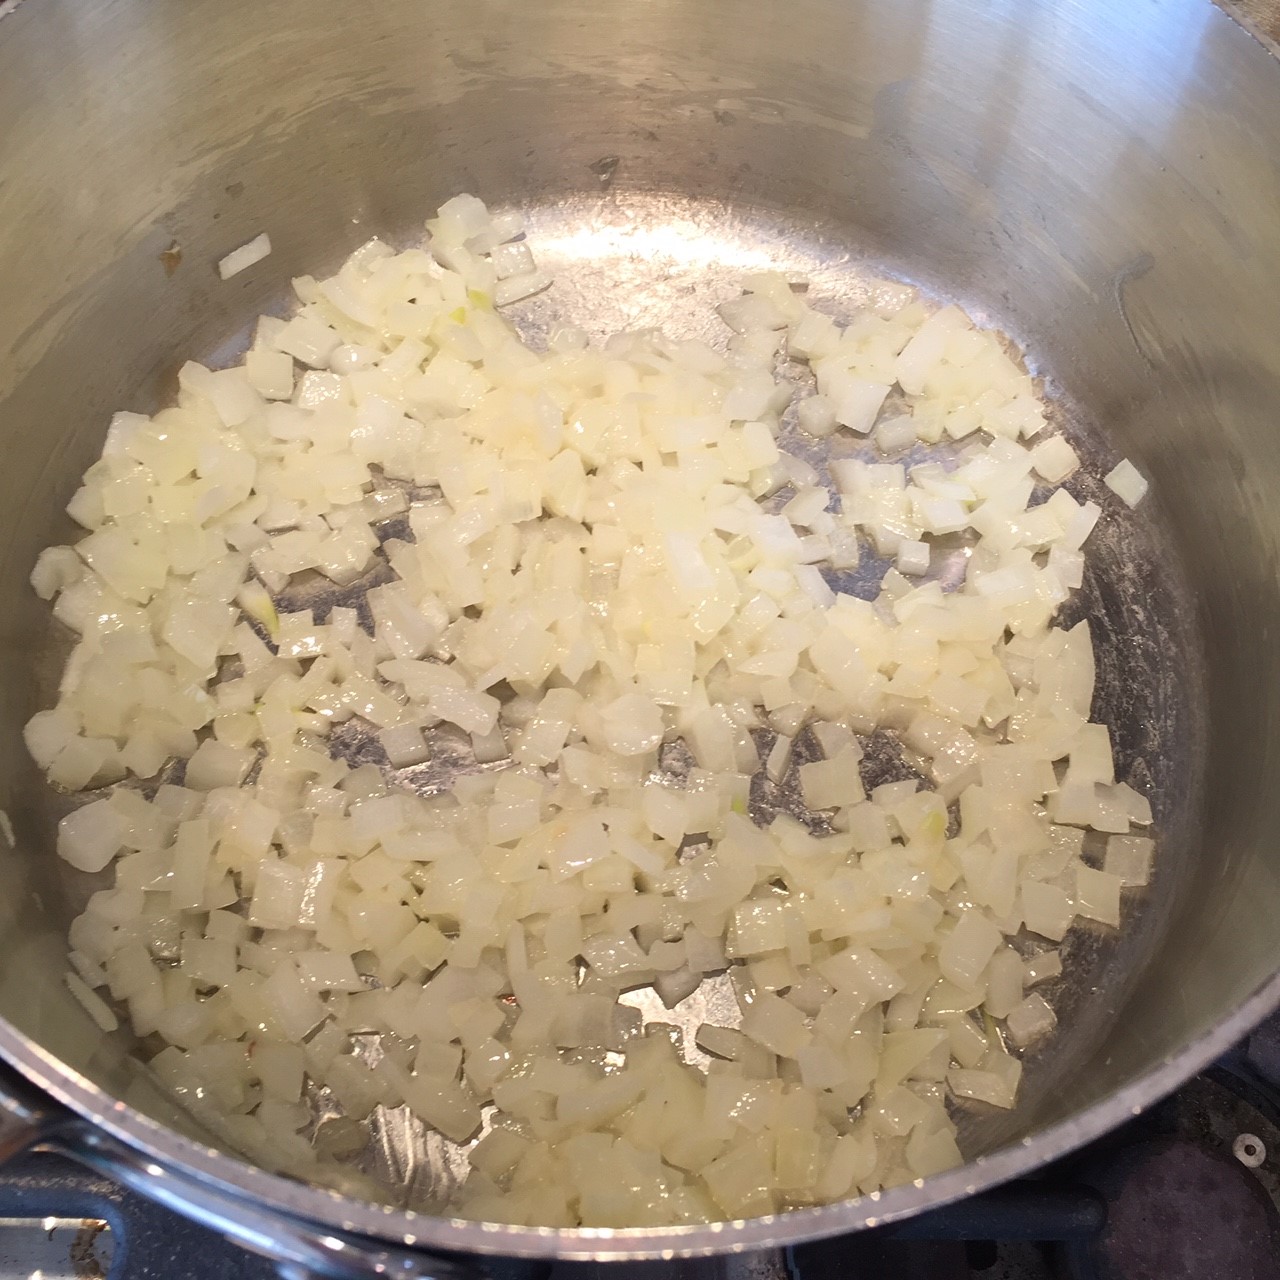
Heat oil in a large pot and saute onions and salt over medium heat until the onions are just starting to brown – about 6 minutes.
Add in the garlic and continuously stir 30 seconds to bloom (but not burn), then stir in the tomato paste. Increase heat to medium high and saute 2-3 minutes to darken the tomato paste a bit. (This adds an umami flavor).
Pour in the wine, paprika, oregano, and red pepper flakes. Cook over medium, scraping up the burnt bits into the paste, until the wine has nearly evaporated – about 3 minutes. Remove from heat.
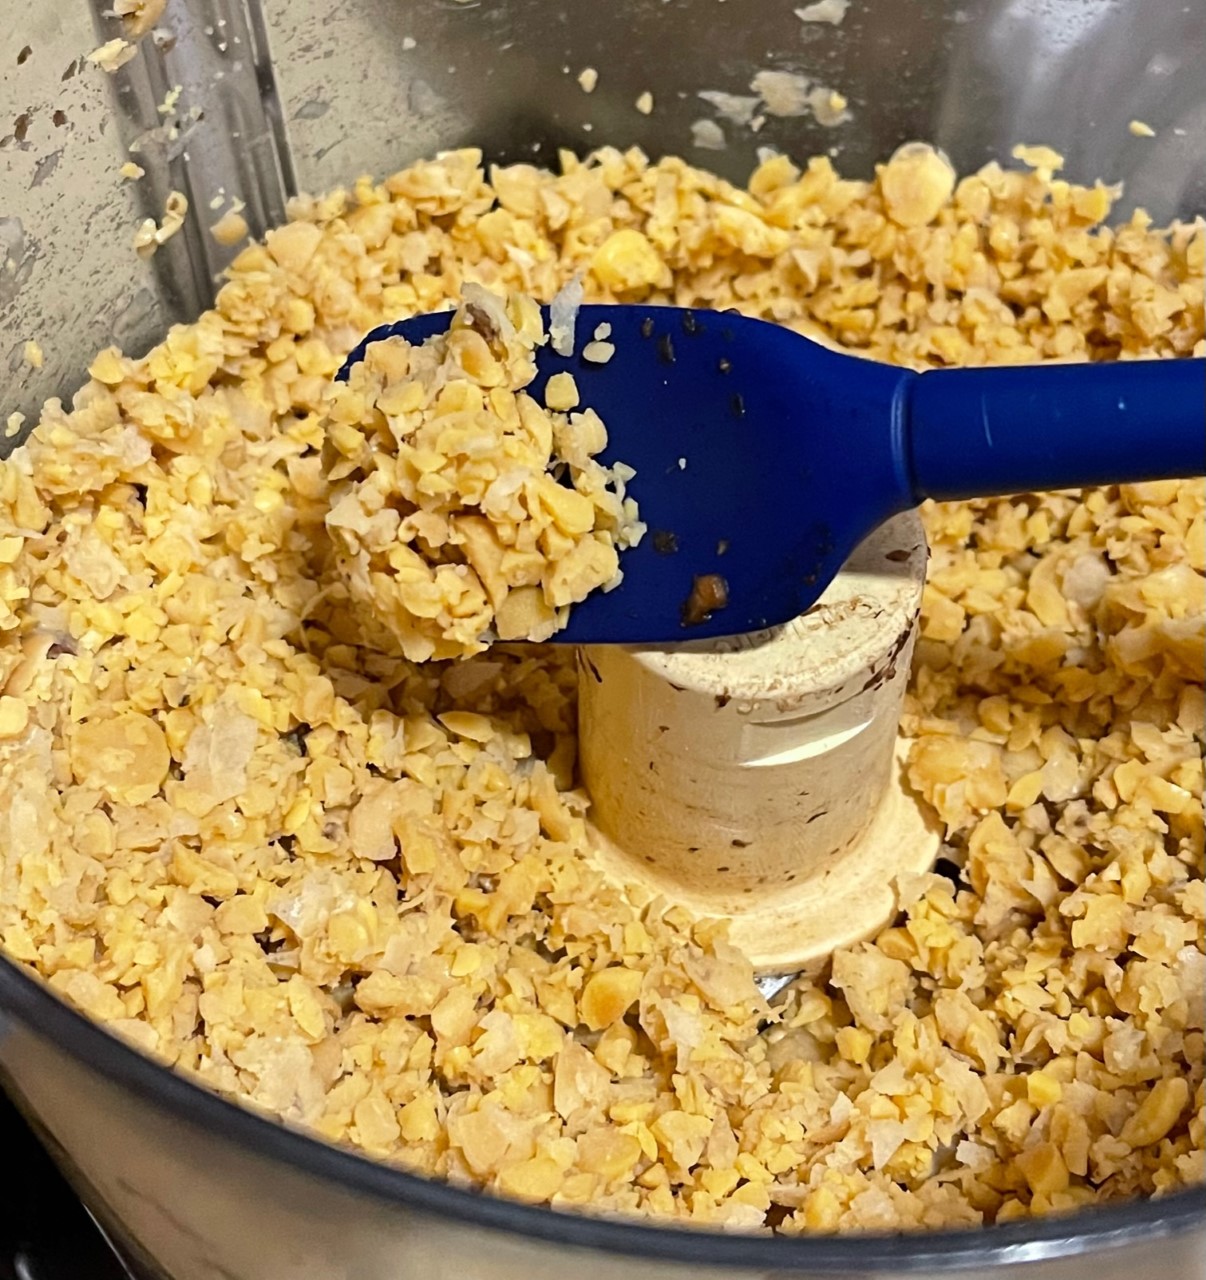
Drain the chickpeas and roughly chop.
Place chopped chickpeas into your food processor and pulse until it’s become small bits, scraping down the sides and bottom as needed. If you don’t have a food processor, you’ll have to chop them by hand.
Empty minced chickpeas into the pot with the onions/tomato paste.
Thoroughly wash mushrooms and coarsely chop into 1cm / 1/2″ pieces.
Place chopped mushrooms in food processor and pulse several times until mushrooms are broken into small bits, scraping sides and bottom, as needed. If you don’t have a food processor, chop by hand.
Empty mushrooms into the pot.
Over medium/high heat, saute mixture, stirring often for 5 minutes.
Pour the chopped tomatoes and their juice into the pot.
Cook over medium/high heat until the liquid has cooked off and the mixture can mound.
I’ve become obsessed with this Salsa Roja recipe. Not only is it fast and easy, but it perks up all that it touches! This, as well as my Enchilada Sauce topping, has become a game changer for my burritos.
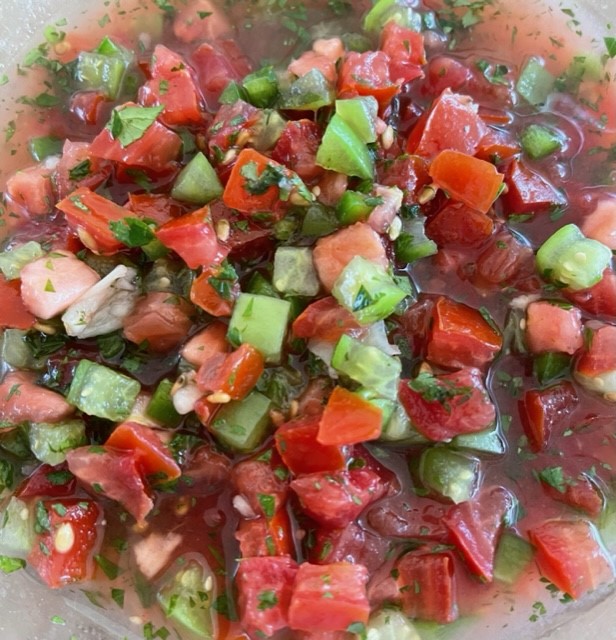
SALSA ROJA – makes a little bit more than 2 cups
4 Roma tomatoes, chopped into 1/3″ (1 cm) pieces
2 tomatillas, chopped into 1/3″ (1 cm) pieces
1 serrano chili (discard seeds & spines), minced
1 jalapeno chili (discard seeds & spines), minced
1/4 cup (4 T) fresh cilantro, chopped
1.5 T fresh Italian parsley, chopped
2 garlic cloves, pressed or minced fine
3/4 tsp table salt
1 tsp lime juice
Prepare all ingredients as directed and place in a bowl.
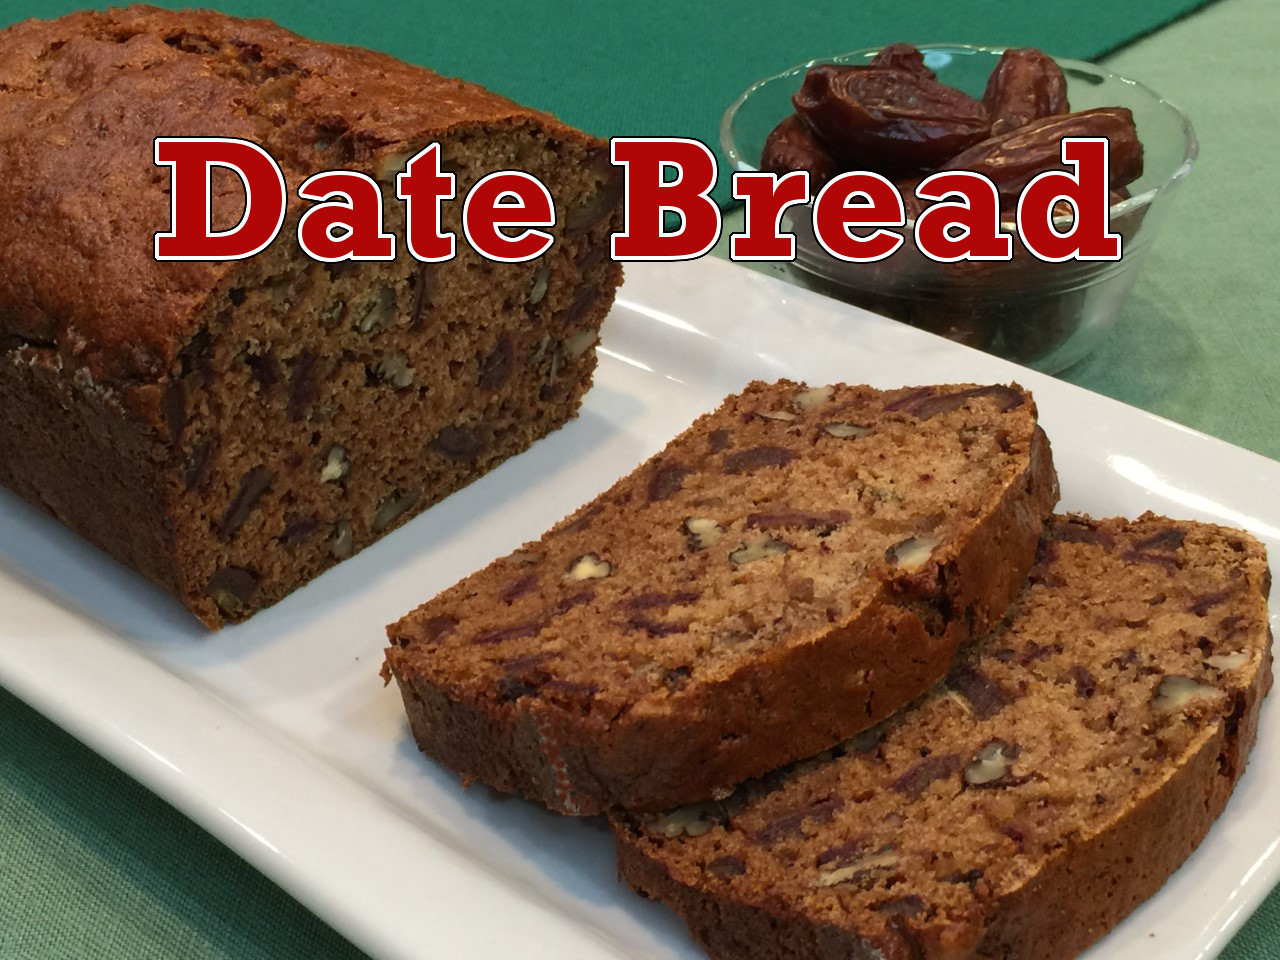
My wonderful sister-in-law, Terry, sent me a picture of her grandmother’s recipe card for Date Bread so I could make it for my husband (her brother). My husband remembered the bread with fondness so, of course, I decided to make it. I have to admit I was skeptical – dates in desserts were NOT something I grew up with. My mother was a sworn chocoholic, and I was following in her footsteps.
But when I took my first bite of Grandma’s Date Bread, I felt like a whole new world opened up. It was absolutely, and unexpectedly, delicious! How could this these dried, brown fruit create such a tender and flavorful bread?
GRANDMA’S DATE BREAD – 1 loaf
1 T butter, softened
8 oz (230g / 1.75 cups) pitted dried dates
1 cup (250 ml) boiling water
1 egg
1.5 cups (190g / 6+5/8 oz) all-purpose flour
3/4 cup (140g / 5 oz) granulated sugar
1 tsp vanilla
1 tsp baking soda
1 cup (95g / 3.75 oz) pecans, lightly toasted
Set out butter to soften.
Preheat oven to 300°F (150°C).
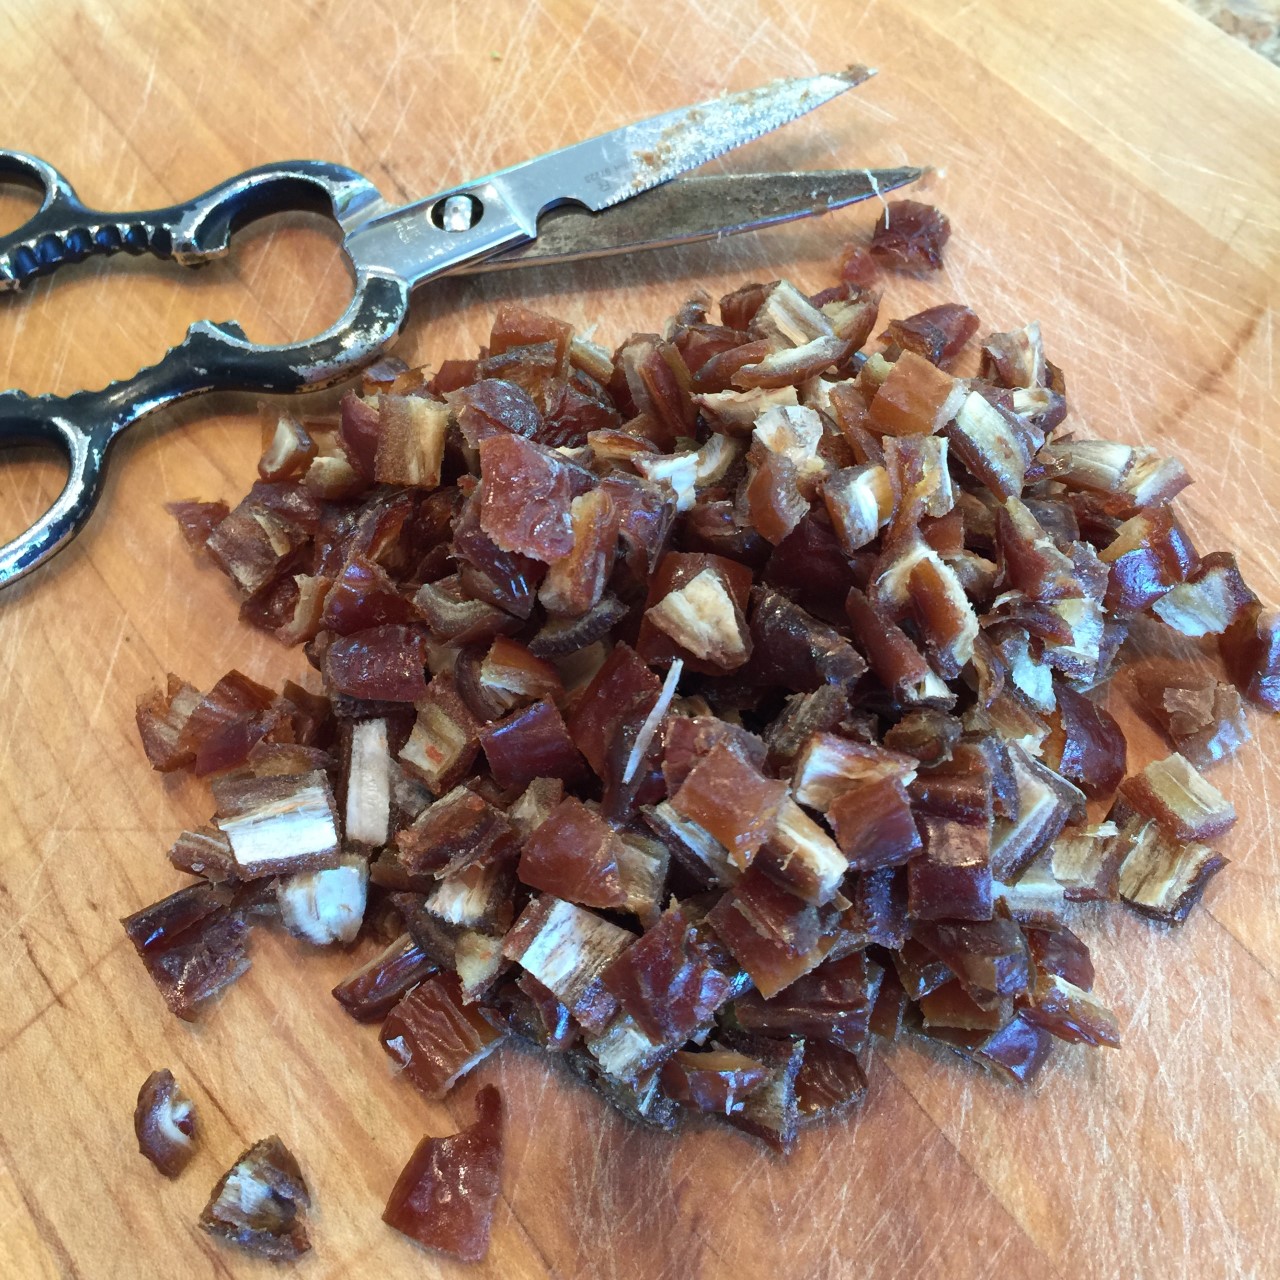
Chop dates – I use my kitchen shears.
Place chopped dates in a bowl and pour in the boiling water. Cover with a plate to retain the heat. Let set for 30 minutes so the dates can soften.
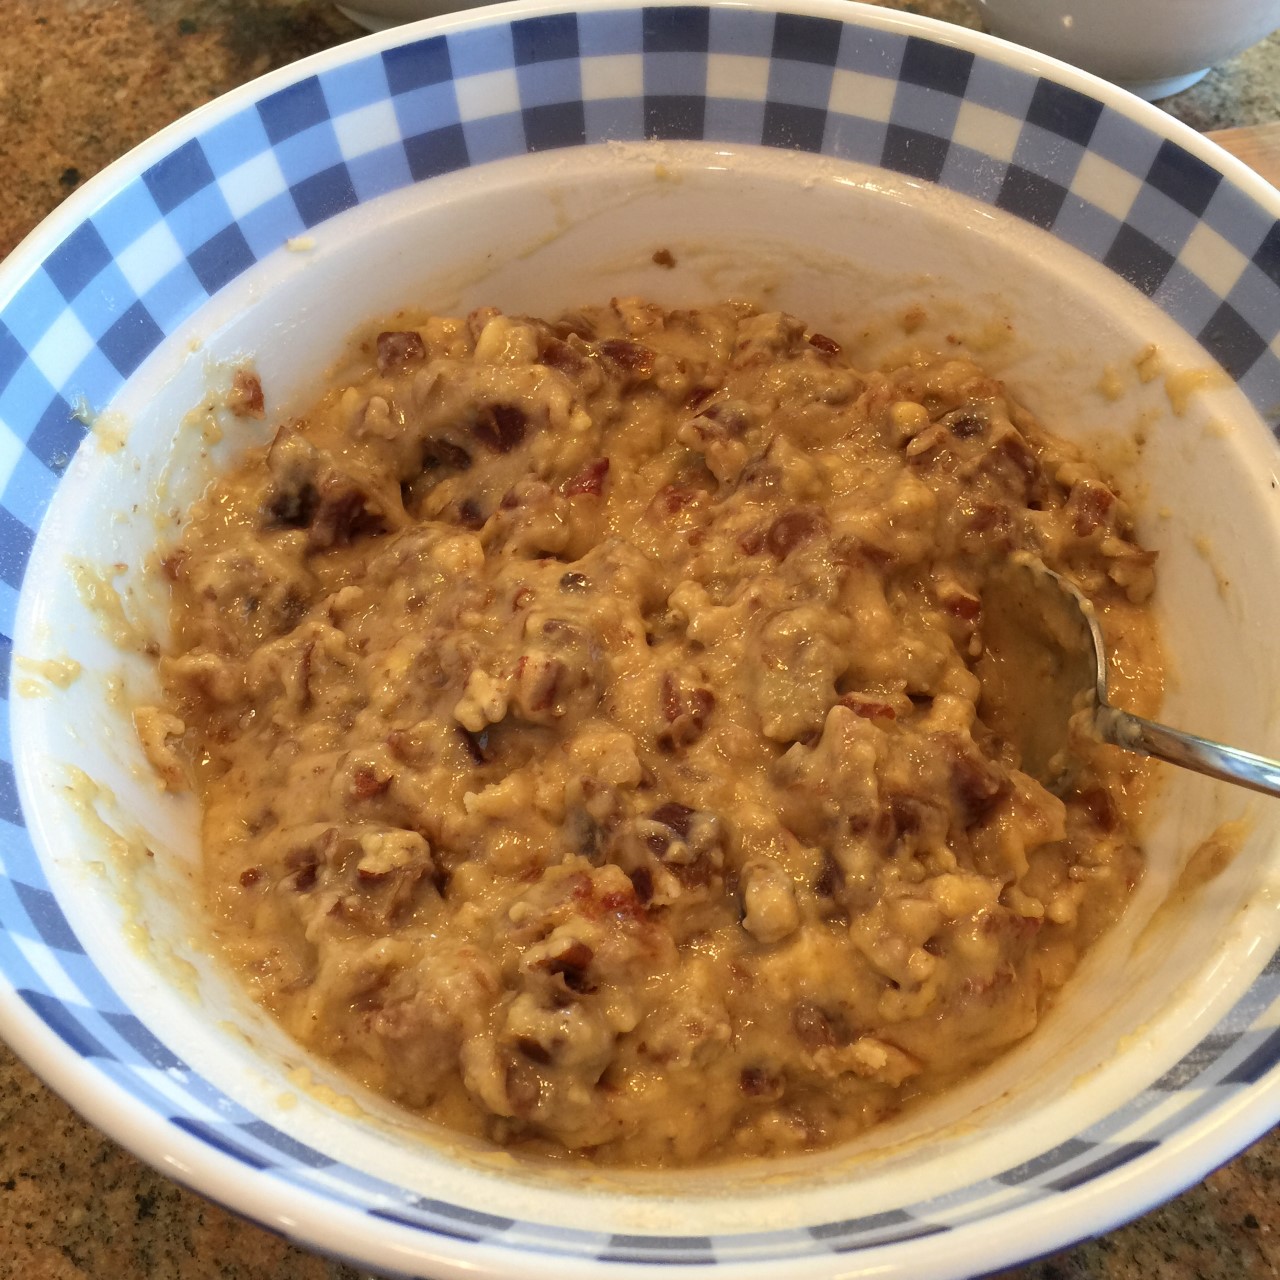
Into a mixing bowl, beat the egg. Add in the softened butter, dates (WITH liquid), flour, sugar, vanilla, baking soda, and pecans. Blend together until the flour is just incorporated – don’t overmix or the bread can toughen.
Pour batter into a greased and floured loaf pan – I use a Pyrex glass pan.
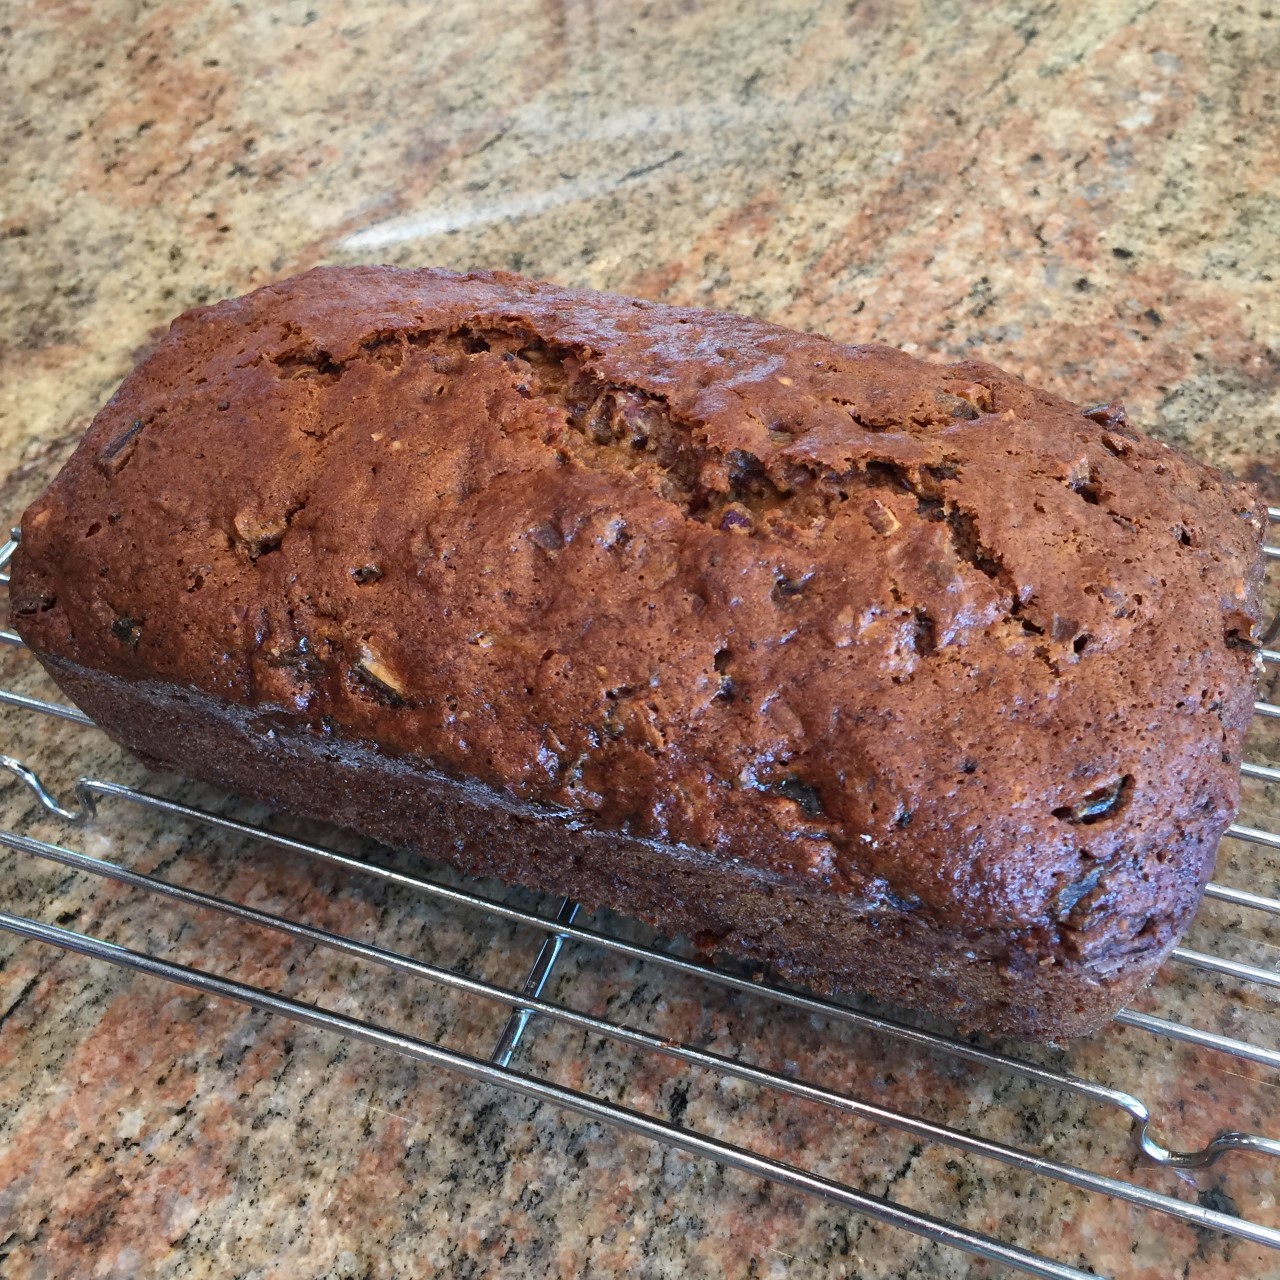
Bake until a toothpick comes out clean and the top bounces back when lightly pushed – about 60-75 minutes. (Mine take 74 minutes.) Make sure to gently press down on the cracked portion – if it’s still mushy, keep baking. The bread will LOOK done before it IS done.
Let set in pan 20 minutes before removing to a wire rack to cool.
Try to resist slicing the hot loaf – it needs to firm up a bit. Give it, at least, 45 minutes if you can.
I hesitate to use the word “burger” for my Mushroom-Nut Burger because it sounds like I’m trying to pass this recipe off as an imitation hamburger – so close to the real thing, you’ll think you’re eating meat. While there are some excellent plant based (aka, fake) burgers on the market now (such as Impossible Burger and Beyond Burger) that can satisfy that craving for meat, this is not one of those.
I really should call this recipe Mushroom-Nut Burger-Alternative because, like my Black Bean Burger recipe, this is merely a patty decked out like a hamburger. It’s not meant to fool anyone….but, it IS delicious!
In developing my Mushroom-Nut Burger, I felt like Goldilocks – trying to find a blend that wasn’t so soft it collapsed, but not so dry it crumbled. I wanted one that was just right.
My greatest challenge was creating a firm patty. I hate when I bite into a veggie burger that appears to be firm because the outside is crusted over, only to find the inside is mush, oozing out the sides. It becomes a bit like eating a melty ice cream cone.
I found the solution to be chopping the firm ingredients – the mushrooms and nuts – into large pieces, so it acts like a skeleton. This prevents the outside from collapsing and the center from squishing out.
The second challenge was binding the ingredients so the patty doesn’t fall apart as you’re eating it. I found 2 eggs and 45 grams (1.5 oz) of flour to be the key. I strongly suggest you weight the flour because I tried less flour and it didn’t work as well.
MUSHROOM-NUT BURGER – makes 4 patties
59g (2oz) (1/3 cup) raw short, sticky rice
150ml (2/3 cup) water
14g (1 tbsp) butter
120g (4oz) (1 cup) onions, chopped
53g (2oz) (3/4 cup) firm mushrooms such as white common or cremini
91g (3oz) (include stem in weight) shiitake mushrooms
1/4 tsp dried thyme
1/4 tsp dried sage
1/2 tsp dried marjoram
1.5 tsp vegetarian Worchestershire sauce
3/4 tsp salt
1 garlic, pressed or minced
70g (2.5oz) (3/4 cup) walnuts
38g (1.25oz) (1/4 cup) salted cashews
2 eggs
45g (1.5 oz) flour
Preheat oven to 190C° (375F°), rack in the center position.
Rinse the raw rice then, into a small saucepan, combine the rice and 150ml water. Cook, covered, until water is absorbed (about 12 minutes). SET TIMER FOR 10 MINUTES TO REMIND YOURSELF! Remove from heat and let cool.
Scrupulously wash mushrooms. Remove and discard the stems from the shiitakes only (they’re too woody to eat). Coarsely chop all the mushrooms – check the measuring tape in the photo for size. The mushrooms will shrink some when cooked.
Coarsely chop walnuts and cashews – check the measuring tape in photo below. Like the mushrooms, these will support the patty. That being said, if you have any nut crumbs on the cutting board, use them – I hate waste! Lightly toast nuts.
Into a skillet melt the butter over medium flame. Add in the onions and saute 2-3 minutes.
Into the onions add the mushrooms, thyme, sage, marjoram, Worchestershire sauce, salt, and garlic. Saute 6 minutes. Set aside to cool.
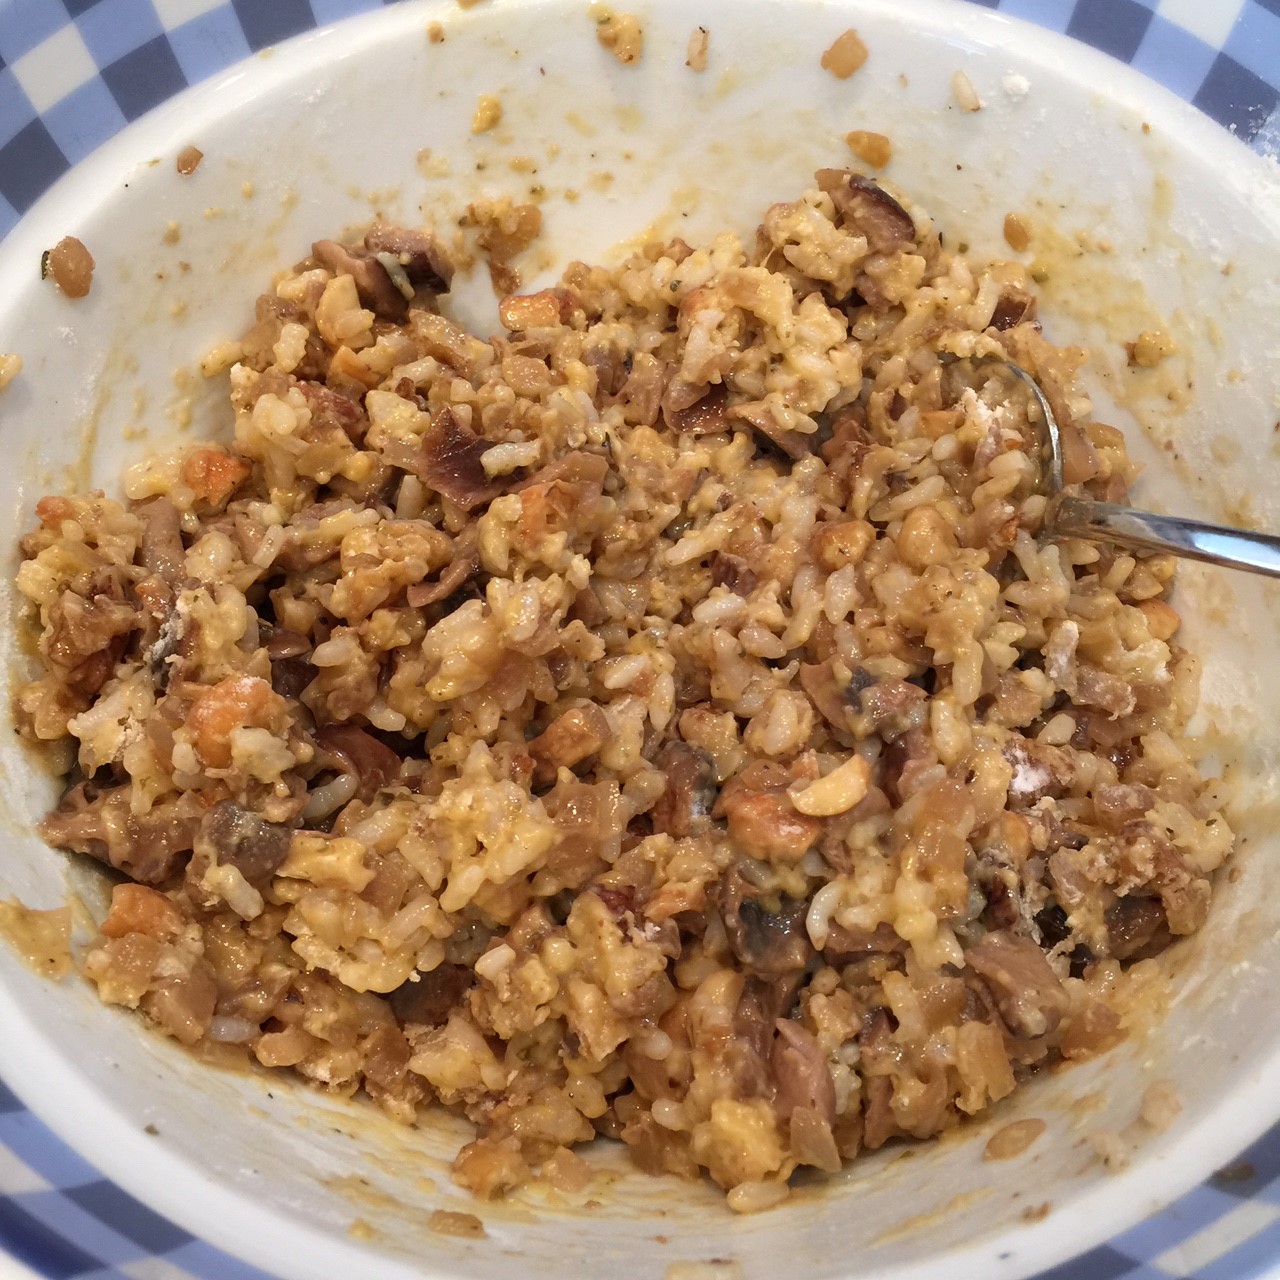
Into a large bowl, beat the eggs. Stir in the cooked rice, nuts, and cooled mushroom saute. Sprinkle in the flour and blend well.
Form 4 patties about 9cm (3.5″) in diameter and place on an oiled baking sheet.
Bake in the preheated 190C° (375F°) and bake for 15 minutes. Flip patties and bake another 15 minutes. Serve.
Holidays in my house were always spent with my Armenian father’s side of the family. As it so often is with immigrant gatherings, food played a major role. The main meal was served in the early afternoon. Then came the clean-up, followed by a second round of the main meal. Armenians love to eat!
Dolma (stuffed grape leaves) was a favorite and always plentiful. My grandmother’s recipe was the absolute best! (My Lebanese friend, Deborah, claims her grandmother’s is the best…but we’ll have to agree to disagree.)
Of course, once I became a vegetarian, my grandmother’s beef and lamb filled dolmas became a happy memory, testing my willpower at holiday dinners. Oh, yes, I made many attempts at a vegetarian version, but they never came close.
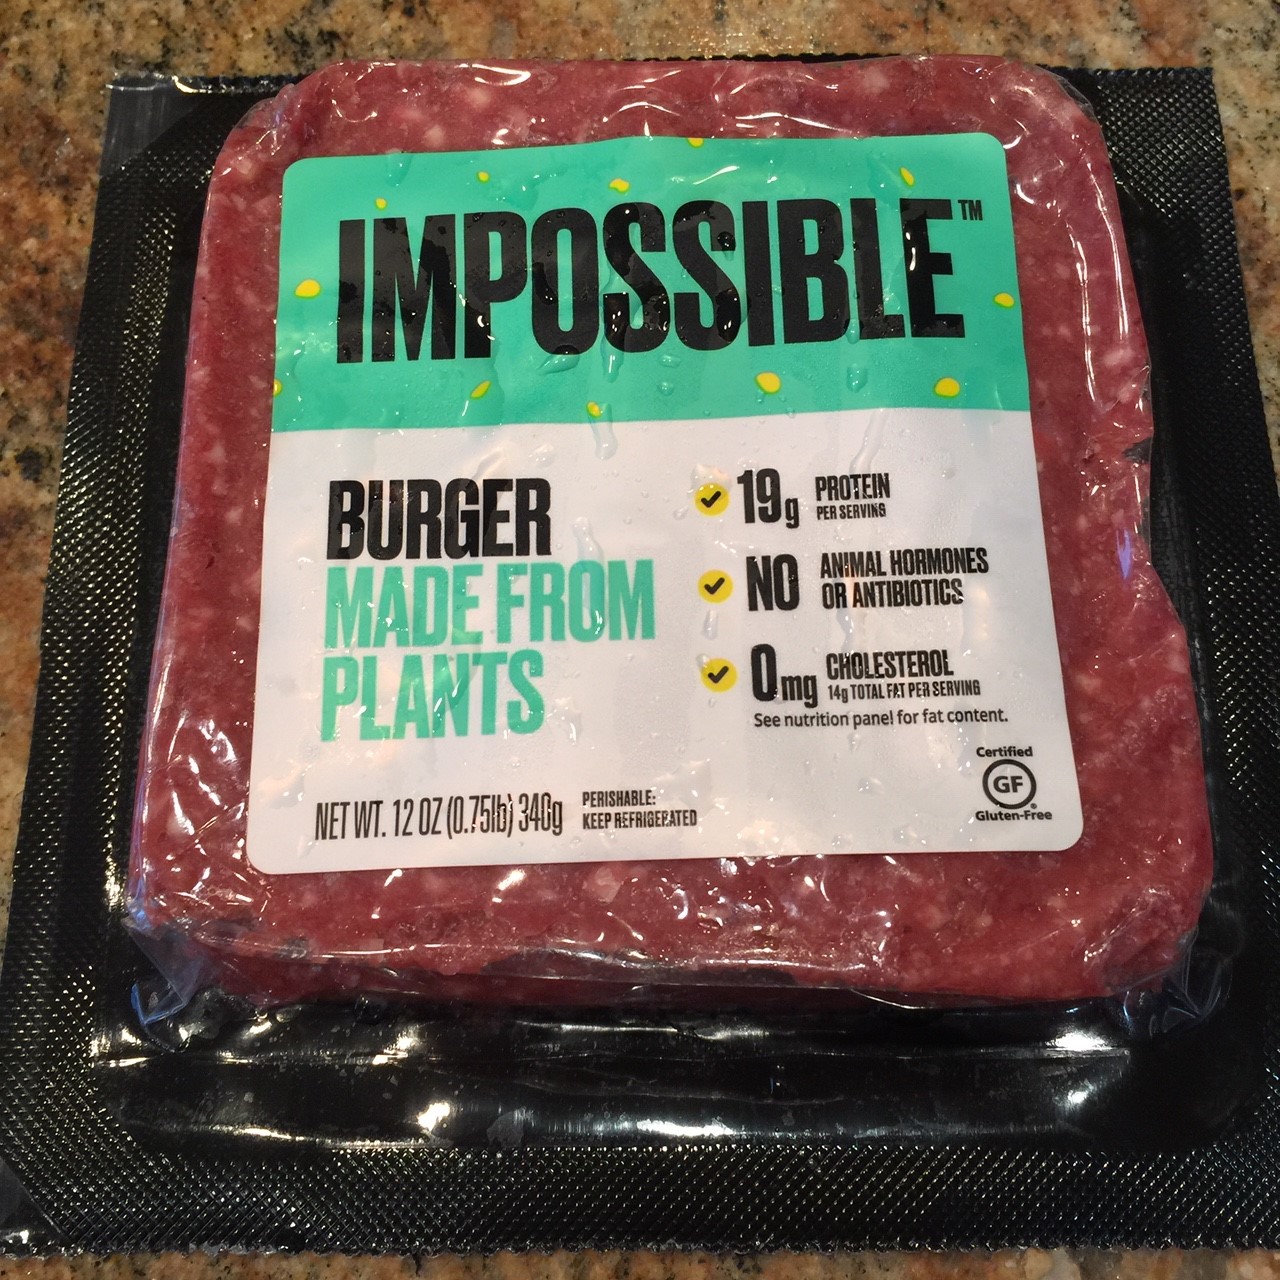
Finally, food technology caught up. Imitation meats were getting better and better. When Impossible Burger became available at my local market, I decided to substitute it in for the beef and lamb (there doesn’t seem to be any imitation lamb yet). I added in a few shiitake mushrooms and Worcestershire sauce for the umani flavor, plus some flour to bind the filling logs so they don’t fall apart. After much tweaking of my recipe, I’m now prepared to serve them to my dolma-loving brother.
Note: I’m recommending Impossible Burger brand for this recipe. (No, they’re not paying me!) This product forms a firmer log so it mimics the filling made with beef and lamb.
Note: While you can grow and brine your own grape leaves, it’s much easier to buy them. Most supermarkets carry them, but you have to search. They’re usually in with the olives, and packaged in glass jars. You may not have much choice in brands. Be aware that they can be very difficult to remove from the jar – quite often I end up tearing a third of them, which makes them unusable. A brand with a wide mouth is best. To remove the leaves, you have to grasp a roll, then gently pull up while twisting. It’s very maddening.
Queen of Freeze note: Unused leaves can be stacked, rolled, and frozen for future use.
VEGETARIAN DOLMA – makes about 26-31, depending on leaf size
340g / 12 oz / 3/4 lb Impossible Burger
3 T parsley, chopped
62 g / 2 oz shiitake mushrooms, coarsely chopped
50 g / 1/3 cup / 1.75 oz uncooked Chinese-style rice (or any white rice)
100 g / 3.5 oz onions, chopped
286 g / 10 oz canned tomatoes plus their juice
1/4 tsp ground black pepper
2 tsp salt
1 T vegetarian Worcestershire sauce
30 g / 4 T all-purpose flour
at least 40 grape leaves (you won’t use them all, but it’s good to have extra)
To get 286 g (10 oz) of the canned tomatoes plus juice, you’re going to have to buy a larger can and weigh out the amount. (Using the entire 15 oz can is too much for this recipe.) Pour the juice into a 4qt (4 litre) or larger cooking pot. Remove and discard the stem area of the tomatoes, and any skin or defects. Chop into small pieces.
Thoroughly wash mushrooms, discarding the stem (it’s too woody). Chop cap into 1cm (3/8″) sized pieces.
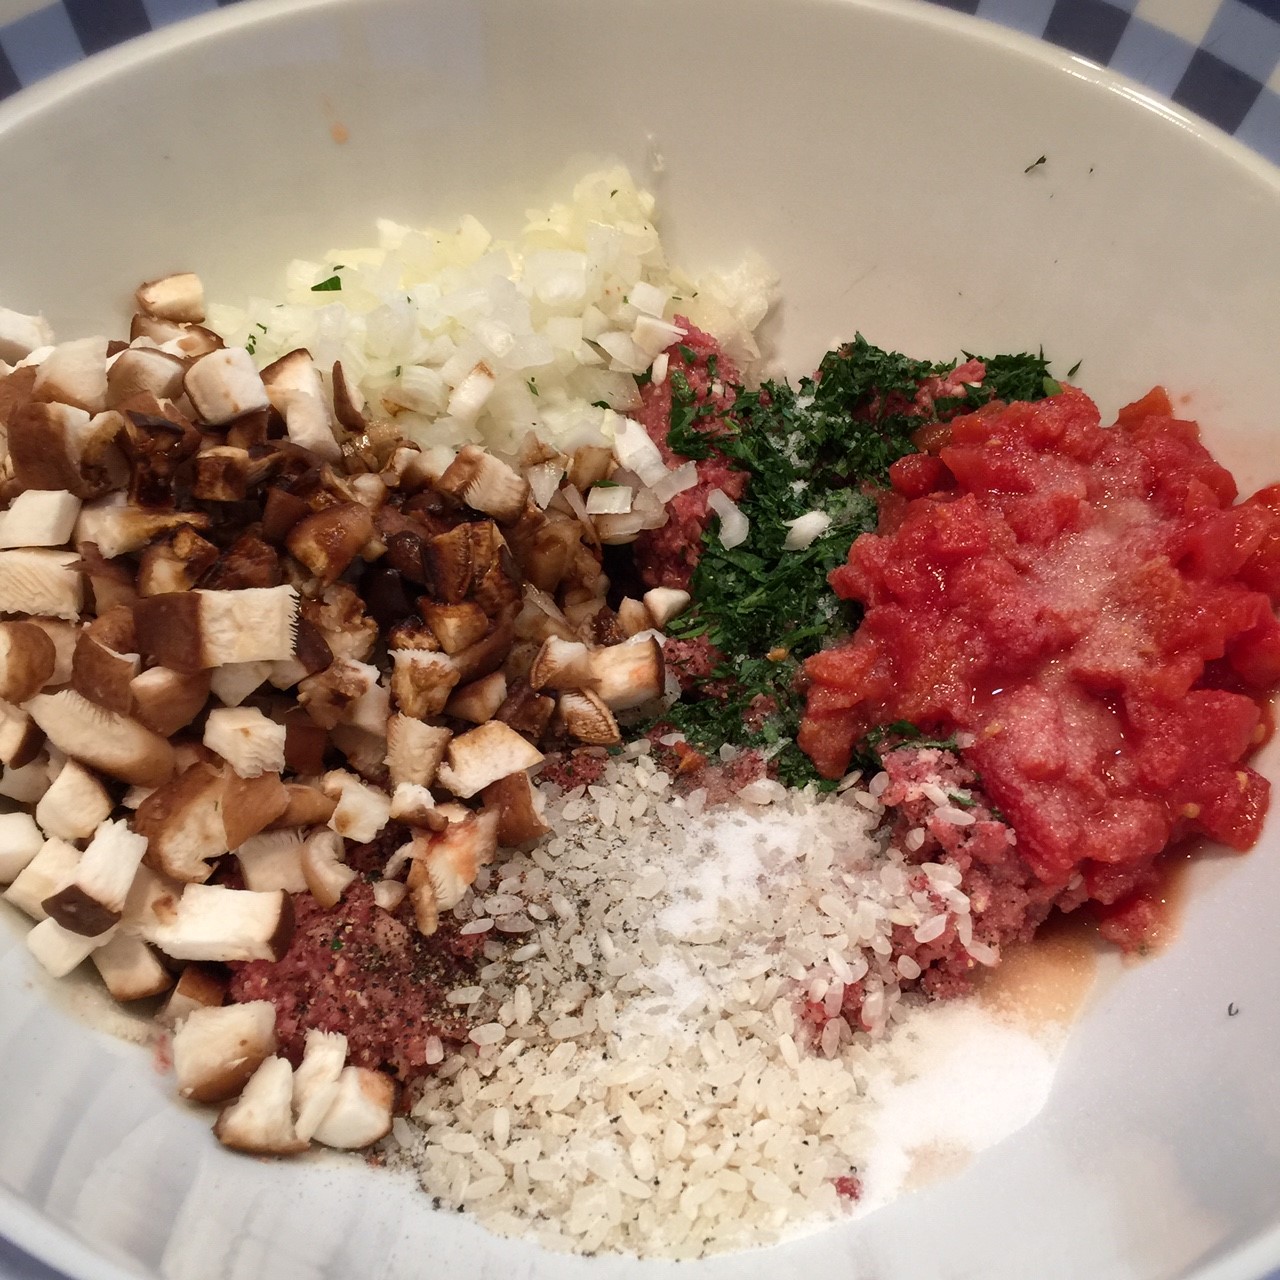
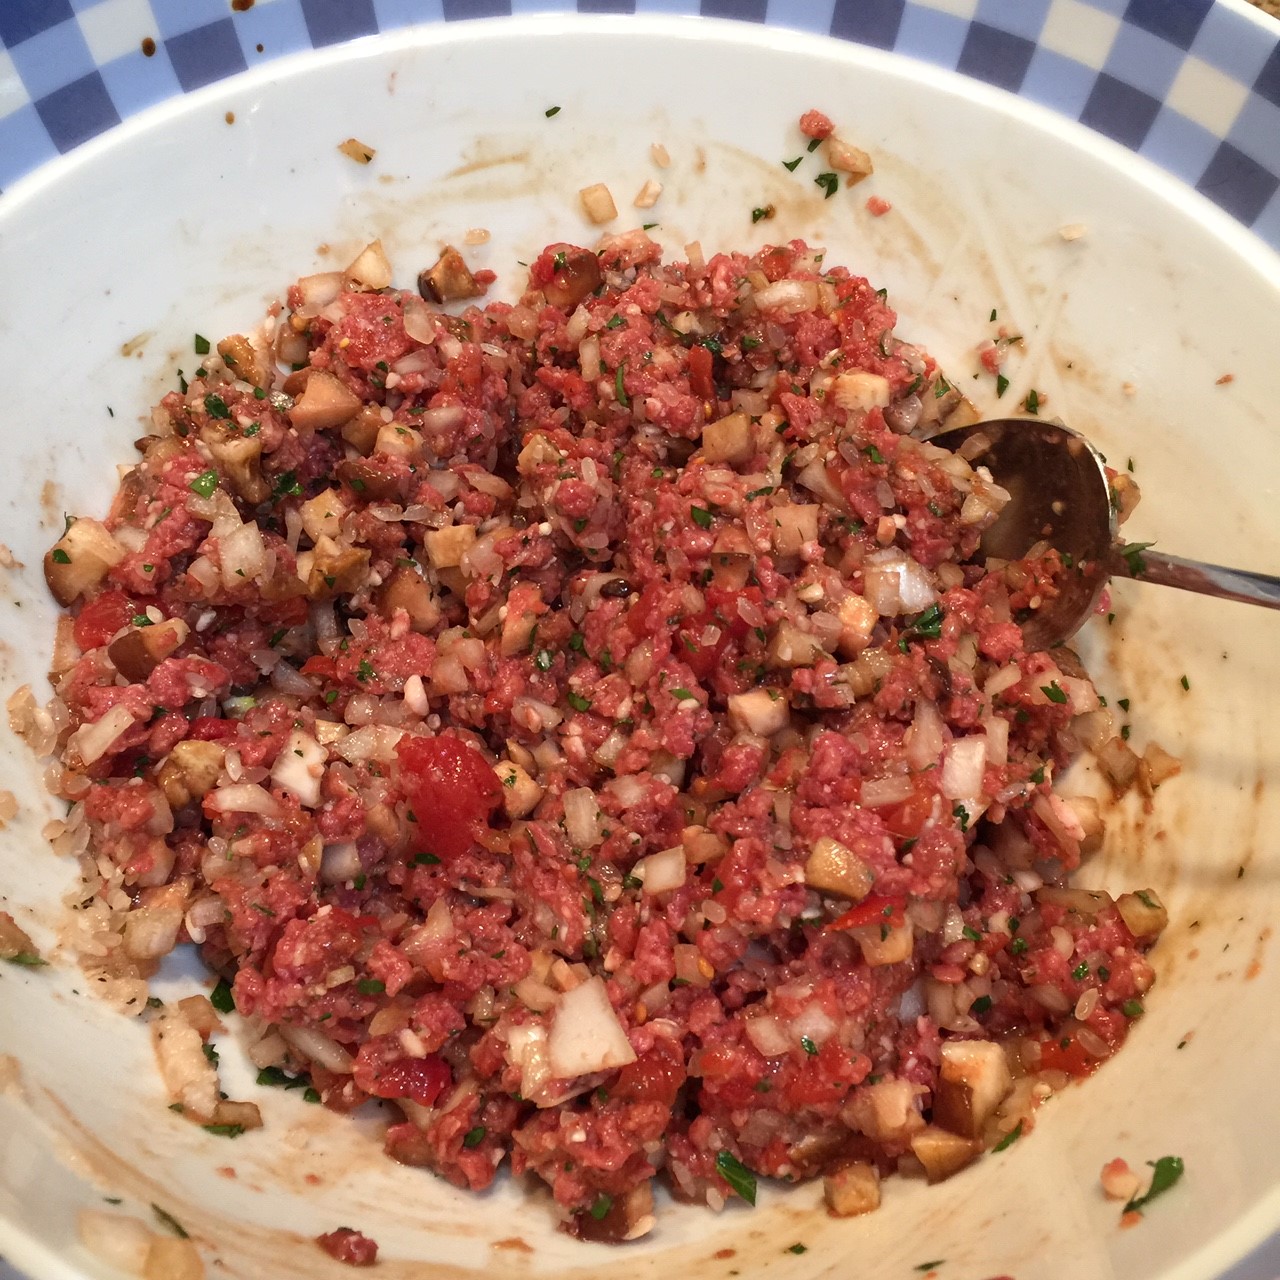
Into a large bowl, put the tomatoes, Impossible Burger, parsley, mushrooms, rice, onions, pepper, salt, and Worcestershire sauce. (You’ll add the flour later.)
Stir mixture to blend.
Before adding in the flour, prepare the grape leaves. Depending on the brand, it can be very tricky to remove them from the jar without tearing many. Torn leaves are pretty useless. So, do your best. You’ll need between 20-40 intact leaves. (The number is dependent on the size of the leaves and how generous you are with the filling.)
After removing the grape leaves from the jar, unroll them and cut off the stems to the nub. Some people rinse off the brine, but I don’t – I like the salty flavor.
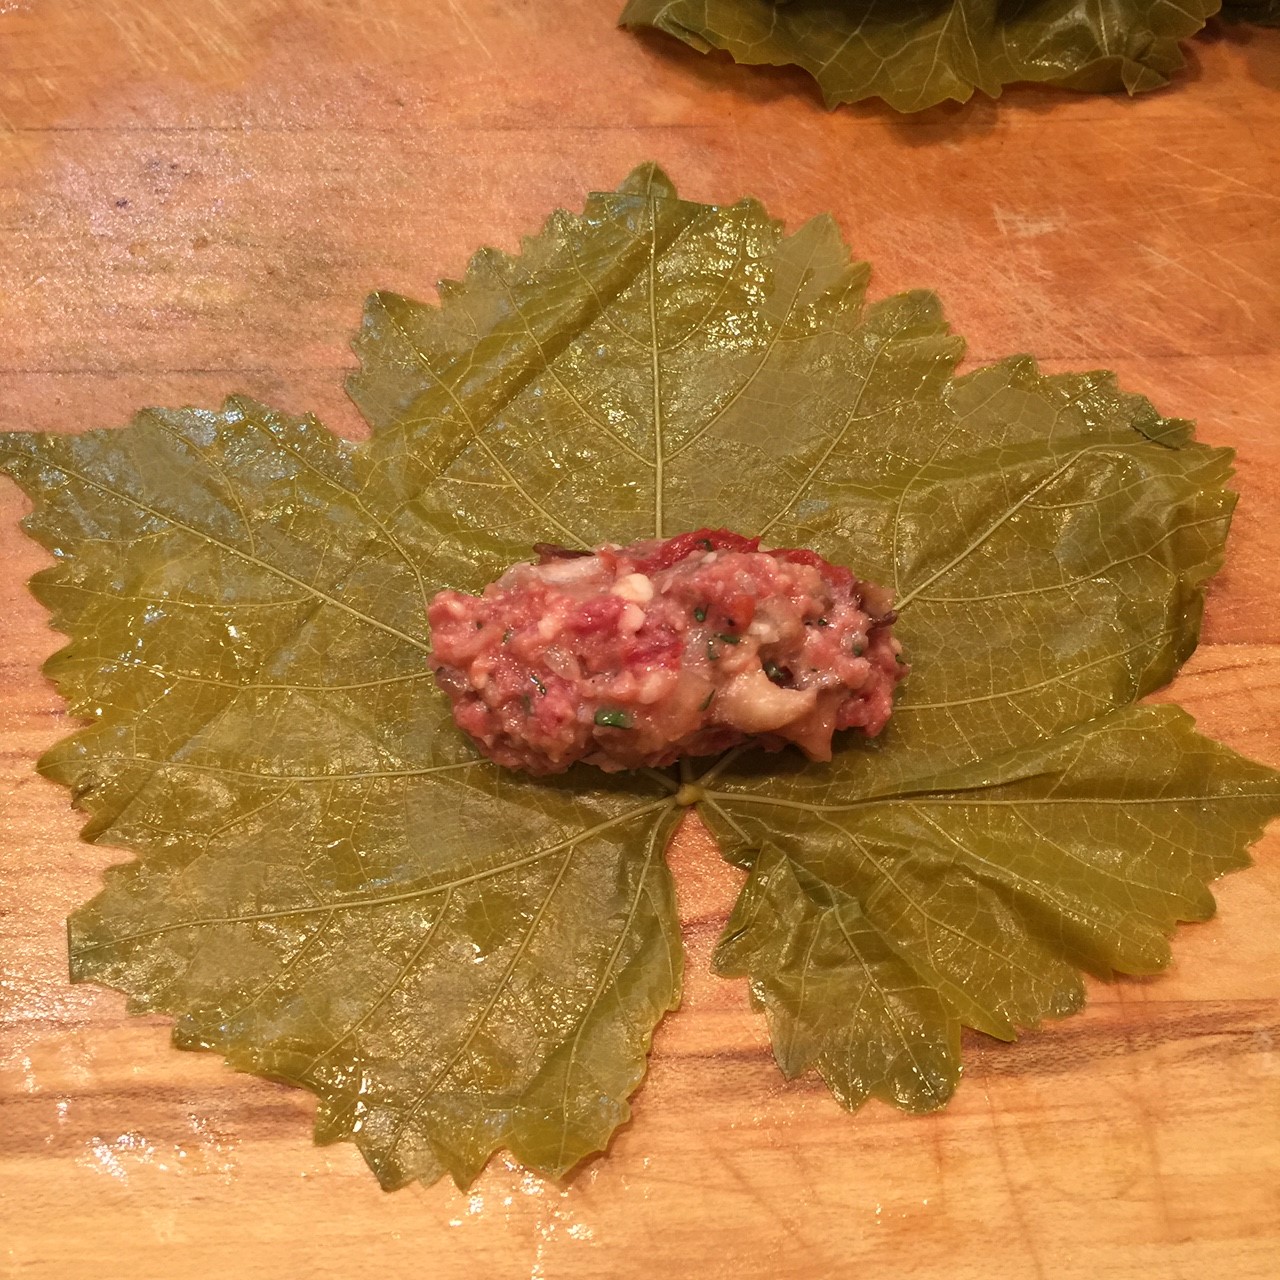
Depending on how much room you have, lay out several leaves, vein-side up, to work in an assembly-line manner.
Add the flour to the filling and mix in. (I like to wait until the last minute to add in the flour.) Spoon out some filling and form a tight log. The amount will depend on the size of the leaf. If you over-stuff, the roll will come apart in the cooking – you need plenty of leaf to fold and roll as you can see from the photo below.
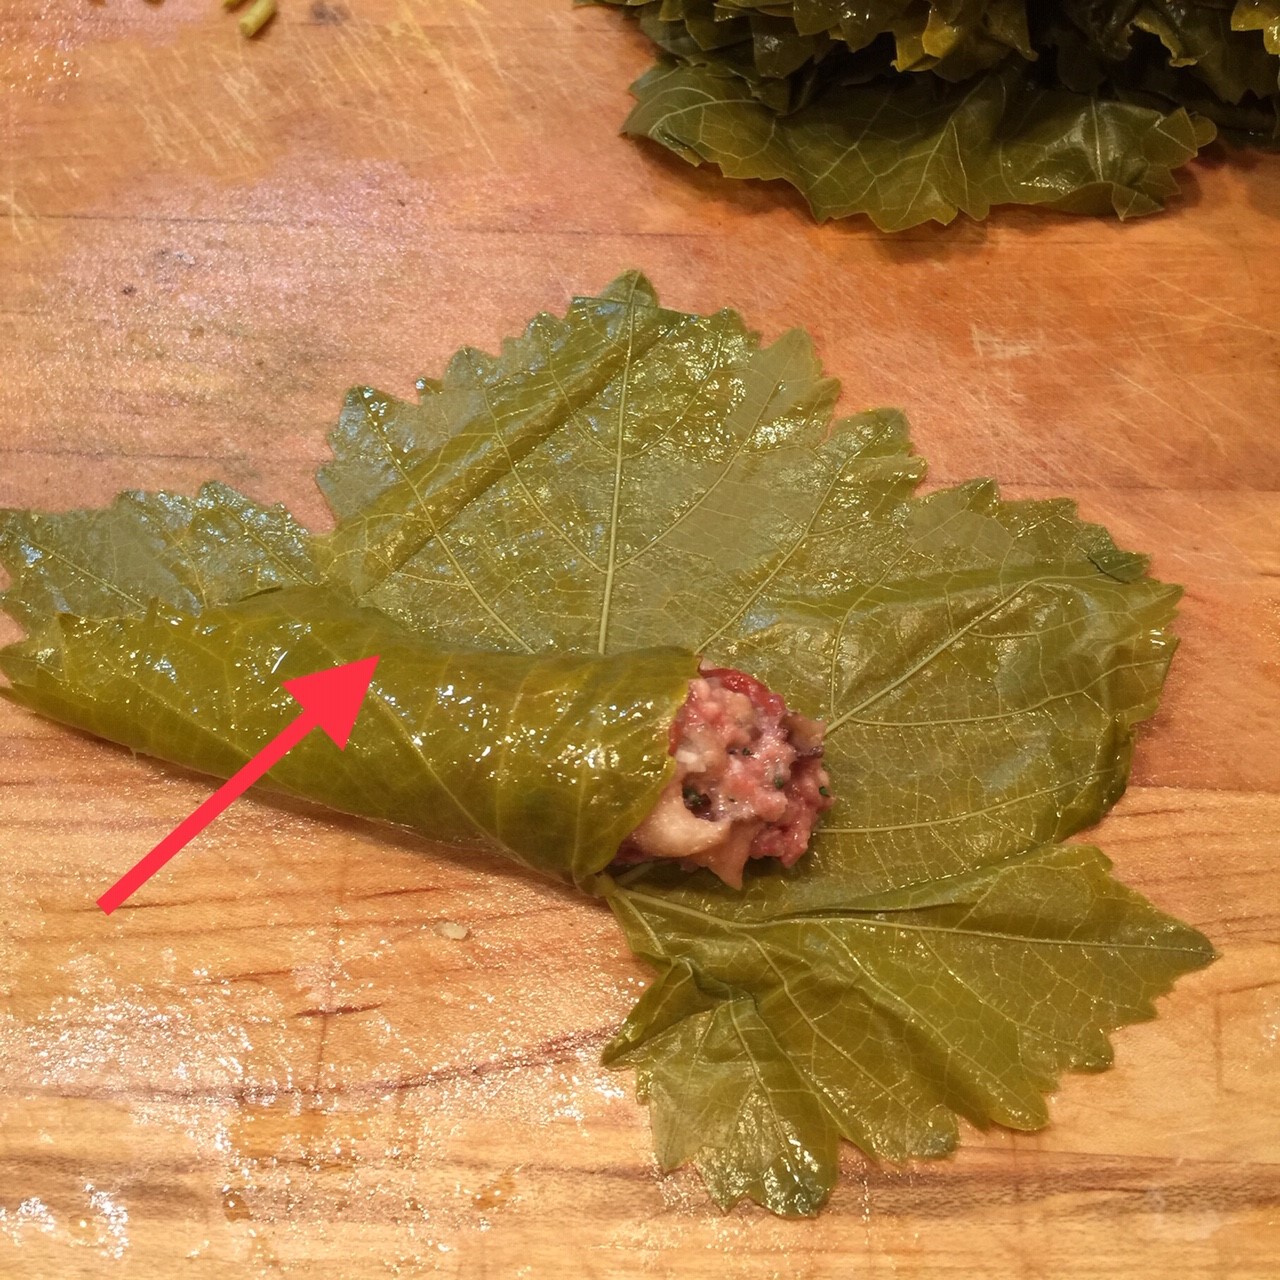
Wrap one of the lower flaps around the filling, tucking in the flap. (Don’t wrap too tightly – the rice will expand with cooking and you don’t want them to burst.)
Wrap the other lower flap around filling as before.
Wrap one of the side flaps toward the center (this seals in the side of the filling).
Fold in the other side flap.
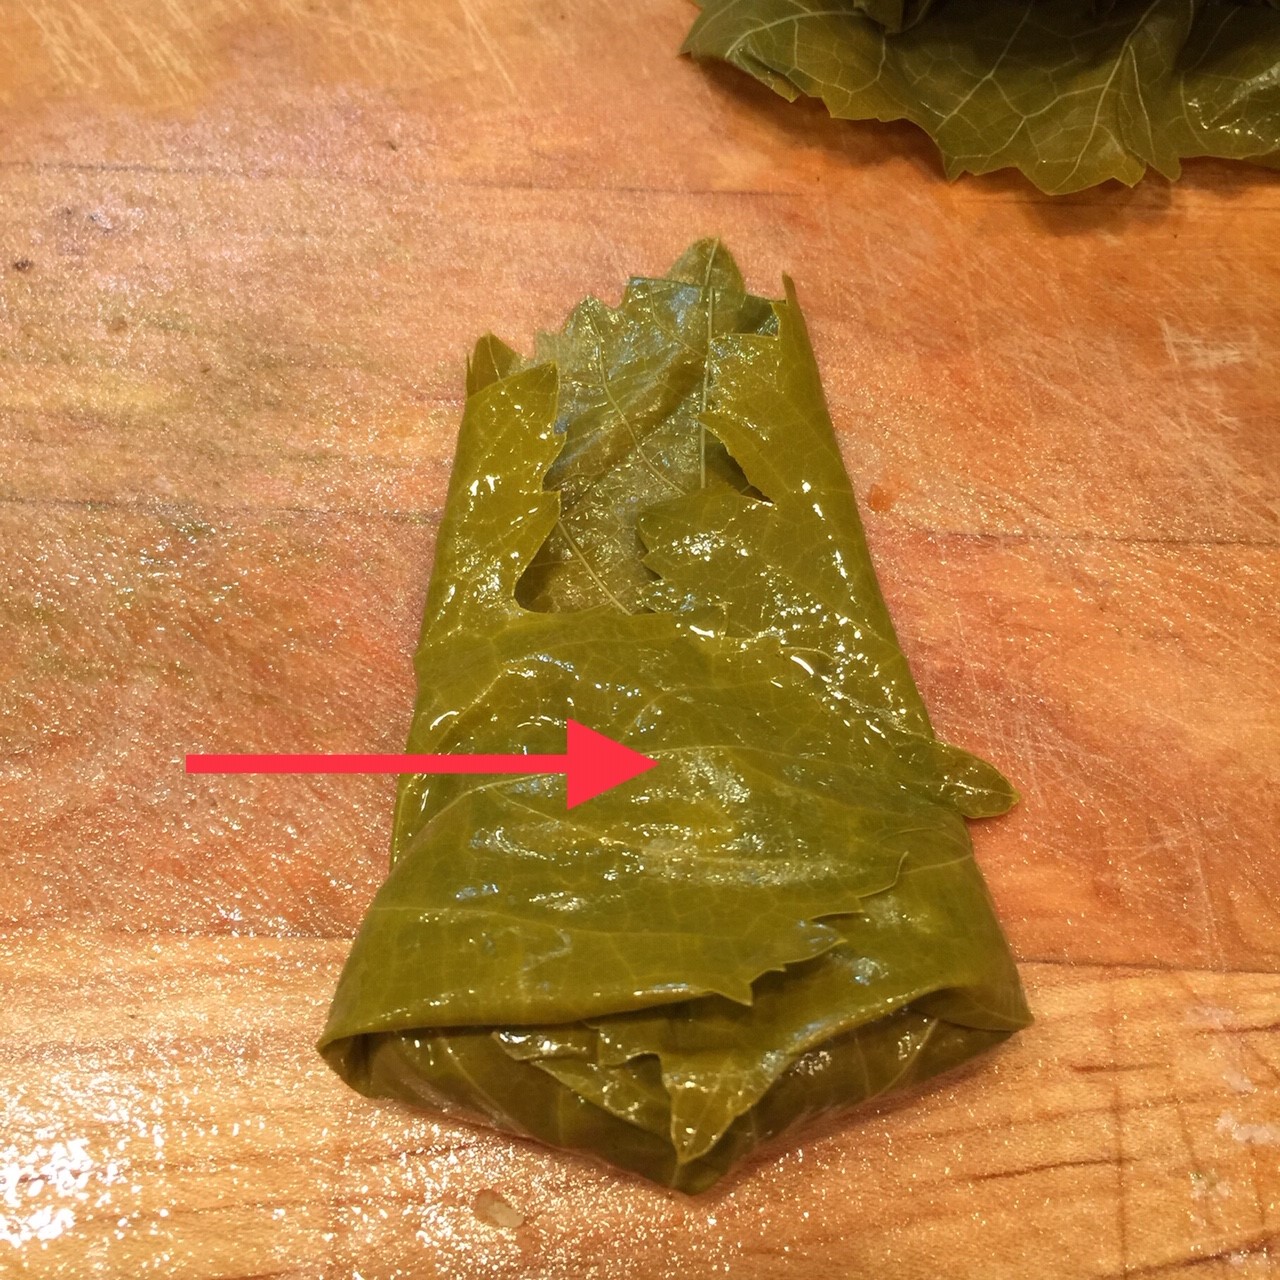
Finally, roll up the dolma starting at the filling end. (Again, don’t roll too tightly.)
Place rolled dolmas in the pot with the tomato juice.
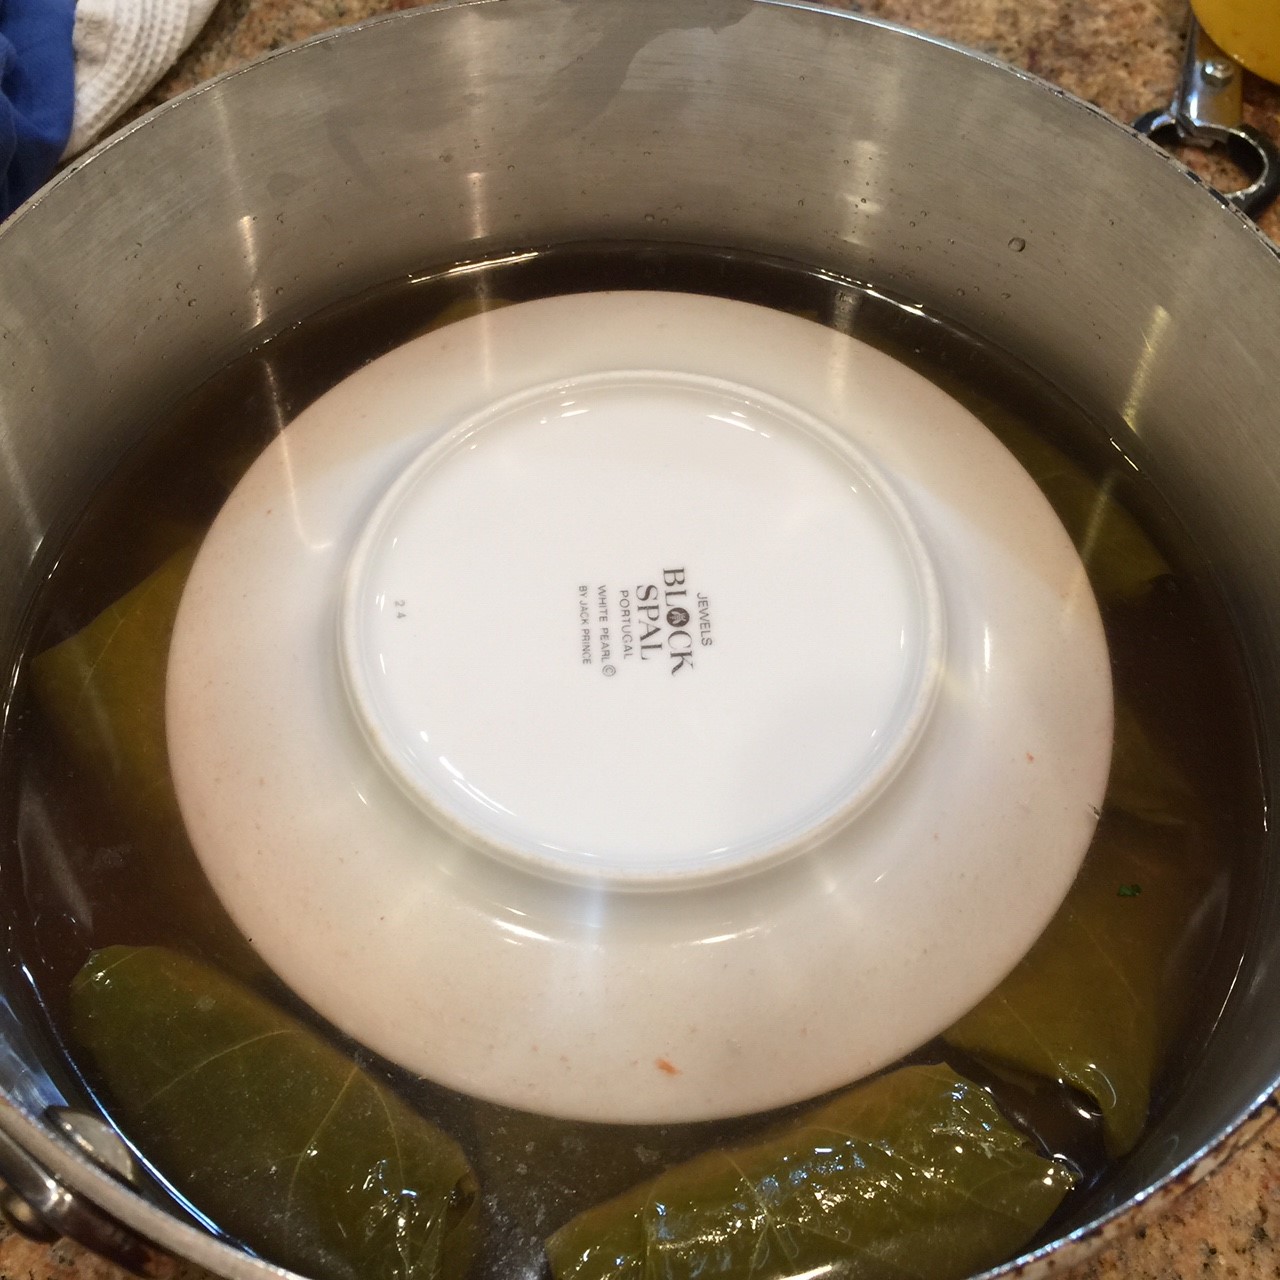
Line them up as you go, creating a second layer, as needed.
Once all the dolmas are wrapped and placed in the pot, cover with water. Place an upturned plate on top to weigh down the dolmas – otherwise, they’ll float.
Bring to a boil, cover pot, and reduce heat to just maintain a simmer. Cook 1 hour. Remove plate and let dolma cool about 15 minutes or more before serving. In my family we eat them plain. You might prefer a dipping sauce, such as tzatziki.