HOMEMADE CORN TORTILLAS – Perseverance Leads To Perfect Tortillas!

HOMEMADE CORN TORTILLAS – Perseverance Leads To Perfect Tortillas!

corn tortilla1 text

I’m a gal who makes nearly everything from scratch. Pasta, breads, yogurt, cakes, and cookies hold no fear for me. I even successfully started making my own flour tortillas. So it came as a shock when I attempted corn tortillas and failed miserably. I threw out the dough in frustration, banished the remaining masa harina (the flour used to make corn tortillas) to the deep freezer, and vowed to never attempt homemade corn tortillas again.

But every now and then I would come across that siren-like bag of masa harina whilst rummaging around the depths of my freezer. She would beckon, tempting me to try again. “You can do it!” she sang.

So I tried again. And she was right. I DID IT!!! Success!!!

How did I do it? I watched several youtube videos on corn tortilla making. Everyone made it look so easy – which it was…..eventually. But there were many bits of useful information they left out which I had to work out for myself. To spare you the angst, I’m going to impart my new found knowledge onto you. Why reinvent the wheel?!

Be sure to read all of the directions and notes before beginning.

NOTE: If you watch how-to videos of tortilla making, you’ll notice most of them use a tortilla press. I chose to use a rolling pin instead because I really didn’t want to buy a press (cheap!), and I thought if it works well without one, YOU wouldn’t want to buy a press.

CORN TORTILLAS – makes 6 five inch tortillas

  • 1 cup masa harina (4.5 oz)
  • 1/2 tsp salt
  • about 1/2 cup water

NOTE: The amount of water used will vary according to the masa harina and, perhaps, even the temperature. This is NOT an exact science.

NOTE: Use your hand to mix the dough, not a spoon. It’s important to feel the dough to reach the proper consistency.

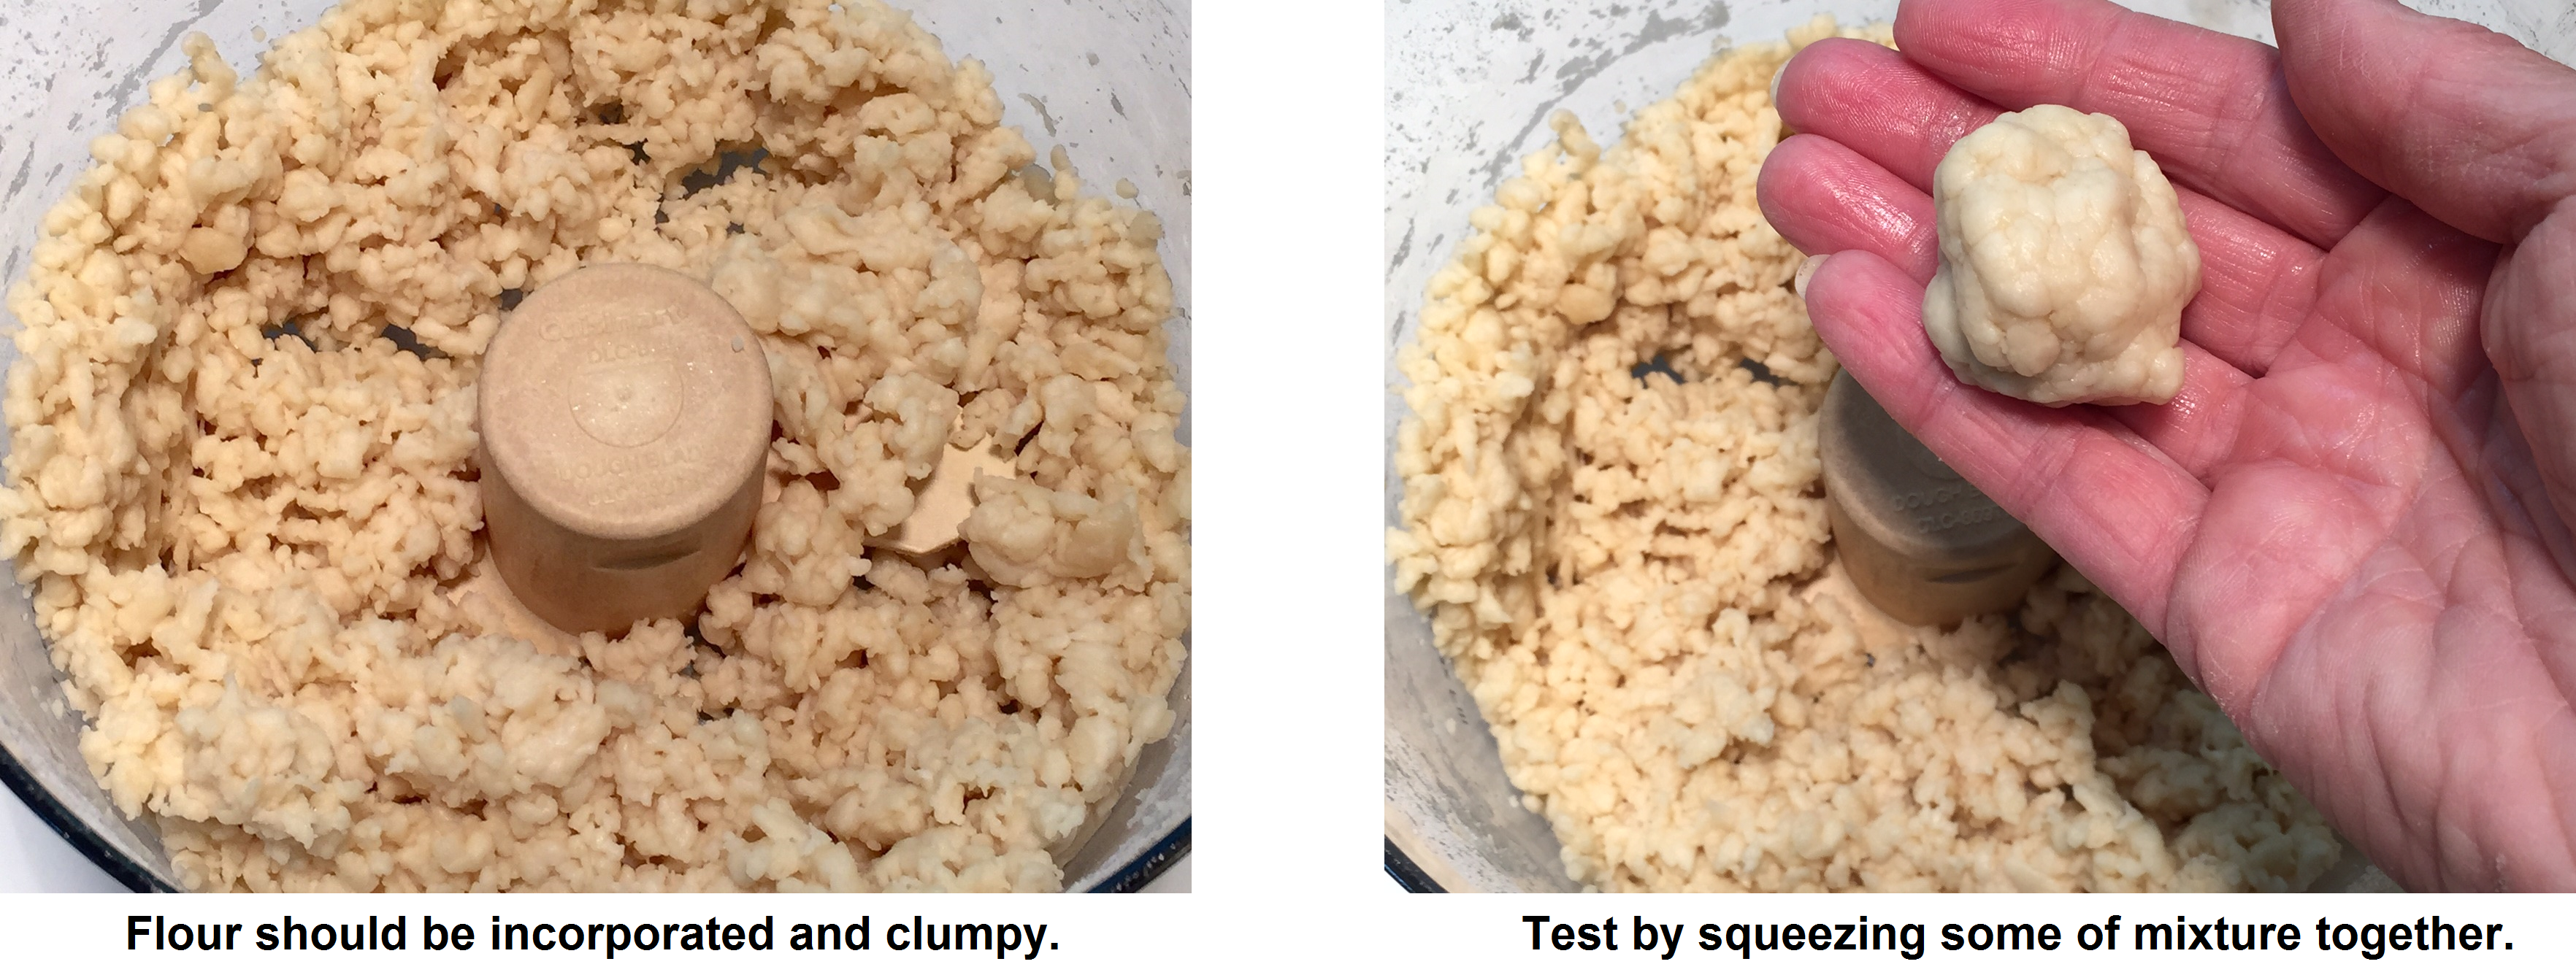
In a bowl, mix together the masa harina and salt with one clean hand. With the other hand pour in half of the water. Begin massaging everything together with the first hand. It will feel like wet sand. You want the dough to stick together, but not be too wet and tacky. Slowly keep adding water until it feels like Play Doh. To test, roll a golf ball sized amount and press it into your flat palm. With palm facing down, try to peel it off. If you can’t, it’s too wet – add a little more masa harina. If it falls right off, it’s too dry – add more water. When you think it’s right, cover bowl with a plate and let rest for 15-30 minutes, so the masa harina fully absorbs the water.

After resting, recheck the dough’s consistency by pressing some into your palm again. Don’t worry about overkneading – unlike wheat flour dough, it won’t get tough. The proper feel of the dough will take experience – one or two times, and you’ll get the hang of it.

Divide dough into 6 pieces and roll into balls.

IMG_1243

Now you’re going to do a rolling test to be sure the dough is properly made, so don’t turn on the griddle yet (no point in heating it up unnecessarily). If the dough isn’t quite right, just scrape it back into the mixing bowl and correct with either more water or masa harina, depending on what’s required.

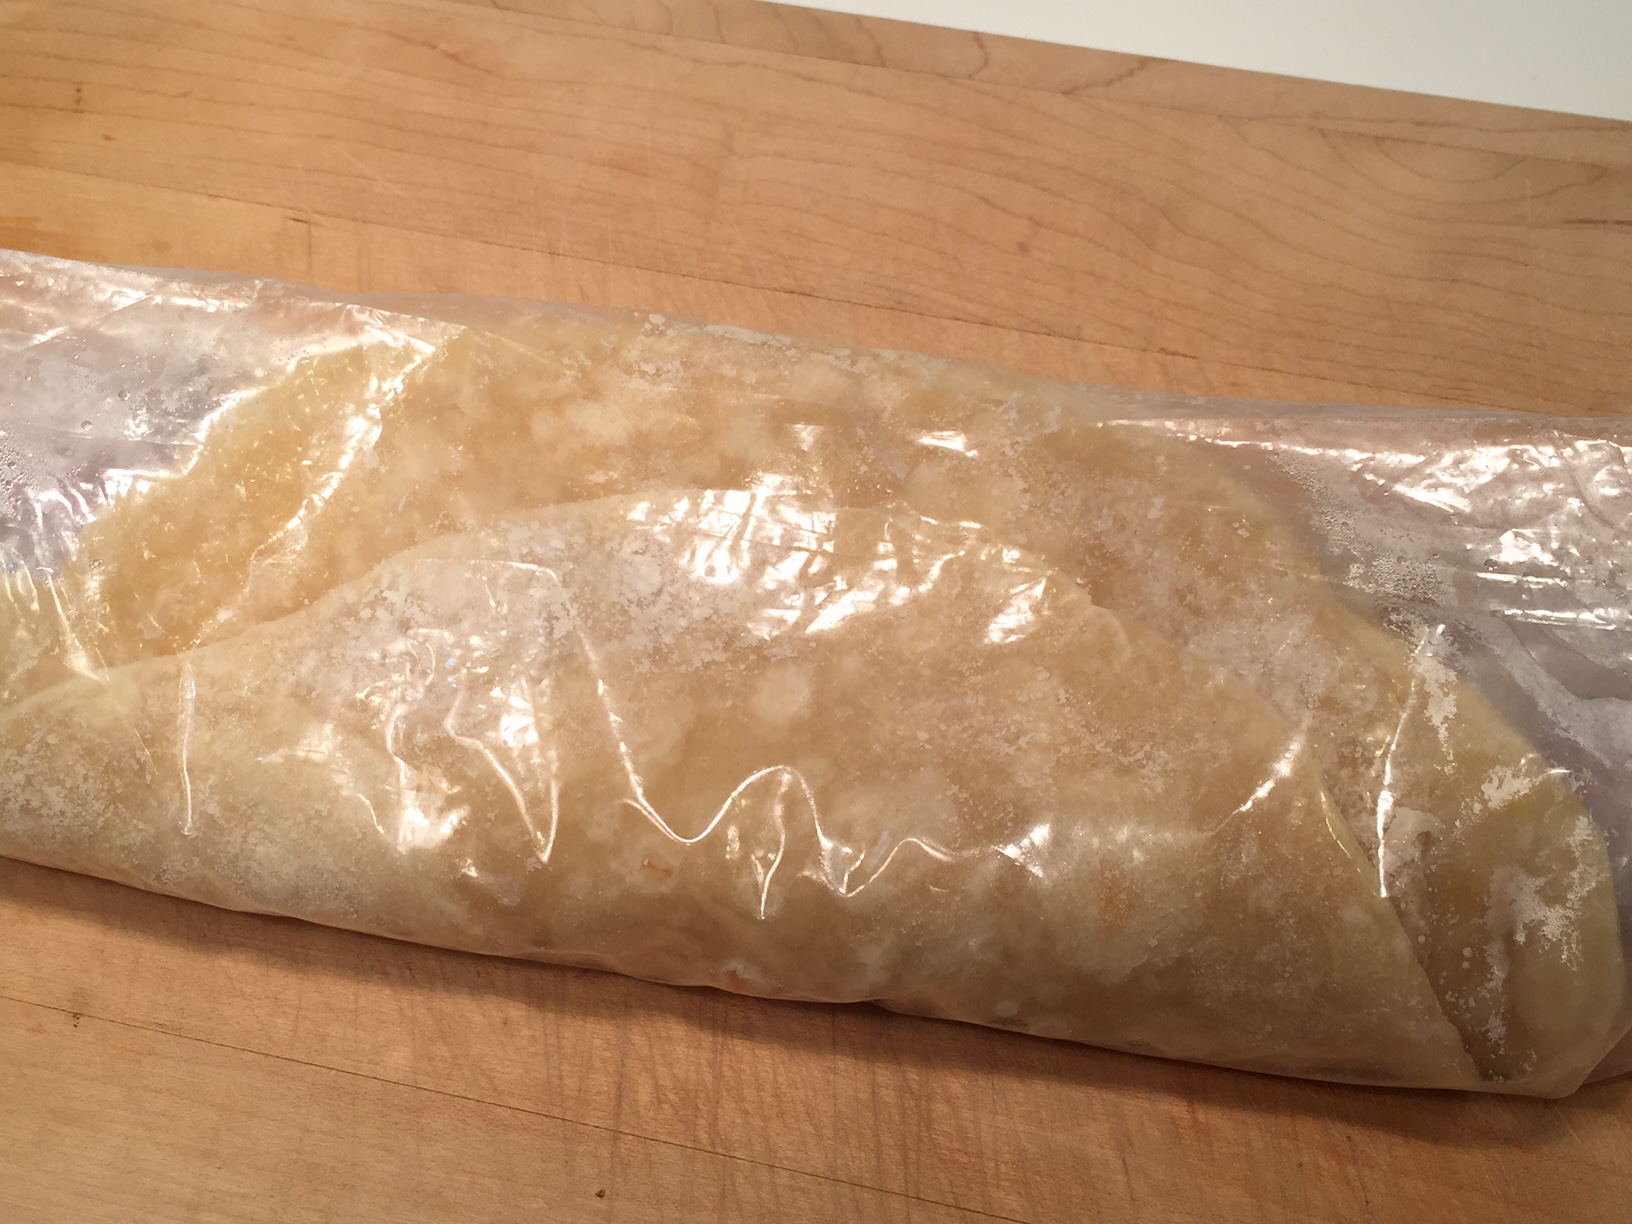
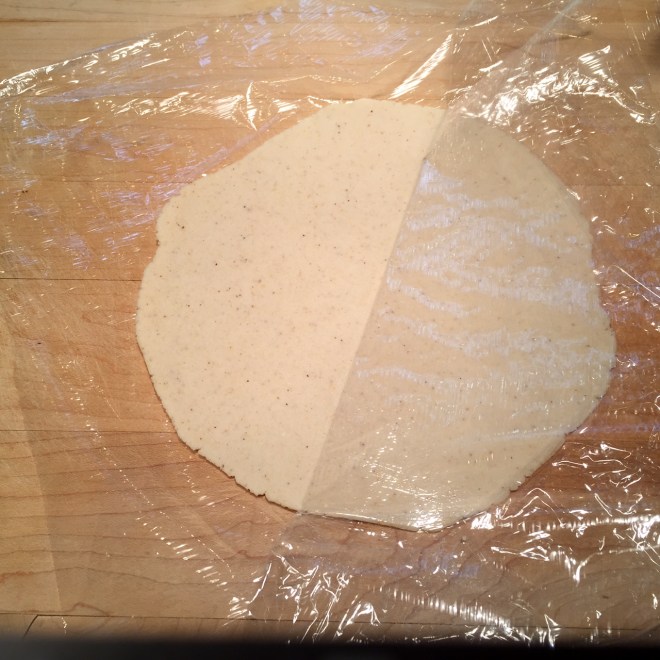
NOTE: You’re going to roll each ball between two pieces of cling wrap (Saran Wrap). Some of the videos suggested waxed paper or using a Ziploc bag cut in half. DON’T! They’re too stiff and increase the odds of tearing the dough when you peel it off.

NOTE: The cling wrap will become less clingy with each tortilla, so use the same pieces for all the tortillas. Less clingy is a good thing – this makes it easier to peel it off.

Place one 8″ piece of cling wrap on a smooth surface. Put one ball in the center and press with fingers until it’s 1/2″ thick. The edges will become jagged.

corn tortilla smash

Keeping your fingers on the disc, use your other hand and press in sides to smooth out edges. The edges will still end up slightly jagged, but much less so by doing this step.

corn tortilla sides

Lay down another piece of 8″ cling wrap at a 45° angle from the bottom cling wrap (so the corners DON’T line up). This will make it easier to separate the two pieces when you peel away the cling wrap.

Smash the disc with a flat object which is at least 5″ in diameter – such as a saucepan, plate, or plastic container. This will start the rolling process.

IMG_1262

Place a rolling pin at the 9 o’clock and 3 o’clock position, and lightly roll back and forth 4 times to about 1/2″ from the edges.

corn tortilla roll

NOTE: Be sure not to roll the pin over the edge and off the tortilla, or the edge will become too thin and it will be impossible to remove the cling wrap without tearing the dough.

Now turn the rolling pin 90° to the 12 o’clock and 6 o’clock position, and roll again the same way. Then again at 10 o’clock and 4 o’clock; and again at 1 o’clock and 7 o’clock.

Repeat the entire rolling process 3 or 4 more times, until the circle is about 5″ in diameter.

Heat the dry griddle (no oil) to medium heat. Give it a minute to warm the surface before attempting to remove the cling wrap from the first tortilla – you want the griddle ready to go once the cling wrap is off since the longer the tortilla is on your hand, the more likely it is to stick to it.

Remove the top piece of cling wrap by grabbing a corner and carefully peeling it away. The top layer is pretty straight forward since it’s laying on the counter. However, if you notice the dough starting to crack – STOP. Try peeling from another corner – you may be able to salvage it. If it keeps tearing, the dough is probably too wet. Scrap the dough off, reform the ball, and begin again.

IMG_1283

Now comes the tricky part – removing the bottom cling wrap. Lay one hand with fingers spread over the tortilla and, putting your other hand underneath the tortilla, flip so that the top hand is on the bottom and bottom hand is on top. The tortilla is still in the middle.

corn tortilla hand on dough

If the tortilla is bigger than your hand, let it hang over on only one side (this is a weak spot). Pick a spot to begin slowly peeling away the cling wrap. Work your way down to the dangling part at the end (unless there is no dangling part) so it doesn’t tear.

IMG_1291

NOTE: You can’t repair a torn tortilla – it’s not like a wheat flour dough. Just scrap it off and start again. You’ll get the hang of it.

NOTE: It’s never too late to adjust the masa harina/water proportions. If at any point you believe the dough is too wet or too dry, go ahead and smash all the balls together and make the correction. (Needless to say, you CAN’T correct a cooked tortilla.)

Flip the dough back to the other hand. (This is the final test to see if the dough is too wet.) If the dough is stuck to your palm and won’t drop out, squish it into a ball and began again. If it transfers without tearing, flip it immediately onto the griddle since the longer it lays on your warm palm, the more likely it will stick.

IMG_1304

NOTE: If the tortilla doesn’t drop onto the griddle flat, DON’T take a spatula to adjust – the dough is too mushy. Let it cook for 30 seconds to firm up before manoeuvring  it.

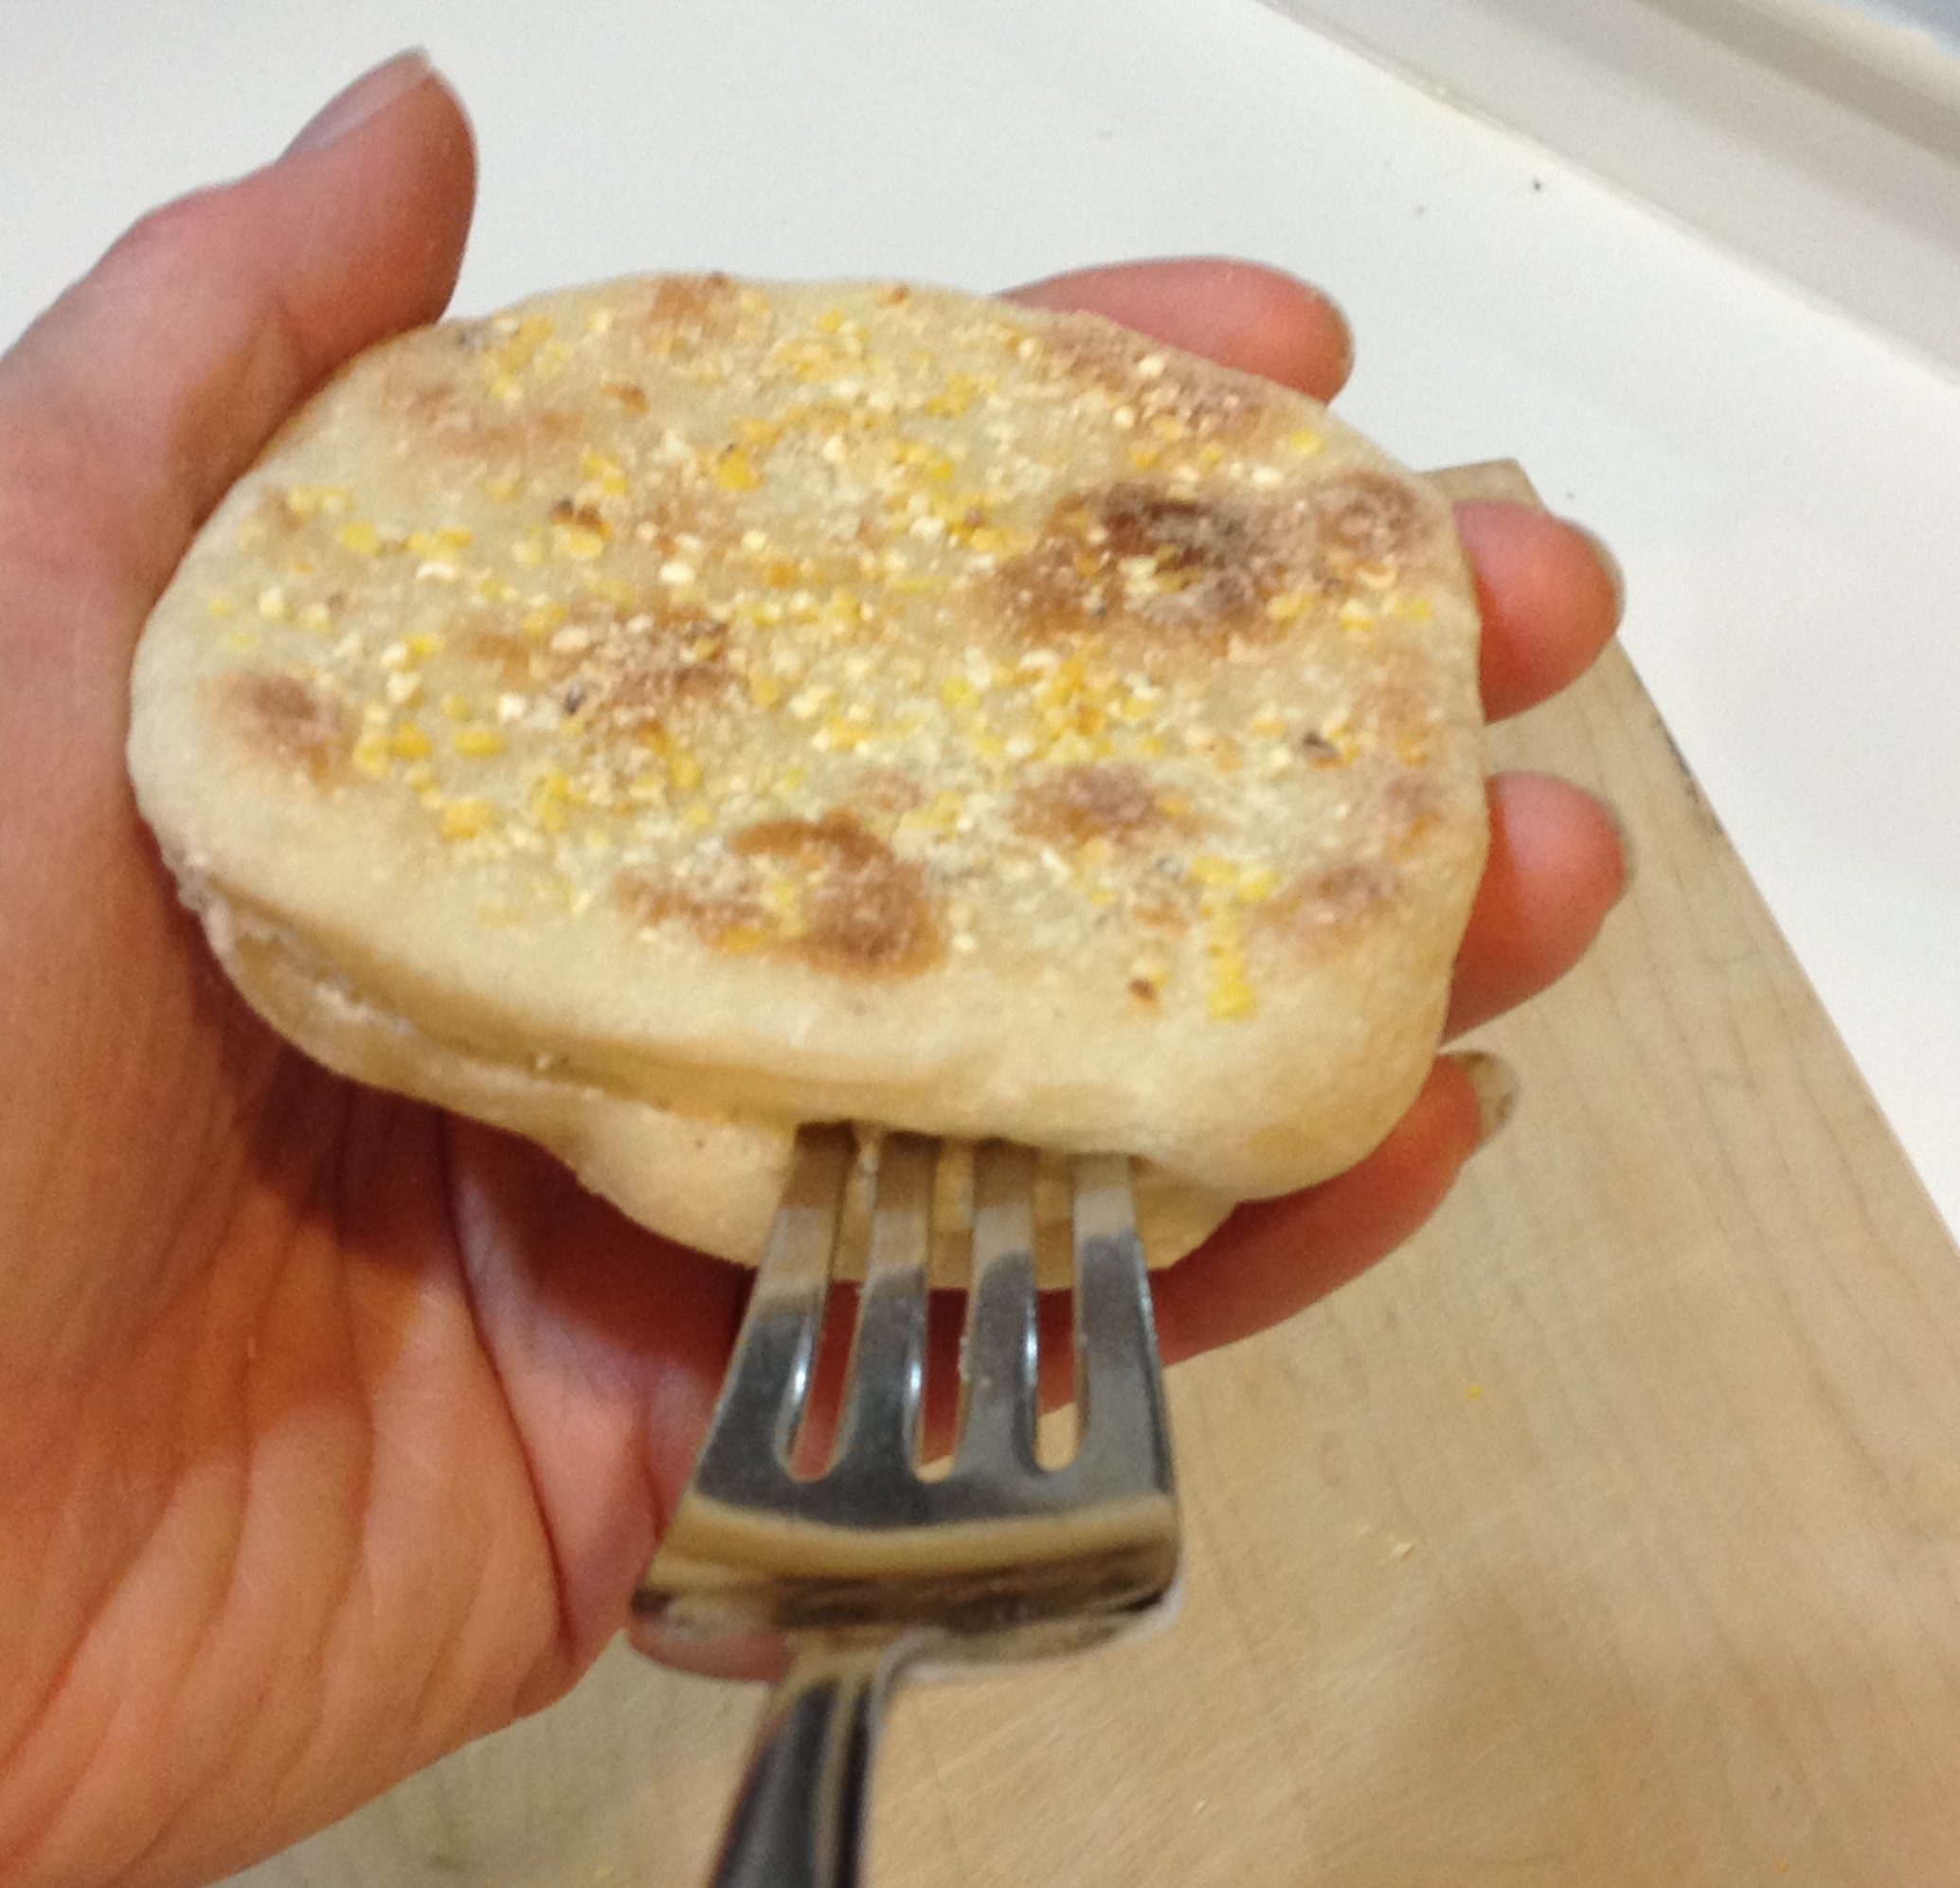
Cook the first side about 1 minute. The edges will become slightly whiter.

corn tortilla cooked edge

Flip and cook another minute.

NOTE: In some of the videos I watched, their tortillas puffed up. Mine never did and it didn’t seem to matter. They were still delicious and rolled perfectly for enchiladas.

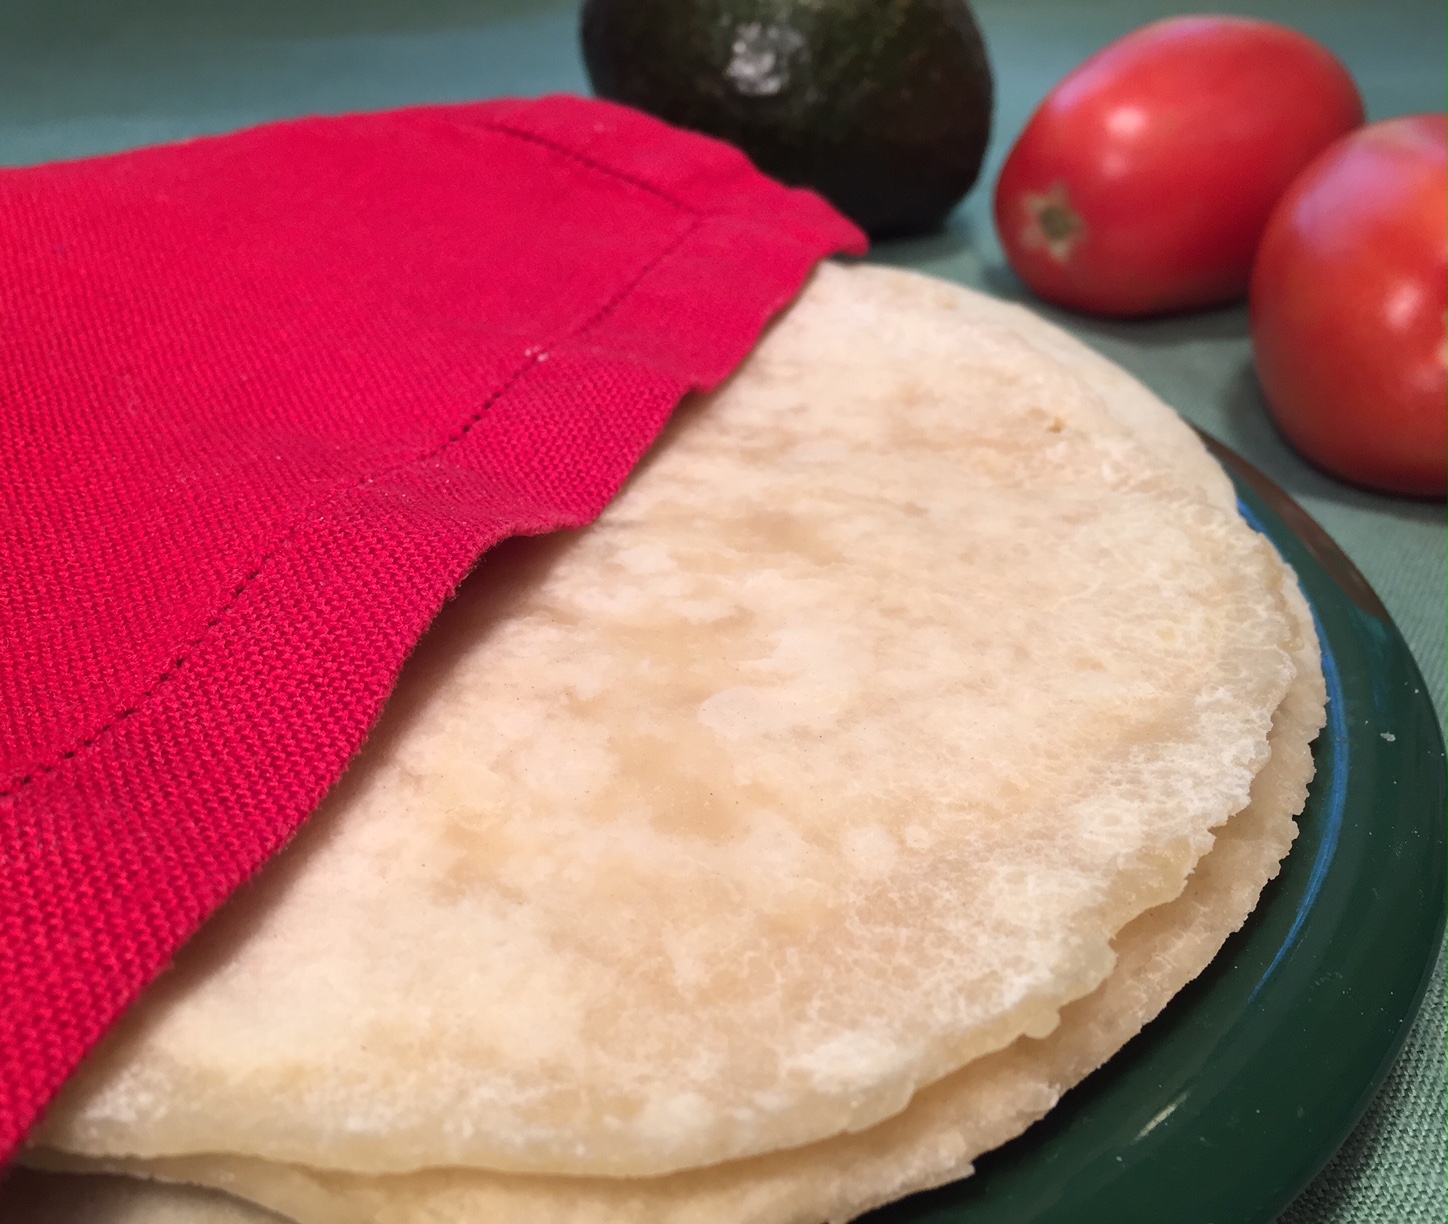
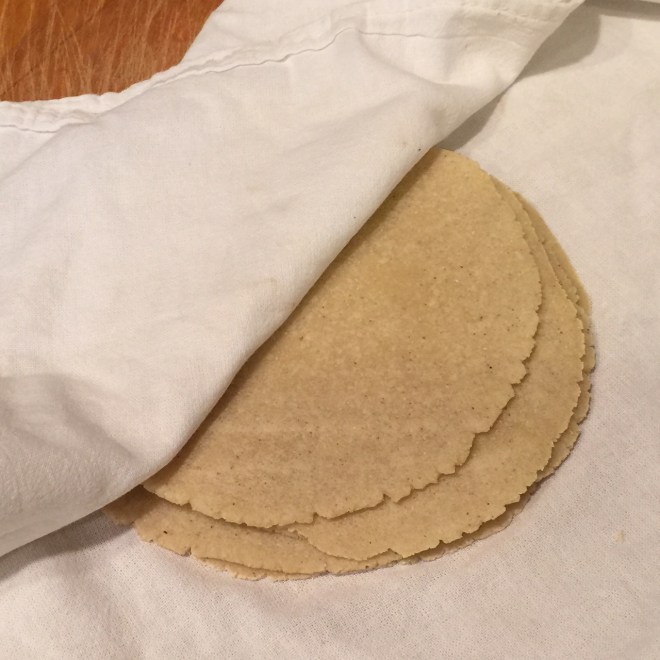
When each is done, place in the center of a tea towel and fold in all 4 corners to cover. This will keep them moist and warm.

IMG_1344

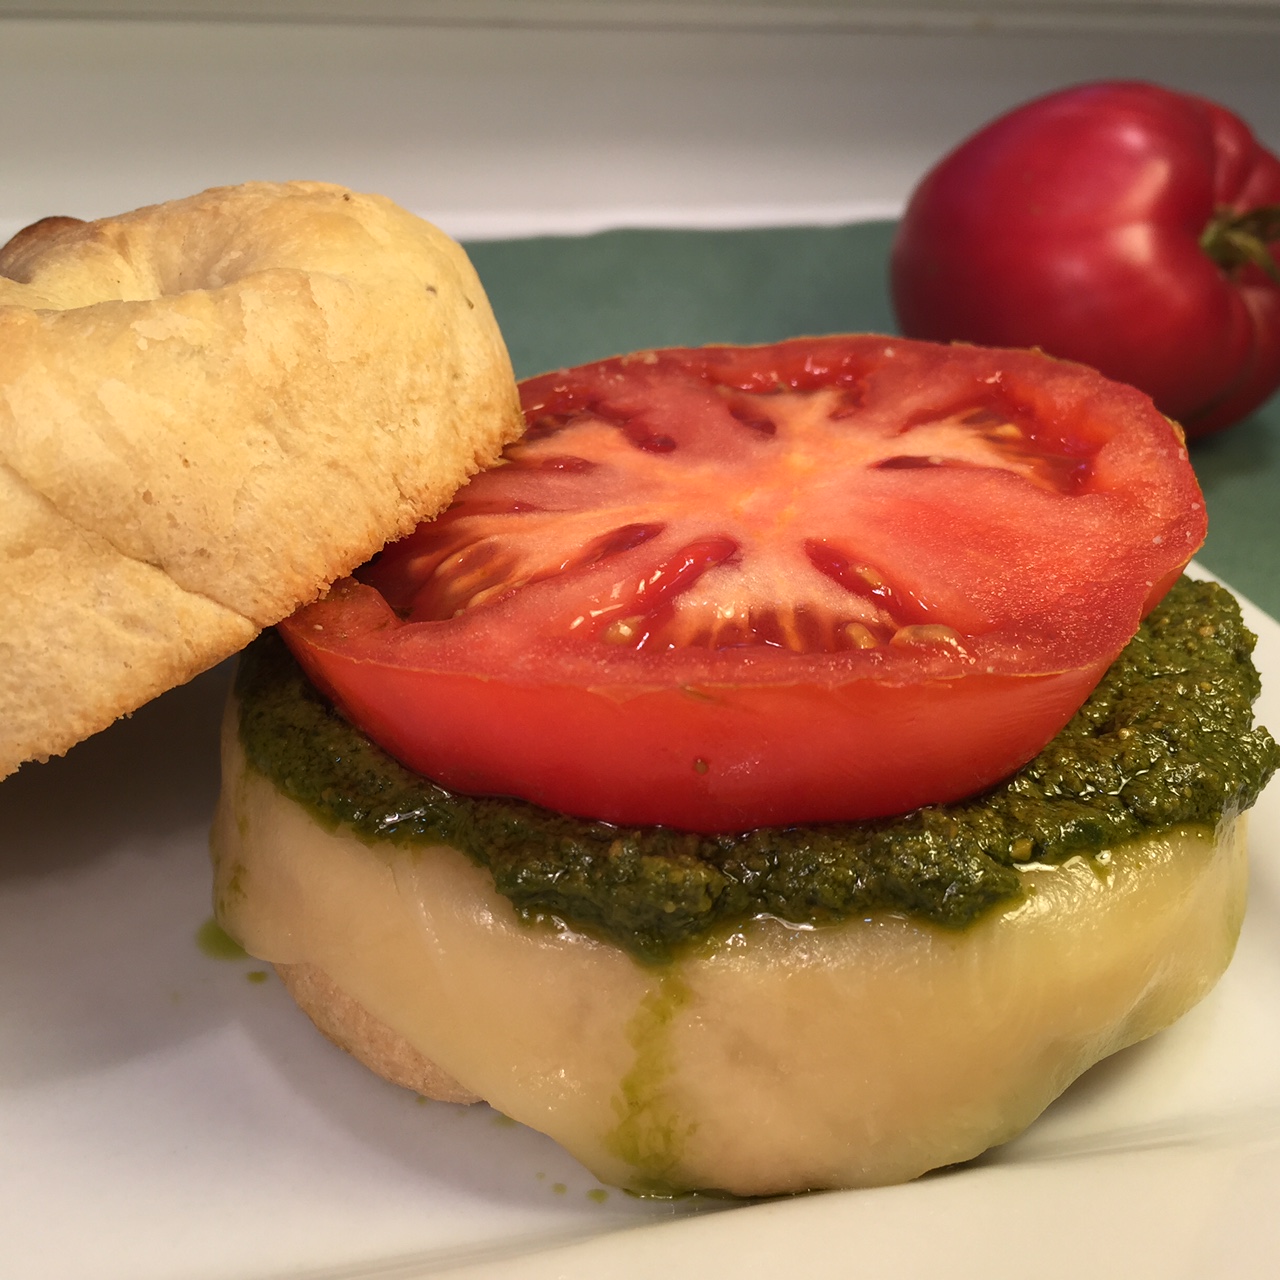
Good luck! Homemade corn tortillas are worth the effort! With a little practice you’ll be able to whip up a few tortillas whenever you want – without having to buy a pack of 10!


HOMEMADE FLOUR TORTILLAS – ¡Muy Buenas

HOMEMADE FLOUR TORTILLAS

HOMEMADE FLOUR TORTILLAS

Last week I posted about Breakfast Burritos and it occurred to me I should post about making homemade flour tortillas.

You may be wondering why I bother making tortillas. Of course, there are the usual reasons: it’s cheaper (although it’s pretty cheap to buy them), and I have control over what goes in them.

But, the main reason I make them is because the purchased packages contain at least 8 tortillas – which is way more than I generally need. Yes, I realize I’m the Queen of Freeze, but, unfortunately, tortillas don’t freeze well. Since I hate waste, I would find myself snacking on them just so I didn’t throw them out. Those are empty calories I DON’T need!

Flour tortillas are surprisingly easy to make, once you get the hang of it. Just roll them out on a floured board and quickly cook on a dry, heated skillet.

NOTE: Even if you have a tortilla press (which I do), you really need to roll them out with a rolling pin on a floured board first, then you can cook them on the press. With the heated press, they stop spreading before they’re the proper size. If you press really hard so they spread to full size before they’re cooked, they’ll shatter. I speak from experience!

FLOUR TORTILLAS – makes about 5  8″ tortillas, depending on how big & thick they are

  • 2 cups all-purpose flour
  • 1/2 tsp salt
  • 1/4 cup vegetable oil (I use corn oil)
  • about 1/2 cup water

Into a food processor put the flour, salt and oil. Pulse a few times, then press the ‘on’ button. Slowly add the water through the pour spout until the mixture forms clumps. Depending on your flour, you may use a little more or less water than the 1/2 cup listed. (You’ll probably need to stop machine and scrap the flour from the side.)

Squeeze some of mixture together to form a small ball. If it doesn’t hold together, turn on processor and drizzle in a tablespoon of water. Run machine another minute to knead.

flour tortilla mixture

If you don’t have a food processor, the holidays are coming – put it on your wishlist! In the meantime, put the ingredients in a bowl and mix with a fork. Then knead for a several minutes on a floured board.

Once the dough is the desired consistency, form tight balls in the amount for the size tortilla you want. I make 5 balls for 8″ tortillas.  Cover in an air-tight container (I just put them in the food processor with the lid on) and let rest for at least 30 minutes.  This decreases the elasticity of the dough and allows them to be rolled easier.

On a floured board, flatten each ball with one hand while pushing in the sides with the other. This helps keep the edges from being too jagged. Then start rolling your dough with a rolling pin, from the center of the dough outwards, forming a circle.

IMG_8298

Heat a dry skillet (no oil or butter) over a medium flame, then place your rolled dough. It will stick initially, so don’t try to move it. After 20 seconds or so, shake the skillet and, when the tortilla scoots around, you can flip it. You don’t want to brown the tortilla (that will make it crispy), just gently cook it through. A couple browned spots on the bubbles are okay. Keep flipping and turning to cook it evenly.

IMG_8299

It should take about 1-2 minutes total. Use your eyes as a guide, not a timer. While the first one is cooking, roll out the second, etc.

Immediately place the cooked tortilla into a plastic bag to keep it soft. If I’m making burritos, I also roll the bag to prevent the tortillas from cracking when I form the burritos.

IMG_8300

They’ll keep a couple of days in the plastic bag, but the point of making them is so you don’t have an abundance of extras. Otherwise, you’ll find yourself tearing off bits and snacking. Unfortunately, the myth that if you eat only a portion of an item the calories don’t count isn’t true. Dang!


PARMESAN BISCUIT SLICES – Cheapness Wins Again!

PARMESAN BISCUIT SLICES

PARMESAN BISCUIT SLICES

I can’t tell you how many recipes I’ve created due to my frugality (aka, cheapness!). For last week’s blogpost, Parmesan Pasta Salad, I needed Parmesan cheese (duh!). Normally, I would never buy grated or shredded cheese (once again – cheap). I would purchase a block and do it myself.

However, when I went to select the Parmesan wedge, there – beckoning me like a siren, RIGHT AT EYE LEVEL! – was a bag of powdery, grated cheese. It would take some doing on my part to get cheese this fine. So, in a Thelma & Louise moment, I grabbed the bag and didn’t look back.

Once the Parmesan Pasta Salad was bagged, tagged, and logged (I watch a lot of Law & Order, SVU), I found there was quite a bit of leftover cheese. Which is where my frugality came into play. I had to use up the stuff.

I decided to make biscuit sticks (like bread sticks, without the yeast), incorporating Parm into the dough AND sprinkled on top. Well, as you can see from the photo above, they didn’t come out at all like I envisioned, but I actually like these ‘slices’ better.

Being a biscuit rather than a bread, there’s no need to wait for rising dough, so they’re fairly quick to put together. Including baking time, start to finish is around half an hour. Not bad!

Note:  I chose to use grated Parm, but you could also use shredded.

PARMESAN BISCUIT SLICES – makes about 20, depending how you cut them

  • 1¾ cups all-purpose flour
  • 1/2 tsp salt
  • 1 T baking powder
  • 1/4 cup chilled butter (salted) – you can use more if you’re feeling decadent
  • 1/4 cup grated Parmesan cheese
  • 3/4 cup milk (I used nonfat)
  • about 1/2 T butter, melted for brushing
  • extra grated Parmesan for dusting

In a large mixing bowl, mix together the flour, salt, baking powder, and Parmesan.

Add in chilled butter, crosscutting with 2 knives until the texture becomes pea-like.

Pour in milk and mix with a fork until most of the flour is incorporated.

Knead the dough 10 times. Count! You don’t want to overmix. You can either empty the dough onto a well-floured surface and knead, or knead directly in the bowl by pushing the dough down with your well-floured knuckles, folding the far half on top of the close half, turning the bowl 90º, and repeating process. TIP:  I always count aloud so I don’t lose track.

Pat the dough into a rectangle using well-floured hands. Then, using a well-floured rolling pin (are you getting the idea the dough is sticky?), roll the dough to 1/2″ thick.

Cut the dough into 1/2″ wide strips using a pizza cutter or knife.

Preheat oven to 450º Fahrenheit.

Generously grease a cookie sheet (even nonstick). Place the strips cut side down (and up) at least 1½” apart. Brush sides and top with melted butter, then sprinkle on the dusting Parmesan. Gently pat cheese into dough.

Bake at 450º F for about 10 minutes, until golden brown. Remove from oven and let rest 1 minute. Remove to wire rack or directly to serving basket.


TOASTY TOMATO & PESTO SANDWICHES

TOASTY TOMATO PESTO SANDWICH

TOASTY TOMATO PESTO SANDWICH

After picking my first tomato of the season, I wanted to make the most of this tempting treat. So I came up with an amazing sandwich:  a toasted focaccia bun topped with melted provolone cheese, slathered with pesto, and a fat slice of my precious tomato.

I’m a firm believer in cooking from scratch – it not only saves big bucks, but it empowers you to choose what goes in your body. So, of course, I made the pesto and focaccia myself.

However, I understand not everyone shares my passion as a diehard DIY-er. So you can simply purchase the pesto and focaccia and STILL have a great tasting sandwich.

As a glass half full kind of gal, I’ve included recipes for the pesto and focaccia, along with the sandwich directions, in my optimism that some of you will give them a try.

TOASTY TOMATO PESTO SANDWICH – makes 1 sandwich

Ingredients:

  • thick tomato slice (preferably home grown or from a farmer’s market)
  • 2 or 3 Tbsp. pesto (recipe follows below)
  • 2 slices provolone (or whatever cheese you prefer)
  • focaccia bun (recipe follows below)

Directions:

  1. Slice the focaccia in half horizontally and toast it.
  2. Lay the cheese on bottom half and zap in the microwave for 15 seconds or so to melt the cheese.
  3. Slather on pesto.
  4. Add the tomato.
  5. Place the top half of the roll.

Now open wide and enjoy the feast!!!

PESTO – makes 1 cup

  • 2½ cups (4 oz) basil, packed
  • 6 cloves garlic
  • 1/2 tsp salt
  • 2½ T lemon juice
  • 1/2 cup Romano cheese, shredded
  • 1/3 cup pine nuts, toasted
  • 1/3 cup extra virgin olive oil

Put all ingredients in a blender and puree. You’re going to need to start and stop the blender a lot in the beginning in order to mix things around by hand.  WARNING:  Do NOT push down with any utensil while machine is running. Been there, done that. Turn machine off before mixing things up! Pretty soon everything will blend on its own.

FOCACCIA BREAD – makes 5 buns

  • 1 cup water, 100º-104º Fahrenheit
  • 1¼ tsp yeast
  • 1½ (7 oz) cups white bread flour
  • 1½ (7¼ oz) cups whole wheat flour
  • 2 T olive oil
  • 1 tsp salt
  • 1/2 tsp dried rosemary
  • coarse salt in grinder for top of bun
  • extra olive oil for soufflé dishes

Proof yeast in water.

Into the work bowl of food processor put all of the white flour, 1 cup of the whole wheat flour, the olive oil, salt, and rosemary. Turn on machine and slowly stream in the yeast water through the pour spout. Add the remaining wheat flour one tablespoon at a time until the dough forms a firm ball. Let the machine run 45 seconds more to knead the dough. (If you don’t own a food processor, you’ll have to do this by hand. As you undertake this task, think about buying a food processor!)

Plop dough into an oiled bowl, then flip dough and place back in bowl. Now both sides are oiled. Cover with tea towel and let rise 1 hour.

Cut dough into 5 pieces. If you have 4¼” individual soufflé dishes (see photo) use them – you’ll need 5.

IMG_1318

The buns will turn out nice and rounded. If you don’t have soufflé dishes, just use a well oiled cookie sheet. As you can see from the photos, the soufflé dishes turn out prettier focaccia buns – but they taste the same!

BAKED IN SOUFFLE DISH VS FREE FORM

BAKED IN SOUFFLE DISH VS FREE FORM

Pour about 1½ tsp olive oil into each soufflé dish. One by one, take a piece of the dough and work it into a 4″ disk, smooth on one side. Place the smooth side down into the oiled dish, and press. Flip dough and press down again, so the dough fills the dish bottom – try not to mar the smooth surface. Cover and let rise 1/2 hour.

Using a finger with a short fingernail (or the stick end of a wooden spoon), make several deep indentations in dough. Brush with a little olive oil (not absolutely necessary to do this), and grind sea salt over top.

Bake in preheated 400º Fahrenheit oven for 20 minutes. Let rest for 10 minutes before removing from soufflé dishes to a wire rack to cool.

Twist & Shout With HOMEMADE PRETZELS!

Homemade pretzels

Homemade pretzels

Who doesn’t love the aroma of freshly baked bread? Even a full stomach will start growling at that intoxicating smell.

So when we’re at the mall it’s hard to resist those soft hot pretzels. If you’re only buying 1 or 2, it’s not such a big deal. But if you’ve got your whole family – look out! You’re talking real money! And if teenaged boys are involved is this group…holy moly! My sons can down a pretzel before I’ve had my first bite, and are ready for more.

I decided to try my hand at making them. All the recipes I found were pretty much the same. Most used all-purpose flour, but one called for bread flour. I wanted a pretzel that had some stretch when I broke it apart. Since bread flour has more protein which causes the stretch (please, don’t ask me the science behind this), it surprised me all-purpose flour was used so often.

I donned my lab coat (complete with goggles – just for the effect) to make a batch with all-purpose and a batch with bread flour.

I also noticed that nearly every recipe had you boiling the formed dough in baking soda and water for 1 minute before baking them. Was this really necessary, I wondered? (I’m not averse to cutting corners when I can!) So while I was in my experimental mode with the flour, I decided to test boiling versus non-boiling.

As a good scientist, I did my tests twice. The results were conclusive – bread flour was best as far as taste and stretch, while the all-purpose pretzels looked prettier and rose a bit more. But I’m a person who cares about the beer, not the bottle, so I’ll be using bread flour.

I’m sorry to report to you lazy cooks, there was actually a big difference with the water bath – whether they were made with bread flour or all-purpose, the unboiled were dryer, had no stretch, and weren’t as pretty, as you can see in the photo below:


pretzel-baked vs boiled

pret text


SOFT PRETZELS – makes 12

  • 1 cup water
  • 2¼ tsp dry active yeast (or 1 packet)
  • about 3 cups bread flour
  • 2 T butter, soft
  • 1/2 tsp salt
  • 4 tsp sugar
  • 1/3 cup baking soda
  • 1/2 tsp cornstarch

Heat the water to 100º-104º Fahrenheit. Stir in yeast and let proof for 5 minutes.

Put 2 cups of the flour, the butter, salt, and sugar into the work bowl of your food processor. When yeast is proofed, turn on machine and slowly add the water through the pour spout. Keep adding flour a few tablespoons at a time until the dough forms a ball. I use nearly all of the 3 cups of flour. If you don’t own a food processor, you’ll have to do this step by hand, kneading about 10 minutes.

Empty dough onto a floured board. Pick up from the bottom and fold in on itself, so the floured side surrounds the ball. Plop into an oiled bowl, then flip the ball and plop back upside down – now the ball is oiled on both sides. Cover with a tea towel and let rise for 1 hour.

Punch down risen dough and place it on a floured board. Cut into 12 equal pieces. Roll and stretch each piece to a length of 18″ or more. Dough is very elastic, so I’ve found it best to stretch each piece about 12″, then start again and stretch to 15″ or so, and finally do a final round to get each piece to 18″. As each piece reaches its final length, form it into pretzel shape (See photo below).

pret shape


Cover with towel and let rise 30 minutes.

In a large NON-ALUMINUM skillet, bring the baking soda and 10 cups of water to a full boil. If you don’t own a large skillet, use a smaller one and cut back on the water and baking soda.

Prepare wash by mixing cornstarch with 1/4 cup water in a small saucepan. Stir constantly while bringing to boil. Remove from heat.

Preheat oven to 450º Fahrenheit.

Carefully drop as many pretzels in boiling water as will fit. Boil 1 minute, flipping after 30 seconds. Remove to well oiled cookie sheet.

When they’re all boiled, brush on cornstarch wash. Sprinkle with coarse pretzel or sea salt. Bake at 450º Fahrenheit for 12 minutes. They’ll brown much earlier than the 12 minutes, but don’t remove from oven – they’re still not done. Transfer to wire rack.

Eat immediately for optimum taste. FYI – these pretzels are only 60 calories each! So live a little – have 2….homemade pretzels are cheap!!!


How Clutter Control Lead To ENGLISH MUFFINS

Homemade English Muffins topped with strawberry jam

Homemade English Muffins topped with strawberry jam

Whether it’s because spring-cleaning is in the air, or the fact that I’m being suffocated by the abundance of  unused possessions in my home, I’m on a Purge, with a capital ‘P’. To prevent me from getting sidetracked or feeling overwhelmed, I assign myself a manageable task-of-the-week. This is Week 12 and, I’m proud to say, I’ve remained on point! As my house is being cleansed, thrift shops have been the benefactors of car loads of my discards. Win-win!

Recently I tackled my kitchen desk. One of the drawers contained a lifetime of recipes clipped optimistically from newspapers and magazines, only to be tossed on the pile and forgotten. (You’ve got that pile, too – I know you do!)

Not only did ridding myself of about two thirds of this paper potpourri gain me an organized drawer, but it also reminded me of recipes I’d forgotten. One was my mom’s Curried Cheese And Olive Spread served on English Muffins, and the another was for……English Muffins. Who am I to thwart fate? When she beckons, I come – or, in this case, cook.

Yeast holds no fear for me, so I decided to start with the English Muffins and make the Curried Cheese And Olive Spread for next week’s blog. While I won’t go so far as to say my English Muffins were better than store-bought, they were delicious.

You may be asking why I bother to make something from scratch when I can simply buy the taste equivalent in the market. Well, there are 2 main reasons why I make things from scratch: 1) I like to know what’s in my food – I don’t want preservatives, or bugs, or ingredients that are unpronounceable; and 2) to save money. What it boils down to is I’m a bit paranoid, and I’m cheap.

While English Muffins are extremely easy to make, they take about 3 hours start to finish. This is because of the rising periods – 2 hours for the first, and 1/2 hour for the second. The actual hands-on time is very minimal.

ENGLISH MUFFINS – makes 6 standard size, or 12 minis

  • 3/4 tsp active dry yeast
  • 1/2 cup water
  • about 1½ cups all-purpose flour
  • 1/2 T salted butter, softened
  • 1/2 tsp sugar
  • 1/2 tsp salt
  • cornmeal for sprinkling (about 3 T)

Heat water to approximately 100º Fahrenheit. Mix in yeast and let proof several minutes.

Put 1 cup flour, the butter, sugar, and salt into the workbowl of your food processor.  When yeast is foamy, turn on the machine and slowly pour in the yeast water. Add in remaining flour one tablespoon at a time – just until the dough starts to form a ball. You probably won’t use all of the flour. Continue to run machine another 30 seconds to knead the dough. If you don’t have a food processor you’ll have to do this by hand. Then start haunting the thrift shops for used machines.

Pour dough onto a floured board. Pick up dough from the floured bottom and fold dough onto itself so the sticky part is encased. Press into a greased bowl, then pick up dough and replace in bowl upside down. Both sides are now greased. Cover and let rise for 2 hours. (This is longer than most breads – you want the air pockets.)

Empty dough onto the floured board and cut into 6 equal pieces (or 12, if making minis). Stretch each piece into a 3″ circle for standard, or 1½” for mini. They’ll be about 3/8″ thick (don’t worry – they’ll rise).

Generously sprinkle cornmeal onto a large skillet or griddle. One by one, press each dough circle into the cornmeal, then flip them and press again. Arrange them in the skillet so they’re not touching. Cover with a tea towel and let rise 30 minutes.

Remove the tea towel and turn on flame to medium. Once the skillet is heated, turn down flame to medium/low. Cook about 5 minutes, until bottom is browned. Flip them and cook another 5 minutes, until browned. The the best way to be sure they’re done is to insert a thermometer through the side of one of the muffins into the center. They’re done at 200º Fahrenheit.

Remove to a wire rack to cool so they don’t get soggy.

The accepted way of splitting English Muffins is to poke a fork all the way around (see photo), then pull apart.

Insert a fork around the side to cut open English Muffins.

Insert a fork around the side to open English Muffins.

Store in a sealed container.


CHEESE STUFFED DINNER ROLLS – Melty Good!

IMG_0853


The dinner roll: a classic. Always a must with company, and mandatory when my kids were little (sometimes that’s all they’d eat!). While there are different types and shapes of dinner rolls, my children’s favorite were the soft yeast rolls I made in a round cake pan.

I don’t know why it took me so long to think of this (probably due to the numbing effect from years of diaper changes, chauffeuring, and stepping on Legos), but it finally occurred to me to stuff a cube of cheese into each dough ball.

The rolls were a hit! And, really, what’s not to like: melty cheese in the middle of a soft yeast roll.

Astute readers may have noticed me bandying about the ‘yeast’ word. Yes, these rolls use yeast which means kneading and rising.

If you’ve been following my blog you’ll know there’s nothing to using yeast. You’ll also know that I believe a food processor is an essential part of a kitchen. Not only will it save you steps, it will save you money because you’ll start making things from scratch that you would have bought ready-made – like yeast rolls.

Of course, you can make these Cheese Stuffed Dinner Rolls without a food processor.  You’ll just have to knead them by hand. But know that that’s 10 minutes you could have spent catching up on Facebook….or dusting.

You can use any kind of cheese you fancy for Cheese Stuffed Dinner Rolls, but I recommend a cheese that stretches when heated such as jack or mozzarella. There’s something irresistible about stretching cheese as you break open a piping hot dinner roll.

CHEESE STUFFED DINNER ROLLS – makes 12 rolls

  • ½ cup milk (I use nonfat)
  • ¼ cup water
  • 2¼ tsp dry yeast (or 1 packet)
  • 2¼ cups all-purpose flour, more or less
  • 2 T sugar
  • ½ tsp salt
  • 2 T butter, softened
  • 12  5/8″ cubes of cheese, just eyeball it – you don’t have to measure

Combine the milk and water, then heat to about 100º Fahrenheit. Sprinkle on yeast and stir. Let proof for about 5 minutes.

Into the food processor put the sugar, salt, butter, and 2 cups of the flour. Pulse the machine a few times, then run about 10 seconds to blend.

When yeast is proofed, run the processor and slowly trickle the liquid through the pour-spout into the flour. The goal is for the dough to just form a ball. Add more flour one tablespoon at a time, if needed, until this happens. (I usually use about 2¼ cups of flour.) When the dough gathers into a ball, continue to run the machine another 30 seconds to knead the dough. (Use this time to think about those poor souls without food processors getting sticky dough all over their hands and flour on their clothes.)

Pour dough onto a floured board and cut into 12 equal pieces. Wrap each piece of dough around a cube of cheese, pinching the dough to seal. When all the cheese is wrapped, place dough balls evenly in a greased 8″ round or square cake pan. Cover and allow dough to rise, filling the pan – about 30 minutes. (See photo.)

yeast rolls rising

Preheat oven to 375º Fahrenheit.

If you like, brush tops with milk – not necessary, but gives them a pleasing golden color. Bake 20-25 minutes, until done. Serve hot for best gooey cheese results.


SPINACH PIE – Popeye Approved!

SPINACH PIE

SPINACH PIE

Spinach is one of those really-good-for-you foods that I tend to put off making. Why? Because I hate cleaning it. If you’ve ever bought fresh spinach, you know what I mean – it’s very muddy. Even when the store does its best to sell clean bunches, I always find dirt in there. Consequently, I wash each leaf under running water, getting in every nook and cranny – after all, I don’t know what’s in that mud.

I admit it – I’m a wee bit overly cautious. (Okay – paranoid!)

I realize life would be easier if I used frozen, but I worry they didn’t clean their spinach very well. Running water over frozen spinach is almost pointless.

All that being said, whenever I do make a spinach dish, I’m glad I did. It’s delicious, healthy, and I always feel I’ve done a noble thing when finished. Then I chide myself for not cooking spinach more often.

My Spinach Pie is a lovely combination of spinach, raisins, and olives, topped with mozzarella, and encased in a hearty crust.

You may be fearless (or less paranoid) when it comes to spinach, but cringe at making a yeast dough. I’m here to tell you, yeast doughs are easy as…(wait for it)…pie. HONESTLY! They’re a piece of cake. (I’ll stop now.) So take a deep breath and I’ll walk you through this Spinach Pie recipe that everyone loves.

NOTE: I prefer to use canned black olives with jalapeños for added kick, but the plain ones are fine.  You can also use kalamata olives, if you like.

ADDITIONAL NOTE: There are 3 olive oil amounts listed separately. The grand total is 5½ T, but I listed them in the amounts to be used for different purposes. The olive oil used to grease the rising bowl, casserole dish, and brush on the dough are not included in this total.

SPINACH PIE

Crust:

  • ¾ cup water, approximately 100º Fahrenheit
  • 2¼ tsp dry yeast
  • 2¼ cups (274g) all purpose flour
  • 1½ T olive oil
  • ½ tsp salt

Filling:

  • 1 lb fresh spinach (stems are included in this weight)
  • 1 T olive oil
  • 3 garlic cloves, pressed
  • ¼ cup onions, finely chopped
  • ¼ tsp cayenne pepper
  • 1   4-oz can black sliced olives (with or without jalapeños)
  • ¾ cup raisins
  • freshly ground pepper
  • ½ lb mozzarella cheese, shredded
  • 3 T olive oil

Stir yeast into water and let proof for about 5 minutes.

Put 2 cups (246g) flour, the 1½ T olive oil, and salt into your food processor. Turn it on and slowly pour the proofed yeast water through the pour spout.  Let run until the flour is incorporated. The goal is for the dough to form a ball. Add more flour tablespoon by tablespoon until this happens. Then, run the machine about 45 seconds to knead the dough.

Note:  If you don’t own a food processor, you’ll have to mix and knead the dough by hand. You can use the time it takes to knead the dough to think about how to save up for a food processor.

Press the dough ball into an olive oil greased bowl, then flip the dough so the entire ball is greased. Cover with a tea towel and let rise for 1 hour.

While dough is rising, prepare the filling (which can also be done ahead of time). Remove and discard the spinach stems. Thoroughly wash spinach leaves, shake to remove excess water, then grab handfuls of leaves and slice. Don’t worry about the size or shape of the sliced leaves – once cooked, the leaves wilt.

In a large pot heat the 1 T olive oil. Sauté the onions, garlic, and cayenne pepper for 5 minutes. Add in the olives, raisins, ground pepper, and spinach. Cook until the spinach is wilted and the liquid boils down a bit. (If you’ve never cooked fresh spinach before, you’ll be amazed by how much the spinach wilts – see photo.) There will still be some liquid – don’t worry about it.

Raw spinach wilts down to nothing.

Raw spinach wilts down to nothing.

Mix the mozzarella and 3 T olive oil together in a bowl.

Preheat oven to 400º Fahrenheit.

When dough has risen, take two thirds of the dough and, on a well floured board, roll into a rectangle large enough to cover the bottom and sides of an 8″x 10″ casserole dish (or comparable size). Liberally grease the casserole dish with olive oil, then carefully place dough. Brush dough with more olive oil.

Tilt the pan containing the spinach, allowing the liquid to drain away. With a slotted spoon, remove the mixture and spread evenly on top of dough. Then sprinkle on cheese.

Roll out the remaining dough into a rectangle large enough to cover top. Lay this piece in place, and roll the edges of the bottom and top dough together. The filling is now completely encased.  You can brush the top with olive oil, water, milk, or an egg wash, if you like. Make 3 slits in the top dough.

Bake at 400º Fahrenheit for 35 minutes.

Necessity Is The Mother Of Inventing CRAN-YAM MUFFINS!

Cran-Yam Muffins

Cran-Yam Muffins

Although I’m generally not the most organized person around the house (open any closet or drawer in my home and you’ll know what I’m talking about), there is one area in which I do excel: I keep scrupulous records of holiday menus. Who attended, what was served and the quantity, if the amount was adequate, and how long things took to cook are all jotted down in my 3-ring binder.

Every year after Thanksgiving dinner I write the same note – that very little cranberry sauce and yams were eaten, and NOT to make them again. And every year I get guilted into making them because “it’s tradition”.

This year, in a vain attempt to be thrifty, I only used half the bag of cranberries to make my sauce, and didn’t use all the yams I bought. A wise move, but not wise enough. The majority of both dishes still went untouched. “I swear, I will never make cranberry sauce and yams for Thanksgiving again!” (You have to imagine me doing a Scarlett O’Hara impersonation while saying that.)

So post-Thanksgiving I had half a bag of cranberries and a yam unused. As you may know by now – I hate waste! Although I’m the self-proclaimed Queen of Freeze, I decided against freezing the cranberries – I knew they would get lost in the frigid abyss and I’d forget all about them. But what else could I do with cranberries?

Pulling out my trusty Joy Of Cooking (a must-have for any kitchen!), I looked up ‘cranberry’ in the glossary. There they were: cranberry muffins. Yes! “What if I added shredded yam and spices to the muffins?” I pondered. Perfect!!!

It took several batches to produce the look and flavor I’d envisioned. (And, yes, I actually had to buy more cranberries and yams. Oh, the irony!) But I’m now ready for future leftover cranberries and yams….even though I WON’T be making them next Thanksgiving. Really.

NOTE:  While paper liners for the muffin tin make life easier in the sense that you don’t have to grease the muffin cups (a job I kind of hate), I suggest you forego the liners for this recipe. The paper (and even foil liners) tend to stick to muffins, making it difficult to remove them without losing a good portion of the muffin. Again: hate waste! So bite the bullet and grease the cups.

CRAN-YAM MUFFINS – makes 12 muffins (standard size)

  • 1¾ cups all-purpose flour
  • 2/3 cup granulated sugar
  • 1 tsp salt
  • 2 tsp baking powder
  • 1 T cinnamon (notice the measure is tablespoon)
  • ½ tsp nutmeg
  • 1 tsp ginger
  • 2 eggs
  • ¾ cup milk (I used nonfat)
  • 4 T salted butter, melted
  • 1¾ cups chopped raw cranberries (measure AFTER chopping), divided
  • 1 cup yam, shredded (I used garnet)

In a medium sized bowl put the flour, sugar, salt, baking powder, cinnamon, nutmeg, and ginger. Mix well with a large spoon.

In another bowl (it can be a little smaller) beat the eggs well. Stir in the milk, cups of the cranberries, and the yams. Add in the melted butter and mix.

Pour the liquid ingredients into the dry. Using the large spoon mix together, working with as FEW strokes as possible. Over mixing will yield tough muffins. It’s fine if there’s some flour not incorporated. The batter will be thick.

Preheat oven to 400º Fahrenheit.

Spoon the batter into the greased muffin cups, dividing the batter equally. Sprinkle the reserved ¼ cup of chopped cranberries on top.

Bake at 400º F for about 23 minutes – the top will be starting to brown. Remove from oven and let cool in tin for 2 minutes. Run a dull knife around each muffin, lifting them up at the end of the circle to loosen. Remove to wire rack.

Let cool at least 15 minutes before eating so they’ve had time to set, but are still warm. Delicious with a cold glass of milk, hot tea, or coffee. To reheat, toast in toaster-oven for 1-2 minutes.


Pumpkin Rolls – Perfect Bread For Fall!

Pumpkin Biscuits

Pumpkin Rolls

It’s Autumn in my part of the world, and that means one thing:  every conceivable food and drink becomes pumpkin flavored.

When I was a kid, the only pumpkin food was pie. But over the years, pumpkin has made an appearance in ice cream, tea, pancakes, coffee, cereal, butter, and on and on. Generally, I’m not one to jump on the pop culture food bandwagon (don’t get me started on Greek yogurt!), but I have a pumpkin roll recipe that’s adds a little seasonal festivity into a meal without being in-your-face PUMPKIN.

Now, don’t panic people, but these rolls are yeast based.  No doubt, while experienced bakers are shrugging their shoulders and murmuring ‘so what?’, newbies hearing the word ‘yeast’, are running to the refrigerated tubes of pre-made dough.

I’ve said it before, using yeast is a snap – especially if you have a food processor. No food processor? Go to a thrift shop, save up your pennies, or put it on your Christmas wish-list. A food processor will cut down on cooking time which, in turn, will encourage you to cook from scratch more often.

This recipe makes about 20 rolls, depending on how big you cut them. You may be tempted to half the recipe, thinking 20-ish rolls too many. Well, I wouldn’t be true to my self-proclaimed title of Queen of Freeze if I didn’t advise you to make the entire recipe (or even double it!) and freeze the leftovers. Next time you want homemade Pumpkin Rolls, just zap them in the microwave for about 15-20 seconds. Besides saving money, I LOVE to save time.

NOTE:  While munching on a Pumpkin Roll, it occurred to me that chocolate frosting would really enhance its yummy-ness. (Of course, adding  chocolate to pretty much anything guarantees thumbs up from this chocoholic.) The frosting turned the dinner rolls into a delectable morning pastry.

Chocolate frosted Pumpkin Rolls

Chocolate frosted Pumpkin Rolls

PUMPKIN ROLLS – makes about 20, depending on how big you cut them

  • ¼ cup water
  • ½ cup milk (I used nonfat – use what you have)
  • 1½ tsp dry yeast
  • 3½ cups all-purpose flour
  • ¼ tsp granulated sugar
  • ½ cup pumpkin (fresh or canned)
  • ½ cup dark brown sugar, packed
  • ¼ cup butter, melted
  • 1 tsp ground ginger
  • ½ tsp salt
  • ¼ tsp nutmeg
  • ¼ tsp allspice
  • ¼ tsp cloves
  • ½ tsp cinnamon

Combine water and milk, then heat to approximately 105º Fahrenheit. Stir in yeast and let proof for about 5 minutes.

In the workbowl of your food processor (or large mixing bowl)  put 3 cups of flour (note that you won’t be using all the flour at this time), the sugars, pumpkin, butter, salt, and spices.

When the yeast liquid is foamy, turn on the food processor. Then slowly pour in the liquid through the pour spout. Add more flour 1 tablespoon at a time until the dough forms a ball. Run the machine for 45 seconds to knead. If you’re not using a food processor, knead by hand for 10 minutes. (I wouldn’t be surprised if sticky dough on your hands and working the dough for 10 minutes convinces you to get a food processor!)

Place dough in a greased bowl, smoosh it down, then flip it. This will grease both sides of the dough. Cover with a tea towel and let rise for an hour.

Turn the risen dough out onto a floured surface. Roll into a square ¾” thick. Using a knife or pizza cutter, slice dough into individual rolls. Place them on a greased or nonstick cookie sheet, cover with a tea towel, and let rise 45 minutes.

Bake in a preheated 350º Fahrenheit oven for 25 minutes.