

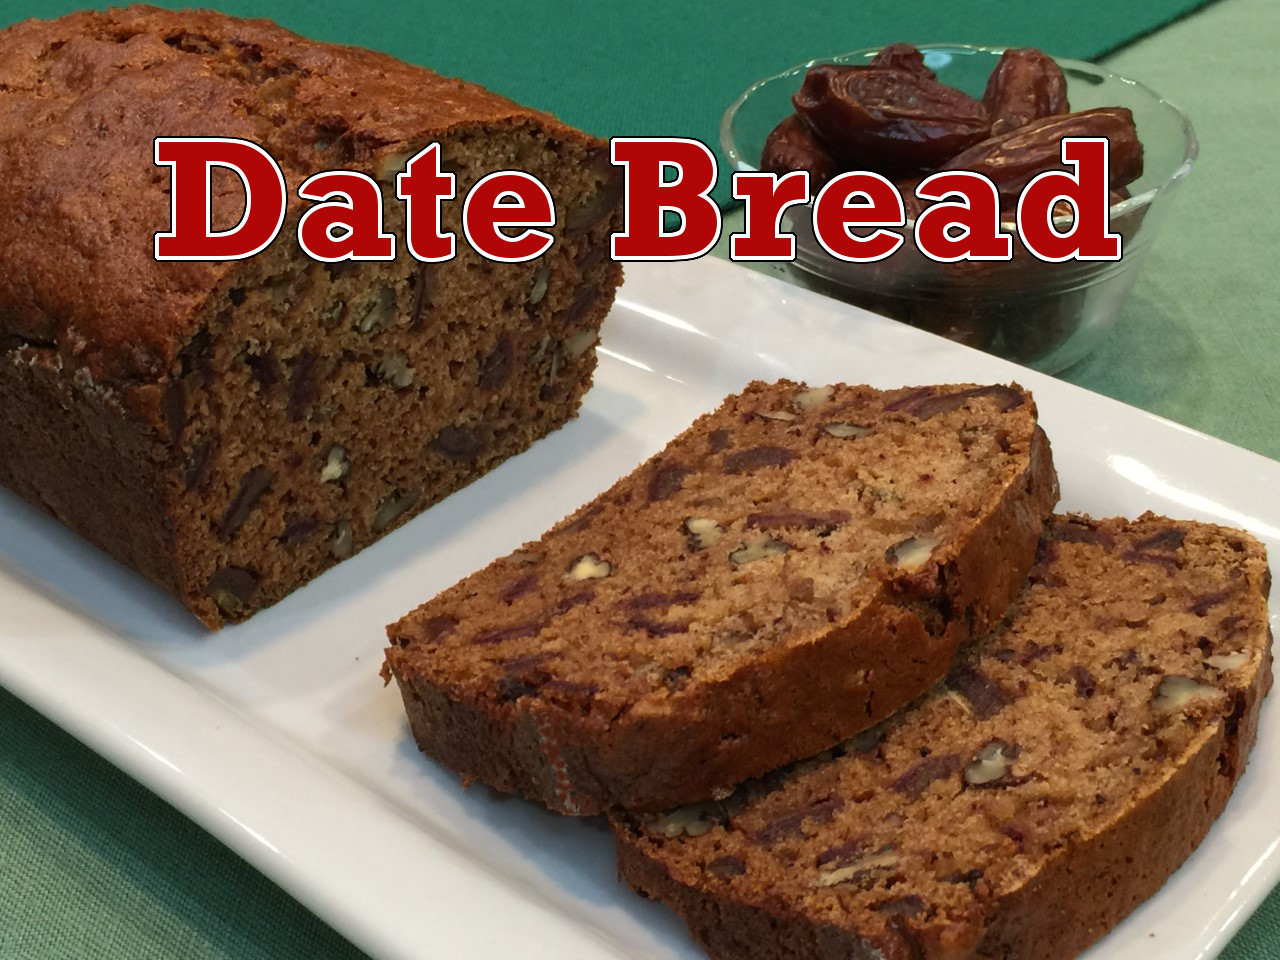
They say necessity is the mother of invention. With my bounty of zucchini from 2 plants, I needed to come up with ideas to use these growing beauties (one can eat only so much stir-fried zucchini!). I thought it would be nice to make something that could be made in bulk and frozen for future use. (I AM the self-proclaimed Queen Of Freeze, after all!)
Putting on my thinking cap, I decided to make a zucchini muffin that was tasty but with no added sugar or egg yolks. It took MANY tries until I finally came up with my Zucchini-Date-Apricot Muffin recipe. For the record, in my early trials, I added a mixture of brans and wheat germ to the dry ingredients. While these may have made the muffins healthier, they yielded a cardboard texture. NOT an enticement for adults, let alone children. I eventually whittled these add-ins down to zero – if no one eats them, what’s the point.
NOTE: Again as self-proclaimed Queen Of Freeze, I discovered you can successfully freeze shredded zucchini for these muffins. I’ve only tried freezing the shreds AFTER lightly squeezing out some of the water. I’m not sure if it would be successful simply freezing the shreds prior to squeezing and then squeezing after thawing. Freeze in portion sizes and make sure you mark how much is in the container.
ZUCCHINI-DATE -APRICOT MUFFINS – (Makes 6-9 muffins, depending on size.)
IMPORTANT NOTE: ALL INGREDIENTS SHOULD BE AT ROOM TEMPERATURE!!!!
Wet ingredients
- 115g (about 19) pitted dried dates
- 32g (5 dried) apricots
- 2 egg whites, room temperature
- 68g (1/4 cup) honey
- 16g (2 T) olive oil
- 1/2 tsp vanilla extract
- 300g (2 cups) zucchini, shredded
Dry Ingredients
- 102g (1/2 + 1/3 cups total) all-purpose (plain) flour
- 29g (1/4 cup) whole wheat flour
- 1/4 tsp salt
- 2 tsp cinnamon
- 1/2 tsp cardamom
- 1/4 tsp nutmeg
- 1 tsp baking powder
- 1/2 tsp baking soda
PREHEAT OVEN TO 375°F (190°C)
You’ll need 2 bowls: a small cereal sized for the dry ingredients, and a medium mixing bowl for the wet.
Into the medium sized bowl, put the egg whites and beat with a fork to break them up and they become foamy.

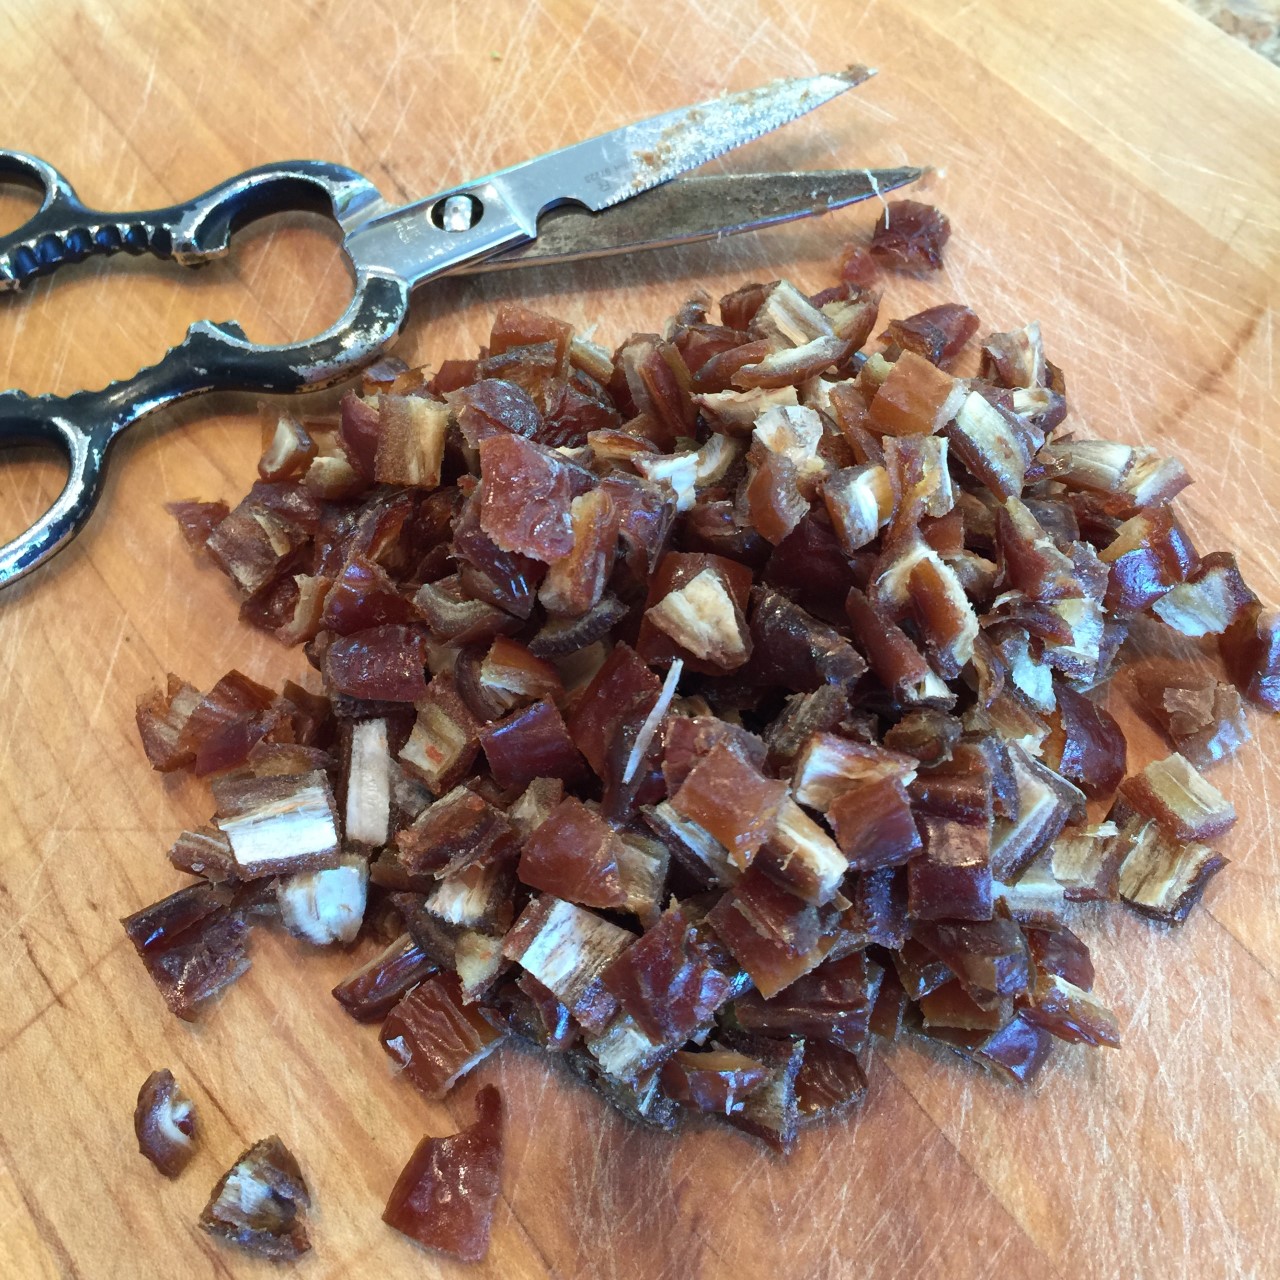
Chop the dates and apricots into small pieces. Add them to the bowl with the egg whites.

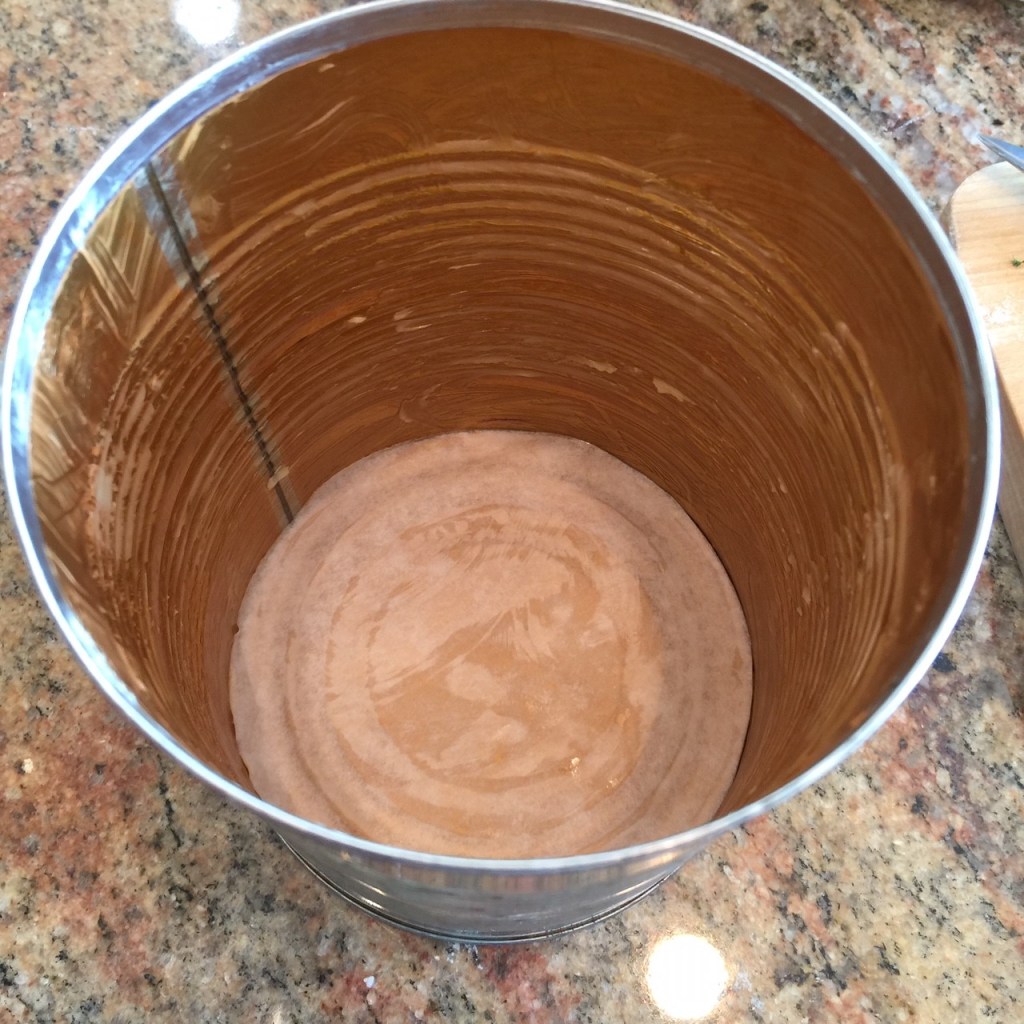
Shred, then chop the zucchini. (I chop the shreds so the muffins don’t have long zucchini strings.)

Into a clean tea towel, place tennis ball sized bundles of the shredded-chopped zucchini, one at a time. Wrap the tea towel around the bundles and twist over a container to extrude the liquid. You don’t need to squeeze out every drop of liquid – just a firm twist. NOTE: If you want to be very precise, you will probably squeeze out about a total of 40g (3+ tablespoons). Discard this liquid. Place squeezed zucchini into the bowl with the egg whites.

Add in the honey, olive oil, and vanilla.

Into the smaller bowl, stir together the all-purpose (plain) flour, whole wheat flour, salt, cinnamon, cardamom, nutmeg, baking powder, and baking soda.

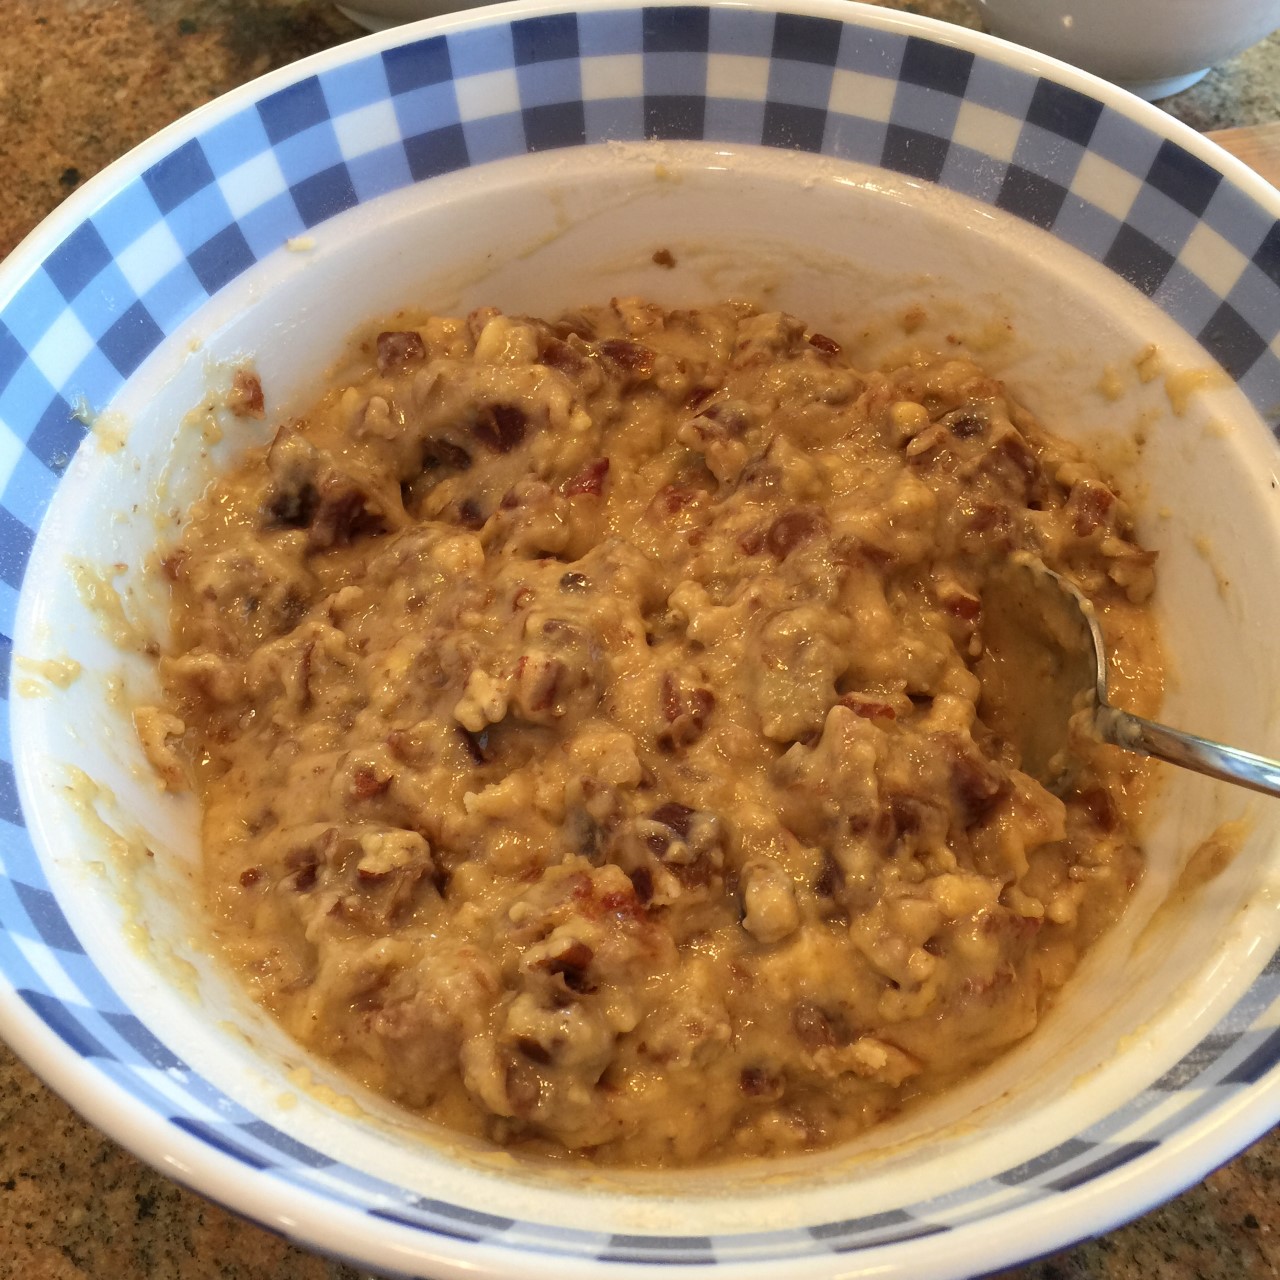
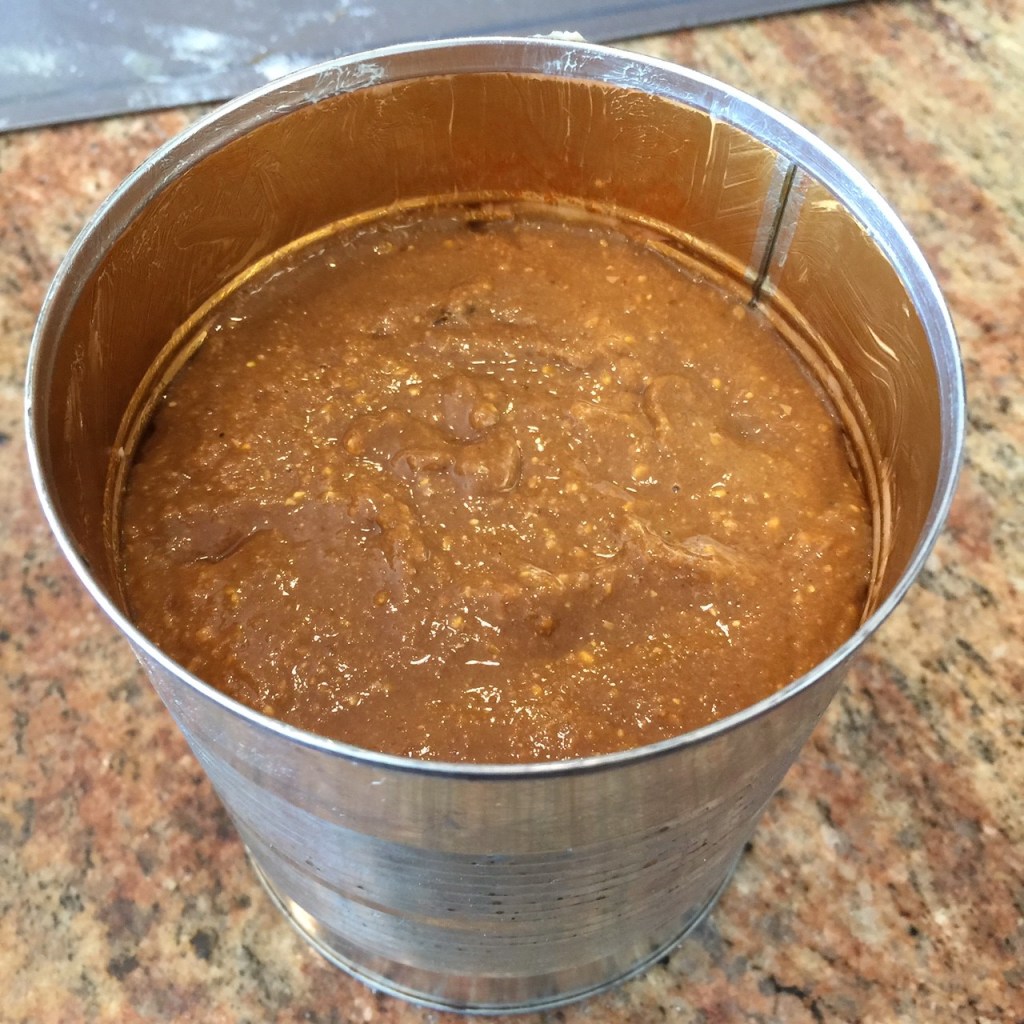
Pour the dry ingredients into the wet ingredients and gently blend until the flour is just incorporated. Don’t over mix or you will produce a tougher muffin.

Into a very lightly oiled muffin tin, fill the cups. (If you have an ice cream scoop, use that – it makes the task much easier.)

The batter will make 6- 9 muffins, depending on size. I find making 9 produces shorter muffins which is more manageable for young children’s hands and mouths, or if you just want a small snack.
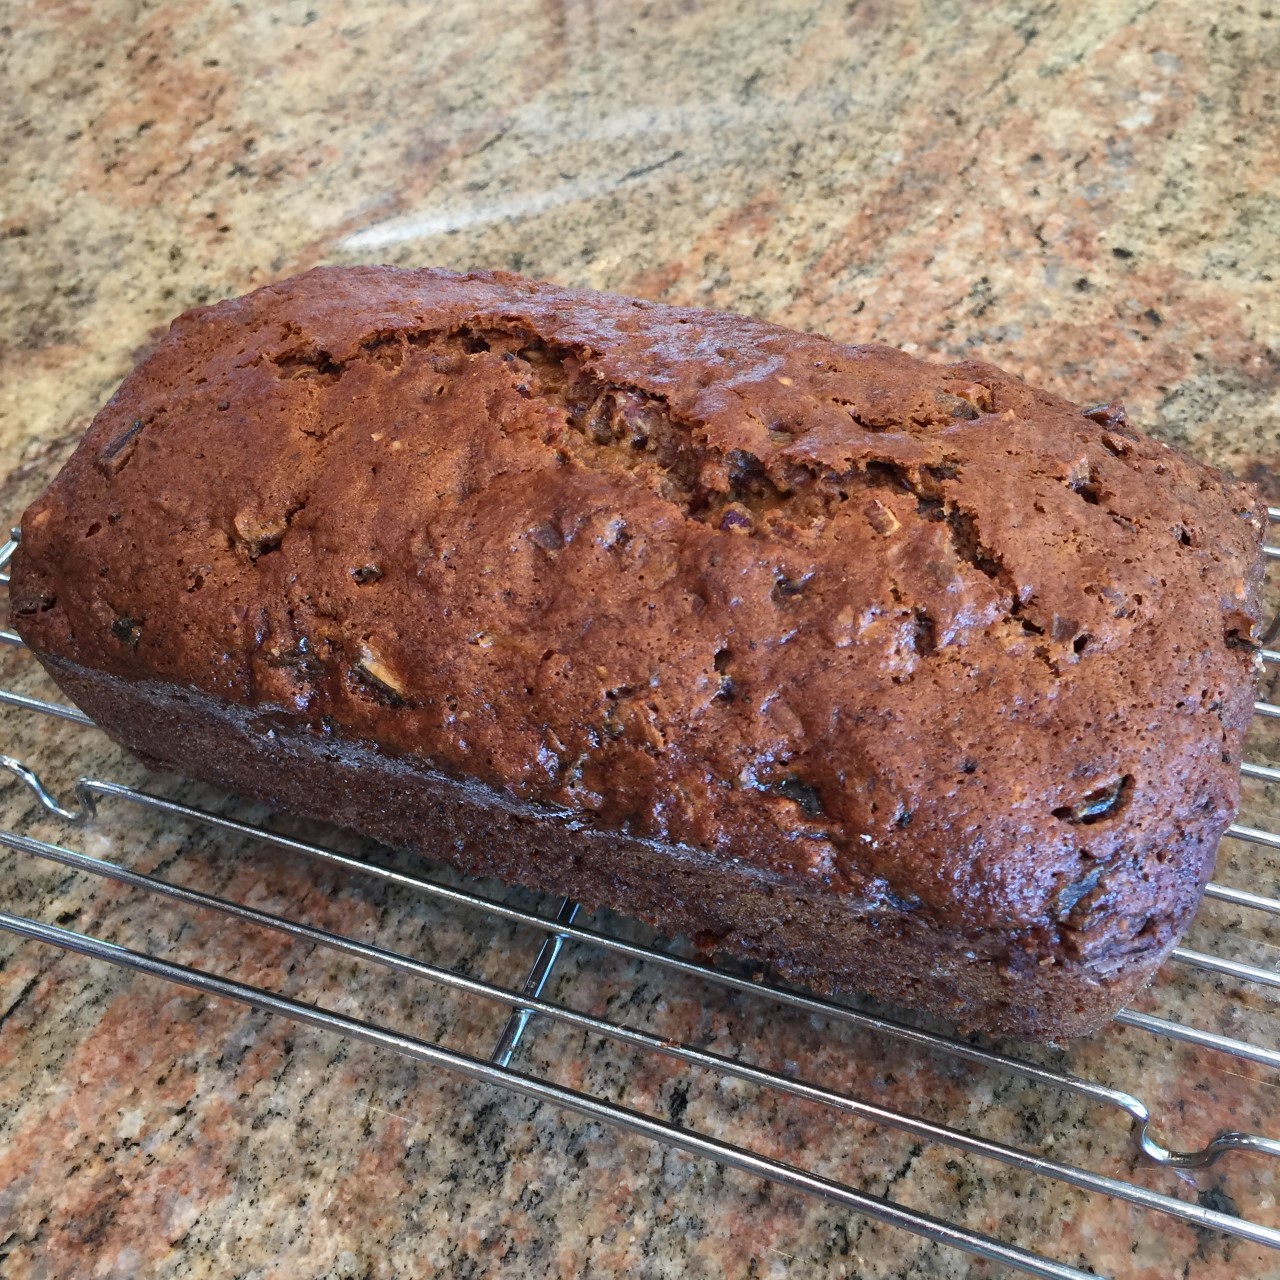
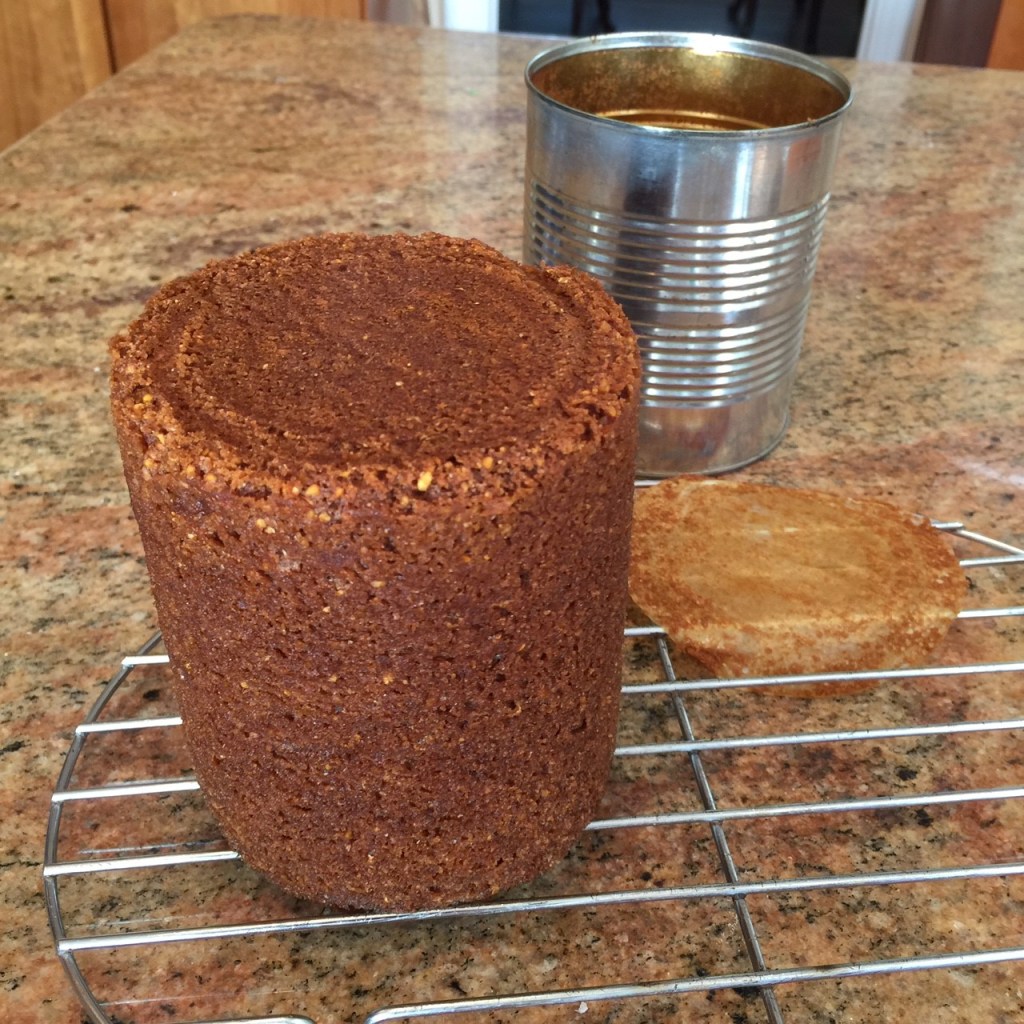
Bake in preheated 375°F (190°) for 18-21 minutes – until lightly browned and top springs back when pressed. Let set in tin for 15 minutes. Then run a rounded-tip knife around the sides, Go around again, gently lifting up the bottoms until muffin is freed. Remove to wire rack to completely cool.


 Brazilian Cheese Rolls – where have these been all my life?! Crusty outside, stretchy inside. An added bonus for those of you who have a problem with gluten: they’re gluten-free!
 Put the milk, olive oil, and butter in a small saucepan. Over a low/medium flame, bring just to a boil, stirring constantly. Immediately pour into the flour.
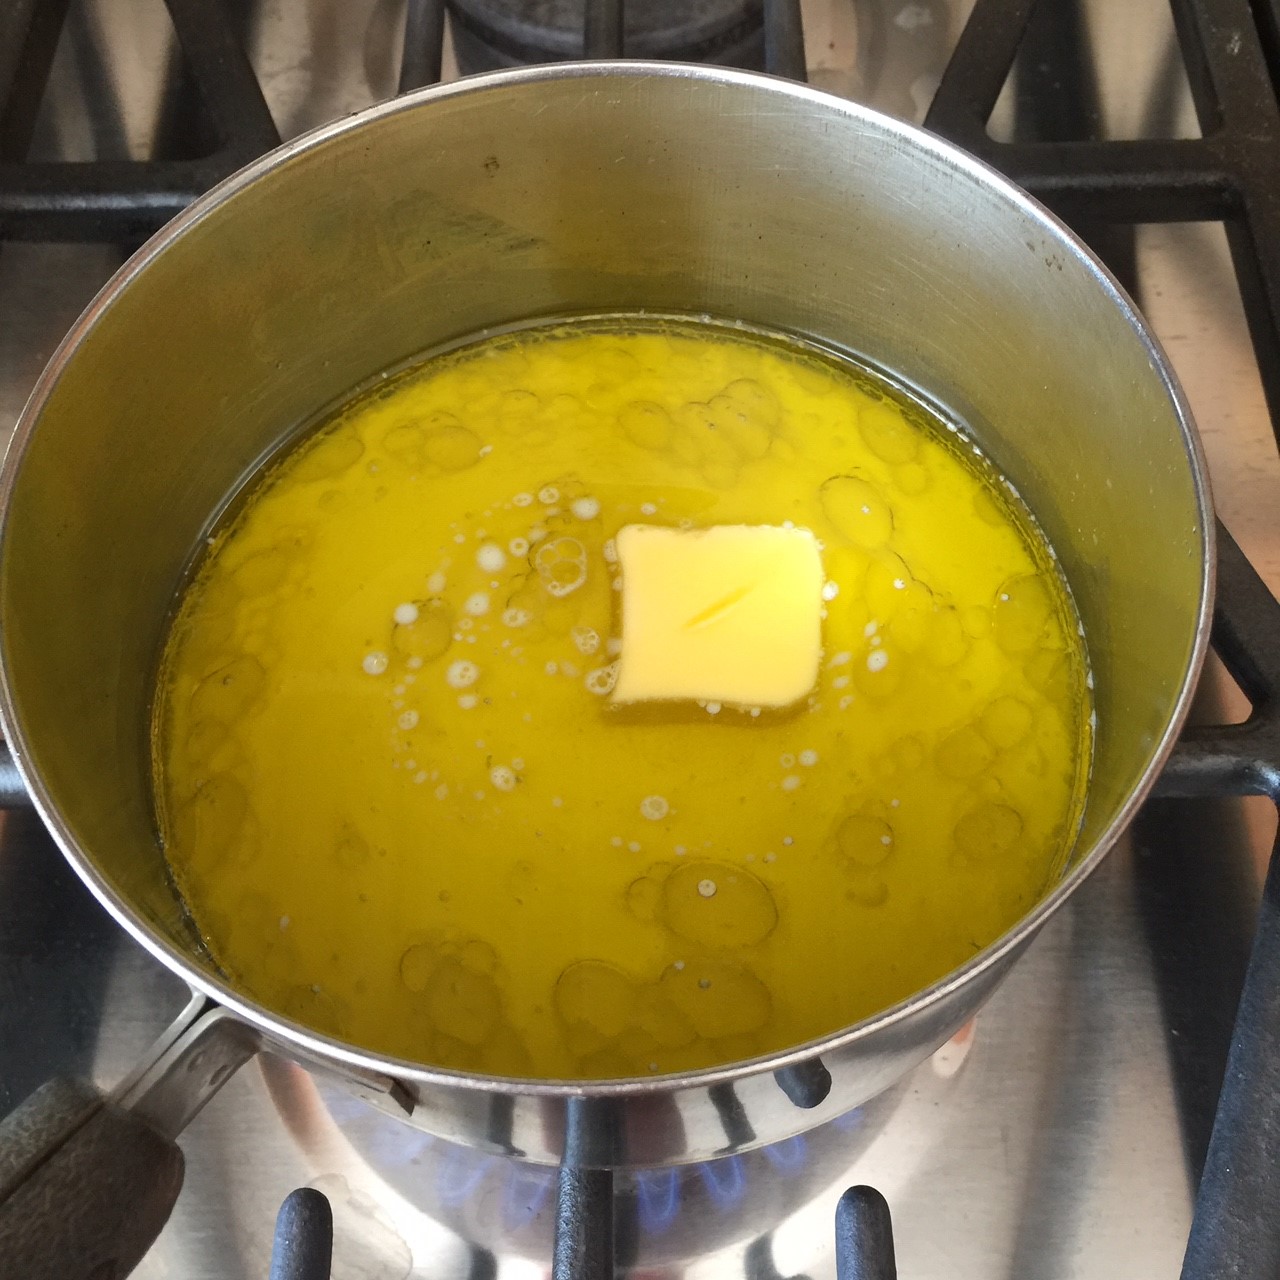 Turn the mixer on low and beat until all the flour is incorporated – about 1-2 minutes. (It will look rough and crumbly.)
  Add in the eggs and mix on low speed. Once it looks creamy (like frosting), continue to beat another minute.
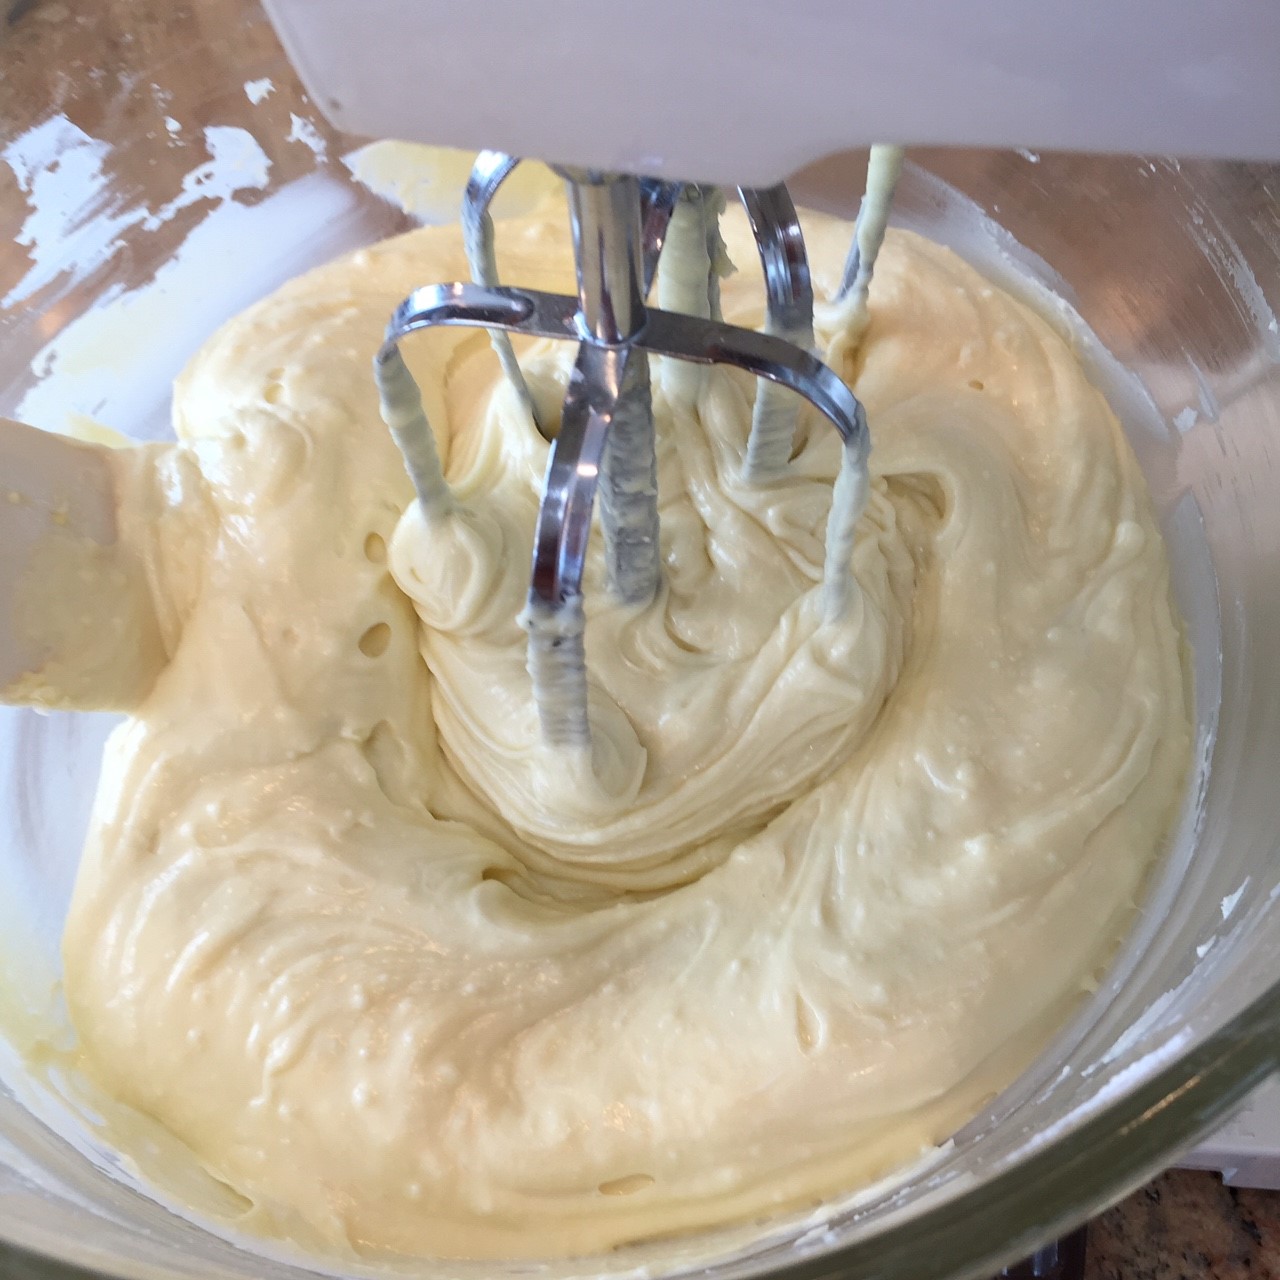 Add in the cheeses, and mix just to blend on low.
 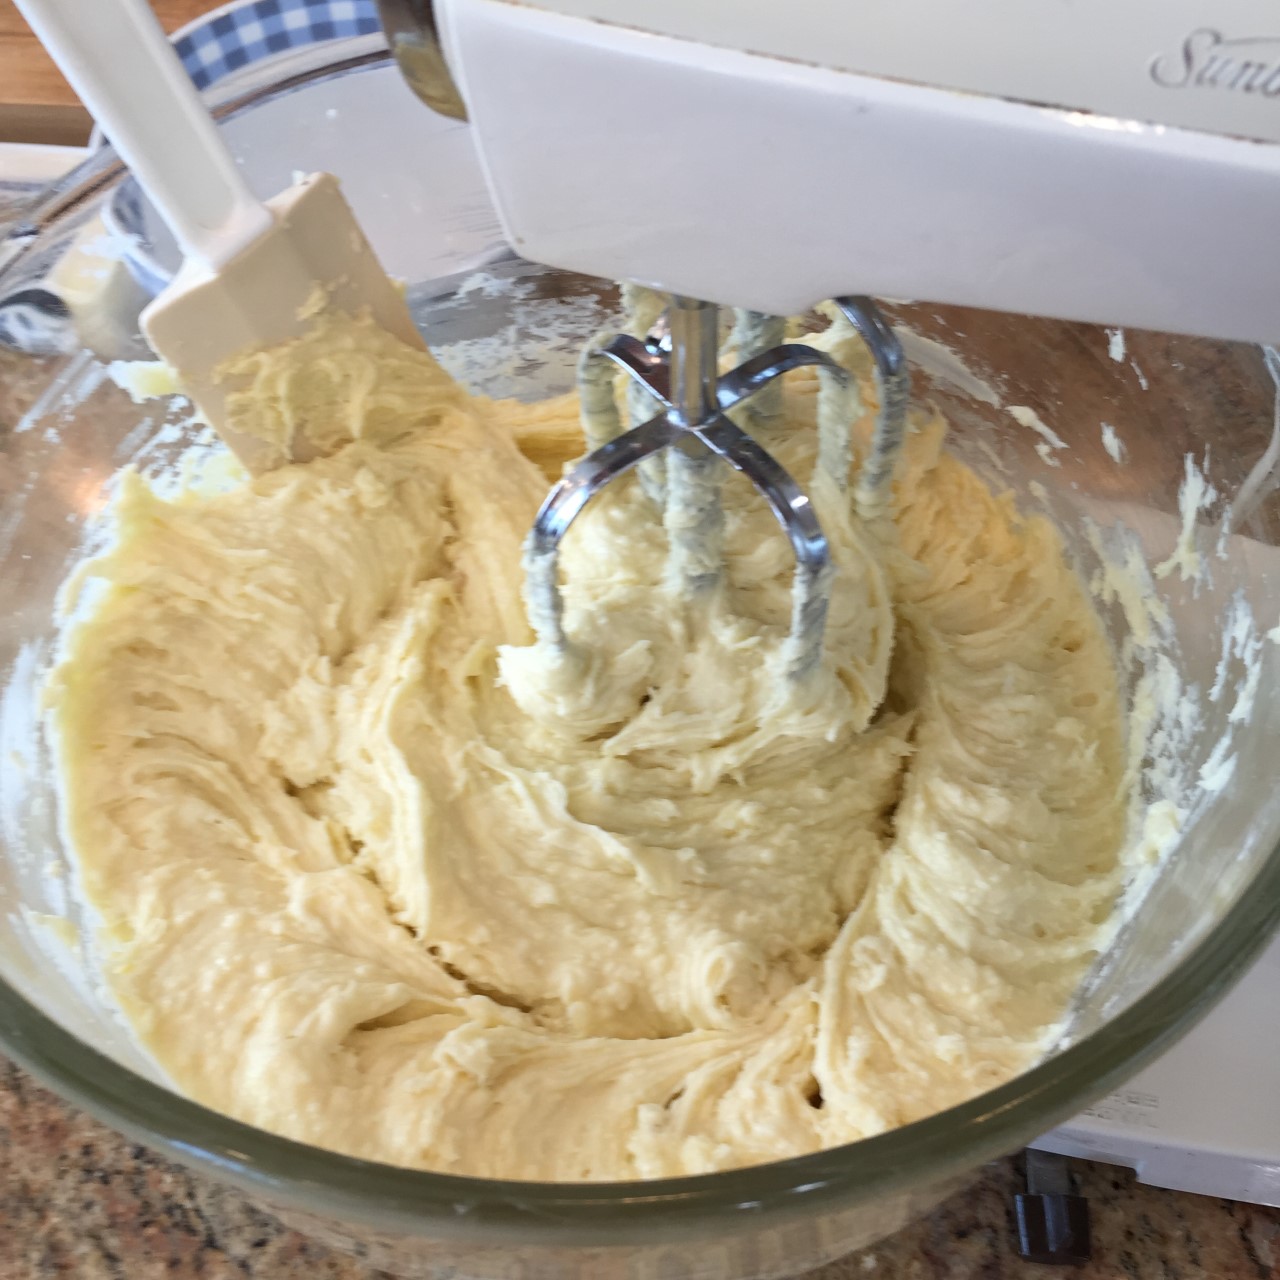 Scrap down the dough and smooth top. Cover bowl and refrigerate at least 2 hours – this will firm up the dough, making it easier to work with.
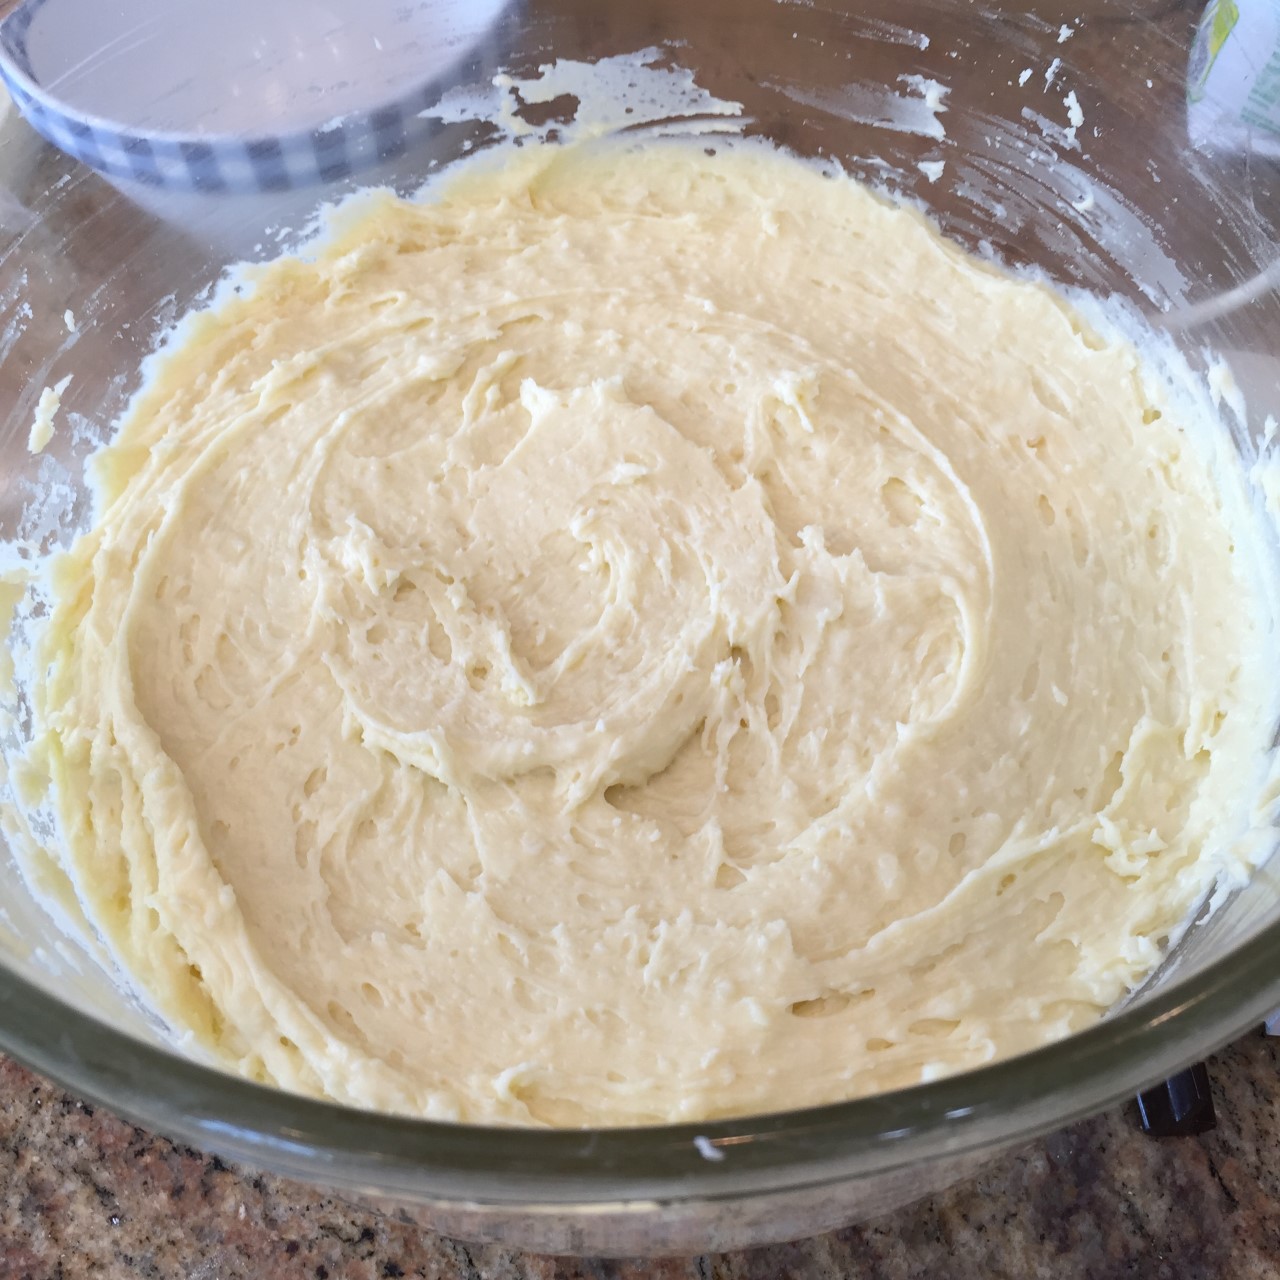
 Using a large spoon, scrap out each wedge and roll into a smooth ball (it helps to have one of your hands wet so the dough doesn’t stick). Place each ball on a parchment lined baking sheet. They’re going to rise as they bake, so make sure to space them. One large sheet will hold all 8 rolls.
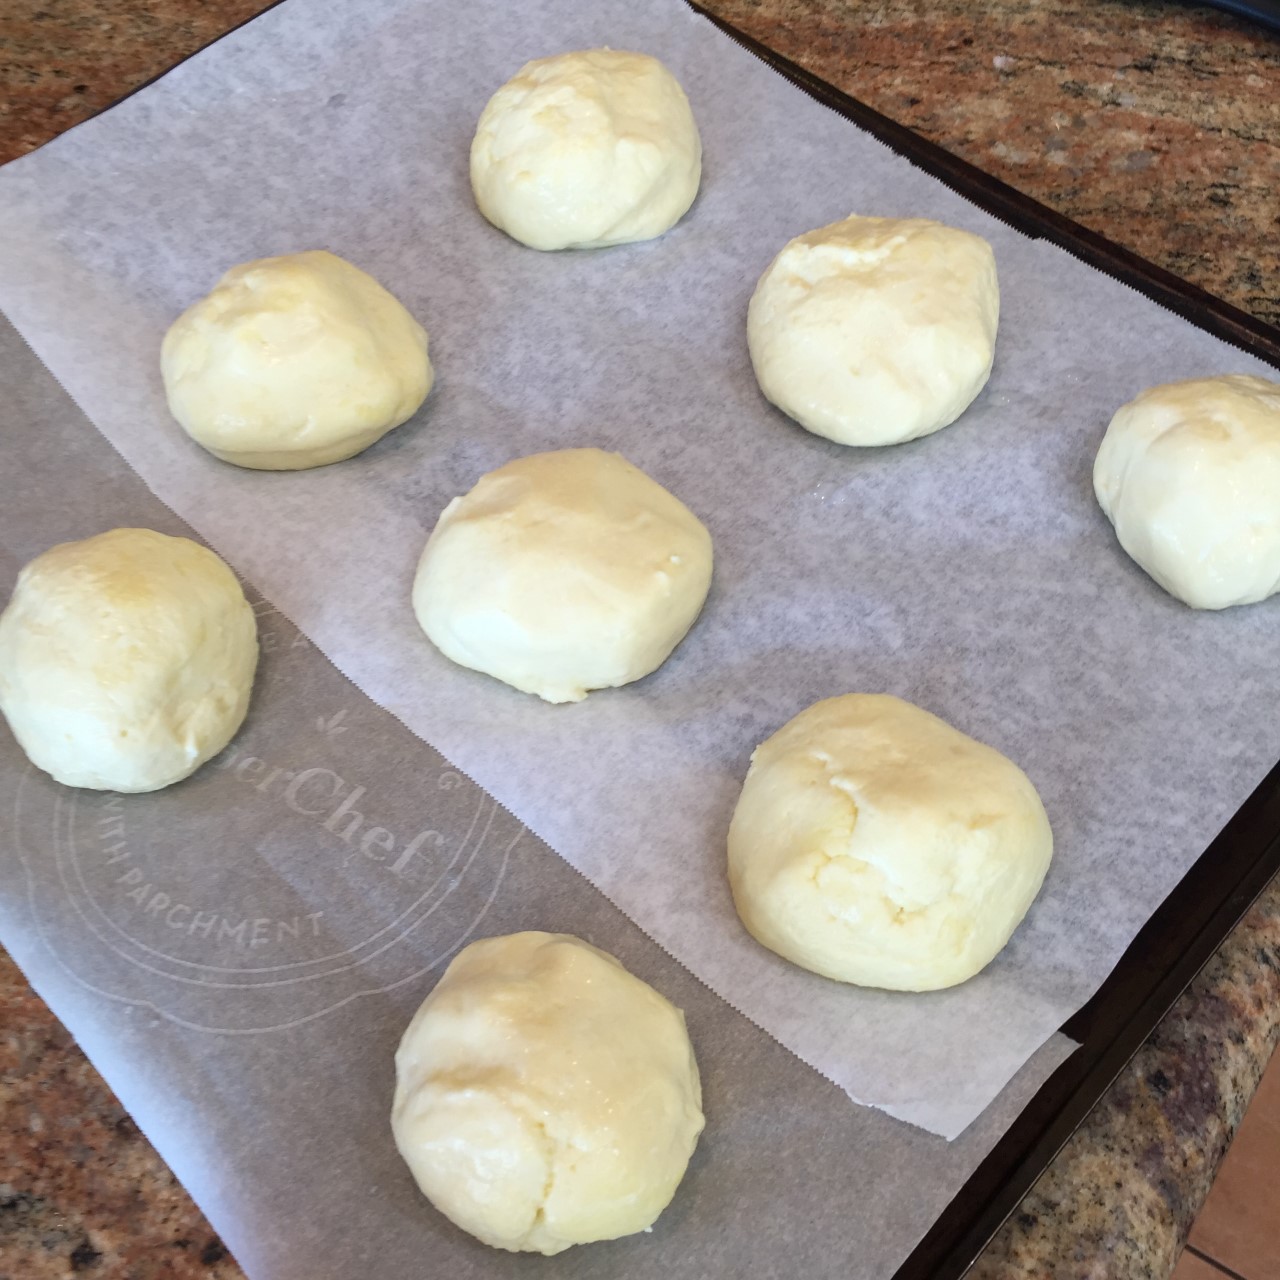 Using a pastry brush, paint the sides and tops of rolls with the egg wash.
  I’m going to use all caps because this is important!: PLACE SHEET IN OVEN, THEN

 Pour 2 T olive oil into a rectangular or square container with sides at least 3″ high, covering the bottom and sides. (The square corners train the dough somewhat and help it fill the corners of the baking pan. If you don’t have a container like this, just use an oiled deep bowl.) The dough is going to rise very high, then collapse somewhat. Cover container and let rise 5½ – 6 hours. Note the low height of the dough when I pour it in.
 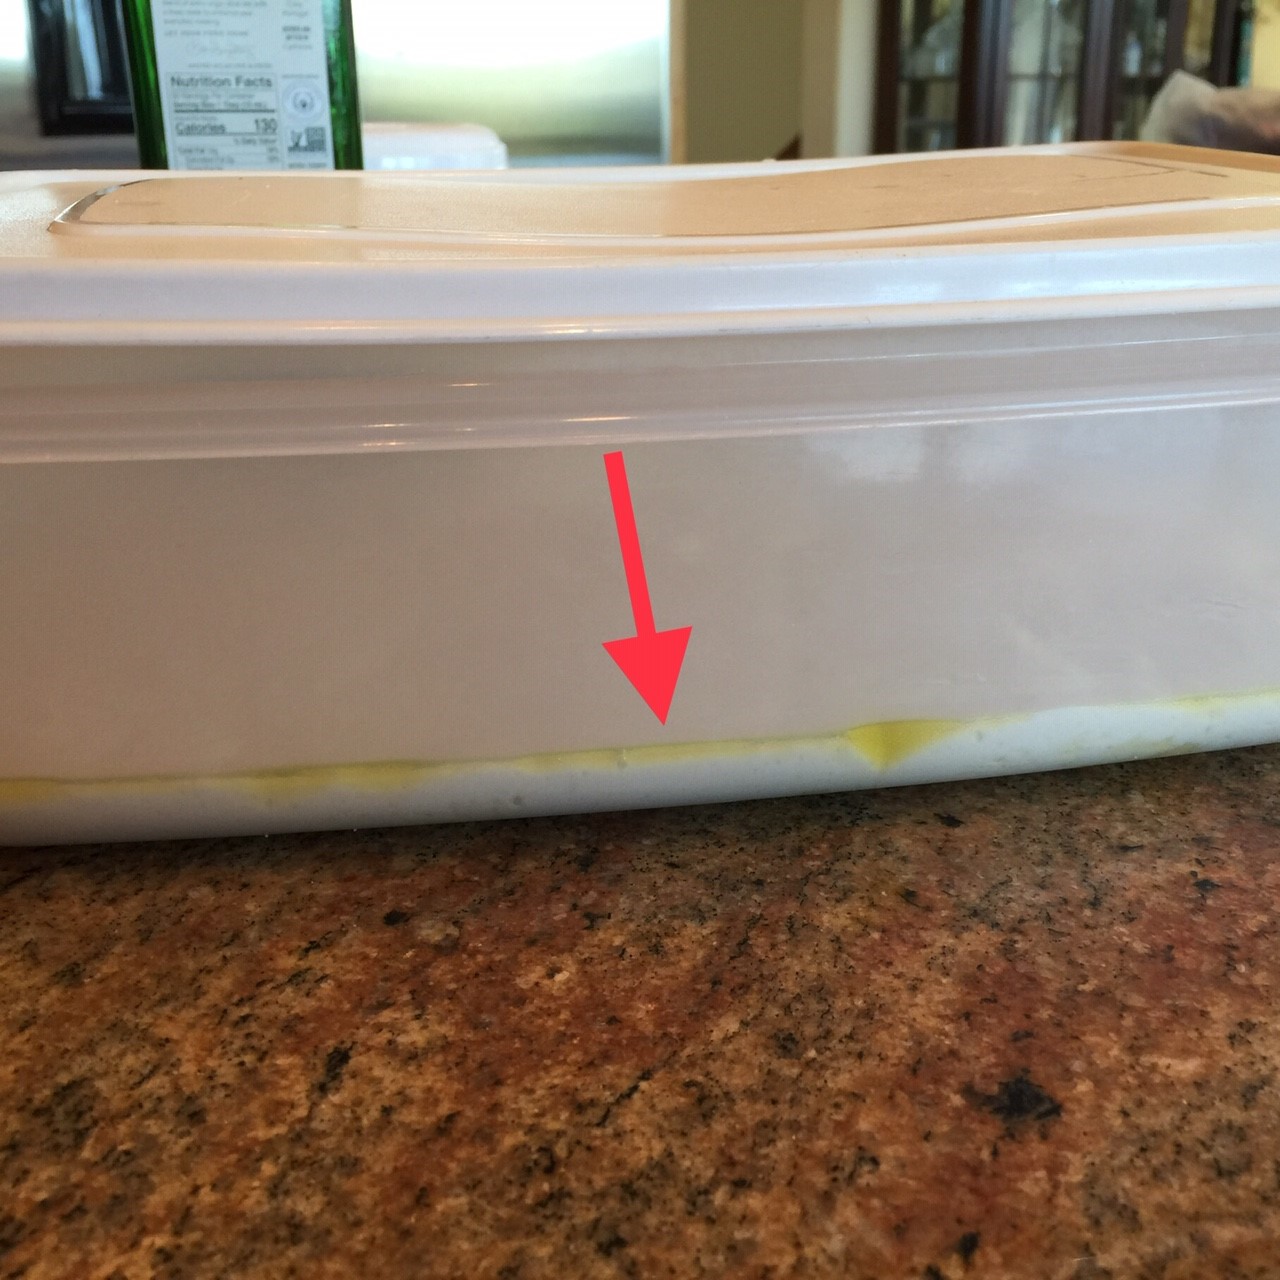 Here’s after 2½ hours:
 After about 4 hours it starts to collapse a bit – this is normal.
 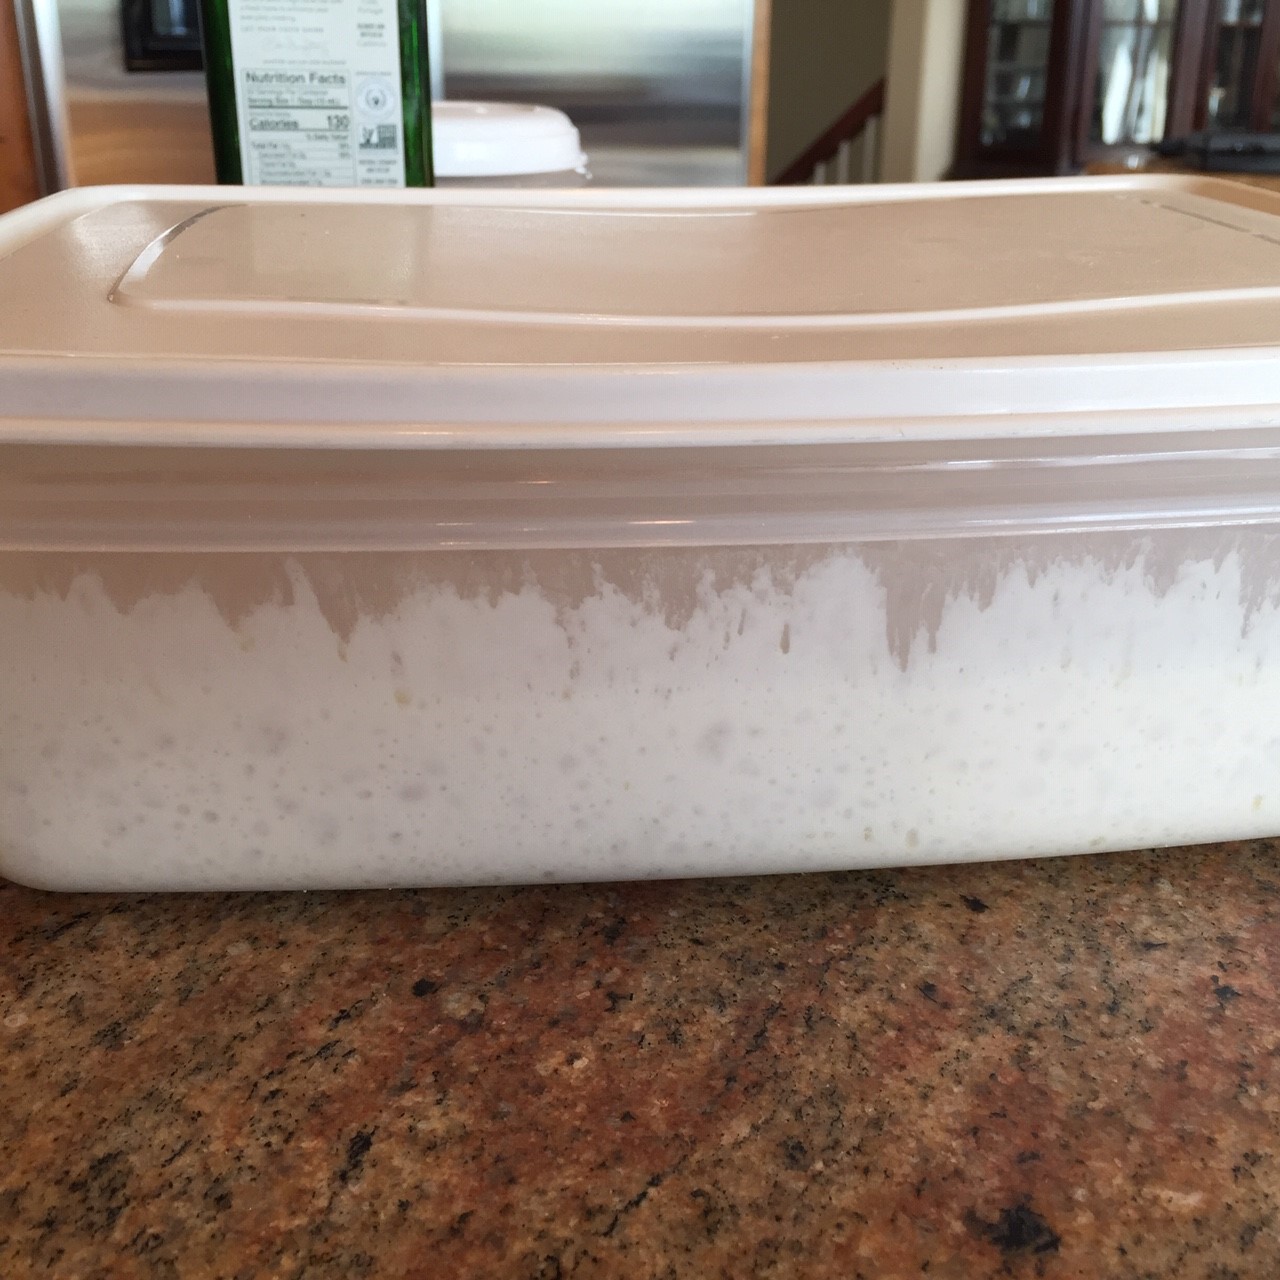 After dough has been rising for 5 hours, preheat oven to 500º Fahrenheit, rack in the middle position. If you have a baking stone or steel (I use a steel), place it on rack as the oven preheats.
 Note how bubbly the dough is:
 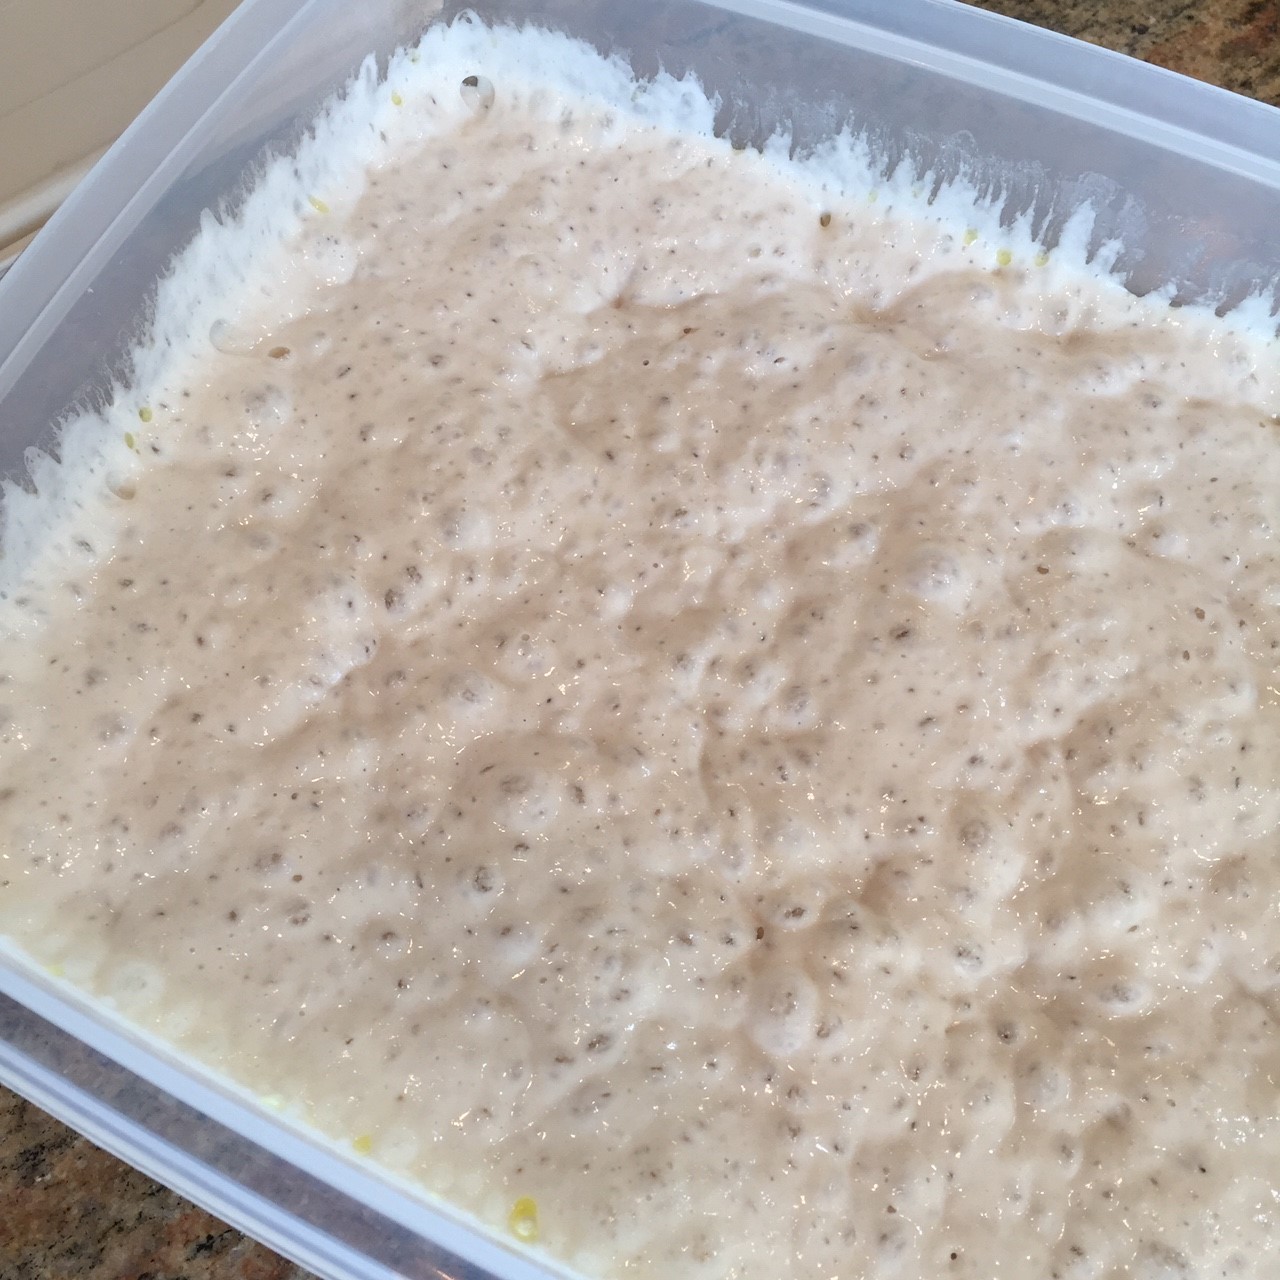 Gently pour the dough into the prepared pan, nudging the dough into the corners – try not to deflate the dough.
 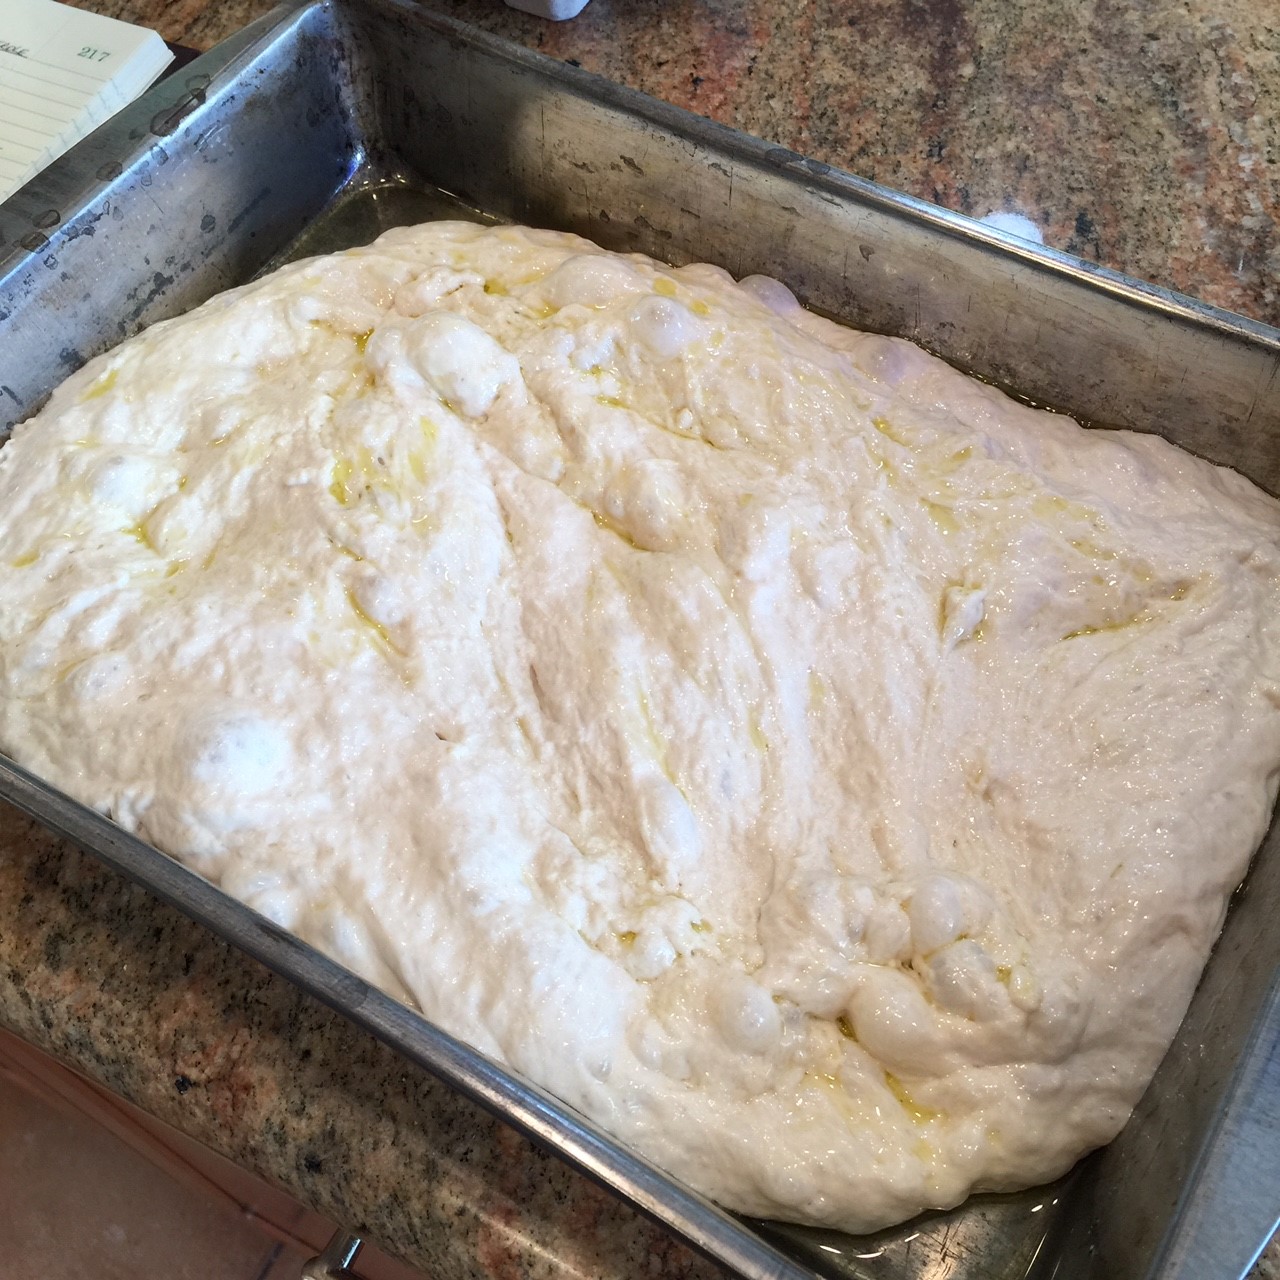 If you’re using toppings such as olives or slices shallots, sprinkle them on, lightly pressing them into the dough. Let dough set uncovered for 20 minutes.
  Brush 2 T olive oil over dough, then sprinkle on 1 tsp oregano, pepper, and salt.
  Place in 500º F preheated oven and bake for 20-25 minutes, until well browned on top and sides have pulled away from the edges a bit. Remove from oven and let rest in pan for about 10 minutes before removing to a wire rack.
 Decrease oven temperature to 350º F, leaving oven door open to expedite the oven temperature drop.
 While omelette is baking, remove focaccia to a cutting board. Using a long bread knife, very carefully slice bread in half horizontally. (Take your time – the edges are crispy, making it difficult. I’ve found it best to cut into the bread only – not in and out, which tends to tear the bread.)
 Once the bread is completely sliced through, leave it together to retain its heat.
 Speedy Thin Crust Pizza has become my go-to pizza recipe not only because I can have it on the table in a little over an hour, but because it’s REALLY good. It’s a very thin pizza with a nice chew.
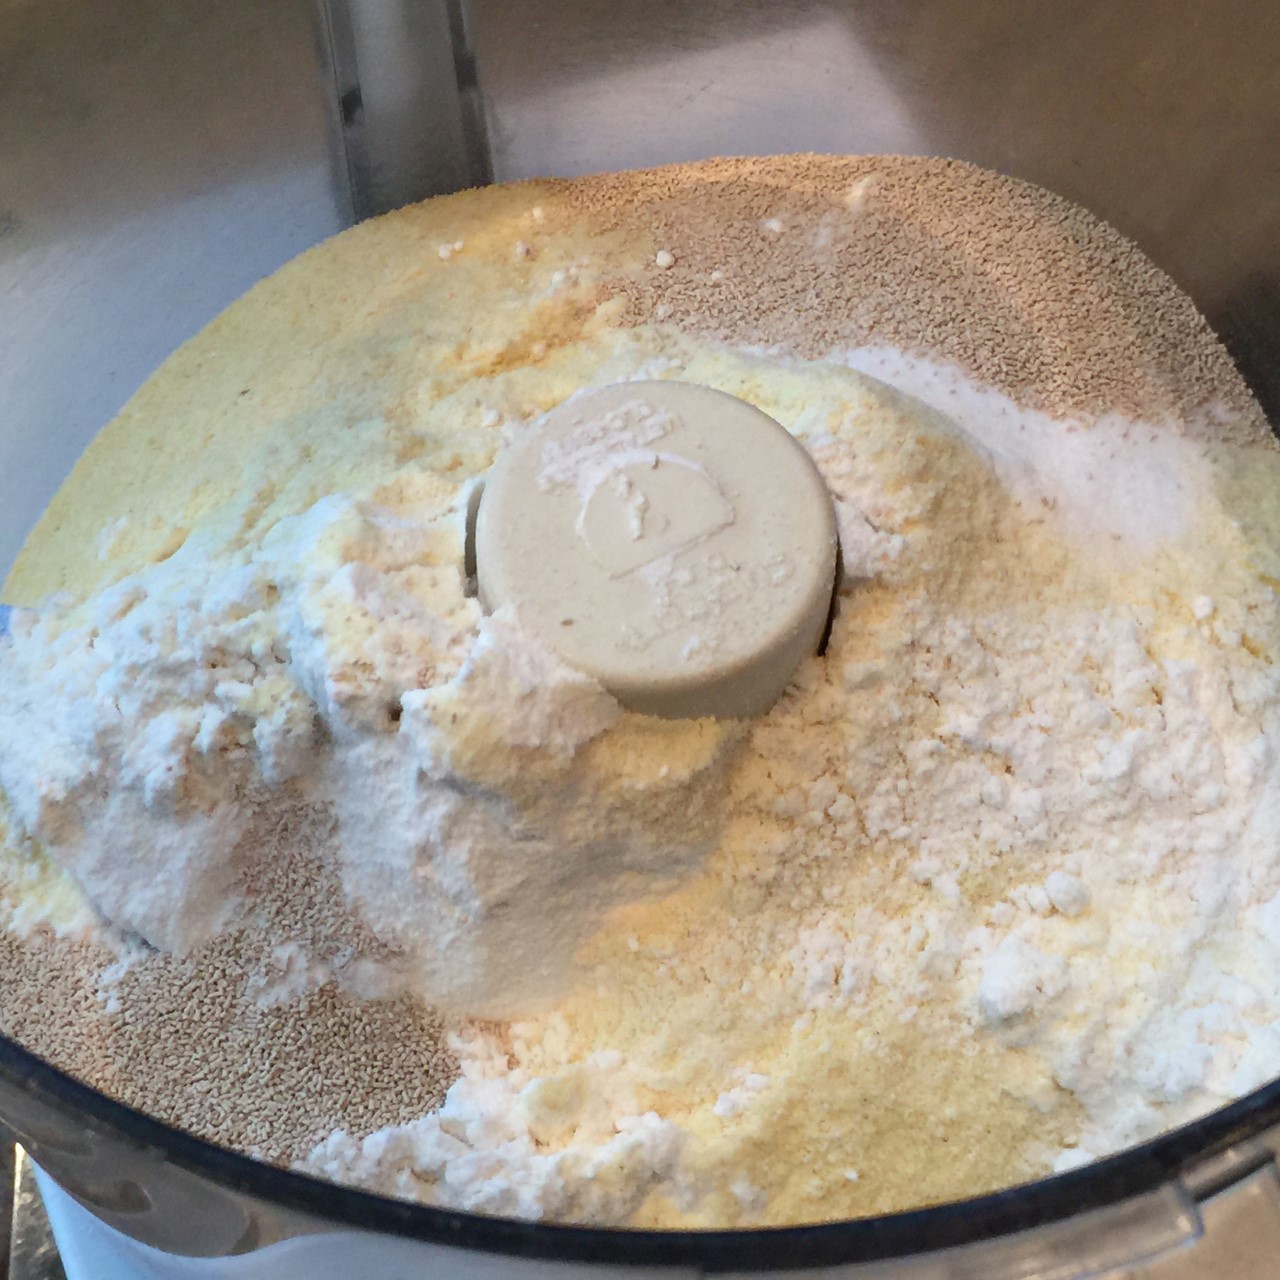 Set the workbowl on the processor base and run the machine for 10 seconds.
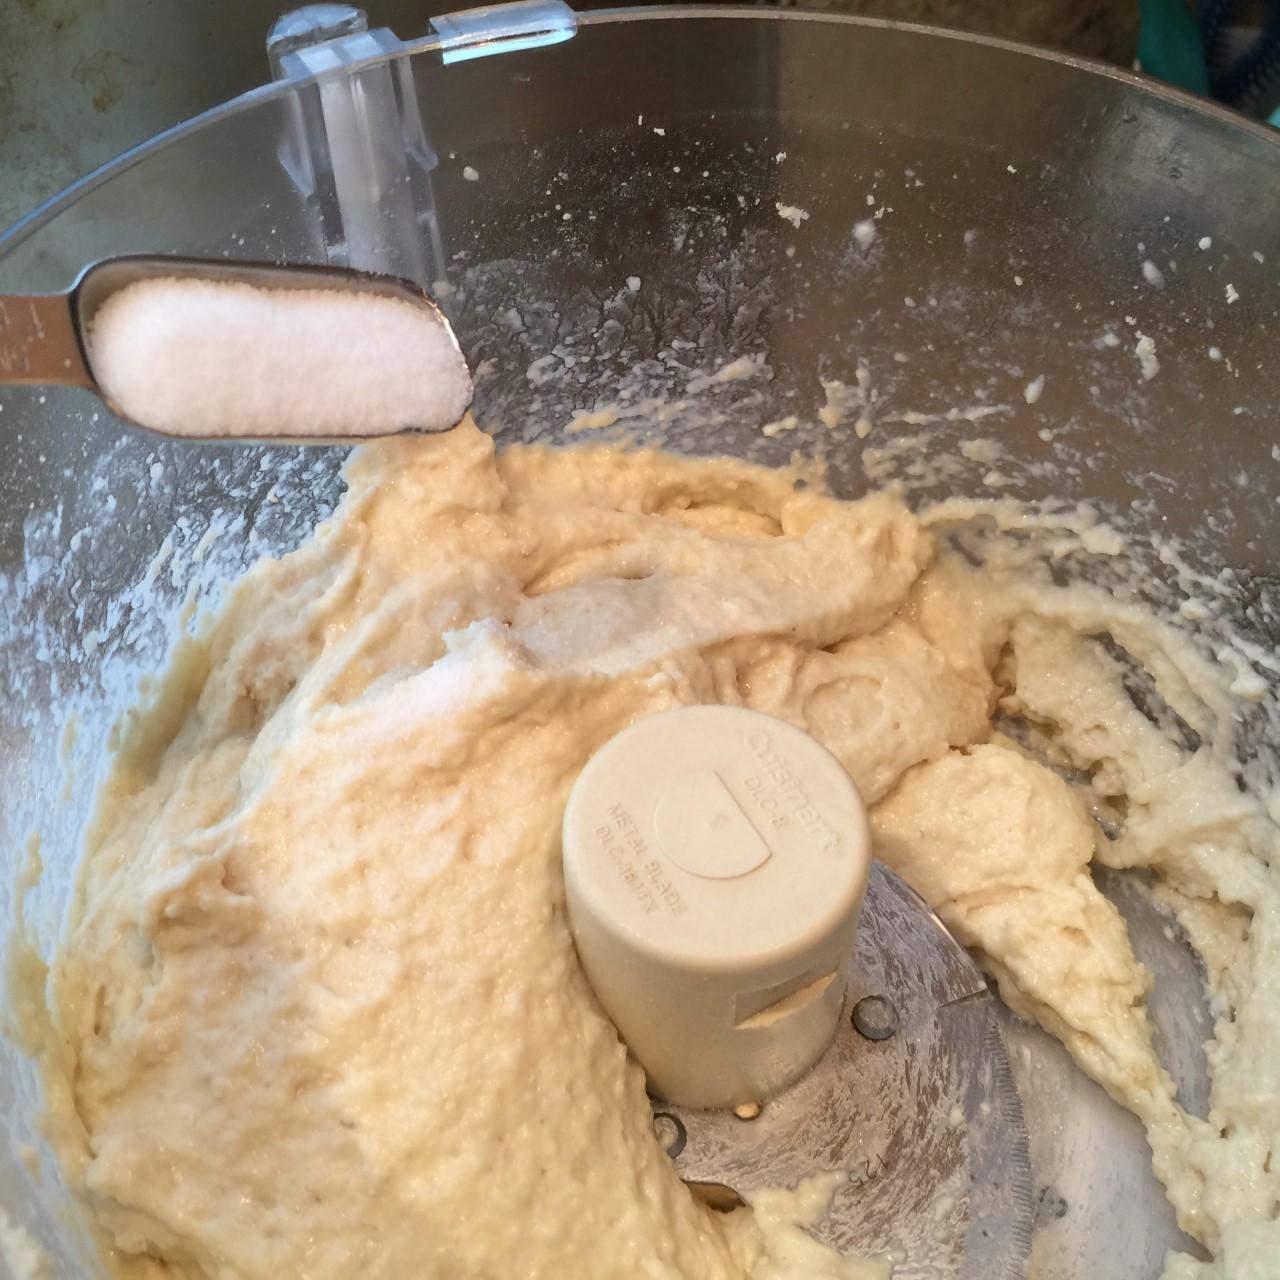 Empty dough onto a floured counter and fold the dough onto itself a few times to bring the dough together.
  Divide the ball in half and place each one on a piece of oiled (I use olive oil) parchment paper approximately 12″ wide. DO NOT USE WAXED PAPER – IT’S TOO THIN!!!
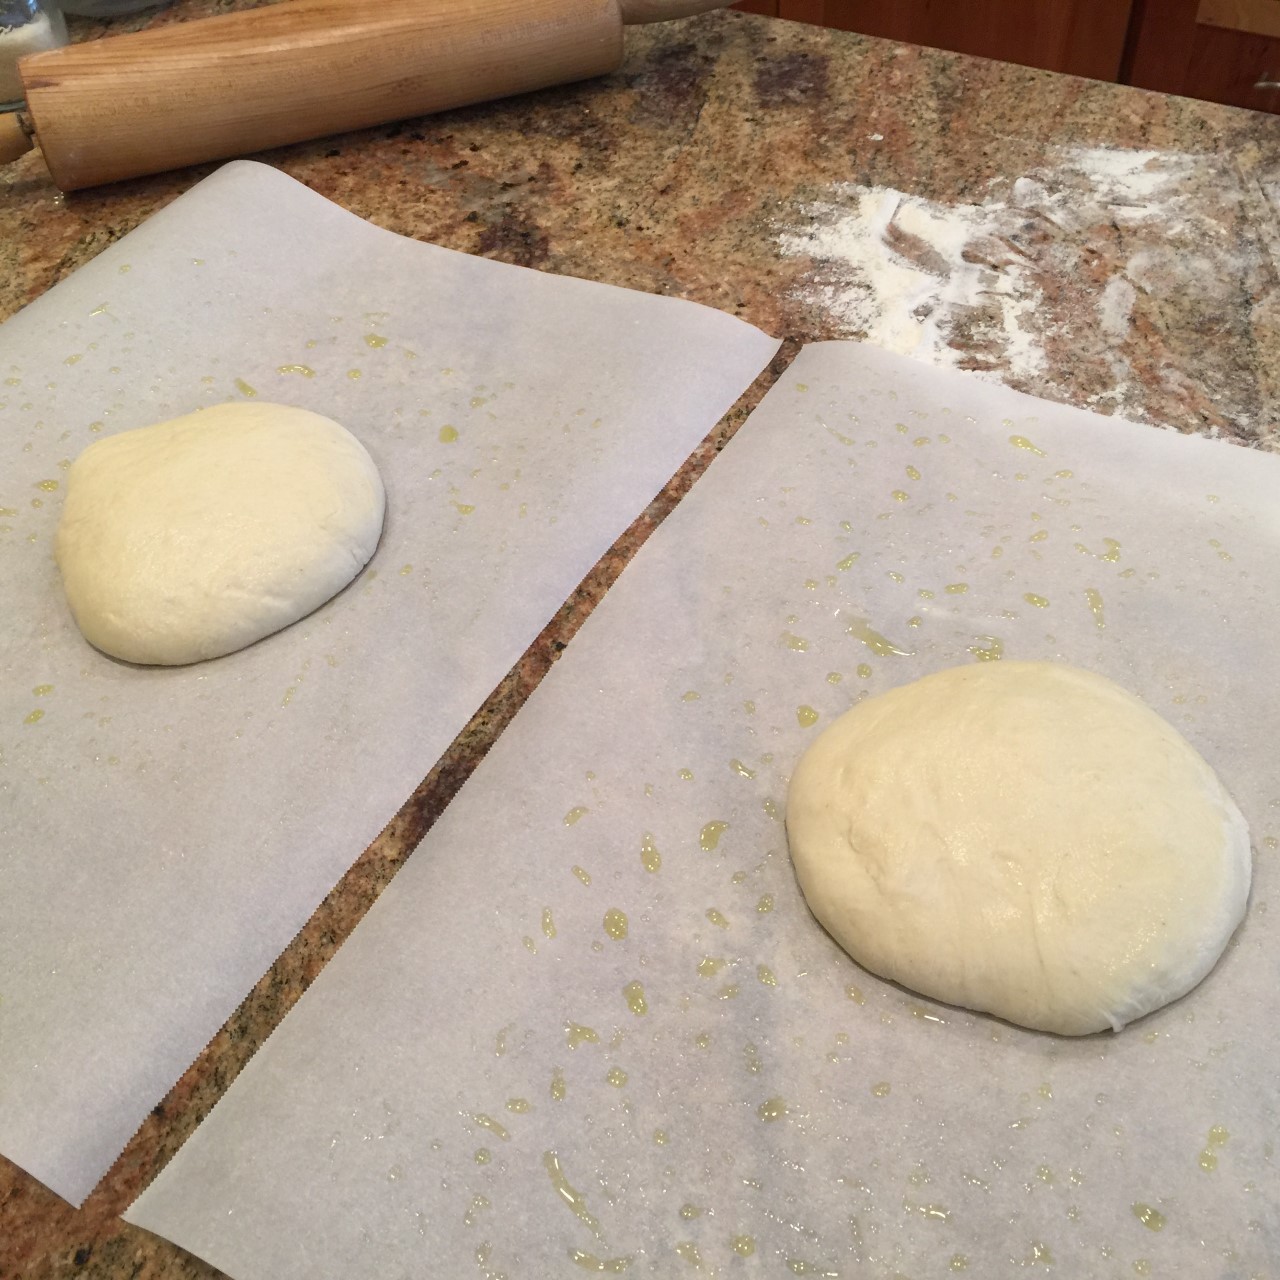 Rub the tops of the dough with a little more oil then top each with another piece of same-sized parchment. Press down with your hands to smoosh the dough into a square to get it started. With a rolling pin roll both dough balls to about 13″ x 10″ using short strokes, working from the center outward. (I find it easier to keep the parchment from sliding on my counter if I place it on a dry tea towel.) Let set 30 minutes.
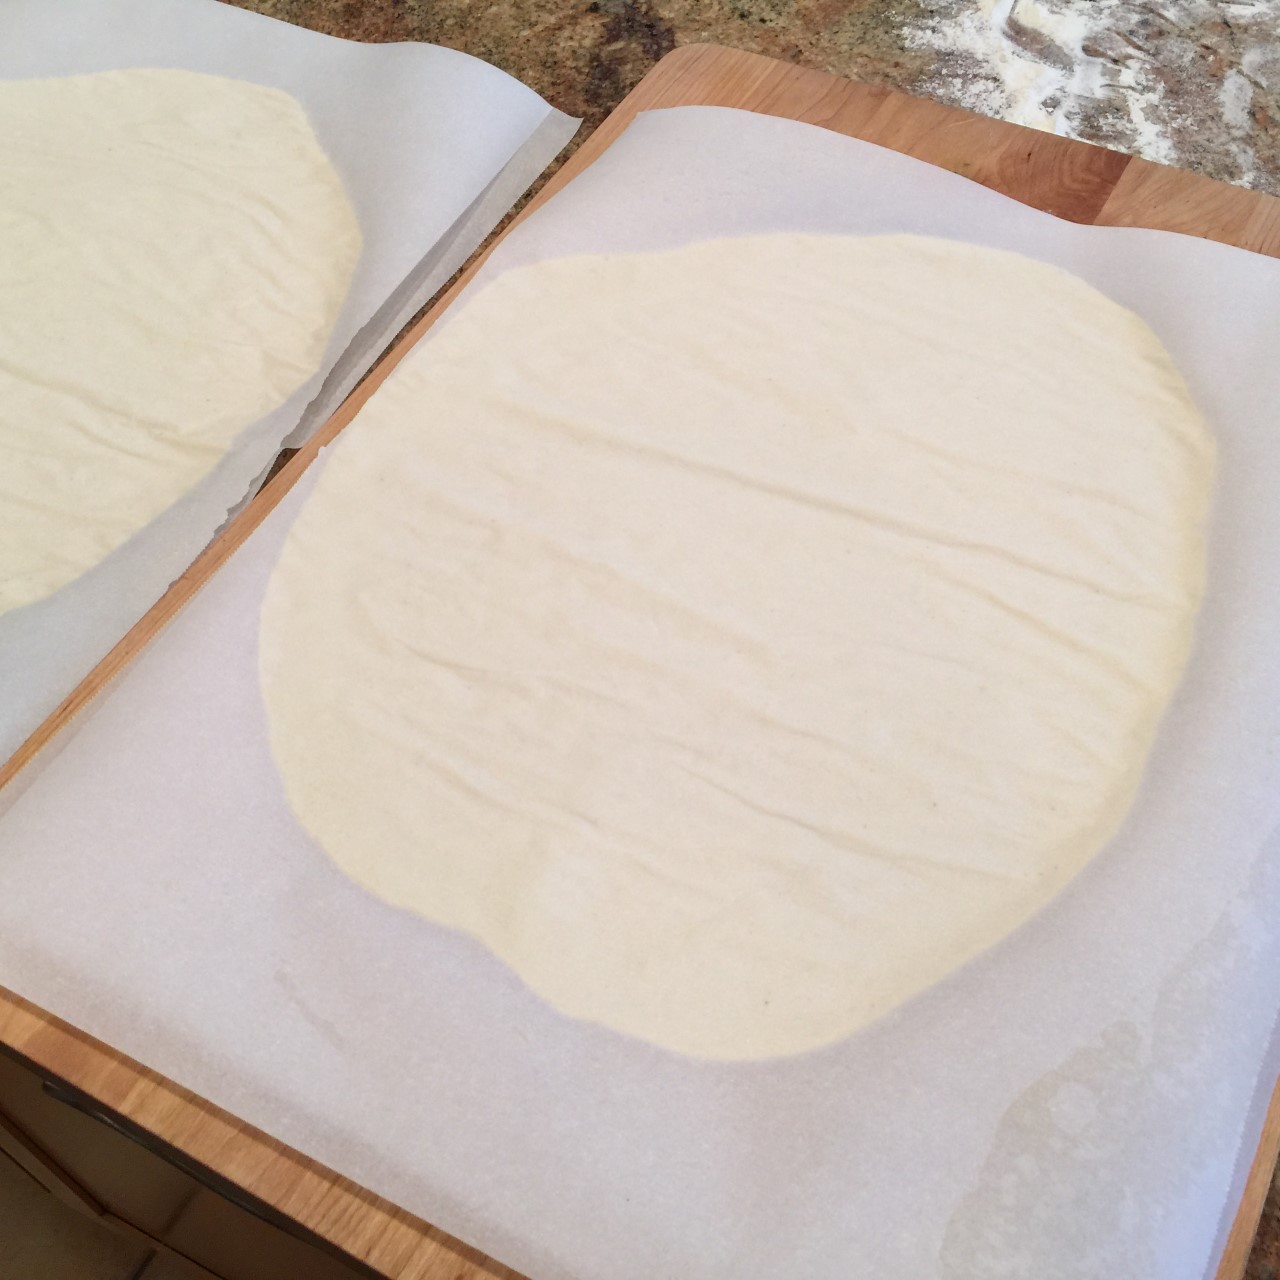 Use this time to get your toppings ready.
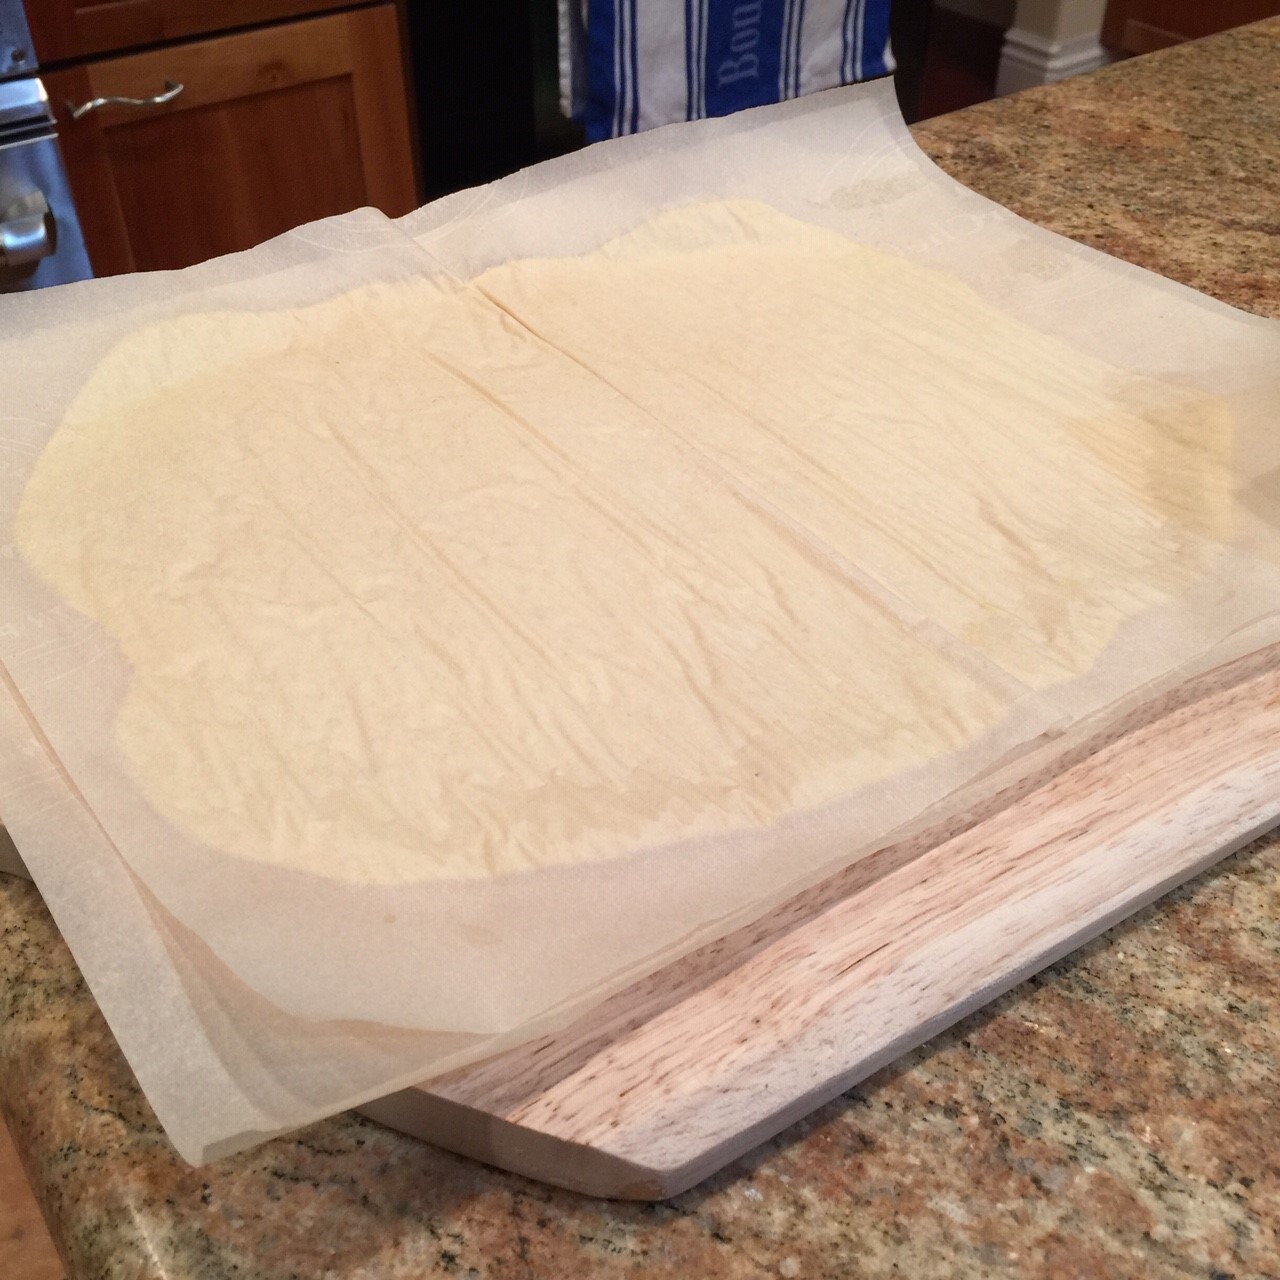 Carefully peel away and discard the top parchment (which used to be the bottom parchment).
 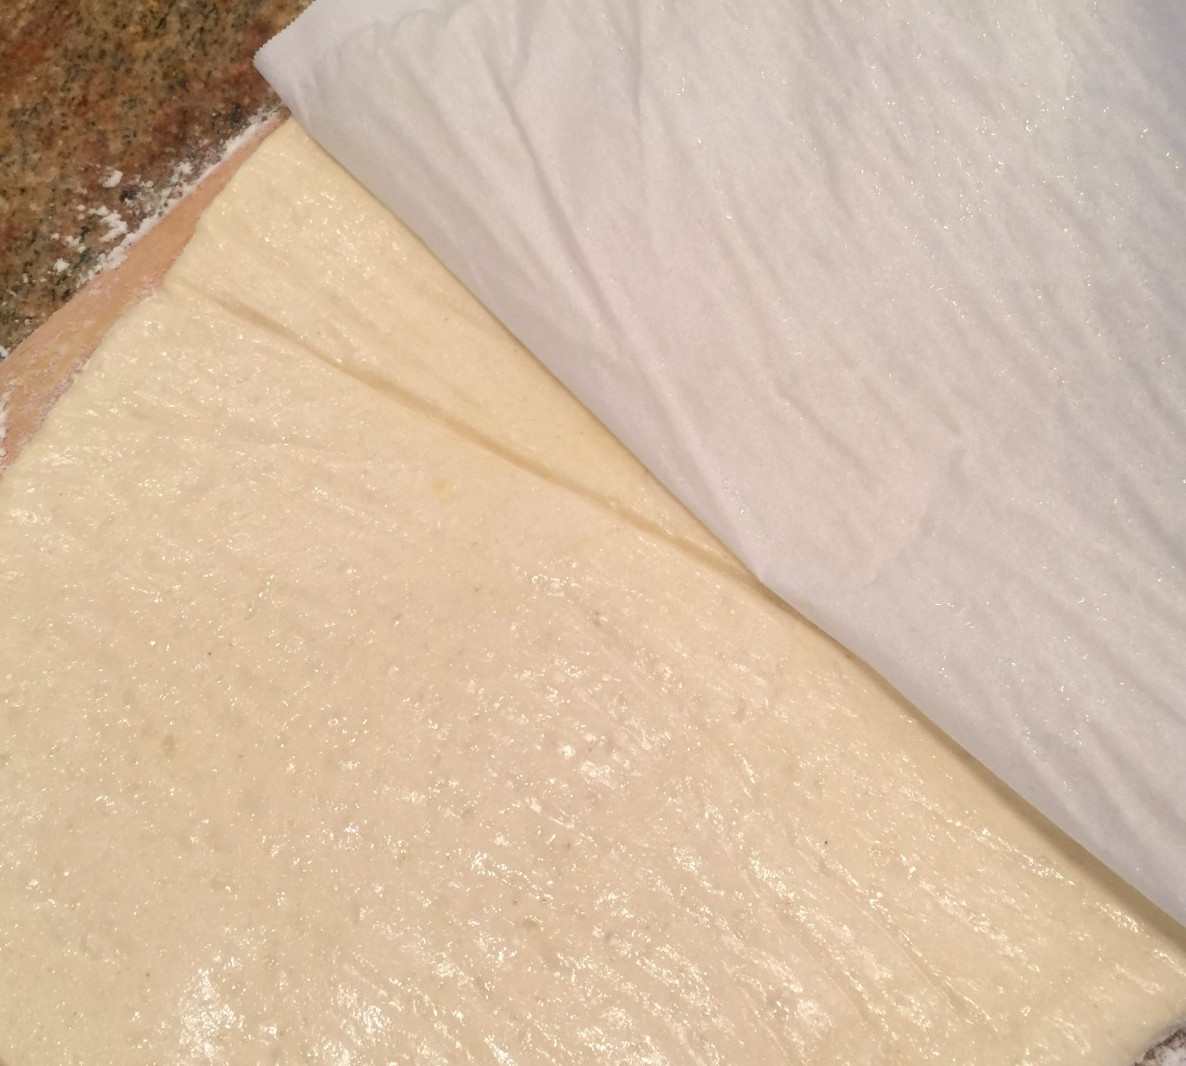 Top pizzas with your choice of sauce and toppings.
 Slide the pizza with bottom parchment onto the preheated stone or steel.
  Bake for 4 minutes. Rotate the pizza 180º, then remove and discard the parchment by securing it in place with a spatula with one hand and pulling out the parchment with the other. (The parchment won’t burn your fingers, so you don’t need to use an oven mitt as long as you don’t touch anything else.)
  Let bake another couple of minutes, until it’s browned to your liking. Remove from oven, let set a minute or two, then slice it up and serve. (This is not the same pizza I placed in the oven in the above pictures.)
 I’m not sure when it happened but, for better or worse, every year new foods become pumpkin flavored during Autumn.
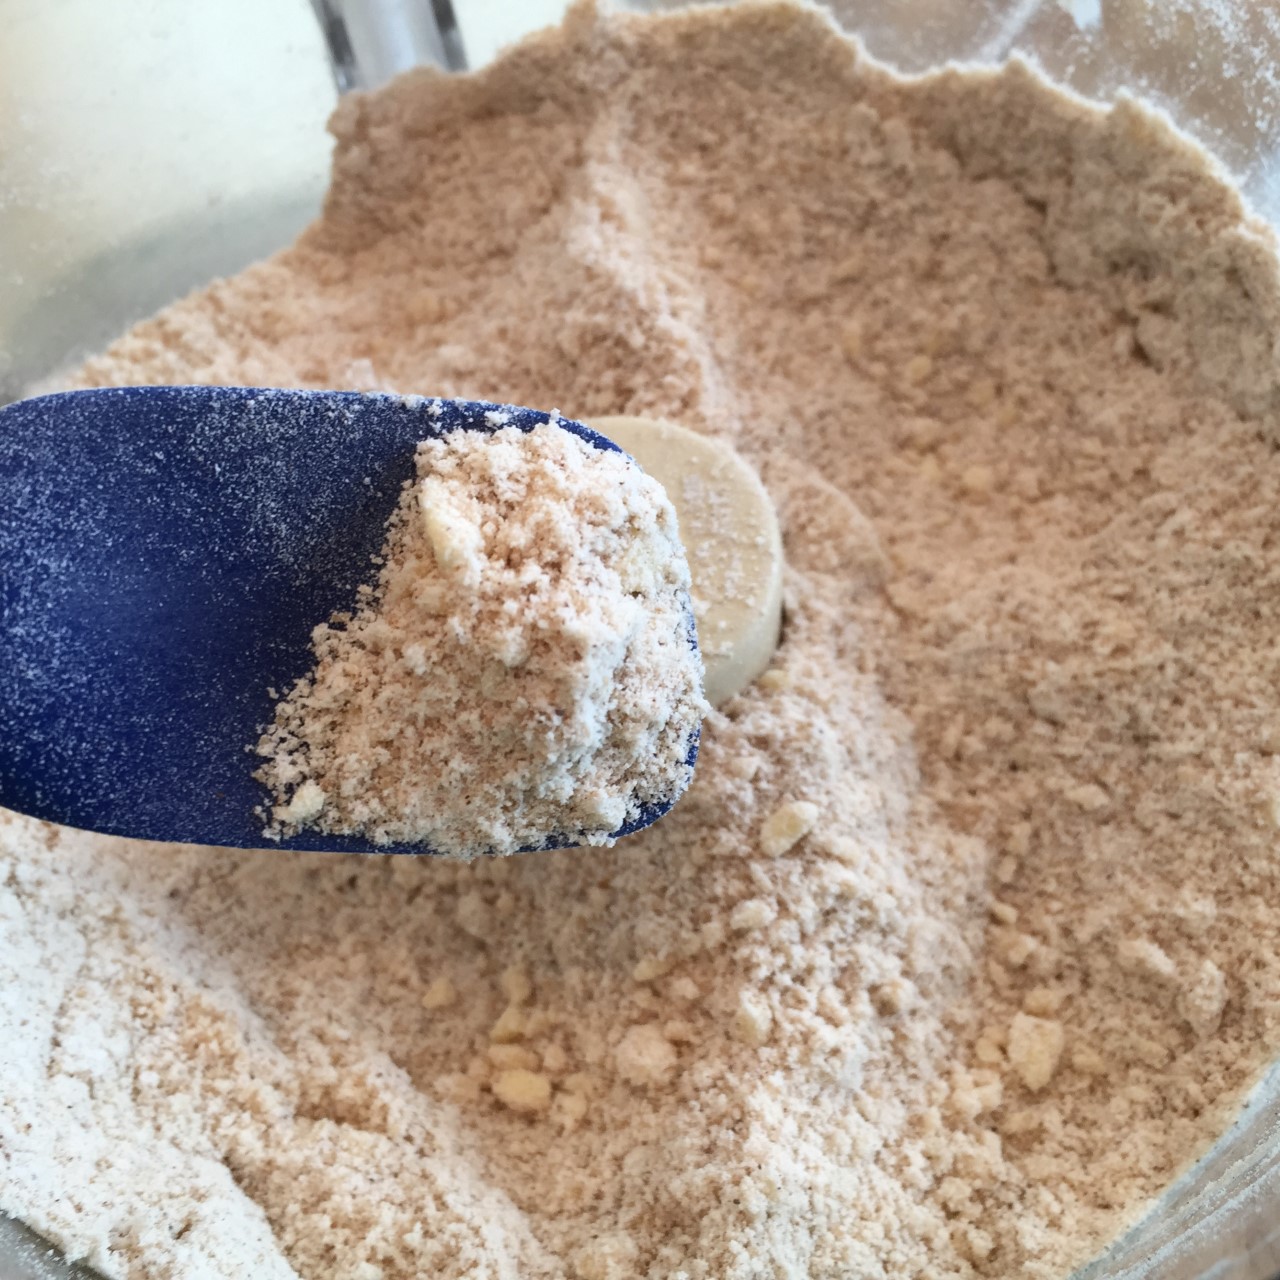 In a small bowl, whisk together the egg, pumpkin, milk, and vanilla. Pour the wet ingredients into the dry and gently fold to mix.
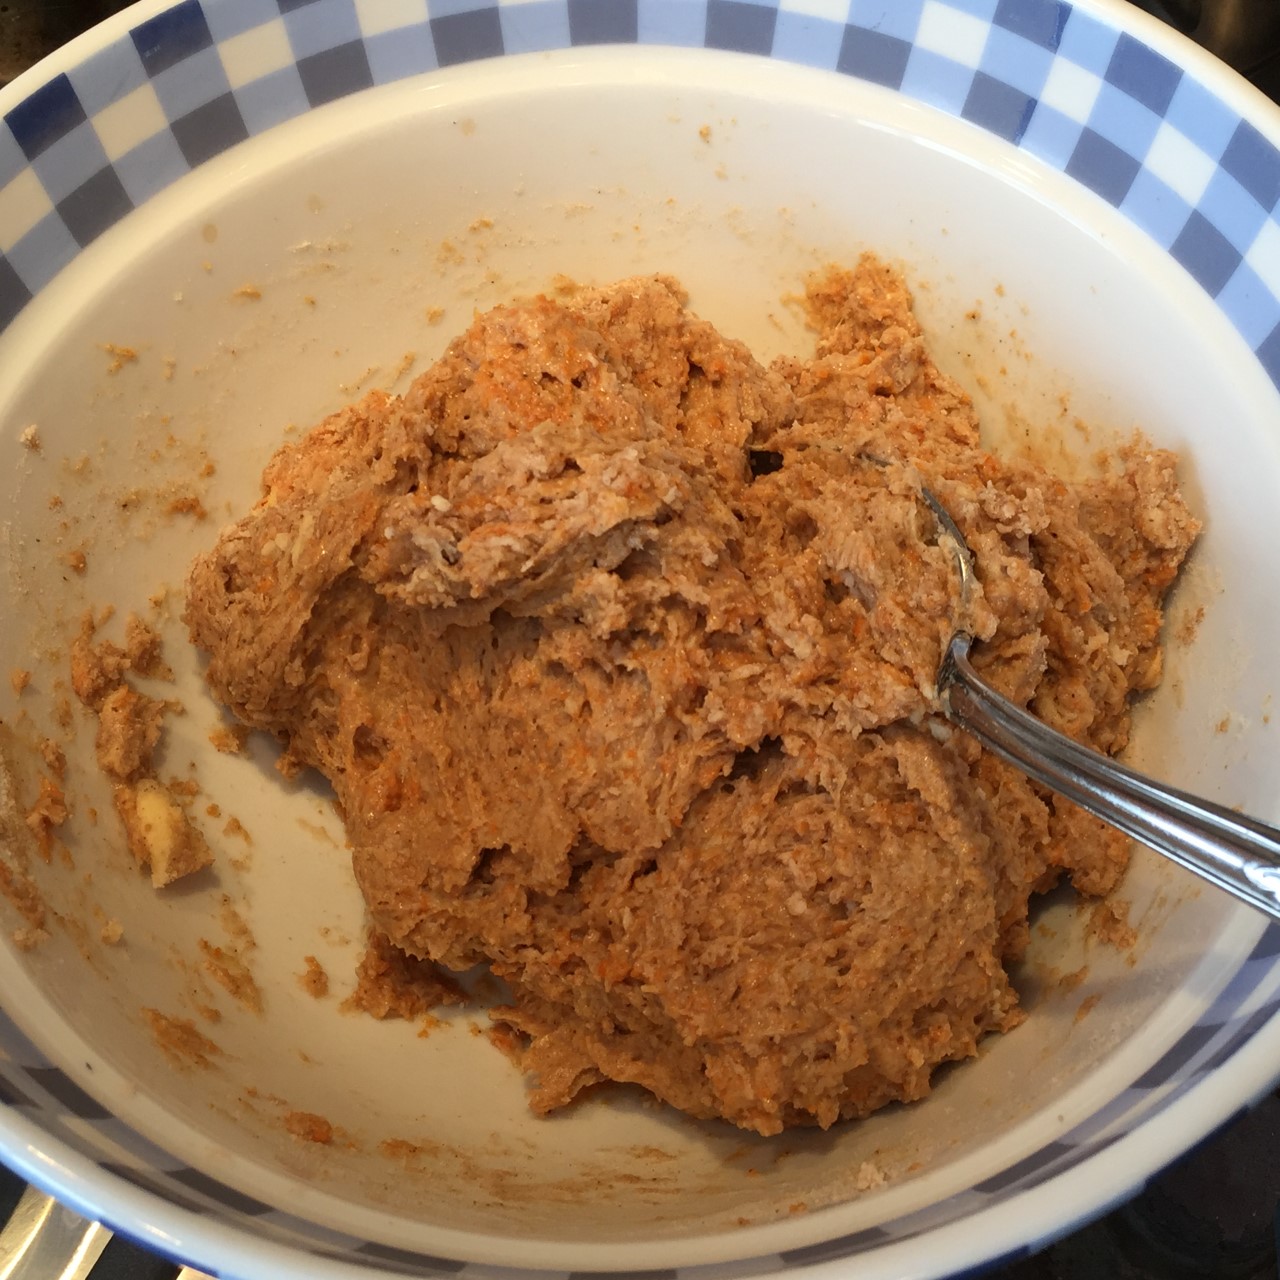 Empty onto a well-floured counter and knead about 5 or 6 times. (I use a bench scraper to help since the dough is sticky.)
 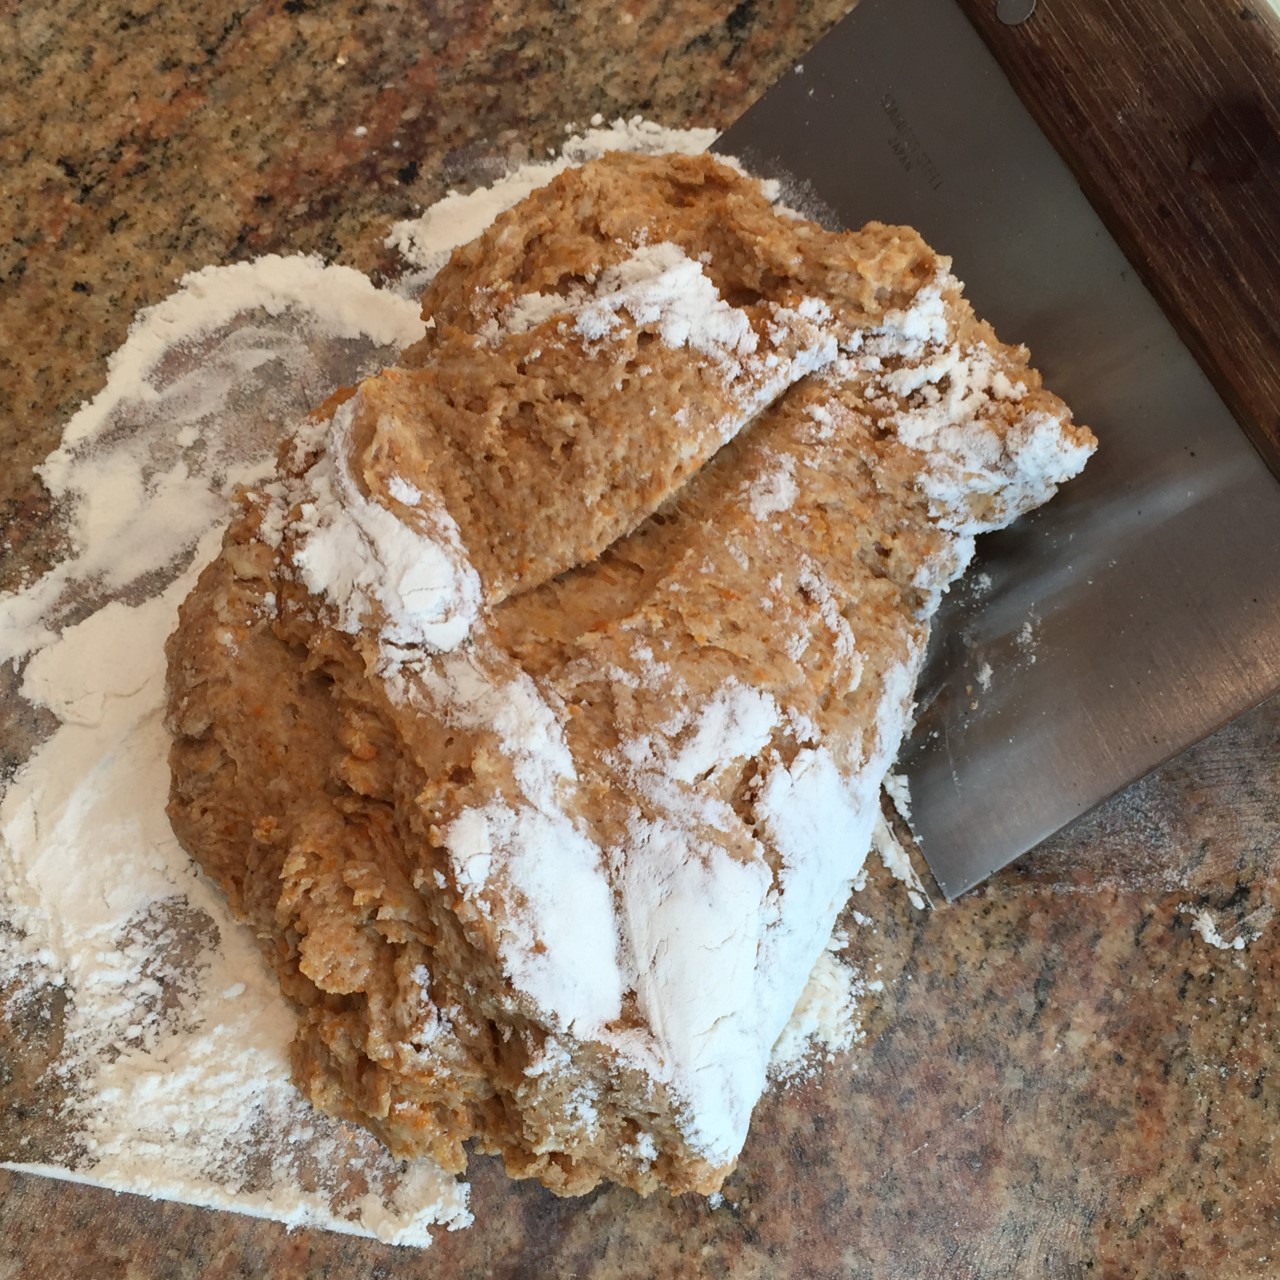 With floured fingers, pat dough into an 8″ circle (try to keep the dough to an even thickness) and cut into 8 wedges.
 Place on a greased or parchment lined cookie sheet (I prefer a dark sheet that’s greased.)
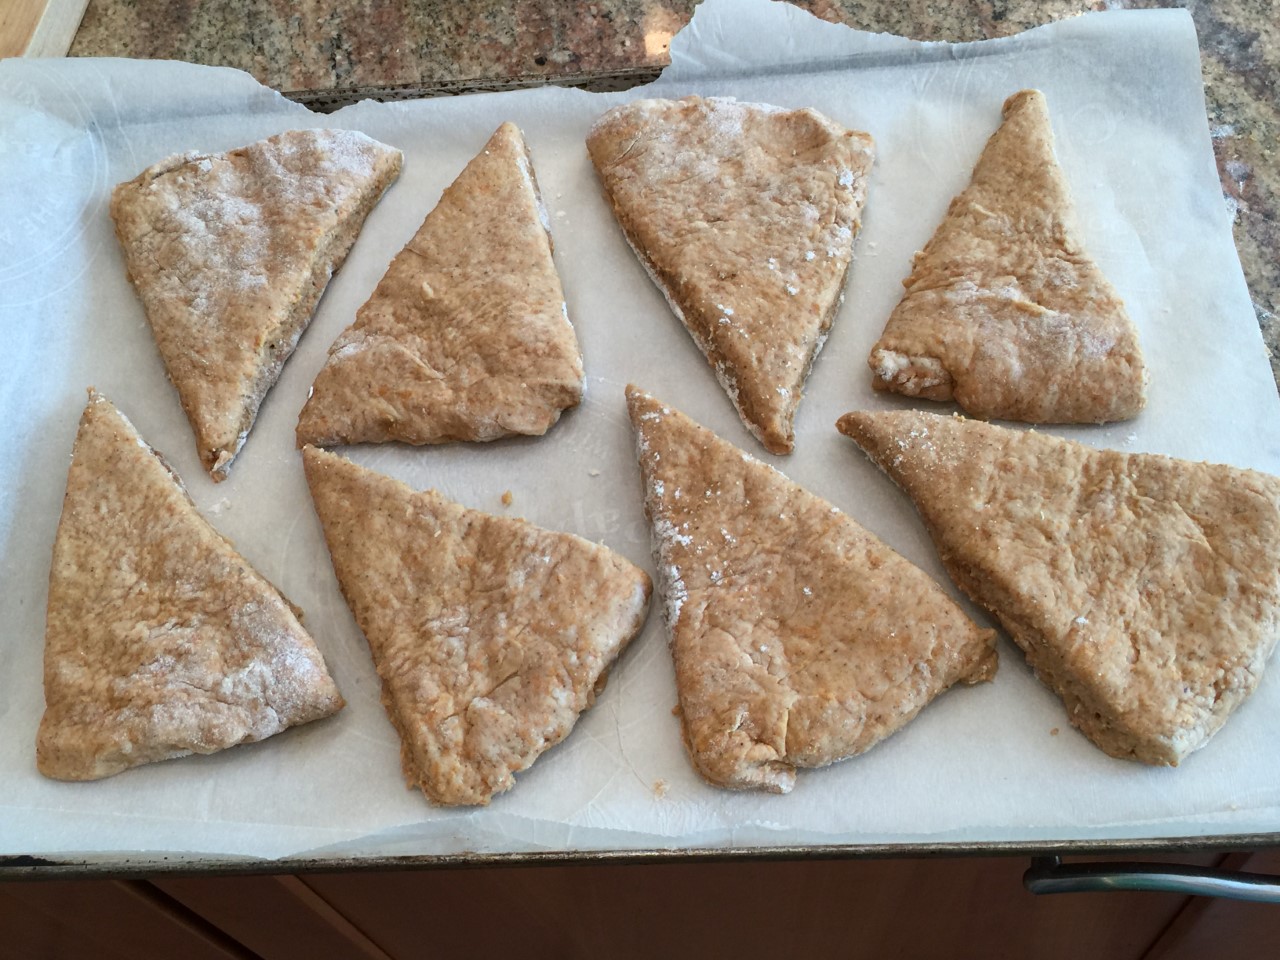 Bake at 400º F with the rack in the middle position for about 16 minutes. They’re at their best when they’re slightly dark on the bottom.
  The last time I baked them, I thought I overcooked them (see photo), but they were amazing – a slight crunch on the outside and perfect chew inside. So when you check them for doneness, look for slightly dark sides.
 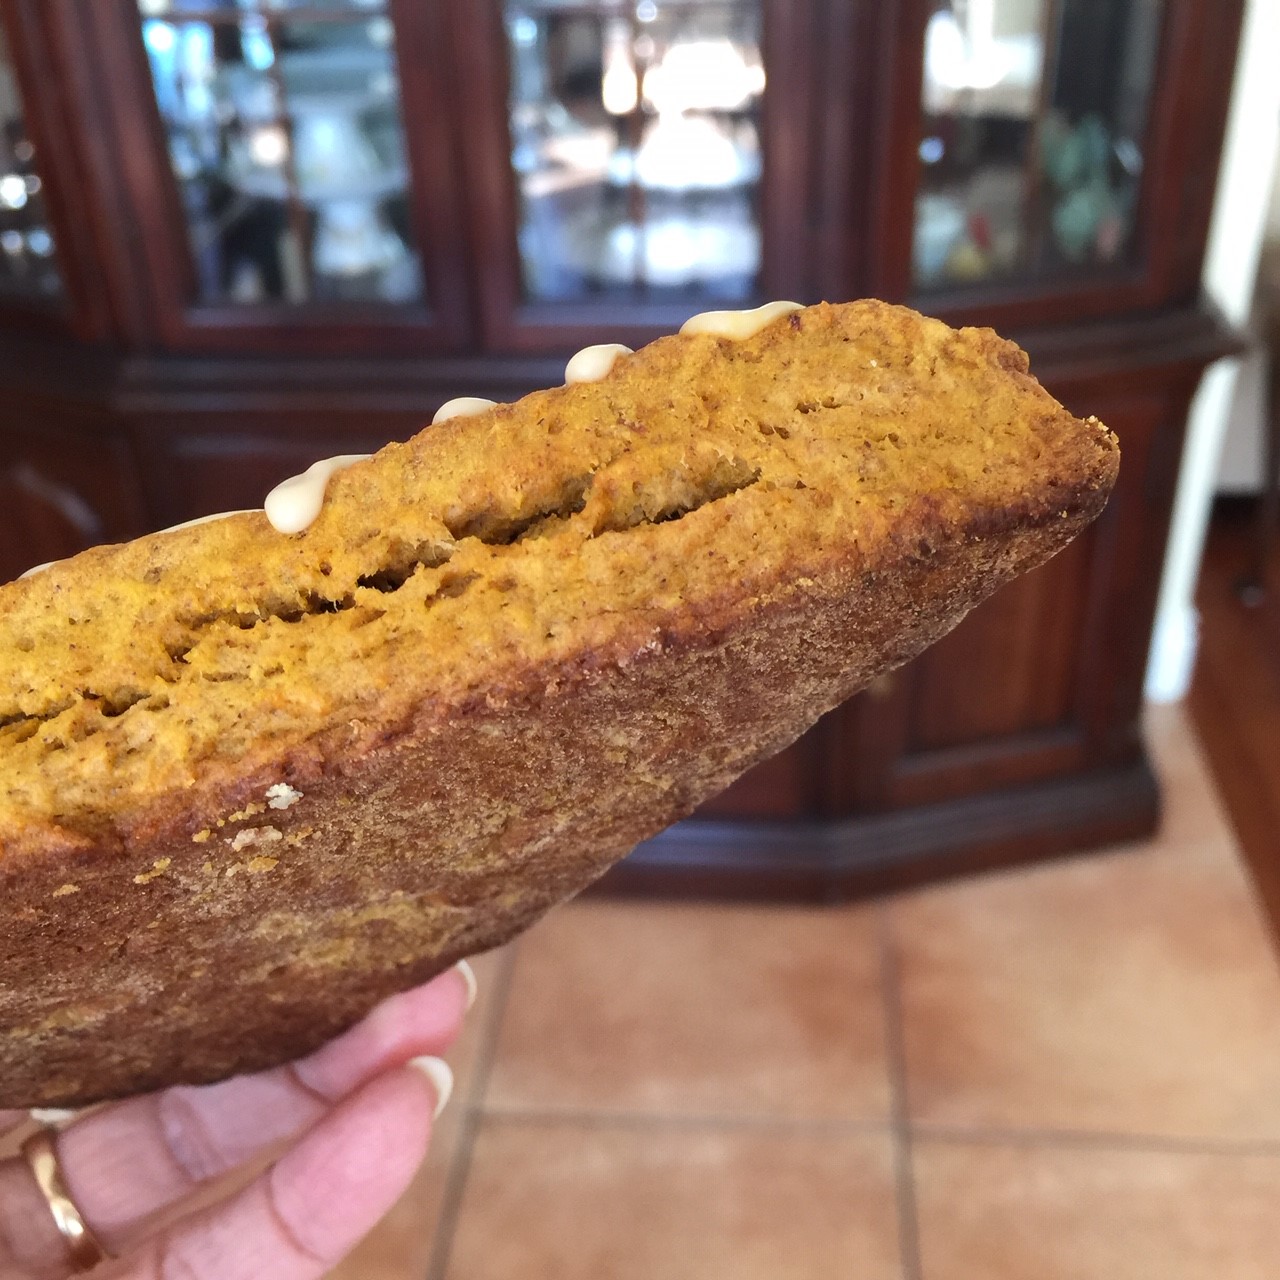 Then remove from oven onto wire rack to completely cool before icing.
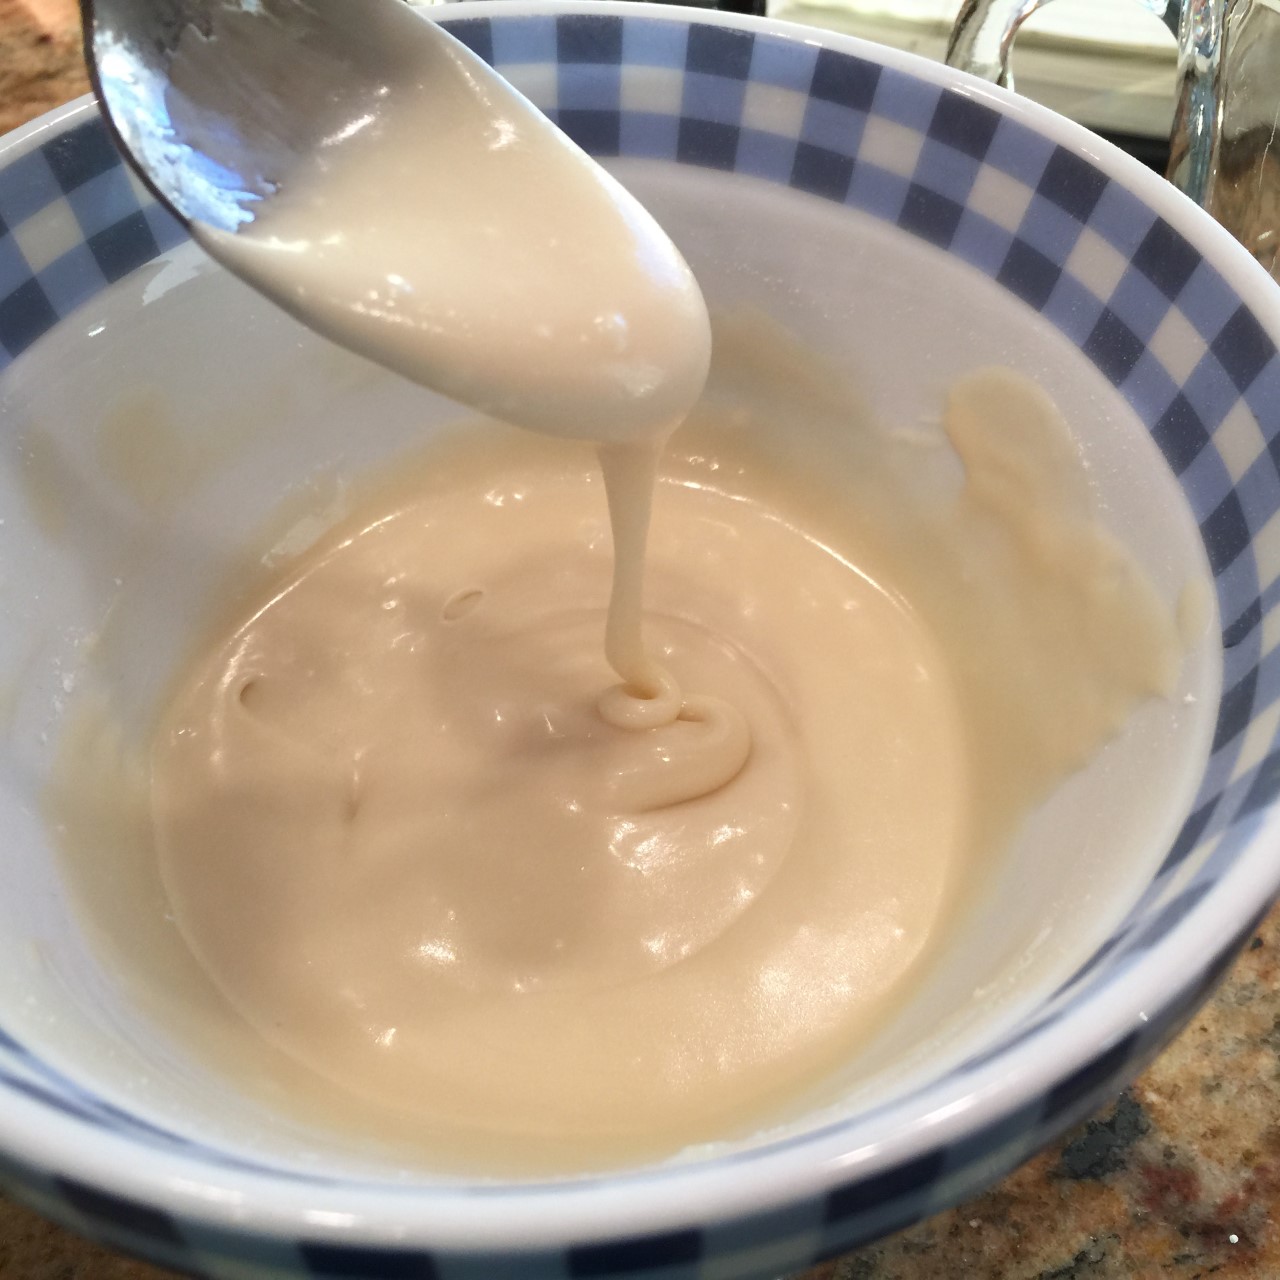 For easier control over the drizzle, pour icing into a spouted cup or a pastry bag with a small circle tip. Design as you wish.
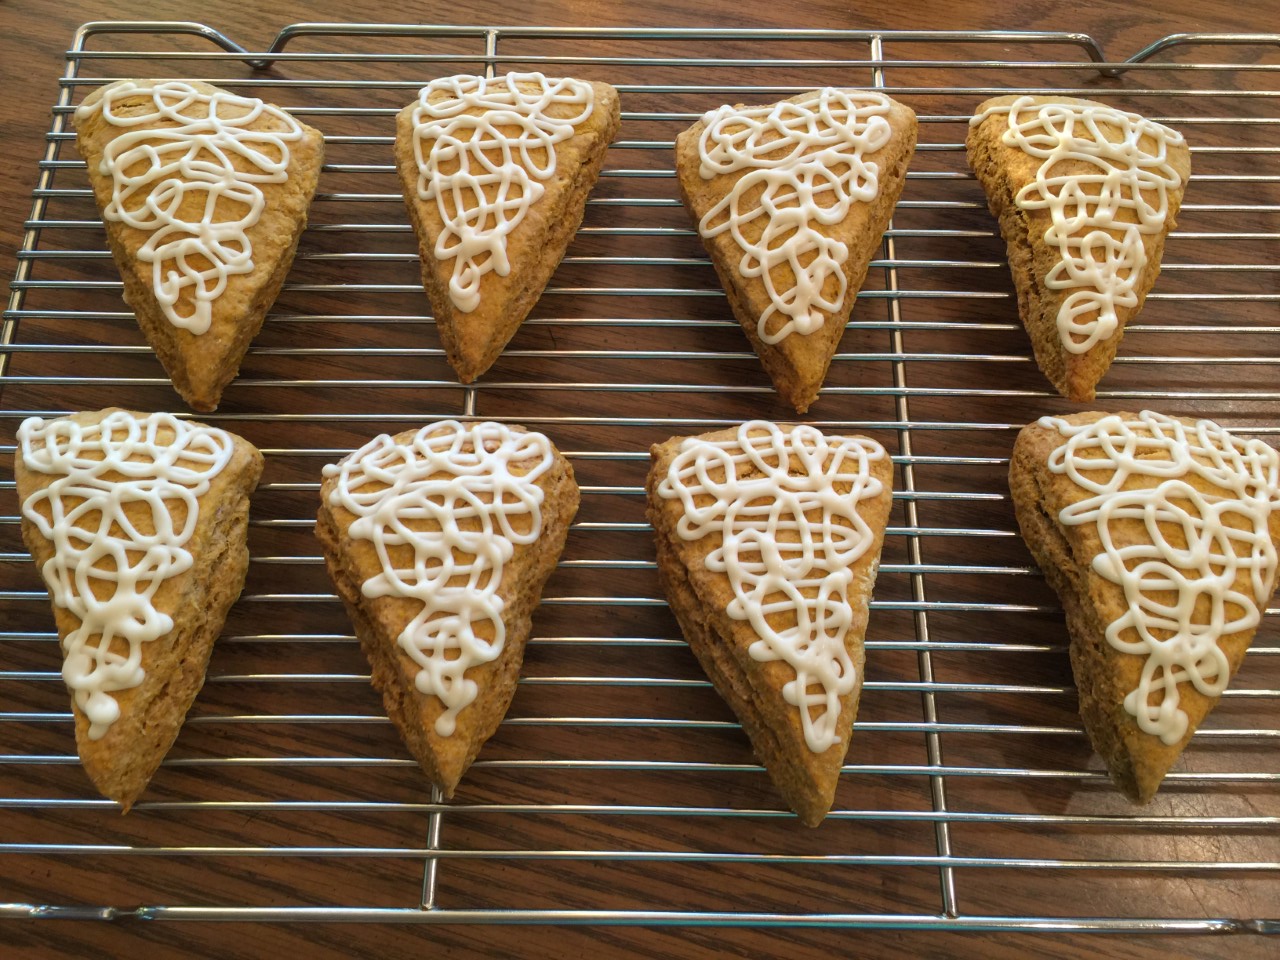 Allow icing to harden before serving.
 I love Indian food! In particular, I look forward to the soft chewy naan bread. I previously posted a plain naan bread recipe (
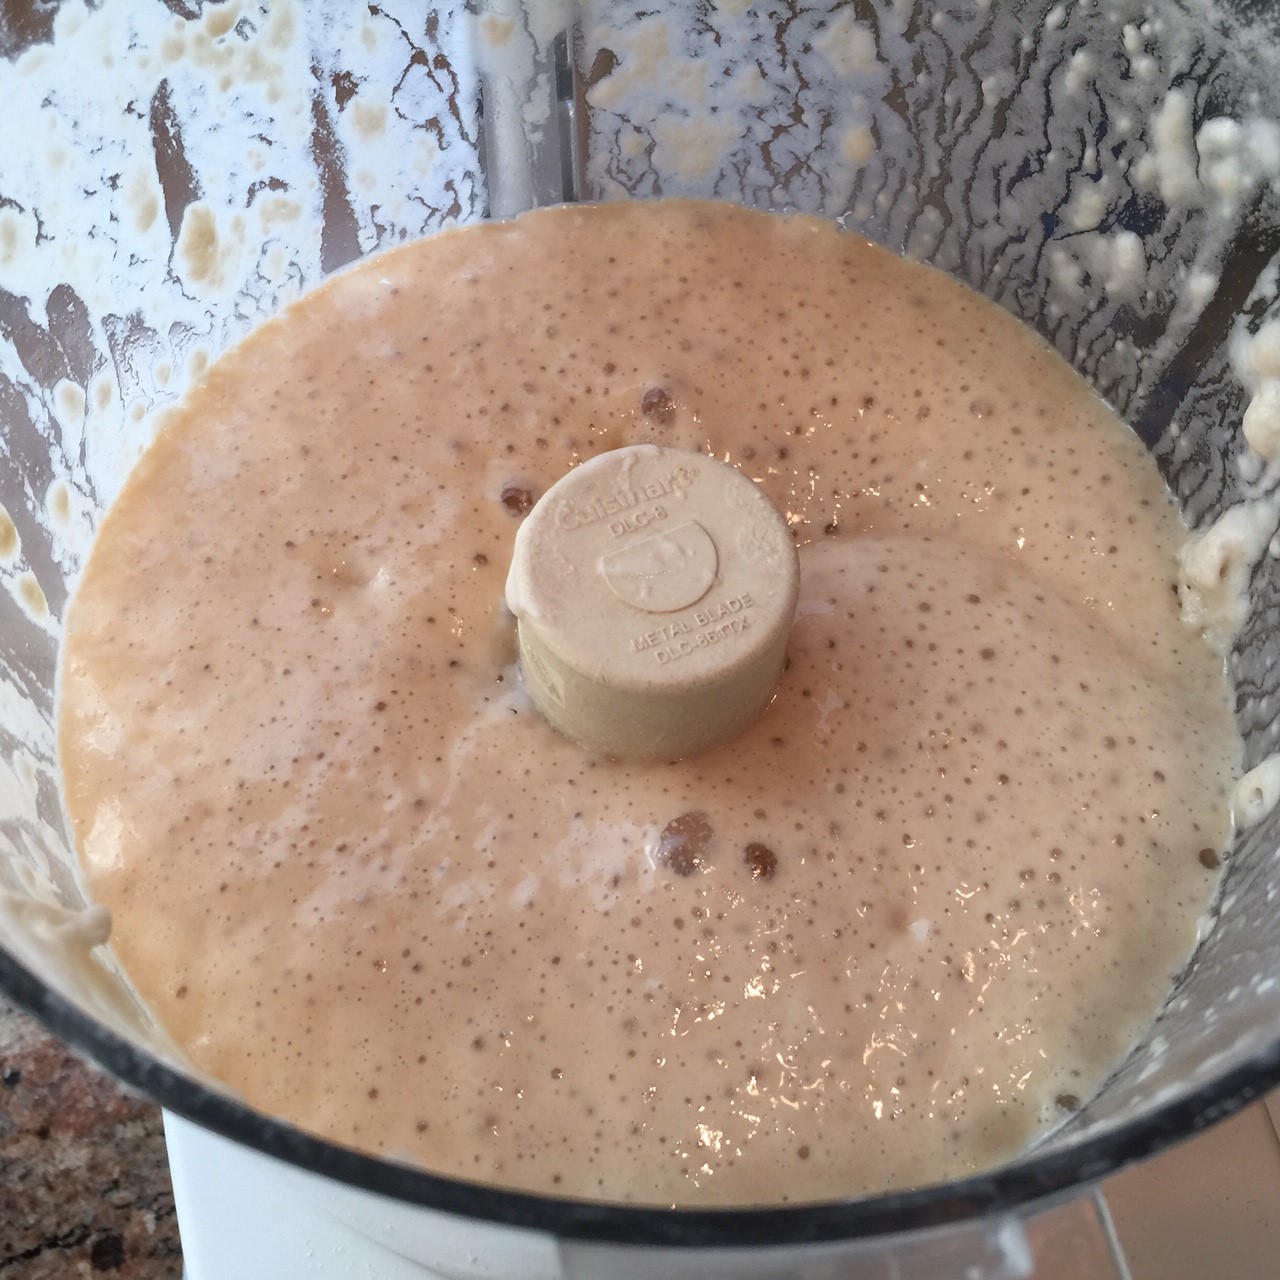 During the half hour wait, sauté the onions: In a skillet put 3 T olive oil, the onions, and salt.
  Over medium to medium/high heat cook until onions are well browned. Adjust heat as necessary. (This step can be done ahead of time.) Remove from heat to cool a bit.
 Once the dough has set for 1/2 hour, add in 3 T olive oil, buttermilk, baking powder, onions, and about 125g (1 cup) of the flour. Blend to combine and break down onion somewhat.
 Add flour in increments until you get a dough that’s only slightly tacky to the touch.
 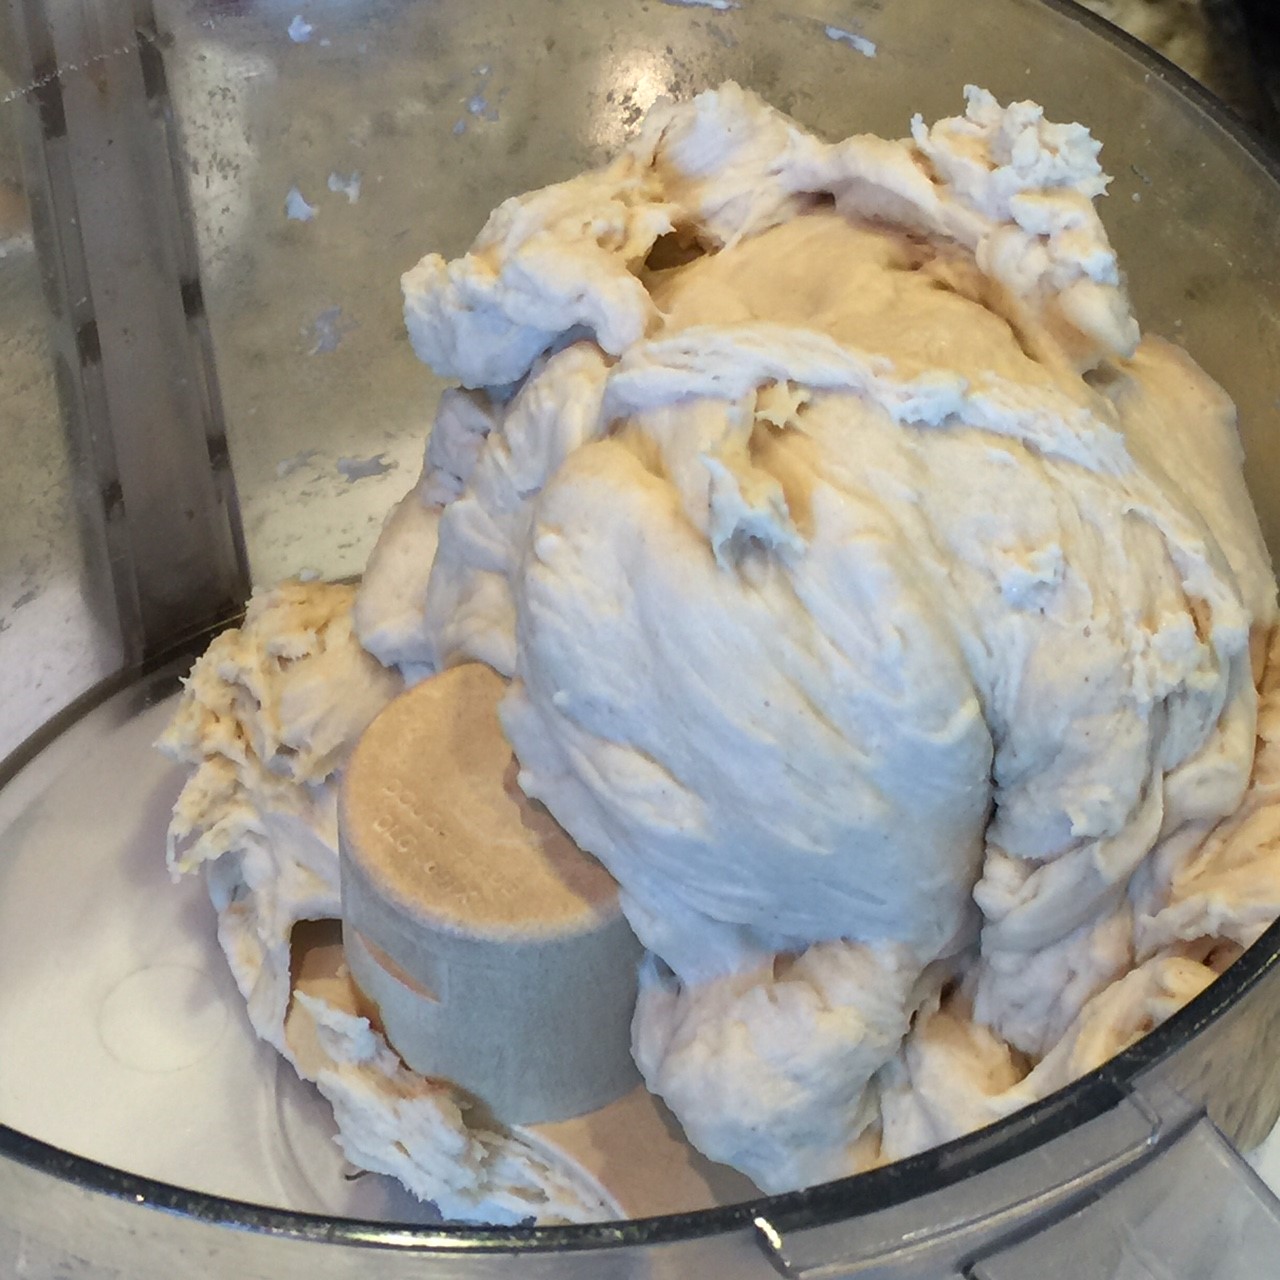 Pour dough into an oiled bowl, flip dough so both sides are oiled, and cover. Let rest about 1 hour, until doubled in size.
 Pour dough onto a lightly oiled counter (not floured). Cut into 8-12 pieces, depending on how large you want them.
 As it’s cooking, roll out next dough ball(s).
 Remove to a tea towel and wrap to keep warm.