ASIAN CABBAGE SALAD – A Savory Delight!

Crunchy Asian Cabbage Salad

Crunchy Asian Cabbage Salad

It all started with leftover cabbage. I had half a head remaining from the Curried Lentil Stew I made two weeks ago. Cabbage has a pretty long shelf-life, but I was at the point of use it or lose it. Well, you know me – I’m not going to throw out perfectly good food if I can help it.

I decided to try my hand at an Asian Cabbage Salad. After reading several recipes, I pulled ideas,  added my own, finally creating a quick and very tasty salad.

You can use red, green, or a combination of cabbage. The red has more bang for the buck in terms of nutrients, and is a bit thicker. I tried it all three ways. It just boils down to a matter of preference and what you have in the house.

ASIAN CABBAGE SALAD – makes a little over 4 cups

  • 4 cups cabbage, shredded (any kind of cabbage will do)
  • 1/2 cup scallions, sliced
  • 8 oz can pineapple rings, drained & sliced
  • 2 T sesame seeds, toasted
  • 1 T sugar
  • 1/2 tsp salt
  • 1/3 tsp dried ginger
  • 2½ T sesame oil
  • 2½ T rice vinegar
  • 3-4 T slivered almonds, toasted

In a large bowl, combine the cabbage, scallions, pineapple, and sesame seeds.

In a small bowl mix together the sugar, salt, ginger, sesame oil, and rice vinegar. Pour over cabbage mixture.

Toss in almonds at serving time.


SPINACH RAREBIT – The Perfect Party Vegetable!

Creamy SPINACH RAREBIT

Creamy SPINACH RAREBIT

Menu planning dinner parties is challenging, even for the most experienced cooks. There must be a variety of food so everyone has at least something they can eat.  Then, you need to organize preparation  to ensure everything is done at the same time. Yikes!

Particularly troublesome is vegetable selection – once cooked, many need to be eaten promptly, since they begin to decline in taste. As soon as my steamed broccoli or roasted carrots are ready, I’m like a mad woman trying to get everyone to the table so they can enjoy the food at its peak of flavor. (For some strange and irritating reason, the announcement that dinner is served seems to provoke a desire in my husband to use the bathroom.)

I serve two vegetables, one generally being SPINACH RAREBIT. Not only is it delicious, but it can be prepared a day or two ahead. I LOVE THOSE RECIPES!!!

But wait, there’s more! It’s forgiving in terms of cooking temperature, so if something is in the oven at a different temperature, go ahead and add the SPINACH RAREBIT anyway – just adjust the time a bit. Plus, as if that’s not enough, it retains its flavor throughout the meal – even for the next couple of days as leftovers. It’s the perfect party dish!

Did you notice I said ‘party dish’? That’s because SPINACH RAREBIT is a little labor intensive.  It’s not hard – just takes time. Not that my husband and kids aren’t worth it….but, let’s be honest – we pull out the big guns for company.

NOTE:  You can save time by buying frozen Welsh rarebit (Stouffer’s makes it). Of course, I encourage you to make your own – you can save money, adjust to your taste, AND you know what’s in your food!

SPINACH RAREBIT – will serve at least 8 people

  • 24 oz frozen chopped spinach
  • 8 oz can water chestnuts, chopped in bite sized bits
  • 6 oz canister French fried onions – (I use French’s)
  • 4 slices fake bacon – (I use Morningstar)
  • Welsh rarebit (recipe follows) – if you buy frozen, you’ll need two 10 oz packages

Oven bake the bacon 15 minutes at 375º, flipping midway. Remove from oven and let sit so it gets crispy. If you have a toasteroven, use it – no point in heating up a big oven for 4 slices of fake bacon.

Rinse spinach in a sieve, then squeeze out water. Wrap in paper towel, then wrap that in an absorbent towel, such a terry cloth. You want to get rid of as much water as you can.

In a large bowl, combine spinach, water chestnuts, and enough Welsh Rarebit Sauce (recipe below) to moisten mixture. Pour this into a casserole dish big enough to hold everything (I use a 10.5″ x 7.5″), smoothing top.

Spread remaining Welsh Rarebit Sauce on top, completely covering spinach mix. Crumble bacon and sprinkle on top. Add the French fried onions (you don’t have to use the entire amount). Cover with foil. Casserole can be refrigerated at this point and baked later – I leave off the onions until just before cooking to make sure they’ll be crispy (not sure it matters).

Bake at 350º Fahrenheit for 25 minutes, then remove foil and bake another 5 minutes.

     Welsh Rarebit Sauce

  • 4 T butter
  • 4 T flour
  • 2 cups milk (I use nonfat)
  • 6 oz extra sharp cheddar cheese, shredded
  • 1/2 tsp dry mustard
  • 1 tsp paprika
  • 1 T chili powder
  • 1/4 tsp salt
  • 1/2 T vegetarian Worcestershire sauce

Melt butter in a saucepan. Turn off flame. Add in flour and work a little of the flour into the melted butter at a time, making a smooth paste. Do this slowly, preferably using a flat headed wooden stirrer. This is the only time you’ll be able to prevent lumps. Keep going until all the flour is incorporated (see photos below). Add in the mustard, paprika, and chili powder. Then cook paste for another minute or two, mashing out any lumps from the spices.

white sauce paste


Pour in milk and cook over a medium heat, stirring often, until thickened. Turn off flame. Add in cheese, salt, and Worcestershire sauce. Stir to blend. Adjust seasoning, if desired.


CURRIED LENTIL STEW – A Slim-Down Special

CURRIED LENTIL STEW

CURRIED LENTIL STEW

I have to admit, I’m not a huge lentil fan. They’re a little bland and mealy, as a rule. But they are a superfood – full of protein, fibre, and all kinds of nutrients, so I was determined to find a recipe that was, at least, palatable.

CURRIED LENTIL STEW goes beyond palatable – it’s downright good! I also found that it actually gets better the next day – thicker and more flavorful. Bonus! That means it can be made ahead of time, which I love. One less thing to do during the dinner-time rush hour.

This dish is low-fat, low-calorie, and easy to throw together.  Who could ask for more?!

NOTE: Lentils are high in phytates, which reduce the bioavailability of nutrients. To counteract this problem, soak the lentils overnight in warm water.

ADDITIONAL NOTE: If you’re daunted by all the spices, you can simply use 1 T curry powder. It’s not as flavorful, but it’s quick.

CURRIED LENTIL STEW – makes about 7 cups

  • 1 cup dry lentils (I used red)
  • 1 cup dry rice (I used Chinese white rice)
  • 4 cups vegetable stock (I used homemade: VEGETABLE STOCK)
  • 1 cup onion, chopped
  • 3 tsp garlic, pressed
  • 1 cup carrots, sliced
  • 1 cup celery, diced
  • 2 cups cabbage, sliced thinly
  • 15 oz can whole tomatoes, diced
  • 1 tsp turmeric
  • 1/2 tsp dry mustard
  • 3/4 tsp cumin
  • 3/4 tsp coriander
  • 1/2 tsp cayenne powder
  • 1/2 tsp cinnamon
  • 1/8 tsp ground cloves (or leave it out completely – my husband doesn’t like it)
  • 1½ tsp salt
  • 1/2 tsp ginger powder
  • 1 T lemon juice

If you’ve soaked the lentils, drain them in a sieve. If not, rinse the lentils and let drain.

Cook the rice.

In a saucepan, sauté the onions in a tablespoon of the vegetable stock for several minutes. Add in carrots, garlic, celery, and cabbage. Sauté another 2 minutes.

Add in turmeric, dry mustard, cumin, coriander, cayenne, cinnamon, cloves, salt, and ginger powder. Sauté another minute or two – until you can smell the spices.

Add in lentils, remaining vegetable broth, lemon juice, and tomatoes.  Bring to a boil, lower flame to bring down to a simmer, and cook uncovered for 30 minutes.

Adjust seasoning to taste. Add in cooked rice.

Can be served immediately or refrigerated and served the next day (which is better, IMO).


LOW-CAL CHOCOLATE DELIGHTS – Watch Your Figure AND Enjoy Dessert!

IMG_1298

LOW-CAL CHOCOLATE DELIGHTS go wonderfully with tea.

I’m a gal who requires (yes, requires) a bit of chocolate everyday. I save it until the end of the day – if I have it earlier, I’m STILL going to have some after dinner.

However, this is a troublesome time of year for us chocoholics. With the weather warming up, the clothes are paring down, and those excess winter pounds are going to show.

Fear not! Have I got a dessert for you: LOW-CAL CHOCOLATE DELIGHTS!

These yummy cookies appeal not only to my sweet tooth, but to my frugal nature. As the self-proclaimed Queen of Freeze, I always have frozen egg whites as a result of recipes that call for only yolks. No way I’m throwing out precious food – waste not, want not!

The calorie count per cookie is going to depend on how big you make them. So I’ve added up the calories for the entire batch – 1267 calories. Divide the number of cookies you make into 1267 and that will be the per cookie calories. I made almost 4 dozen, so each cookie is approximately 30 calories.  Not bad considering even the worst tasting store-bought are at least 60. I allow myself 3 or 4 – this way I feel like I’ve had a full dessert, but only consumed 90-120 calories.

LOW-CAL CHOCOLATE DELIGHTS – I made 43 cookies

  • 2 egg whites
  • 2/3 cup granulated sugar
  • 1/3 tsp vanilla
  • 4 oz unsweetened chocolate, melted and cooled

Beat egg whites just until they become stiff (when the peak that forms when you lift up the spatula doesn’t collapse). With beaters going, add in sugar a tablespoon at a time. Whites will become glossy.

Scrap the batter clinging to the beaters into the bowl. Pour in the chocolate and vanilla, and gently fold everything together using a large spoon. It’s okay if it’s a little streaky – they look pretty that way.

Preheat oven to 350º Fahrenheit.

Spoon batter onto greased or nonstick cookie sheets. Bake for 15 minutes. Remove from oven and let cookies set 2 minutes on hot sheet before transferring them to a wire rack. Store in airtight container.


SATAY POTATO SALAD – A New Twist On An Old Favorite

SATAY POTATO SALAD

SATAY POTATO SALAD

Easter may have come and gone, but not the multitude of decorated hard boiled eggs. (Hopefully,  all have been found.) Just how many egg salad sandwiches can you serve before everyone cries, “enough”?

While mulling over this dilemma, my mind wandered (as it often does) to the leftover satay sauce in my fridge. It had reached that critical point where I needed to use it or freeze it. As a frugal cook, loosing it was NOT an option.

And then the ah-ha moment:  potato salad to use the eggs, and satay to replace the mayonnaise. I thought scallions instead of yellow onions and some leftover red pepper for color and crunch. The result was delicious. In future, I’ll throw in some toasted peanuts.

Potato salad is not a measure-carefully dish. My recipe is for the amounts that I used THAT time. The next time I’m sure I’ll vary it depending on what I have available.

NOTE: Last year I posted another great recipe to use up those hard boiled eggs: MOM’S “CHICKEN” CASSEROLE.

SATAY POTATO SALAD – makes approximately 3 cups

  • 1½ lbs Yukon potatoes
  • 5 hard boiled eggs
  • 1 stalk celery, chopped
  • 3 stalks scallions, sliced
  • 1/4 cup red pepper, chopped
  • 1/2 cup Satay Sauce (recipe below)
  • optional:  toasted peanuts

Scrub potatoes, leaving skin on. Chop into 1/2″ cubes. Boil until fork can pierce the cubes. Rinse with cool water.

Combine the potatoes with the eggs, celery, scallions, red pepper, and Satay Sauce.  Serve either refrigerated or warm.

Satay Sauce – makes 1¼ cup

  • 1/2 cup peanut butter (I use the grind-it-yourself kind in the store)
  • 1/3 cup water
  • 1/3 cup soy sauce
  • 3 T lemon juice
  • 3 cloves garlic, pressed
  • 1 tsp dried ginger
  • 1 T sesame oil

Mix all ingredients together in a blender or food processor. Pour into a saucepan and simmer for about 5 minutes. (Can be frozen).


How Clutter Control Lead To ENGLISH MUFFINS

Homemade English Muffins topped with strawberry jam

Homemade English Muffins topped with strawberry jam

Whether it’s because spring-cleaning is in the air, or the fact that I’m being suffocated by the abundance of  unused possessions in my home, I’m on a Purge, with a capital ‘P’. To prevent me from getting sidetracked or feeling overwhelmed, I assign myself a manageable task-of-the-week. This is Week 12 and, I’m proud to say, I’ve remained on point! As my house is being cleansed, thrift shops have been the benefactors of car loads of my discards. Win-win!

Recently I tackled my kitchen desk. One of the drawers contained a lifetime of recipes clipped optimistically from newspapers and magazines, only to be tossed on the pile and forgotten. (You’ve got that pile, too – I know you do!)

Not only did ridding myself of about two thirds of this paper potpourri gain me an organized drawer, but it also reminded me of recipes I’d forgotten. One was my mom’s Curried Cheese And Olive Spread served on English Muffins, and the another was for……English Muffins. Who am I to thwart fate? When she beckons, I come – or, in this case, cook.

Yeast holds no fear for me, so I decided to start with the English Muffins and make the Curried Cheese And Olive Spread for next week’s blog. While I won’t go so far as to say my English Muffins were better than store-bought, they were delicious.

You may be asking why I bother to make something from scratch when I can simply buy the taste equivalent in the market. Well, there are 2 main reasons why I make things from scratch: 1) I like to know what’s in my food – I don’t want preservatives, or bugs, or ingredients that are unpronounceable; and 2) to save money. What it boils down to is I’m a bit paranoid, and I’m cheap.

While English Muffins are extremely easy to make, they take about 3 hours start to finish. This is because of the rising periods – 2 hours for the first, and 1/2 hour for the second. The actual hands-on time is very minimal.

ENGLISH MUFFINS – makes 6 standard size, or 12 minis

  • 3/4 tsp active dry yeast
  • 1/2 cup water
  • about 1½ cups all-purpose flour
  • 1/2 T salted butter, softened
  • 1/2 tsp sugar
  • 1/2 tsp salt
  • cornmeal for sprinkling (about 3 T)

Heat water to approximately 100º Fahrenheit. Mix in yeast and let proof several minutes.

Put 1 cup flour, the butter, sugar, and salt into the workbowl of your food processor.  When yeast is foamy, turn on the machine and slowly pour in the yeast water. Add in remaining flour one tablespoon at a time – just until the dough starts to form a ball. You probably won’t use all of the flour. Continue to run machine another 30 seconds to knead the dough. If you don’t have a food processor you’ll have to do this by hand. Then start haunting the thrift shops for used machines.

Pour dough onto a floured board. Pick up dough from the floured bottom and fold dough onto itself so the sticky part is encased. Press into a greased bowl, then pick up dough and replace in bowl upside down. Both sides are now greased. Cover and let rise for 2 hours. (This is longer than most breads – you want the air pockets.)

Empty dough onto the floured board and cut into 6 equal pieces (or 12, if making minis). Stretch each piece into a 3″ circle for standard, or 1½” for mini. They’ll be about 3/8″ thick (don’t worry – they’ll rise).

Generously sprinkle cornmeal onto a large skillet or griddle. One by one, press each dough circle into the cornmeal, then flip them and press again. Arrange them in the skillet so they’re not touching. Cover with a tea towel and let rise 30 minutes.

Remove the tea towel and turn on flame to medium. Once the skillet is heated, turn down flame to medium/low. Cook about 5 minutes, until bottom is browned. Flip them and cook another 5 minutes, until browned. The the best way to be sure they’re done is to insert a thermometer through the side of one of the muffins into the center. They’re done at 200º Fahrenheit.

Remove to a wire rack to cool so they don’t get soggy.

The accepted way of splitting English Muffins is to poke a fork all the way around (see photo), then pull apart.

Insert a fork around the side to cut open English Muffins.

Insert a fork around the side to open English Muffins.

Store in a sealed container.


GREEK STUFFED PORTOBELLOS – They’re Greek To Me!

greek portobello

GREEK STUFFED PORTOBELLO

Two things that make my pupils dilate when choosing a recipe are it’s: 1) fast to prepare, and 2) can be made ahead of time. Bonus points if the cooking time is short.

Greek Stuffed Portobellos are all that – and delicious, too! I know I’m on a winner when even my picky-eater youngest son will eat them. They’re great for sneaking things into your child’s diet that they may not normally eat – like spinach. (We moms sometimes have to be sneaky – they’ll thank us later!)

Something you may not realize is portobello mushrooms are just common button mushrooms all grown up. So now I only buy the more expensive portobellos when I’m stuffing them and save my money on recipes that call for sliced or chunks of portobellos by using the smaller common mushrooms – they’ll do fine.

GREEK STUFFED PORTOBELLOS – makes 4

  • 4 portobello mushrooms
  • 1/2 T olive oil
  • 1 cup onions, chopped
  • 2 garlic cloves, pressed
  • 2 cups spinach, chopped
  • 1/4 cup scallions
  • 3/4 cup Roma tomatoes, chopped
  • 1 tsp oregano
  • 1 tsp dill
  • 1/2 tsp salt
  • 1 T lemon juice
  • 1/3 cup kalamata olives, halved
  • 5 oz feta cheese, crumbled

Sauté onions and garlic in olive oil for a few minutes. Add in spinach, scallions, tomatoes, oregano, dill, and salt. Continue to cook until spinach is wilted. Remove from heat. Stir in lemon juice, olives, and feta.

Remove and discard stem from mushrooms, and thoroughly wash. Rub with olive oil and place on broiler pan open side up. Divide the spinach mixture between the mushrooms.

Broil 4″ from heating element for about 15 minutes – until browned.

Serve with rice.


CHEESE STUFFED DINNER ROLLS – Melty Good!

IMG_0853


The dinner roll: a classic. Always a must with company, and mandatory when my kids were little (sometimes that’s all they’d eat!). While there are different types and shapes of dinner rolls, my children’s favorite were the soft yeast rolls I made in a round cake pan.

I don’t know why it took me so long to think of this (probably due to the numbing effect from years of diaper changes, chauffeuring, and stepping on Legos), but it finally occurred to me to stuff a cube of cheese into each dough ball.

The rolls were a hit! And, really, what’s not to like: melty cheese in the middle of a soft yeast roll.

Astute readers may have noticed me bandying about the ‘yeast’ word. Yes, these rolls use yeast which means kneading and rising.

If you’ve been following my blog you’ll know there’s nothing to using yeast. You’ll also know that I believe a food processor is an essential part of a kitchen. Not only will it save you steps, it will save you money because you’ll start making things from scratch that you would have bought ready-made – like yeast rolls.

Of course, you can make these Cheese Stuffed Dinner Rolls without a food processor.  You’ll just have to knead them by hand. But know that that’s 10 minutes you could have spent catching up on Facebook….or dusting.

You can use any kind of cheese you fancy for Cheese Stuffed Dinner Rolls, but I recommend a cheese that stretches when heated such as jack or mozzarella. There’s something irresistible about stretching cheese as you break open a piping hot dinner roll.

CHEESE STUFFED DINNER ROLLS – makes 12 rolls

  • ½ cup milk (I use nonfat)
  • ¼ cup water
  • 2¼ tsp dry yeast (or 1 packet)
  • 2¼ cups all-purpose flour, more or less
  • 2 T sugar
  • ½ tsp salt
  • 2 T butter, softened
  • 12  5/8″ cubes of cheese, just eyeball it – you don’t have to measure

Combine the milk and water, then heat to about 100º Fahrenheit. Sprinkle on yeast and stir. Let proof for about 5 minutes.

Into the food processor put the sugar, salt, butter, and 2 cups of the flour. Pulse the machine a few times, then run about 10 seconds to blend.

When yeast is proofed, run the processor and slowly trickle the liquid through the pour-spout into the flour. The goal is for the dough to just form a ball. Add more flour one tablespoon at a time, if needed, until this happens. (I usually use about 2¼ cups of flour.) When the dough gathers into a ball, continue to run the machine another 30 seconds to knead the dough. (Use this time to think about those poor souls without food processors getting sticky dough all over their hands and flour on their clothes.)

Pour dough onto a floured board and cut into 12 equal pieces. Wrap each piece of dough around a cube of cheese, pinching the dough to seal. When all the cheese is wrapped, place dough balls evenly in a greased 8″ round or square cake pan. Cover and allow dough to rise, filling the pan – about 30 minutes. (See photo.)

yeast rolls rising

Preheat oven to 375º Fahrenheit.

If you like, brush tops with milk – not necessary, but gives them a pleasing golden color. Bake 20-25 minutes, until done. Serve hot for best gooey cheese results.


QUINOA TABBOULEH – Super Food, Super Good!

QUINOA TABBOULEH

QUINOA TABBOULEH

Up until a couple of years ago I had never heard of quinoa. Suddenly it’s everywhere and all the cool people are eating it. Well, I may not be “cool”, but I AM room temperature and like to know what’s going on.

What’s going on is the revival of an ancient grain called quinoa (pronounced “keen’-wah”). It’s high in protein and lacks gluten (which has become the bad-boy of the food world these days). It also cooks really fast – it’s done is 10-15 minutes.

I decided to make tabbouleh, replacing the traditional bulgur with quinoa. Excellent!

Quinoa Tabbouleh is one of those multifaceted dishes that makes for a light lunch coupled with a hearty yeast roll, a substitute for a green salad, or a tangy side dish to accompany your entrée.

Even better, it’s easy to make and can be prepared well ahead of time. One less thing to do during that hectic count-down period when you’re trying to have everything done at the same time. (Don’t even think of talking to me during crazy-time!)

NOTE:  An easy way to chop parsley is to put washed parsley in a cup and snip away with your kitchen shears.

Chop parsley using kitchen shears

Chop parsley using kitchen shears

QUINOA TABBOULEH – makes 6 cups

  • 1½ cups uncooked quinoa
  • 1¾ tsp sea salt
  • 1/3 cup extra virgin olive oil
  • ¾ cup lemon juice (fresh or bottled)
  • 2 garlic cloves, pressed
  • ¼ tsp ground pepper
  • 2 cups tomato, chopped
  • 1½ cups parsley, finely chopped (measure before chopping)
  • 1 1/3 c cucumbers, chopped
  • 4 scallions, sliced

Cook quinoa by bringing 3 cups water and quinoa to a boil, then simmering covered until water is absorbed (about 10-15 minutes).  Stir every few minutes, keeping an eye out so it doesn’t burn. Let cool.

Combine all ingredients. Refrigerate until serving. It will keep for days.


SPINACH PIE – Popeye Approved!

SPINACH PIE

SPINACH PIE

Spinach is one of those really-good-for-you foods that I tend to put off making. Why? Because I hate cleaning it. If you’ve ever bought fresh spinach, you know what I mean – it’s very muddy. Even when the store does its best to sell clean bunches, I always find dirt in there. Consequently, I wash each leaf under running water, getting in every nook and cranny – after all, I don’t know what’s in that mud.

I admit it – I’m a wee bit overly cautious. (Okay – paranoid!)

I realize life would be easier if I used frozen, but I worry they didn’t clean their spinach very well. Running water over frozen spinach is almost pointless.

All that being said, whenever I do make a spinach dish, I’m glad I did. It’s delicious, healthy, and I always feel I’ve done a noble thing when finished. Then I chide myself for not cooking spinach more often.

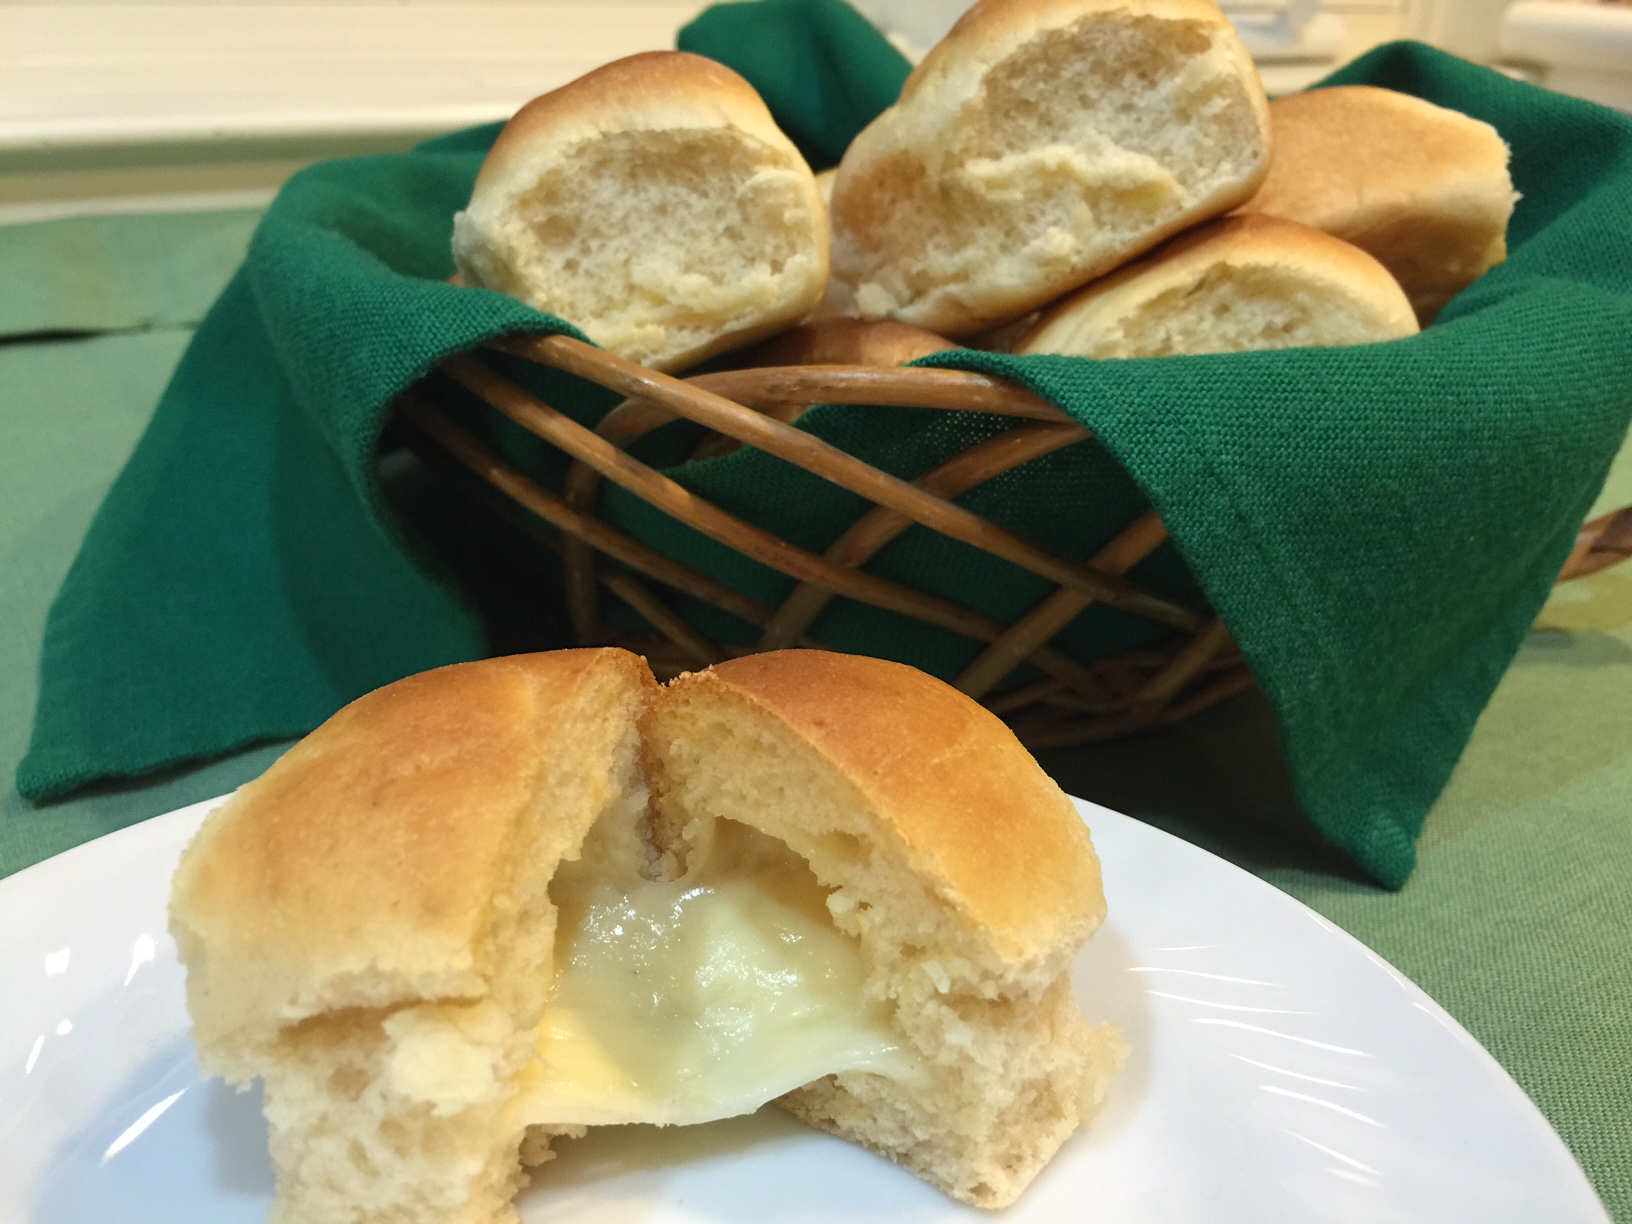
My Spinach Pie is a lovely combination of spinach, raisins, and olives, topped with mozzarella, and encased in a hearty crust.

You may be fearless (or less paranoid) when it comes to spinach, but cringe at making a yeast dough. I’m here to tell you, yeast doughs are easy as…(wait for it)…pie. HONESTLY! They’re a piece of cake. (I’ll stop now.) So take a deep breath and I’ll walk you through this Spinach Pie recipe that everyone loves.

NOTE: I prefer to use canned black olives with jalapeños for added kick, but the plain ones are fine.  You can also use kalamata olives, if you like.

ADDITIONAL NOTE: There are 3 olive oil amounts listed separately. The grand total is 5½ T, but I listed them in the amounts to be used for different purposes. The olive oil used to grease the rising bowl, casserole dish, and brush on the dough are not included in this total.

SPINACH PIE

Crust:

  • ¾ cup water, approximately 100º Fahrenheit
  • 2¼ tsp dry yeast
  • 2¼ cups (274g) all purpose flour
  • 1½ T olive oil
  • ½ tsp salt

Filling:

  • 1 lb fresh spinach (stems are included in this weight)
  • 1 T olive oil
  • 3 garlic cloves, pressed
  • ¼ cup onions, finely chopped
  • ¼ tsp cayenne pepper
  • 1   4-oz can black sliced olives (with or without jalapeños)
  • ¾ cup raisins
  • freshly ground pepper
  • ½ lb mozzarella cheese, shredded
  • 3 T olive oil

Stir yeast into water and let proof for about 5 minutes.

Put 2 cups (246g) flour, the 1½ T olive oil, and salt into your food processor. Turn it on and slowly pour the proofed yeast water through the pour spout.  Let run until the flour is incorporated. The goal is for the dough to form a ball. Add more flour tablespoon by tablespoon until this happens. Then, run the machine about 45 seconds to knead the dough.

Note:  If you don’t own a food processor, you’ll have to mix and knead the dough by hand. You can use the time it takes to knead the dough to think about how to save up for a food processor.

Press the dough ball into an olive oil greased bowl, then flip the dough so the entire ball is greased. Cover with a tea towel and let rise for 1 hour.

While dough is rising, prepare the filling (which can also be done ahead of time). Remove and discard the spinach stems. Thoroughly wash spinach leaves, shake to remove excess water, then grab handfuls of leaves and slice. Don’t worry about the size or shape of the sliced leaves – once cooked, the leaves wilt.

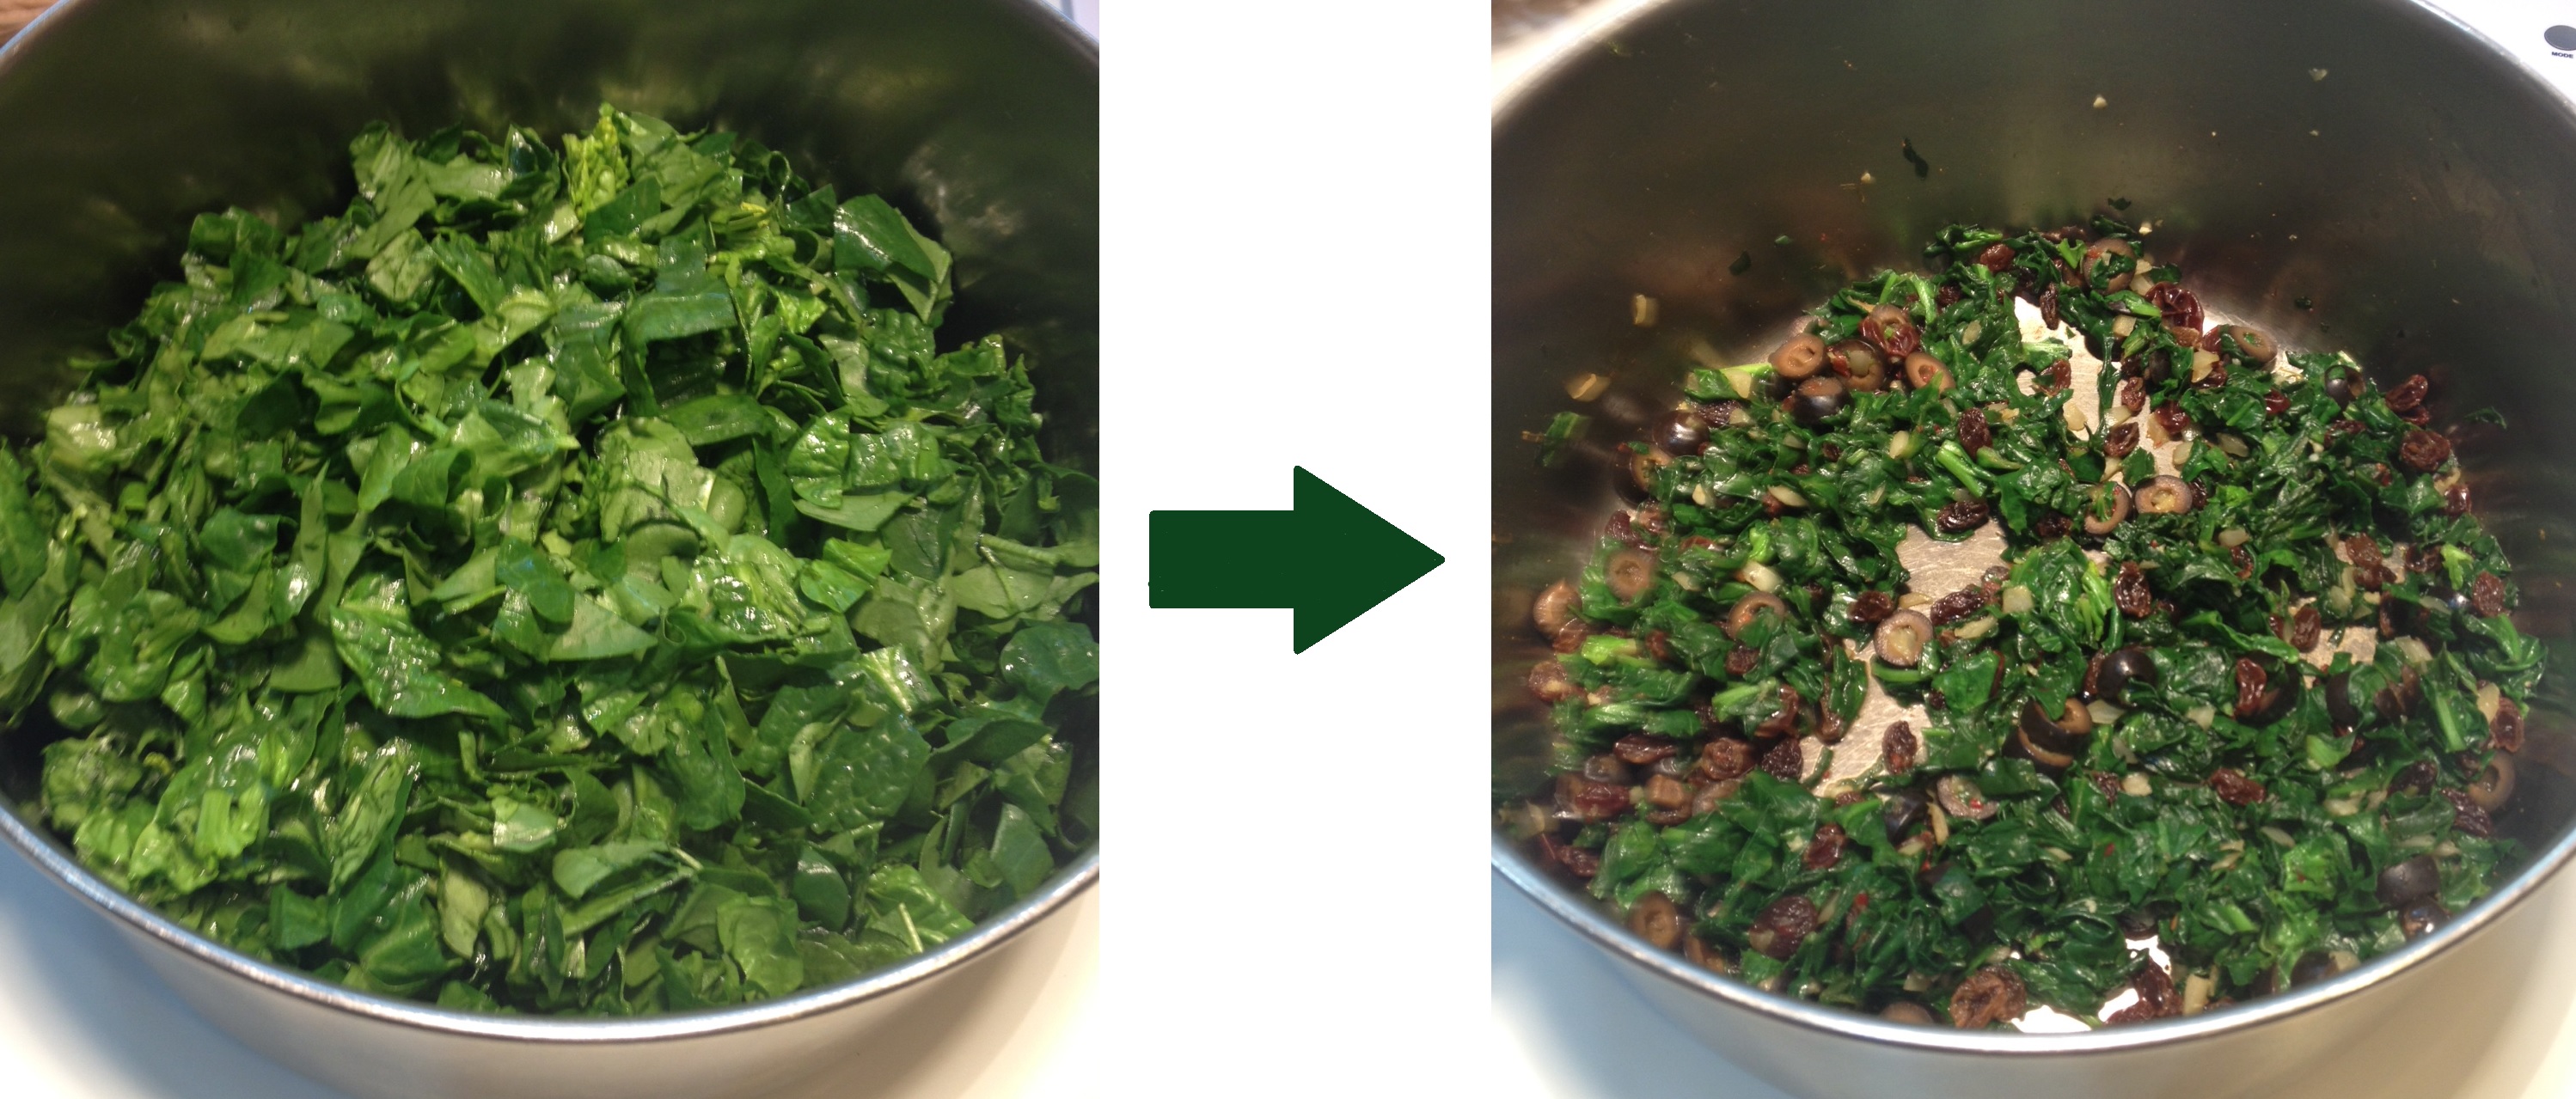
In a large pot heat the 1 T olive oil. Sauté the onions, garlic, and cayenne pepper for 5 minutes. Add in the olives, raisins, ground pepper, and spinach. Cook until the spinach is wilted and the liquid boils down a bit. (If you’ve never cooked fresh spinach before, you’ll be amazed by how much the spinach wilts – see photo.) There will still be some liquid – don’t worry about it.

Raw spinach wilts down to nothing.

Raw spinach wilts down to nothing.

Mix the mozzarella and 3 T olive oil together in a bowl.

Preheat oven to 400º Fahrenheit.

When dough has risen, take two thirds of the dough and, on a well floured board, roll into a rectangle large enough to cover the bottom and sides of an 8″x 10″ casserole dish (or comparable size). Liberally grease the casserole dish with olive oil, then carefully place dough. Brush dough with more olive oil.

Tilt the pan containing the spinach, allowing the liquid to drain away. With a slotted spoon, remove the mixture and spread evenly on top of dough. Then sprinkle on cheese.

Roll out the remaining dough into a rectangle large enough to cover top. Lay this piece in place, and roll the edges of the bottom and top dough together. The filling is now completely encased.  You can brush the top with olive oil, water, milk, or an egg wash, if you like. Make 3 slits in the top dough.

Bake at 400º Fahrenheit for 35 minutes.