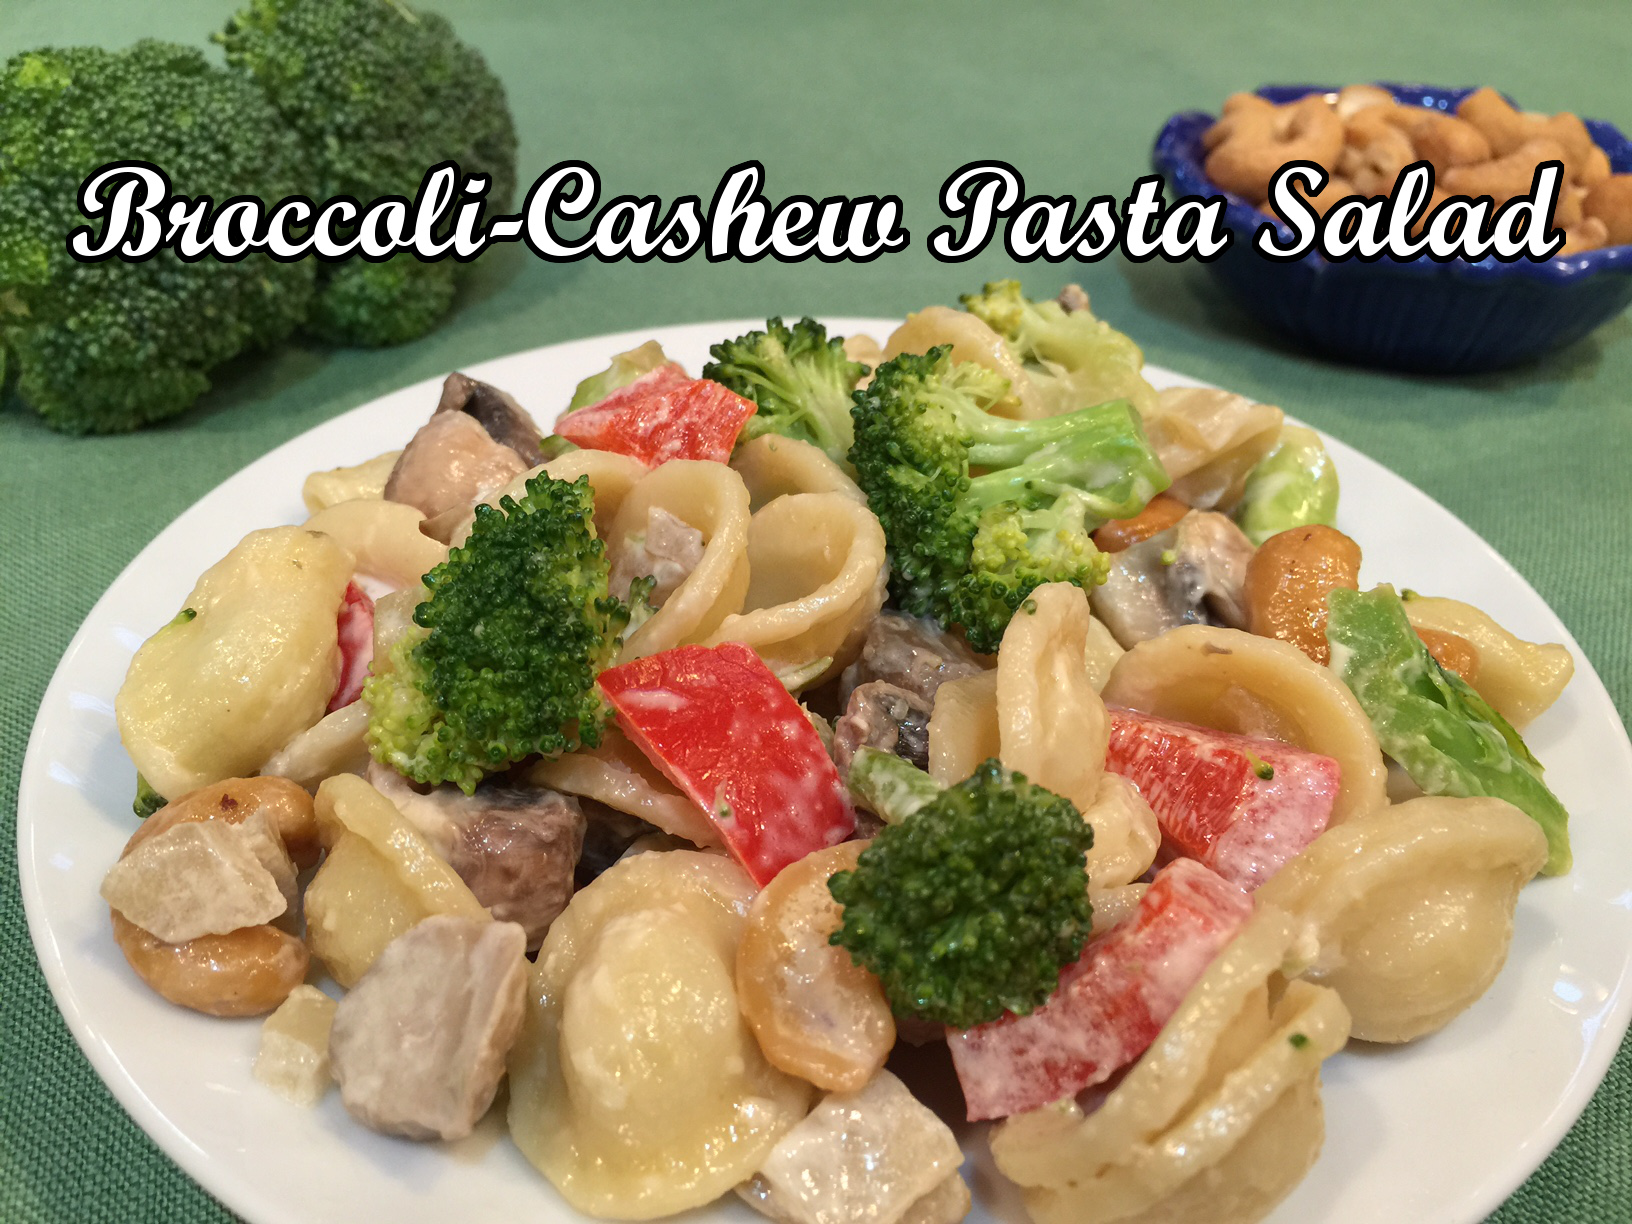
GINGERBREAD COOKIES WITH CHOCOLATE CHIPS – Chewy Goodness!

gingerbread cookies text
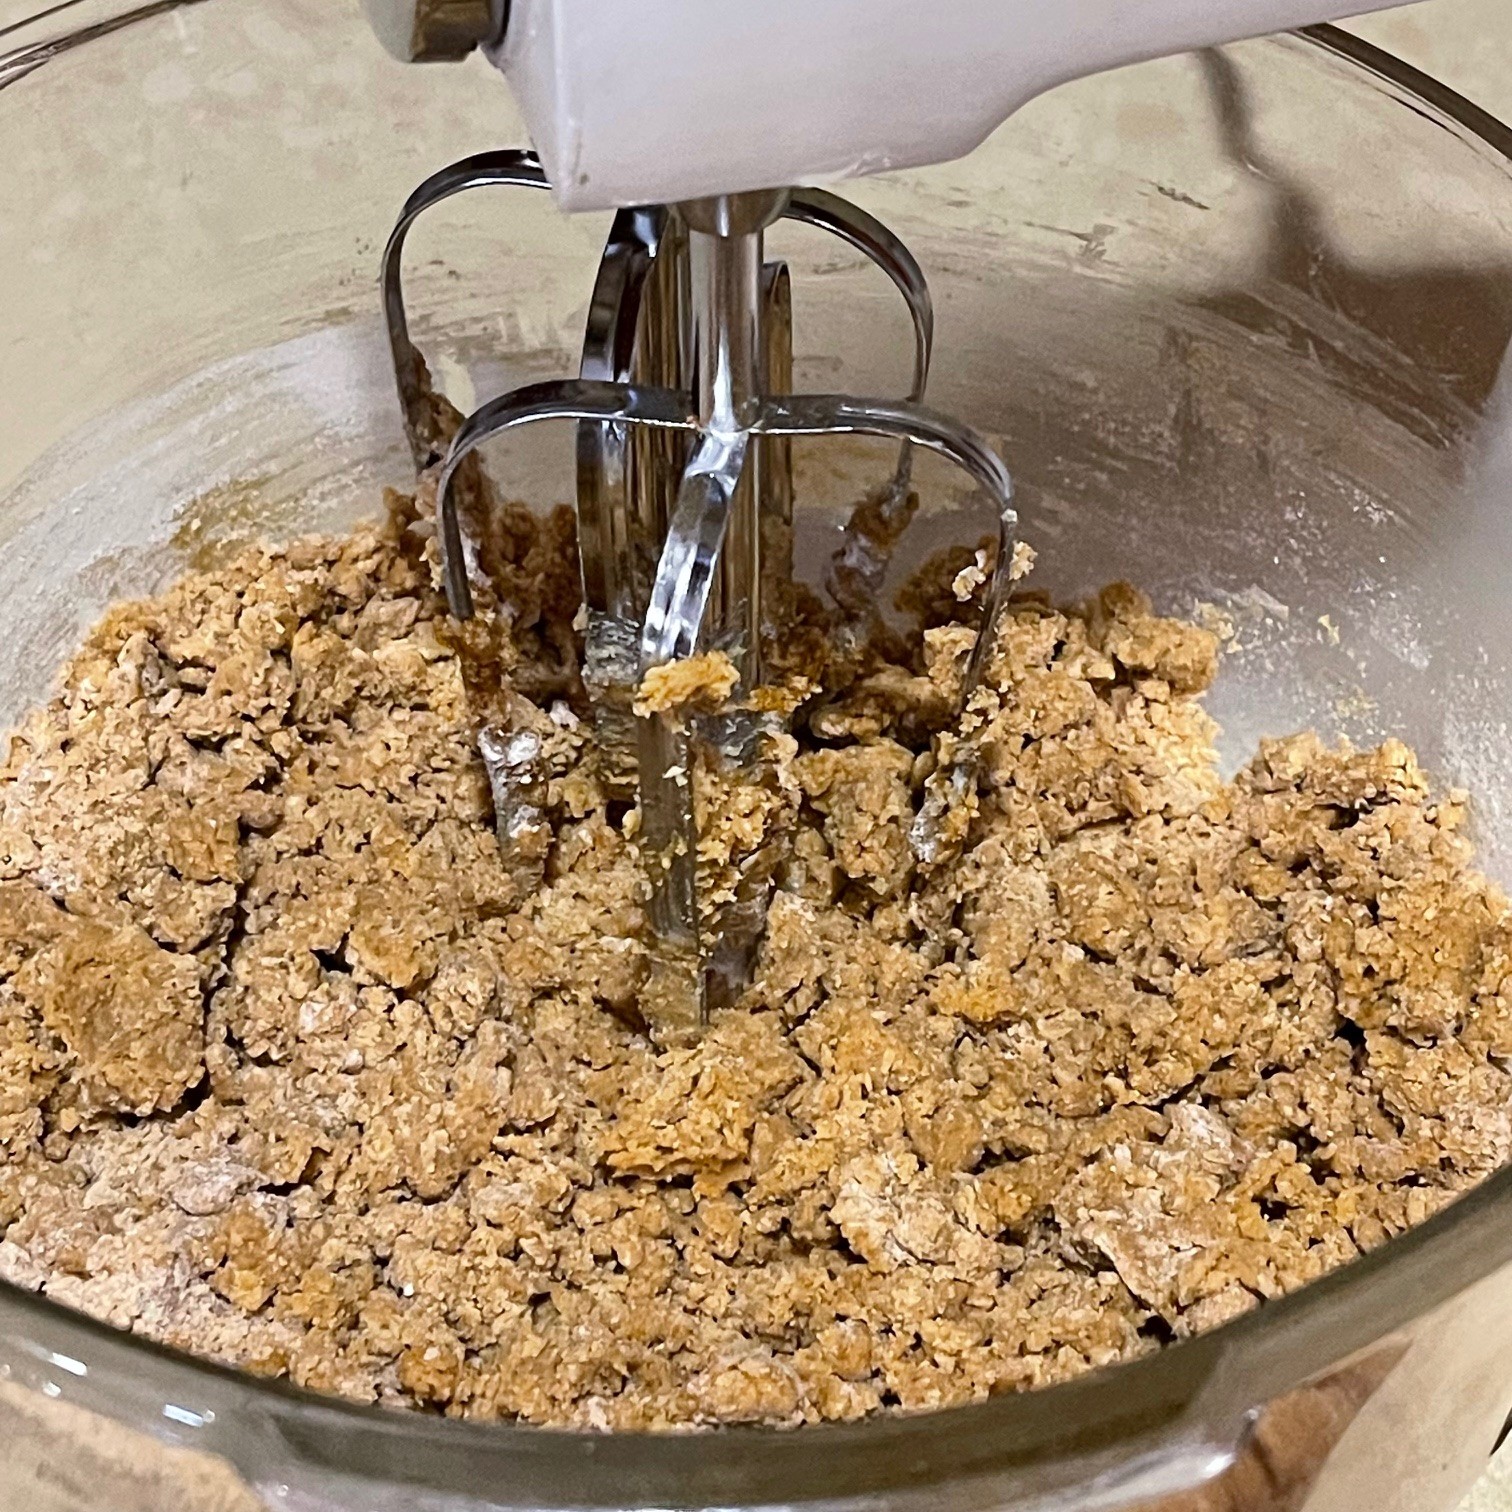
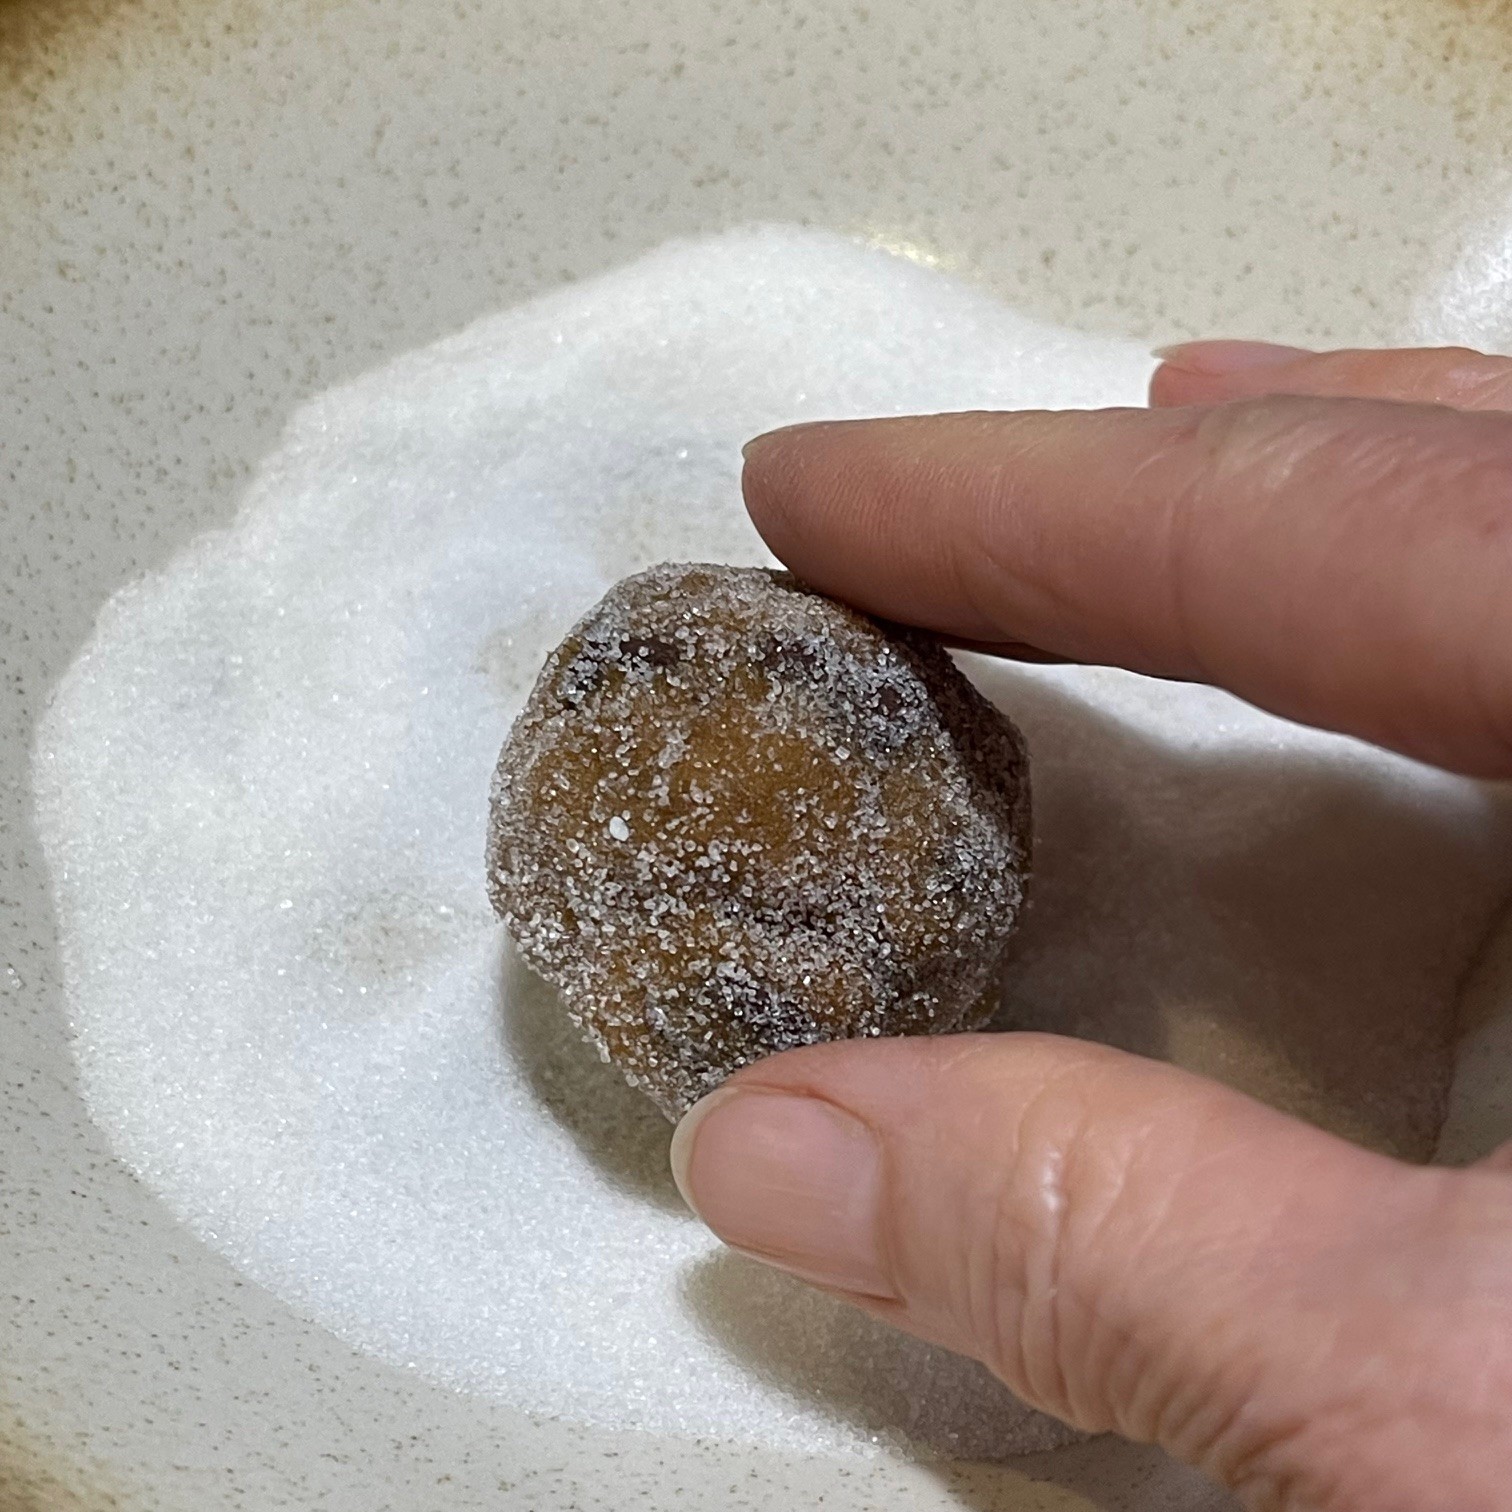
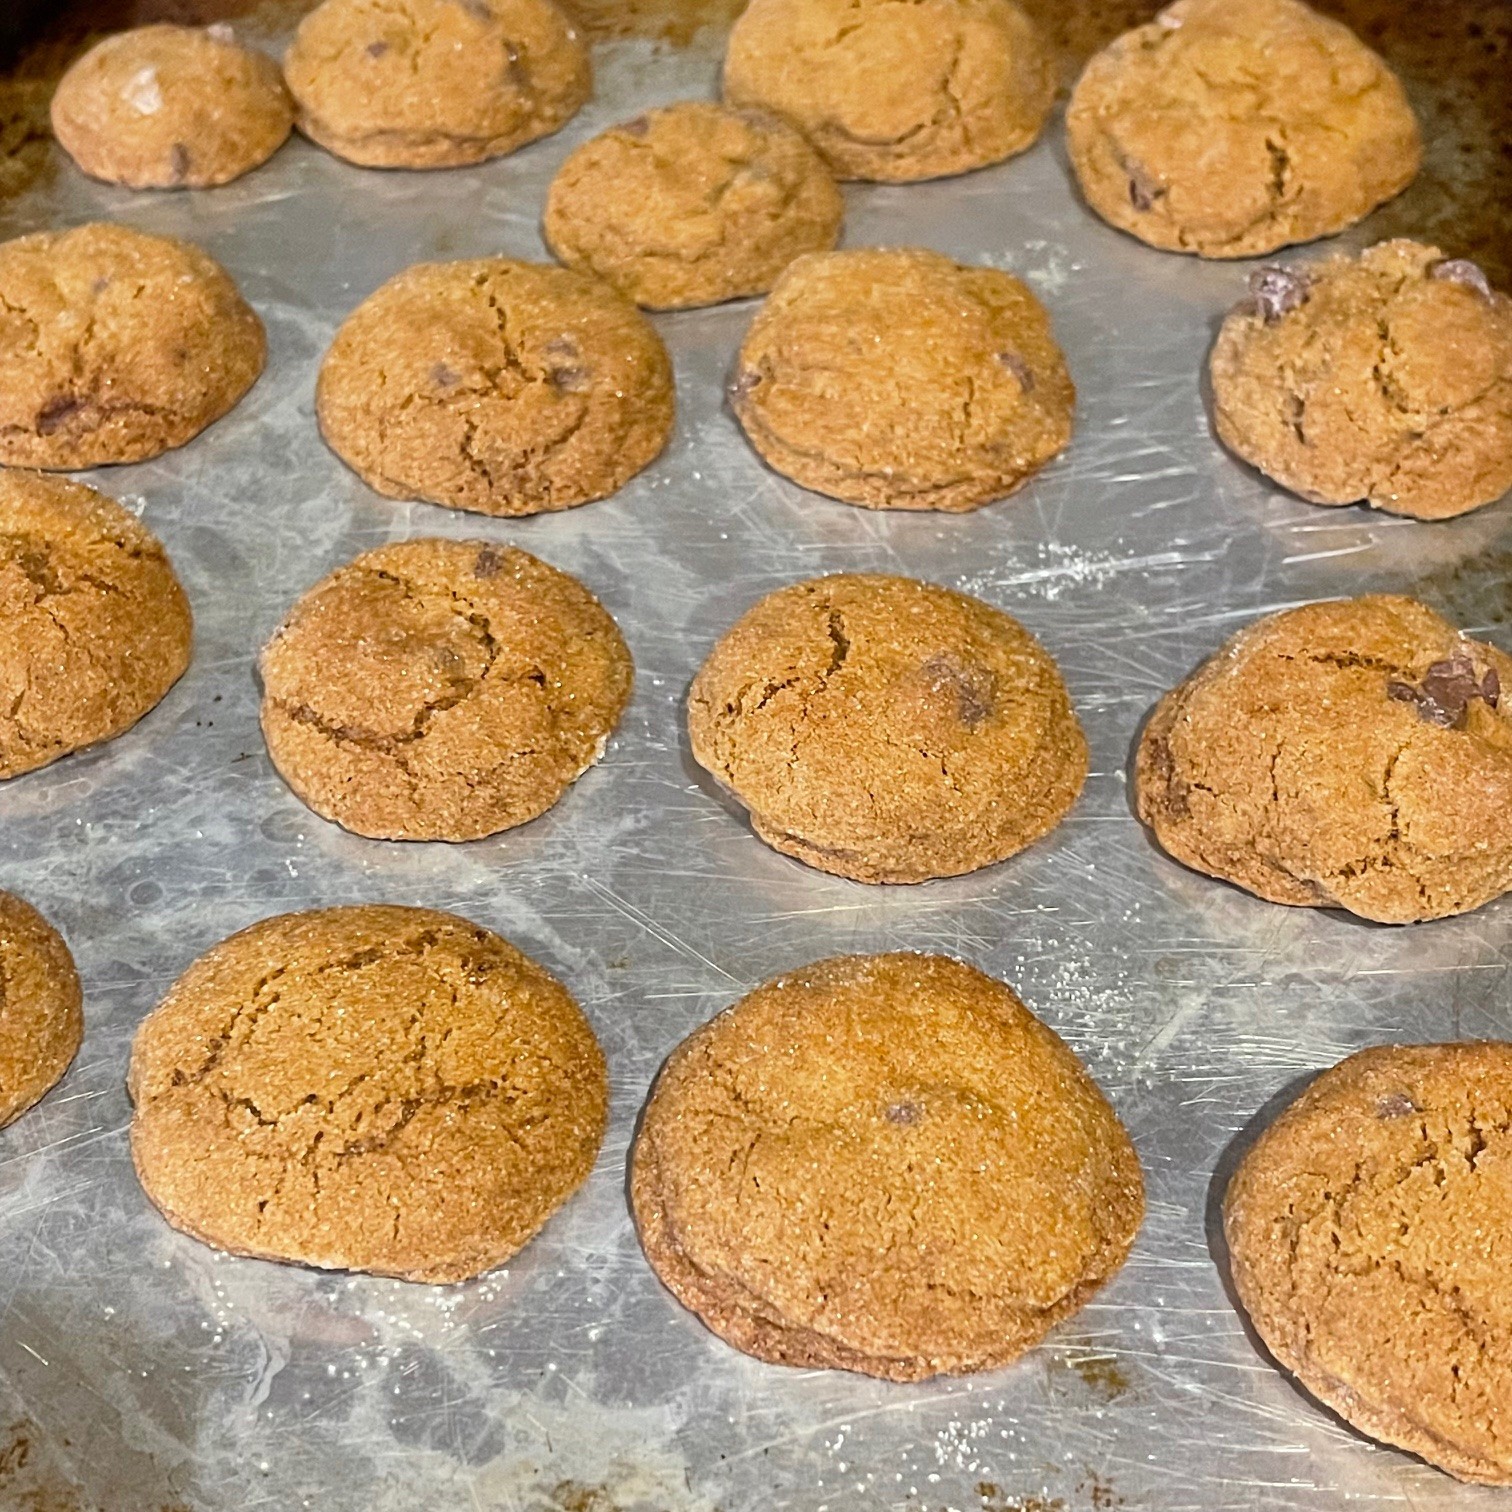
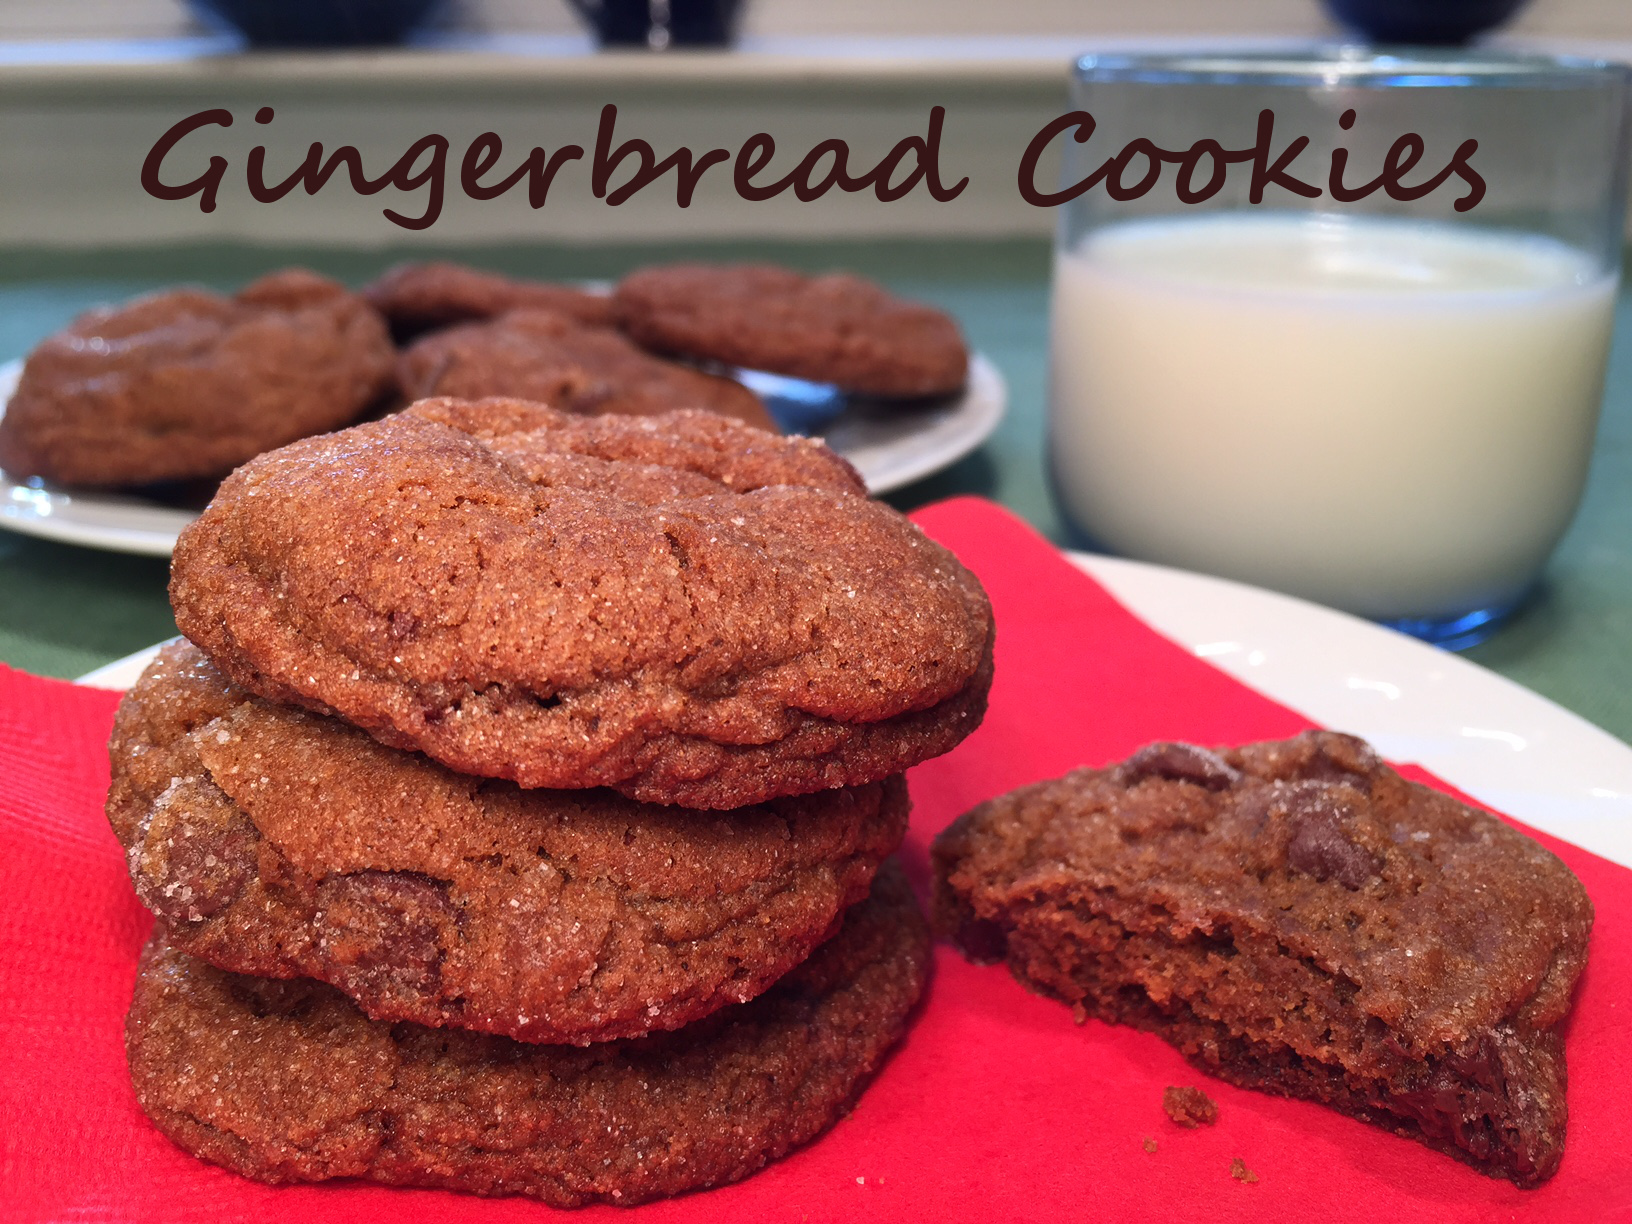
Gingerbread Cookies with chocolate chips are my kids’ favorite. They’re soft cookies with a flavorful bite from ginger, cloves, and cinnamon. The chocolate chips balances them out with with a creamy sweetness.

Once the dough is made, it needs to be refrigerated and then rolled into balls – a great task for little ones (with very clean hands) who want to help. At this point, the dough can be frozen, ready and waiting to be popped in the oven for a last minute dessert.

GINGERBREAD COOKIES WITH CHOCOLATE CHIPS – makes about 3 dozen

  • 2¼ cup (265g / 9.25 oz) all-purpose flour
  • 2 tsp baking soda
  • 1½ tsp dried ginger powder
  • 1¼ tsp cinnamon
  • 1/2 tsp ground cloves
  • 1/2 tsp salt
  • 3/4 cup (168g) butter, softened
  • 1 cup (168g / 6 oz) dark brown sugar, packed
  • 1 egg
  • 1/4 cup (75g by weight / 2.5oz) molasses
  • 1 cup (155g / 5.4 oz) semi-sweet chocolate chips
  • about 1/3 cup granulated sugar for rolling dough into

In a small bowl combine the flour, baking soda, ginger, cinnamon, cloves, and salt. Set aside.

Using a standing mixer, cream butter and brown sugar for 3 minutes at medium-high. Don’t short-change this – you want the batter to blend together.

Mix in egg and molasses. This will take 1-2 minutes to get to a creamy texture.

I

Add the flour mixture to the batter on low speed until the flour is almost completely incorporated. It will be clumpy – this is normal.

Stir in chocolate chips on low speed, just until all the flour is incorporated and dough starts holding together.

Cover bowl (I use a plate) and refrigerate dough for 1 hour to make it easier to handle.

After the chill time is up, PREHEAT OVEN TO 375°F.

Remove chilled dough from fridge. If dough is too solid to work with, let it sit for a bit. You want it firm, but not rock-hard. Put the 1/3 cup sugar in a cereal bowl. Roll the dough into 1″ balls, then roll each ball in the sugar, coating it completely.

Place coated balls on a greased or parchment lined baking sheet as you go.

Bake at 375º Fahrenheit 10-12 minutes. Don’t overbake or you’ll get a dry cookie. Remember, they’ll continue to cook on the hot cookie sheet out of the oven. The edges should look done, but the center should look slightly underdone.

Let cookies set for 5 minutes before removing them to a wire rack to completely cool.

TIP: If you want to freeze the uncooked dough balls for future use (I’m AM the self-proclaimed Queen of Freeze, after all), put the dough balls (without rolling in sugar) on a non-greased cookie sheet and place in freezer until solid. Gather them into a container for storage. When ready to bake, roll them firmly into granulated sugar and place them on prepared cookie sheets, letting them thaw about 20 minutes. Bake as directed.

AREPAS – A Central American Favorite

arepas text
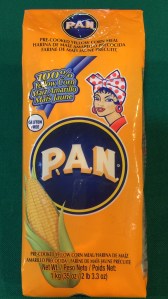
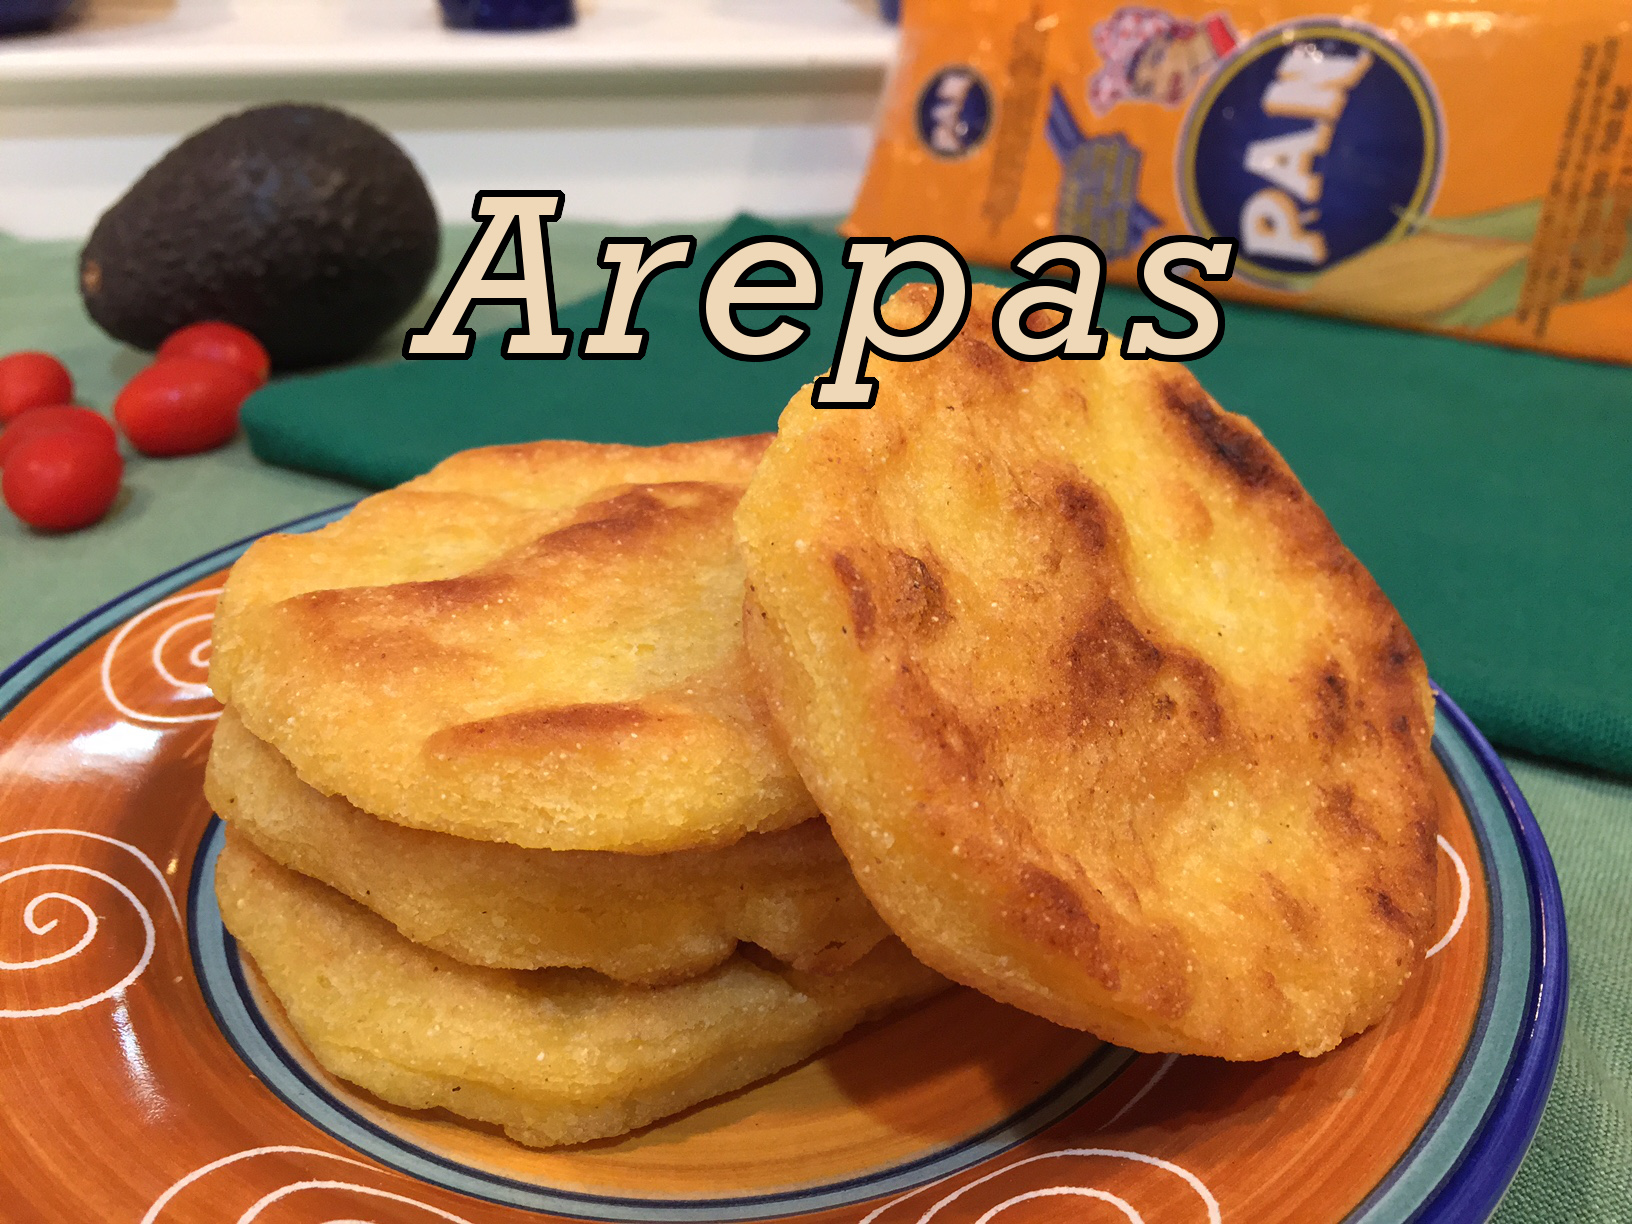
I’ve been on a mission to try making foods from scratch that you would normally never think of, such as tortillas (flour and corn), Italian rustic bread, yogurt, cream cheese, and pasta. I think you get the idea.

But all the aforementioned foods have been homemade for centuries, and without the aid of modern kitchen conveniences.  How hard could it be? So far – not very. Yes, it takes more time than buying ready-made, but at what price? When I cook, I know what’s in my food. Plus, the price mark-up is incredible. Did I mention that I’m cheap?

Arepas are cornmeal flat, round bread patties (like an English muffin) that are slit open and stuffed with whatever you like. I’ve included a recipe for my favorite filling. You can even spread them with jam or honey. Use your imagination. They are amazingly easy it make – even kids (with very clean hands) can prepare the dough.

NOTE: The most common masarepas is PAN Harina. Below is a photo of what I bought. PAN is a brand, but others make it, too. You may need to go to a specialty store for hispanic foods (I had to). PAN Harina is NOT the same as masa harina, which is used for corn tortillas.

FullSizeRender (18)

TIP:  Store masarepas, and all extra flours & grains, in the freezer until use to prevent bugs and keep them fresh. Bring to room temperature before using.

AREPAS – makes 6

  • 2 cups (310g / 10 6/8 oz) masarepas
  • 1 tsp salt
  • 1 tsp baking powder
  • about 2½ cups  (650 ml) water
  • about 1/4 cup (60 ml) vegetable oil

Put the masarepas, salt, and baking powder is a bowl. Use your dominant hand to mix it. (Yes, you’re going to mix the dough with your hand – it’s the easiest way.) With your non-dominant hand, pour in about 1 cup of the water. Slowly squish the mixture until water is absorbed. Add another cup of water and slowly squish. (If you squish quickly, the water squirts and makes a mess.) The end result should be a soft dough (softer than Playdoh), but not so soft that it sticks to your hand and won’t stay formed. Add more water, if needed…or more masarepas, if you’ve added too much.

Divide dough into 6 equal pieces. Shape each into a patty 4″ in diameter and about 1/2″ thick.

Preheat oven to 400º Fahrenheit.

Have ready a wire rack sitting on a cookie sheet.

Over medium flame, heat 2 T oil in a 10″ skillet, or 4 T oil in a bigger skillet. When oil is hot, place in as many discs that will fit. When bottom is browned (about 3 minutes), flip cooking again until browned. Place on wire rack. Add more oil to skillet with each batch.

When all arepas are fried, place cookie sheet into oven for 10 minutes. Remove and cool until you can slice them in half without burning yourself.

BLACK BEAN & RICE FILLING – makes about 2 cups

  • 1 cup cooked black beans, mashed
  • 1/2 cup cooked rice (I use Brown Rice Medley from Trader Joe’s)
  • 1/2 cup SALSA VERDE
  • 1/2 cup tomatoes, chopped
  • 1/2 cup avocado, mashed
  • 1/2 cup jalapeño jack cheese, shredded
  • 1/4 tsp salt
  • 1  2.25 oz can jalapeño sliced black olives

Blend all ingredients together.

PANZANELLA: It’s Fresh Tomato Time!

panzanella text2

Many of you know by now that I’m the self-proclaimed Queen of Freeze. Not only do I cook in bulk and then freeze the extras in portion sized containers for future use, but I also freeze unused ingredients that I don’t need at the moment – for example, egg whites when I only need the yolk, or the remaining tomato paste when I only need a tablespoon. I’ve been teased about my frugality, but these bits and bobs have saved a trip to the market many a time.

Quite often I have partial loaves of homemade bread laying in my deep freezer. I generally use them in bread pudding or an omelette casserole. But recently I found a recipe from America’s Test Kitchen for Panzanella, a bread and tomato salad.

It’s quite simple to make, but you need to allow 15 minutes for the bread cubes to toast and the tomatoes to drain, and 10 minutes for the toasted bread cubes to marinate in a vinaigrette, so plan your timing accordingly.

PANZANELLA – makes about 5 cups

  • 6 cups rustic Italian or French loaf, cubed in bite sized pieces
  • 8 T extra virgin olive oil, divided
  • 3/4 tsp salt, divided
  • 1½ lbs tomatoes
  • 3 T red wine vinegar
  • 1/4 tsp pepper
  • 1 cucumber, seeded and sliced
  • 1/4 cup fresh basil, chopped (TIP: chop in a cup using kitchen shears)
  • 1 shallot clove, sliced thin

Combine bread cubes, 2 T olive oil, and 1/4 tsp salt. Use your hands to mix – it’s easier than a spoon. Pour onto jelly roll pan and bake at 400º fahrenheit for 13-17 minutes (tossing midway), until browned.

While bread is toasting, slice tomatoes in half along the equator and poke with your finger to loosen seeds. Shake halves over sink to remove them. Chop tomatoes into bite sized pieces and put into a strainer that’s resting on a container to catch the juice. Make sure the bottom of the strainer isn’t touching the bottom of the container. Sprinkle on 1/2 tsp salt and mix with hands. The salt will draw out the excess juice. Let drain for, at least, 15 minutes. You’ll use the strained juice in the vinaigrette, so don’t throw it out!

Whisk together 1/4 cup of the strained tomato juice, 6 T olive oil, vinegar, and pepper in a large bowl. Add in the toasted bread cubes and mix to coat. Let marinate for 10 minutes.

To the bread cube marinade add the tomatoes, cucumber, basil, and shallots. Toss gently to mix and serve immediately.


TOMATO SOUP – Mmm Mmm Good…For Your Waistline!

tomato soup text

It’s that time of year when the temperature starts to rise and the clothing starts to shed. No more bulky sweaters to hide those extra pounds.

Years ago there was a soup commercial with a girl hanging a yellow polka dot bikini on her wall as incentive to stick to her diet. To aid in her endeavor, she would eat soup for lunch – all the while singing “she wore an itsy bitsy teeny weeny….”.

It’s really not a silly idea. Soup is low in calories and filling enough to get you away from the table unscathed by a grilled cheese sandwich and French fries.

I found an easy recipe from America’s Test Kitchen for creamy tomato soup – without the cream (or any dairy at all, for that matter). Of course, I adjusted it for vegetarians by substituting vegetable stock for chicken stock.

Here’s the important thing: DON’T BUY TOMATOES FROM A SUPERMARKET! They were picked green and have no flavor. Either grow them yourself, or buy them from a local farmer’s market. Otherwise, buy canned whole tomatoes (Muir Glen brand is rated best), which is what you’ll have to do most of the year.

TOMATO SOUP – makes about  5 cups

  • 3-4 T extra virgin olive oil, divided
  • 1/2 cup yellow onion, finely chopped
  • 3 garlic cloves, pressed
  • 1 bay leaf
  • 1/4 tsp red pepper flakes
  • 28 oz can whole tomatoes OR 2 lbs fresh Roma tomatoes
  • 3 slices white bread, crust removed
  • 1 T brown sugar (I used dark brown sugar)
  • 2 cups vegetable stock (here’s my recipe for homemade: VEGETABLE STOCK)
  • 2 T brandy (optional)
  • salt and pepper to taste (I used 1/2 tsp salt)

Heat 2 T oil in large saucepan, then add onions, garlic, bay leaf, and red pepper flakes. Sauté about 5 minutes.

Remove stem ends and any skins or impurities from tomatoes. Coarsely chop (don’t worry too much about this – they’re going in the blender eventually) and add to onions, continuing cooking.

Tear bread into pieces and stir into soup, along with brown sugar. Cover pot and let simmer 5 minutes. Remove lid and cool 15 minutes. DISCARD BAY LEAF!! This is very important – you don’t want it blended with the soup or you’ll have to throw it out.

Purée the soup in a blender. Depending on the size of the pitcher, this will require 1-2 batches. With each batch, add in 1 T olive oil before blending.

Clean out saucepan (or use another) and pour in puréed soup. Add in the vegetable broth and bring to a simmer, stirring until heated through. Stir in brandy, if using. Adjust seasoning, as needed.

GNOCCHI WITH BROWN BUTTER SAGE SAUCE

gnocchi 2

Making Potato Gnocchi from scratch sounds scarier than it really is. Honestly! Basically, all you have to do is make mashed potatoes, roll them into ropes, cut them into 1″ pieces, and boil them. You can even get the kids involved…or your spouse.

The potatoes need to be lump-free, so you’ll need either a ricer or a food mill. Another tool that is nice, but not essential, is a gnocchi board (see photo) to form the ridges. A fork will work if you don’t have one. (The ridges help hold the sauce.)

FullSizeRender (19)

A huge bonus to making gnocchi is they freeze well so, as long as you’re at it, you may as well make extra for those days when you lack the desire, time, energy, and desire (it bears mentioning twice!) to cook.

I’ve included a Brown Butter Sage Sauce recipe below, but you can top gnocchi with pesto, pink sauce, or anything you fancy.

POTATO GNOCCHI

  • 1.5 lbs (approximately) russet potatoes
  • 1 egg, beaten
  • 1 cup flour
  • 1 tsp salt

Peel and chop potatoes in thirds. Boil in salted water until easily pierced with a fork. Drain.

Immediately put the hot potatoes through a ricer or food mill. Stir in the salt and flour first, then the egg. (Adding the flour first cools down the potatoes a bit to prevent cooking the egg.)

Empty the potato mixture onto a well floured board and knead the dough for about 30 seconds to get it to stick together.

Have ready a cookie sheet lined with parchment or waxed paper and, if you’re going to be eating immediately, start the water boiling in a large pot.

Pull off kiwi sized (it really doesn’t matter is it’s not exact) hunks of potato dough and, on a well floured board, roll into a rope 1/2″ in diameter. If your rope is too long for your board, use a smaller hunk for the rest. Slice into 1″ segments. Form ridges by rolling each one along a gnocchi board or the backside of a fork, going towards the tip of the tines. The ridges help the sauce to adhere to the gnocchi. Place them on the cookie sheet, not touching. Continue until all dough is done.

When the water is fully boiling, drop in desired amount of gnocchi. Once they’ve all floated to the top, turn off heat and let them sit in water for 30 seconds. Remove the cooked gnocchi with a slotted spoon to the sauce. Save the gnocchi water to add to the sauce, as needed – the water will extend the sauce, and the flour will thicken it.

NOTE: If you don’t want to cook the gnocchi immediately, place cookie sheet in freezer. When gnocchi are frozen, store them in portion sized containers.

BROWN BUTTER SAGE SAUCE – for 2-3 servings

  • 4 T butter
  • 1 small shallot, minced
  • 1 tsp fresh sage, chopped
  • 1½ tsp lemon juice
  • 1/4 tsp salt

NOTE: Prepare the sauce just before cooking the gnocchi.

Melt butter in a 10″-12″ skillet over medium-high flame, swirling until butter turns amber and becomes aromatic (about 1½-2 minutes). Remove pan from burner and add in sage and shallots, stirring for 1 minute off-heat (the residual heat is enough to cook the sage and shallots). Blend in salt and lemon juice. Cover to keep warm.

Spoon cooked gnocchi directly into sauce. Add gnocchi water, if needed to expand the sauce.

Top with a grated hard cheese such as Pecorino-Romano, if you like.


QUINOA STUFFED EGGPLANT – Get Ready For Summer!

quinoa stuffed eggplant text

Last week I wrote about CHOCOLATE WACKY CAKE after being asked to use and critique a coconut balsamic vinegar. I know vinegar, particularly balsamic, sounds like a crazy ingredient for a chocolate cake, but it’s amazing – try it, and thank me later.

This week I’m posting about about QUINOA STUFFED EGGPLANT, which also calls for vinegar. It’s an easy recipe, and excellent to add to your repertoire for when your friends come calling with bags of eggplant from their garden.

NOTE: You can substitute rice or sorghum for the quinoa.

QUINOA STUFFED EGGPLANT

  • 1 large eggplant, or 2-3 smaller ones
  • 1 T olive oil
  • 1/2 c quinoa, raw
  • 1 cup onions, chopped
  • 3 garlic, pressed
  • 1 T fresh basil, chopped
  • 1/4 tsp cinnamon
  • 1/8 tsp cayenne pepper
  • 1 lb Roma tomatoes, chopped
  • 1 cup hard cheese (such as Parmesan, Romano, or Pecorino-Romano), grated
  • 2 T pine nuts, toasted
  • 2 tsp red wine vinegar
  • 2 T parsley, chopped

Slice eggplant in half lengthwise. Score each half by making slashes diagonally through pulp, half an inch apart. Do the same going the opposite way. MAKE SURE YOU DON’T CUT THROUGH THE SKIN! Brush a liberal amount of olive oil on cut sides, then sprinkle with salt and pepper.

Line a cookie sheet with parchment paper and place the eggplant cut side down. Bake on lowest rack at 400º for 40-50 minutes, until softened. Drain by laying the eggplant cut side down, on a terry cloth towel that’s topped with a couple of layers of paper towels.

Cook quinoa according to package directions.

Sauté onion in the 1 T olive oil. Add garlic, basil, cinnamon, cayenne, and 1/2 tsp salt. Cook 30 seconds only, then stir in cooked quinoa, tomatoes, 3/4 cup cheese, pine nuts, and vinegar.

Turn eggplant cut side up, and smash down pulp with a spoon to make eggplant into a bowl. Divide the quinoa filling between the eggplant halves, compacting and mounding it.

Top with remaining cheese and return eggplant to parchment lined cookie sheet. Bake at 400º in the upper third of oven for 5-10 minutes, until cheese browns.

Sprinkle on fresh basil and serve.

WACKY CAKE: It’s Crazy Good!

IMG_2354

I was recently asked to try a coconut balsamic vinegar and give my opinion. I used it in recipes you’d expect: Apple Sorghum Salad, Quinoa Stuffed Eggplant, and Roasted Garlic Brussels Sprouts. But, I also wanted to do a think-outside-the-box dish. A dessert perhaps? WHAT????

Then I recalled a chocolate cake recipe, called Wacky Cake, I found years ago in a lady’s club cookbook. At the time, I thought it was so named because all of the ingredients were put in a bowl and mixed at once. Now that I have made MANY cakes from scratch, I realize it’s because there are NO eggs, butter, or milk. Crazy, right?!

Wacky Cake came into frugal existence during the days of rationing, when these ingredients were hard to come by. The recipe called for cocoa, oil, baking soda, sugar…and white vinegar. At first glance, vinegar sounds like a horrible ingredient for a chocolate cake. But then I remembered, you can make buttermilk by combining milk with vinegar. So suddenly the vinegar didn’t seem so odd….until I realized there was no milk in this recipe. Hmmmm.

Since I’d made the cake before and knew it tasted good, I decided to take a chance and use the coconut balsamic vinegar. (I like to live on the edge….or, at least, nearby.)

Believe it or not, the Chocolate Wacky Cake came out utterly delicious! It was moist, firm, rose beautifully, and chocolaty. Day 3 tasted just as good as Day 1. There was no Day 4.

I topped it with a  Brown Sugar Frosting (Betty Crocker’s recipe), which was the perfect complement to the rich chocolate. I’ve included the recipe below.

Note:  You can make 29 cupcakes from this recipe.  Bake them at 350º F for about 17 minutes.

CHOCOLATE WACKY CAKE

  • 1 T instant coffee granules (you can probably use 1 cup of coffee & dilute it with 1 cup water if you don’t have the granules – but I’ve never done this myself)
  • 2 cups (473g) water
  • 2 cups (387g) granulated sugar
  • 1/2 cup (41g) unsweetened cocoa powder
  • 1 tsp salt
  • 2 tsp vanilla
  • 2/3 cup (165ml / 141 grams by weight) vegetable oil
  • 3 cups (364g) all-purpose flour
  • 2 tsp baking soda
  • 2 T vinegar (I’ve used both white and balsamic)

Preheat oven to 350º F (177°C) and grease and flour a 9″ x 13″ (23cm x 33cm) pan.

Into a large mixing bowl, add the coffee granules. Bring the water to a boil and stir into the coffee granules.


Add in the sugar, salt, cocoa powder, vanilla, and oil, stirring to blend by hand.

Add in the flour, baking soda, and vinegar. If using an electric mixer, use low speed and blend just until flour is incorporated – don’t over mix.

Pour into a greased and floured 13″x 9″ (23cm x 33cm) baking pan, tapping the filled pan 2 or 3 times on the counter to remove any air pockets.

Place in preheated 350°F (177°C) oven and bake for 30-40 minutes, until top springs back when lightly pressed. Also, if you put the pan close to (BUT NOT TOUCHING!) your ear, you can hear a faint crackling sound if it’s not done. If you hear the crackling, return pan to the oven for another minute and check again until the sound disappears – mine baked for 34 minutes. Let cool completely before frosting.

BROWN SUGAR FROSTING – covers a 13″x 9″ cake

  • 1/2 cup (112g) (1 stick) butter
  • 1 cup (148g) dark brown sugar, packed
  • 1/4 (49g) cup milk
  • 2 cups (217g) powdered sugar, measure before sifting

In a saucepan melt butter. Over medium heat, stir in brown sugar and bring to boiling. Lower flame to low and stir constantly for 2 minutes. Add milk, increase heat, and bring to boil. Then, remove from heat and let cool for 30 minutes.

Sift powdered sugar to prevent lumps. Gradually stir into butter/sugar. If you let the butter/sugar cool too long and it’s not mixing well into the powdered sugar, just put it in the microwave for about 30 seconds and try blending again. You may need to zap it another 15 seconds or so.

Place saucepan into a bowl of ice water, and stir continuously until spreadable, but not too thick.

Frost cake. Let set at least 20 minutes before slicing.

MINI YORKIES: Fun Sized Yorkshire Puddings

mini yorkies text

As promised in last week’s TOFU ST. JACQUES A LA BONNIE post, this week I’m writing about Mini Yorkshire Puddings, which were the container for this scrumptious dish. (Often, puff pastry shells are used, but who needs the fat and calories!)

Yorkshire Pudding is traditionally made in a large pan, using drippings from whatever roast you’re cooking. But the sides would became tall and crispy, while the large center sunk and was kind of flabby and tasteless. Since the best part of the pud is the crispy edge, baking Yorkshire Pudding in muffin tins has gained in popularity.

I tried different ratios of eggs to milk to flour, achieving the best texture for my palate.

I also experimented with shortening versus butter versus oil to grease the cups. Shortening won that contest – it yielded a crispier pudding.

The final variable was whether to flour the sides. It didn’t seem to matter that much – both versions were crispy, however, the floured ones were very slightly taller. Since flouring muffin tins is kind of a messy task, it wasn’t worth the effort to me.

NOTE: The batter needs to rest for at least 30 minutes before baking, so plan accordingly. They need to be served immediately.

MINI YORKSHIRE PUDDINGS – makes 12

  • 4 eggs
  • 123g (1½ cup) milk (I used nonfat)
  • 3/4 tsp salt
  • 186g (1½ cup) all purpose flour
  • 1 T vegetable oil

Into a bowl beat the eggs and milk. Whisk in the salt and flour until fairly smooth (some small flour lumps are acceptable). Place a plate over bowl and let rest for, at least, 30 minutes.

With rack in middle position, turn oven to 450º F.

While oven is heating, grease cups (sides and bottoms) of a 12-cup muffin tin with shortening.

In a small saucepan pour 1 T vegetable oil. As the oven gets close to 450º F, heat up the oil and drizzle it into the batter, whisking continuously. Pour batter into a container with a spout (such as a pitcher or measuring cup) to make it easier to fill the muffin cups. Fill each cup halfway to start, then go back and evenly divide the remaining batter amongst the cups.

When oven is at 450º F (don’t jump the gun!), put muffin tin in oven and set timer for 20 minutes. Do not open door!!! (The cool air will prompt the puds to deflate a bit.)

After 20 minutes, reduce temperature to 350º F and set timer for 7 minutes. Again – do not open door!!! Turn on oven light and peer through door to see if they’re well browned. If they look satisfactory, open door, pull out rack, and pierce tops with a skewer to allow steam to escape. Remove tin from oven and empty Yorkies into a bread basket.

Eat immediately – they’re at their best when fresh and hot. However, if you have leftovers, you can reheat them for a couple of minutes in a toaster oven (or standard oven, if you don’t have one).

TOFU ST. JACQUES A LA BONNIE: OoLaLa!

tofu st jacques text

Throughout our marriage, my husband’s dinner choice for special occasions has always been Coquilles St. Jacques á la Parisienne (scallops in a white wine sauce).

Being a vegetarian, once I discovered fake (or, ‘faux’, since we’re talking French here) meats, Skallops and its like were substituted. These worked well since real scallops taste kind of fake anyhow.

Don’t get me wrong, I love imitation products – at least, SOME of them (you have to experiment). They talk you off the ledge when you crave your mom’s chicken casserole or spaghetti with meat sauce. Also, they allow you to revive those recipes you thought were unusable in the vegetarian world. BUT…they are a processed food and, as such, I try and limit them to once or twice a week.

So, I decided to try extra firm tofu in place of the fake scallops. It actually works quite well. True, tofu doesn’t have the chew of imitation scallops, but it blends quite well with the mushrooms and white wine sauce, and makes a tasty alternative. I added in diced pimentos for a little extra flavor and color. (Quel horreur!)

The final change I made (which you don’t have to) is replacing the high fat, calorie laden puff pastry shells usually used to contain the St. Jacques, with mini-Yorkshire puddings. The recipe for my Mini-Yorkies will be in next week’s blogpost.

TOFU ST. JACQUES A LA BONNIE – makes about 3 cups

  • 1 block extra-firm tofu
  • 175g (3/4 cup) vermouth
  • 261g (2 cups) mushrooms (5 oz), chopped
  • 1 tsp salt
  • 1/4 tsp white pepper
  • 1 bay leaf
  • 30g  (1/4 cup) shallots, finely chopped
  • 3 T butter
  • 30g (4 T) flour
  • 183g (3/4 cup) milk (I use half cream, half nonfat milk – don’t judge!)
  • 2 egg yolks
  • 1½ tsp lemon juice
  • 45g (1/2 cup) (2 oz) Emmentaler Swiss cheese, grated
  • 44g (2 oz jar) diced pimentos, drained
  • 4 puff pastry shells or mini Yorkshire puddings

Remove tofu from package and extract liquid by sandwiching it between 2 plates for 30 minutes, at least. Pour off water periodically. Cut into 1/2″-3/4″ cubes.

Into a skillet place the tofu, vermouth, mushrooms, salt, pepper, bay leaf, and shallots. Top with about 1 cup of water. Bring to a boil, reduce flame to simmer, cover skillet, and cook 5 minutes.

With slotted spoon, remove the tofu and mushrooms to a bowl. Boil down liquid to 1 cup. Remove bay leaf and discard.

In a small bowl whisk the egg yolks. Set aside.

Melt butter in a saucepan. Turn off heat and carefully mix in flour to make a paste. It’s best to use a flat-headed wooden spoon for this to mash out all lumps. This is the only chance you have to get rid of lumps – once you add liquid, they’re there for good. When the roux (paste) is perfectly smooth, cook it over a low heat for 1 minute.

Turn heat to medium and pour milk and reduced vermouth liquid into the roux. Stir often until sauce begins to thicken. Turn off heat. Slowly drizzle about 1/2 cup of this sauce into the egg yolks, whisking constantly so they don’t curdle. Turn the flame to medium again under the saucepan, and pour the yolk mixture back into the sauce, stirring constantly until thick – about 1 minute.

NOTE: You never introduce egg yolks directly into a hot liquid – they’ll cook. Rather, you temper the yolks by slowly introducing a small amount of hot liquid into them, and then pouring them into the sauce.

Add the lemon juice, cheese, and pimento to the sauce. Taste and season, if needed. (I never do.)

Blend the tofu mixture and sauce together in the skillet – off heat.

Bake the puff pastry shells or mini-Yorkshire puddings. Just before they’re done, heat up the tofu mixture. If using puff pastry shells, remove the center holes and doughy bits inside; if using the Yorkies, split open. Pour the heated TOFU ST. JACQUES A LA BONNIE on top and serve.

SALSA VERDE – Could NOT Be Easier!

Salsa Verde with text

I finally decided to woman-up and learn to make salsa. This was one of the few food items it never occurred to me to make. For one thing, I don’t use salsa that often.  And, for another, I envisioned lots of ingredients and lots of mincing.

But after washing and storing yet another plastic container that held my favorite store-bought salsa, I made up my mind to make my own. (I was running out of storage space – and, really, how many containers does one need?!)

I did my usual research of various recipes and then came up with my own – fine tuning it after the first attempt. I was surprised at just how easy salsa is to make. Since Salsa Verde was a success, next time:  Salsa Roja!

SALSA VERDE – makes 2 cups

  • 1/2 lb fresh tomatillas
  • 1 jalapeño chili
  • 1 green bell pepper
  • 57g (1/2 cup) white onion, chopped
  • 3 T fresh cilantro
  • 1 T fresh parsley
  • 1/2 tsp salt
  • 1 tsp lemon juice
  • 1 tsp lime juice
  • 1/4 tsp ground cumin
  • 1/4 cup water

In upper third of oven, broil the tomatillas, jalapeño, and bell pepper. When tops start turning black, flip them until that side turns black, too.

Remove stem ends of jalapeño and bell pepper. Slice open and discard seeds.

Place all ingredients into a blender or food processor. Pulse on a high speed until salsa is consistency you like. Adjust seasoning, if needed.