Homemade English Muffins topped with strawberry jam
Whether it’s because spring-cleaning is in the air, or the fact that I’m being suffocated by the abundance of unused possessions in my home, I’m on a Purge, with a capital ‘P’. To prevent me from getting sidetracked or feeling overwhelmed, I assign myself a manageable task-of-the-week. This is Week 12 and, I’m proud to say, I’ve remained on point! As my house is being cleansed, thrift shops have been the benefactors of car loads of my discards. Win-win!
Recently I tackled my kitchen desk. One of the drawers contained a lifetime of recipes clipped optimistically from newspapers and magazines, only to be tossed on the pile and forgotten. (You’ve got that pile, too – I know you do!)
Not only did ridding myself of about two thirds of this paper potpourri gain me an organized drawer, but it also reminded me of recipes I’d forgotten. One was my mom’s Curried Cheese And Olive Spread served on English Muffins, and the another was for……English Muffins. Who am I to thwart fate? When she beckons, I come – or, in this case, cook.
Yeast holds no fear for me, so I decided to start with the English Muffins and make the Curried Cheese And Olive Spread for next week’s blog. While I won’t go so far as to say my English Muffins were better than store-bought, they were delicious.
You may be asking why I bother to make something from scratch when I can simply buy the taste equivalent in the market. Well, there are 2 main reasons why I make things from scratch: 1) I like to know what’s in my food – I don’t want preservatives, or bugs, or ingredients that are unpronounceable; and 2) to save money. What it boils down to is I’m a bit paranoid, and I’m cheap.
While English Muffins are extremely easy to make, they take about 3 hours start to finish. This is because of the rising periods – 2 hours for the first, and 1/2 hour for the second. The actual hands-on time is very minimal.
ENGLISH MUFFINS – makes 6 standard size, or 12 minis
- 3/4 tsp active dry yeast
- 1/2 cup water
- about 1½ cups all-purpose flour
- 1/2 T salted butter, softened
- 1/2 tsp sugar
- 1/2 tsp salt
- cornmeal for sprinkling (about 3 T)
Heat water to approximately 100º Fahrenheit. Mix in yeast and let proof several minutes.
Put 1 cup flour, the butter, sugar, and salt into the workbowl of your food processor. When yeast is foamy, turn on the machine and slowly pour in the yeast water. Add in remaining flour one tablespoon at a time – just until the dough starts to form a ball. You probably won’t use all of the flour. Continue to run machine another 30 seconds to knead the dough. If you don’t have a food processor you’ll have to do this by hand. Then start haunting the thrift shops for used machines.
Pour dough onto a floured board. Pick up dough from the floured bottom and fold dough onto itself so the sticky part is encased. Press into a greased bowl, then pick up dough and replace in bowl upside down. Both sides are now greased. Cover and let rise for 2 hours. (This is longer than most breads – you want the air pockets.)
Empty dough onto the floured board and cut into 6 equal pieces (or 12, if making minis). Stretch each piece into a 3″ circle for standard, or 1½” for mini. They’ll be about 3/8″ thick (don’t worry – they’ll rise).
Generously sprinkle cornmeal onto a large skillet or griddle. One by one, press each dough circle into the cornmeal, then flip them and press again. Arrange them in the skillet so they’re not touching. Cover with a tea towel and let rise 30 minutes.
Remove the tea towel and turn on flame to medium. Once the skillet is heated, turn down flame to medium/low. Cook about 5 minutes, until bottom is browned. Flip them and cook another 5 minutes, until browned. The the best way to be sure they’re done is to insert a thermometer through the side of one of the muffins into the center. They’re done at 200º Fahrenheit.
Remove to a wire rack to cool so they don’t get soggy.
The accepted way of splitting English Muffins is to poke a fork all the way around (see photo), then pull apart.
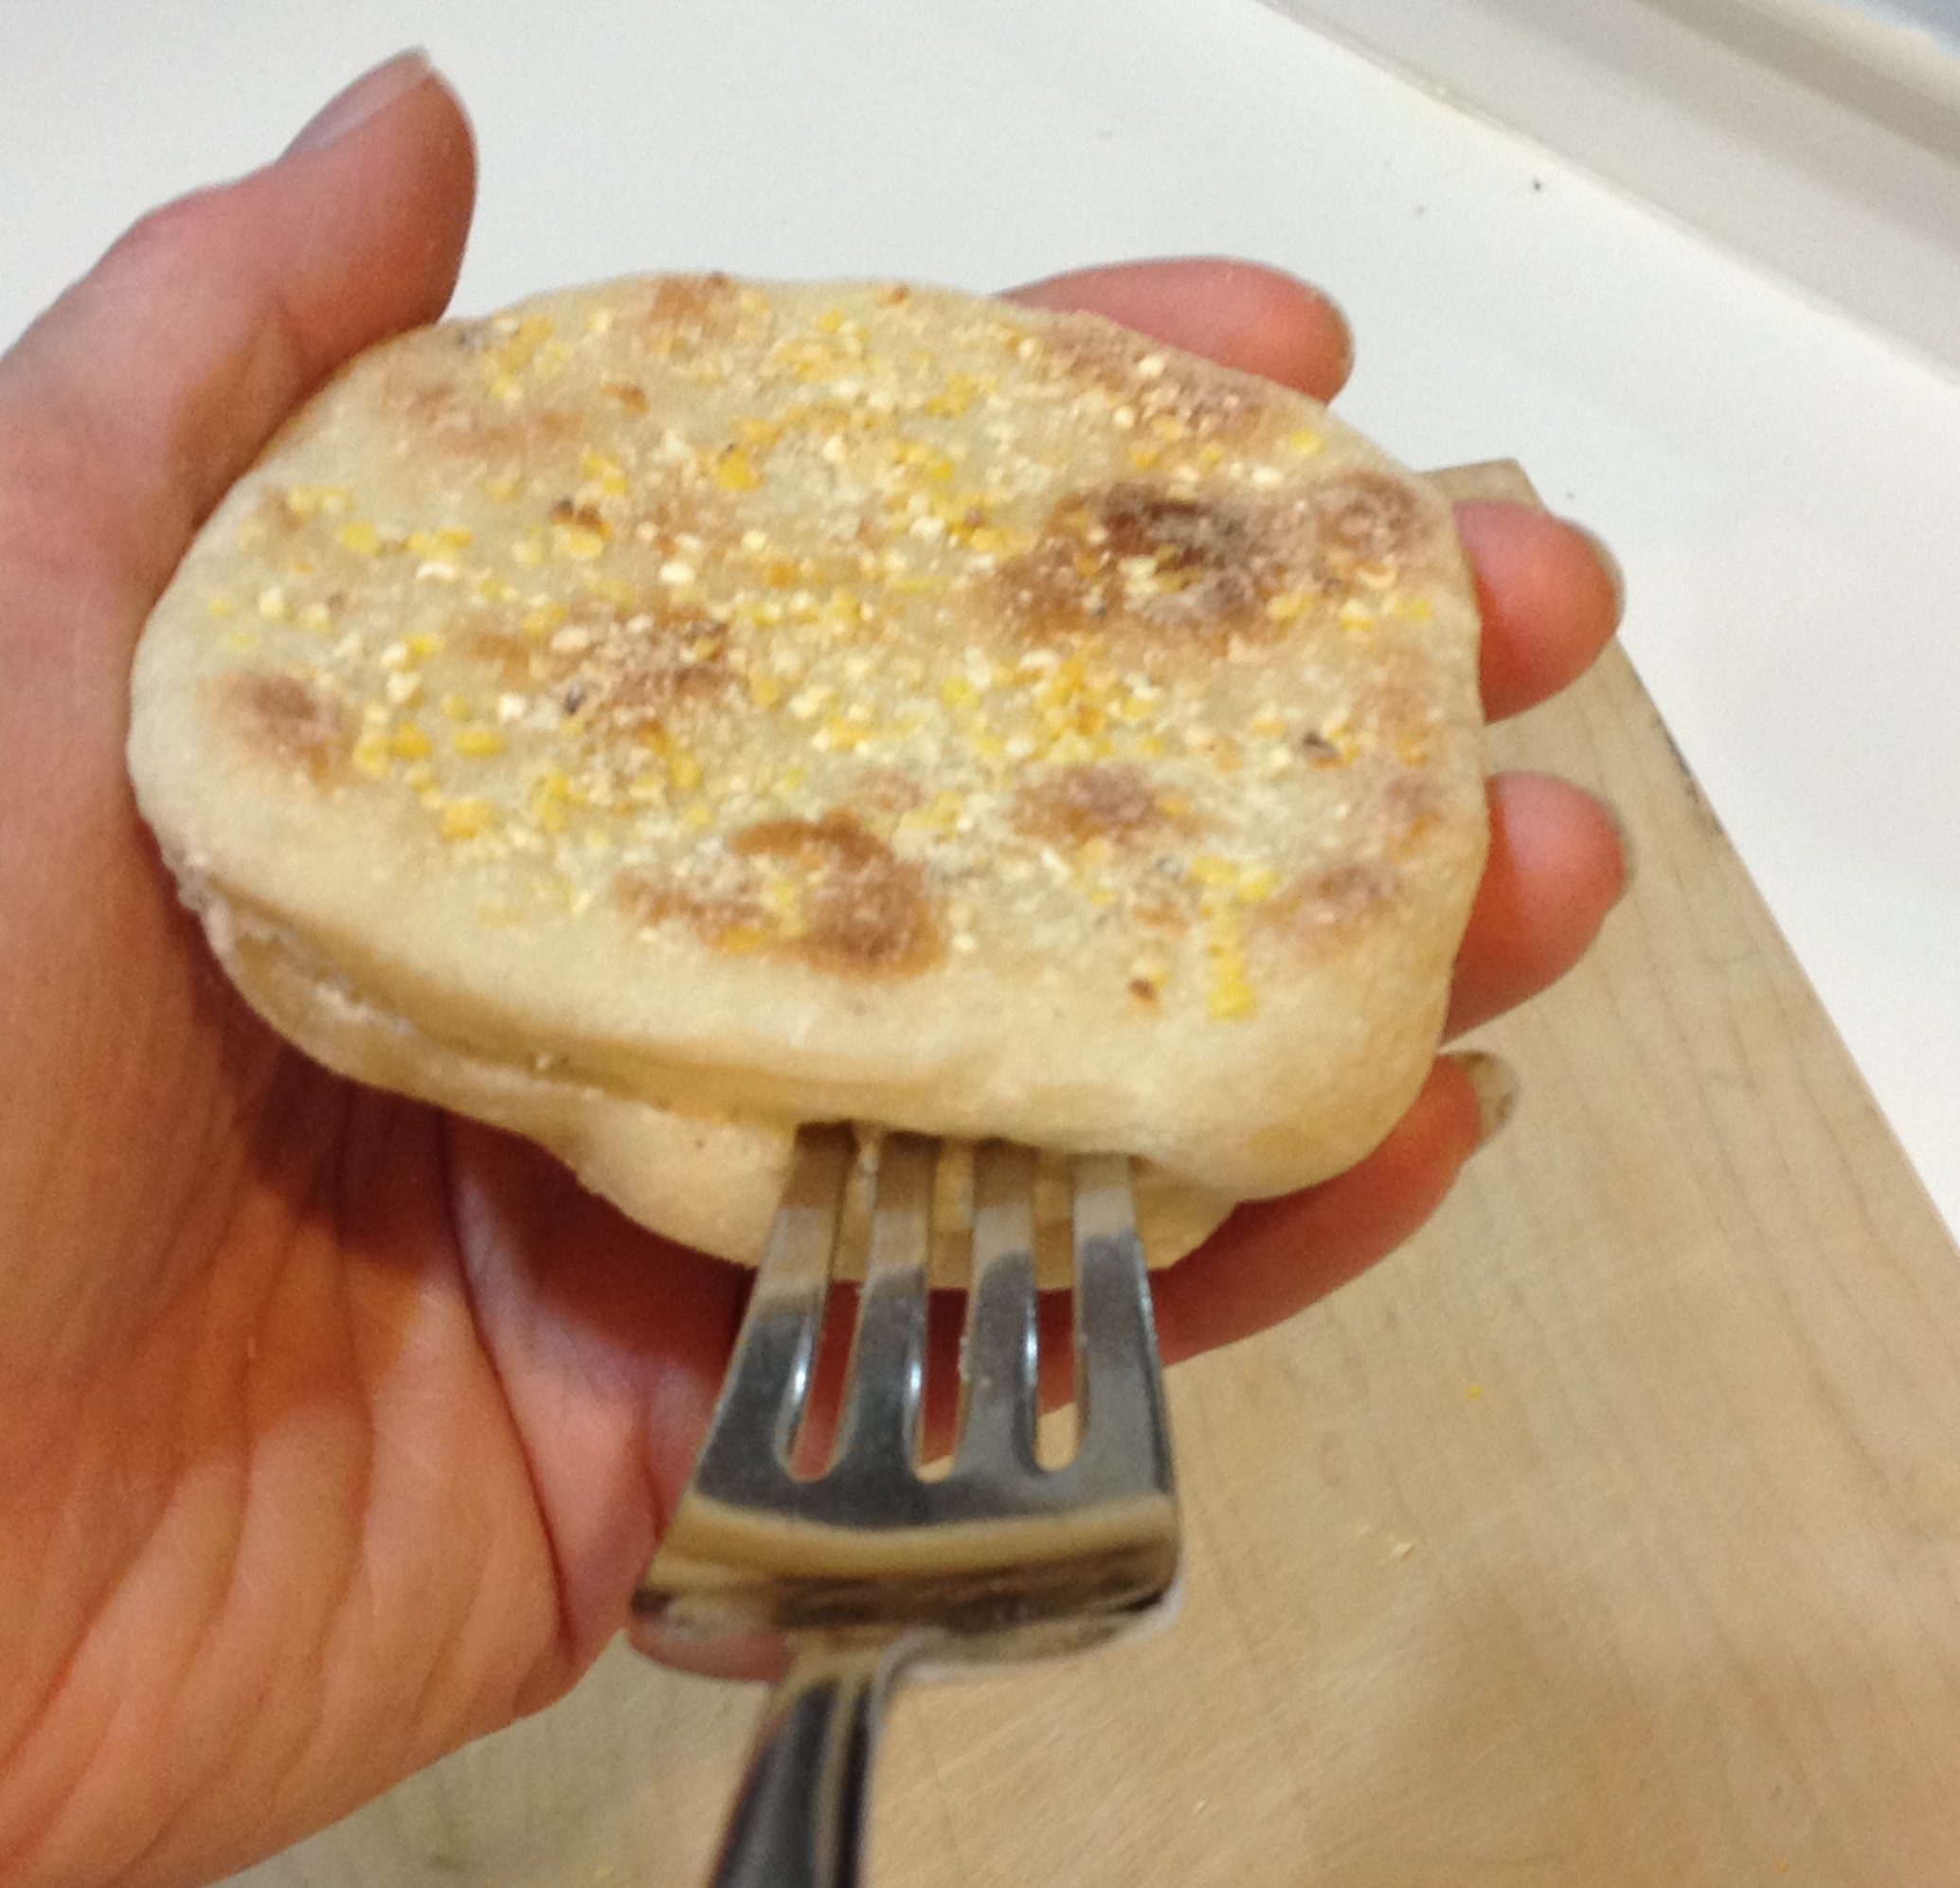
Insert a fork around the side to open English Muffins.
Store in a sealed container.