GIAMBOTTA – Low Cal Doesn’t Have To Mean Low Flavor!

giabotta2-textIt’s that time of year again when spring is just beyond the horizon. Soon we’ll be able to leave the house without bulky sweaters and coats. This means, of course, we won’t be able to hide those holiday pounds anymore.

Soooo, let’s do something about it NOW!

Just because I’m slimming down doesn’t mean I’m about to sacrifice taste. There are plenty of delicious meals one can prepare to keep the calories at bay. Giambotta is one such recipe. It’s a delicious stew that’s quick to put together and makes enough to last for several days.

TIP: Don’t leave out the tomato paste – it adds flavor.  You may be reluctant to open a can for just 1 tablespoon.  As Queen Of Freeze, my advice is to spoon out 1 tablespoon mounds of the remaining tomato paste onto a piece of waxed paper and freeze.  Once frozen, roll the waxed paper around the paste blobs and place in a freezer bag.  That way you’ll have tomato paste for future recipes.

GIAMBOTTA – makes about 9 cups (I forgot to measure)

  • 1 eggplant
  • 2 tsp salt, divided
  • 1 onion, chopped
  • 1 lb russet potatoes, chopped into 1/2″ cubes (don’t peel)
  • 2 red bell peppers
  • 2 zucchinis
  • 6 T extra virgin olive oil, divided
  • 28 oz can whole peeled tomatoes
  • 1 T tomato paste
  • 2 cups water
  • 1  1/3 cup fresh basil, divided (USE FRESH!)
  • 1 T dried oregano (or 1/3 cup fresh)
  • 6 cloves garlic, pressed
  • 1/4 tsp red pepper flakes
  • optional:  hard cheese such as Pecorino-Romano or Parmesan, grated

Cut unpeeled eggplant into 1/2″ cubes. Place in a sieve and sprinkle on 1½ tsp of the salt. Toss cubes and salt together with your hands. The salt will draw out some of the water from the eggplant. Let drain for about 1/2 hour.

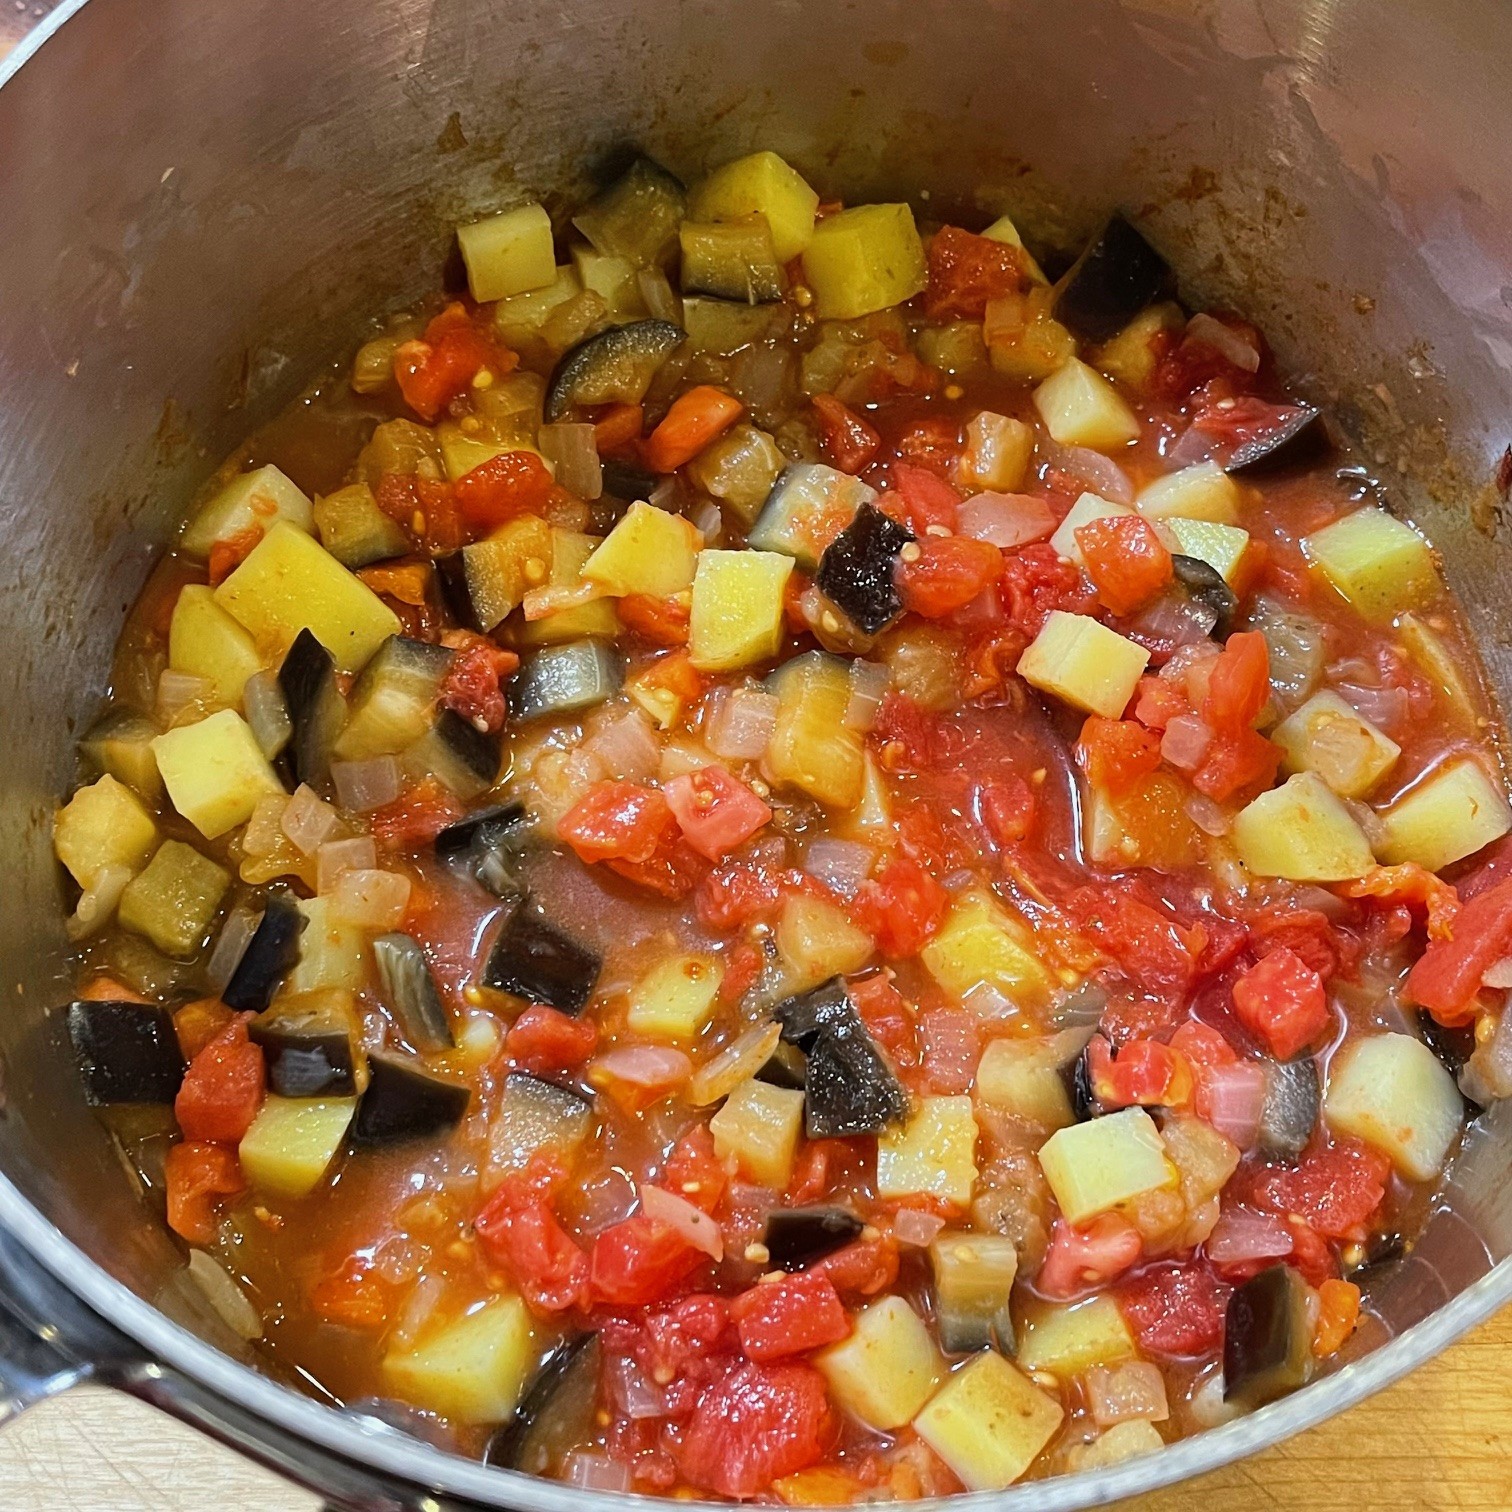
While eggplant is draining, chop the tomatoes, discarding the stem ends and any peels or imperfections. Also, chop the onion and potato.

Into a Dutch oven, heat 2 T of the olive oil over medium/high heat. Add in the drained eggplant, onion, and potatoes. Sauté until potatoes just start to brown – about 7 minutes.

Lower flame to medium and shove the veggies to the sides of the pot, leaving the center empty. Place the tomato paste in empty center and pour 1 T olive oil over it. Cook this mixture 2 minutes in the center, stirring often. This will bring out the flavor the tomato.

After cooking the paste, stir it into the veggies. Pour in 2 cups of water, scraping up the fond (the burnt bits stuck to the bottom of the pot). Add in the tomatoes (including the juice) and bring to boil. Cover pot and lower heat to maintain a simmer. Cook 20-25 minutes, just until potatoes are done (test by poking with fork).

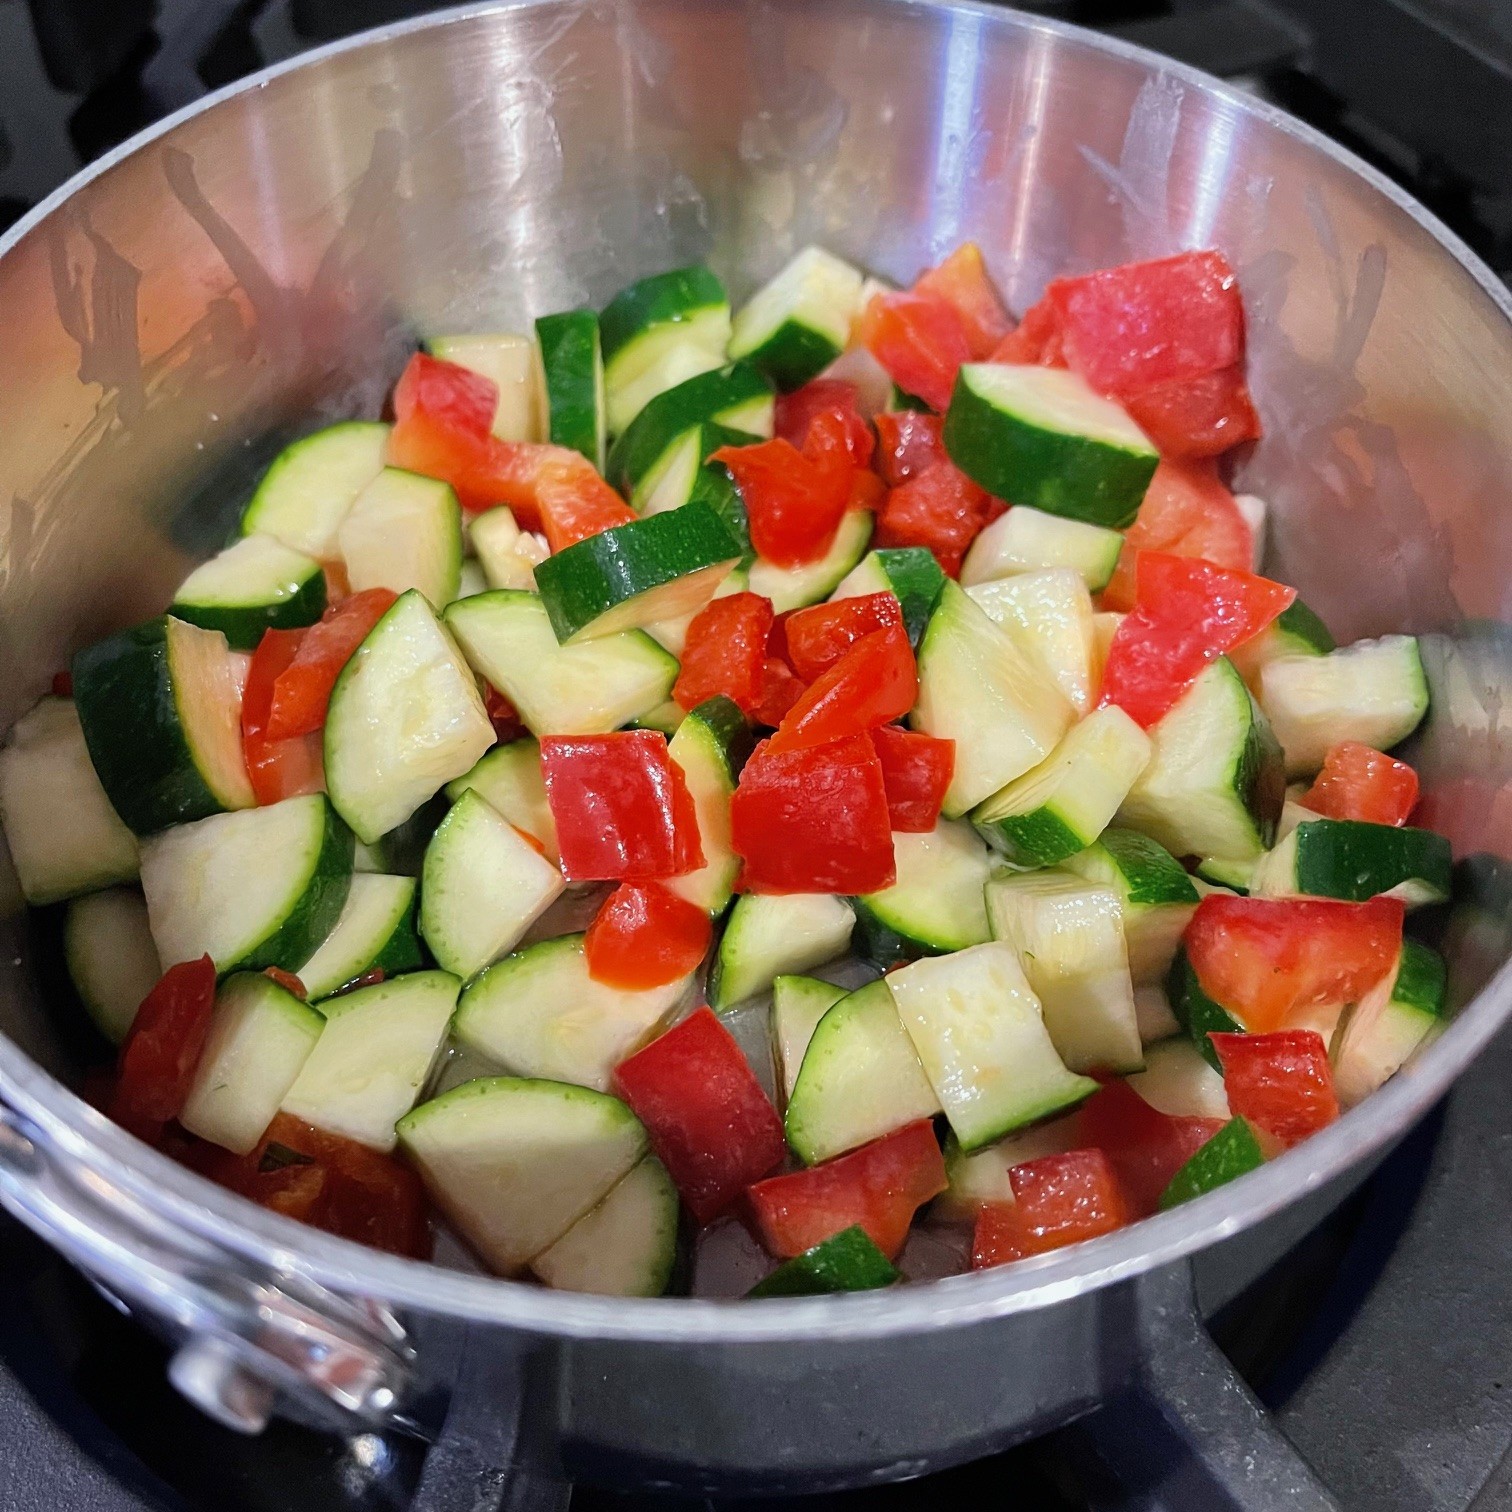
While this is cooking, chop the zucchinis and bell peppers. Set aside.

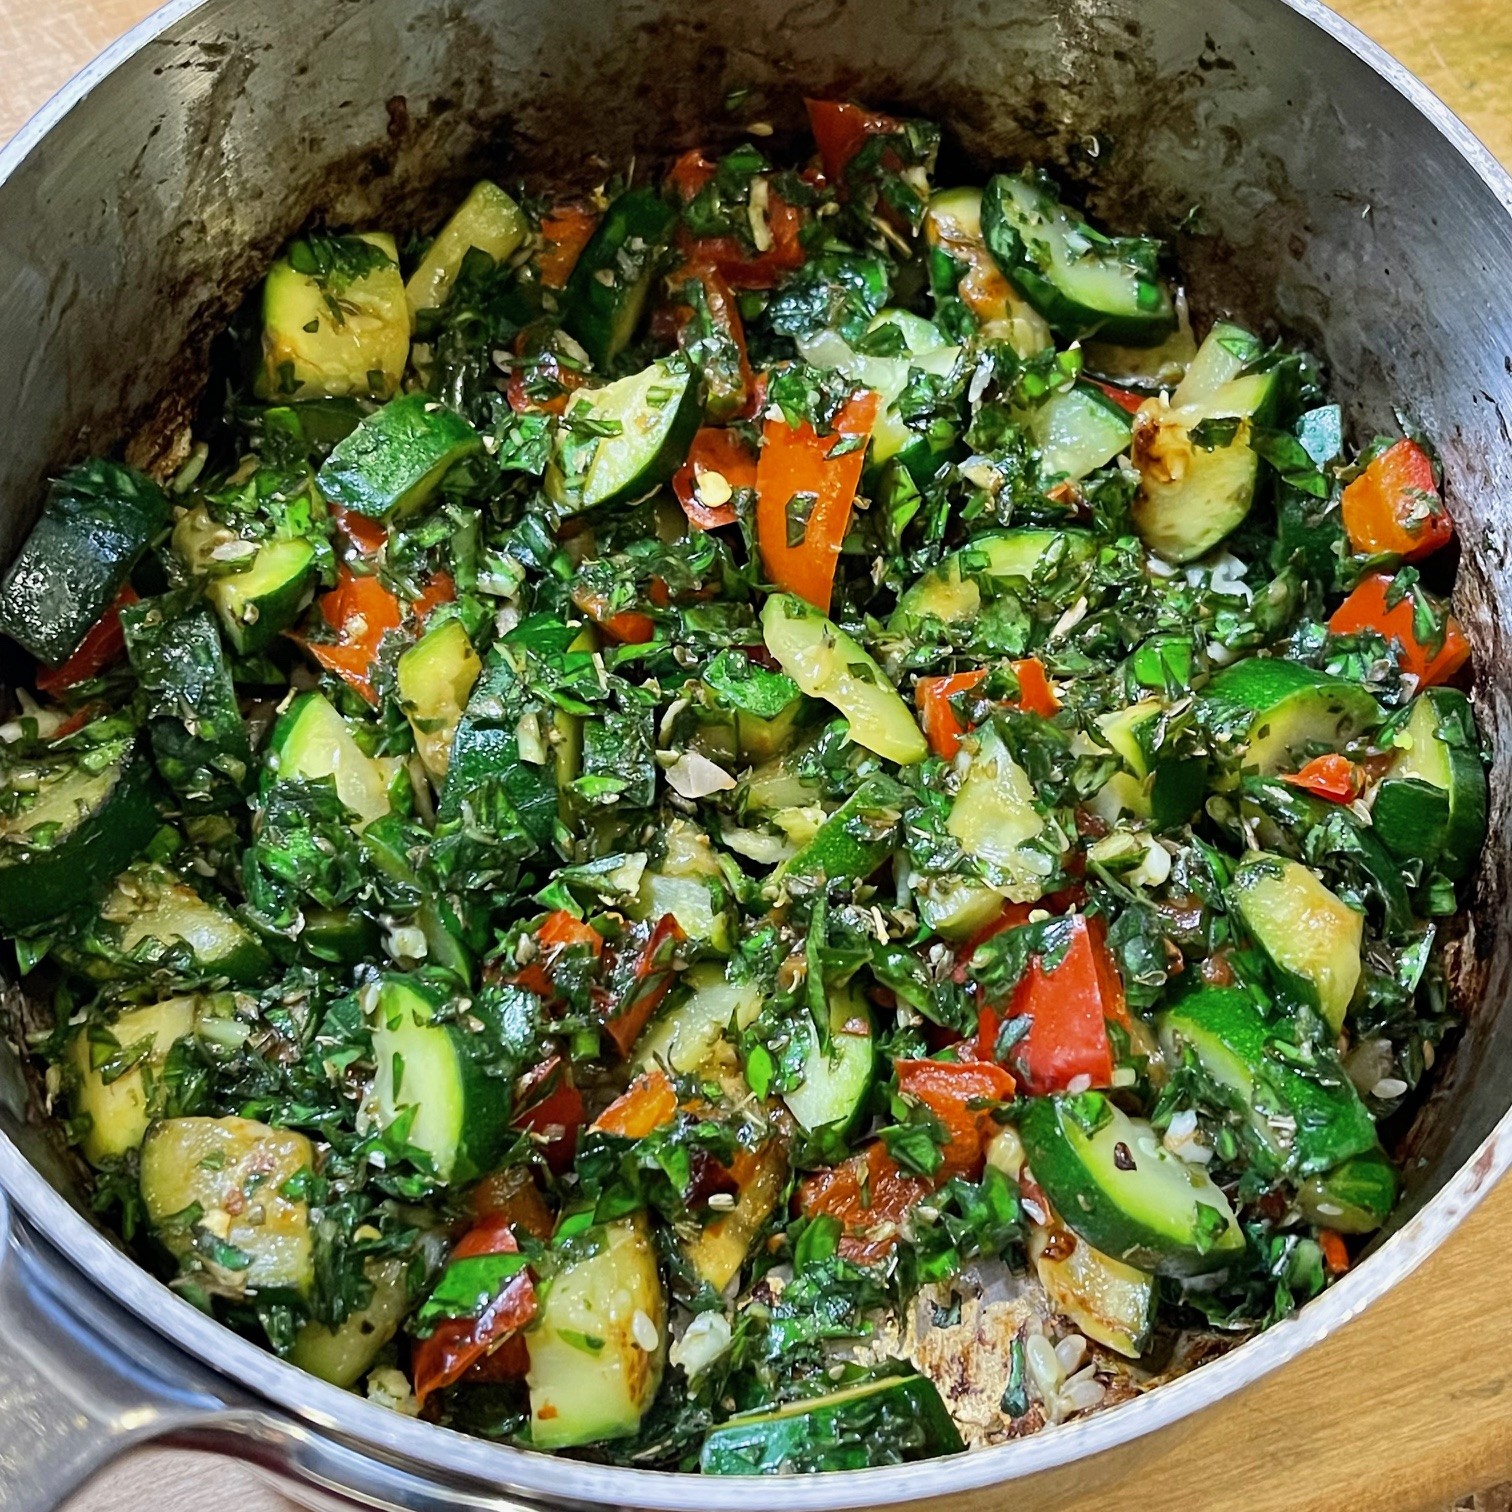
Chop the basil and make a paste by mixing 1/3 cup basil (save the remaining 1 cup for later) with the oregano, 2 T olive oil, garlic, and pepper flakes.

In a skillet, heat 1 T olive oil over medium/high flame. Add in the zucchini, bell peppers, and 1/2 tsp salt. Cook 10-12 minutes, until browned.

Shove the zucchini and peppers to sides (like with the eggplant), leaving the center clear. Place the basil paste in center and cook 1 minute. Mix the paste and zucchini/pepper mix together. Pour into a bowl until ready to use.

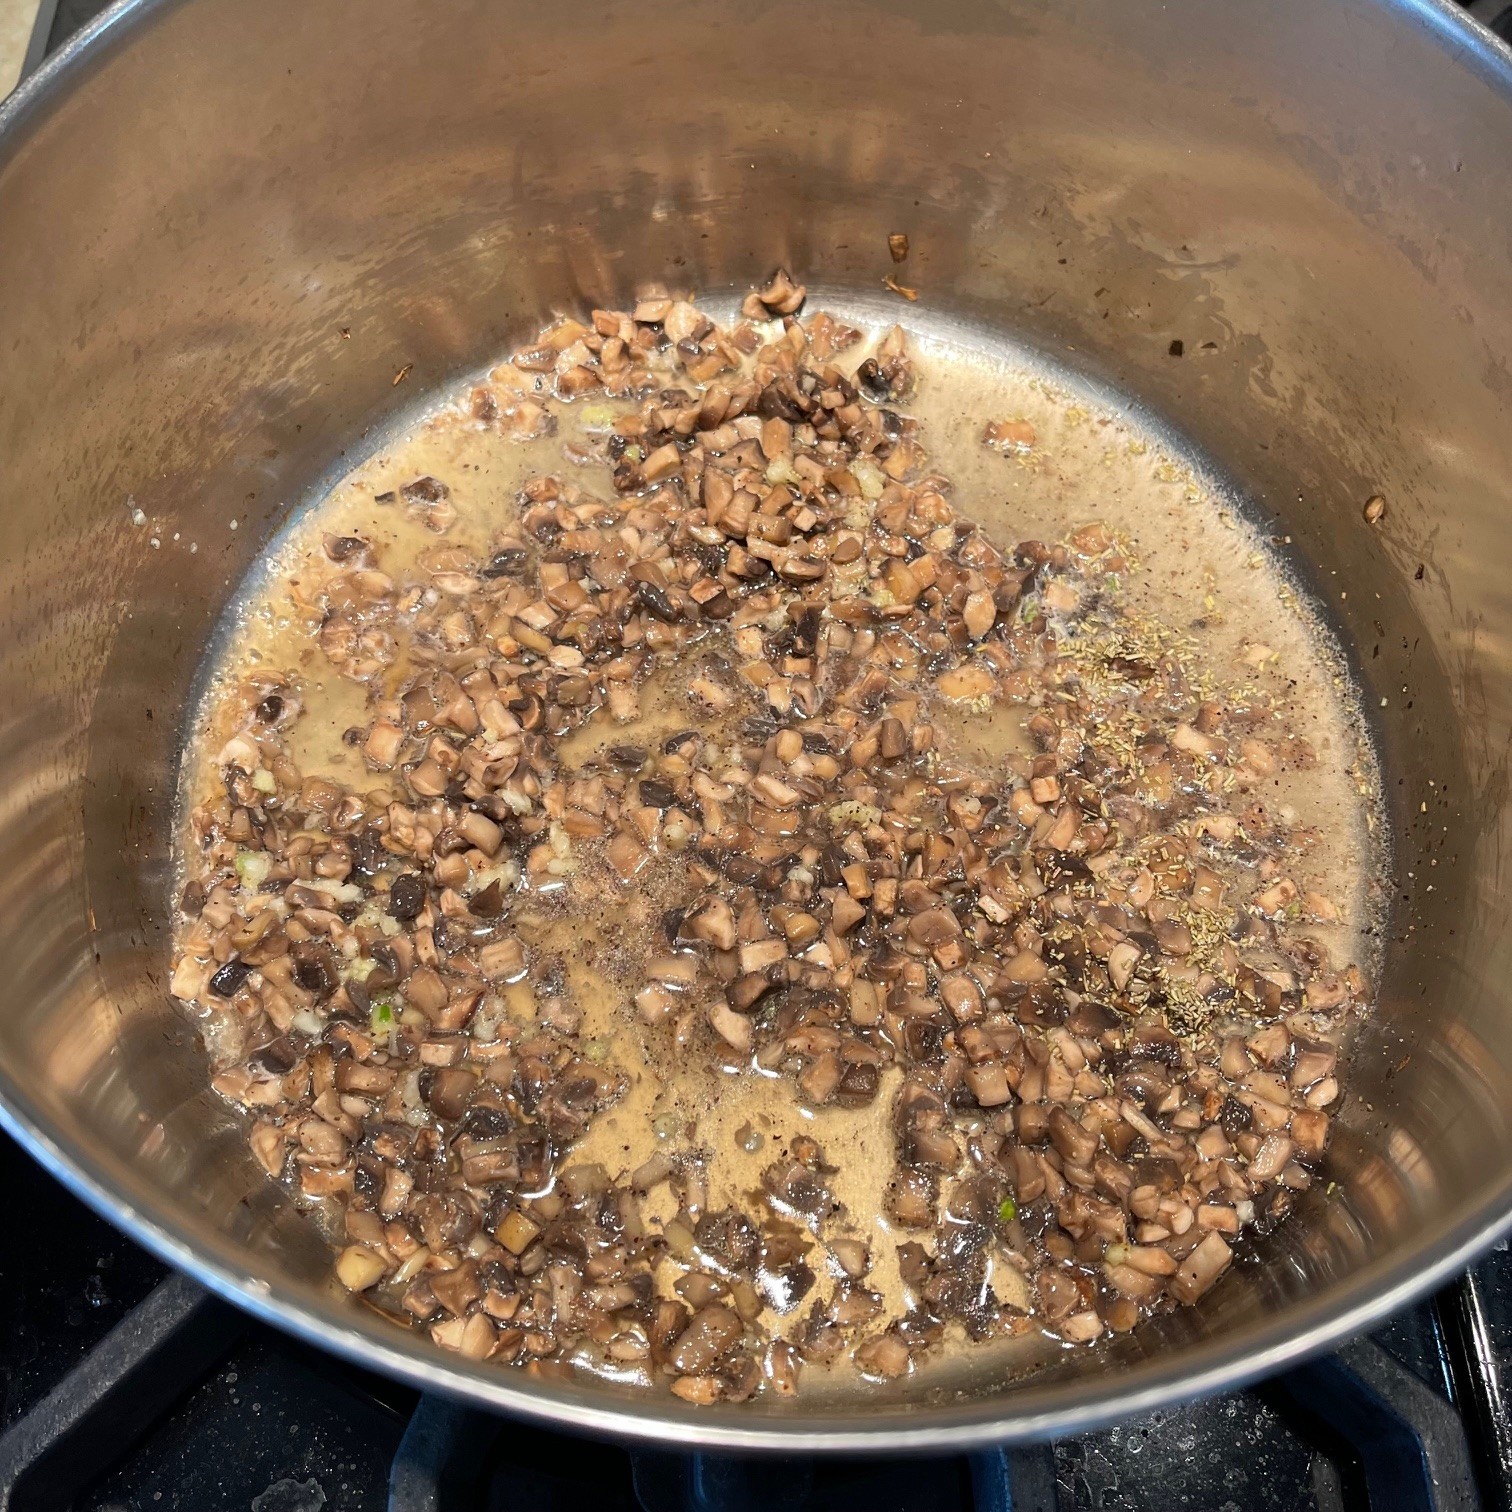
Add 1/4 cup water into the now empty skillet. Notice all the blackened bits. This is called ‘fond’ and it’s full of flavor!

Over medium-high heat, scrap fond off bottom. Save.

When eggplant mixture is done, add in the zucchini/red peppers and fond water from skillet. Cover pot and let sit off-heat for 20 minutes to combine flavors.

When ready to serve, stir in remaining 1 cup chopped basil. Top servings with grated cheese, if desired. (I highly recommend using the cheese!)

KALAMATA OLIVE BREAD – Pretty As A Picture!

olive-bread1-textCompany was coming and I needed a bread – fast! I flipped through my America’s Test Kitchen cookbook and found this Kalamata Olive Bread recipe made in a cast iron skillet. (To those under 35, cookbooks are how people used to get recipes!)

I’m always looking for ways to use my cast iron skillet, so I tried it. The results? It was fast, it was beautiful, and, best of all, it was delicious.

NOTE: A cast iron skillet is imperative to producing the crisp top, side, and bottom.

IDEA FOR NEXT TIME:  Include crumbled Feta cheese in the dough.

KALAMATA OLIVE BREAD

  • 5 T extra virgin olive oil
  • 3 cloves garlic, sliced in half lengthwise
  • 12.5 oz (2½ cups) (355g) all-purpose flour
  • 4 T fresh basil, chopped
  • 1 T baking powder
  • 1/2 tsp salt
  • 4.5 oz (1½ cup) (130g), divided, Parmesan cheese, grated
  • 1 cup (250 ml) milk (I used whole milk)
  • 1/2 cup sour cream (or yogurt – I’ve used both)
  • 1 egg
  • 1 cup (115g) Kalamata olives, coarsely chopped

Preheat oven to 450º Fahrenheit.

In a 10″ cast iron skillet, heat olive oil over medium/high. Add in the garlic and sauté for about 30 seconds, just until fragrant. You want to flavor the oil but not burn the garlic. Remove pan from heat and let cool down while preparing the rest of the recipe.

In medium bowl, mix together the flour, basil, baking powder, salt, and 3.5 oz (1 cup) Parmesan.

In a large mixing bowl, beat the egg to break it up. Whisk in the milk and sour cream.

Remove garlic from skillet and mince (I use a garlic press). Add the garlic to the egg mixture. Stir in all but 1 T olive oil. Pour in the dry ingredients and blend until nearly all the flour is incorporated. Add in the Kalamata olives and gently finish blending. DON’T OVERMIX OR THE BREAD WILL BE TOUGH.

Heat remaining 1 T oil in skillet. Turn off heat but leave pan on burner. Pour in batter (it will be thick), smoothing top. Sprinkle on remaining 1 oz (1/2 cup) Parmesan.

Bake at 450º F for 20 minutes, until top is golden brown. Remove from oven and let cool 5 minutes in skillet. Remove to wire rack. I like to serve it as soon as it’s cool enough to eat.

CHEESY “HAM” CASSEROLE – Kids Love It!

cheesy-ham-cass-text
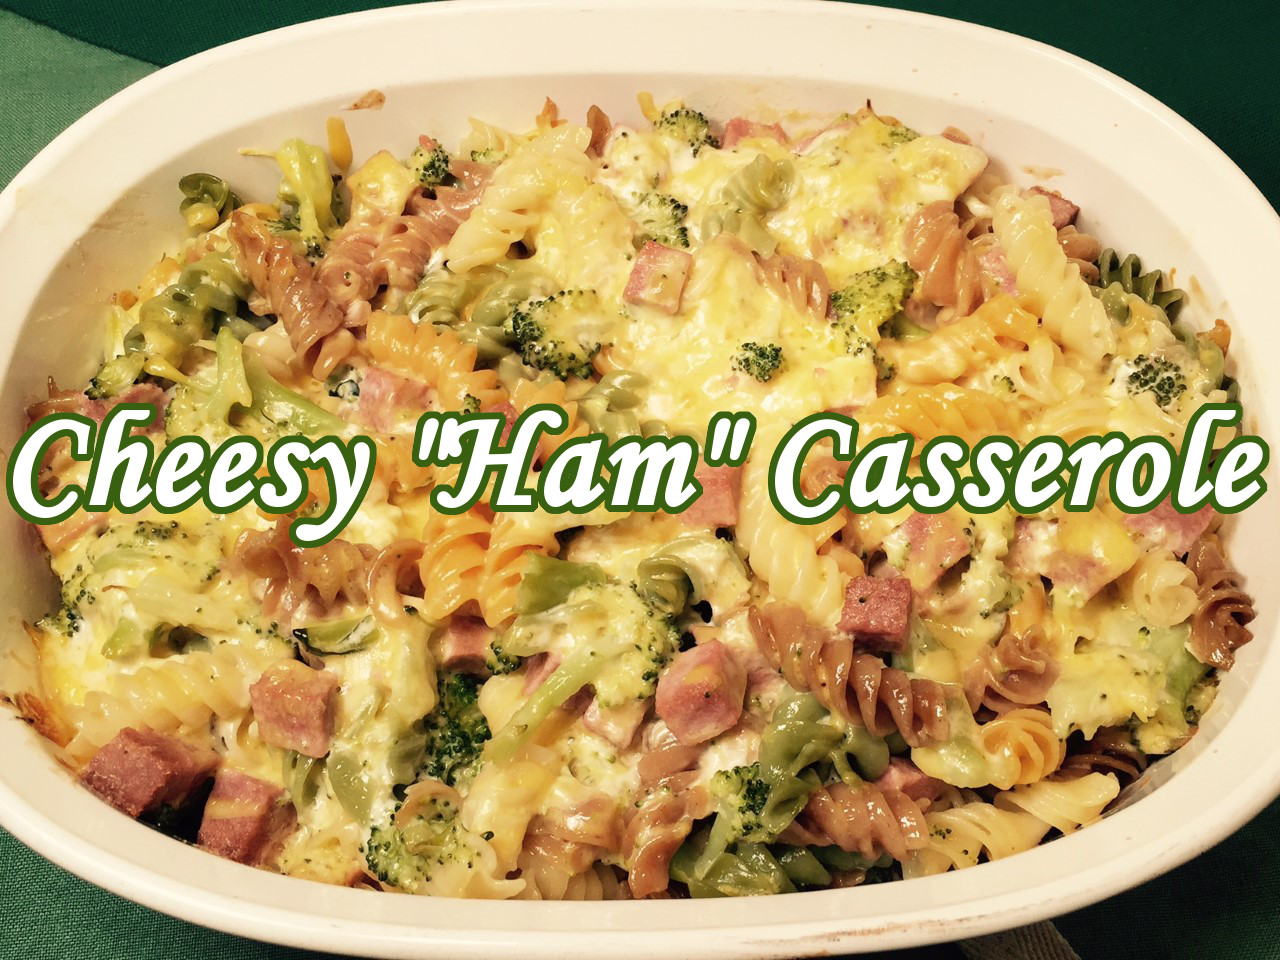
Being the mother of picky eaters, I’ve struggled to find dishes my boys would willingly eat. CHEESY “HAM” CASSEROLE became an instant favorite in our home. A bonus is that it’s loaded with broccoli, so even if they try to pick out the larger pieces, they’re still ingesting the smaller bits. (Hey, I’ll take what I can get!)

New readers may be perplexed by a vegetarian cooking blog using ham. Well, if you look carefully you notice the quotation marks around the word “ham”. That’s my shorthand for “fake”, “faux”, or “imitation”. If the idea of fake meat makes you cringe, then just leave it out and call the dish CHEESY BROCCOLI CASSEROLE. But for those of us ex-carnivores who like meat but are choosing not to eat it, the right imitation meat keeps us from falling off the vegetarian wagon.

CHEESY “HAM” CASSEROLE is quite easy to put together, plus it can be prepared ahead of time. Half an hour before dinner, just pop the casserole in the oven to bake. Use the cooking time to make your side dishes, set the table, and get the kids to make their way into the kitchen (a feat in itself).

CHEESY “HAM” CASSEROLE

  • 7 oz (204g OR 3 cups) uncooked spiral noodles (I use Wacky Mac)
  • 7.5 oz (211g OR 2½ cups) broccoli pieces
  • 305 oz (104g) fake ham (I use Worthington frozen “Ham” loaf)
  • 7 oz (257g OR 1¼ cup) mayonnaise
  • 2/3 cup (150 ml OR 164 g) milk (any kind)
  • 3 cups (174g OR 6 oz), divided, medium Cheddar cheese, shredded

Bring a large pot of water to boil and cook the noodles until they are ALMOST done – they will continue to cook in the oven. Rinse with cold water in a colander to stop the cooking process.wacky-mac-cooked
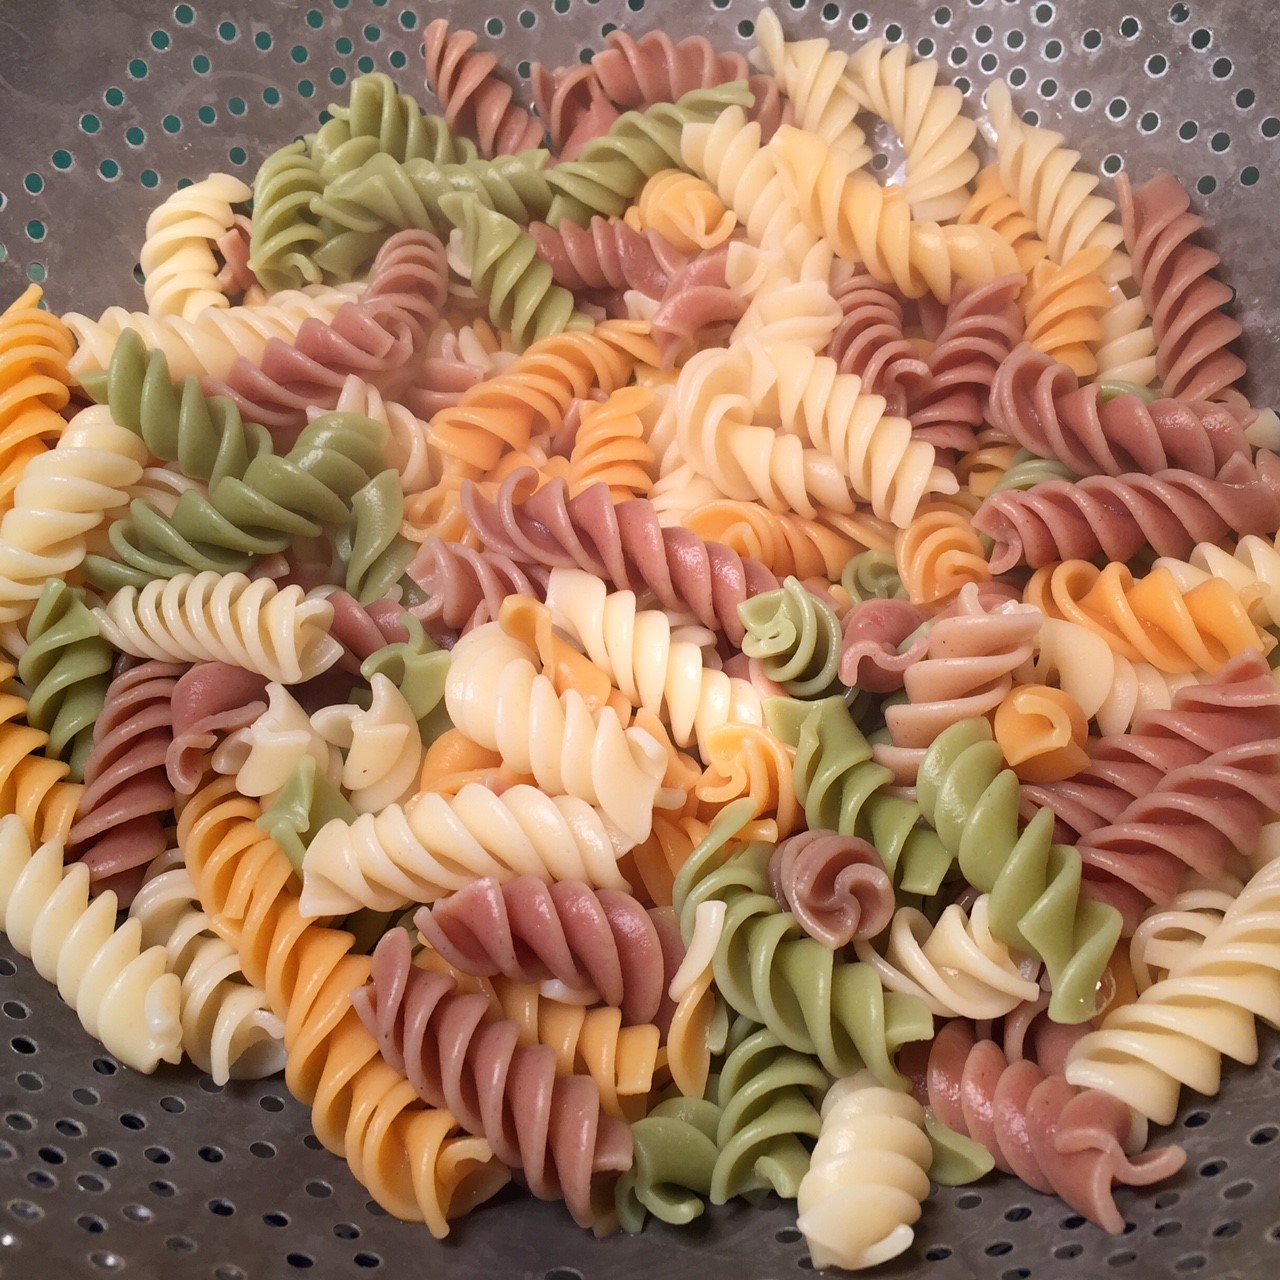
NOTE:  If you’re using colored pasta, such as Wacky Mac that I use, you’ll notice that the color, unfortunately, fades with cooking. (See photo below). I don’t think there’s anything that can be done.wacky-mac-raw-vs-cooked-text
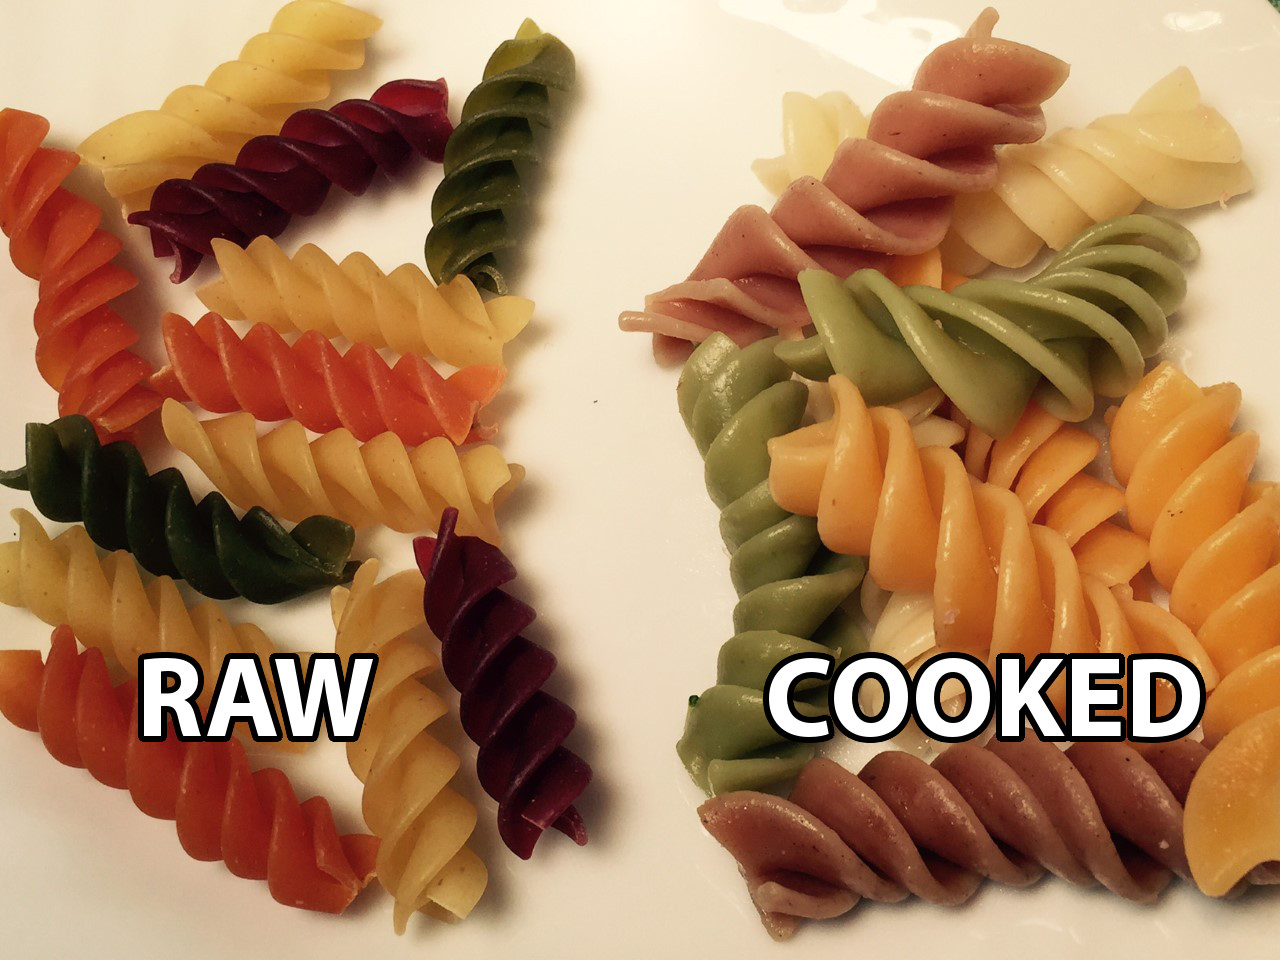
While the pasta is cooking, steam the broccoli. Like the noodles, you don’t want it overcooked or it will be mushy. Just steam it for about 5 minutes.steam broccoliWhile the pasta and broccoli are cooking, cube the “ham” into bite-sized pieces. ham-chopping
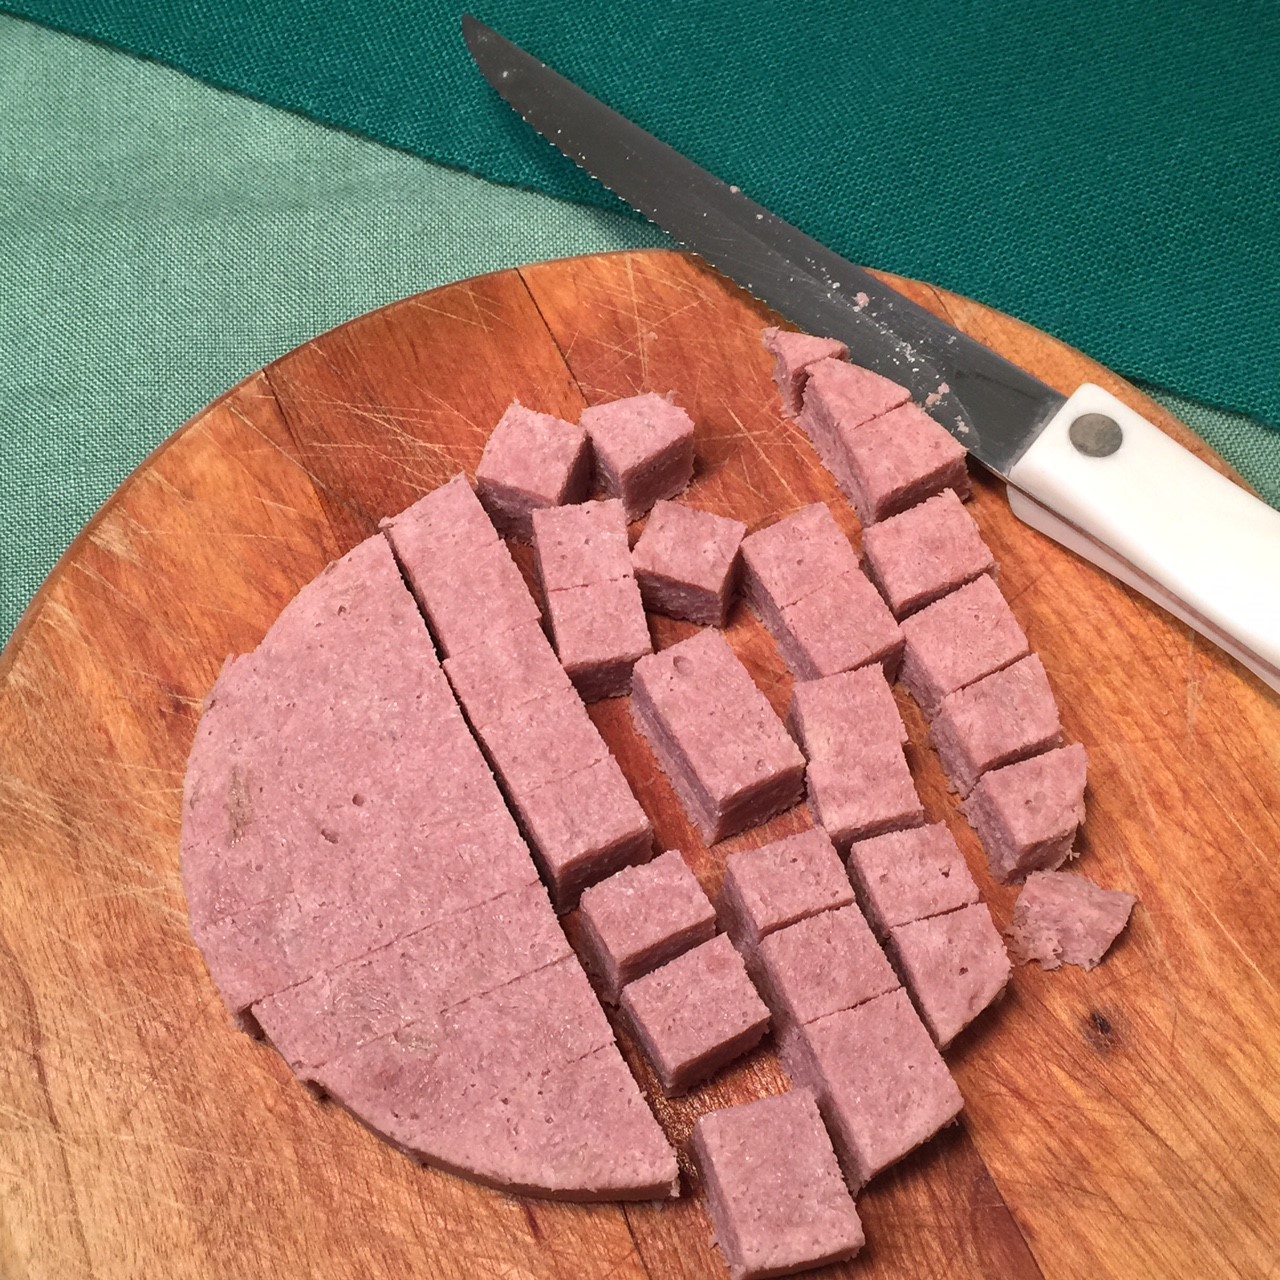
To save dirtying a bowl, use the empty pasta pot to combine the noodles, broccoli, “ham”, mayonnaise, milk, and 2½ cups (139g OR 5 oz) of the cheese. Stir gently, but thoroughly. Pour into a 2.5 quart casserole and sprinkle the remaining 1/2 cup (35g OR 1 oz) cheese on top. Cover and bake at 350º Fahrenheit for 30 minutes.

TRES LECHES CAKE – A Three Kings Day Treat!

tres-leches-cake-textIt seemed appropriate to post a Tres Leches Cake recipe for Three Kings Day, (aka, the Epiphany). Tres Leches (three milks), three kings. Yeah, okay – it may be a stretch. But it’s still a delicious recipe and you could certainly serve it on the Epiphany…or anytime, for that matter.

It needs to be made a day in advance of serving so that the three milks (evaporated, sweetened condensed, and cream), which get poured over the hot cake, can be fully absorbed. But other than that bit of planning, it’s a very easy cake to make.

TRES LECHES CAKE

  • 2 cups all-purpose flour
  • 2 tsp baking powder
  • 1 tsp salt
  • 3/4 tsp cinnamon
  • 1 cup milk (any kind – I use nonfat)
  • 8 T butter
  • 4 eggs
  • 2 cups sugar
  • 4 tsp vanilla, divided
  • 14 oz can sweetened condensed milk
  • 12 oz can evaporated milk
  • 2 cups heavy cream, divided
  • 3 T light corn syrup

Preheat oven to 325º Fahrenheit.

In a bowl, mix together the flour, baking powder, salt, and cinnamon. Set aside.

In a small saucepan, heat together the milk and butter, just until the butter melts. Remove from heat.

Into the large bowl of your electric mixer, beat the eggs for 30 seconds on low speed. After 30 seconds, slowly start pouring in the sugar (still on low speed). Once all the sugar is added, increase the mixer speed to medium/high and beat until mixture is pale and glossy – about 5-7 minutes. On low speed, slowly add in the milk/butter and 2 tsp vanilla. Mix in the flour a third at a time.

Pour batter into a greased and floured 13″x 9″ pan. Spread the batter so the center dips down lower than the sides. As the cake bakes, the center will naturally rise. By scooping down the center, this will help ensure you get a flat-topped cake. Bake at 325º F for 30-35 minutes.

While cake is baking, mix together the sweetened condensed milk, the evaporated milk, 1 cup of cream, and 1 tsp vanilla. I suggest you use a container with a spout for easy pouring.

When cake is done, remove from oven. Prick the hot cake every 1/2″ with a skewer or fat toothpick. Very slowly pour the milk mixture over the hot cake. (You’ll have to stop for awhile now and then to allow the milks to absorb into the cake.) There will probably be some pooling on top in spots. That’s okay. Let cake set for 15 minutes after you pour on the milks, then put in refrigerator UNcovered overnight, up to 24 hours.

Before serving, make frosting by combining 1 cup cream, the corn syrup, and 1 tsp vanilla together in the small bowl of your electric mixer. Beat on high until soft peaks form. Spread over cold cake.

CHILI CHEESE NIBBLES -Easy To Make, Hard To Resist!

chili-cheese-nibbles-text
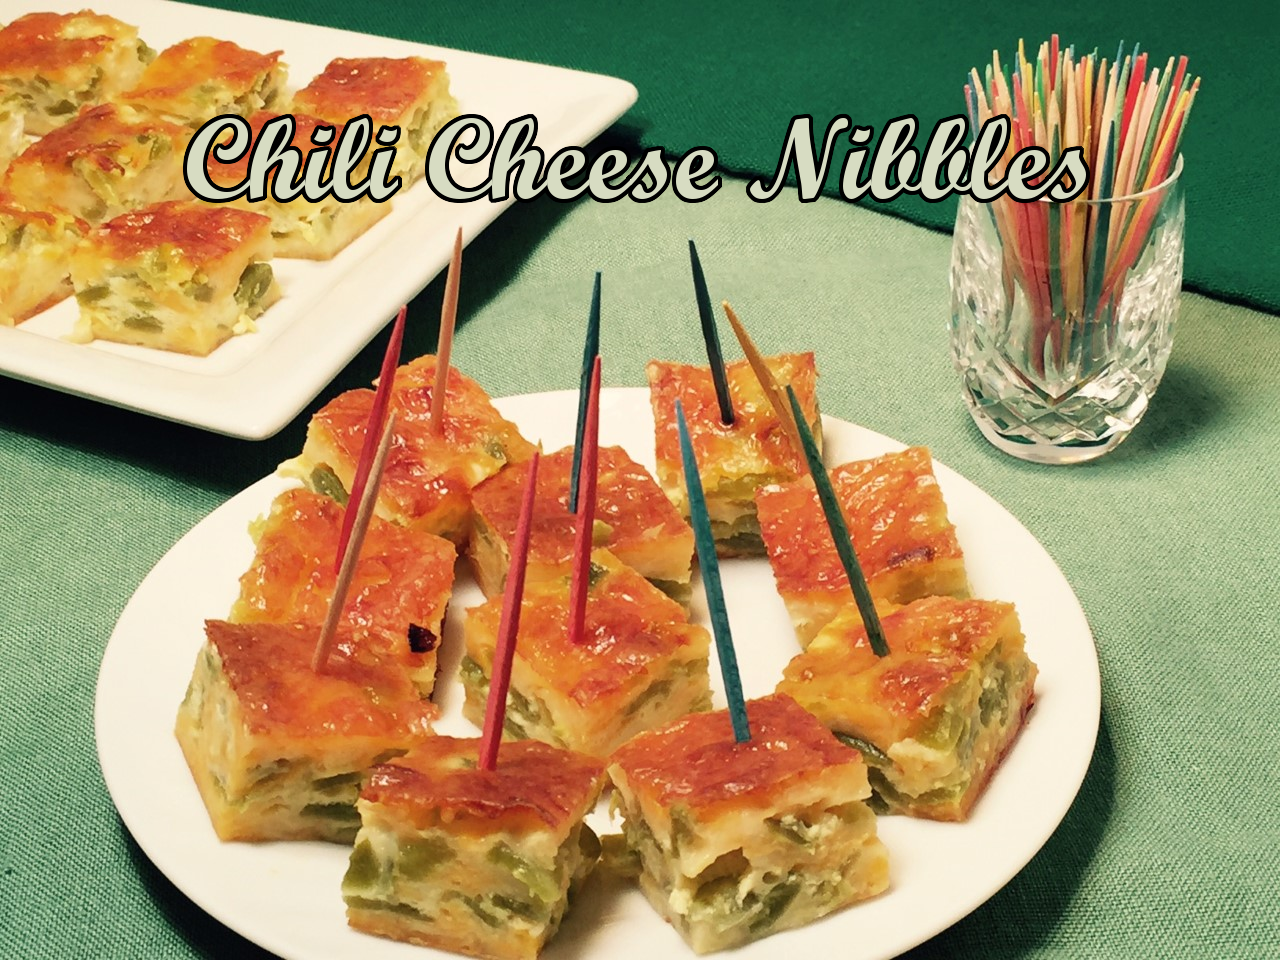
Anyone who owns a television, computer, or has been to a store lately knows it’s the holiday season. People will gather for small get-togethers and big galas. And where people celebrate, there’s always food. (It’s a rule!)

Party food can be tricky business – you don’t want it drippy, crumbly, or something that can’t be cleanly bitten into (you know – like when the entire top layer comes with the bite, slapping your chin with a greasy mess).

CHILI CHEESE NIBBLES are an hors-d’oeuvre that passes all my criteria. Did I mention they’re delicious?! In fact, they are so good (especially hot out of the oven) that I suggest you make extra – especially the crispy edges.

CHILI CHEESE NIBBLES – makes about 20 squares

  • 2  4-oz cans diced green chilies (I use one can mild, one can hot)
  • 12 oz Jack cheese, shredded (about 3 cups)
  • 6 oz sharp Cheddar cheese, shredded (about 1½ cups)
  • 2 T milk (any kind)
  • 1 T flour
  • 2 eggs

Preheat oven to 375º fahrenheit.

Discard excess juice from chilies – there won’t be much.

Grease an 8″x 8″ pan (or its equivalent).

Combine cheeses.

shredded-cheese-in-bowl
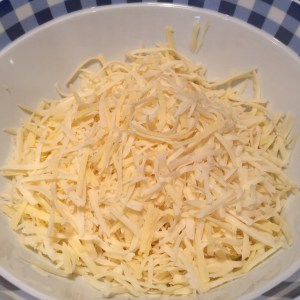
In a small bowl, combine the milk and flour to form a smooth paste.

flour-paste 
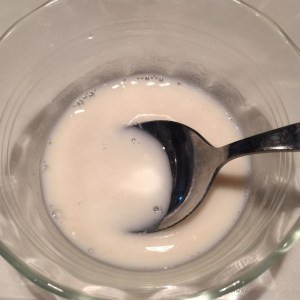
In a larger bowl, beat the eggs. Pour the flour paste into the eggs, beating to combine.

flour-paste-into-eggsSprinkle about one-third of cheese (you don’t have to measure) onto baking pan. Top with one can of chilies, spreading evenly. Add half of the remaining cheese, then the other can of chilies, the rest of the cheeses, and, finally, pour egg mixture over chili-cheese mixture, smoothing top.

chili-cheese-directionBake at 375º F, uncovered, for 45 – 50 minutes – until browned. Don’t worry about the edges being too dark – they’ll be discarded into your mouth. Remove from oven and let set for about 15 minutes.

chili-ch-done
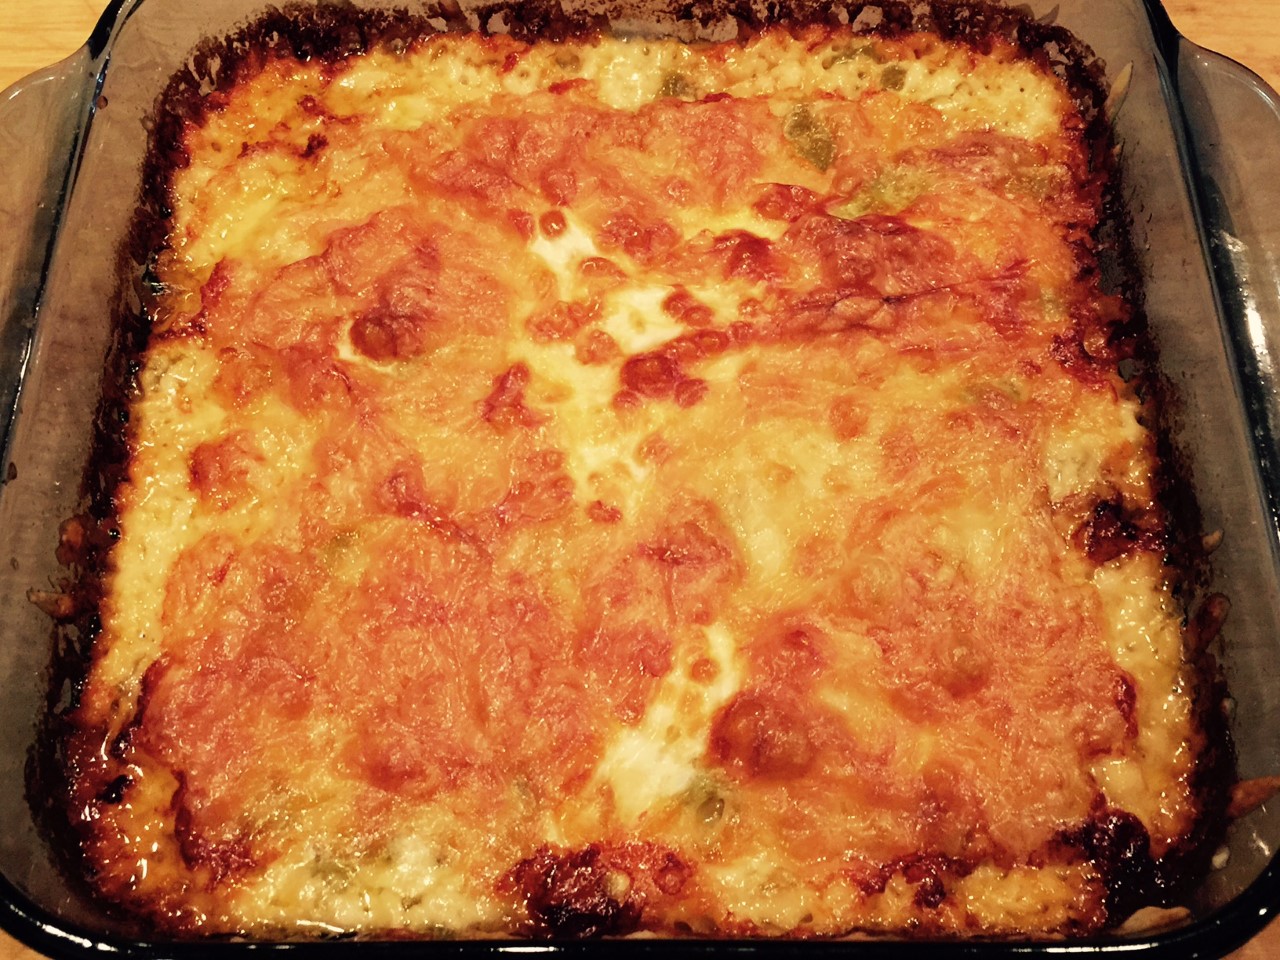
Run a spatula around edges and underneath to loosen.

chili-ch-remove1
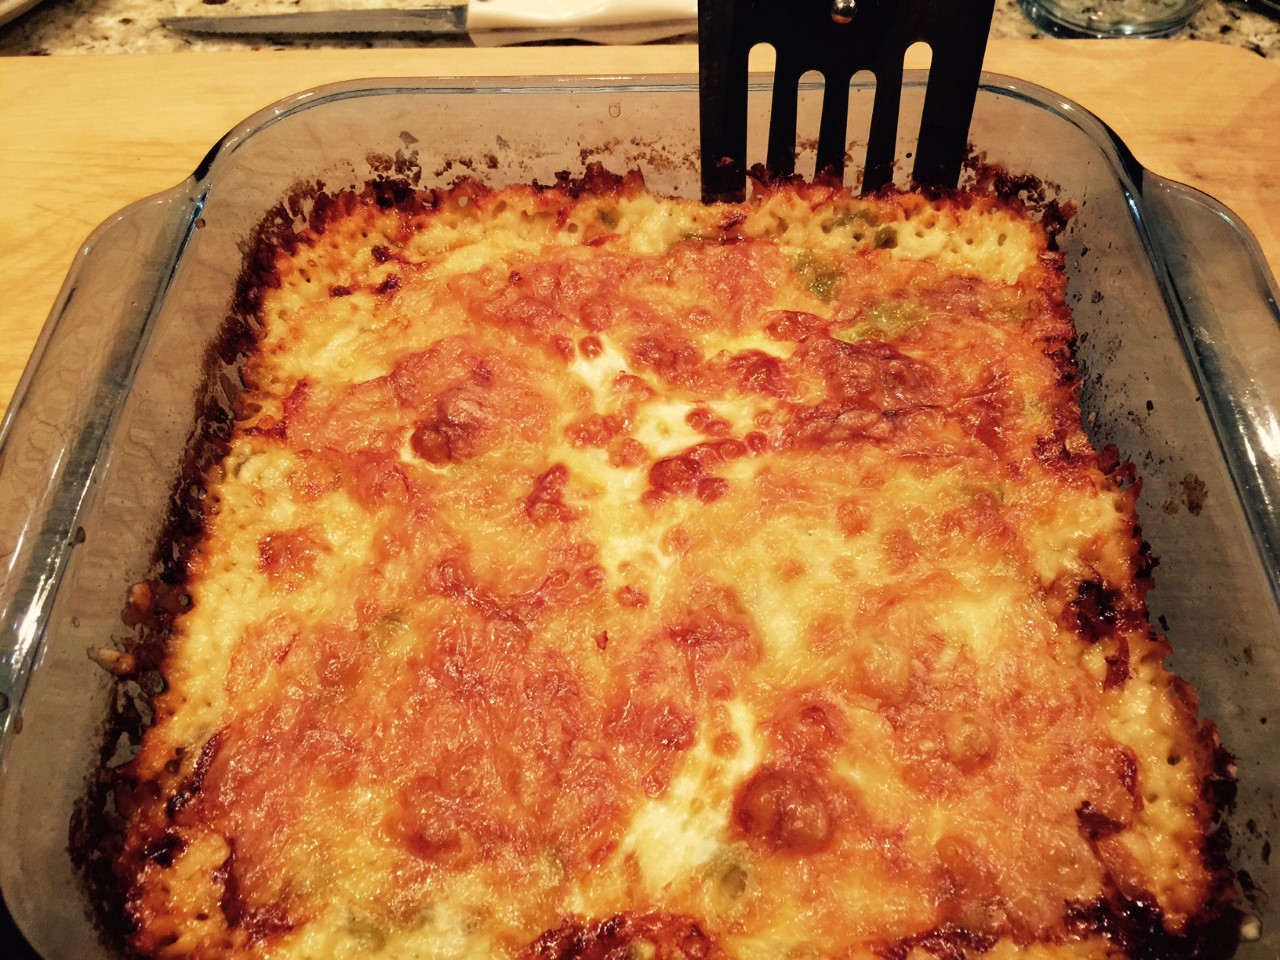
Place a plate on top and flip to remove – it will plop down…hopefully. Then place another plate on top (which is the bottom of the chili-cheese mixture) and flip again. Now, it’s right side up. Here’s the BEST part – cut off the 4 edges and eat them (you won’t be serving them). They are an irresistible crispy, warm, cheesy temptation.

chili-cheese-removeLet the square rest a few more minutes to make sure it’s firm, then slice into squares. TIP: I used a large pizza wheel.


PASTA ALLA NORCINA FLORENTINE: Molto Buona!

pasta-alla-norcina-florentine-text
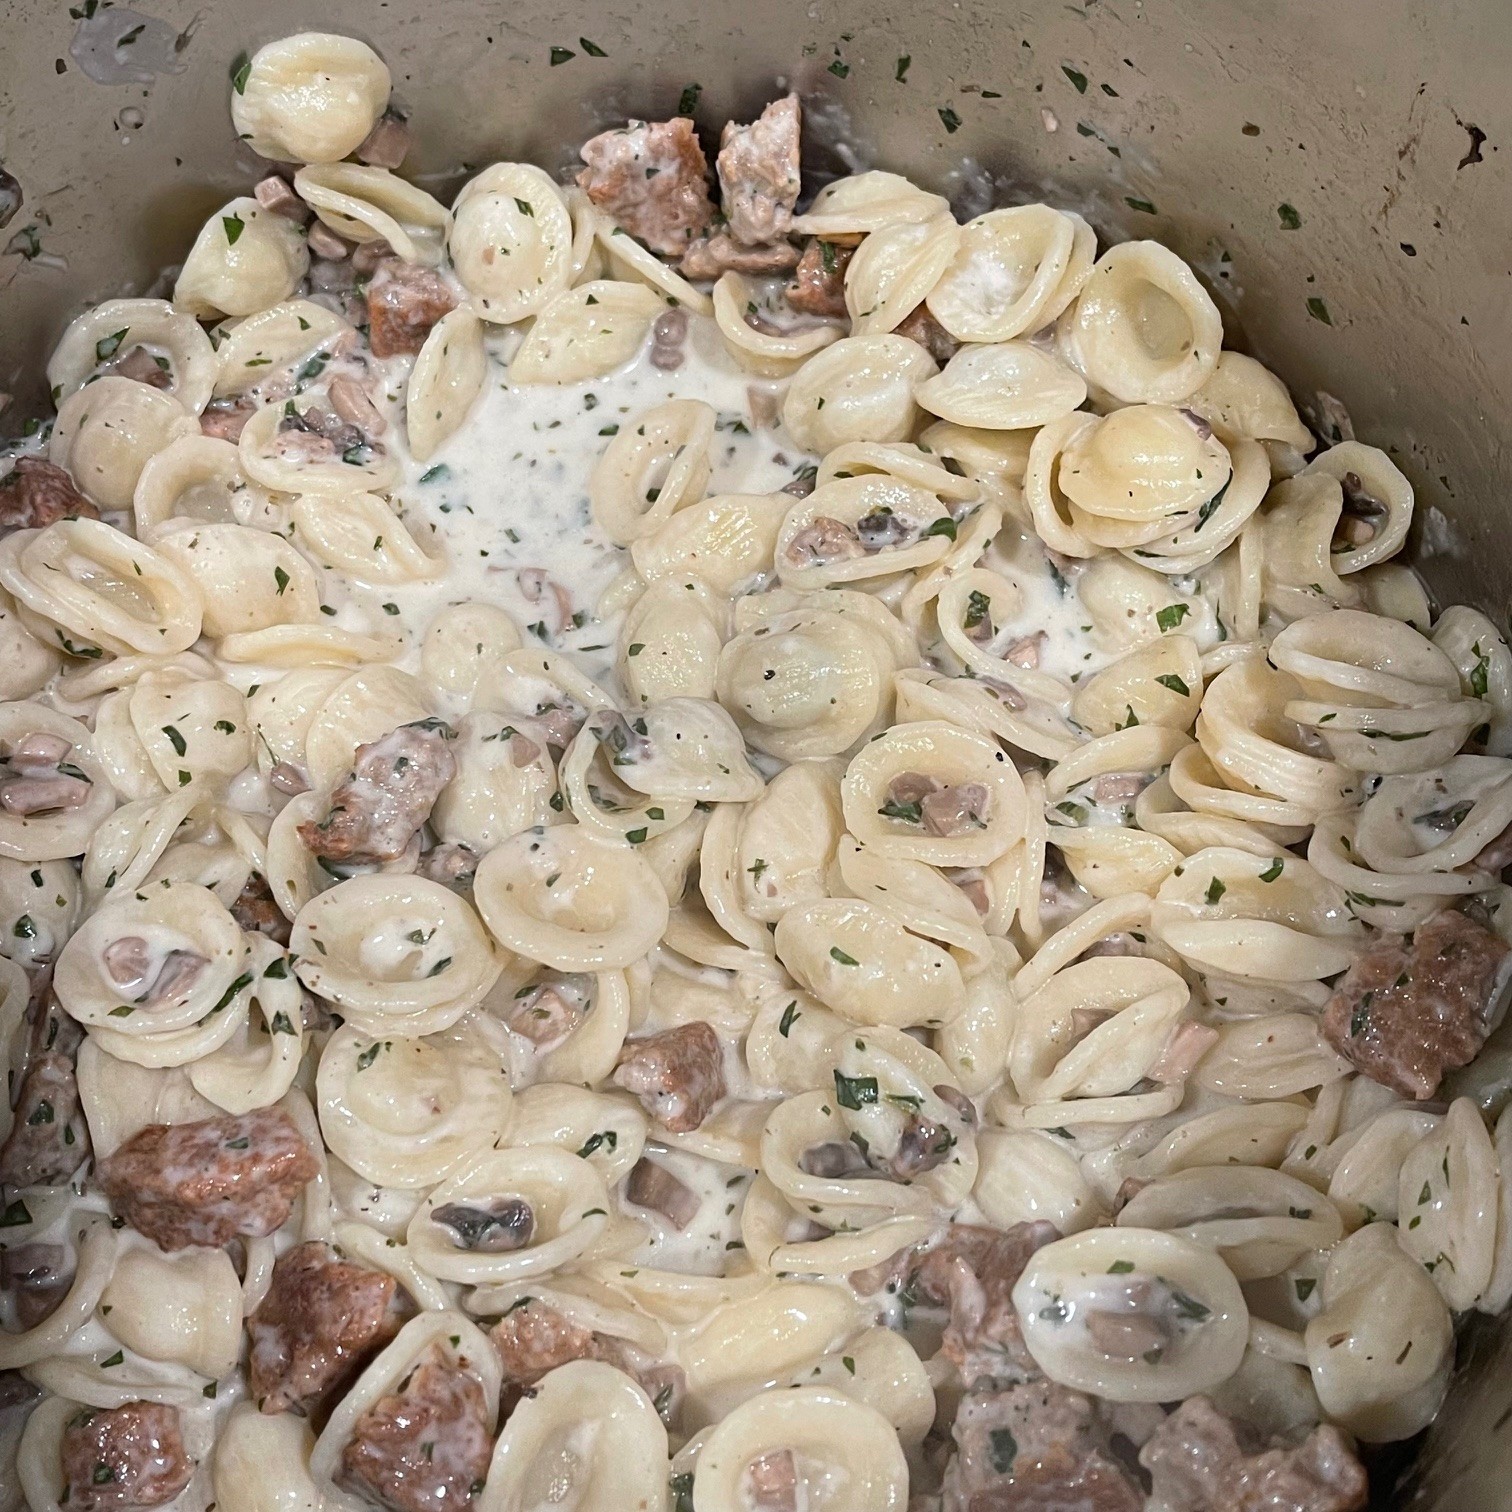
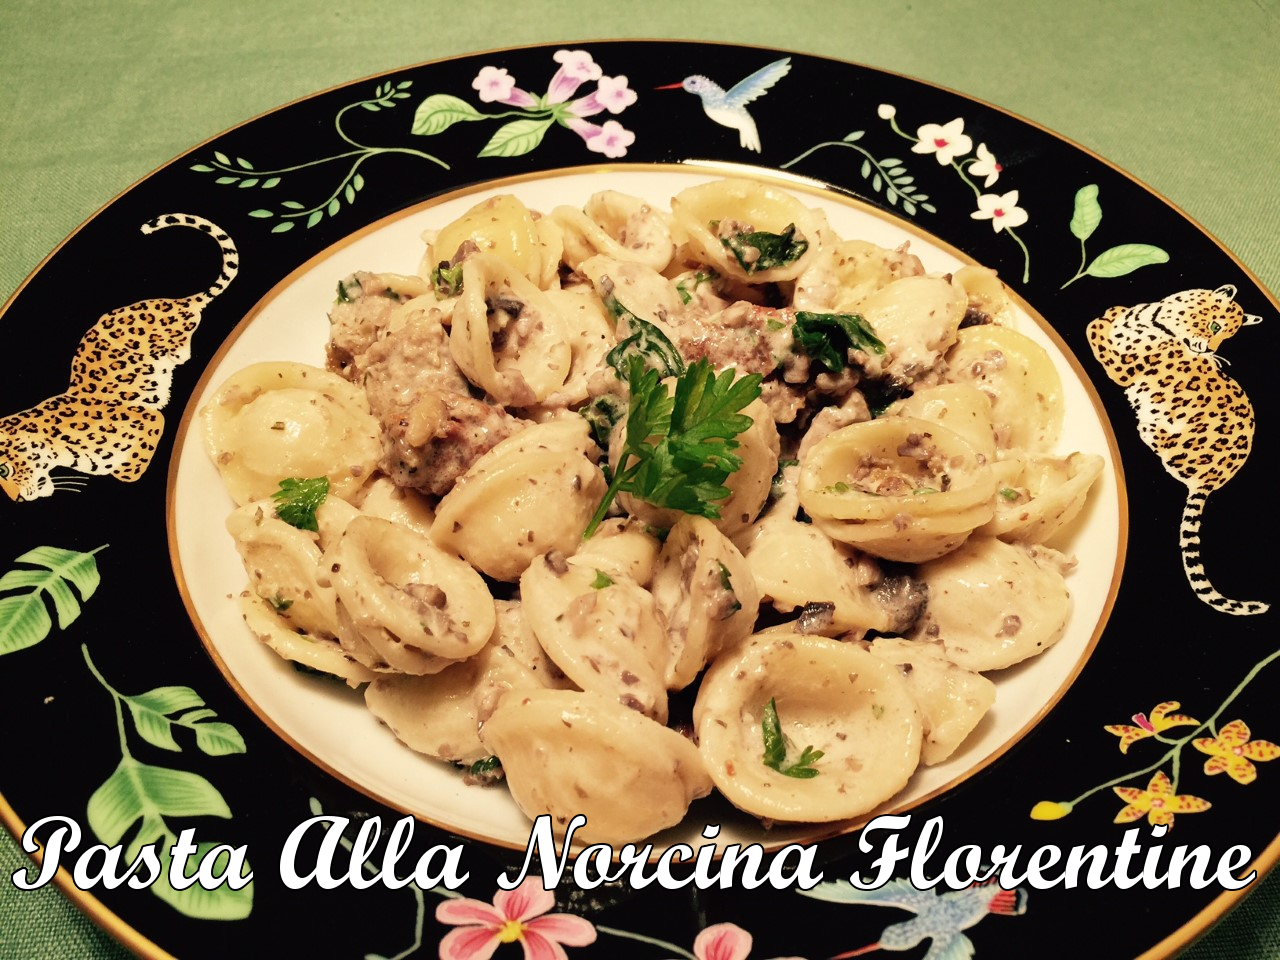
The one imitation meat that really does taste like the real thing is “sausage”. (quotation marks denote fake meat.) My go-to brand is Morningstar Sausage Patties. (I’ve never actually tried any other brand since these are so good!)

So when I saw an episode of America’s Test Kitchen featuring Pasta Alla Norcina, I was pretty confident their recipe could be adapted quite well for vegetarians. And, was I right! I went one step further and added spinach – I happened to have some extra in the fridge. (Waste not, want not.)

Not only is my PASTA ALLA NORCINA FLORENTINE a tasty delight, but it can be made in about half an hour – great for busy schedules.

Note: Try and use the orecchiette pasta. The name means ‘little ears’, since that’s what they look like. They’re perfect for capturing the other ingredients in the dish, so you get everything in one bite.

PASTA ALLA NORCINA FLORENTINE – makes about 5 cups

  • 343g (12 oz) orecchiette pasta
  • 4 “sausage” patties (I use Morningstar original patties, but their spicy ones add a nice kick)
  • 227g (8 oz) mushrooms (I prefer the common white mushrooms)
  • 1 tsp salt + more for pasta water
  • 166g (3/4 cup) cream
  • 2 T olive oil
  • 2 tsp garlic, pressed
  • 1/2 tsp crushed dried rosemary
  • 1/2 tsp pepper
  • 98g (1/2 cup) white wine
  • 18g (1½ oz) (about 1 cup) fresh spinach, chopped
  • 57g 2 oz) Pecorino-Romano cheese, grated
  • 18g (1/2 cup) parsley, chopped (tip: put parsley in a cup and use kitchen shears to chop)
  • 1 T lemon juice

Cook the pasta in a large pot of boiling salted water.

As the pasta is cooking, bake the “sausage” patties per package instructions (about 15 minutes). Set aside to cool when done.

Pulse the mushrooms 10 times in the food processor. If you don’t have one, chop them very small. (Then, add “food processor” to your gift list for the holidays!)


In a skillet, heat oil over medium/high flame and sauté mushrooms for 7 minutes. Add in salt, garlic, rosemary, pepper, and wine. Cook until wine has evaporated. Keep an eye on it – it doesn’t take long (about 3-5 minutes).

As the mushrooms are cooking, break up the cooled sausage patties into bite-sized pieces and mix with cream in a bowl. Set aside.

When pasta is cooked, save 1½ cups of the pasta water, then drain. (FYI, pasta water is a great thickener.)

Into the mushrooms pour 3/4 cup of the pasta water, the “sausage” and cream, and spinach. Simmer 3 minutes.

Into the now empty pasta pot, combine the pasta, mushroom mixture, Pecorino-Romano, parsley, and lemon juice. Add in extra pasta water, if needed (I never need to).


APPLE-POTATO FRITTATA: A Spooktacular Recipe All Year ‘Round!

halloween-frittata-text-horizontal
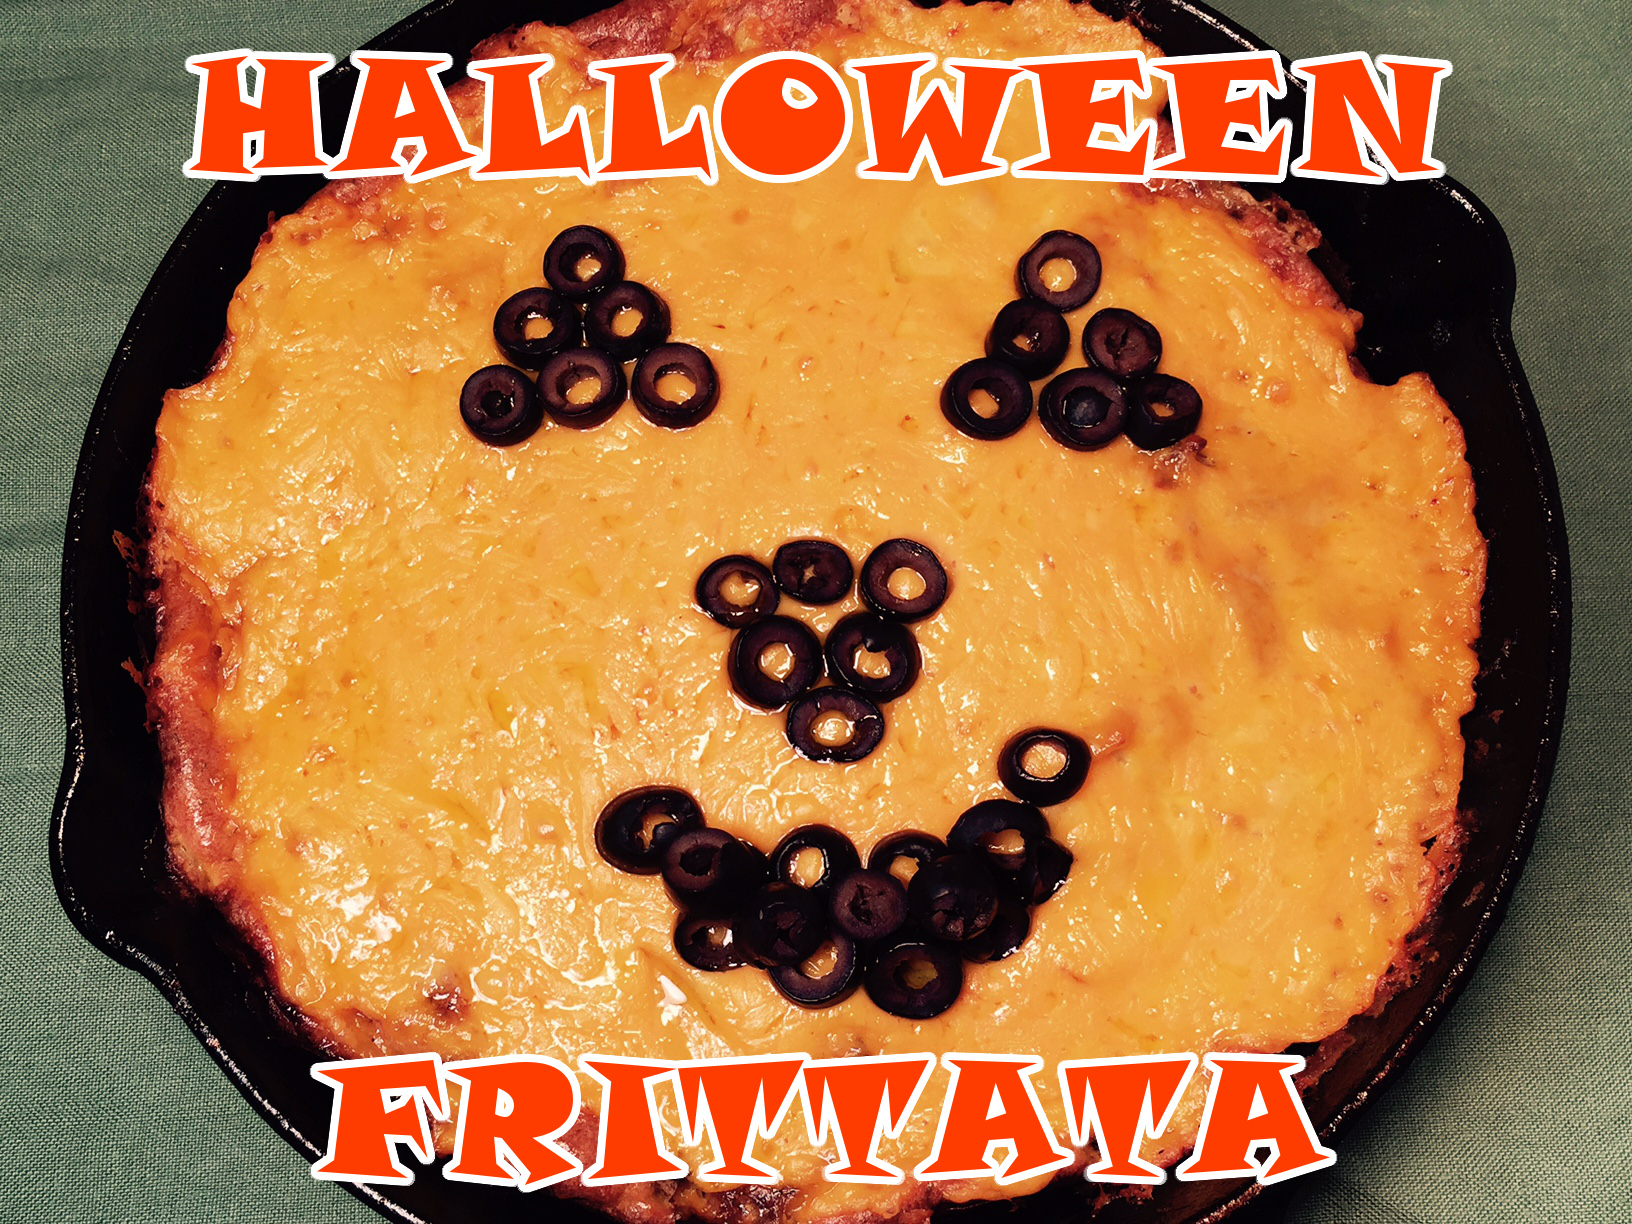
I’ve been struggling with a post topic for Halloween – there’s only so much pumpkin one can eat. Then I came across a wonderful article by Helen Nichols – 34 Science-Backed Health Benefits Of Apples. A lightbulb went off!lightbulb-moment-croppedInspired by my new-found apple information and beautiful photos, I decided to create an apple based recipe. A memory shot out from the deep recesses of my mind of a college friend who told me she made an apple omelette because it was all she had in the fridge. She couldn’t believe how delicious it was. I was skeptical, but obviously intrigued enough to file it away in my memory-bank.

Ideas began floating around me: apples… potatoes… onion… Halloween. Finally it hit me – a frittata filled with apples, potatoes, and onions, topped with melted orange colored cheese to resemble a pumpkin.

Like most egg dishes, APPLE-POTATO FRITTATA needs to set before eating so it’s firm enough to retain its shape. This is perfect for a Halloween dinner – you can make it before the trick-or-treaters come knocking at your door, then eat it during lulls in between visits. It doesn’t need to be piping hot to enjoy.

Note:  Make sure your skillet is oven-proof. The ideal pan for this recipe is cast-iron.

Additional Note:  I leave the apples and potato unpeeled for added nutrients and fibre.

APPLE-POTATO FRITTATA – makes 4-5 servings

  • 1 cup onions, chopped
  • 1 lb Yukon potato, UNpeeled
  • 1 lb apples (I prefer Golden Delicious), UNpeeled
  • 6 T olive oil, divided
  • 1½ tsp salt, divided
  • 1/4 tsp pepper
  • 1 tsp dried dill
  • 8 eggs
  • 1/4 cup sour cream
  • 8 oz orange colored cheese (I used Colby Longhorn), shredded

Into a medium sized mixing bowl put 4 T olive oil, 1 tsp salt, and the pepper. Add in onions. Slice the potato in half, then cut each half in half in the same direction. Thinly slice each quarter in the opposite direction. Stir into onions, mixing well.

Heat 1 T olive oil in cast iron 10″ skillet over medium/high flame. Pour in onion mixture. Press down with a spatula, making an even layer. Cover pan with lid. Set timer for 15 minutes. Stir, pack down, and cover again every 5 minutes until 15 minutes is up.

Note:  Trust me on this:  set your timer, when indicated!  I realize it’s for a short period of time and you’re sure you’ll remember. Been there, done that. These short periods of time are just long enough to think you can squeeze in a small chore, which always takes longer than expected. SET YOUR TIMER!

While onions/potatoes are cooking, cut the apples: with apples sitting upright, cut down along edge of core. Turn apple 45 degrees and cut again. Do this 2 more times. Discard core. Take the 4 pieces and half them horizontally. Then make thin slices vertically. When timer goes off, stir apples into onions/potatoes. Pack down and continue cooking, covered, for 5 minutes more.

While apples are cooking, break eggs into the same mixing bowl you used for the onions and potatoes – no point in dirtying another bowl. Add in sour cream and remaining 1/2 tsp salt. Lightly whisk together.

When apple/onion/potato mixture is finished cooking, stir into eggs. Heat 1 T olive oil in skillet over medium/high and pour in egg mixture. Run a heat-proof spatula along edge of skillet for 15 seconds to stir up the eggs a bit. Smooth top, cover, and cook 5 minutes.

Preheat oven to 350º fahrenheit.

Uncover skillet and place in oven. Set timer for 20 minutes. Remove from oven and sprinkle on cheese, covering entire top. Put back in oven and bake 5 more minutes to melt cheese.

Remove from oven and decorate, if desired. I used black olive slices. Let set for, at least, 20 minutes before slicing. (If you’re feeling decadent, you can slather extra sour cream on top!)

Thank you, Helen Nichols, for the motivation to create this delicious recipe!

NAAN BREAD – A Super Scooper

naan-bread-textThe subject of my previous post was Saag Paneer,  a delicious spinach/paneer cheese Indian dish. The best way to enjoy Saag Paneer is by scooping it up with Naan Bread. So, naturally, I decided to try my hand at this soft, chewy flatbread.

Traditionally, Naan Bread is cooked by throwing it on the sides of a tandoori oven. While I do like to do things the right way, there are limits. Fortunately, a cast iron or nonstick skillet does the trick.

While it’s not difficult to make Naan Bread, one does have to plan ahead – after making the dough, it needs to rest in the refrigerator for, at least, 16 hours.

Note:  Obviously, historically, bread was made by hand. But I’m a gal who likes to save time and energy when I can, so I HIGHLY recommend using a food processor. If you don’t own one, look into buying one – I often see them at thrift stores, if a new one is beyond your means.

NAAN BREAD – makes 8

  • 2 cups all-purpose flour
  • 1¾ cups bread flour
  • 1 tsp dry yeast
  • 2½ tsp sugar
  • 1 cup ice water
  • 1/4 cup plain yogurt
  • 6 T vegetable oil
  • 2 egg yolks
  • 2½ tsp salt
  • 1½ T butter

Into the work bowl of your food processor, pulse together the flours, yeast, and sugar. Add in the ice water, yogurt, oil, and yolks. Blend for 10 seconds, then let rest for 10 minutes. Add in the salt and process until dough forms a ball and pulls away from the sides.

Empty dough onto lightly floured surface and knead for about 1 minute. Place in an oiled bowl, pressing down, then flipping dough to coat other side. Cover with a plate or plastic wrap. (I use the free shower caps they give you in hotels. The elastic holds tight to the bowl, and you can use them over and over.) Place in refrigerator for, at least, 16 hours.

Divide dough into 8 equal pieces and roll each into a ball. Lay them on a board or greased cookie sheet, not touching. Cover and let rest 20 minutes.

Cooking the 8 dough pieces can be done by one person, as long as you keep at it and don’t get distracted. But if you have an assistant – so much the better.

In small pan, melt butter. Set aside.

Heat a small amount of vegetable oil in a 10″ skillet (I use cast iron) over a medium flame. While it’s heating, roll out one ball on a very lightly floured surface to about 6″ in diameter. Stab (it’s called docking) rolled out dough all over with a fork to prevent it puffing up. Hold dough splayed out in one hand away from other balls and spritz it with water with the other hand. Then place dough circle wet side down onto heated skillet. (Make sure you lay the dough down carefully rather than tossing it, which will cause the heated oil to splash.) Spritz dry side with water and cover.

While first side of dough is cooking, roll out the next circle and dock with fork. When the first piece is browned on bottom (about 2 minutes), flip, cover, and cook until browned. Remove to large tea towel. Brush with a little melted butter.

Add a small amount of oil to empty skillet, pick up prepared dough, spritz with water, and place wet side down. Spritz top with water, cover, and begin on next piece. Continue as before until all pieces are cooked.


CASHEW CRISPS -The Forgotten Nut!

cashew-crisps-textBelieve it or not, sometimes I crave a chocolate-free cookie. That’s a pretty bold statement from a certified chocoholic – but, there it is.

CASHEW CRISPS are a simple little cookie that go well with a cup of tea, coffee, or a big glass of cold milk. They’re easy to make and perfect for kids who want to help. This recipe makes about 4½ dozen cookies – the more hands to roll dough-balls, the better!

NOTE: If you like these cookies, next time make extra and freeze the uncooked dough balls for future use. I always like to have extra baked goods at the ready!

CASHEW CRISPS – makes about 4½ dozen

  • 3/4 cup salted cashews
  • 3/4 cup butter
  • 1 cup sugar
  • 1 tsp vanilla
  • 1 T molasses
  • 1 egg
  • 1½ cups all-purpose flour
  • 3/4 tsp baking soda
  • 1/2 tsp baking powder
  • 1/2 tsp salt

Toast cashews. Put in blender or food processor, then pulse until finely ground.

Melt butter and combine with sugar, vanilla, and molasses using an electric mixer. (If you don’t have an electric mixer, hand mix vigorously.)  Beat in cashews, then beat in the egg.

Add in flour, baking soda, baking powder, and salt, blending just until flour is incorporated. Let dough rest half an hour.

Roll into 1″ balls. Place on greased cookie sheet (unless using non-stick).

Bake at 350º for 10-11 minutes. (Cookies bake faster on a dark sheet.)

SALSA VERDE – Could NOT Be Easier!

Salsa Verde with text

I finally decided to woman-up and learn to make salsa. This was one of the few food items it never occurred to me to make. For one thing, I don’t use salsa that often.  And, for another, I envisioned lots of ingredients and lots of mincing.

But after washing and storing yet another plastic container that held my favorite store-bought salsa, I made up my mind to make my own. (I was running out of storage space – and, really, how many containers does one need?!)

I did my usual research of various recipes and then came up with my own – fine tuning it after the first attempt. I was surprised at just how easy salsa is to make. Since Salsa Verde was a success, next time:  Salsa Roja!

SALSA VERDE – makes 2 cups

  • 1/2 lb fresh tomatillas
  • 1 jalapeño chili
  • 1 green bell pepper
  • 57g (1/2 cup) white onion, chopped
  • 3 T fresh cilantro
  • 1 T fresh parsley
  • 1/2 tsp salt
  • 1 tsp lemon juice
  • 1 tsp lime juice
  • 1/4 tsp ground cumin
  • 1/4 cup water

In upper third of oven, broil the tomatillas, jalapeño, and bell pepper. When tops start turning black, flip them until that side turns black, too.

Remove stem ends of jalapeño and bell pepper. Slice open and discard seeds.

Place all ingredients into a blender or food processor. Pulse on a high speed until salsa is consistency you like. Adjust seasoning, if needed.