MUSHROOM & SPINACH TOPPED POLENTA – Easy Peazy!!!


Polenta topped with mushrooms and spinach

Polenta topped with mushrooms and spinach

I realize there are people that have neither the time nor the inclination to do a lot of cooking from scratch. But there are certain costly foods that are so easy to make, I feel it my duty to encourage (some might say “nag”) you to give it a try.

One such food is polenta. With such an exotic name, you might assume it’s a time-consuming process made from a variety of expensive ingredients. Uh, no. It’s merely cornmeal mush. If you want to be fancy, you can add some spices and maybe throw in a few dried tomatoes. But, basically, it’s boiled cornmeal and salted water. So, before you fork out big money for a tube of polenta (which you’re going to have to heat up) you may as well buy some cornmeal and try cooking it yourself.

I topped my polenta with a quick stir-fry of mushrooms, scallions, and spinach, then spooned on some brown sauce for a delicious, easy meal.

TIME SAVING TIP:  As the Queen of Freeze, I suggest you double or even triple the brown sauce recipe and freeze the extra in portion sized containers. One less thing to do in future! (Make sure you like the recipe before you load up your freezer with brown sauce, though.)

POLENTA TOPPED WITH MUSHROOMS & SPINACH

Polenta – serves 2 or 3

  • 2/3 cup cornmeal
  • 2 cups water
  • 1/2 tsp salt
  • optional: 1/2 tsp cayenne pepper (for a little kick!)

In a saucepan, bring the cornmeal, water, salt, and cayenne to a boil – stirring often. Reduce heat slightly to keep the water at a simmer. Continue stirring until the mixture thickens (about 10 minutes). Add in any extras, such as dried tomatoes, herbs, cheese, etc.

If you want the polenta mushy, serve immediately. But if you want it firm, pour the hot mixture in a container such as a loaf pan lined with waxed paper, smooth top, and refrigerate for several hours. To serve, remove from pan and cut into serving sizes. To heat, you can either fry or broil polenta in butter or oil.

Mushrooms & Spinach Stir-fry – serves 2 or 3

  • 9 oz mushrooms, chopped
  • 1½ cups spinach, chopped & packed
  • 1/2 T butter
  • 1/3 cup scallions, sliced

In a skillet, melt butter and add in mushrooms, spinach, and scallions. Sauté for several minutes – until spinach is just wilted.

Brown Sauce – makes 1 cup

  • 1 T cornstarch
  • 2 tsp sugar
  • 2 tsp rice vinegar
  • 5 T soy sauce
  • 1 cup water

In a small saucepan, combine cornstarch, sugar, vinegar, and soy sauce. Smash any lumps. Turn on heat to medium and add the water. It will be the color of coffee with cream. Stir often (constant is best) and bring to a boil. The color will now be coffee WITHOUT cream, and the sauce will be thickened slightly. Remove from heat.

To Assemble:

Place Polenta on plate. Top with Mushrooms & Spinach and ladle on Brown Sauce.


VEGGIE-CHEESE WAFFLE: It’s What’s For Dinner!

IMG_0798

I’m a gal who’s cooool (notice the extra “o’s”? – oh, yeah!). So when there’s a new food trend, I’m right there with fork in hand.

The pop-food that caught my eye recently was waffles. No longer just for breakfast, dripping in maple syrup, today’s waffles are topped with ice cream for a hot fudge sundae, made into a Monte Cristo sandwich, baked into a 7-layer cookie bar, ice cream wedged between 2 waffles for an ice cream sandwich. I’ve gained 5 pounds just thinking about those luscious delights.

Since I like to think outside the box, I wondered what if I added veggies to the batter and topped it with caramelized onions, thus creating a dinner (or lunch) waffle? Epic win! (See – I’m SOOOO with it!) They were delicious, filling, and the calories were quite reasonable since I left out the oil in the batter and the syrup on top.

So grab that waffle maker you have hidden in the back of the cupboard and go make dinner!

DINNER WAFFLES – makes 2½ large waffles

  • 2 T cider vinegar plus enough milk (I use nonfat) to equal 1 cup
  • 2 onions, sliced
  • 2 T butter
  • 1/8 tsp salt (this is separate from salt below)
  • 1 zucchini, shredded, chopped, or cut into half moons
  • 4 mushrooms, chopped
  • 2/3 cup fresh spinach, chopped & packed
  • 1 egg
  • 1/2 T Dijon mustard
  • 1/8 tsp dried dill
  • 1 cup all-purpose flour
  • 1 tsp baking powder
  • 1/2 tsp baking soda
  • 1/4 tsp salt
  • 3/4 cup Swiss cheese, shredded
  • optional: 3 strips imitation bacon (I use Morningstar), cooked crispy, then crumbled
  • oil to grease waffle iron, if needed

Combine cider vinegar and milk – we’re making buttermilk. Let sit as you prepare the rest of the recipe. If you already have buttermilk, then just use 1 cup of it instead.

Caramelize onions by melting butter in a skillet at medium heat and frying onions for about 20 minutes – until they’re golden brown. (Don’t worry about the skillet – an SOS pan takes care of that in no time) Stir often. Sprinkle in 1/8 tsp salt.

In a saucepan, sauté the zucchini, mushrooms, and spinach in a drop of oil until cooked.

In a mixing bowl (preferably one with a spout for easy pouring), beat egg and Dijon. Beat in buttermilk. Gently stir in by hand the dill, flour, baking powder, baking soda, and 1/4 tsp salt. Don’t over mix – there can still be streaks of flour. Add in cooked veggies and cheese, and stir just enough to mix everything.

Preheat waffle iron. Brush with oil, if needed. Pour on batter. If using “bacon”, sprinkle on. Close lid and cook.

NOTE: The secret to prevent waffles from sticking to the iron is not to lift up the lid too early.  If you do that, you’ll have a big mess on your hands. I set my timer for 4 minutes before I check – by then, the waffle has baked enough to hold together. I usually have to cook it another couple of minutes.

Top with onions and serve hot.


NAVAJO TACOS – Worth The Effort!

IMG_0218Navajo Tacos are one of those dishes I tend to forget about until I flip through my recipe box. (This is the device we used before the days of computers to store our recipes.) When I do make them, I chide myself for not doing so more often – they’re uber yummy…and not as time consuming as I think it will be.

If you’re unfamiliar with this dish, Navajo Tacos are fry bread topped with chili. Really, what’s not to like?!

In order for the chili and fry bread to be done at the same time, start the chili first. Then, as it’s simmering prepare the fry bread.

NOTE:  You can shorten the chili cooking time by using pre-cooked beans. Reduce the vegetable stock to 1 cup since you won’t need the extra 1/2 cup to be absorbed into the raw beans.

ADDITIONAL NOTE:  The fry bread is cooked in oil – not just a tablespoon or two, at least 2 inches. I’m all about saving money. Make sure you strain and save the oil after you use it in a plastic container you designate specifically for used cooking oil – don’t mix it back with the clean oil. Then, you can use the same oil over and over until it’s too grungy to use again. You can actually freeze it, if you like. When it’s time to dispose of it, check online for places to donate used cooking oil (they actually exist!)

NAVAJO TACOS – makes 6 servings

     Chili

  • 1/2 cup raw Great Northern beans
  • 1/2 cup onions, chopped
  • 1 tsp garlic, pressed (1 clove)
  • 1/2 T vegetable oil
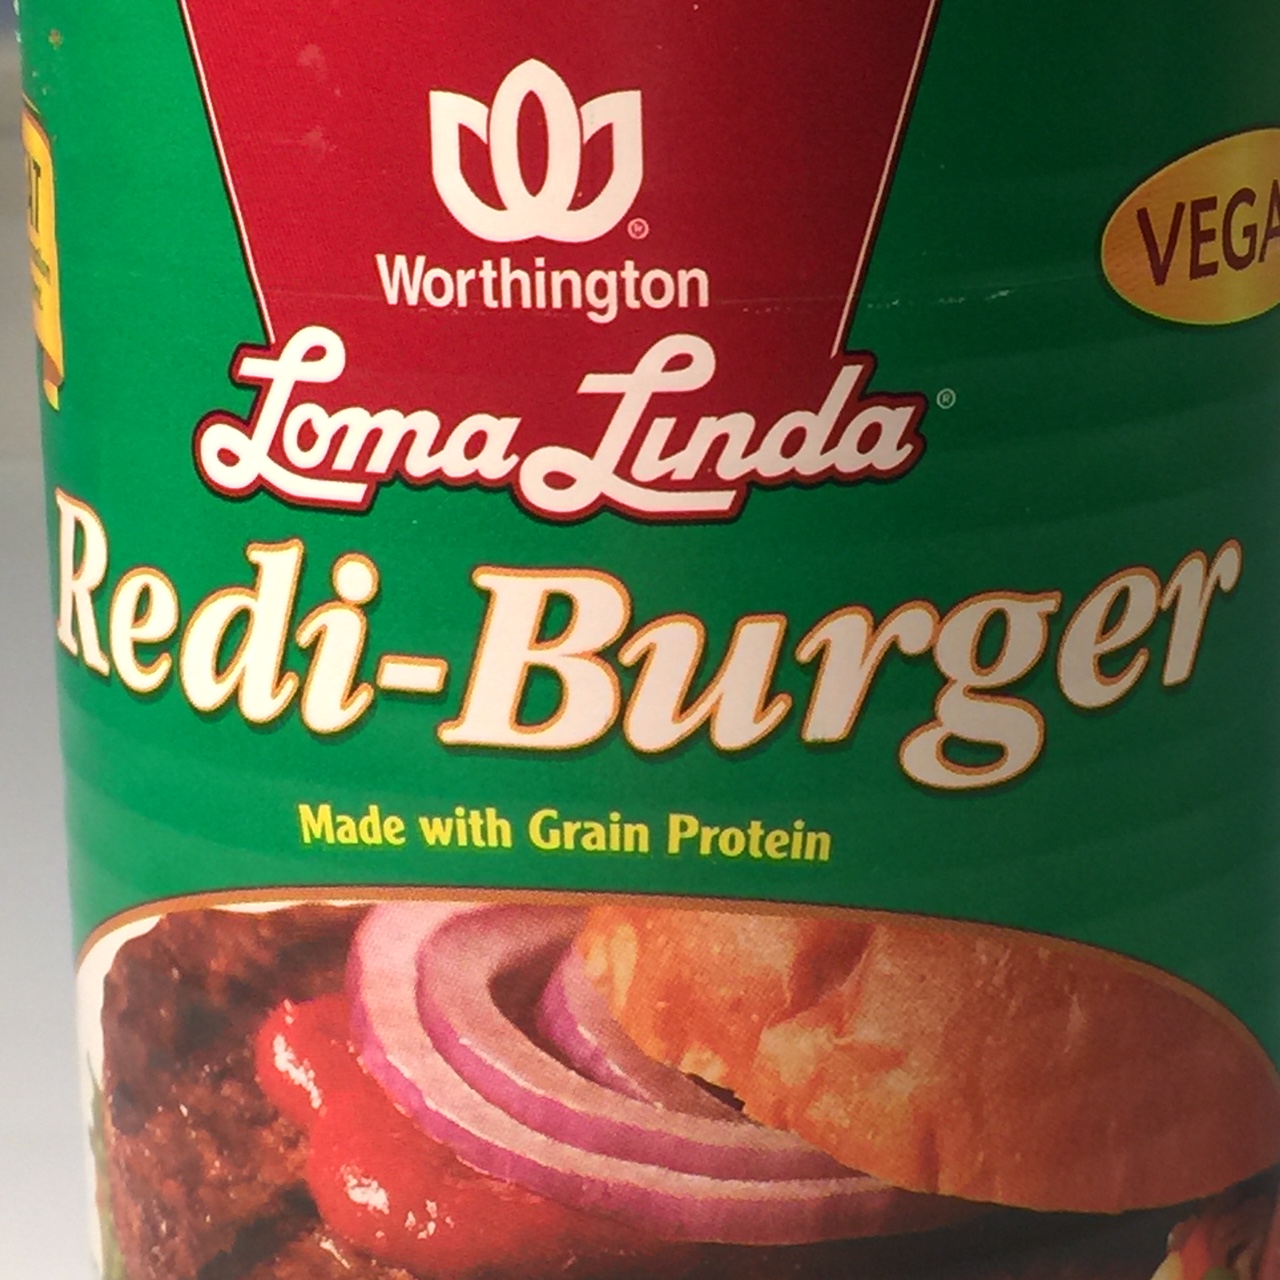
  • 1 lb fake ground beef (I use Worthington Redi-Burger – see photo below)
  • IMG_02121½ cups vegetable stock – or 1 cup if using pre-cooked beans
  • 1 T chili powder
  • 1 tsp cumin
  • 1 tsp oregano
  • 1 tsp basil
  • 1/2 tsp salt

Put beans in a saucepan and cover with an inch of water. Bring to boil, lower flame to simmer for 5 minutes. Turn off stove, cover pot, and let sit for 1 hour. Drain. You can do this step ahead of time.

Sauté onions and garlic in oil for 5 minutes. Add in fake meat, breaking it up with a flat headed stirrer, if necessary, depending on the brand (I have to do this with Redi-Burger). Add in the stock, beans, chili powder, cumin, oregano, basil, and salt.

Bring to boil, lower flame to simmer mixture, cover, and let cook for 1½ hours, until beans are done.

Chili can easily be frozen so if you like this recipe, next time double or triple the recipe and then freeze for future use. No point in cooking and cleaning more than you need to.

     Fry Bread – makes 6

  • 2 cups all-purpose flour
  • 1/2 cup instant nonfat dry milk
  • 1 T baking powder
  • 1/2 tsp salt
  • 2 T shortening (I use Crisco)
  • 3/4 cup water
  • vegetable oil for deep frying

Put flour, dry milk, baking powder, salt, and shortening into the work bowl of your food processor. If you don’t own a food processor you’ll have to do this all by hand. (During the next 15 minutes of tedious work, think about how you really need a food processor.)

Turn on machine, then slowly add in the water through the pour spout. Allow machine to run 30 seconds after dough has formed a ball. (This is how fast and easy it is to knead with a food processor!) Divide dough into 6 equal balls, then flatten with your hands as much as possible. Cover with a tea towel and let rest while oil is heating.

Heat 2 inches of oil in a wok or deep pan to 375º Fahrenheit.

On a floured board, roll out a dough piece with a rolling pin to make a 5″-6″ circle. (See photo below)

IMG_0184

Carefully pick up dough and gently pat excess flour from bottom. Drop into hot oil. Let cook for 3 minutes, then flip and fry 2 more minutes. Both sides should be golden brown. (See photos below)

fry bread frying

Remove to a large cookie sheet lined with paper towels. Keep warm by storing in an oven heated to 200º Fahrenheit.

While one dough is frying, roll out the next so it’s ready to go. Keep the uncooked dough covered with a tea towel so they don’t dry out.

Assembly

Ladle chili over fry bread. Top with tomatoes, cheese, lettuce, olives, guacamole, or whatever you like.


CURRIED LENTIL STEW – A Slim-Down Special

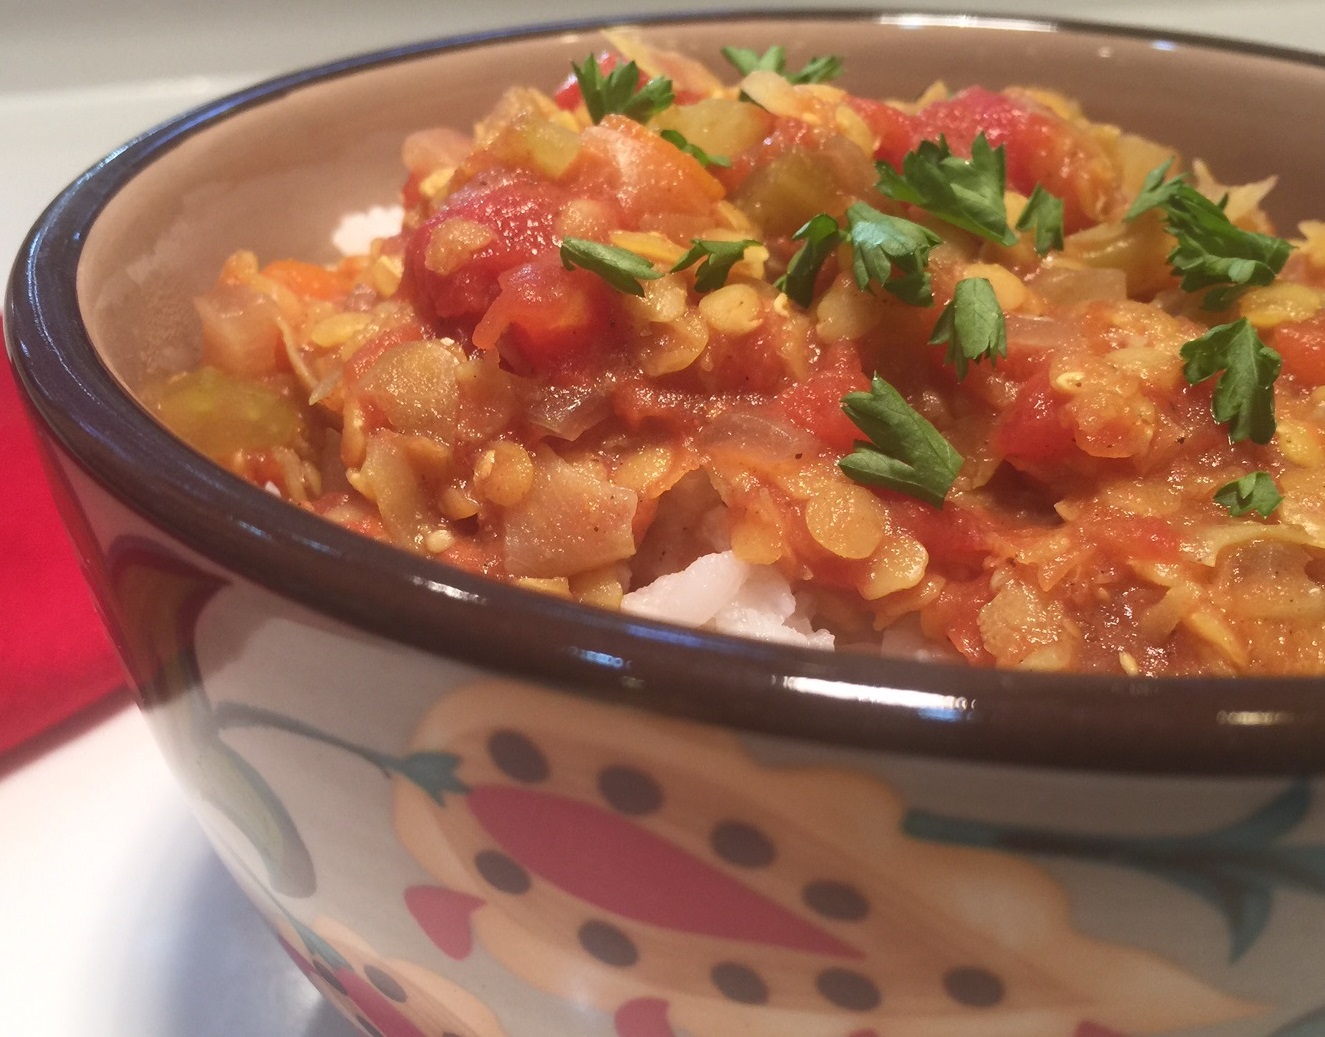
CURRIED LENTIL STEW

CURRIED LENTIL STEW

I have to admit, I’m not a huge lentil fan. They’re a little bland and mealy, as a rule. But they are a superfood – full of protein, fibre, and all kinds of nutrients, so I was determined to find a recipe that was, at least, palatable.

CURRIED LENTIL STEW goes beyond palatable – it’s downright good! I also found that it actually gets better the next day – thicker and more flavorful. Bonus! That means it can be made ahead of time, which I love. One less thing to do during the dinner-time rush hour.

This dish is low-fat, low-calorie, and easy to throw together.  Who could ask for more?!

NOTE: Lentils are high in phytates, which reduce the bioavailability of nutrients. To counteract this problem, soak the lentils overnight in warm water.

ADDITIONAL NOTE: If you’re daunted by all the spices, you can simply use 1 T curry powder. It’s not as flavorful, but it’s quick.

CURRIED LENTIL STEW – makes about 7 cups

  • 1 cup dry lentils (I used red)
  • 1 cup dry rice (I used Chinese white rice)
  • 4 cups vegetable stock (I used homemade: VEGETABLE STOCK)
  • 1 cup onion, chopped
  • 3 tsp garlic, pressed
  • 1 cup carrots, sliced
  • 1 cup celery, diced
  • 2 cups cabbage, sliced thinly
  • 15 oz can whole tomatoes, diced
  • 1 tsp turmeric
  • 1/2 tsp dry mustard
  • 3/4 tsp cumin
  • 3/4 tsp coriander
  • 1/2 tsp cayenne powder
  • 1/2 tsp cinnamon
  • 1/8 tsp ground cloves (or leave it out completely – my husband doesn’t like it)
  • 1½ tsp salt
  • 1/2 tsp ginger powder
  • 1 T lemon juice

If you’ve soaked the lentils, drain them in a sieve. If not, rinse the lentils and let drain.

Cook the rice.

In a saucepan, sauté the onions in a tablespoon of the vegetable stock for several minutes. Add in carrots, garlic, celery, and cabbage. Sauté another 2 minutes.

Add in turmeric, dry mustard, cumin, coriander, cayenne, cinnamon, cloves, salt, and ginger powder. Sauté another minute or two – until you can smell the spices.

Add in lentils, remaining vegetable broth, lemon juice, and tomatoes.  Bring to a boil, lower flame to bring down to a simmer, and cook uncovered for 30 minutes.

Adjust seasoning to taste. Add in cooked rice.

Can be served immediately or refrigerated and served the next day (which is better, IMO).


GREEK STUFFED PORTOBELLOS – They’re Greek To Me!

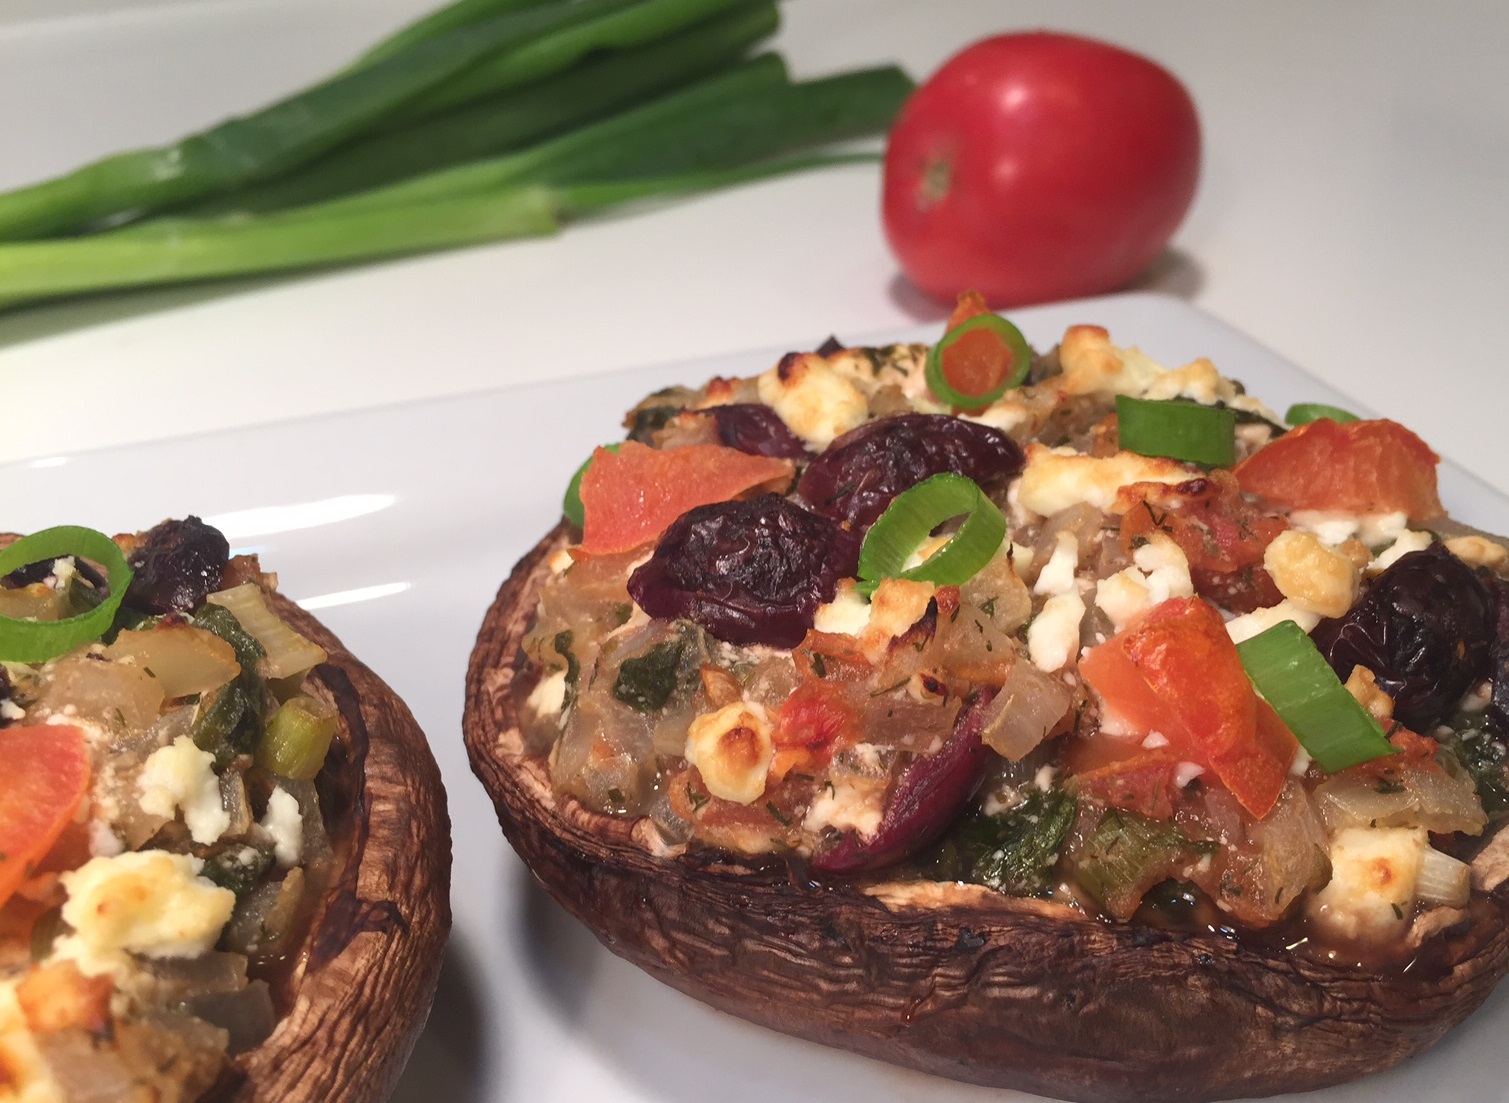
greek portobello

GREEK STUFFED PORTOBELLO

Two things that make my pupils dilate when choosing a recipe are it’s: 1) fast to prepare, and 2) can be made ahead of time. Bonus points if the cooking time is short.

Greek Stuffed Portobellos are all that – and delicious, too! I know I’m on a winner when even my picky-eater youngest son will eat them. They’re great for sneaking things into your child’s diet that they may not normally eat – like spinach. (We moms sometimes have to be sneaky – they’ll thank us later!)

Something you may not realize is portobello mushrooms are just common button mushrooms all grown up. So now I only buy the more expensive portobellos when I’m stuffing them and save my money on recipes that call for sliced or chunks of portobellos by using the smaller common mushrooms – they’ll do fine.

GREEK STUFFED PORTOBELLOS – makes 4

  • 4 portobello mushrooms
  • 1/2 T olive oil
  • 1 cup onions, chopped
  • 2 garlic cloves, pressed
  • 2 cups spinach, chopped
  • 1/4 cup scallions
  • 3/4 cup Roma tomatoes, chopped
  • 1 tsp oregano
  • 1 tsp dill
  • 1/2 tsp salt
  • 1 T lemon juice
  • 1/3 cup kalamata olives, halved
  • 5 oz feta cheese, crumbled

Sauté onions and garlic in olive oil for a few minutes. Add in spinach, scallions, tomatoes, oregano, dill, and salt. Continue to cook until spinach is wilted. Remove from heat. Stir in lemon juice, olives, and feta.

Remove and discard stem from mushrooms, and thoroughly wash. Rub with olive oil and place on broiler pan open side up. Divide the spinach mixture between the mushrooms.

Broil 4″ from heating element for about 15 minutes – until browned.

Serve with rice.


SPINACH PIE – Popeye Approved!

SPINACH PIE

SPINACH PIE

Spinach is one of those really-good-for-you foods that I tend to put off making. Why? Because I hate cleaning it. If you’ve ever bought fresh spinach, you know what I mean – it’s very muddy. Even when the store does its best to sell clean bunches, I always find dirt in there. Consequently, I wash each leaf under running water, getting in every nook and cranny – after all, I don’t know what’s in that mud.

I admit it – I’m a wee bit overly cautious. (Okay – paranoid!)

I realize life would be easier if I used frozen, but I worry they didn’t clean their spinach very well. Running water over frozen spinach is almost pointless.

All that being said, whenever I do make a spinach dish, I’m glad I did. It’s delicious, healthy, and I always feel I’ve done a noble thing when finished. Then I chide myself for not cooking spinach more often.

My Spinach Pie is a lovely combination of spinach, raisins, and olives, topped with mozzarella, and encased in a hearty crust.

You may be fearless (or less paranoid) when it comes to spinach, but cringe at making a yeast dough. I’m here to tell you, yeast doughs are easy as…(wait for it)…pie. HONESTLY! They’re a piece of cake. (I’ll stop now.) So take a deep breath and I’ll walk you through this Spinach Pie recipe that everyone loves.

NOTE: I prefer to use canned black olives with jalapeños for added kick, but the plain ones are fine.  You can also use kalamata olives, if you like.

ADDITIONAL NOTE: There are 3 olive oil amounts listed separately. The grand total is 5½ T, but I listed them in the amounts to be used for different purposes. The olive oil used to grease the rising bowl, casserole dish, and brush on the dough are not included in this total.

SPINACH PIE

Crust:

  • ¾ cup water, approximately 100º Fahrenheit
  • 2¼ tsp dry yeast
  • 2¼ cups (274g) all purpose flour
  • 1½ T olive oil
  • ½ tsp salt

Filling:

  • 1 lb fresh spinach (stems are included in this weight)
  • 1 T olive oil
  • 3 garlic cloves, pressed
  • ¼ cup onions, finely chopped
  • ¼ tsp cayenne pepper
  • 1   4-oz can black sliced olives (with or without jalapeños)
  • ¾ cup raisins
  • freshly ground pepper
  • ½ lb mozzarella cheese, shredded
  • 3 T olive oil

Stir yeast into water and let proof for about 5 minutes.

Put 2 cups (246g) flour, the 1½ T olive oil, and salt into your food processor. Turn it on and slowly pour the proofed yeast water through the pour spout.  Let run until the flour is incorporated. The goal is for the dough to form a ball. Add more flour tablespoon by tablespoon until this happens. Then, run the machine about 45 seconds to knead the dough.

Note:  If you don’t own a food processor, you’ll have to mix and knead the dough by hand. You can use the time it takes to knead the dough to think about how to save up for a food processor.

Press the dough ball into an olive oil greased bowl, then flip the dough so the entire ball is greased. Cover with a tea towel and let rise for 1 hour.

While dough is rising, prepare the filling (which can also be done ahead of time). Remove and discard the spinach stems. Thoroughly wash spinach leaves, shake to remove excess water, then grab handfuls of leaves and slice. Don’t worry about the size or shape of the sliced leaves – once cooked, the leaves wilt.

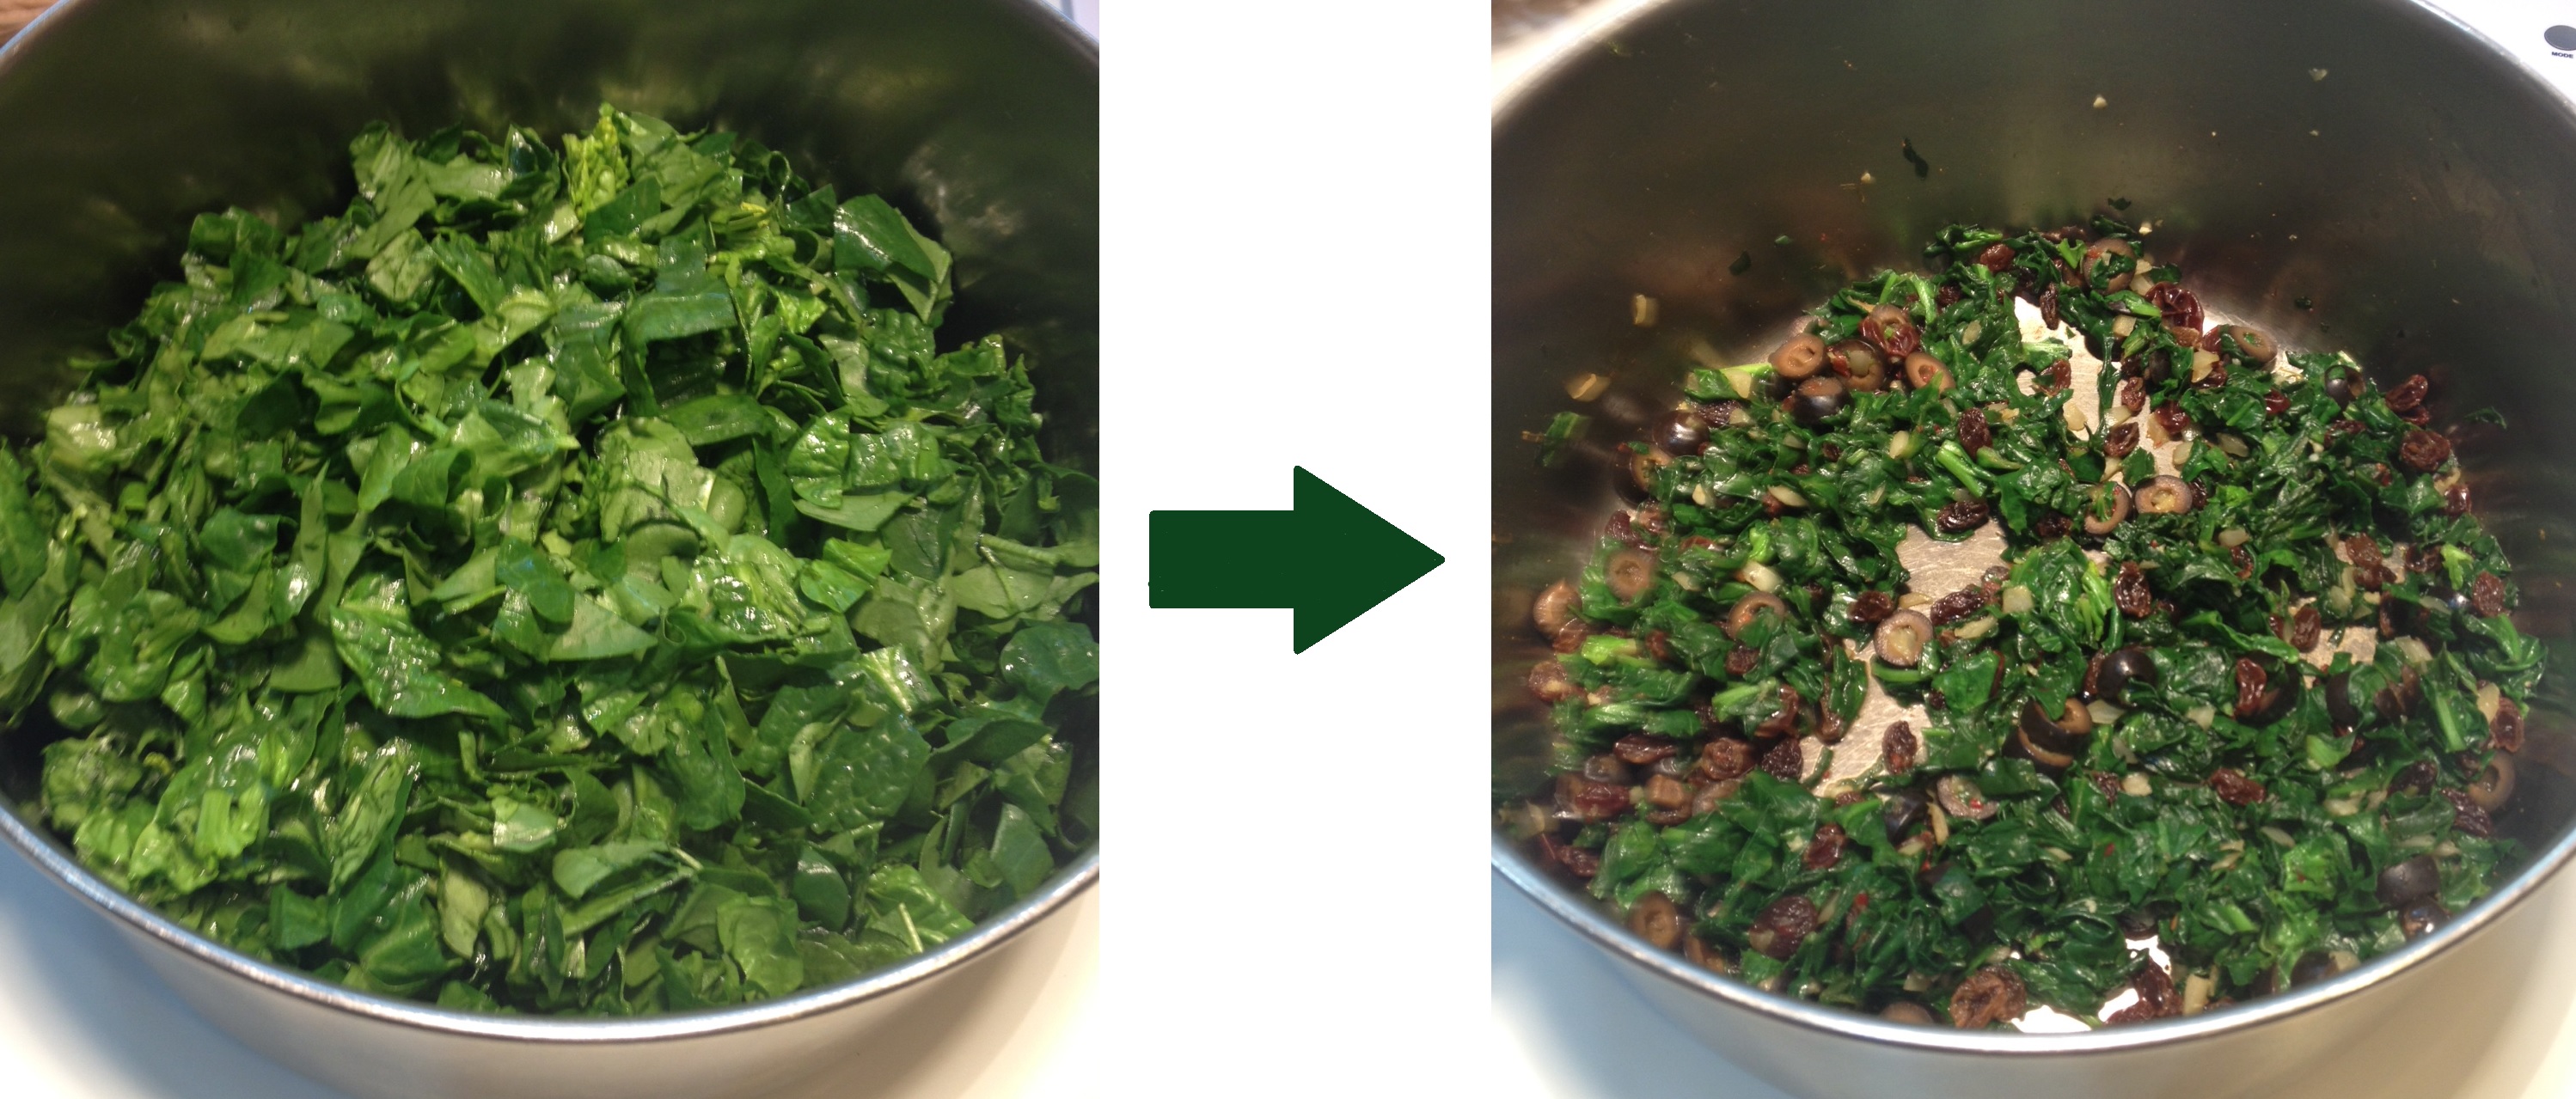
In a large pot heat the 1 T olive oil. Sauté the onions, garlic, and cayenne pepper for 5 minutes. Add in the olives, raisins, ground pepper, and spinach. Cook until the spinach is wilted and the liquid boils down a bit. (If you’ve never cooked fresh spinach before, you’ll be amazed by how much the spinach wilts – see photo.) There will still be some liquid – don’t worry about it.

Raw spinach wilts down to nothing.

Raw spinach wilts down to nothing.

Mix the mozzarella and 3 T olive oil together in a bowl.

Preheat oven to 400º Fahrenheit.

When dough has risen, take two thirds of the dough and, on a well floured board, roll into a rectangle large enough to cover the bottom and sides of an 8″x 10″ casserole dish (or comparable size). Liberally grease the casserole dish with olive oil, then carefully place dough. Brush dough with more olive oil.

Tilt the pan containing the spinach, allowing the liquid to drain away. With a slotted spoon, remove the mixture and spread evenly on top of dough. Then sprinkle on cheese.

Roll out the remaining dough into a rectangle large enough to cover top. Lay this piece in place, and roll the edges of the bottom and top dough together. The filling is now completely encased.  You can brush the top with olive oil, water, milk, or an egg wash, if you like. Make 3 slits in the top dough.

Bake at 400º Fahrenheit for 35 minutes.

Fast And Easy FETTUCCINE PRIMAVERA: Molto bene!!!

Fettuccine Primavera

FETTUCCINE PRIMAVERA

Think “fettuccine” and the word “fattening” probably comes to mind. Well, if you want fettuccine alfredo, then “heart attack on a plate” is an appropriate leap. But the high calories and cholesterol come from the butter and cream, not the pasta. The noodles themselves are only about 210 calories per 1½ cup of cooked fettuccine.

Fettuccine Primaverde is one of those dishes I make when I want something light and/or fast. Washing and chopping the veggies is the longest part – cooking is done in about 5 minutes. If you make the pasta noodles (which I do), then it takes a bit longer. The last time I made Fettuccine Primaverde I used leftover fettuccine pasta from the night before, so I enjoyed the benefit of homemade noodles without the effort. Dinner was ready in 20 minutes!

This recipe makes enough for 3-4 people, depending on how large the portions are. If you purchase the pasta, cook the amount you’ll need. If you’re making the pasta, use 1½ cups flour and 2 eggs.

FETTUCCINE PRIMAVERA – makes 3-4 servings

  • 3 T butter
  • 3 T olive oil (I use extra virgin)
  • 3 garlic cloves, pressed
  • ½ tsp cayenne pepper
  • 12 mushrooms (about 7 oz), coarsely chopped
  • 10 stalks asparagus, sliced into 1″ pieces
  • 1 red pepper, chopped
  • 1/3 cup kalamata olives
  • ½ cup vegetable stock (I use homemade: Homemade Vegetable Stock)
  • about ¼ cup Romano cheese, shredded
  • 1½ T pine nuts, lightly toasted
  • 3-4 servings fettuccine pasta, cooked

Melt butter and oil together in 10″ skillet. Add in garlic and cayenne pepper. Sauté for 1 minute.

Add in mushrooms, asparagus, and red pepper. Sauté about 2 more minutes.

Add in vegetable stock and olives. Bring to a low boil. Let cook another couple of minutes. Test the asparagus – when it can be pierced with a fork, but is NOT mushy, it’s finished.

To serve, pile fettuccine pasta in a bowl or on a plate and ladle veggies over it. Sprinkle on cheese and pine nuts.


Beurek – A “Handy” Little Treat

Cheese Boerg

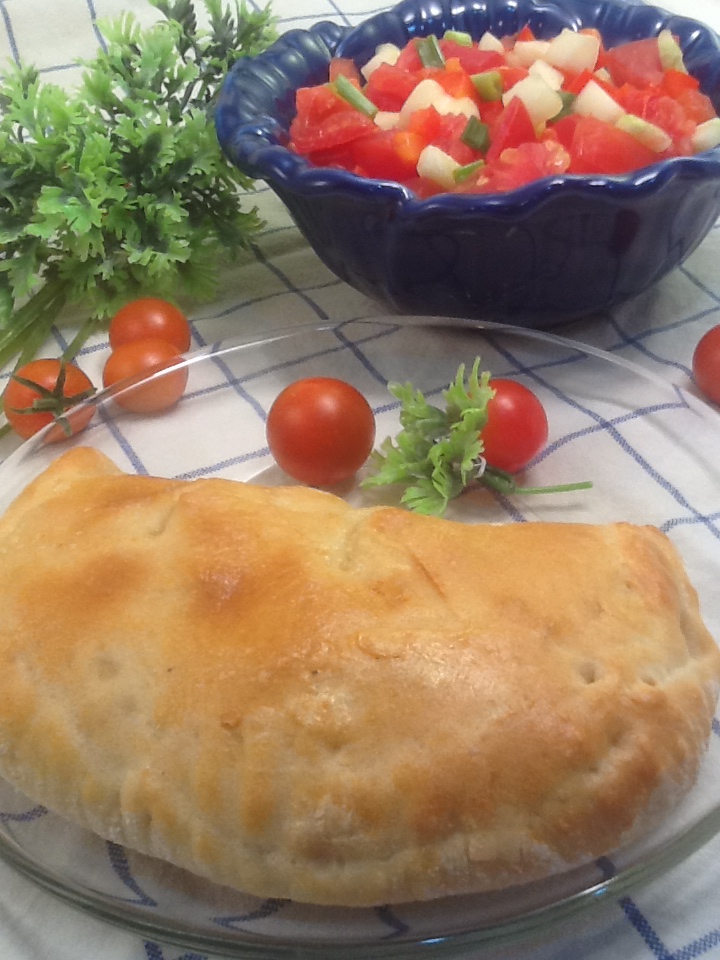
Cheese Beurek served with Armenian Salad.

Like all ethnic families, our Armenian family gatherings centered around food. Stops were pulled, and a feast was enjoyed by all – generally twice in the same day.

A favorite amongst the children was Cheese Beurek (pronounced ‘burr-egg’). They’re similar to the Cornish pasty and Italian calzone. Admittedly, these tasty delights are a bit of work – they’re not difficult, just time consuming.

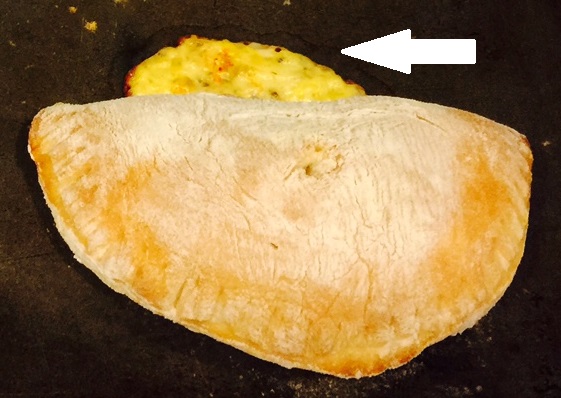
Now here is the issue of utmost importance with Cheese Beurek:  to ooze or not to ooze. Unless you’re very careful, some of the cheese filling oozes out midway through the baking process, forming a crispy cheese appendage. (See photo below.)

Oozy Beurek

Oozy Beurek

To be honest, I quite like this cheesey bonus disc, and there’s still plenty of cheese inside. But they don’t look very nice and, of course, when they’re completely enclosed, there are no greasy fingers.

I embarked on a mission to discover why the bursting forth of cheese so I would know how to counteract this situation if I wanted to serve Cheese Beurek for company. Oddly enough, the leakage comes from the folded side, not where the edges meet, like you might expect. This is probably because I crimp the heck out of the dough.

So I made countless Cheese Beurek, experimenting with different methods including slitting the top, using less filling, keeping the filling away from the center of the fold, and brushing the dough with egg before placing the filling. What finally worked was using a piece of floured waxed paper to assist in folding the dough, rather than my hands. I guess I was stretching the dough with my palm even though I tried to be careful. The paper keeps the dough stable.

So there you have it!

One thing I should mention is that sometimes beurek is made using a filo or puff pastry dough, rather than bread dough. It’s just a matter of preference.

NOTE:  This recipe involves a rising dough, so allow time for it.

CHEESE BEUREK – makes 12 beurek

  • 2 tsp dry yeast
  • 1¼ cups water, 100º – 104º Fahrenheit
  • 3 1/3 cups all purpose flour, approximately
  • 1 tsp sugar
  • 1½ tsp salt
  • ¼ cup shortening (I use Crisco)
  • ½ lb Muenster cheese, shredded
  • 1 egg, beaten and divided
  • ½ tsp black ground pepper
  • ¼ tsp garlic salt
  • ½ tsp salt

Stir yeast into the water and let proof (foam) for about 5 minutes. Put 2½ cups of flour into the work bowl of your food processor.  Add in sugar, salt, and shortening.  Turn on the machine and slowly pour in the yeast water. Turn off machine and sprinkle in a few more tablespoons of flour. Turn on machine. The goal is for the dough to form a ball. Keep adding in flour a little at a time until the ball forms – you may not need all the flour. If you don’t have a food processor, you’ll have to mix in a bowl and knead by hand. (Start saving your pennies, you really should have one!)

Pour the dough onto a floured bread board. Pick up the ball from the flour-y bottom and fold the dough onto itself, so now floured dough surrounds it and the sticky dough is encased. (I HATE touching sticky dough with my hands.) Gently toss the ball to dislodge excess flour. Plop the dough into a greased bowl, press down, then flip the dough. Now the ball is greased on both sides and your hands should still be clean. Cover with a tea towel and let rise for about an hour.

Prepare the filling while the dough is rising. Into a mixing bowl blend the cheese, half of the egg, the pepper, garlic salt, and salt. Into a smaller bowl make an egg wash by beating the other half of the egg and 1 tablespoon water.

When the dough has risen, pour it onto a well floured board and cut into 12 pieces. Form each piece into a ball, then flatten with the palm of your hand. Let the dough rest about 10 minutes so it’s easier to roll out.

One by one (unless you’re doing an assembly line with helpers) roll out a dough circle to be about 5½” in diameter. Place this on a lightly floured square of waxed paper. Spread about 2½ tablespoons of the filling on one half of the dough, leaving a 3/8″ border from the edge. Dip your finger in water and run it around the entire border to moisten dough. Put your palm under the waxed paper and fold the dough in half.  (See picture below.)

Fold dough using waxed paper.

Fold dough using waxed paper.

UPDATE: I’ve just discovered an even better method to prevent leakage:  form 12 oblong cheese balls from the filling, place on waxed paper, and freeze. Place frozen balls on dough circles, wet edges with water, and fold dough over cheese ball, being careful not to poke the frozen cheese through the dough.

Press edges together, then crimp well with a fork.boereg crimped

Place on a greased or non-stick cookie sheet – don’t crowd. One standard sheet will hold 6. With a dry pastry brush, whisk away excess flour.

Preheat oven to 450º Fahrenheit. Do this after beureks are assembled to give them a bit of a rest as the oven is heating.

When the oven is heated, brush the tops of the Cheese Beurek with egg wash. Bake for 12 minutes, until top is golden brown. Serve hot.


Barbecue Pulled “Pork” Sandwiches – Oh, Yeah!

BBQ "pork" sandwich with roasted carrots,  mushy peas, and a nice cool beer.

BBQ “pork” sandwich with roasted carrots, mushy peas, and a nice cool beer.

I’m NOT a southern gal, but after trying this Barbecue Pulled “Pork” Sandwich, all I can say is ‘hoo-weee!’

As an ex-carnivore, one of the things I miss most is BBQ – shredded pork or beef sandwiches, to be specific. It occurred to me that maybe there was something I could substitute for the meat. Thanks to the internet, I discovered that people were using jackfruit. What the heck was a jackfruit, I wondered? (Yes, aloud.) I learned it was an ugly looking fruit, popular in the Asian community, and you can buy it canned.

Off I went to the Asian market. Apparently, canned jackfruit is VERY popular because there were numerous brands, most of them in syrup. YOU DO NOT WANT THAT KIND!!! Look carefully, possibly in another section, and you’ll find jackfruit in brine. That’s what you want.

I began this Pulled “Pork” journey with Blissful Basil, a vegan blog, who posted about a jackfruit barbecue sandwich. Naturally, I had to put my own spin on it after trying her recipe. I opted to make my own barbecue sauce, which gave those sandwiches quite a kick. My nose was a-runnin’ and perspiration was a-beadin’ (sorry – it’s the spices a-talkin’)…but, I liked it! This Barbecue Pulled “Pork” Sandwich really satisfied that hankerin’ (I’ll stop now, I promise) for BBQ.

NOTE:  You can use bottled barbecue sauce, if you’d like, instead of making it.

BARBECUE PULLED “PORK” SANDWICH – makes 6-7 sandwiches

  • 2 cans jackfruit in brine, drained
  • 1 T oil (I used canola)
  • 1½ cups onions, chopped
  • 1½ T chili powder
  • 1 tsp cumin
  • ¼ tsp cayenne pepper
  • 1½ cups barbecue sauce, recipe follows below

Cut off and discard any tough core bits from the jackfruit. Slice the pieces into thin strips.

In a large skillet, sauté onions in oil for  several minutes. Stir in chili powder, cumin, cayenne powder, and continue to cook another minute to bring the spices to life. Add the jackfruit and barbecue sauce and bring to a low boil. Cover and simmer for 25 minutes, stirring now and then. As this cooks, the jackfruit will soften and you can break it up even more with a flat wooden stirrer.

Pour mixture onto a jellyroll pan and bake at 350º Fahrenheit for 20 minutes, stirring once or twice.

Spoon onto whatever you fancy and serve.

BARBECUE SAUCE – makes 1½ cups

  • ¼ cup oil (I used canola)
  • 1 T garlic, minced
  • 1 cup ketchup
  • ¼ cup red cider vinegar
  • 2 tsp hot sauce (use more or less, depending on your spiciness preference)
  • 4 tsp dark brown sugar, packed
  • 4 tsp dijon mustard

Sauté garlic in oil until you can smell it but it hasn’t browned – about 1 minute. Add in ketchup, vinegar, hot sauce, brown sugar, and mustard. Bring to a low boil and cook for 10 minutes, stirring frequently. At first, the oil will be floating on top, but by the end of cooking time it will be incorporated.

This sauce freezes well, so if you like it make a lot and freeze. It’s excellent on pizza!


Vegetable Curry Stew – A Winter Warm Up!

Curry Stew

Vegetable Curry Stew

There’s nothing better on a chilly evening than a nice savory stew. If you’re a curry lover, you’ve got to try my Vegetable Curry Stew. The combination of coconut milk, spices, and vegetables is the stuff of which dreams are made.

Besides warming the cockles of your heart (and stomach), this stew has the benefit of being low in calories. Who couldn’t use THAT as we begin our journey down Weight Gain Road. Even though Halloween is behind us, leftover candy certainly isn’t. Coming up are the food related holidays of Thanksgiving, Christmas, Hanukkah, New Year’s Eve, and the parties that go along with them.

You may be wondering how Vegetable Curry Stew could possibly be low in calories when coconut milk is involved. As always, it’s all about portion control. Instead of using canned coconut milk, I buy powdered. That way, I can use less but still get that luscious coconut milk flavor. If your store doesn’t carry powdered, just buy it online. I use Maggi brand, but I expect they’re all good.

Next, you may be wondering if you can just use part of the can and dilute it with water. While I’ve never done it, I see no reason why you can’t. But the reason I don’t is the powdered is so much easier to use, and it takes up less space in the pantry (always a plus.) Also, I don’t have to worry about what to do with the leftover (you know how I hate waste!). I’m not sure how well coconut milk freezes. Of course, you can double the recipe and use up the can that way.

Finally, you may be wondering how I know what you’re wondering. It’s a gift!

NOTE:  Don’t get frightened by the long list of ingredients.  Most of them are spices – all of which a well-stocked kitchen should have. The thing about herbs and spices is that they’re initially expensive.  BUT once you’ve bought them they last a long time.  Don’t believe those people who say you have to throw them out after a year. Buy the spices and cook from scratch – you are going to save money in the long run.

VEGETABLE CURRY STEW – makes 4 to 5 cups

  • 3 T butter
  • 1 cup onions, chopped
  • 2 garlic cloves (about 1½ tsp), minced
  • 1 tsp coriander
  • ½ tsp dried ginger
  • 1 tsp cumin
  • ½ tsp cardamon
  • ½ tsp dried mustard
  • 1/8 tsp ground cloves
  • ½ stick cinnamon
  • 1/8 tsp cayenne pepper
  • ½ tsp tumeric
  • ½ tsp salt
  • 1/3 cup coconut powder (or half can coconut milk)
  • ¾ cup water (eliminate this if you’re using canned coconut milk)
  • 1 cup carrots, chopped
  • 1 T lemon juice (fresh or bottled)
  • 1 cup potatoes, chopped (I use Yukon)
  • 1 cup yam, chopped (I use garnet)
  • 1 cup cauliflower, chopped
  • 2 mushroom, chopped
  • 1 cup broccoli, chopped

WHEW!  That’s a lot of typing. If you’re one of those cooks that likes to have everything prepared before you start cooking, go for it.  But I’m going to give you instructions for the fastest way to prepare this stew. There’s a lot of down time when various ingredients are simmering, so that’s when I prepare the next lot.

Melt the butter in a large pot. As it’s melting, chop the onions and skin the garlic. Add the onions and press the garlic into the pot. Sauté for 10 minutes.

As the onions are cooking (make sure you stir them now and then), assemble your spices, measuring spoons, coconut powder, water, and lemon juice. Chop the carrots.

When the 10 minutes are up, turn off the burner and add the spices. Sauté over a low heat for 2 minutes. Add in the coconut milk, water, carrots, and lemon juice. Bring to a simmer. Cover and let simmer for 10 minutes.

While this is simmering (stir now and then), prepare the potatoes, yam, cauliflower, and mushrooms.

When the 10 minutes are up, add in the chopped potatoes, etc. Cover and simmer 10 minutes.

As this is simmering, prepare the broccoli.

When the 10 minutes are up, add in the broccoli. Simmer 5 minutes.

Serve immediately or reheat later.