

Sometimes all it takes for a recipe to go from ‘meh’ to marvelous is one thing. This is usually an ingredient. But, every now and then, it’s a technique. With my Orange Tofu Balls: it was both.
In developing a new recipe, I generally start with a recipe that catches my eye. I make the recipe as written, then tweak it to suit my taste. In this case, I started with Moosewood Cookbook’s Buddha’s Jewels – Asian style tofu balls.
The recipe instructed to drain the tofu by sandwiching it between 2 plates and pressing out as much liquid as would come. After chopping the drained tofu and mixing it with the remaining ingredients, I formed golf-ball sized balls and baked. However, the uncooked balls were never really firm and had to be dealt with gingerly or they’d fall apart. During the baking process they sank into a mound rather than remain in a tight ball.
It finally came to my attention that there was too much moisture in the tofu. The plate pressing was not enough – I had to squeeze chopped tofu in a tea towel to properly extract the water. Then, I added some flour for good measure. Success!
ORANGE TOFU BALLS – makes about 15
Balls:
- 397 g (14 oz) firm or soft tofu
- 30g (2 T) peanut butter (I use creamy)
- 28g (2 T) soy sauce
- 2 scallions, white and green part, sliced thin
- 60 g (1/2 cup) red pepper, chopped fine
- 111 g (4 oz) mushrooms (I’ve used shiitakes & white common – both worked)
- 61 g (1/2 cup) water chestnuts, chopped fine
- 33 g (1/4 cup) all-purpose flour
Orange Sauce
- 8g / 1 T cornstarch
- 12g / 1 T water
- 172g (3/4 cup) orange juice
- 32g (2 T) pure maple syrup
- 46g (1/4 cup) rice wine vinegar
- 28g (2 T) soy sauce
- 1 garlic, pressed or minced
Preheat oven to 375° Fahrenheit (190° Celsius).
The first thing to do is extract as much water as you can from the tofu. You can either begin by sandwiching the tofu block between two plates to get it started (you can use this time to chop the remaining ingredients), or go straight to squeezing it in a tea towel. Either way works.
Chop the tofu block (drained or not) into very small pieces. Spoon a fistful onto a clean tea towel.
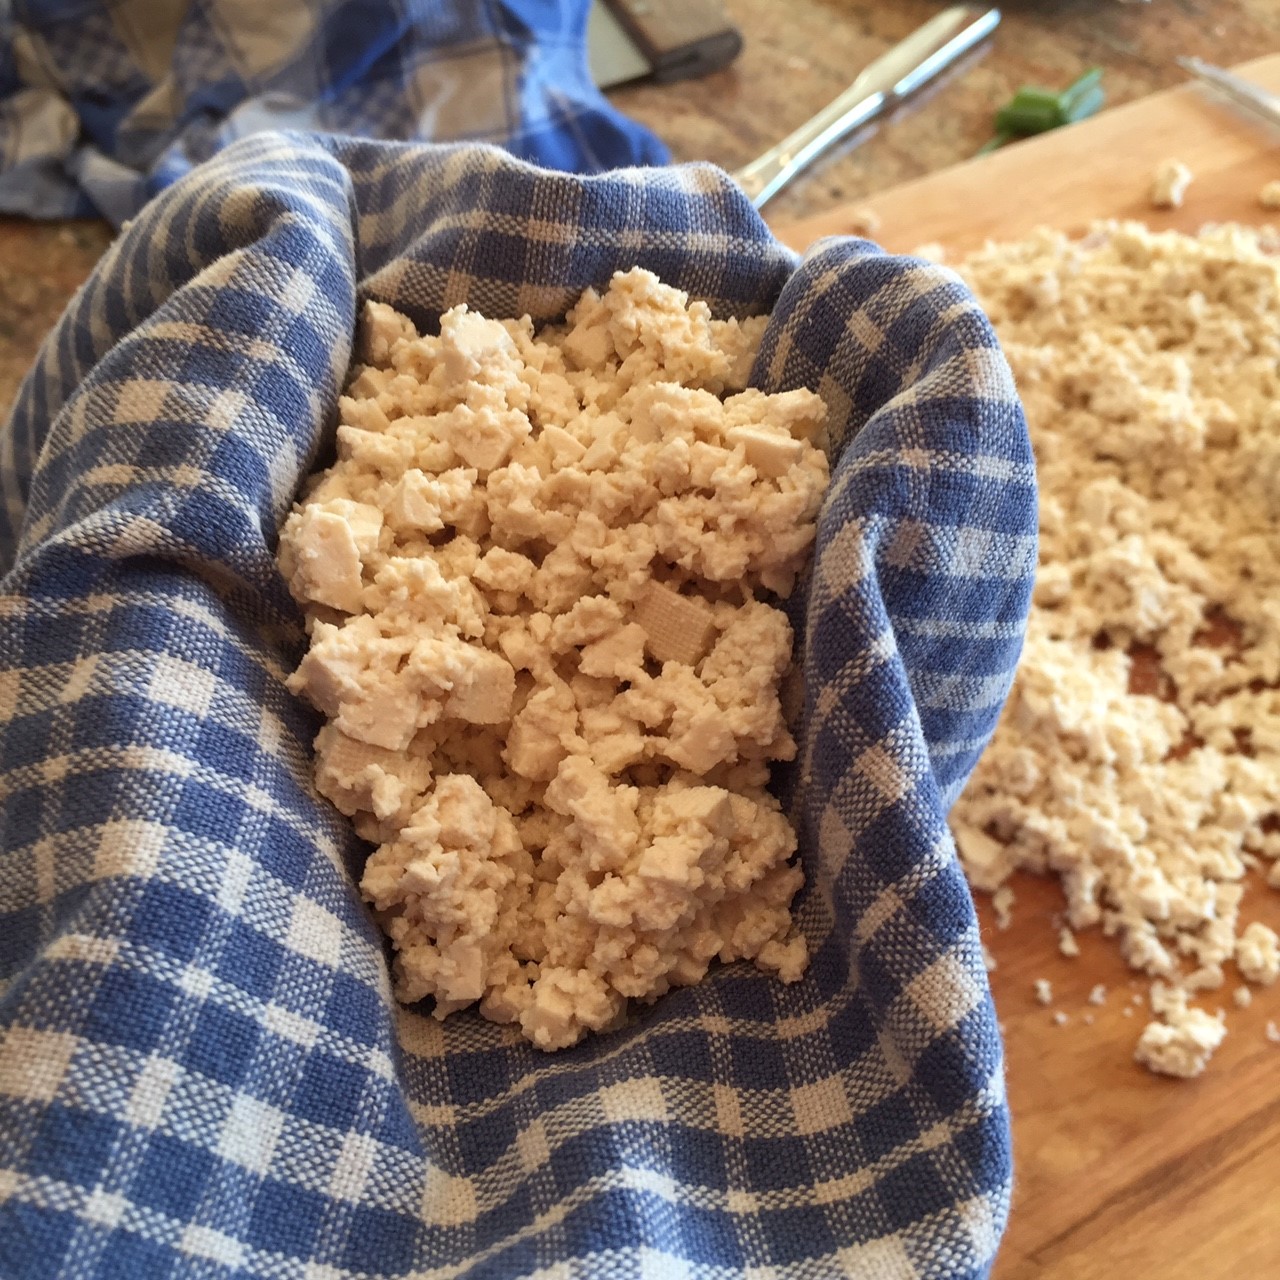
Wrap the towel around the tofu, forming a sack, and twist to extract as much liquid as you can. (Do this in small batches – if there’s too much, it’s harder to twist out the water.) Empty tofu onto a bread board. Continue until all tofu has been squeezed.


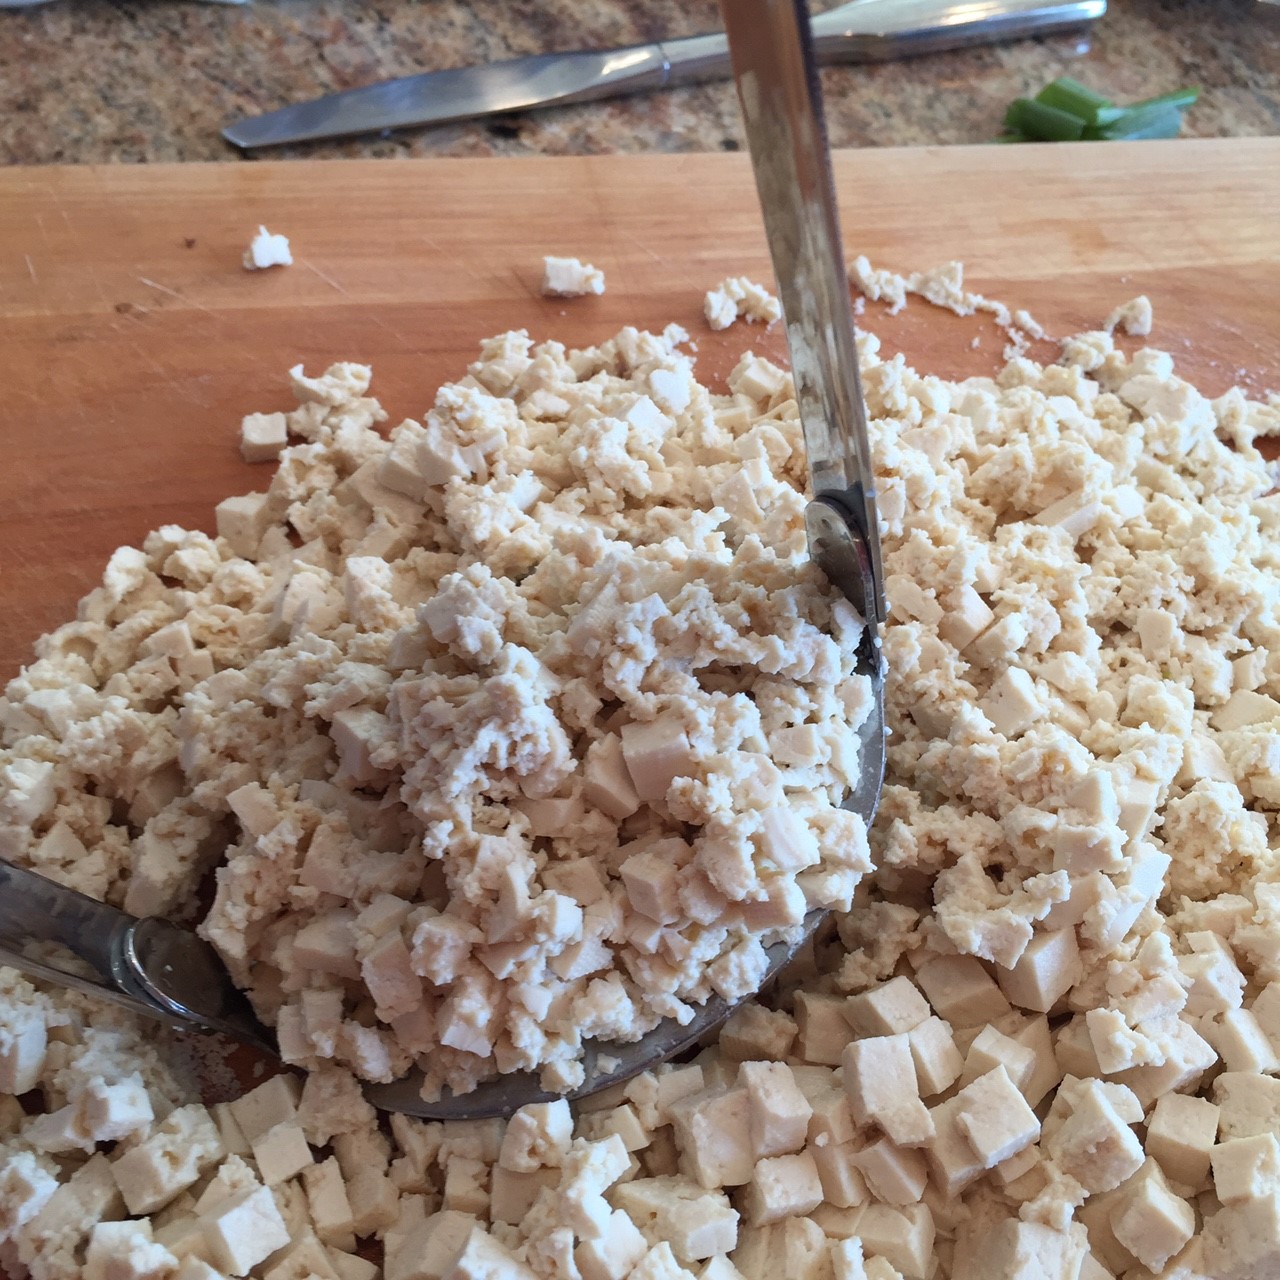
Use a potato masher to smash the drained tofu.
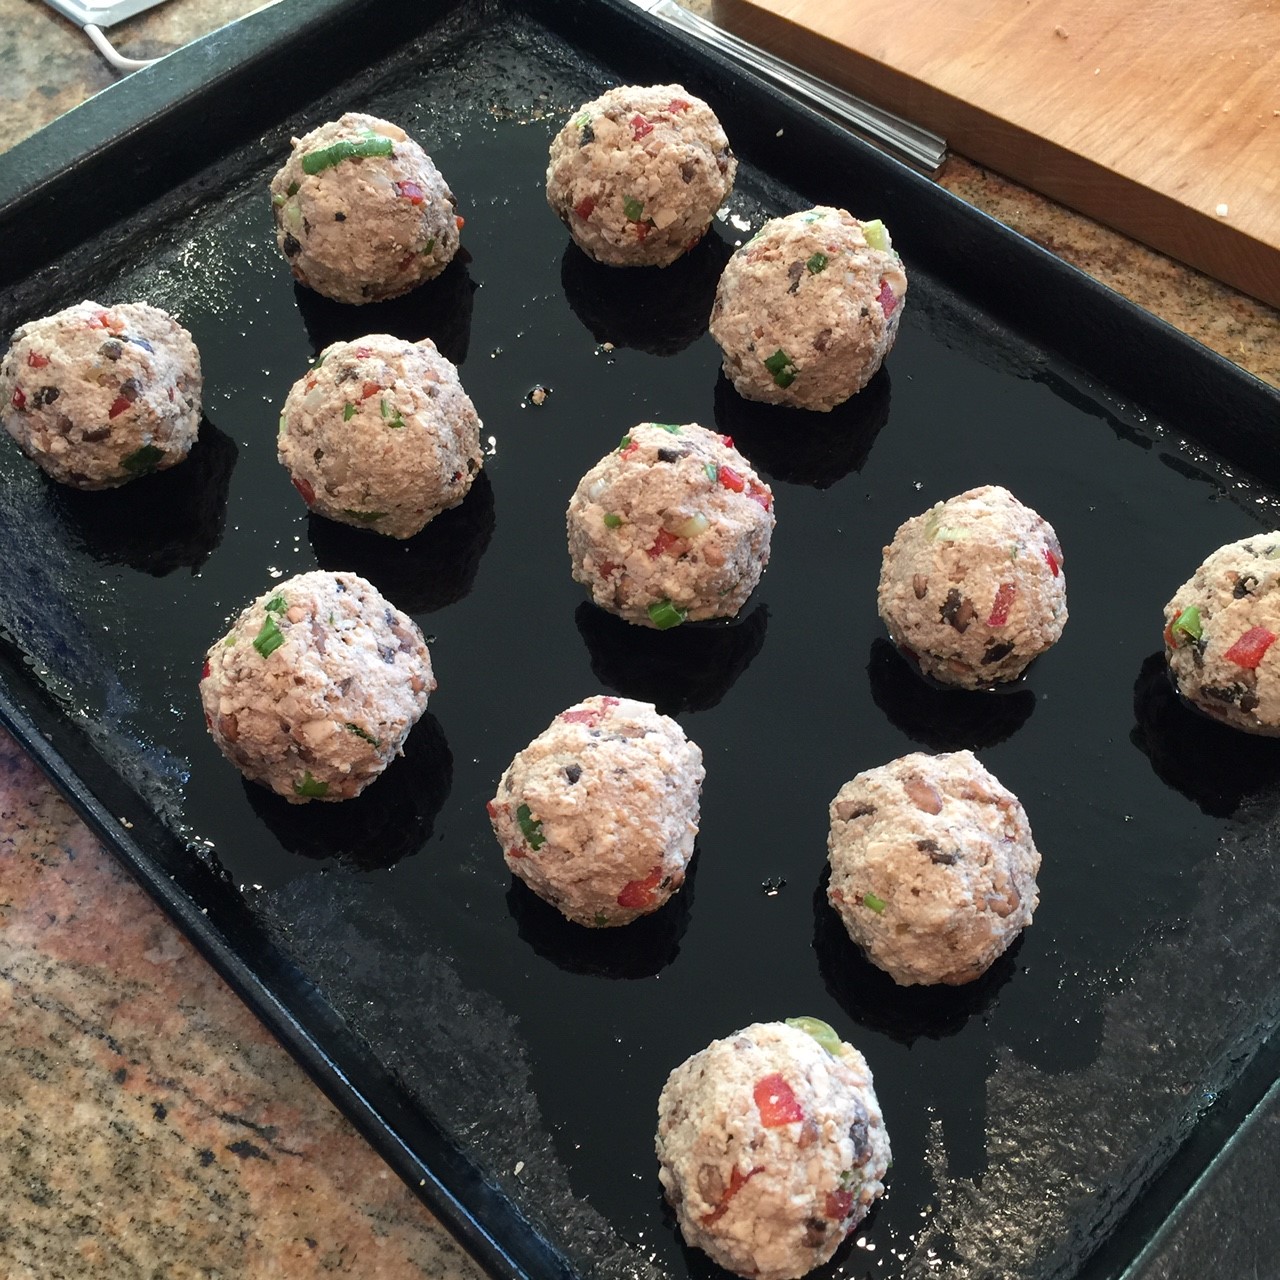
In an empty mixing bowl, add the peanut butter, soy sauce, scallions, red pepper, water chestnuts, mushrooms, and flour – blend well.

Add in the mashed tofu and blend well.

Oil a rimmed cookie sheet with a very light coating of oil. Form about 14-15 compact balls with the tofu mixture and place on sheet spaced well apart to get good heat circulation. (A 3-T scoop, packed tightly, forms just the right size.)
Bake in preheated 375° F (190° C) oven for 45 minutes.
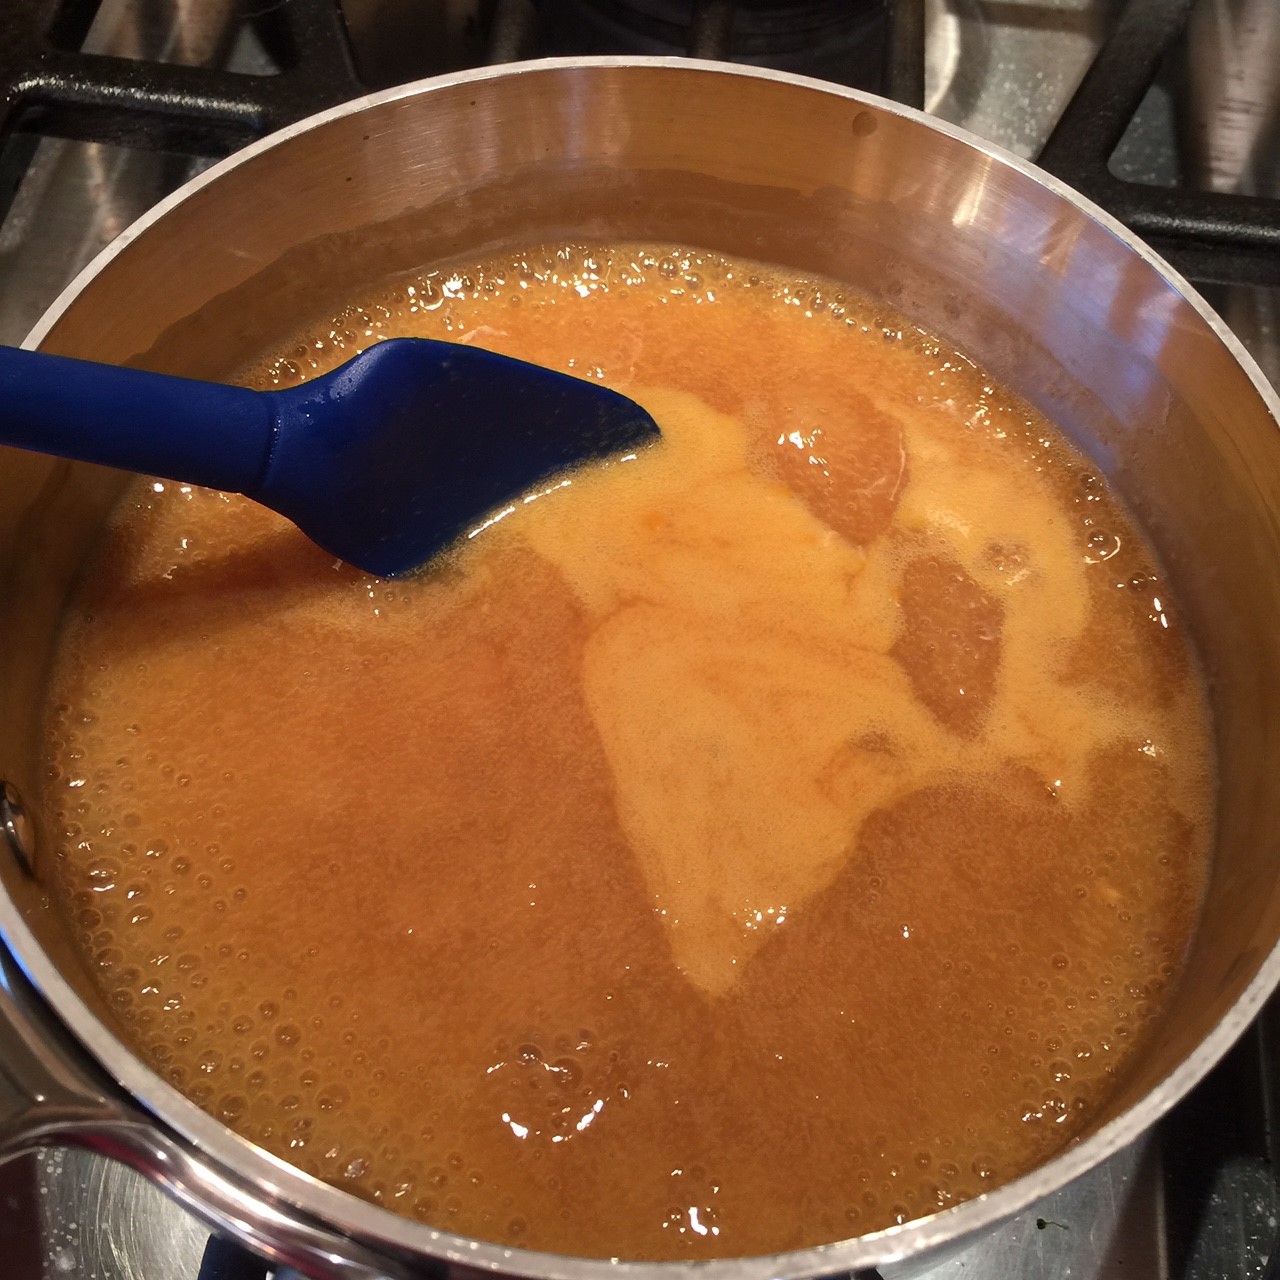
As the tofu balls are baking, prepare the orange sauce: In a small bowl combine the 1 T cornstarch with 1 T water to form a slurry. Set aside.

In a small saucepan, combine the orange juice, maple syrup, rice wine vinegar, 2 T soy sauce, and garlic. Bring to a boil.

When the liquid begins to boil, drizzle in the slurry – stirring as you pour. Continue to stir until the sauce thickens. Remove from heat.
When the Tofu Balls are darkened, serve immediately with the warmed orange sauce. I like to serve it over rice.


 I hate waste – particularly of food. Unless it’s gone bad, I find a way to use it or save it (thus my self-proclaimed moniker of Queen of Freeze!) So I often find myself with bits and bobs which need to be eaten.
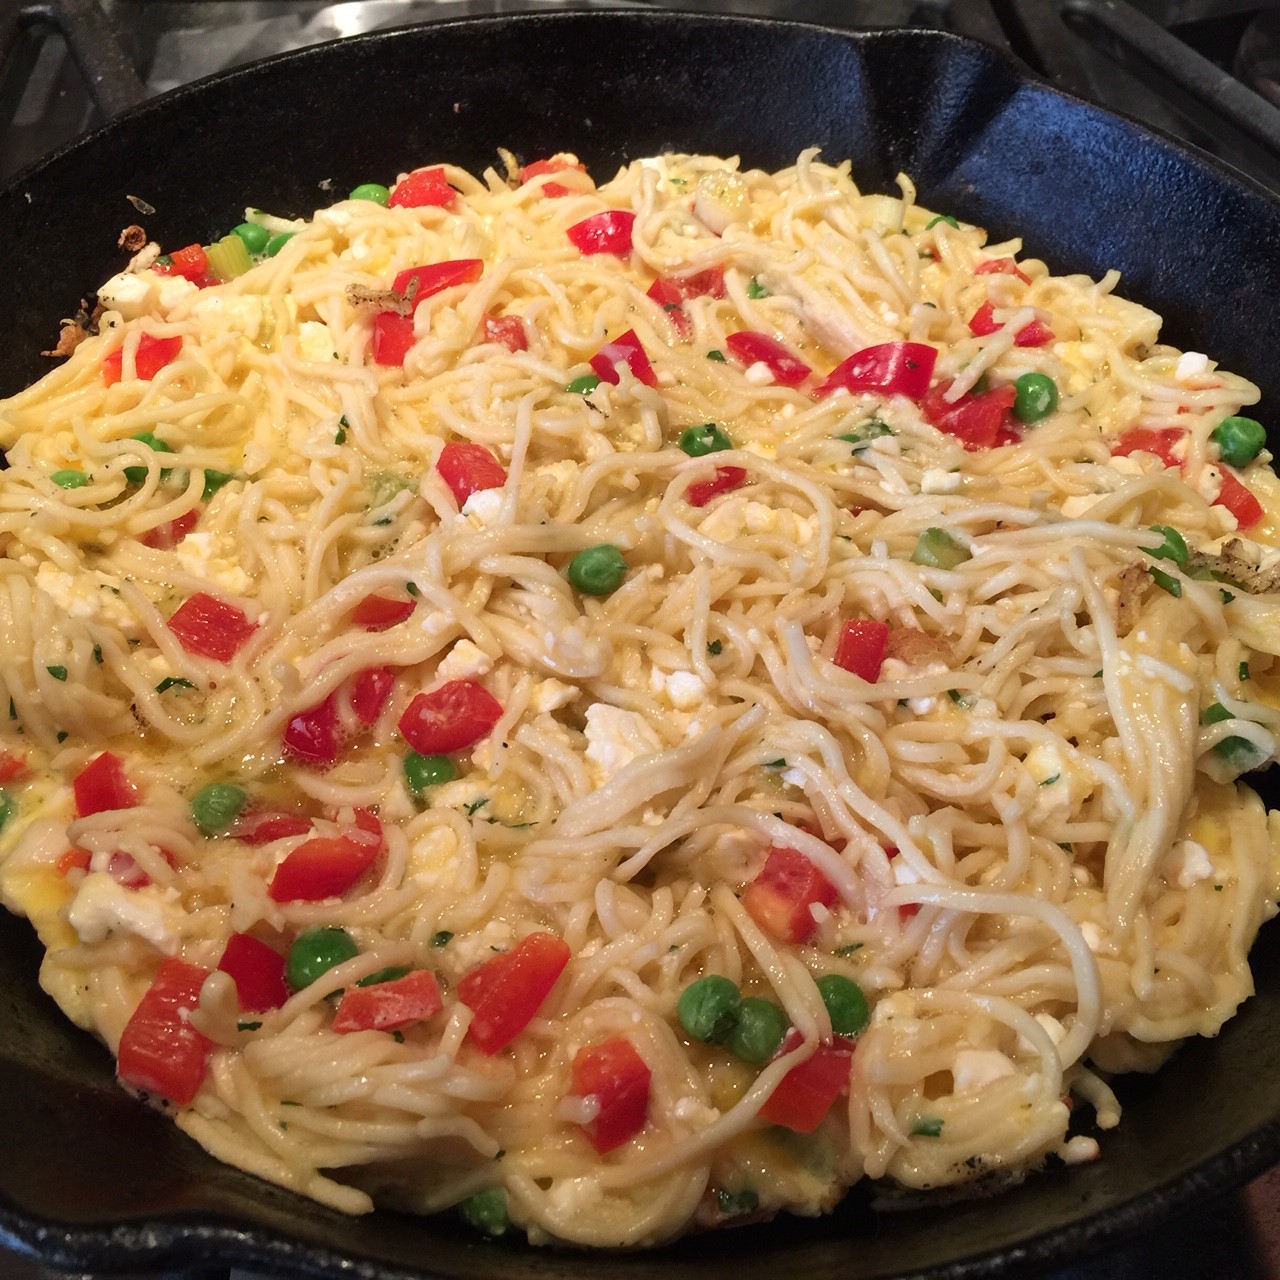 Here comes the tricky part – you’re going to need to flip the frittata to brown the other side. Loosen the bottom using a metal spatula. Once the bottom is no longer stuck, carefully slide the frittata onto a large plate.
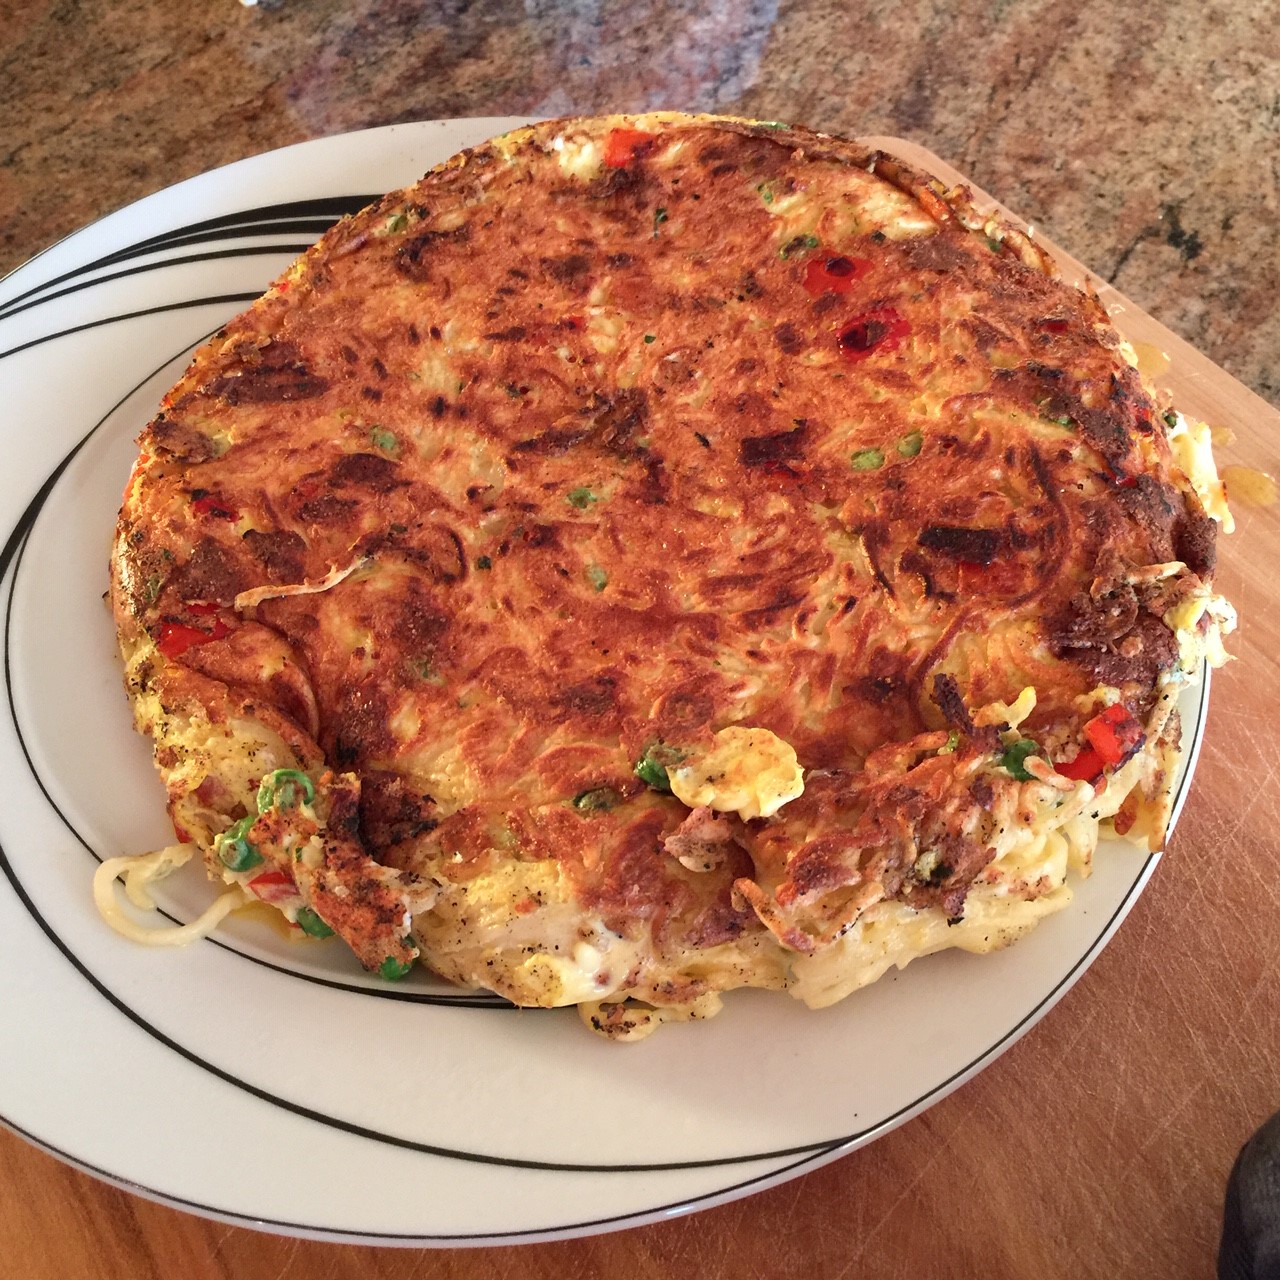 (Or, you can place a plate on top of the skillet and, using oven mitts, flip the skillet letting the frittata drop onto the plate.) Cover with another plate and flip.
  Then, slip the flipped frittata back into the skillet and cook until the bottom is well browned.
  Let set about 5 minutes before slicing.
 Broccoli Garlic Pasta is a new addition to my list of favorite dinners. It’s one of those recipes that I create in order to use up an ingredient that would soon be going bad – in this case, it was mushrooms. I threw in other items I had on hand – the pièce de résistance being the Feta cheese, which made all the difference.
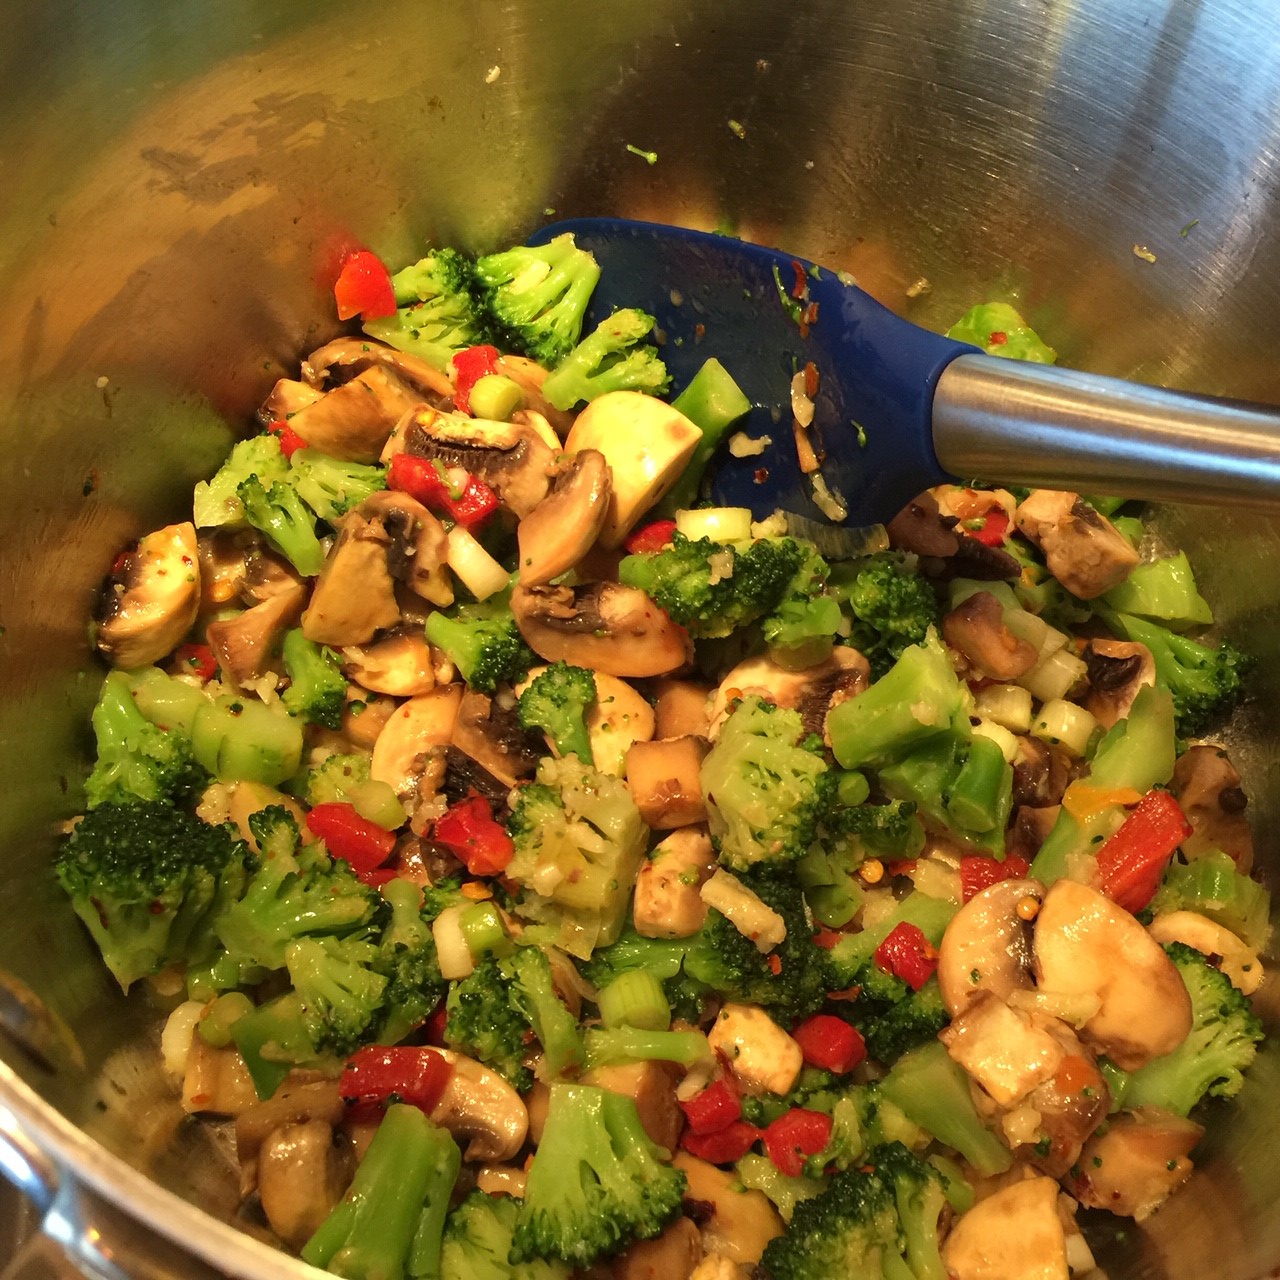 Kill heat and sprinkle on flour. Over low flame, stir 1-2 minutes to slightly thicken the liquid and cook-off the flour taste.
  Add in the wine and cream. Cook over medium heat about 1 minute.
  Stir in the Feta, Pecorino, and parsley. Stir in the pasta and heat through. Pour into serving bowl (or let remain in pot), cover, and let set for about 5 minutes to allow pasta to absorb the liquid and thicken up.

 Pour 2 T olive oil into a rectangular or square container with sides at least 3″ high, covering the bottom and sides. (The square corners train the dough somewhat and help it fill the corners of the baking pan. If you don’t have a container like this, just use an oiled deep bowl.) The dough is going to rise very high, then collapse somewhat. Cover container and let rise 5½ – 6 hours. Note the low height of the dough when I pour it in.
  Here’s after 2½ hours:
 After about 4 hours it starts to collapse a bit – this is normal.
  After dough has been rising for 5 hours, preheat oven to 500º Fahrenheit, rack in the middle position. If you have a baking stone or steel (I use a steel), place it on rack as the oven preheats.
 Note how bubbly the dough is:
 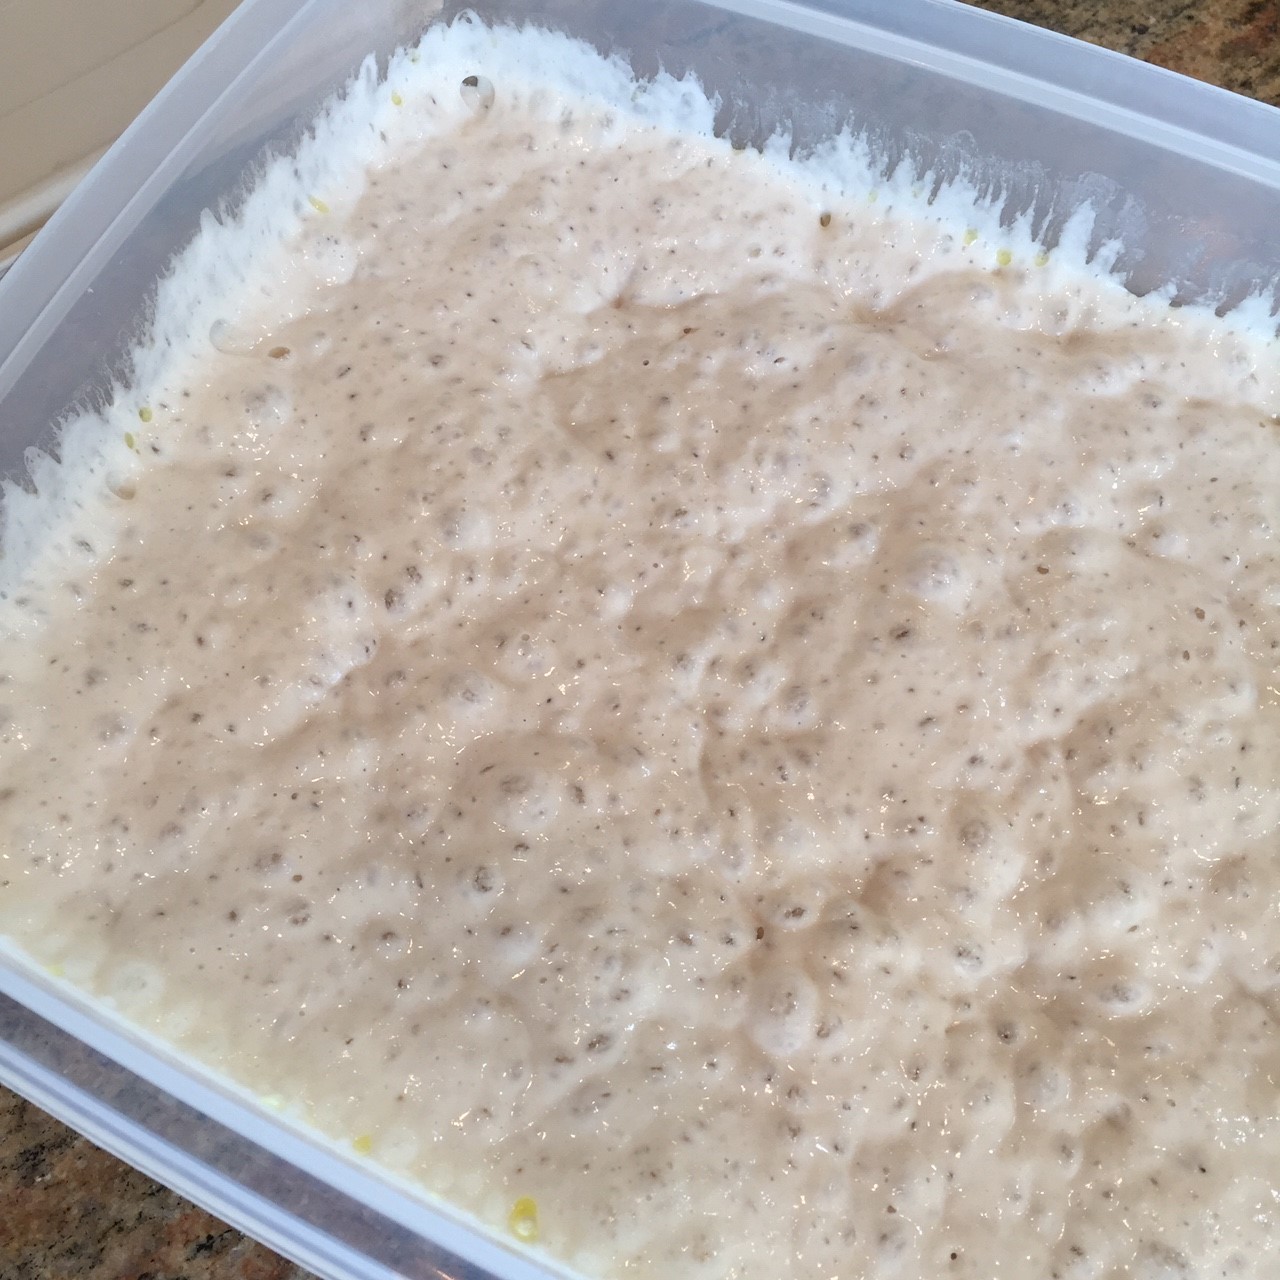 Gently pour the dough into the prepared pan, nudging the dough into the corners – try not to deflate the dough.
 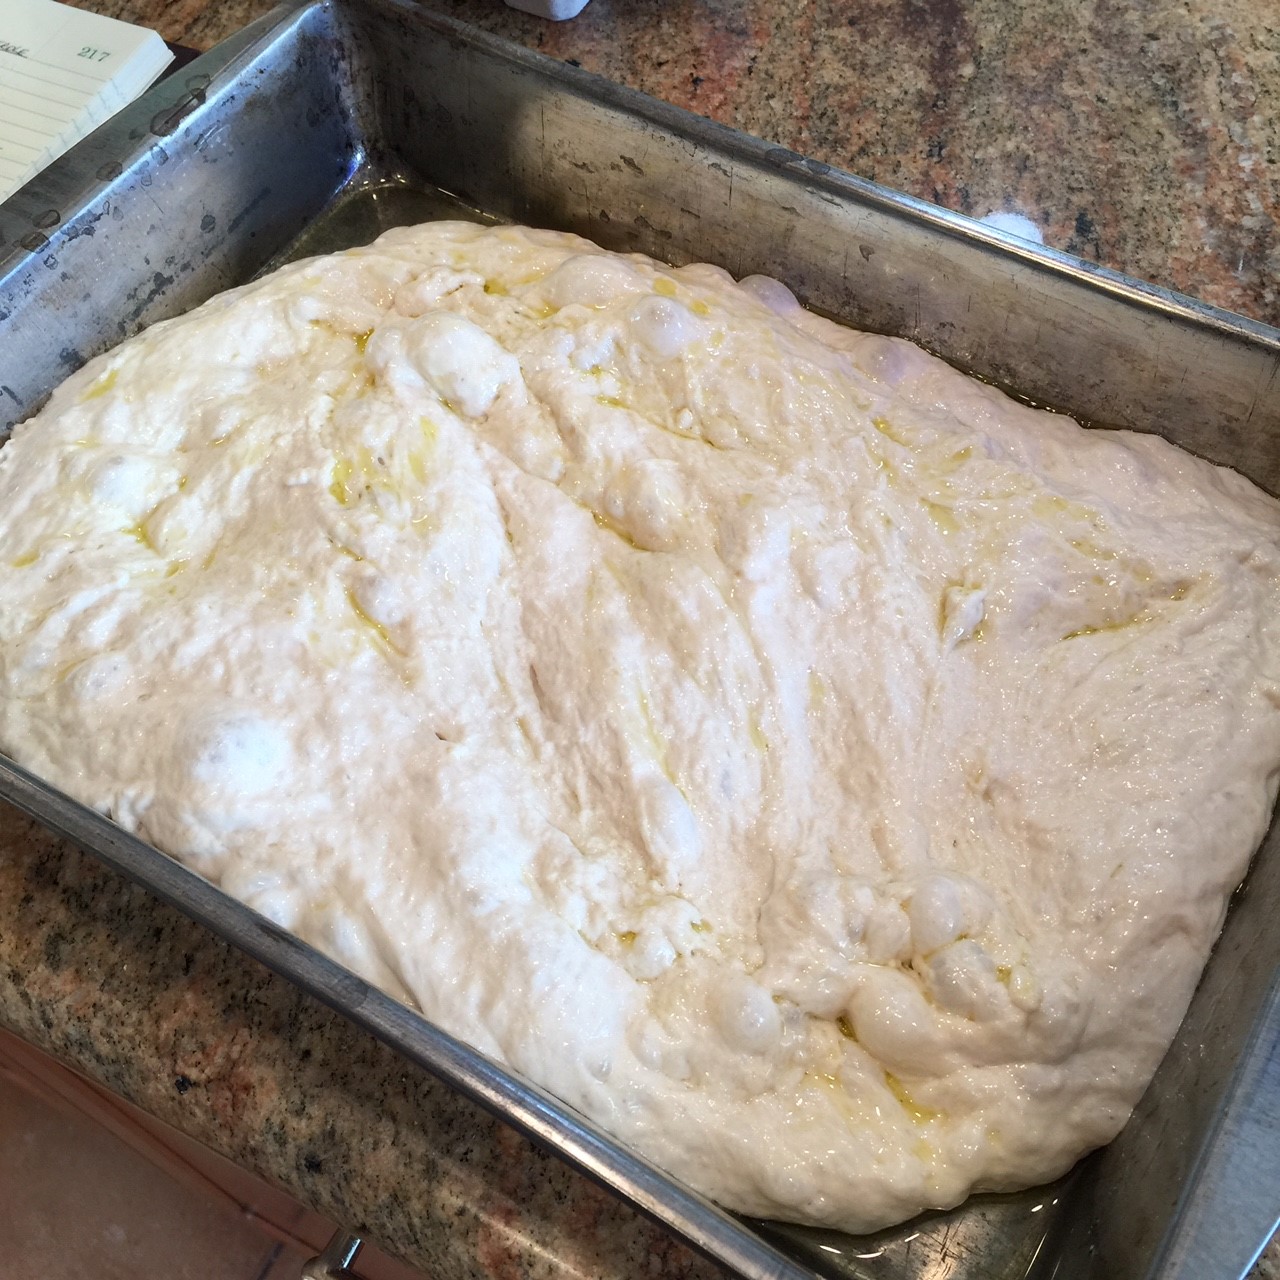 If you’re using toppings such as olives or slices shallots, sprinkle them on, lightly pressing them into the dough. Let dough set uncovered for 20 minutes.
  Brush 2 T olive oil over dough, then sprinkle on 1 tsp oregano, pepper, and salt.
  Place in 500º F preheated oven and bake for 20-25 minutes, until well browned on top and sides have pulled away from the edges a bit. Remove from oven and let rest in pan for about 10 minutes before removing to a wire rack.
 Decrease oven temperature to 350º F, leaving oven door open to expedite the oven temperature drop.
 While omelette is baking, remove focaccia to a cutting board. Using a long bread knife, very carefully slice bread in half horizontally. (Take your time – the edges are crispy, making it difficult. I’ve found it best to cut into the bread only – not in and out, which tends to tear the bread.)
 Once the bread is completely sliced through, leave it together to retain its heat.
 Speedy Thin Crust Pizza has become my go-to pizza recipe not only because I can have it on the table in a little over an hour, but because it’s REALLY good. It’s a very thin pizza with a nice chew.
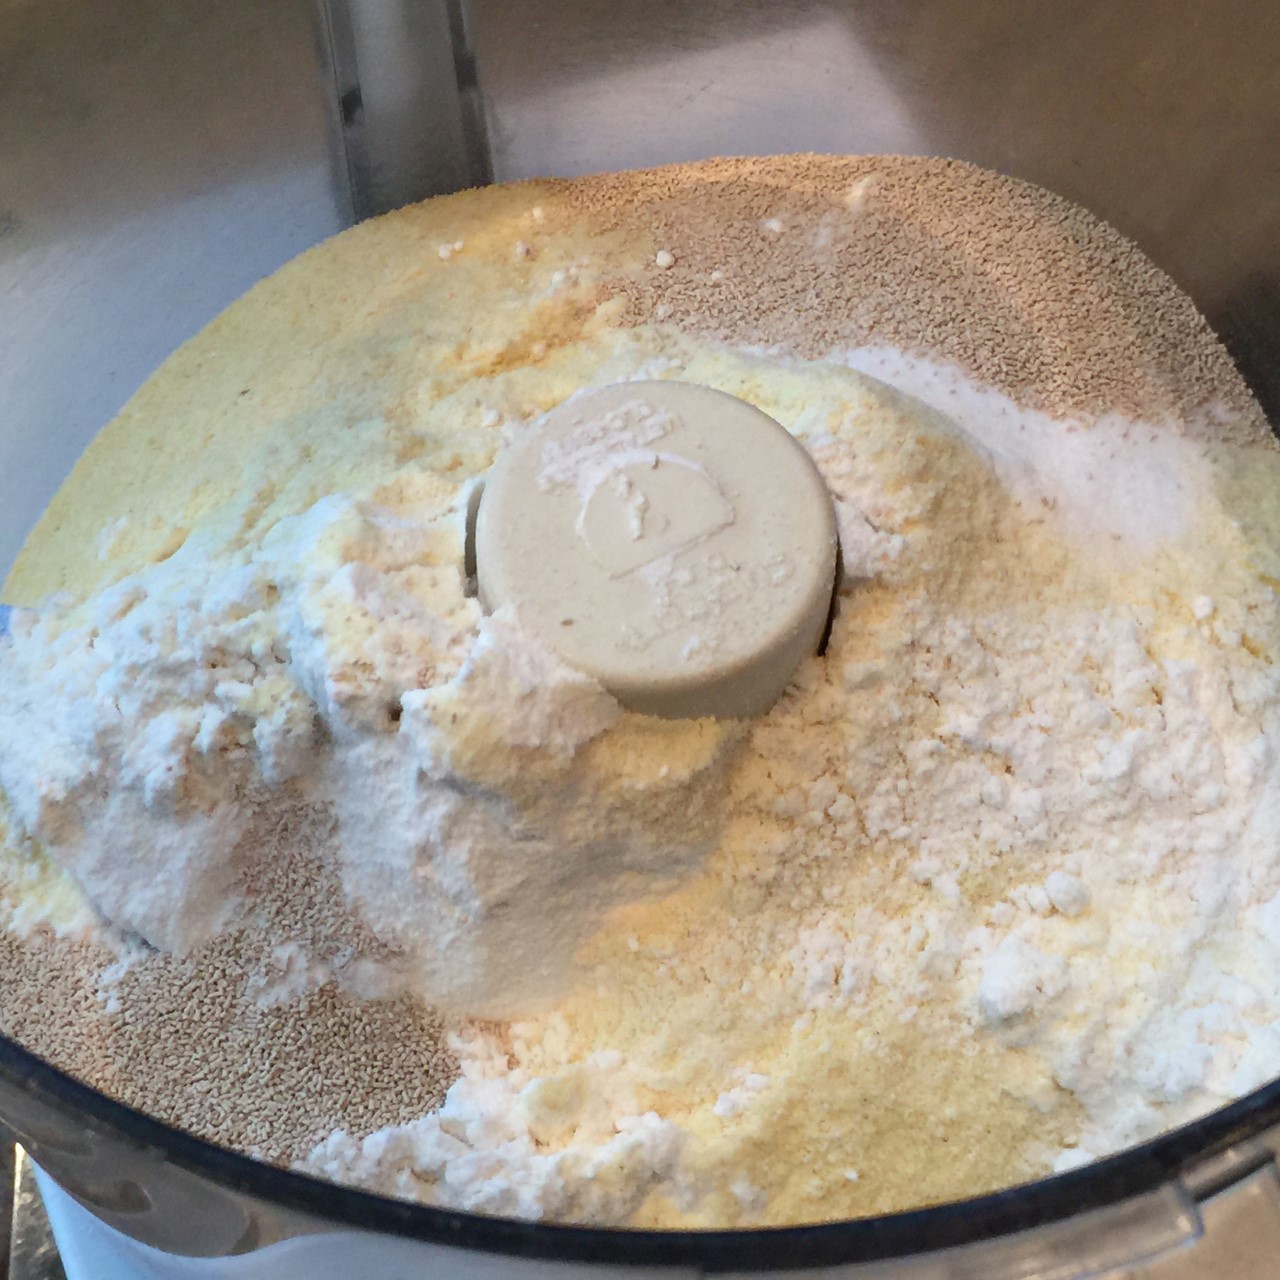 Set the workbowl on the processor base and run the machine for 10 seconds.
 Let mixture set in place for 10 minutes. Add in the salt and process for 30 seconds.
 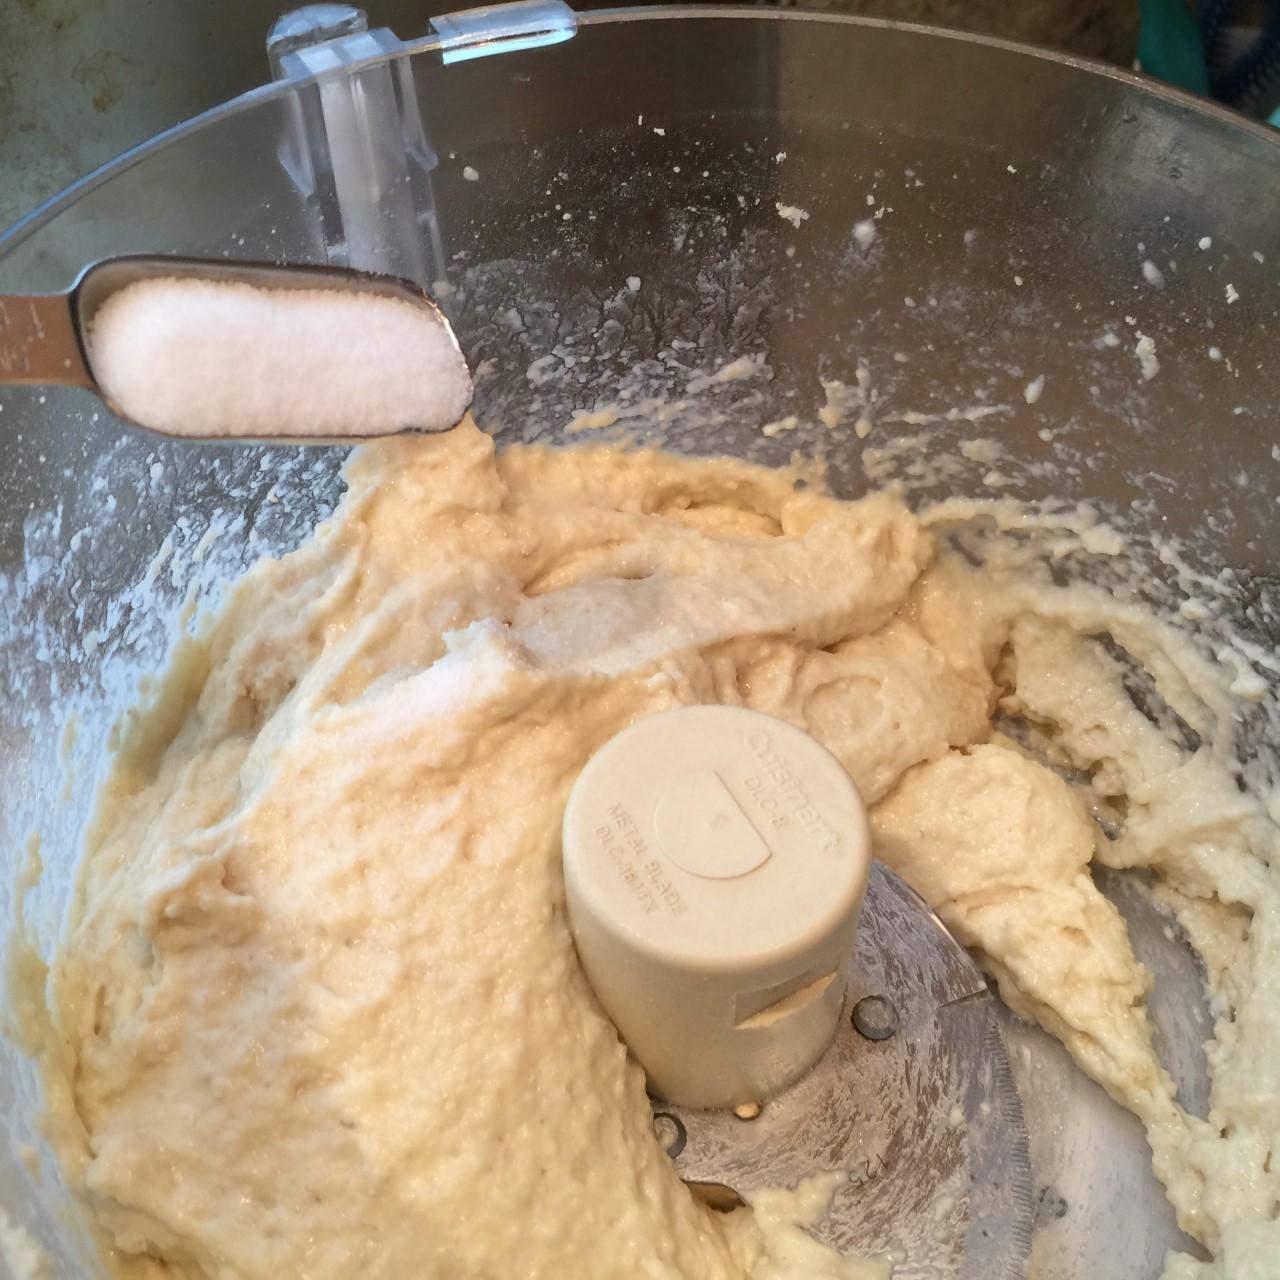 Empty dough onto a floured counter and fold the dough onto itself a few times to bring the dough together.
  Divide the ball in half and place each one on a piece of oiled (I use olive oil) parchment paper approximately 12″ wide. DO NOT USE WAXED PAPER – IT’S TOO THIN!!!
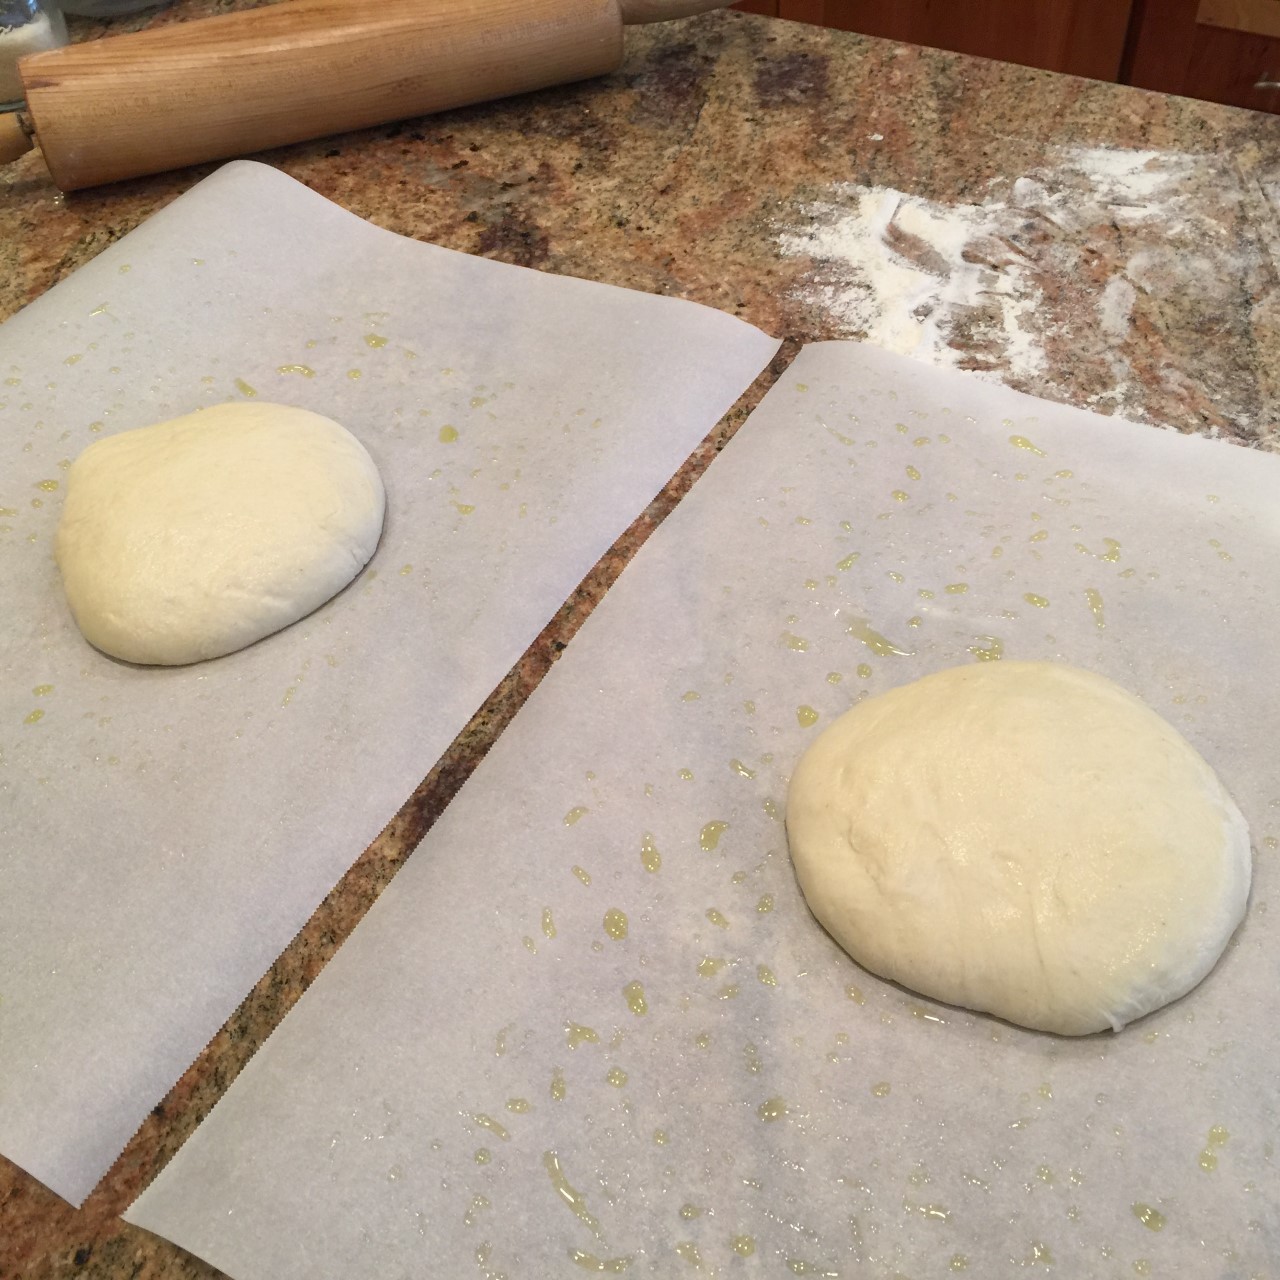 Rub the tops of the dough with a little more oil then top each with another piece of same-sized parchment. Press down with your hands to smoosh the dough into a square to get it started. With a rolling pin roll both dough balls to about 13″ x 10″ using short strokes, working from the center outward. (I find it easier to keep the parchment from sliding on my counter if I place it on a dry tea towel.) Let set 30 minutes.
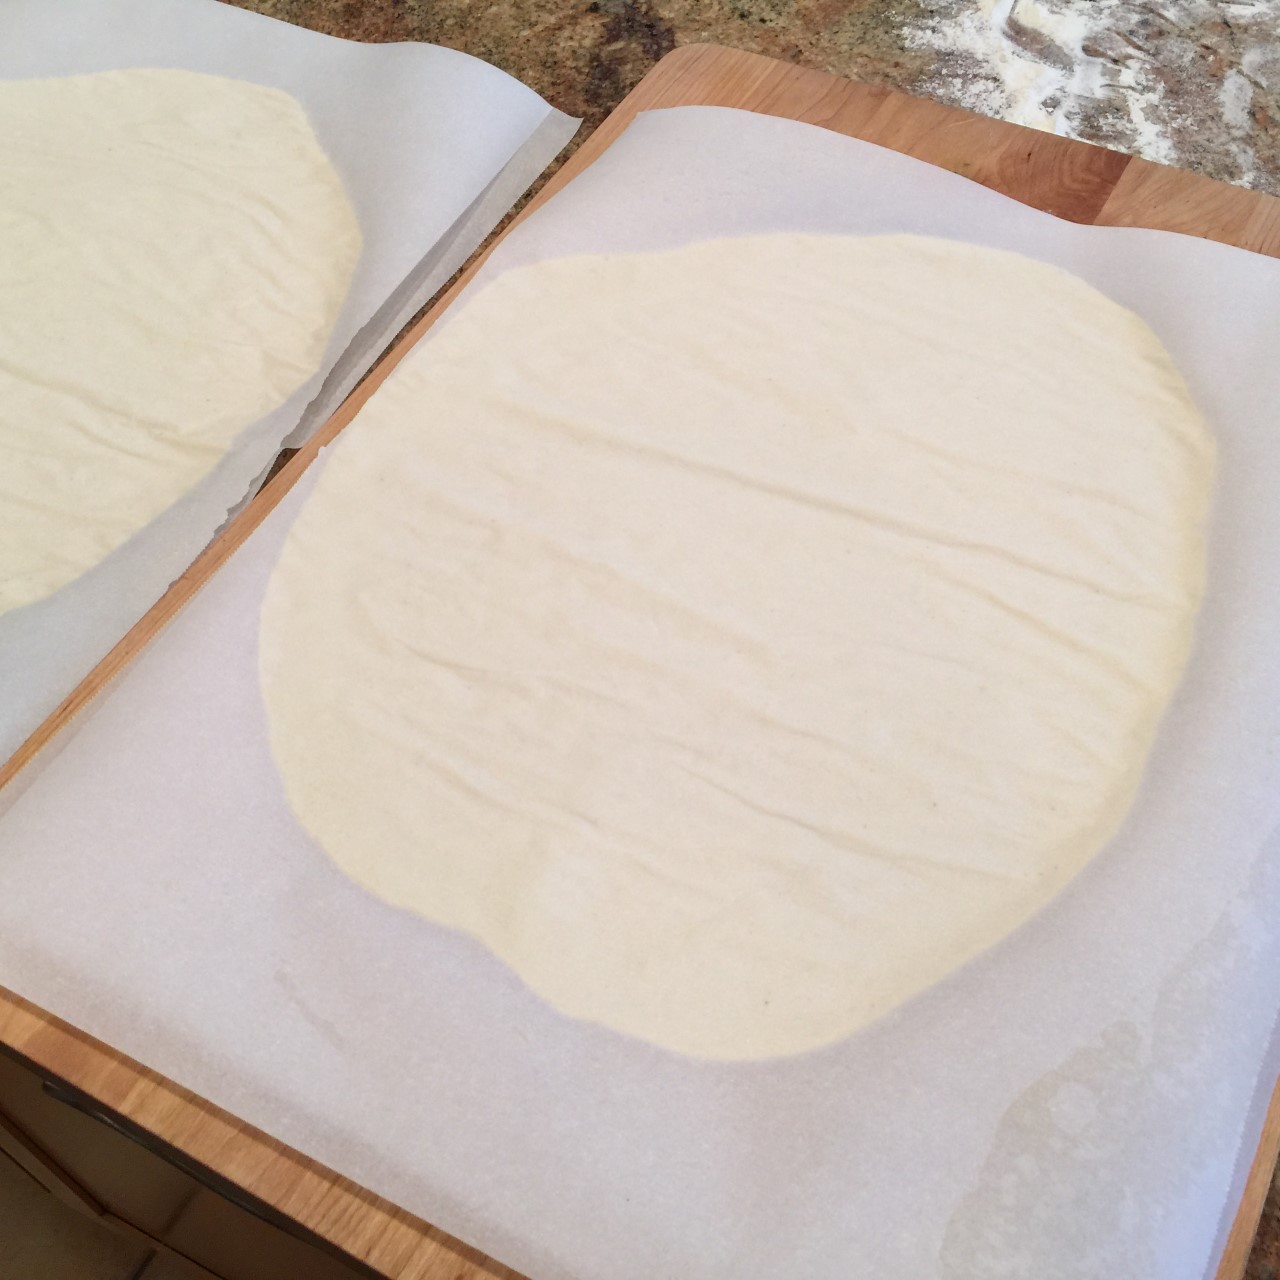 Use this time to get your toppings ready.
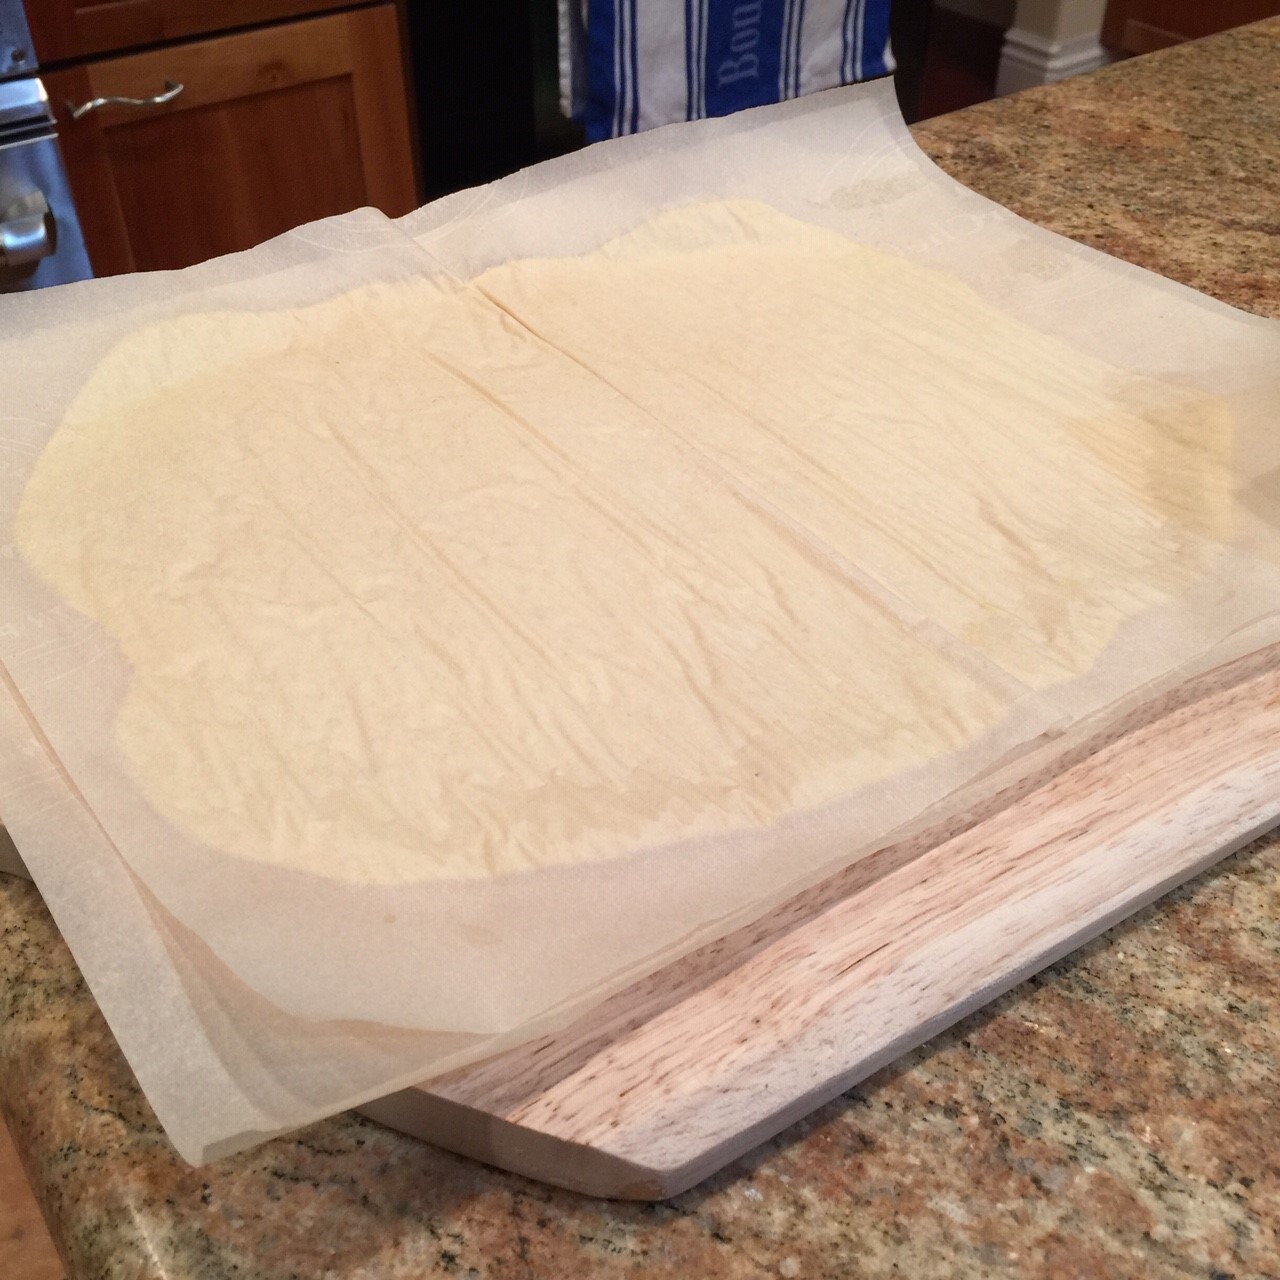 Carefully peel away and discard the top parchment (which used to be the bottom parchment).
 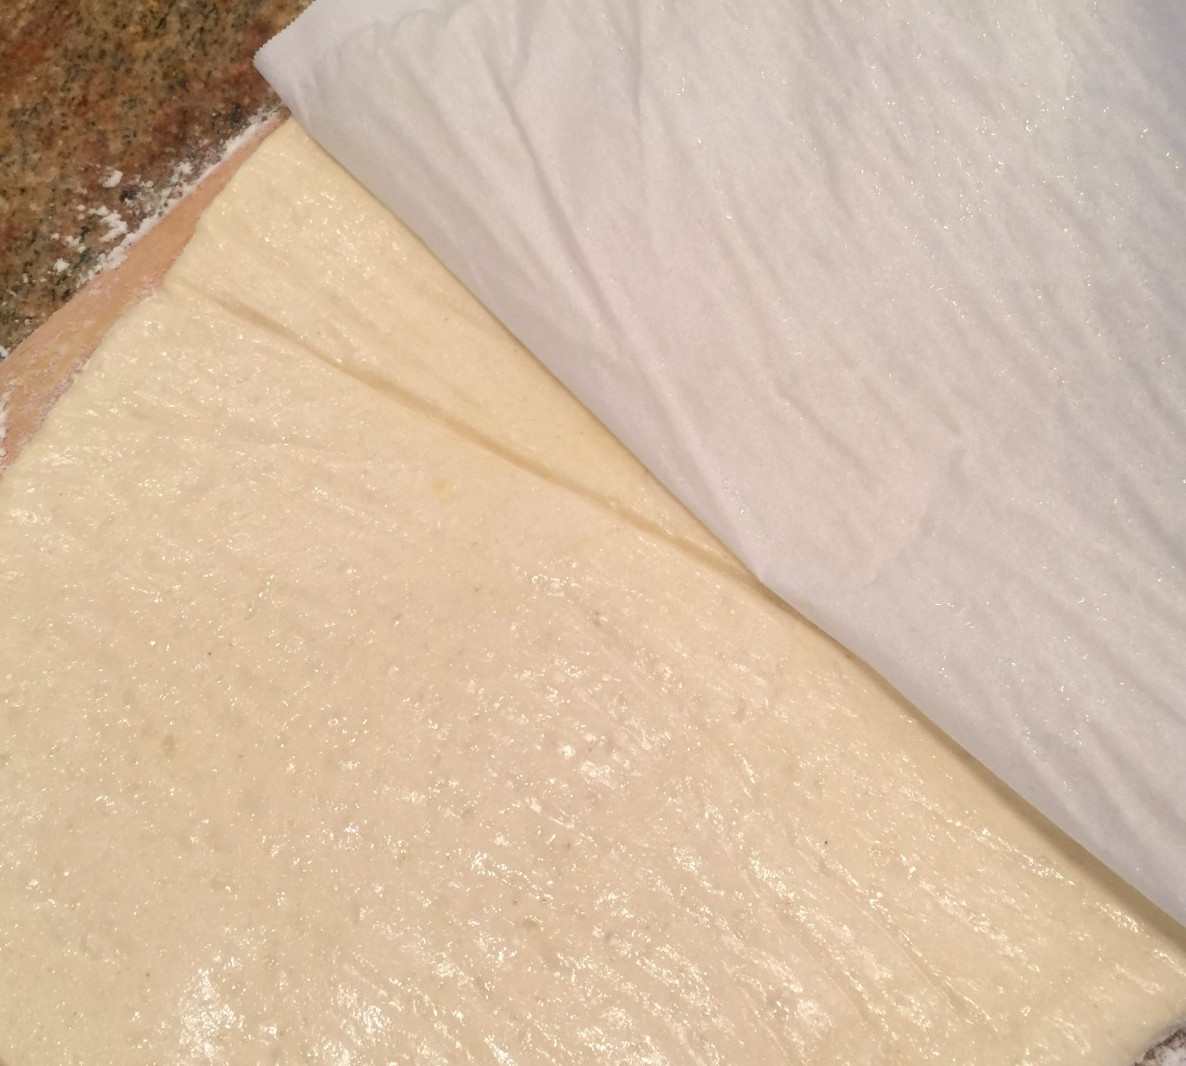 Top pizzas with your choice of sauce and toppings.
 Slide the pizza with bottom parchment onto the preheated stone or steel.
  Bake for 4 minutes. Rotate the pizza 180º, then remove and discard the parchment by securing it in place with a spatula with one hand and pulling out the parchment with the other. (The parchment won’t burn your fingers, so you don’t need to use an oven mitt as long as you don’t touch anything else.)
  Let bake another couple of minutes, until it’s browned to your liking. Remove from oven, let set a minute or two, then slice it up and serve. (This is not the same pizza I placed in the oven in the above pictures.)
 Green Chili Stew is an incredibly tasty blend of flavors that’s quick to put together. The little pop of lime is my favorite part!
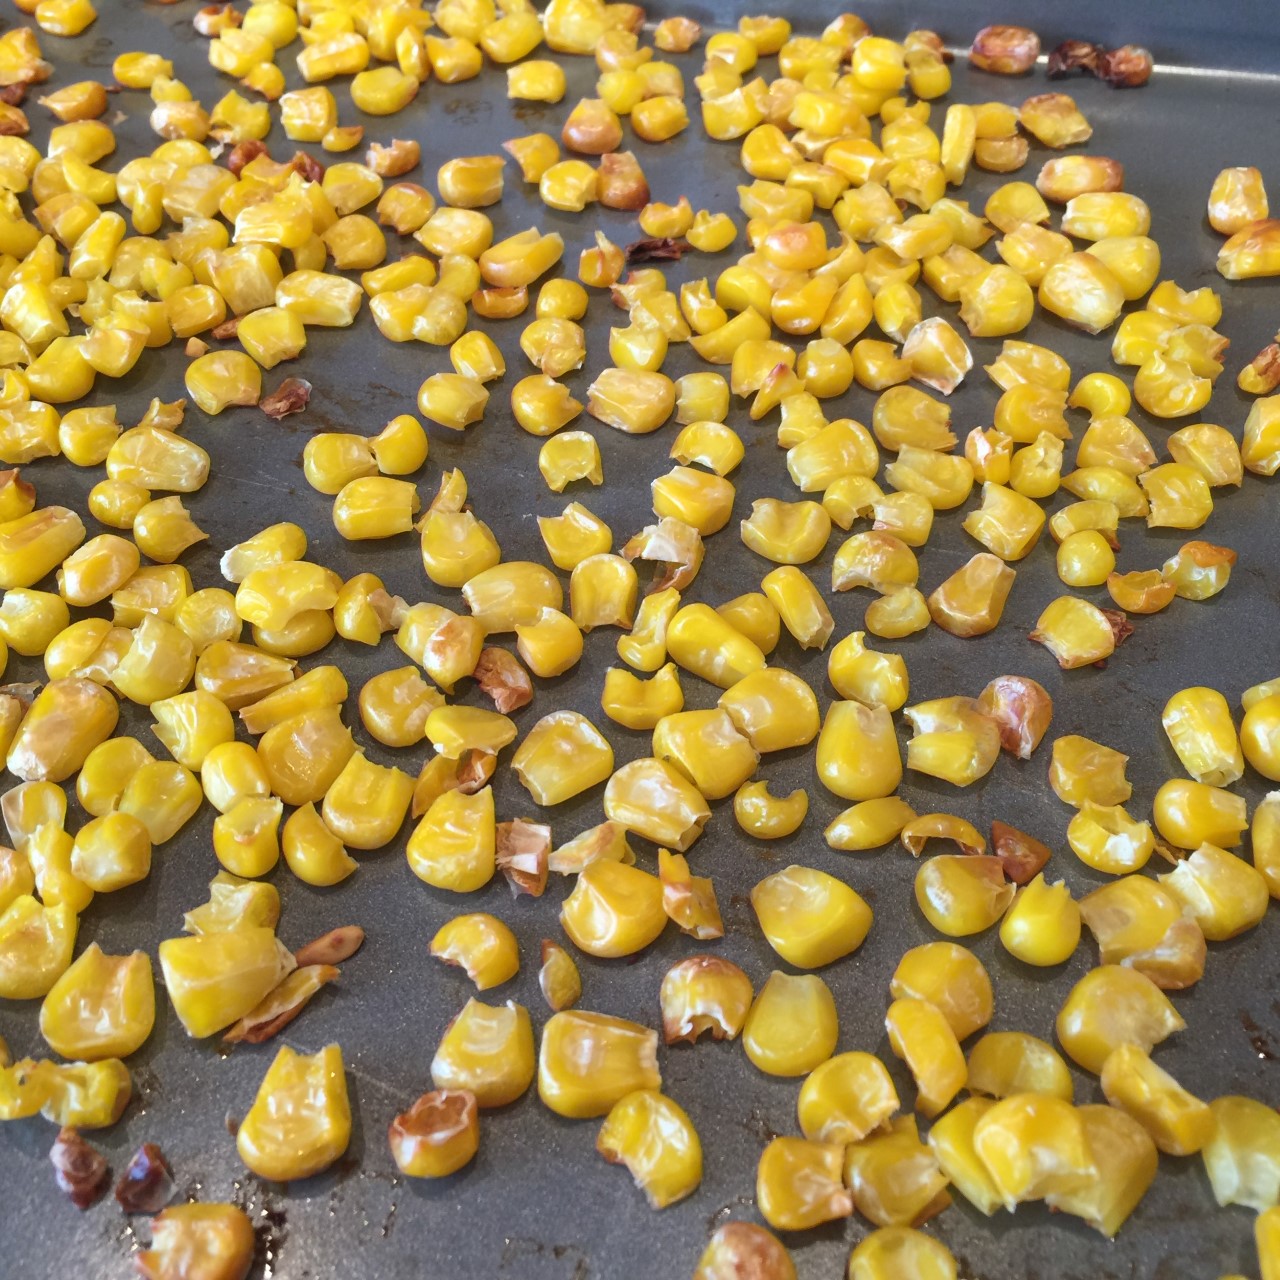 If you’re using fresh chilis, turn oven to broil. Wash and cut pepper and chilis top to bottom. Discard seeds and ribs. Lay cut side down on cookie sheet.
 Broil until skin starts to blacken. (It only takes a few minutes, so keep an eye on it!!!). Remove and discard blackened skin.
 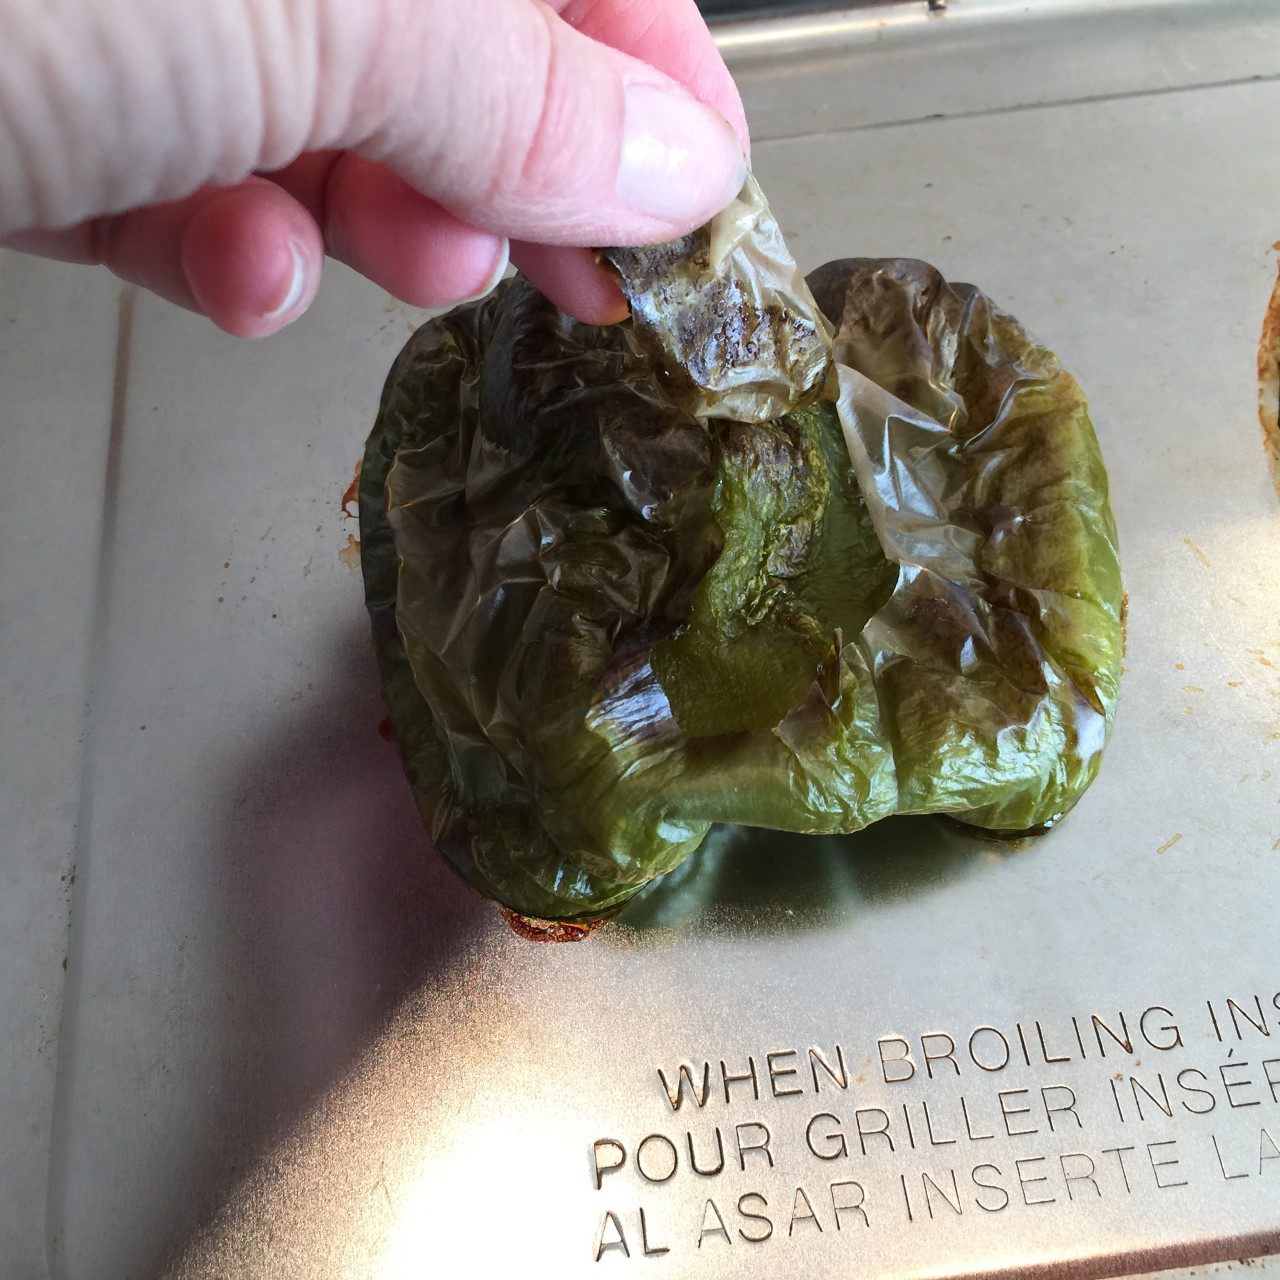 Chop skinless pepper and chilis into bite-sized pieces.
 Wash tomatillos well (they feel kind of waxy) and chop into bite-sized pieces.
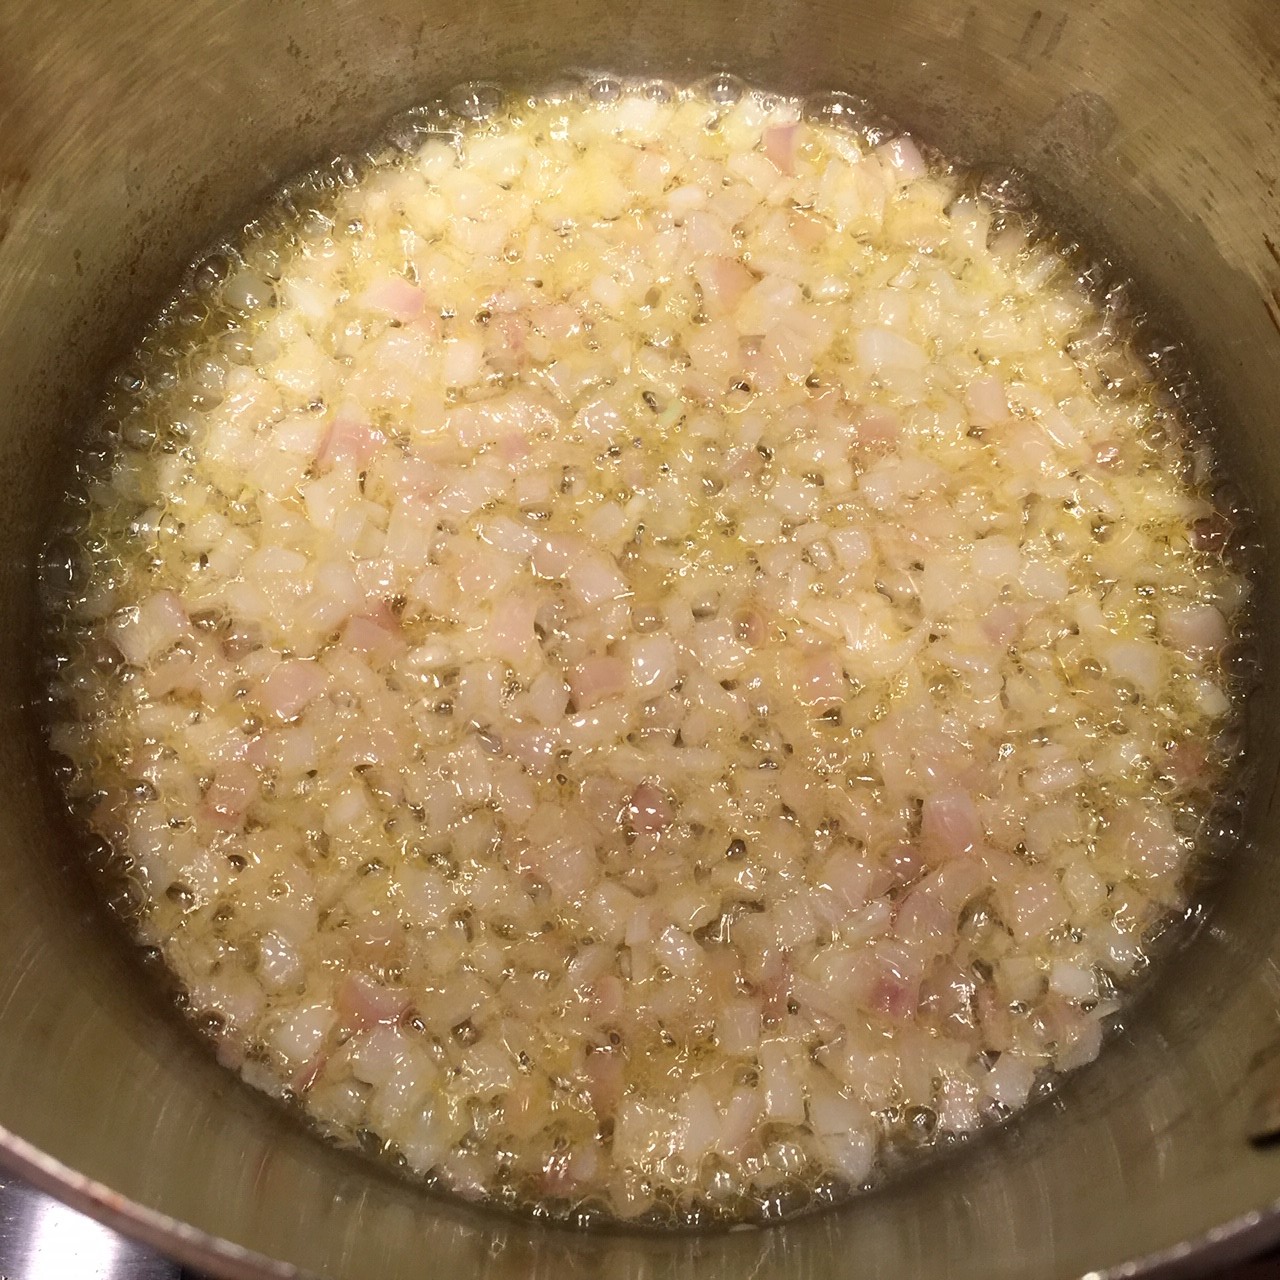
  In a Dutch oven, place the oil, onions, garlic, cumin, coriander, and 1 tsp salt. Sauté over medium/high heat 4 minutes, stirring often.
  Add in corn, chilis, and pepper – cook 3 minutes, stirring often.
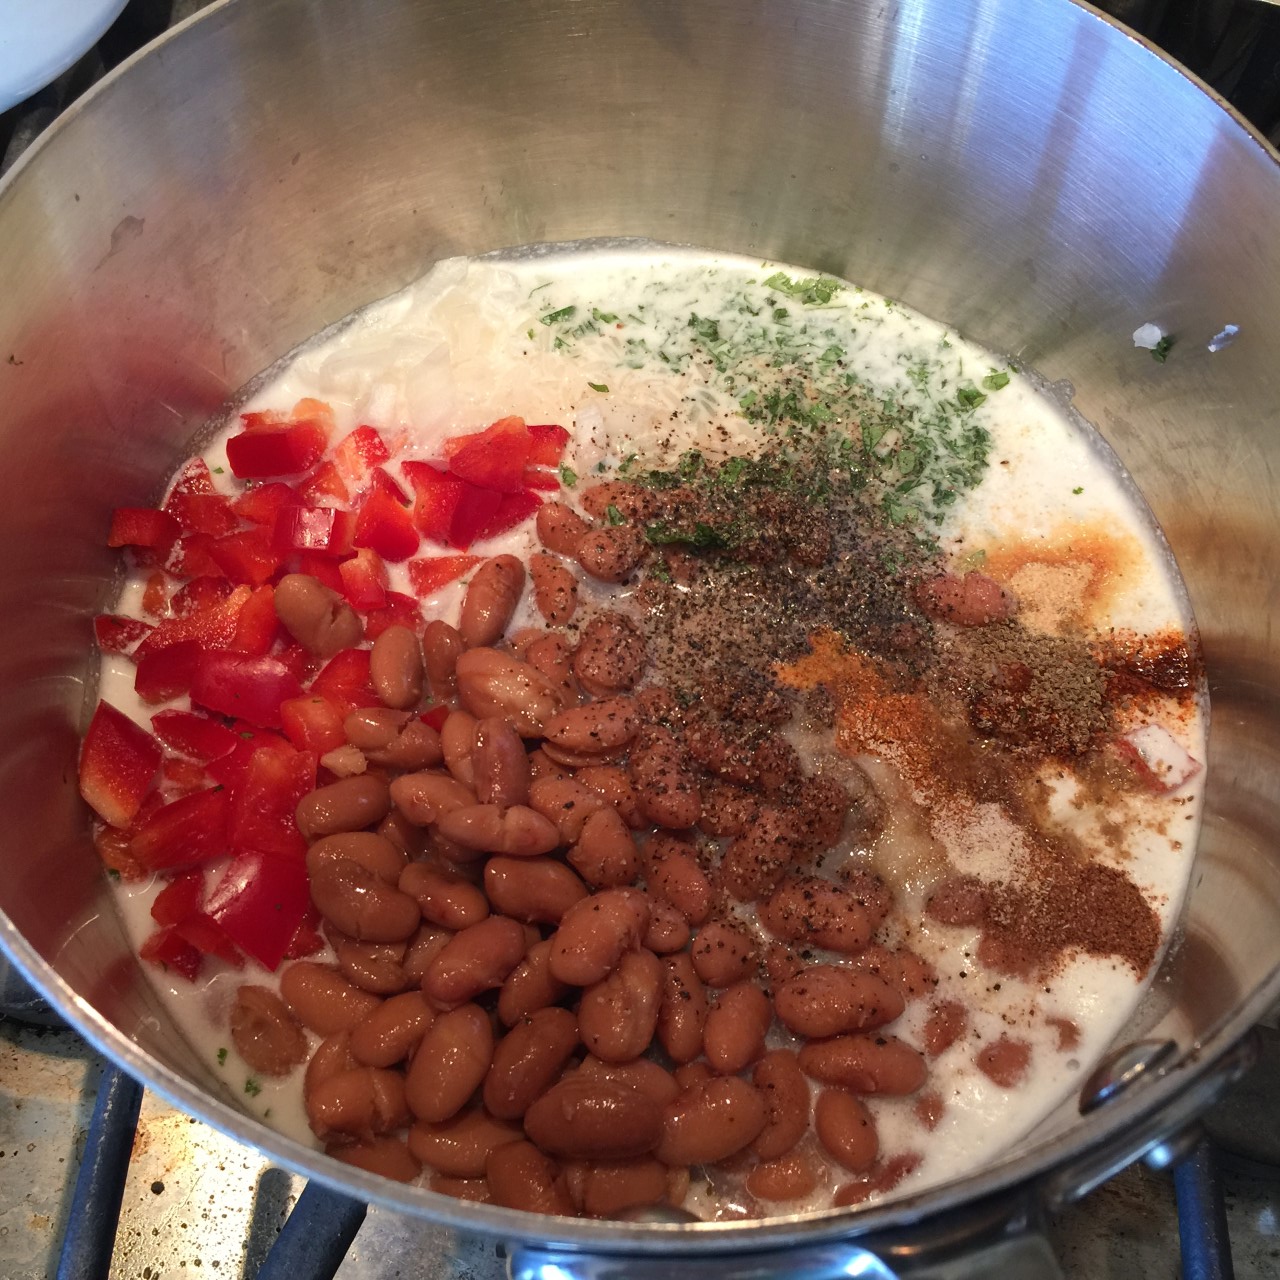
 Add in hominy, beans, tomatillos, vegetable stock, and fake chicken or tofu. Turn burner to medium/high heat, bring to a boil, cover, and reduce heat to keep a simmer. Cook for 20 minutes. Stir in cilantro, lime juice, and additional salt, if needed (I usually add in 1 tsp salt).

 Bring to boil, then reduce heat to simmer. Cover and cook over low heat for a total of 30 minutes. At first, stir now and then – until it’s been cooking for about 20 minutes. At this point most of the liquid will have been absorbed into the rice. Stir more often now to prevent burning. If all the liquid has been incorporated before the 30 minutes is up, turn off the heat and let the covered pot sit on the hot burner. This is to make sure the rice is completely cooked.
  Eat as is, or do something crazy (like I do) and serve as an open faced sandwich on a homemade
 Remove from heat and stir in vinegar, mustard, and dried tomatoes.
 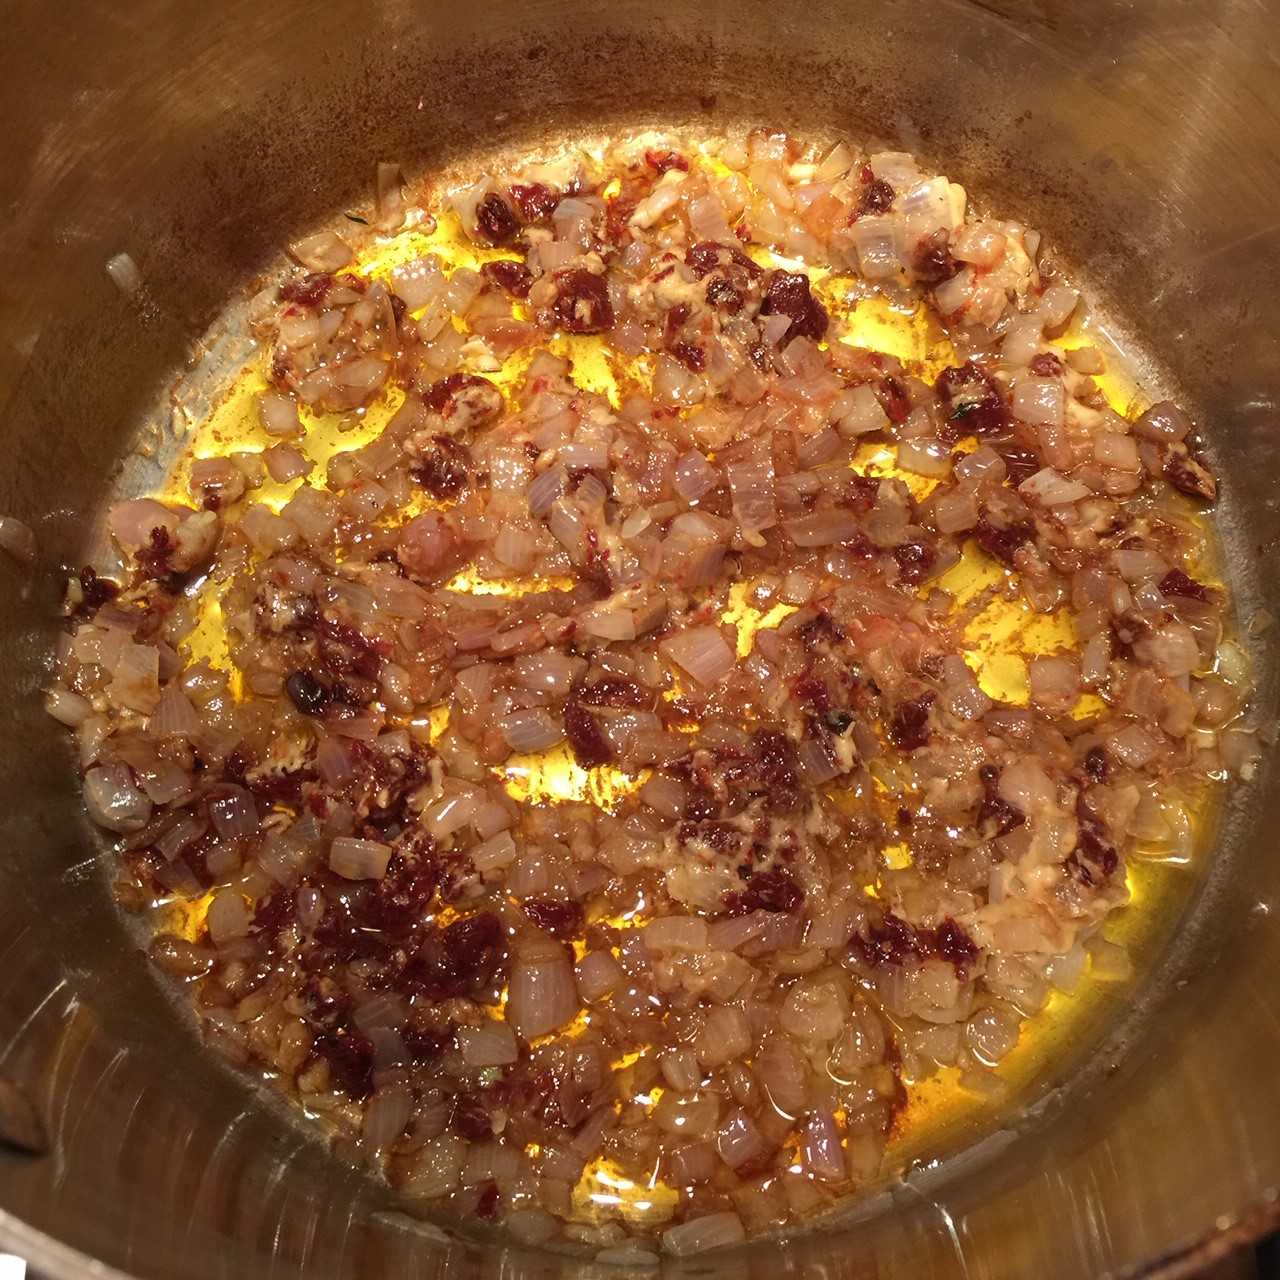 In a Dutch oven, bring 2 quarts of water and 1 T salt to a boil. Remove 1/2 cup of this water and stir into shallot mixture.
 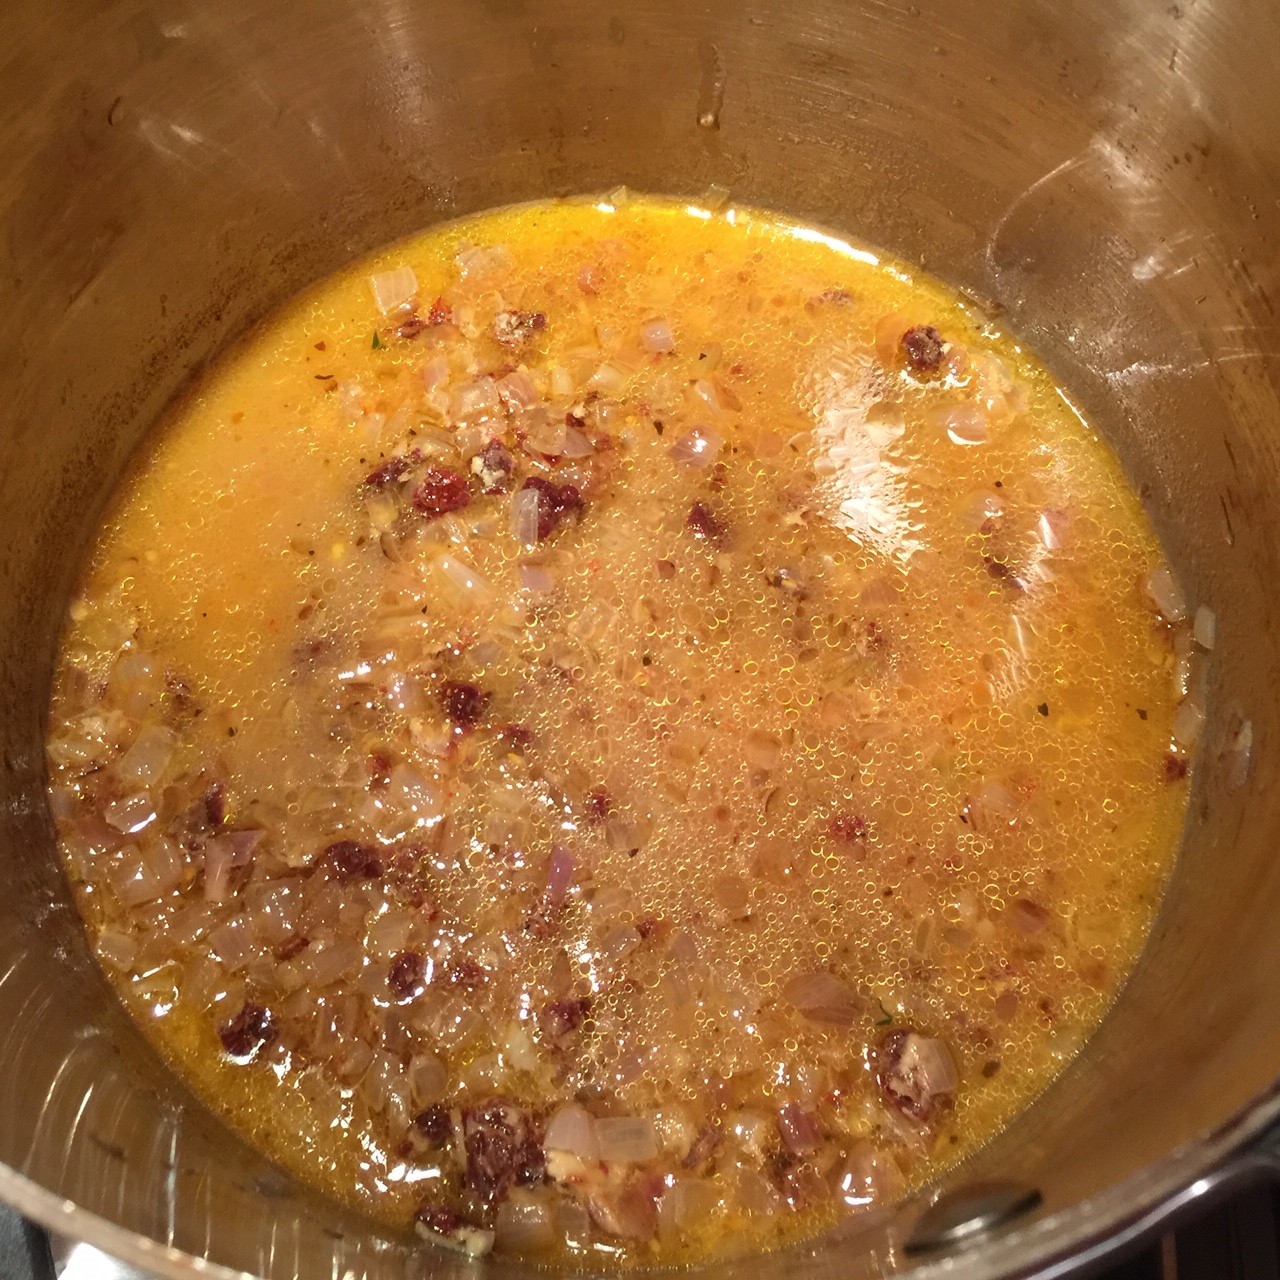 To the pot of boiling water add the broccoli and cauliflower.
 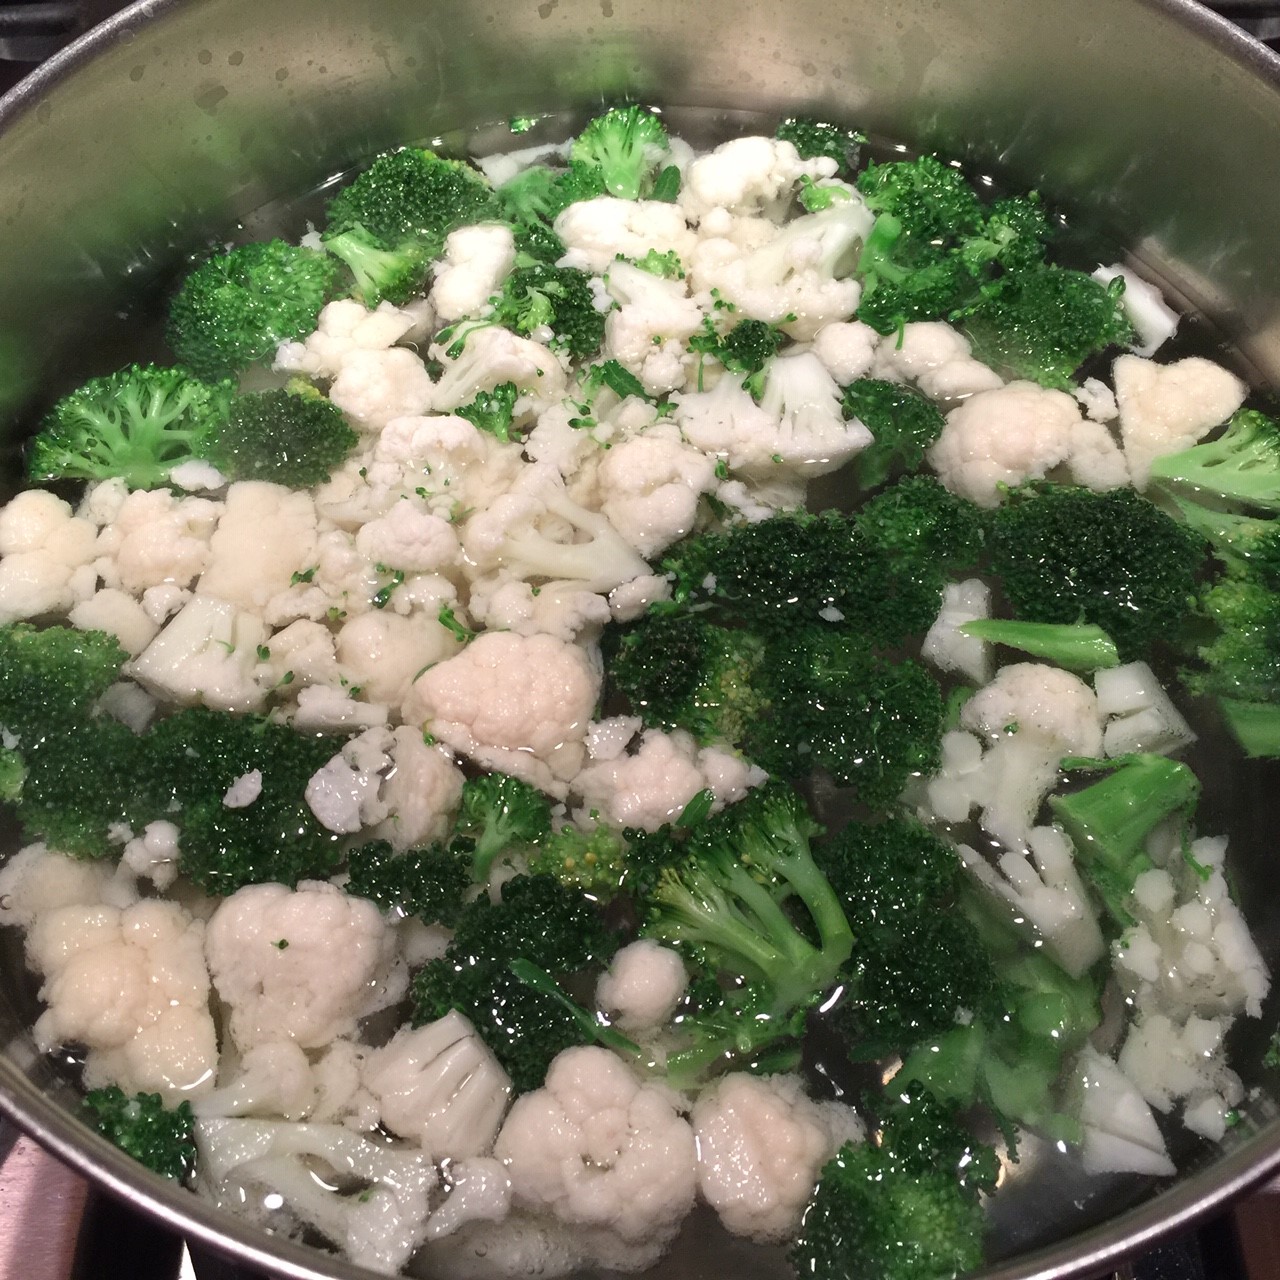 When the water resumes boiling, cook veggies 1 minute only, just to blanch them, then scoop them out and add to the shallot mixture (which is still off-heat).
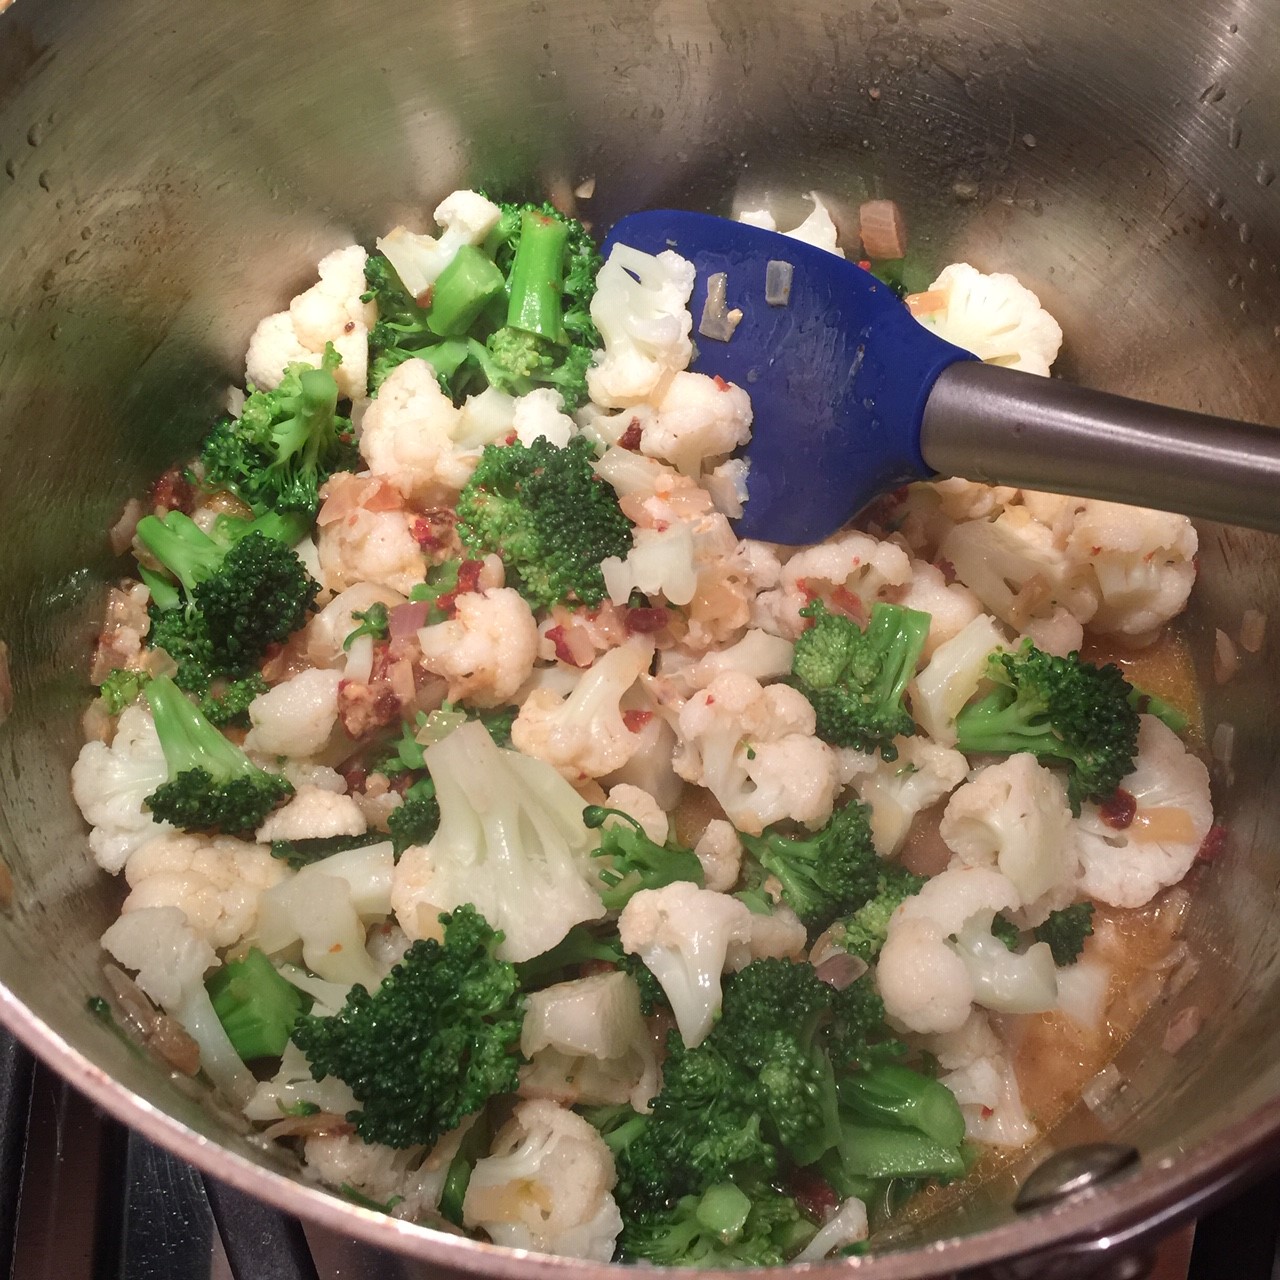 Add the pasta and lemon zest to the boiling water, cooking until the pasta is done.
 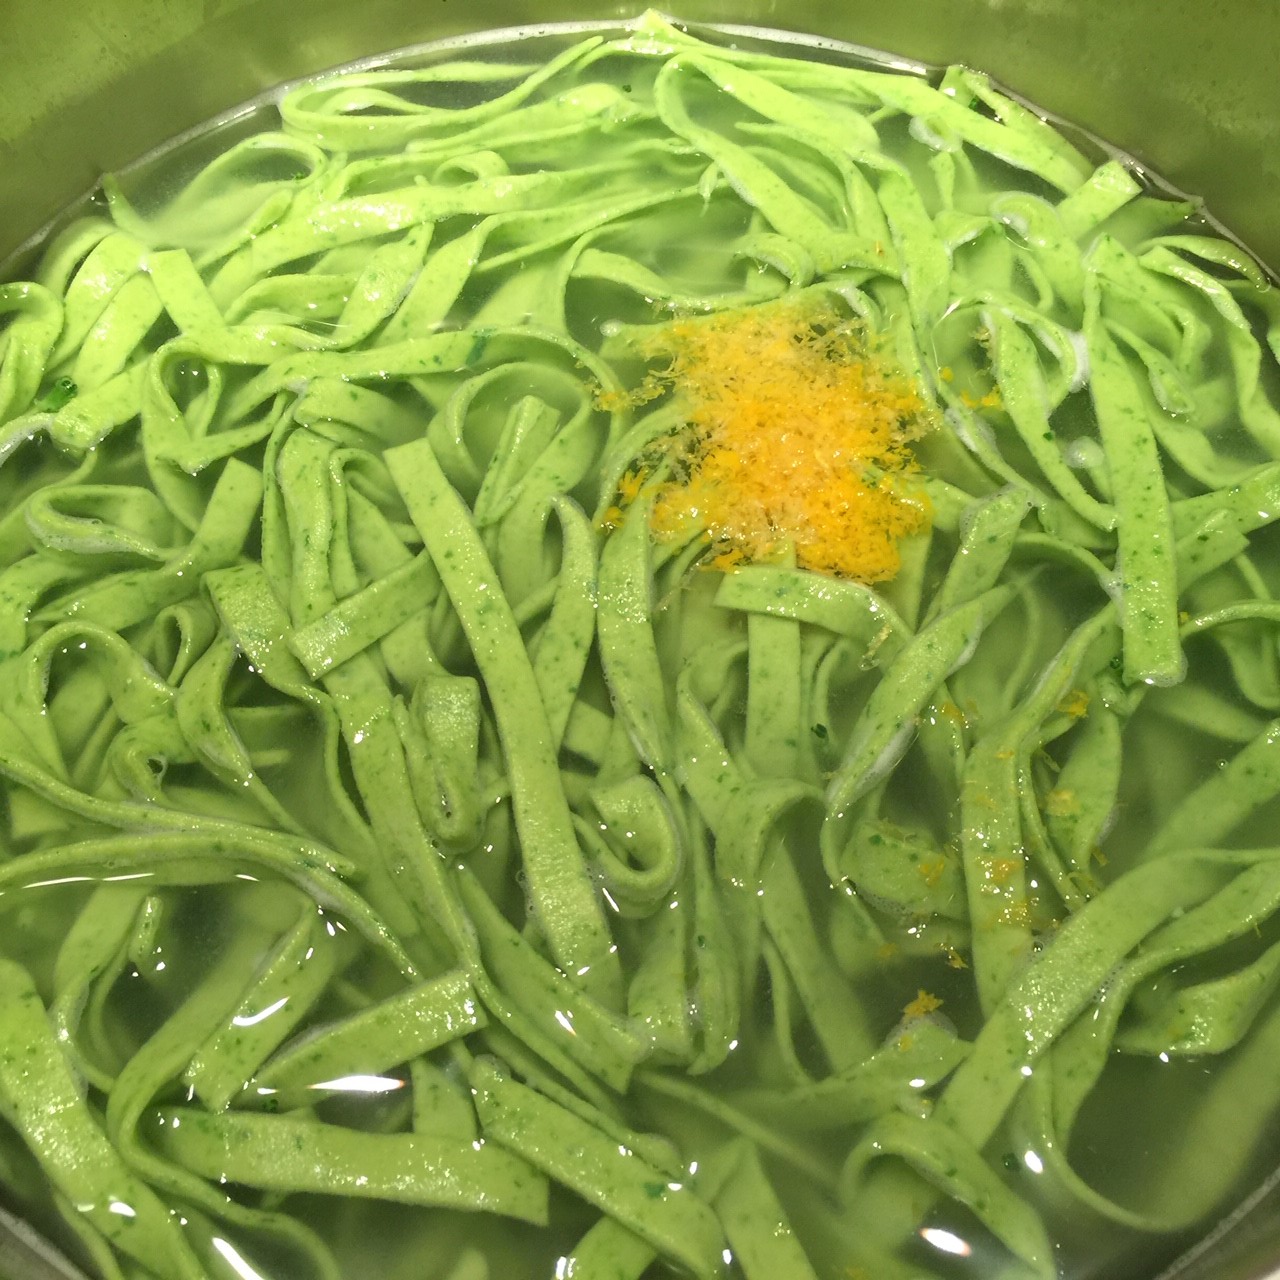 Save a cup of the pasta water in case you need it, then drain pasta. Into the empty Dutch oven combine the shallot mixture and pasta.
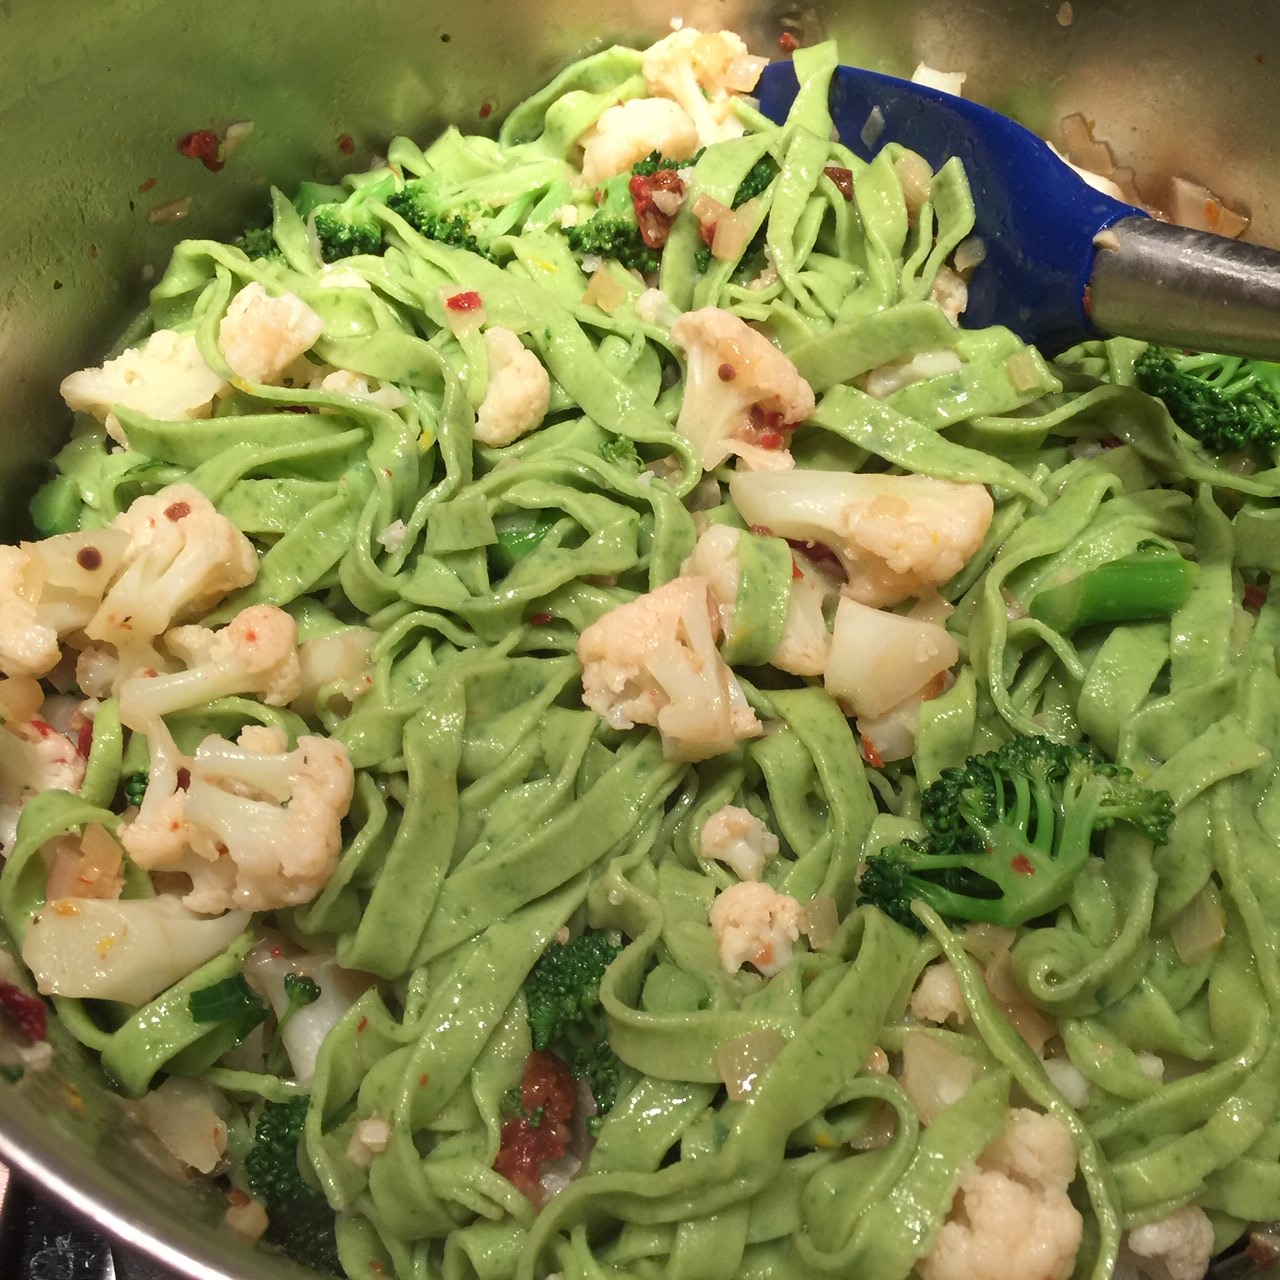 Adjust seasoning, if needed. Add saved pasta water if you feel it needs to be looser.
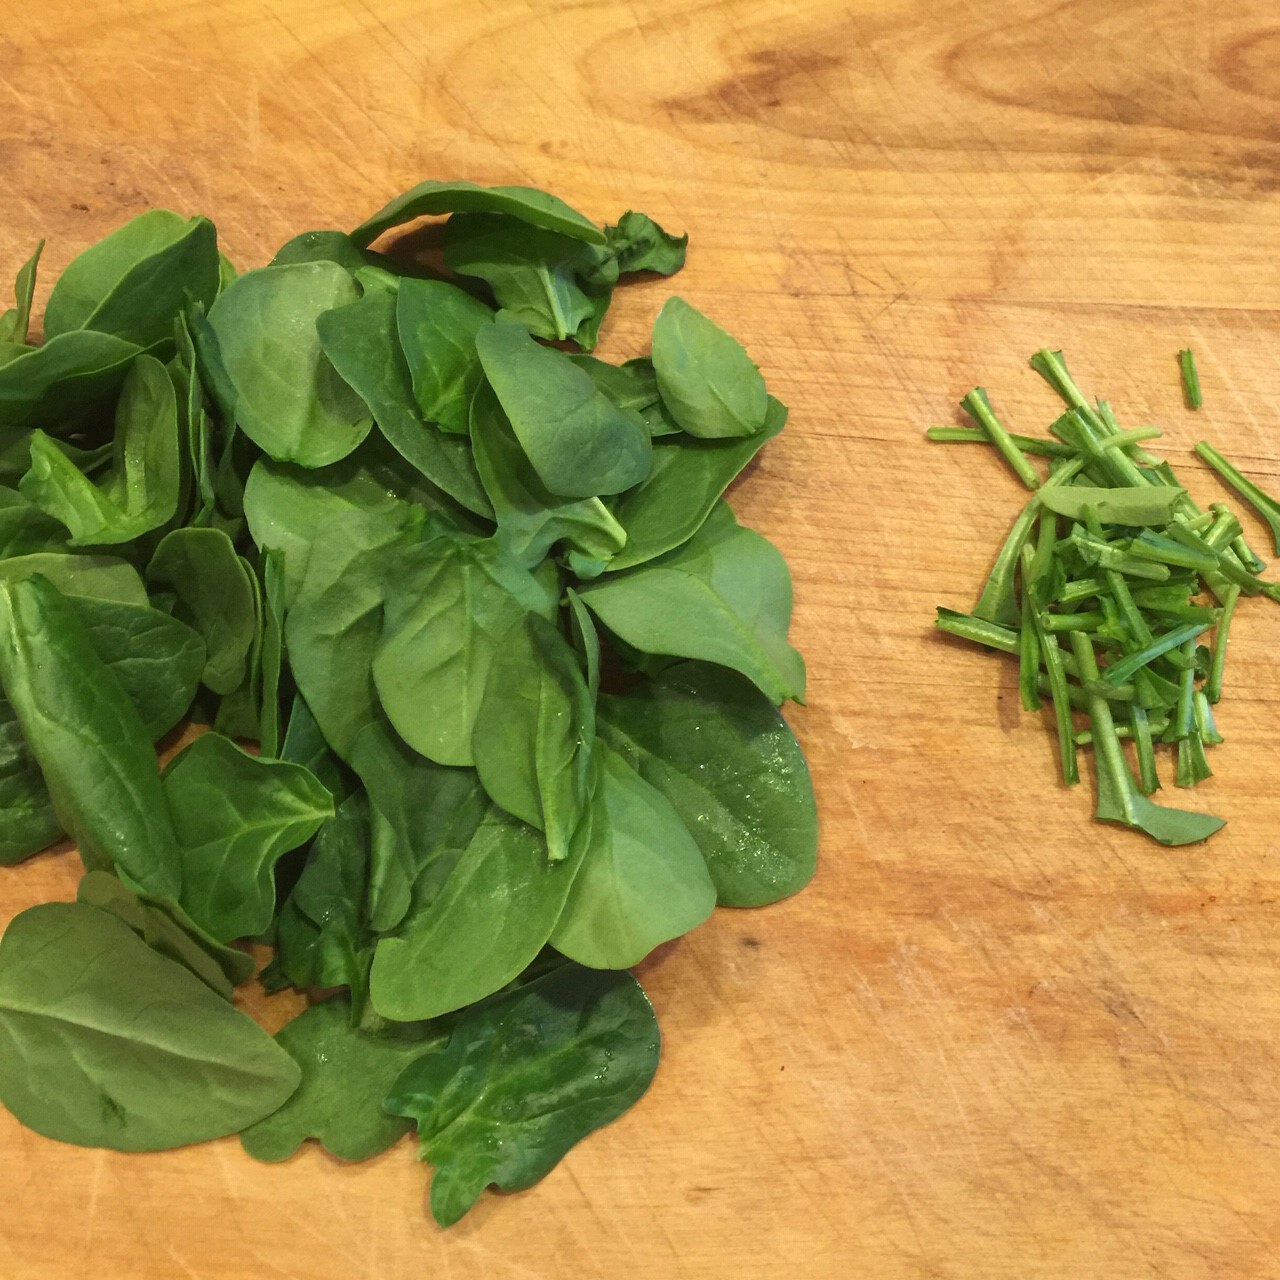 Chop leaves with knife, then place in food processor and pulse until leaves are very finely chopped.
 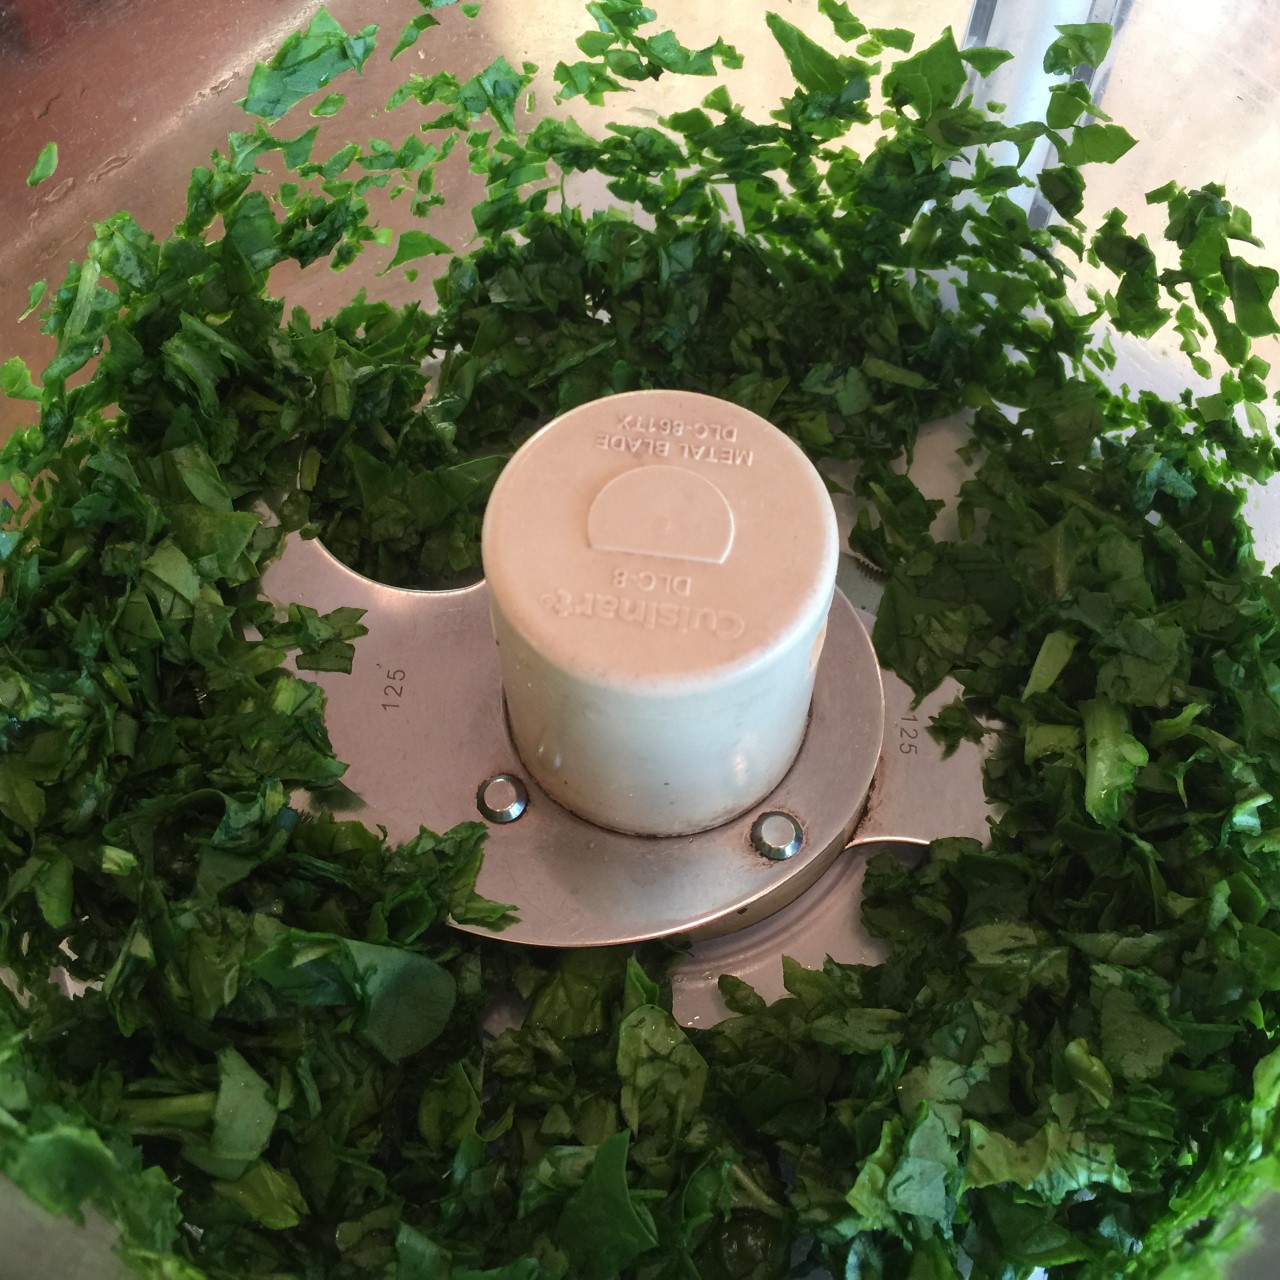 Add egg and oil, and pulse a few times to blend.
 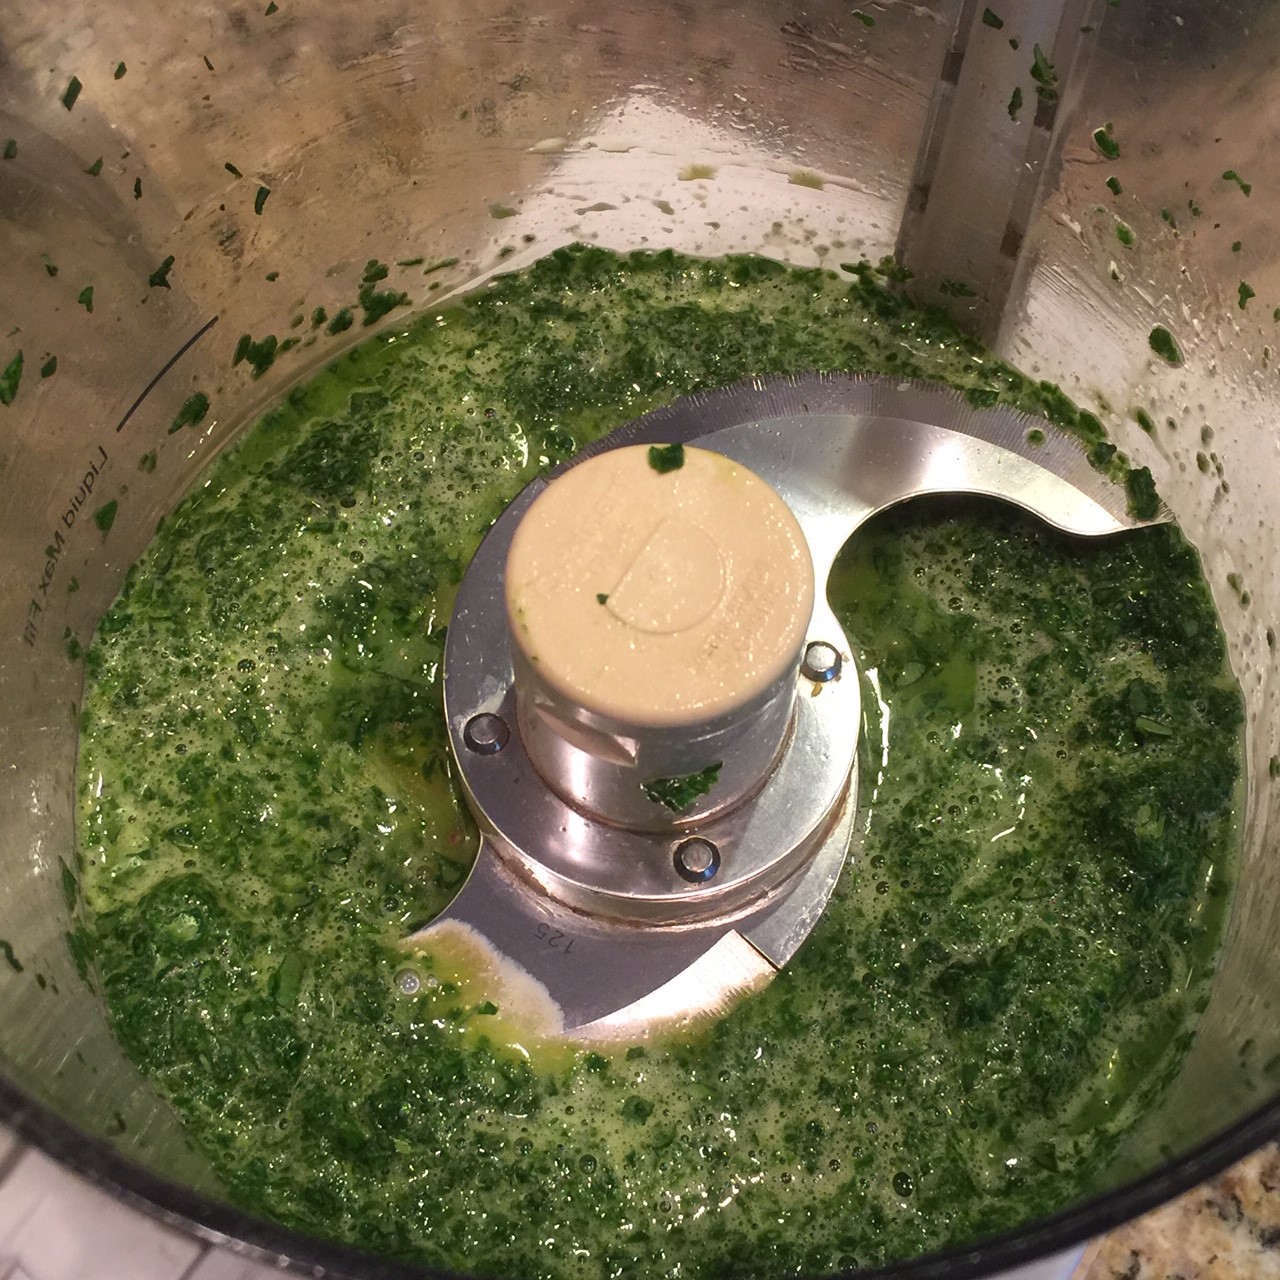 Pasta making is all about having the right ratio of liquid to dry ingredients. The spinach, egg, and oil are the wet, and the flour is the dry. You’ll have to go by feel since the water in the spinach and the size of the egg are variable. Don’t worry, there’s wiggle room!
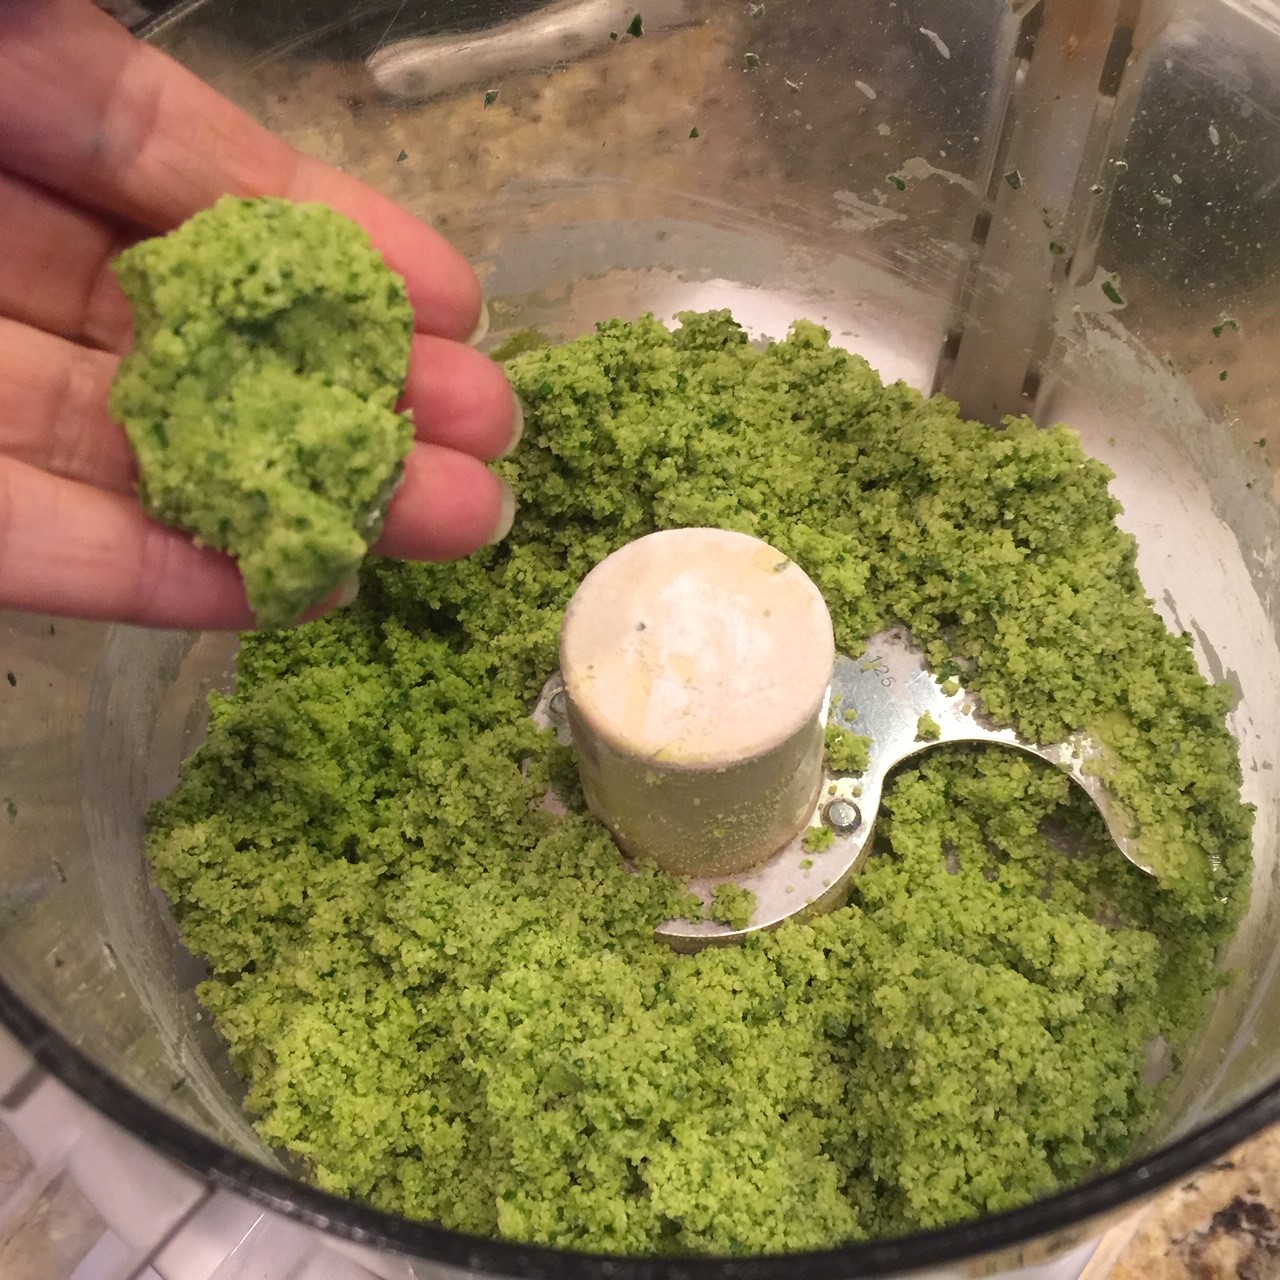 When dough reaches the proper consistency, form 2 balls and place them back in food processor with lid to rest for about 1/2 hour or so.
 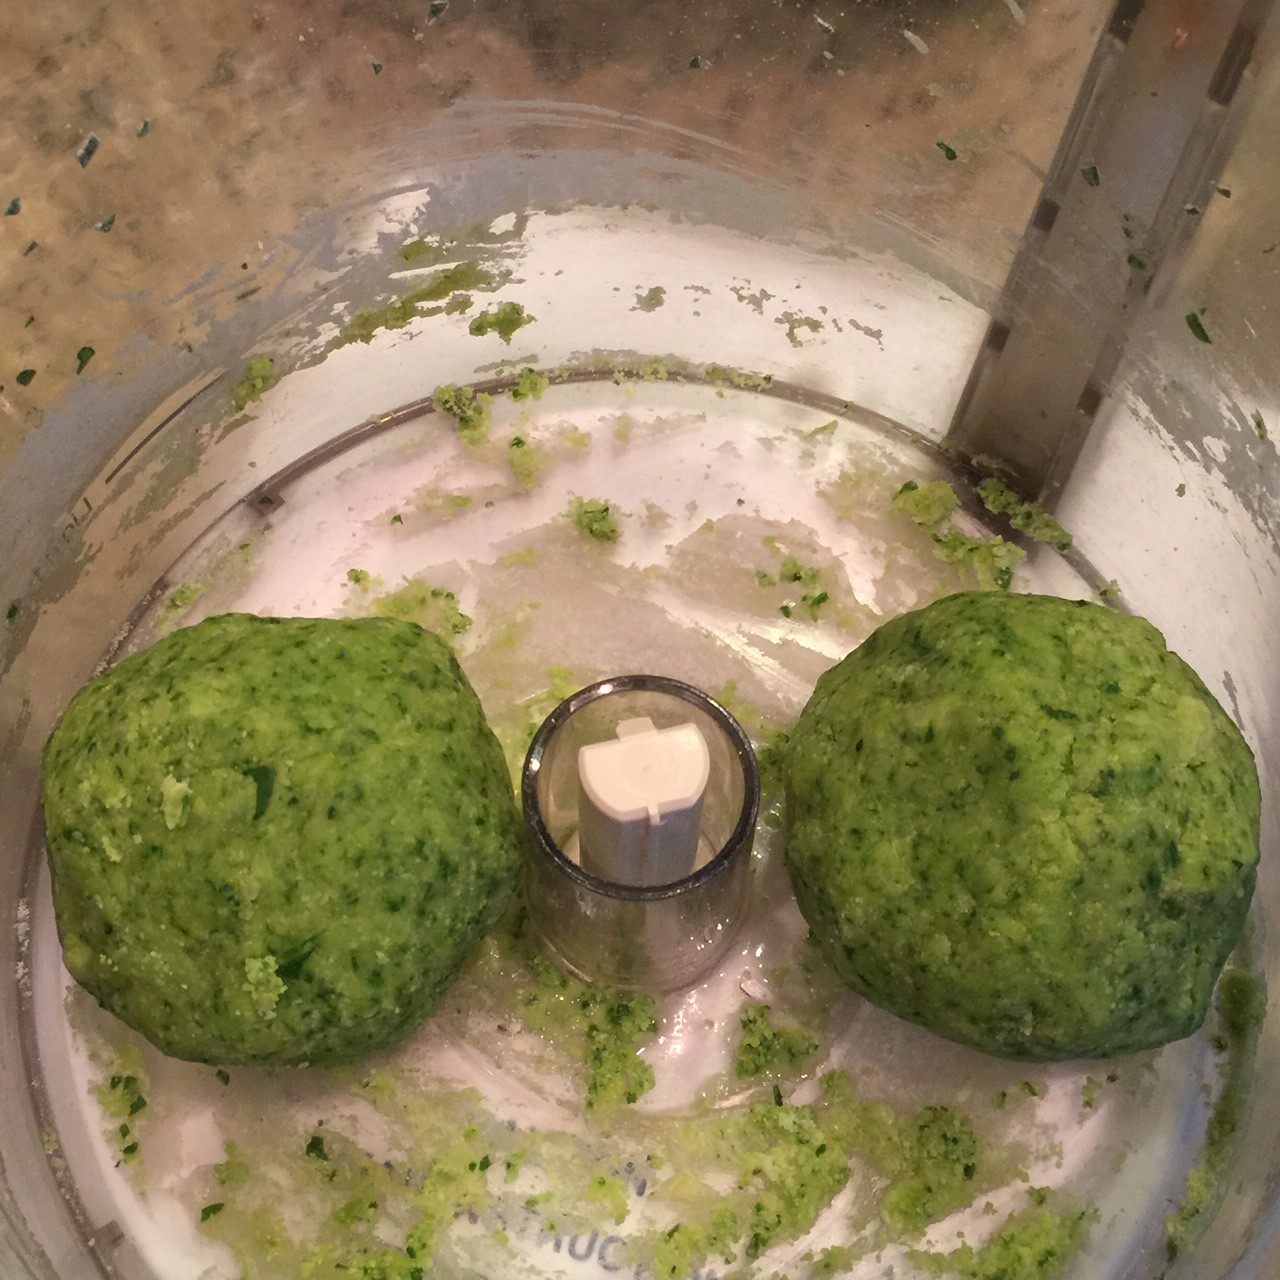 Attach pasta machine to a table or countertop with plenty of room to lay out dough. You’ll also need something to hang the dry pasta over, such as a dowel. Pour about 1/4 cup of flour on the work surface. Work as quickly as you can so the dough doesn’t dry out.
 Brush off extra flour the run dough through machine at the lowest number setting (this will be either ‘0’ or ‘1’). Fold dough like an envelope and run it through again.
 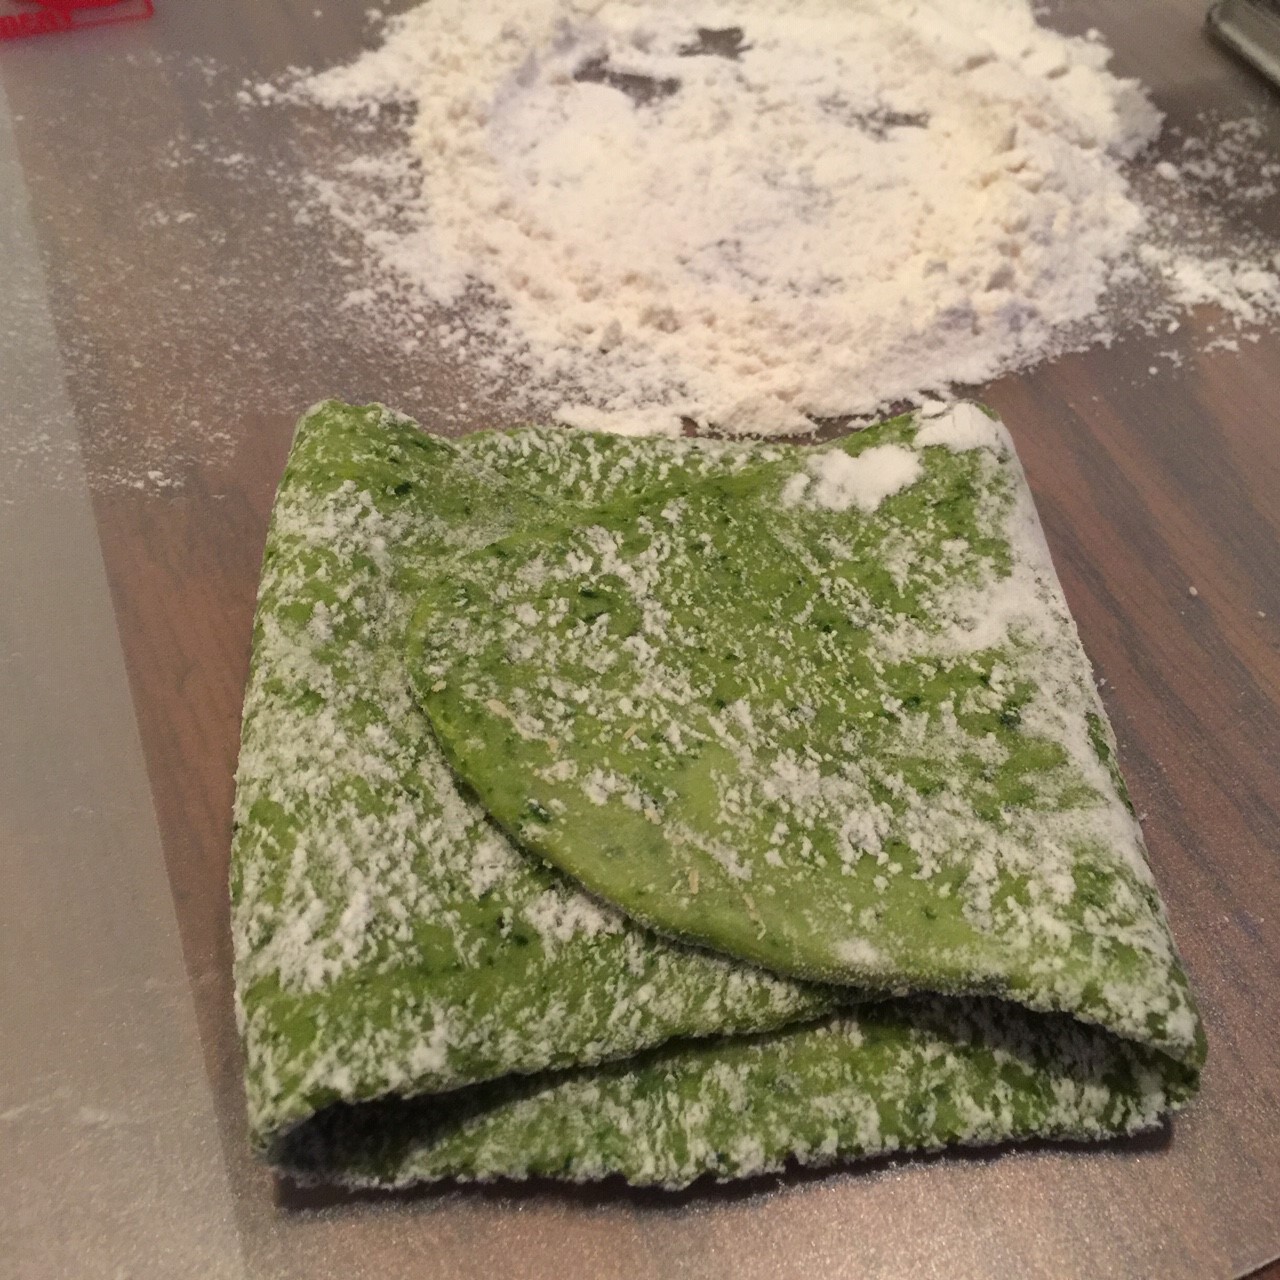 Lay dough flat and rub a little flour over both sides of dough.
 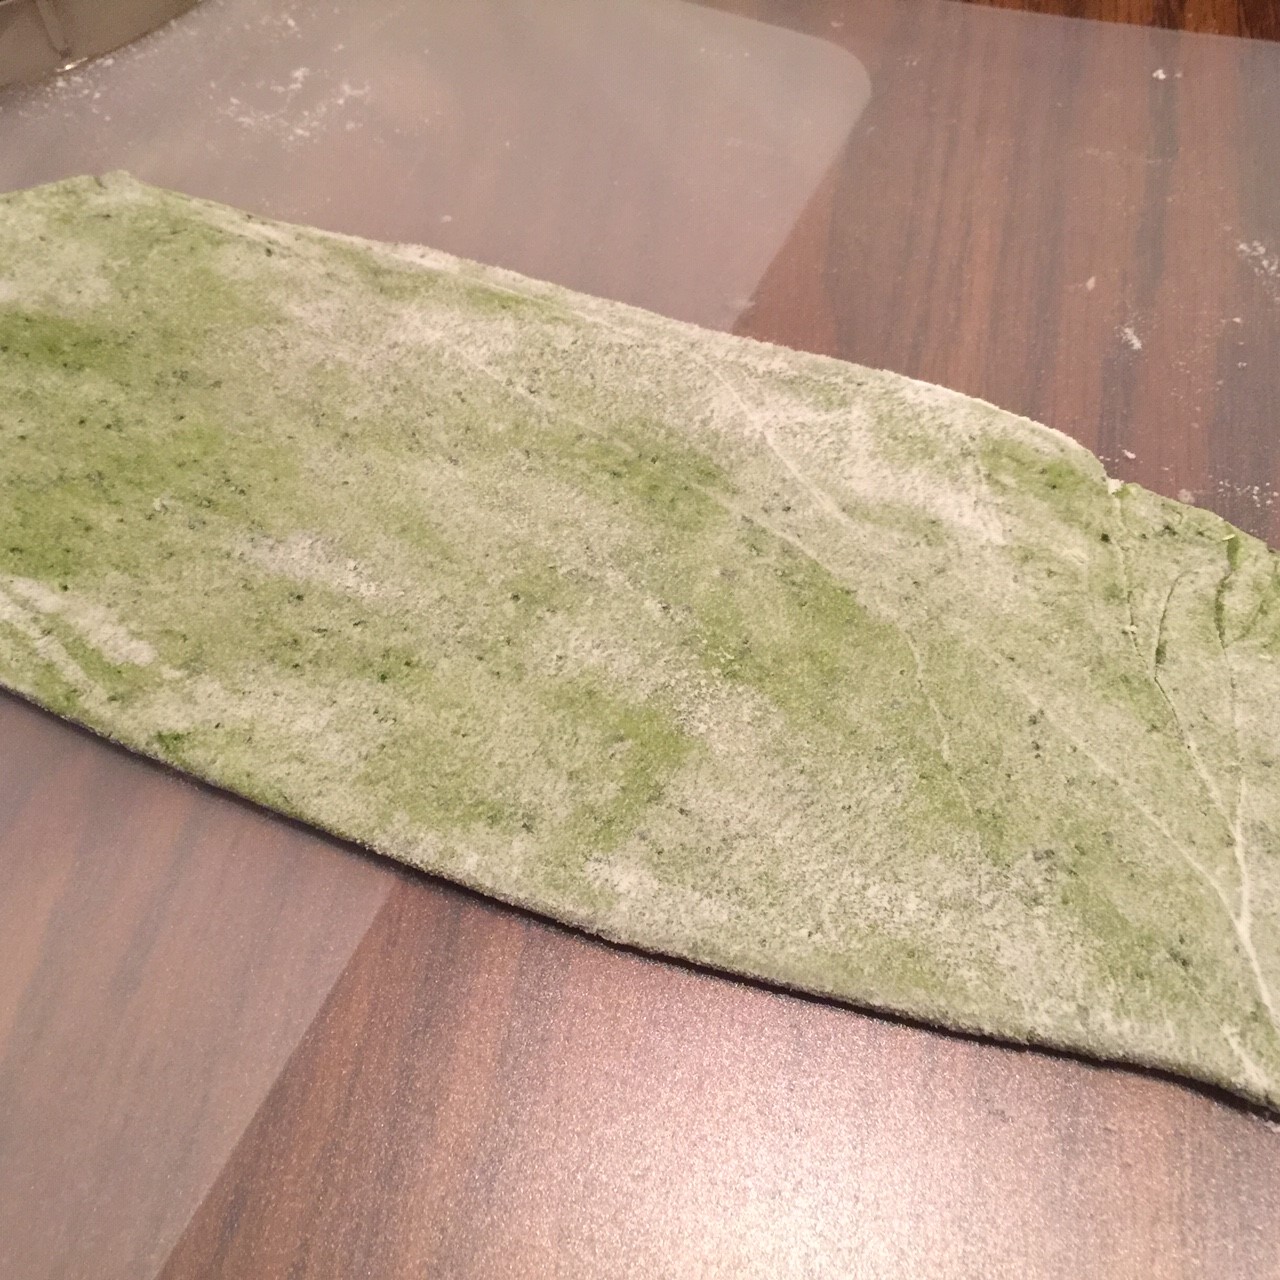 Fold in half and run it through machine at same setting. Repeat this last step 3 more times. You will have run the dough 6 times through the machine on the lowest setting. Repeat with second dough ball.
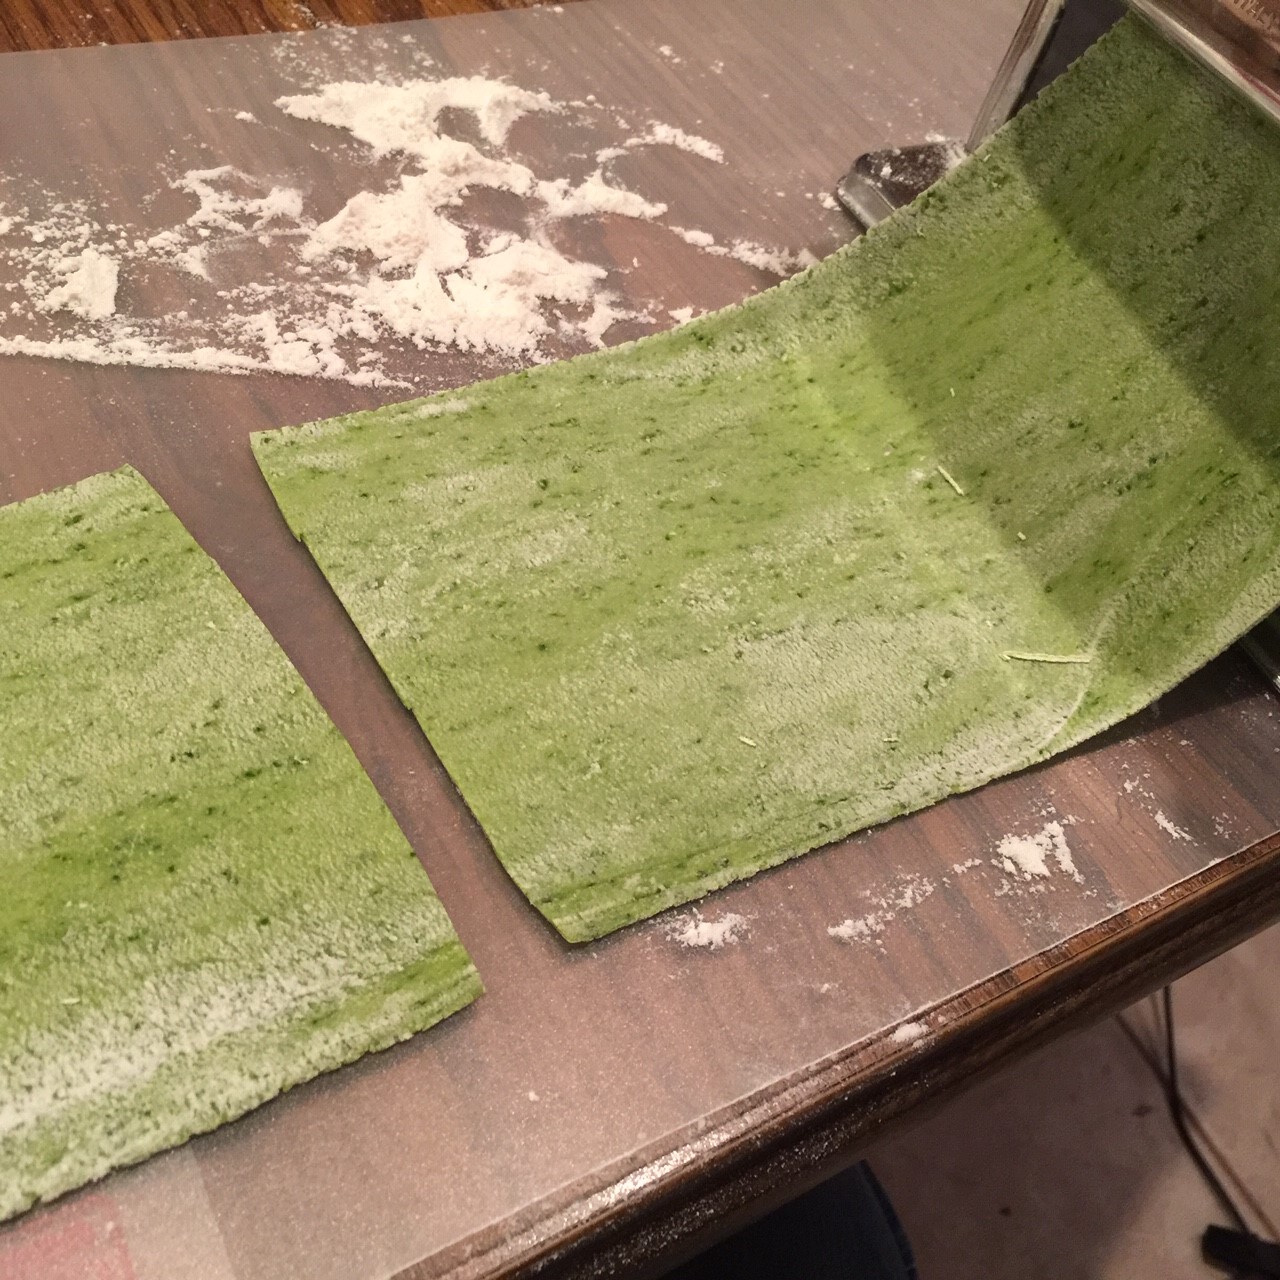 Run these pieces through the cutter before doing the other strip, so the cut edges don’t dry out.
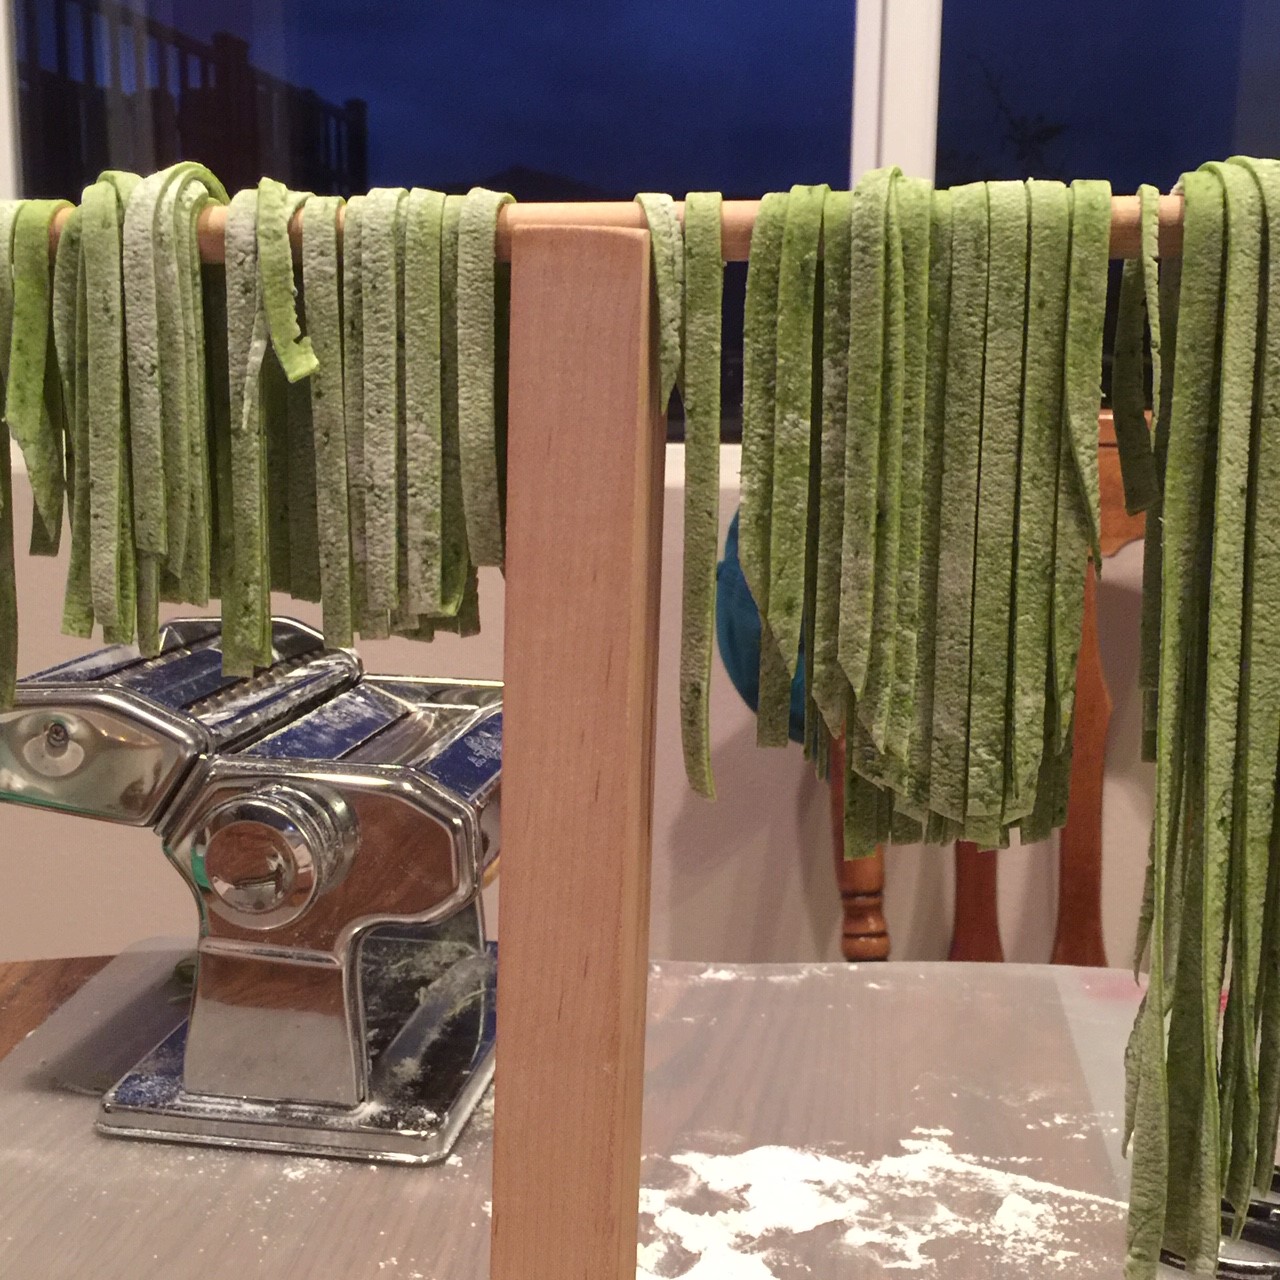
 Mexican Rice is one of those foods that can be both a side dish and an ingredient in something else. For example, Monday night you might want a side dish with a bit of a kick to perk up a main course, and then on Tuesday it can become part of a burrito or taco. One preparation, two meals! Love it!!!
 Empty into a large measuring cup and add enough stock or water (both work fine) to add up to 4 cups total. Set aside.
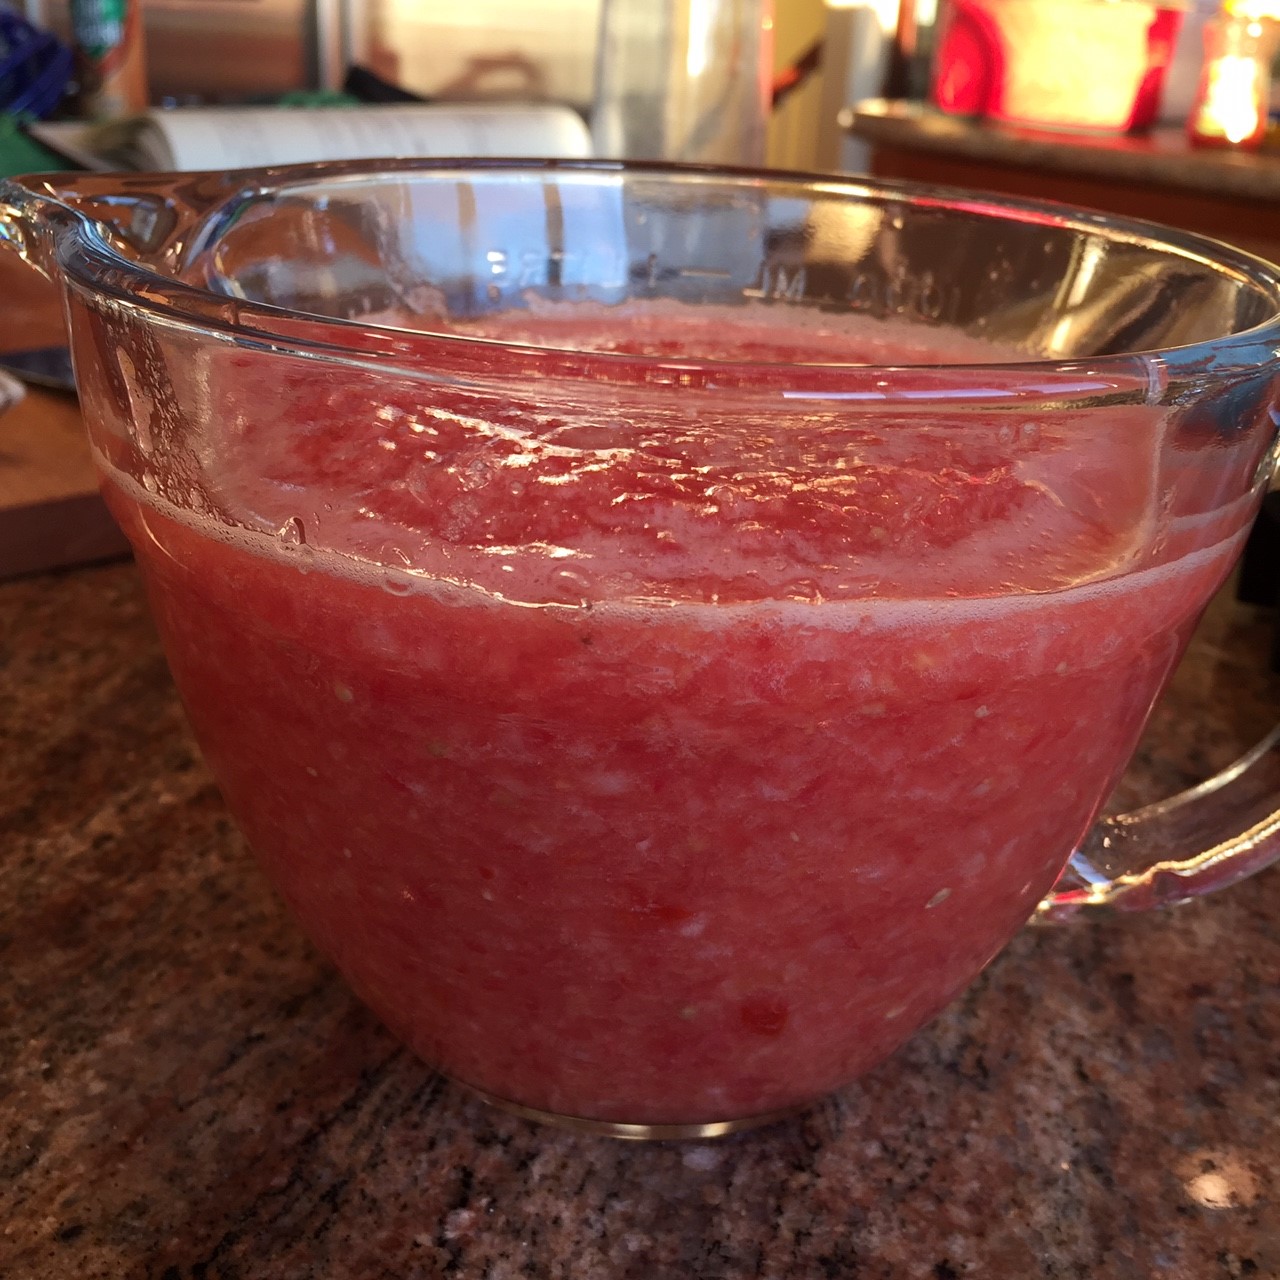 Put uncooked rice in a sieve and rinse well to remove excess starch.
  In a saucepan, heat oil. Add rinsed rice and sauté 6 minutes.
  Stir in the tomato purée, garlic, salt, jalapeños, and tomato paste. Pour into casserole dish.
 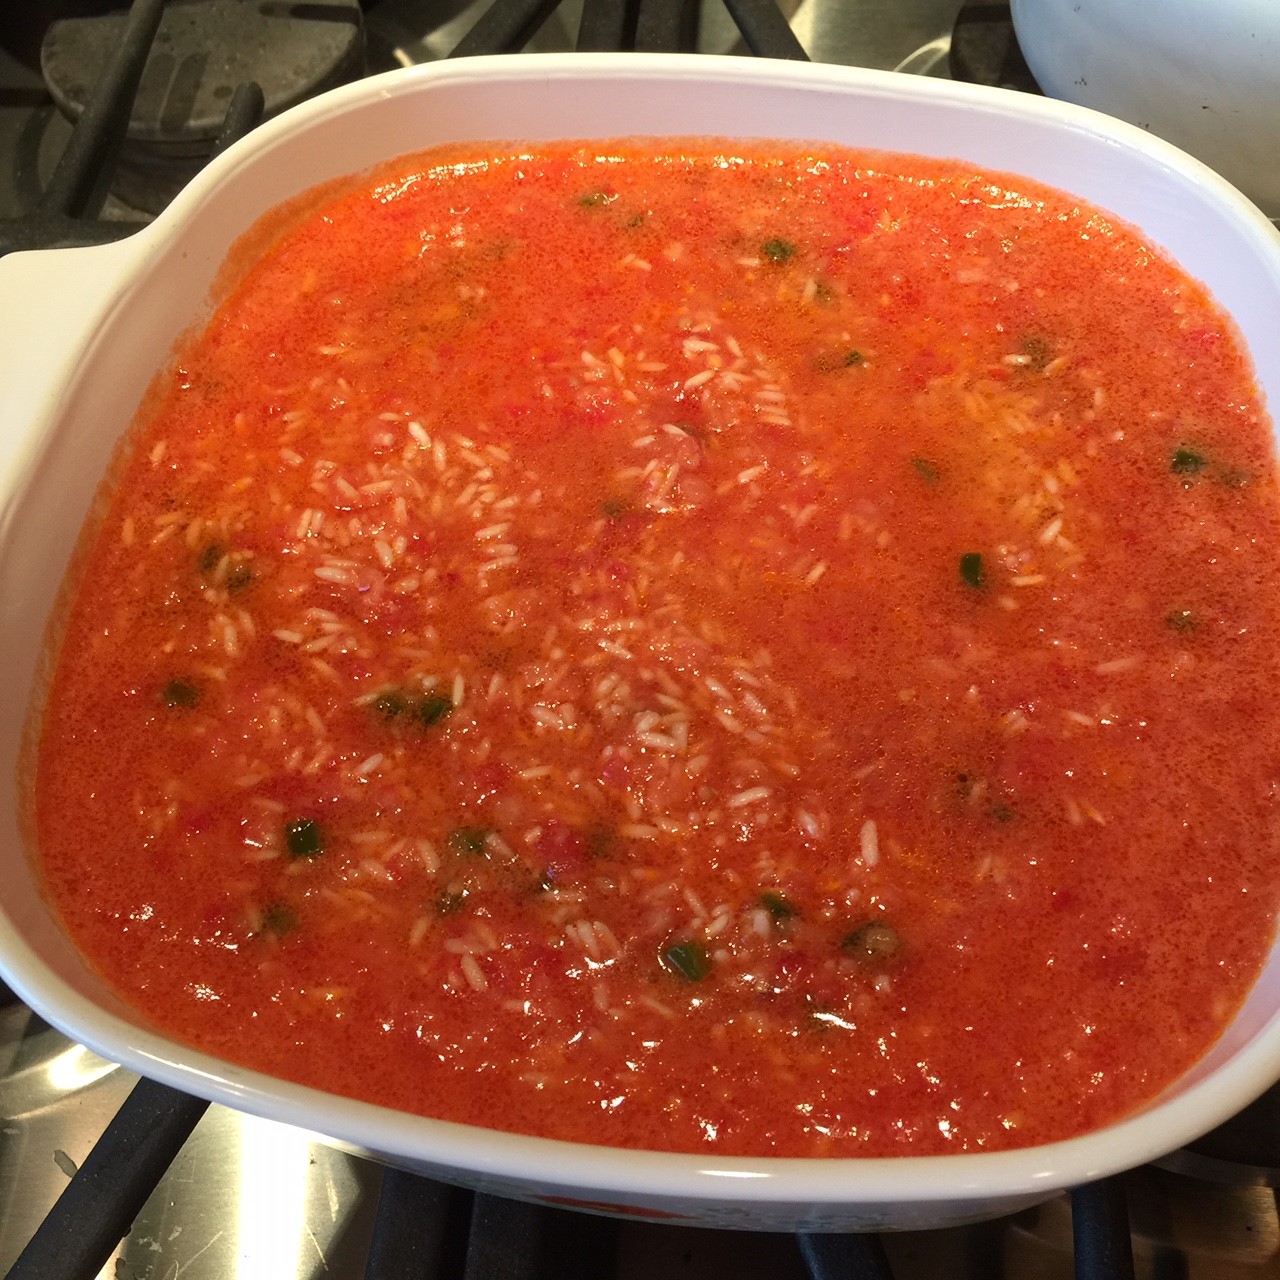 Cover and bake at 350º F 30-40 minutes, stirring halfway through, until rice is fully cooked. (Make sure rice is fully cooked – it won’t continue to soften off-heat.)
  Add in cilantro and lime juice to taste. If you want more kick, stir in another minced jalapeño.