Armenian Salad

Armenian Salad

Armenian Salad

Anyone raised in an Armenian home, like I was, knows that food is a central part of our world. Family gatherings were abuzz with endless food preparation and overlapping conversations.

We were a traditional group – men cooked the shish kabab and women did everything else. Whoops, I almost forgot – the men did suggest it was time for leftovers as soon as the last plate was dried and put away.

Generally speaking, Armenian foods are labor intensive. Dolma, lahmajoun, boereg, and kufte take quite a bit of time to produce, especially for a large family with hearty appetites. But, believe it or not, there are one or two dishes that are easy, nonfat, and meatless – something that’s sure to tug at your vegetarian heartstrings.

Armenian Salad is a favorite, particularly during the summer when bounty from the garden (or your local farmer’s market) can be chopped, tossed, and chilled in no time.  The flavor of these few ingredients awakens your mouth with an explosion of freshness – a perfect foil to the heaviness of many Armenian dishes.

ARMENIAN SALAD

  • 4 cups tomatoes, coarsely chopped (I use Roma tomatoes)
  • 1 red pepper, chopped
  • ½ cup scallions, thinly sliced, using white and green part
  • 2 cucumbers, skinned, seeded, and chopped
  • ¼ cup lemon juice (fresh or bottled)
  • 2 tsp salt

Toss everything together and chill briefly.  The longer it sits, the soupier it gets, so lessen the chill time by using cold ingredients.


Make A Hot Tomato’s (that’s me!) Stuffed Tomatoes!

Stuffed Tomatoes

Stuffed Tomatoes

I have to confess that until a few months ago I had never eaten a stuffed tomato.  It’s not that I’d never heard of stuffed tomatoes (hey – I’ve been around….well, at least, nearby), it’s just that they never sounded very appealing.  I guess I must have thought they’d be bland and mushy.

For an upcoming dinner party I had planned on making Spinach And Mushrooms Topped Polenta.  This was a mixed group (i.e., vegetarians and carnivores) so I wanted something that appealed to both groups. I always feel like the pressure is on when cooking for carnivores – I want to show them vegetarian cooking is more than tofu and sprouts.

I was racking my brain for the perfect side dish for this entree.  It had to be visually appealing as well as have a taste that complimented the rather bland polenta, spinach, and mushrooms.  Something red, I decided, which pretty much meant carrots, red peppers, or tomatoes.  Tomatoes seemed like a perfect match.  Not only are they a vibrant red, but their flavor would play well against the polenta dish.

In thumbing through several cookbooks (to those of you under 30:  yes, in the old days we used actual books for recipes), I found tomato aspic, soup, stewed, stuffed, and tarts. I honed in on ‘Stuffed’.  Hmmm!  I liked the idea of a contained side dish since the mushrooms were going to be scattered with a brown sauce on top.  A nice, bright, plump tomato would do very well, visually.  Taste-wise, I still had my doubts.

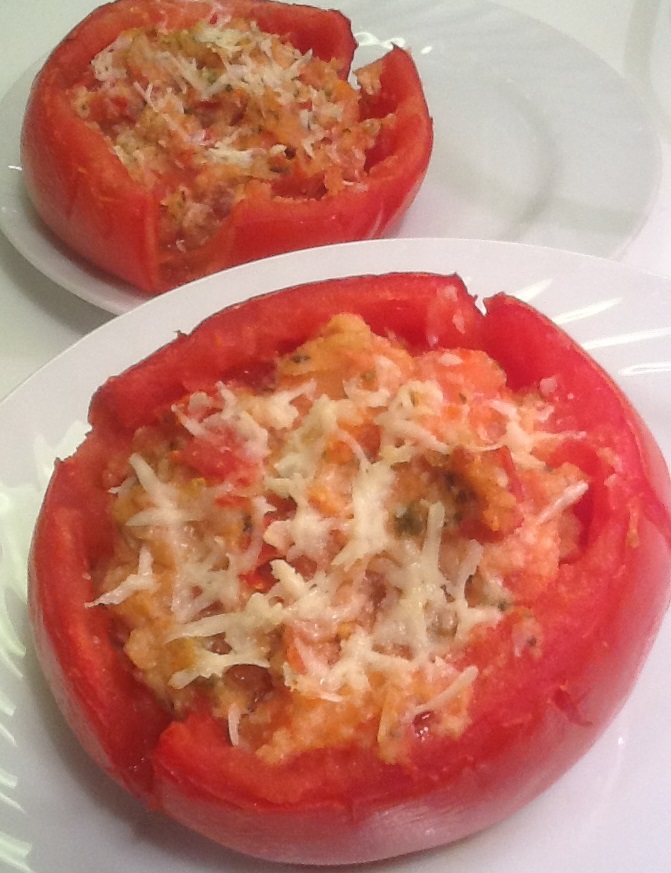
After reading a few stuffed tomato recipes, I came up with own.  Holy Moly!  When I took my first bite, my mouth was aglow with delite.  I actually said, ‘Where has this been all my life?’ I couldn’t believe how powerful the tomato flavor was, balanced perfectly with the garlic, seasoned bread crumbs, spices, and Romano cheese.  Plus these Stuffed Tomatoes formed a perfect marriage with the Spinach And Mushrooms Topped Polenta.

Not only are Stuffed Tomatoes easy to prepare, pretty as a picture, and so tasty you’ll swear you’re hearing angels singing ‘Alleluia’ as you take your first bite, but they can also be prepared (but not baked) ahead of time so that’s one less thing to do as you’re trying to get your meal timed right. (Stay out of my way during the last 20 minutes of dinner prep!)

It doesn’t matter what variety of tomato you choose, but it’s best to use one that’s broader than it is tall.  Tall, thin tomatoes, such as Roma, tend to fall over and spill their contents thus producing an unstuffed Stuffed Tomato.  Not good!  Also, choose ones that are flat on the stem end as this will become the bottom.  For variety, you can also choose a gold or yellow heirloom – what’s life without shaking it up a bit?!

If you’d like to watch me make these delicious Stuffed Tomatoes, click on Stuffed Tomatoes.

STUFFED TOMATOES – makes 2

  • 2 tomatoes (intact and blemish-free)
  • ½ T olive oil
  • 1 garlic clove, pressed
  • 1/4 tsp dried oregano
  • 1/8 tsp dried basil
  • pinch cayenne pepper (also called red pepper spice)
  • 1 small bay leaf or ½ large one
  • ½ tsp salt
  • 2 T seasoned bread crumbs
  • ¼ cup Romano cheese, finely shredded
  • 2 T additional Romano cheese, finely shredded

Slice 1/3″ from BOTTOM of tomatoes.  (The stem end will become the bottom of the Stuffed Tomato). Carefully scoop out and save the pulp, leaving the sides and skin intact. Use a spoon for this task – you don’t want to pierce the sides of the tomato. Clean out all the nooks and crannies of seeds and goo, and give the tomatoes a few good shakes over the sink.  Set aside, letting them drain upside down.

Dice the tomato tops and meatier pulp.

In a small saucepan over a low/medium heat, sautè olive oil, garlic, oregano, basil, cayenne pepper, bay leaf, and salt for 1 minute. Take care not to burn the garlic.  Add in the diced tomatoes, turn up the heat to a medium flame, and cook for about 2 minutes. You want the tomato pieces cooked but not mushy.  What you’ll notice is the pieces have still retained their shape but quite a bit of liquid has been released. Turn off the burner.

Quickly strain the liquid using a small strainer, if you have one, or carefully pouring off as much liquid as you can into the sink (use a lid to prevent solids from slipping through. Empty any solids in the strainer back into the saucepan.  You don’t want to get rid of all of the liquid, just most of it – that’s why you need to do this step quickly.  REMOVE AND DISCARD BAY LEAF!!!

Preheat oven to 350º Fahrenheit.

Stir in the bread crumbs and ¼ cup Romano.  Stuff the tomatoes with the mixture, packing it down.  There should be exactly enough filling for 2 tomatoes.  Top each tomato with 1 T shredded Romano.

Place Stuffed Tomatoes on a greased cookie sheet that has sides (in case of leakage) and bake for 20 minutes. Then turn on broiler (leaving tomatoes where they are) and broil for another 2 minutes, until tops are browned.  Keep an eye on them – you don’t want to burn them! Serve hot.


Roasted Carrots – Shaking It Up A Little

ROASTED CARROTS

ROASTED CARROTS

I’ve been feeding my dog the exact same food everyday since the day we adopted her over 10 years ago.  And I don’t mean just the same brand – I mean the exact same flavor of canned and dry. Don’t feel bad for her.  Every now and then I’ve given her something new – just to mix things up.  She won’t eat it.  And she’s a gal who loves to eat.  So I gave up.  I’ve decided that unless she comes to me and complains, she will continue to get the same old, same old.

One day my husband was watching me dish out my dog’s food and, with pity in his voice, remarked how boring it must be for her to eat the same thing everyday. I couldn’t believe my ears. This from the man who’s been eating Quaker Instant Raisins and Spice Oatmeal EVERY MORNING for as long as I can remember. Our cupboards are filled with boxes of it so we don’t (God forbid) run out – even though I go to the market several times a week. (And don’t get me started about how much money we could save if he’d just buy the big canisters of plain oatmeal and add in his own raisins and spices.)  Of course, I pointed out the irony of his concern.

You may be wondering what my dog’s and my husband’s meal proclivities have to do with a vegetarian cooking blog. I’m glad you asked. Almost without fail, my family has broccoli with our dinner. We all love it (except for my youngest son, who hates pretty much all vegetables), it’s healthy, and steaming it is a snap.  My husband sometimes even has it at lunch, too.  What can I say – he’s a man who knows what he likes.  (Thank goodness I’m on that list.)  I suppose people are creatures of habit, but we were in very deep rut.

Back in my carnivorous days, I used to make roasts surrounded by carrots and potatoes. The fat from the roast, combined with the long roasting period, would caramelize the surrounding veggies.  They were SO good!  But once I stopped roasting meat, I stopped roasting veggies.  I do have a delicious recipe for carrots with pistachio nuts in a Cointreau/butter sauce – but that’s too much work for an everyday dinner.  So it was steamed broccoli,  with asparagus or cauliflower – when I thought about it – for variety.

But, did it have to be so? I asked myself.  (I have a tendency to talk to myself – I pretend it’s to my pets, but I’m not fooling anyone.)  What if I coat carrots with vegetable oil and bake them, as I would with the roast.  Hmmmm!  I wondered.  The skies cleared!  The angels sang!  It was a joyous moment when I took that first bite.  Yes!  They were sweet; they were tender; they were pretty.  And thus began a new go-to side dish in our home: roasted carrots.

Roasted carrots are super fast to put together and take 20-30 minutes to bake, depending on the oven temperature.  If I want them as fast as possible, I bake them at 400ºF, maybe even 425ºF.  But if I’m baking a main dish at a lower temperature, I’ll put the carrots along side it in the oven, and just roast them longer.  I haven’t noticed a different in taste between roasting fast at a higher temperature, or slower at a lower one.  They’re always good.

ROASTED CARROTS

  • carrots cut into 2″ pieces (I buy the bags of cut carrots)
  • oil (I use canola)

Use a baking pan with sides (such as a jelly roll pan or a broiler pan) so the carrots don’t roll off over the side when you stir.  Pour a little puddle of oil in the middle of the pan – I don’t measure, but for 2 people I use approximately 1 T oil.  Then pour the carrots onto the pan and roll them in the oil, so they’re completely coated.  Roll the carrots around on the pan to grease the bottom, then spread them out so they don’t touch.  Bake at 350ºF – 425ºF, depending on how fast you need them and/or whether you’re baking something else at the same time.  Stir the carrots every 10 minutes, until they’re DARK brown on the parts that touch the pan bottom. Best served right away.

NOTE:  As you know, I’m a fan of making things from scratch, and avoiding pre-made items. That being said, I do buy the bags of pre-cut carrots.  I’m not recommending this, though. It’s just that it’s so darned fast to open the bag and pour the already prepared carrots onto the jelly roll pan.  But SOMEDAY – I swear – I’m going to start buying whole carrots and clean and cut them myself.  I will!  But for now, at least I’ve expanded our side dish repertoire.  Baby steps.

Mushy Peas: A Super-Food Disguised As A Side Dish!

Mushy Peas
Mushy Peas

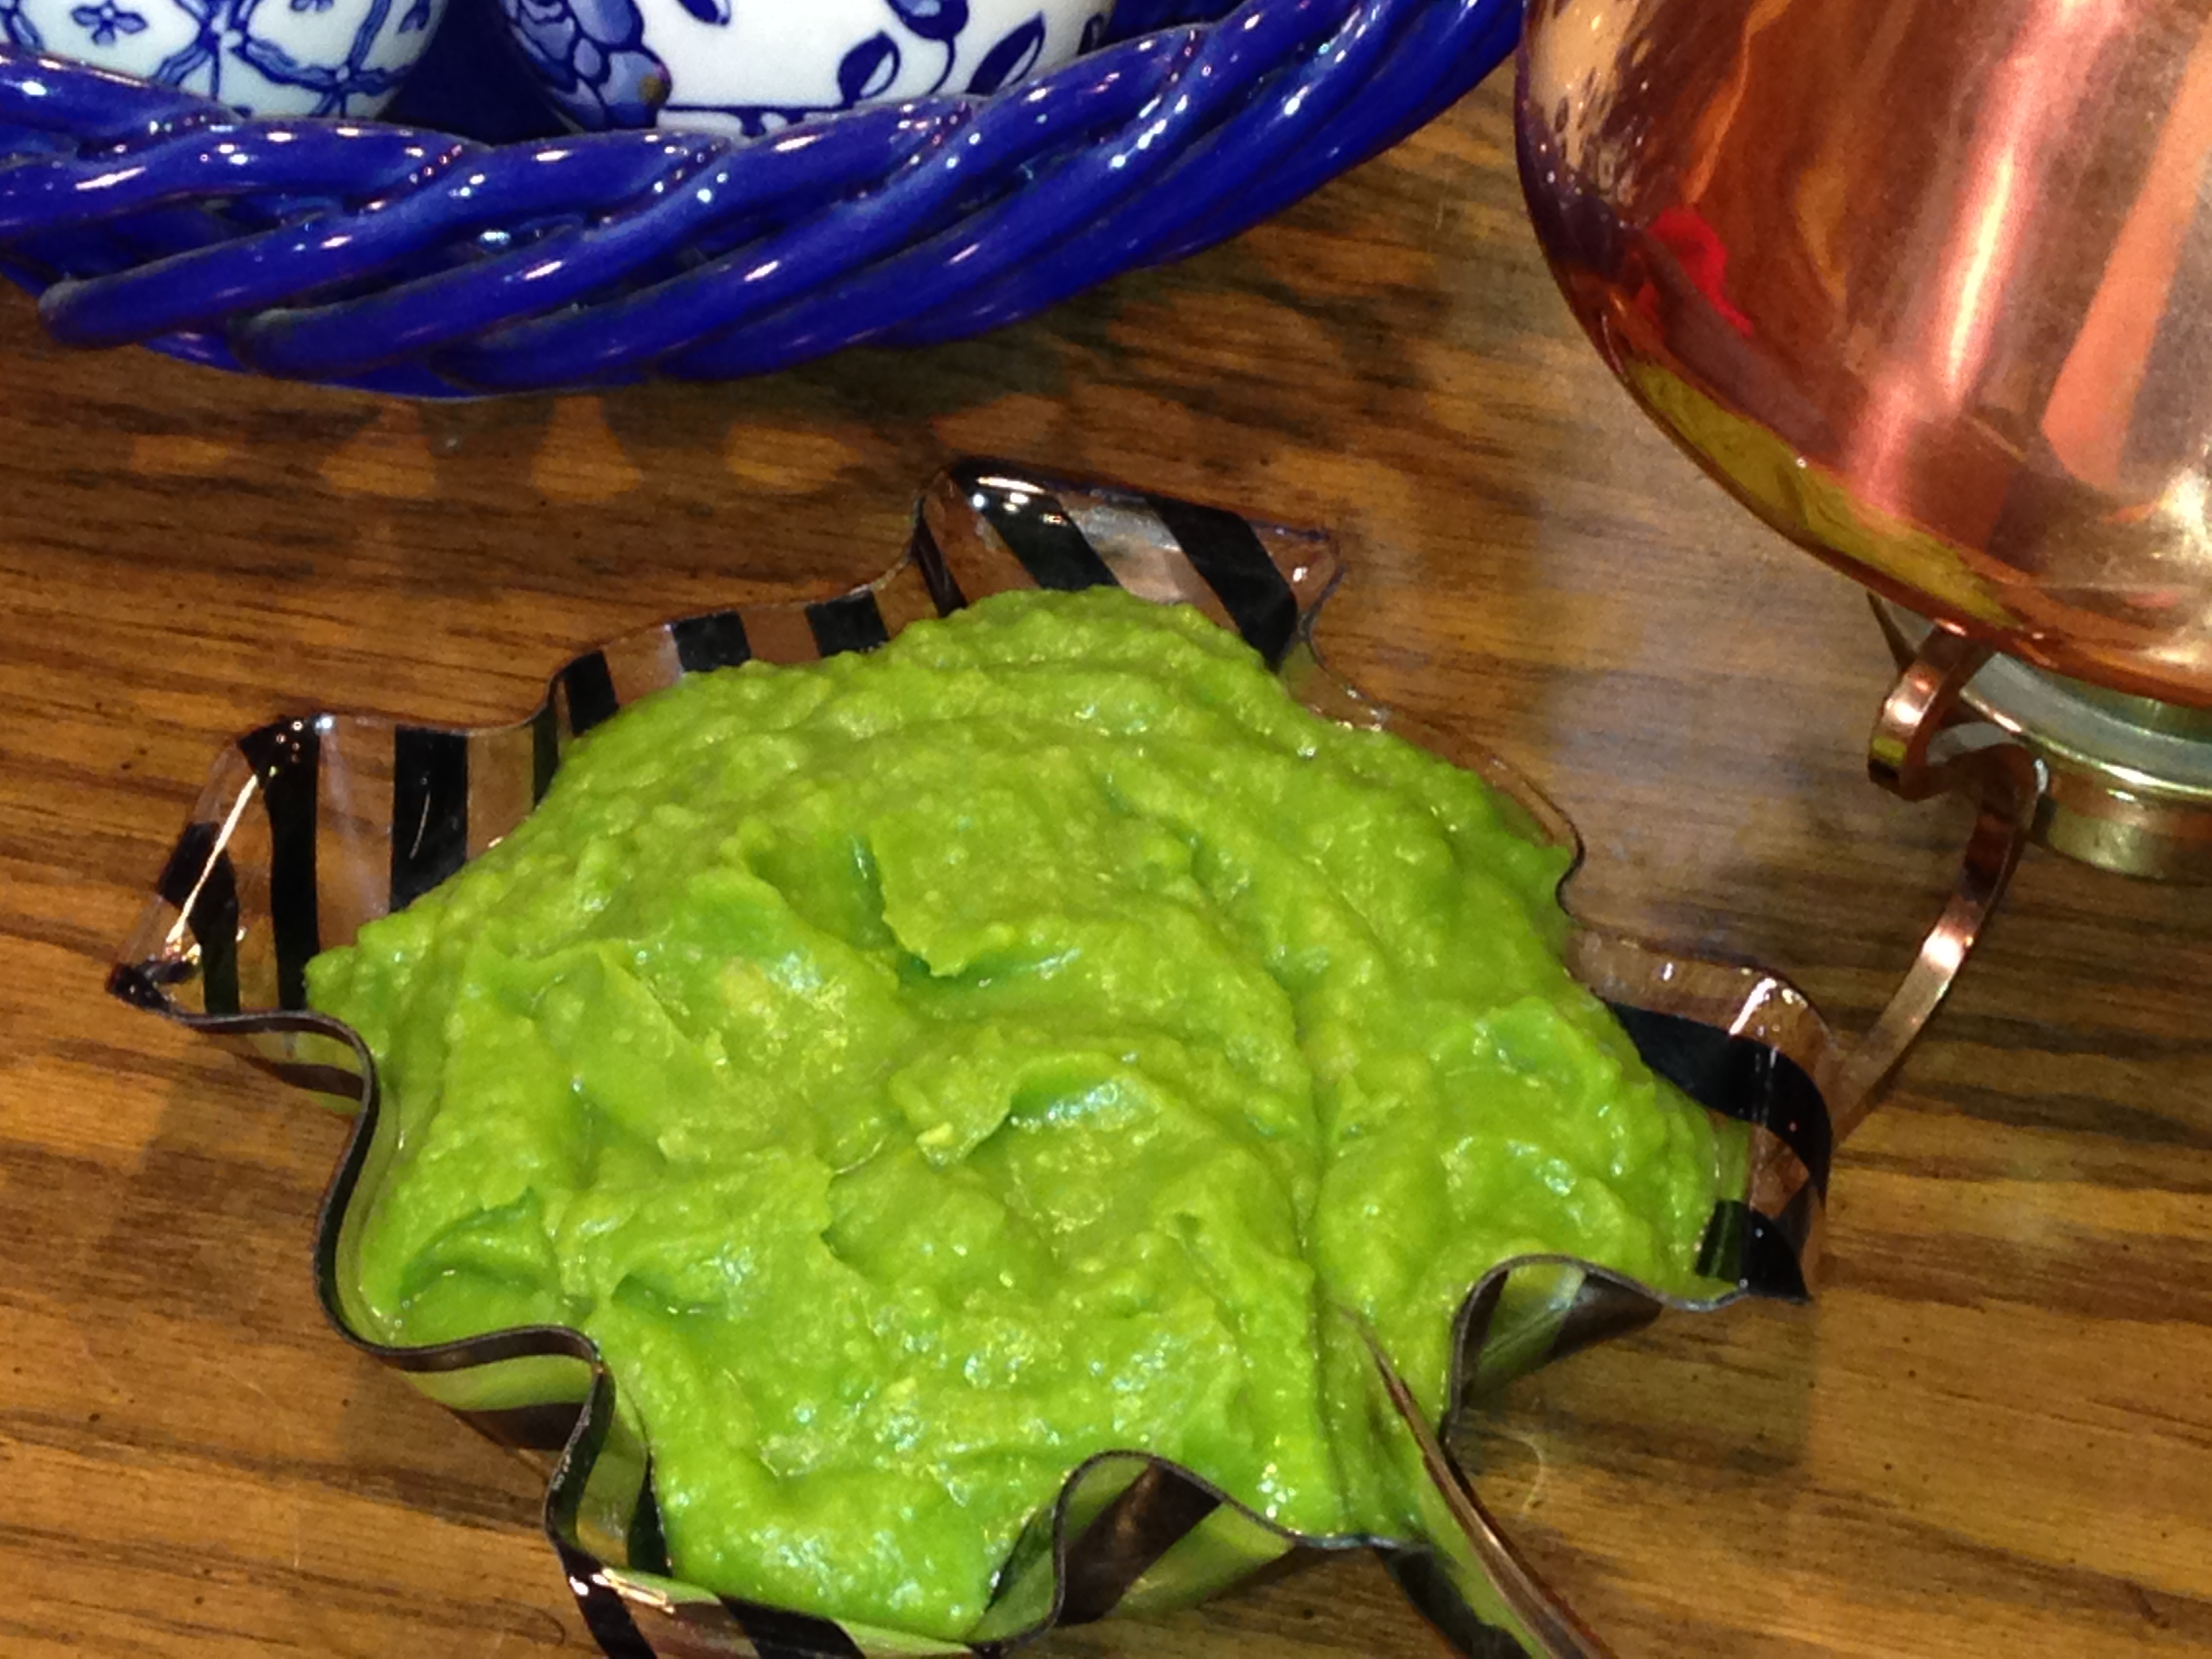
Mushy Peas.  Could this sound any more disgusting?  Mushy anything is usually not a good thing.  Mushy apples, mushy lettuce, mushy sandwich.  No thanks, I think I’ll give that a miss. But Mushy Peas?  Well, that’s something else.

It’s very common in the UK, served along side fish and chips, or a nice pie.  Not only are Mushy Peas tasty, pretty (vivid green), easy, and cheap, they’re also amazingly good for you.  When I googled ‘Mushy Peas’ recently I was astounded – they’re full of protein, fibre, and all kinds of nutrients.  Who knew something so delicious could be so good for you?  They make a wonderful side dish to many foods, plus they add that lovely green to the plate.

Now I’m sure I’m going to get some flak for this, but I use split peas to make my Mushy Peas. In the UK they use marrowfat peas.  But I live in the US and can’t find them here.  I can find tinned mushy peas, but what a waste of money!  Also, the green food coloring they put in the tinned ones is becoming a health concern.  Who needs the grief!   Making them yourself is MUCH cheaper.  And split peas make delicious Mushy Peas – I don’t care what anyone says!

Even though they only take about 15 minutes to cook – you do have to plan ahead because the peas need to soak at least 8 hours.  Usually I just get the soaking started before I go to bed. But if I forget, I can still get them soaking in the morning before 9AM and they’re fine.

IMPORTANT:  don’t skip the baking soda!  You might not think it makes a difference, but it does.  I didn’t think it would be any big deal to leave it out so I did a couple of times.  The first time I’d forgotten I left out the baking soda and couldn’t figure out why the peas took so much water to cook and the peas just didn’t come out right.  Plus they were a khaki brown color instead of the pretty bright green from before.  Next time, I left out the soda again – it still had’t occurred to me how important the soda was (duh!) – and the same thing happened.  THEN it hit me – ‘Oh, yeah!  I guess I should have followed EVERYONE’S instructions – use baking soda.’ Since then, the peas have come out perfectly.

MUSHY PEAS – makes about 1 cup

  • 1/2 cup dried marrowfat or split peas
  • 1 tsp baking soda
  • optional:  salt, sugar, Tabasco Sauce, or any other flavoring you fancy

At least 8 hours before cooking time soak the peas in plenty of water and the baking soda.  Stir it up to dissolve the soda.

About 20 minutes before serving time rinse the soaked peas in a sieve, then put them in a small saucepan (or larger depending on how many dried peas you’re using).  Cover the peas with about ¼” of water and turn on the burner to a medium low heat.  Keep a close eye on them because they’re going to start foaming once they start boiling.  When that happens, turn down the heat and keep them simmering until the water is ALMOST absorbed. Then turn off the burner and let them finish cooking from the remaining heat. (If you cook them to the point where the water is gone – even if they look perfect – they will get really dry really fast.) You don’t have to mash them – it just happens on it’s own.  Add in salt (a little goes a long way – I use just under 1/4 tsp salt for this amount) and any other flavoring. In the UK, sugar is often added.

We have Mushy Peas nearly every night with our dinner.  Easy peasy!  (lame joke, I know – don’t judge!)